
Updated: 8 / 2 3 /2021 Page 1 | 19
Creating Captions with YouTube
This guide will walk you through how to create and edit captions with YouTube, as well
as some basic information about captions and transcripts.
Why Caption?
Captioning isn’t just for students who are deaf and/or hard of hearing. It helps students
who don’t speak English as their first language, those who may need to watch videos
with the sound muted, and those who learn best by seeing and hearing the material. It
also helps viewers learn new vocabulary. If a student doesn’t have a good internet
connection, a transcript is very useful. Content in multiple mediums helps everyone
learn better; it’s a principle of Universal Design for Learning. In a 2016 study by the
Oregon State University Ecampus Research Unit, most students report using closed
captions for maintaining focus, comprehension, and retention. Transcripts are often used
as study aids.
Legally, multi-media needs to be accessible.

Updated: 8/23 /2021 Page 2 | 19
Contents
Creating Captions with YouTube ............................................................................. 1
Why Caption? .................................................................................................... 1
Contents ........................................................................................................... 2
Captioning Terms ............................................................................................... 3
YouTube and Accuracy ........................................................................................ 3
Getting Started .................................................................................................. 3
Video File ....................................................................................................... 4
Transcript ....................................................................................................... 4
Caption File .................................................................................................... 4
Google Account ............................................................................................... 4
Sign into YouTube and set up a YouTube Channel................................................... 4
Privacy and Community Guidelines .................................................................... 5
Copyright ....................................................................................................... 5
YouTube Account Verification ............................................................................ 6
Upload your video .............................................................................................. 6
YouTube Privacy Settings ............................................................................... 10
Add Automatic Captions/Subtitles ....................................................................... 11
Disable automatic captions ............................................................................. 13
Other options ................................................................................................ 13
Using automatic captions to create a transcript ................................................. 14
View your captions ........................................................................................... 17
Interactive Transcripts ................................................................................... 18
Use your captions created with YouTube elsewhere (optional) ................................ 19
Create a Playlist (optional) ................................................................................ 19
Updated: 8/23 /2021 Page 3 | 19
Captioning Terms
• Subtitles are transcript files with time codes (aka a time-stamped transcript).
These tell the computer when to display the text on the screen. Technically,
YouTube creates subtitles.
• Transcripts are just text - where all spoken words from the audio are presented
textually. An audio-only clip will only have a transcript or a time-stamped
transcript.
• True Captions display all sounds from the audio (spoken words, background
noises/music, etc.) in text form synced to display with the video and have
standards for sizing, color, etc. Captions are typically professionally produced.
• Video Description (aka Audio Description) is used in order provide access for
users who are visually impaired. This is where all meaningful content that is
provided visually (which is not also provided in the dialog) is described. Think of
video description like a screenplay.
YouTube and Accuracy
You may wonder, “Why not just use the Automatic Captions in YouTube?” YouTube’s
Automatic Captions create a somewhat accurate time-based transcript. It used to be
very inaccurate; however, it’s been improving greatly. With clear, moderately spaced
speakers, automatic captions may give you about 80% accuracy, but right now they
provide no punctuation. The meaning needs to be the clear for all users. To be
accessible, everyone should have equal access to your communication, and you’ll want
to make sure your students have an accurate account of what you’re saying. It doesn’t
look good on your part to have lots of errors, especially on new vocabulary!
YouTube Help offers up-to-date, step-by-step guidance on how to Add your own
subtitles & closed captions.
Getting Started
These directions assume you have the following items:
1. Video file you would like to caption
2. Transcript that matches the audio in the video (optional)
3. Google account
4. Text editor
Updated: 8/23 /2021 Page 4 | 19
Video File
In order to upload a video to YouTube, you’ll need to have a video in one of these
supported formats.
The video file also needs to be no longer than 15 minutes (and no larger than 2 GB.) If
you have a verified YouTube account, you will be allowed to upload longer videos.
However, it’s really best to break up longer lectures into smaller segments.
If you must upload videos longer than 15 minutes, YouTube provides directions for
Computer, Android, and iPhone & iPad.
Transcript
This guide will walk you through the steps for using an existing transcript and creating a
transcript using YouTube.
Transcript files need to be in .txt format to work with YouTube. If you have the text in
another document format, you’ll just need to convert/save it to plain text.
Caption File
If you happen to already have a caption file (time-stamped transcript), you can upload it
to YouTube as well.
Supported YouTube subtitle and caption file formats
Google Account
If you don’t have a Google account, navigate to Google Accounts
https://myaccount.google.com/ and choose Create an Account.
Sign into YouTube and set up a YouTube Channel
Note: Due to recent changes with how Google allows its applications to work (or not
work) in other browsers, Chrome may provide a better experience when working with
your YouTube channel.
1. Go to YouTube: http://www.youtube.com/
2. Click on the Sign In button – it will be on the upper right corner.
Updated: 8/23 /2021 Page 5 | 19
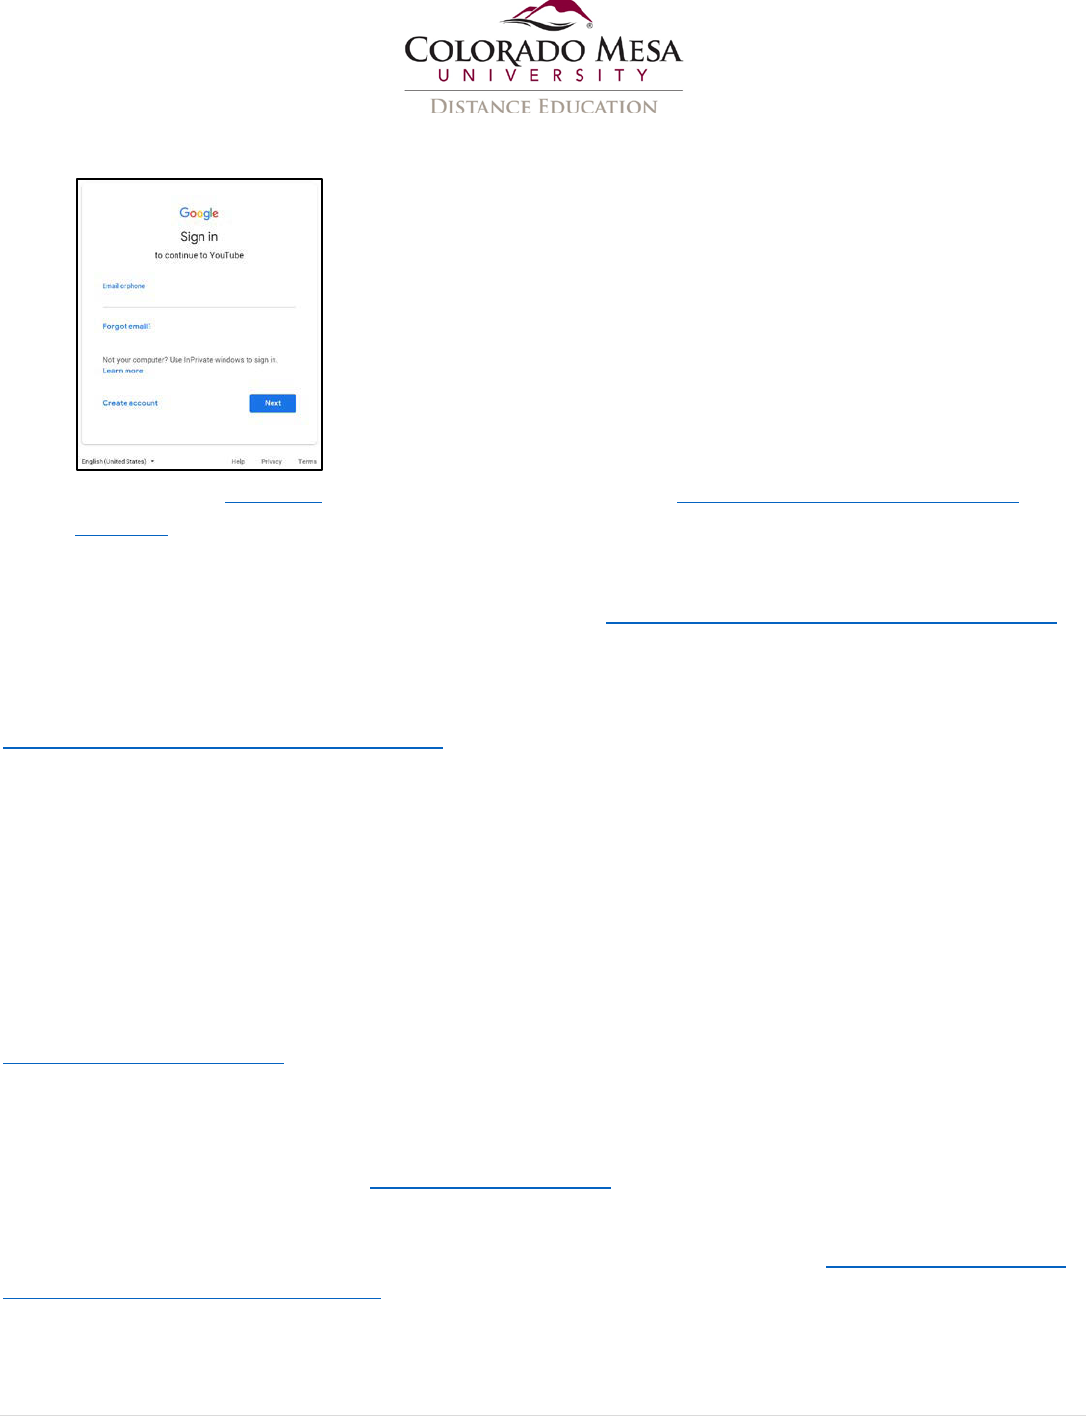
3. Use your Google account credentials to Sign In.
4. Set up your Channel on YouTube. (Check out the directions on creating a new
channel. Option: If you wish to use a business or other name, check out options
for Brand Accounts.)
YouTube offers additional guidance on signing up managing your account and channels
Privacy and Community Guidelines
Depending on your personal privacy preferences, you’ll want to check out Google’s
protecting your identity information.
Please be aware that identity/privacy features may be updated from time to time, so pay
attention to any updates in the same way you would for any other social media.
You may have seen stories in the news about issues with censorship in how YouTube
applies how it holds content creators to allegedly vague and/or unevenly applied
Community Guidelines. Keep this in mind when posting content. For example,
YouTube has in the past blocked or age-restricted what is seemingly clear fair use of
copyrighted material for education purposes, as well as educational material about
controversial figures and topics. All content creators should become familiar with the
Community Guidelines.
Copyright
YouTube provides helpful information on copyright, fair use and creative commons,
including protecting your own copyrighted content.
Remember that you can only post video that you have the rights to post. YouTube
explains what’s going on if you’ve ever had a video removed with a Takedown Notice or
an automatic Content ID Match.

Updated: 8/23 /2021 Page 6 | 19
YouTube Account Verification
To verify your YouTube account, go to: https://www.youtube.com/verify. Or, you can
navigate to the Status and features area in your Channel settings. Verifying your
account allows you to upload videos longer than 15 minutes if needed. The maximum
file size is 128GB.
Upload your video
1. Click on the Add Video (webcam) icon and choose the Upload video option at the
top right of the screen.
Alternately, if you are already in your channel, click Create (webcam) icon and
choose the Upload videos option at the top right of the screen.
2. Select Files to upload. (You have the option browse your computer for the file or
drag and drop the file.)
3. Once you’ve uploaded your video, YouTube needs some time to process the video.
Updated: 8/23 /2021 Page 7 | 19
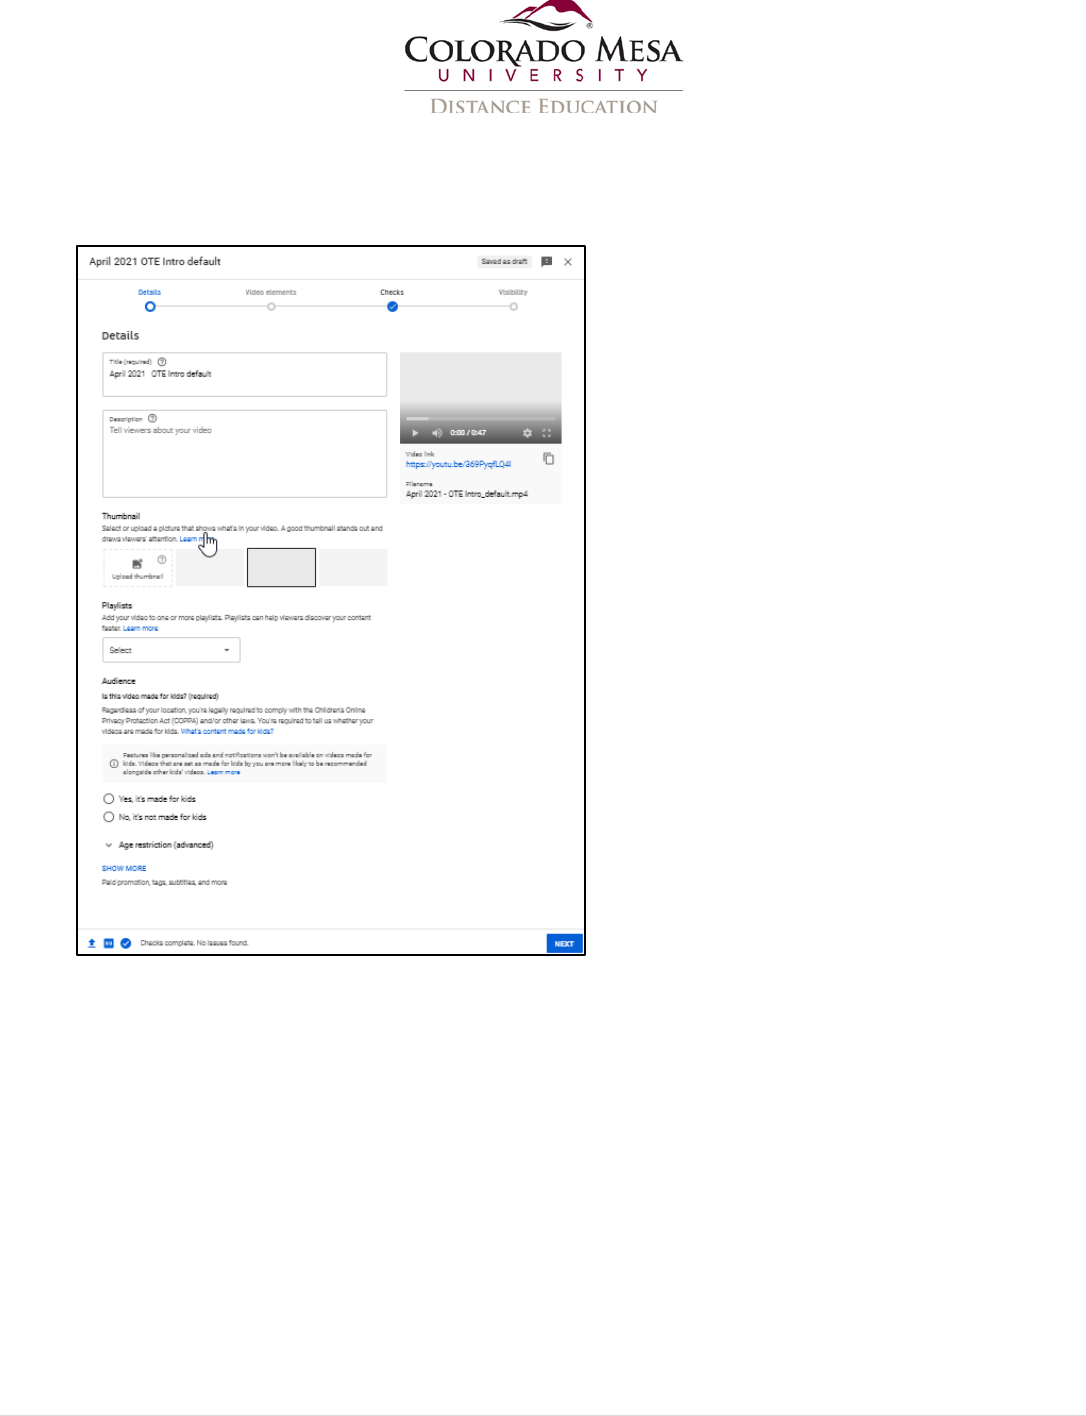
4. Add a Title and Audience (required) and any optional details such as applicable
Description, Thumbnail selection, Playlist selection, etc. Click on Show More to
access additional options such as Tags.
5. Click the Next button once you’re finished.
Updated: 8/23 /2021 Page 8 | 19
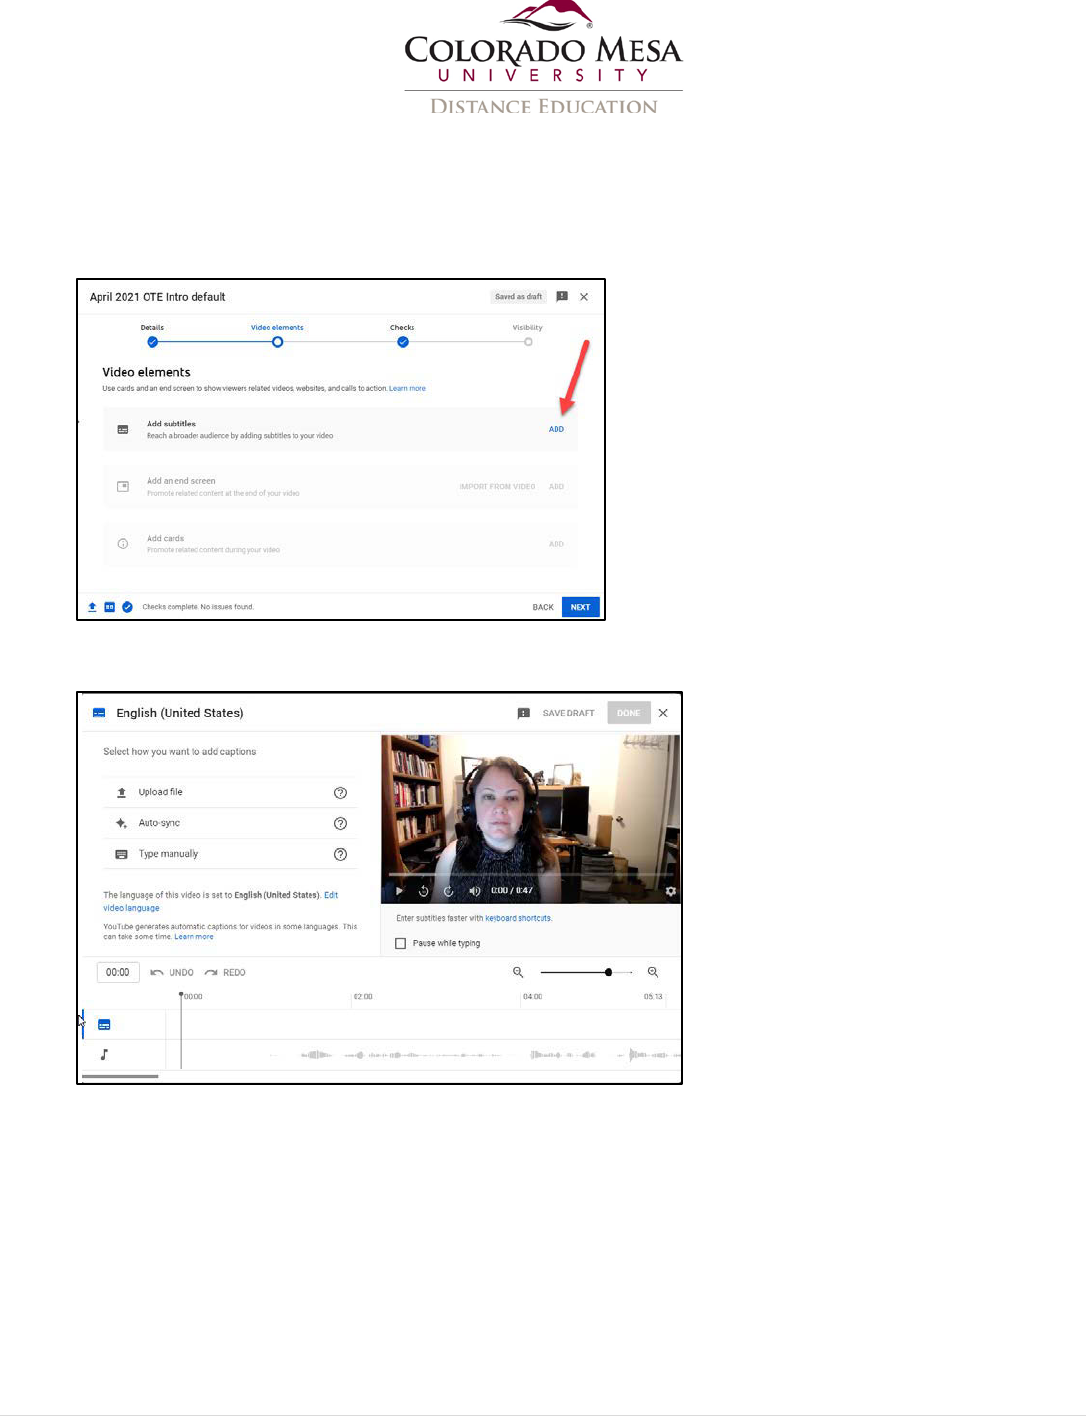
6. In the Video elements dialog, you have the opportunity to Add subtitles, end
screen, and cards. If you already have a transcript, caption file or wish to type
your own captions, click ADD to Add subtitles. (If you want to use or start with
YouTube’s automatic captions, click NEXT instead.)
7. By default, your language will most likely be English; you may click Edit video
language if you need to change this.
8. Then, select how you want to add captions yourself:
o Upload file (with timing or without timing) A subtitle or closed caption file
contains the text of what is said in the video. It also contains time codes for
when each line of text should be displayed. Some files also include position
and style info, which is especially useful for deaf or hard of hearing viewers.
o Auto-sync Type or paste in a full transcript of the video and subtitle timings
will be set automatically.
o Type manually Create subtitles and closed captions by typing them in as
you watch the video.
Updated: 8/23 /2021 Page 10 | 19
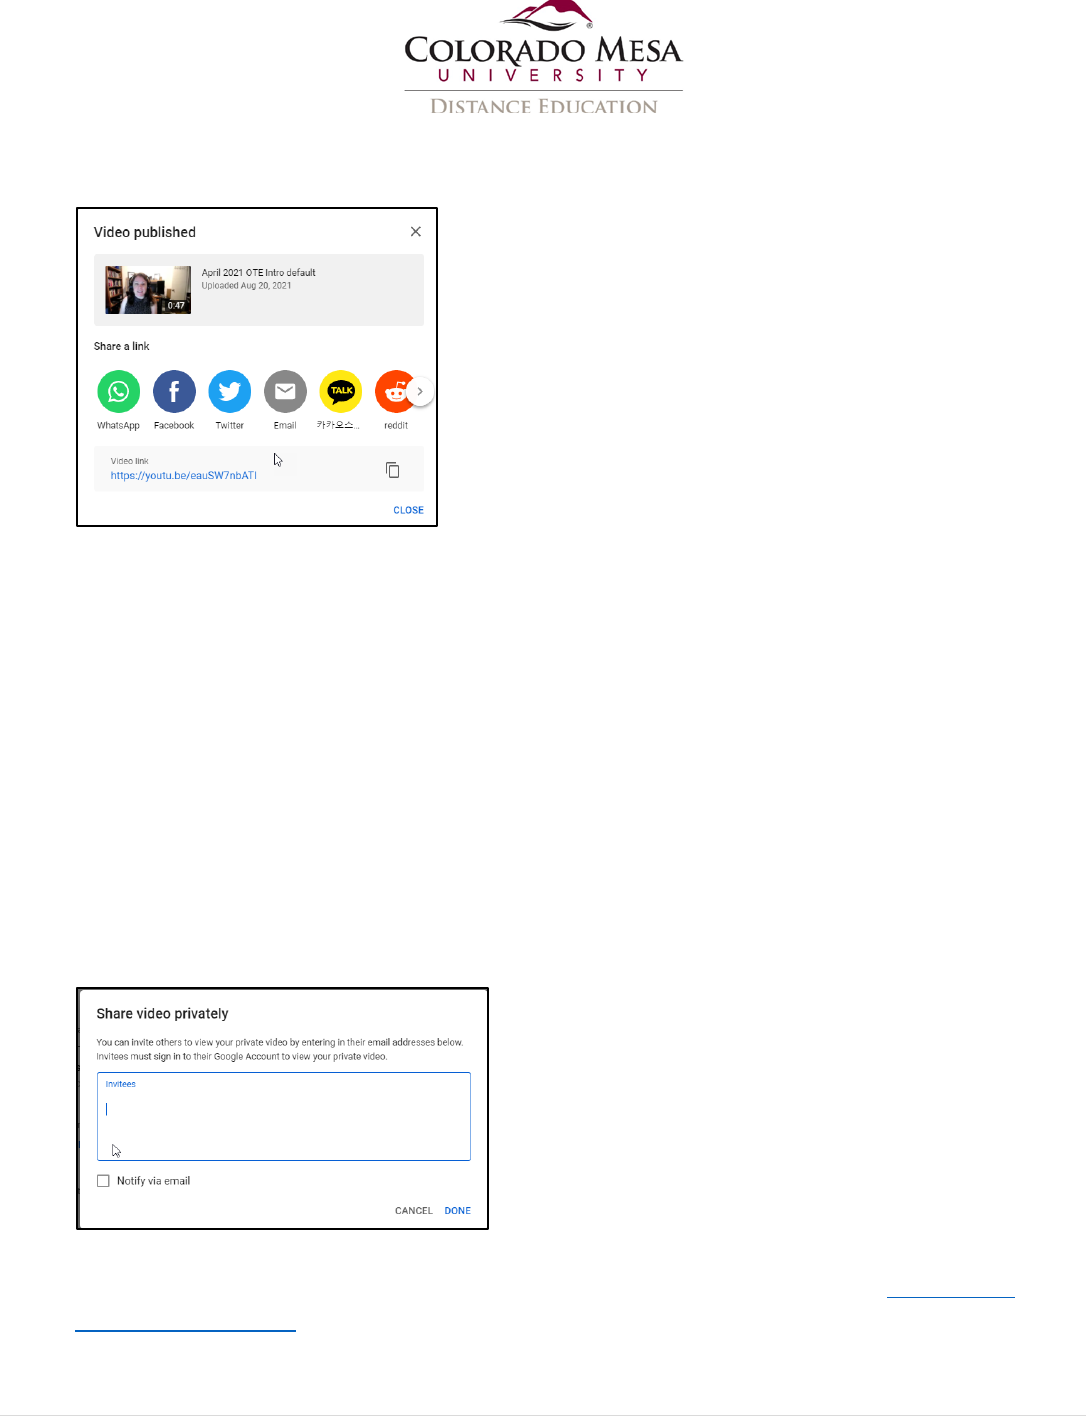
11. Once the video is published, you have the opportunity to Share a link if you
wish or just click Close.
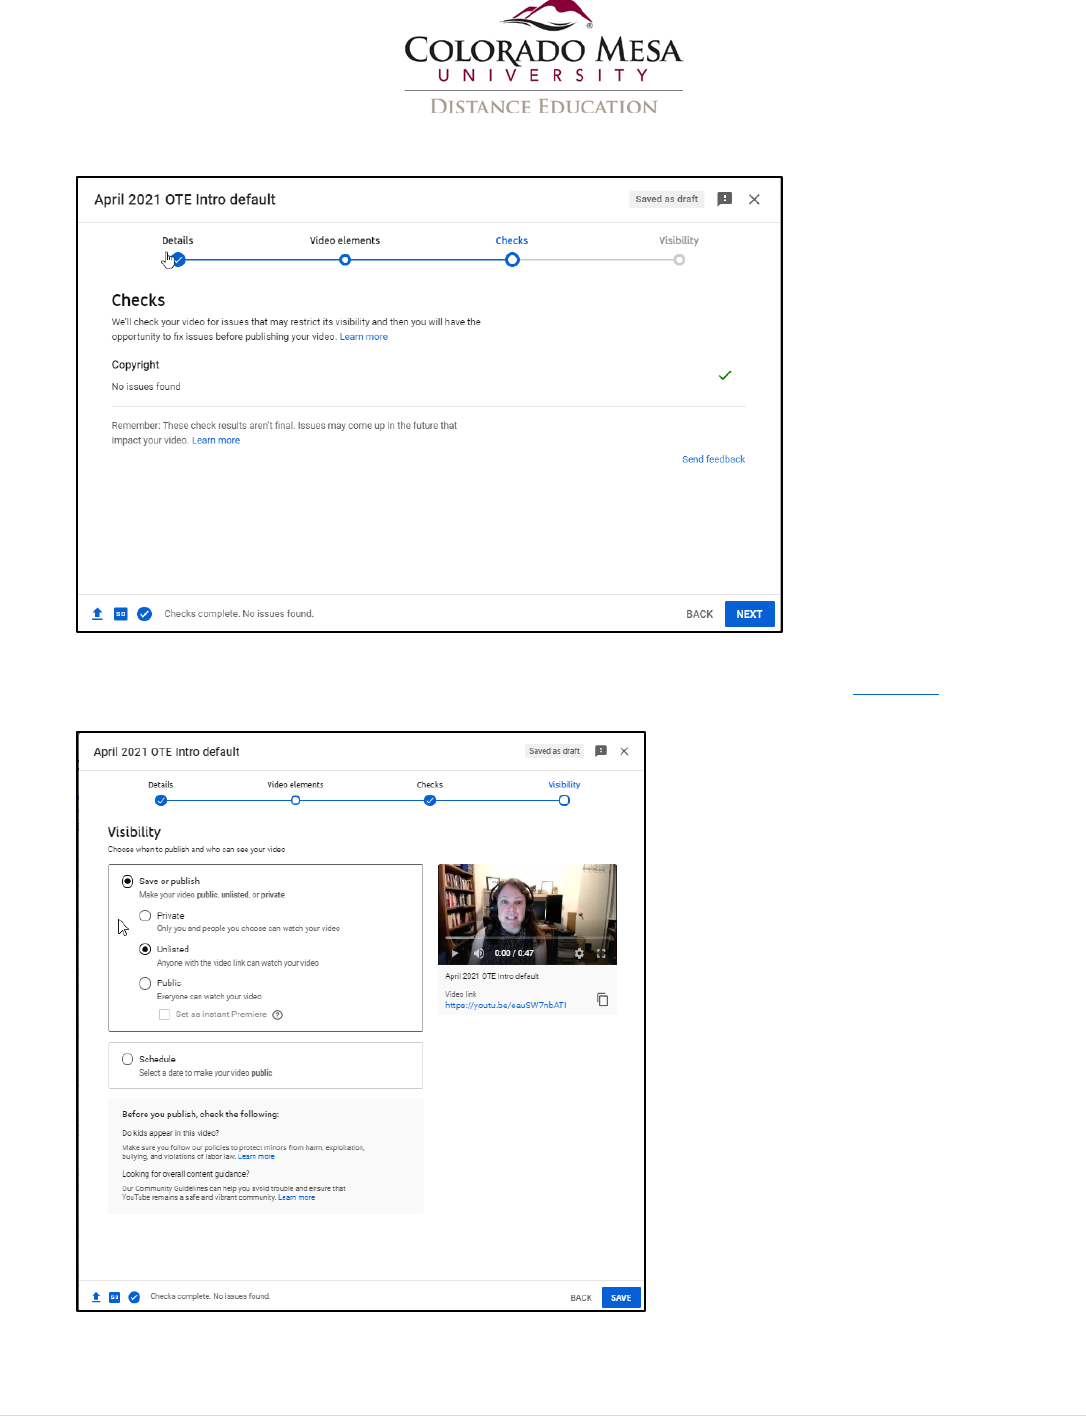
YouTube Privacy Settings
Videos are private until you publish them.
Your choices are: Public, Unlisted, Private, or Scheduled. (You are able to adjust these
settings as you wish later in the Video Manager, too.)
• Public: Anyone anywhere with web access can see your video.
• Unlisted: Only people with the link to your video can see it. They don’t need to
have a Google account to access it, just the link. Unlisted videos won’t show up in
searches or on your channel page. However, people who you’ve shared the link
with can share it with others, so it may become more public than you intended.
• Private: Only people you specifically add can view your video. These people must
have a Google account in order to view your view, and you’ll need to add them to
the Share video privately area once you’ve chosen to post your video as Private.
• Scheduled: You may use this option to schedule a private video to go public at a
specific time. (For more details, check out YouTube’s directions on scheduling
video publish time.)
Updated: 8/23 /2021 Page 11 | 19
YouTube offers more information on Video Privacy Settings.
For instructional videos, we suggest choosing the Unlisted setting unless you want
others to have access to your lecture.
Think about others’ privacy, too! If anyone appears in the video besides you, be sure
that you have permission from those shown to post the material.
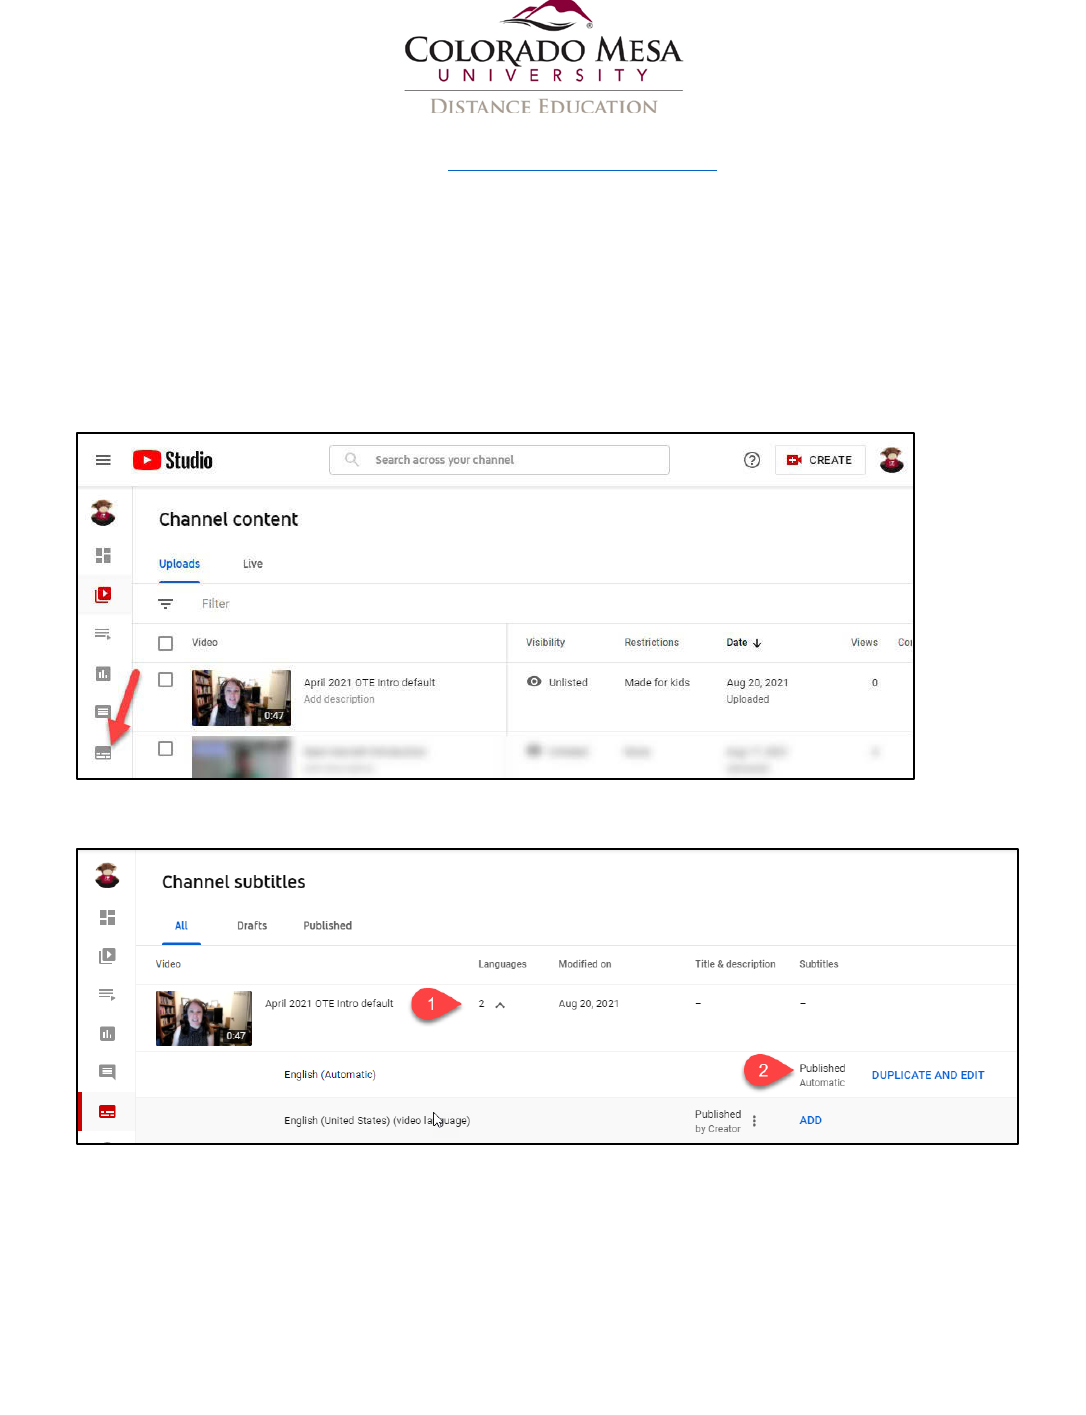
Add Automatic Captions/Subtitles
1. Once your video is in your channel, click on the Subtitles icon.
2. In Channel subtitles, find your video, click on the link under Languages to
expand it, and then select the English (Automatic) option.
Updated: 8/23 /2021 Page 12 | 19
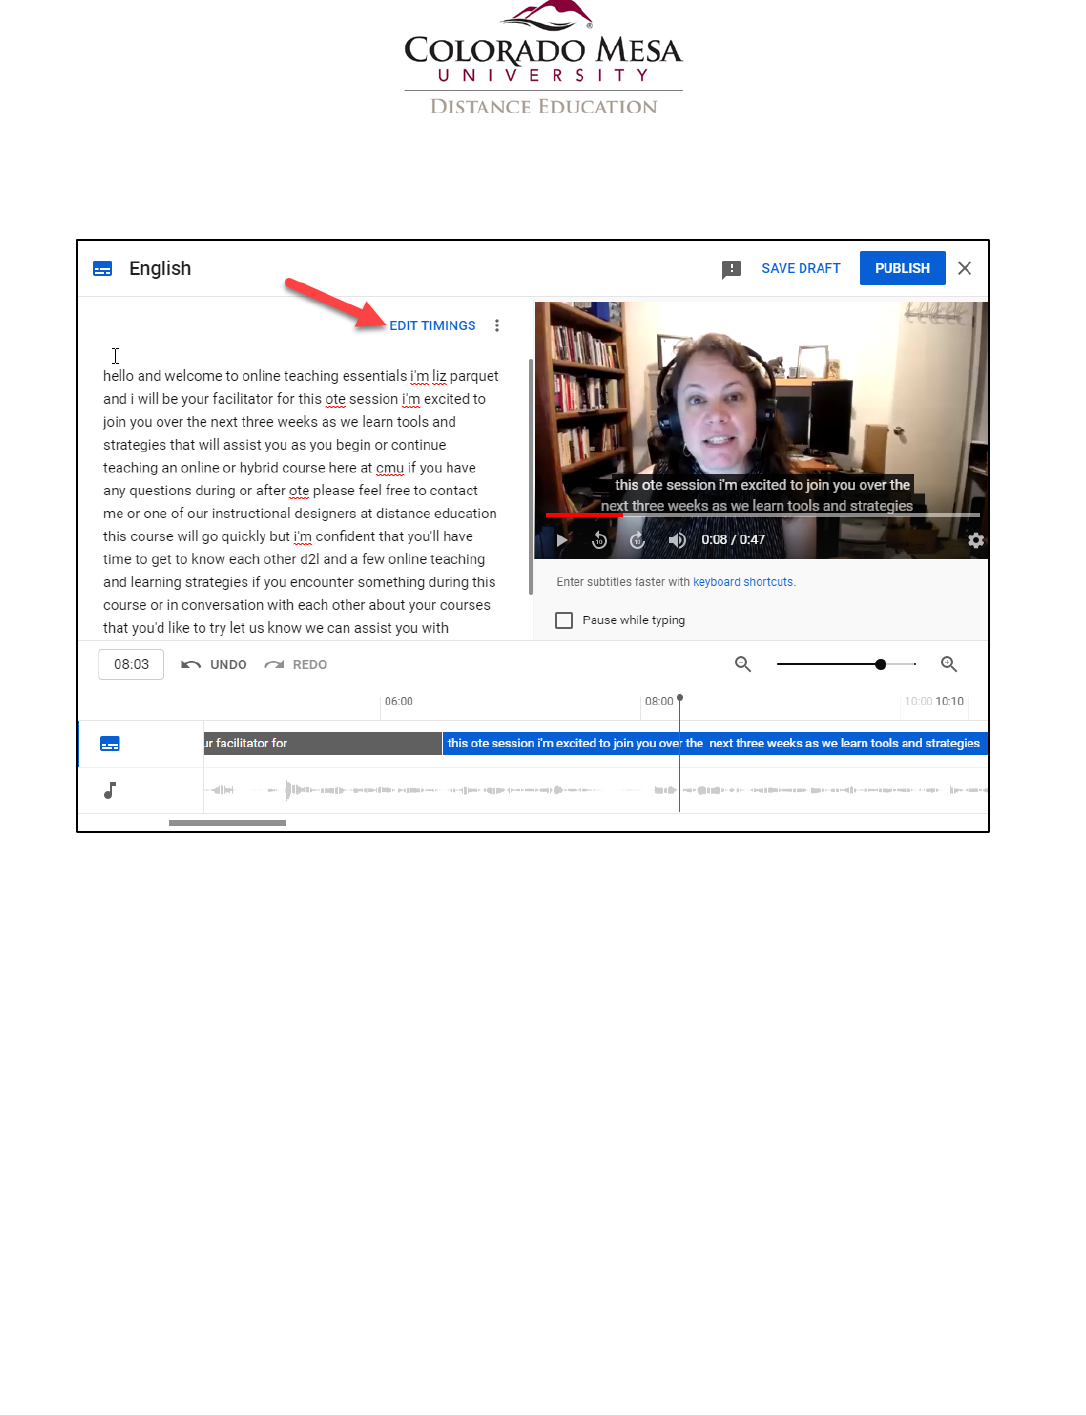
3. Use the editor to review your automatic captions and adjust as needed. By default,
you’re in the Edit as Text option. Click the Edit Timings option if you find that
format easier to edit.
You’ll notice that there is no punctuation or capitalization. You can add proper
punctuation and capitalization and correct meaningful spelling/wording errors.
Note: If there are meaningful sound effects or non-dialog sounds that you want to be
sure someone who is unable to hear the audio has access to, you can include these in
the text, too, with brackets around them. Examples:
• [Sneezes]
• [Door slams]
• [Explosion]
You can Save Draft if you need to finish editing later. Once your edits are complete,
remember to click the Publish button. When you save the draft or publish the edits, this
creates a new English subtitles file.
Updated: 8/23 /2021 Page 13 | 19
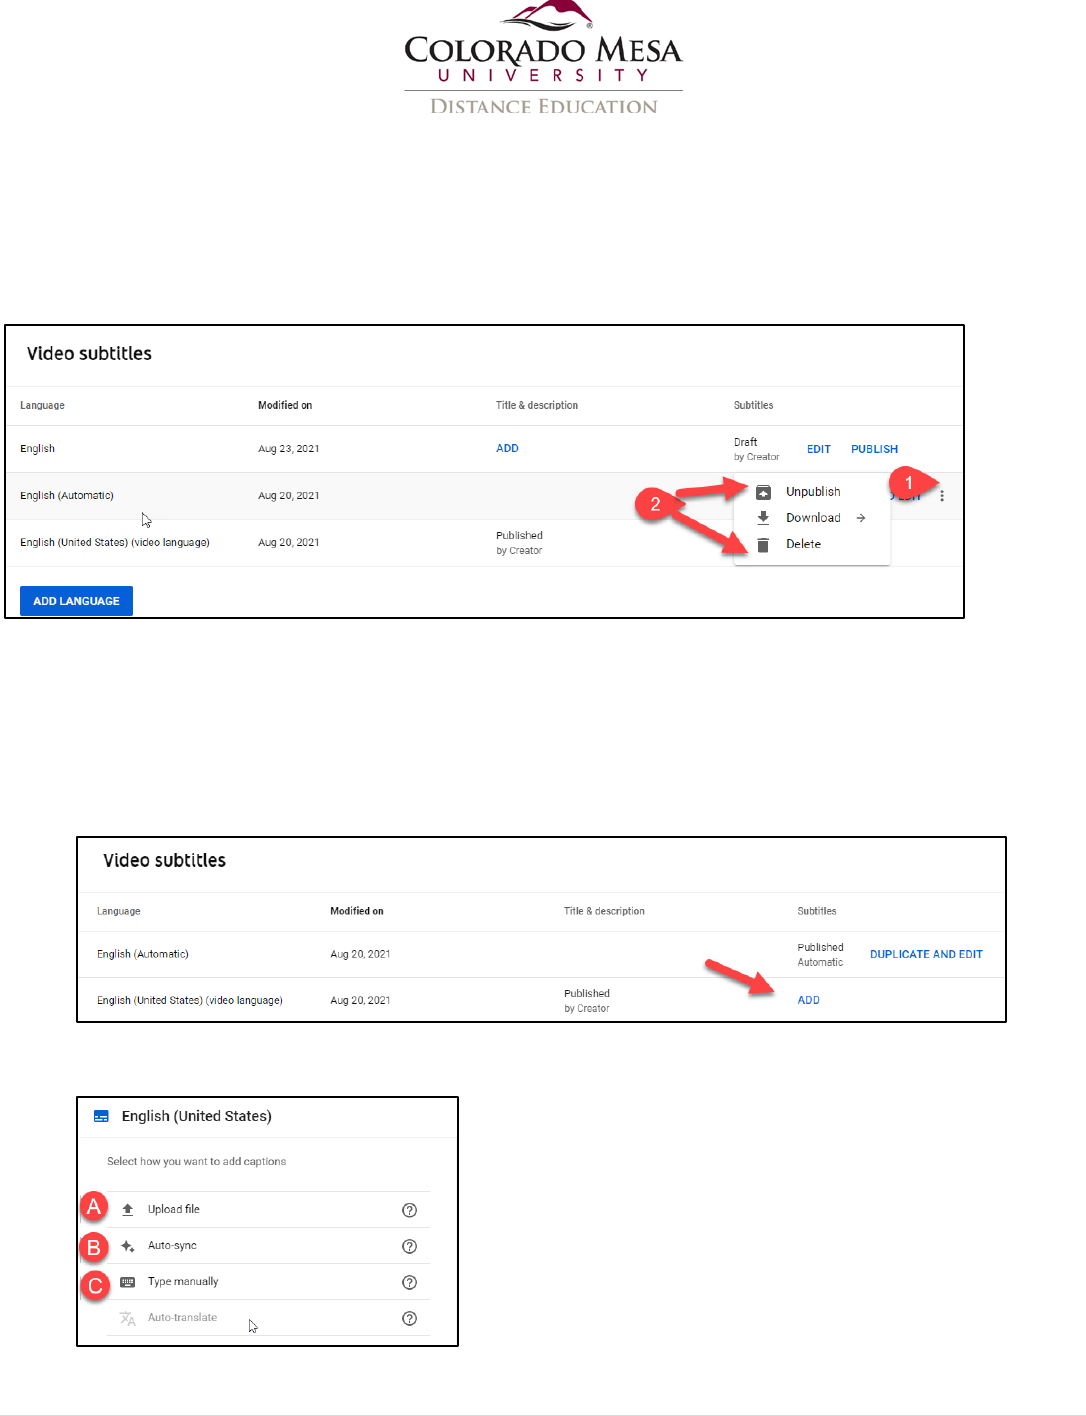
Disable automatic captions
If you do not want the automatic option to pop up for viewers, you may Unpublish or
Delete it in the View subtitles area by clicking on the 3-dot menu beside the
Published Automatic track and then selecting the Unpublish or Delete option from the
dropdown menu.
Other options
You may want to skip the automatic captions option if you have a text transcript, or a
captions file already. If you have a brief video and are used to the editor, you may
prefer typing your own captions.
1. Click the ADD button by the English option (not the automatic option).
2. In Select a how you want to add captions, you’ll have three choices: Upload a
file, Auto-sync, or Type manually.
Updated: 8/23 /2021 Page 14 | 19
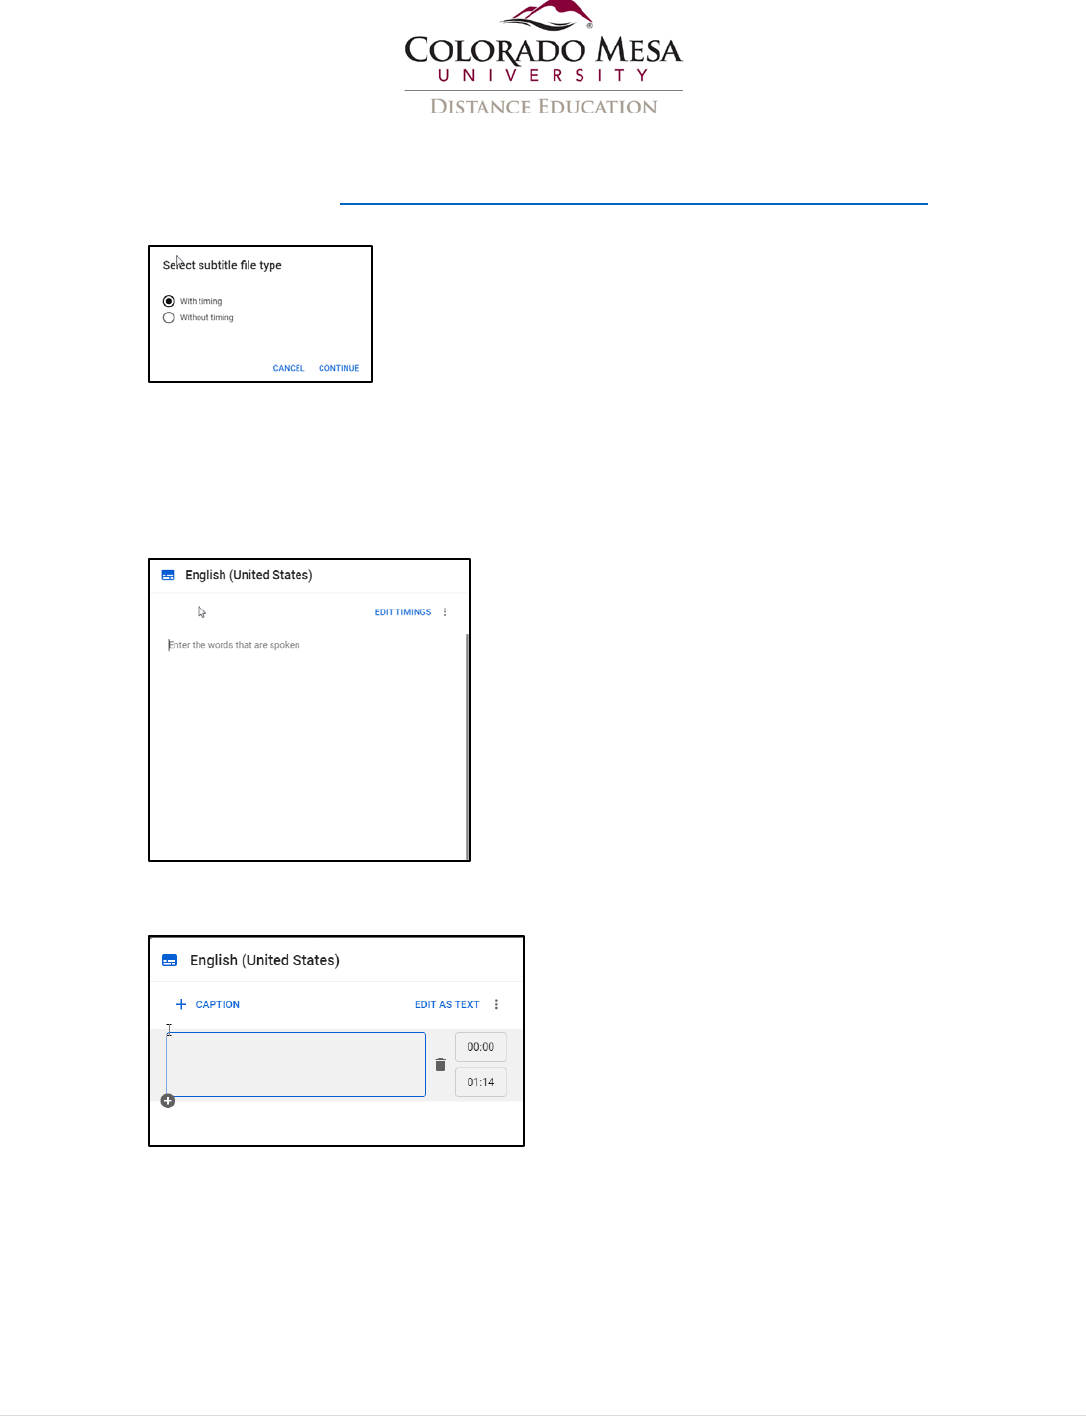
a. Upload a file: Use this option if you already have a caption file. Check out
YouTube Help’s Supported subtitle and closed caption files page. You’ll need
to select With timing or Without timing.
Then, select the file you wish to upload from your device. Depending on the
length of the video, it will take a few minutes for the captions to process.
Once they are available, you’ll want to disable automatic captions.
b. Auto-sync: This option allows you to type or paste a full transcript of the
video and YouTube will create the subtitle timings automatically.
c. Type manually: This option allows you to type or edit your subtitles/CC as
in YouTube as you watch the video.
Using automatic captions to create a transcript
You may use this option as soon as YouTube provides automatic captions for your video.
1. Click Edit on the English automatic transcripts track.
2. Review the time-stamped transcript for your video. You’ll probably notice some
errors right away. You have two options to edit the transcript. 1) You can click on
Updated: 8/23 /2021 Page 15 | 19
the text and/or time stamps to edit them directly in YouTube. Or, 2) you can
download a copy of the time-stamped transcript and use a text editor to fix the
transcript.
• Take a look at the errors. If they are minimal, such as no punctuation or a
few spelling mistakes, it’s probably easiest to edit directly in YouTube. If the
timing is off and there is lots of incorrect text, it’s probably best to edit in
another program.
• If there are no Automatic Captions, possible problems may be: the video is
too long, the file is too large, the sound quality is too poor, there is a long
silence at the start of the video, or the audio may be jumbled due to too
many speakers with overlapping dialog.
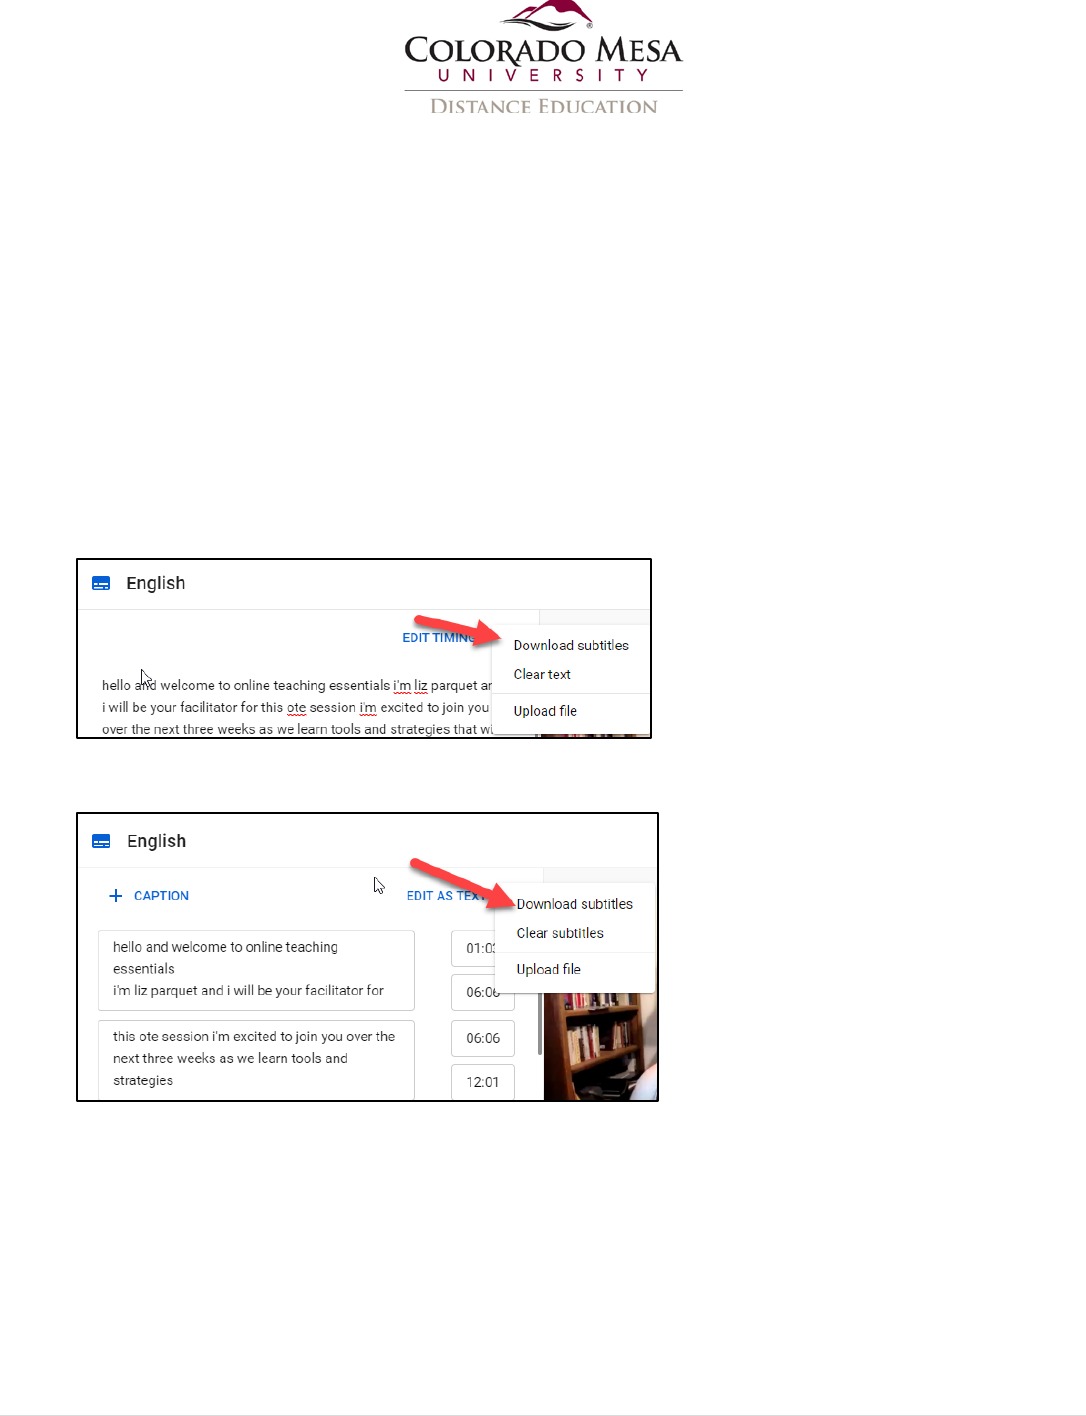
3. Text: If you only want text (transcript.txt file), use the Options (3-dot menu)
beside Edit Timings to select Download subtitles.
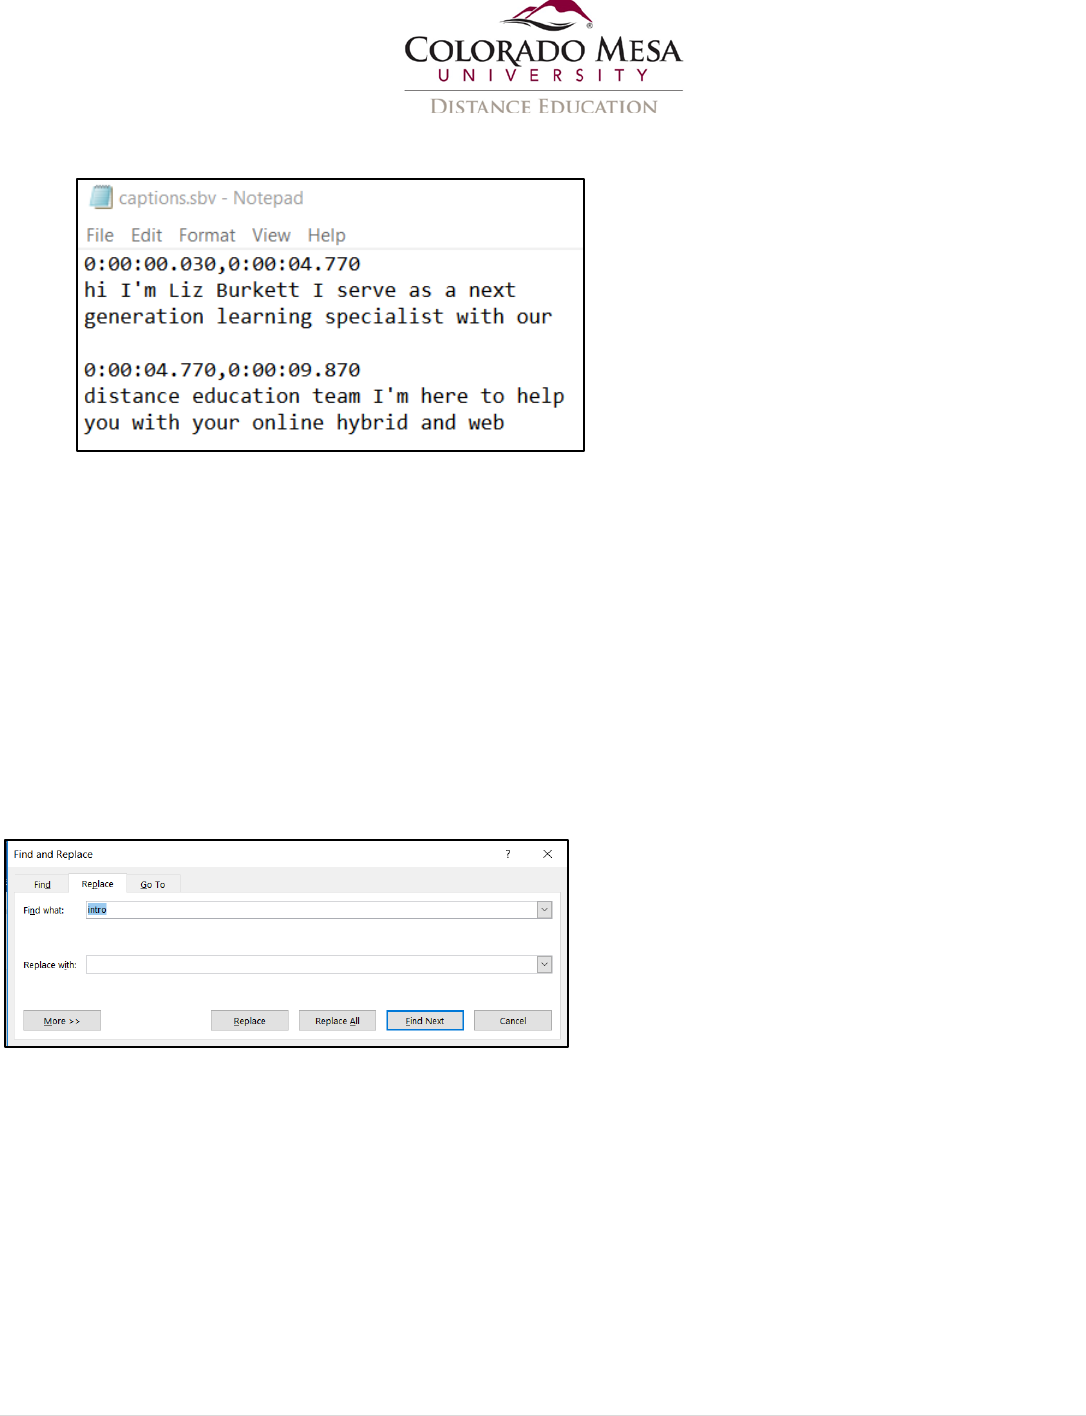
Timestamped: If you want text with time-stamps (captions.sbv file), use the
Options (3-dot menu) beside Edit Timings to select Download subtitles.
4. Save the file or choose which program to use to open the file. (By default, the file
will be named transcript.txt or captions.sbv.) Note: For most browsers, the file
download will go to the Downloads folder by default.
5. Open the transcript.txt or captions.sbv file with Notepad.
Updated: 8/23 /2021 Page 16 | 19
6. Edit your time-stamped transcript in Notepad.
Note: If you have Notepad++ on your computer, you can use it instead of Notepad. You
can edit your transcript directly in Notepad++ and save it as a .srt file. (Notepad only
allows you to save as a .txt file.)
7. If you prefer editing your transcript in Word: select all (CTRL+A) and copy
(CTRL+C) all of the text from Notepad.
8. Open a new Word document
9. Paste (CTRL+V) the transcript into Word.
10. Edit the transcript.
Note: A quick way to fix proper names, course specific vocabulary or other common
errors in Word is to use the Find and Replace feature (CTRL+F).
11. Save your transcript as a plain text file (.txt), or .sbv file if you want to keep
the timestamps.
Note: If the time stamps make the editing process difficult, you may delete them and
work with just the text of the transcript. YouTube is able to create time stamps with
your transcript once you upload it back to YouTube. Also, if you plan on posting the
transcript in D2L or Panopto at some point, go ahead and save an accessible PDF copy of
the transcript you edited in Word, too.

Updated: 8/23 /2021 Page 17 | 19
Add your caption file or transcript
1. Navigate to your video in the Video Manager.
2. Click Edit on the English automatic transcripts track.
3. In Select how you want to add captions, choose Upload a file.
4. Choose With timing for captions.sbv file or Without timing for transcript.txt
file.
5. Browse for your file.
6. Once the timings are set, you’ll be able to view the scrolling transcript and the CC.
7. You may make changes as needed.
8. Once you are happy with your captions, be sure they are saved and click Publish.
9. YouTube will let you know that the Subtitles have been published. Once subtitles
have been published, you’ll need to return to the editor to make any changes.
View your captions
Depending on the length of the video, it may take a few minutes for the transcript to
sync with the video. Once the transcript syncs, an English (or other language) track will
be added.
Now, when you go to the video, you should be able to see captions!
If you don’t see captions, click on the CC button and make sure that the English captions
are on. (The English automatic captions track is the track automatically created by
YouTube. These will be your only two options unless you’ve uploaded additional tracks,
such as another language translation.)
Updated: 8/23 /2021 Page 18 | 19
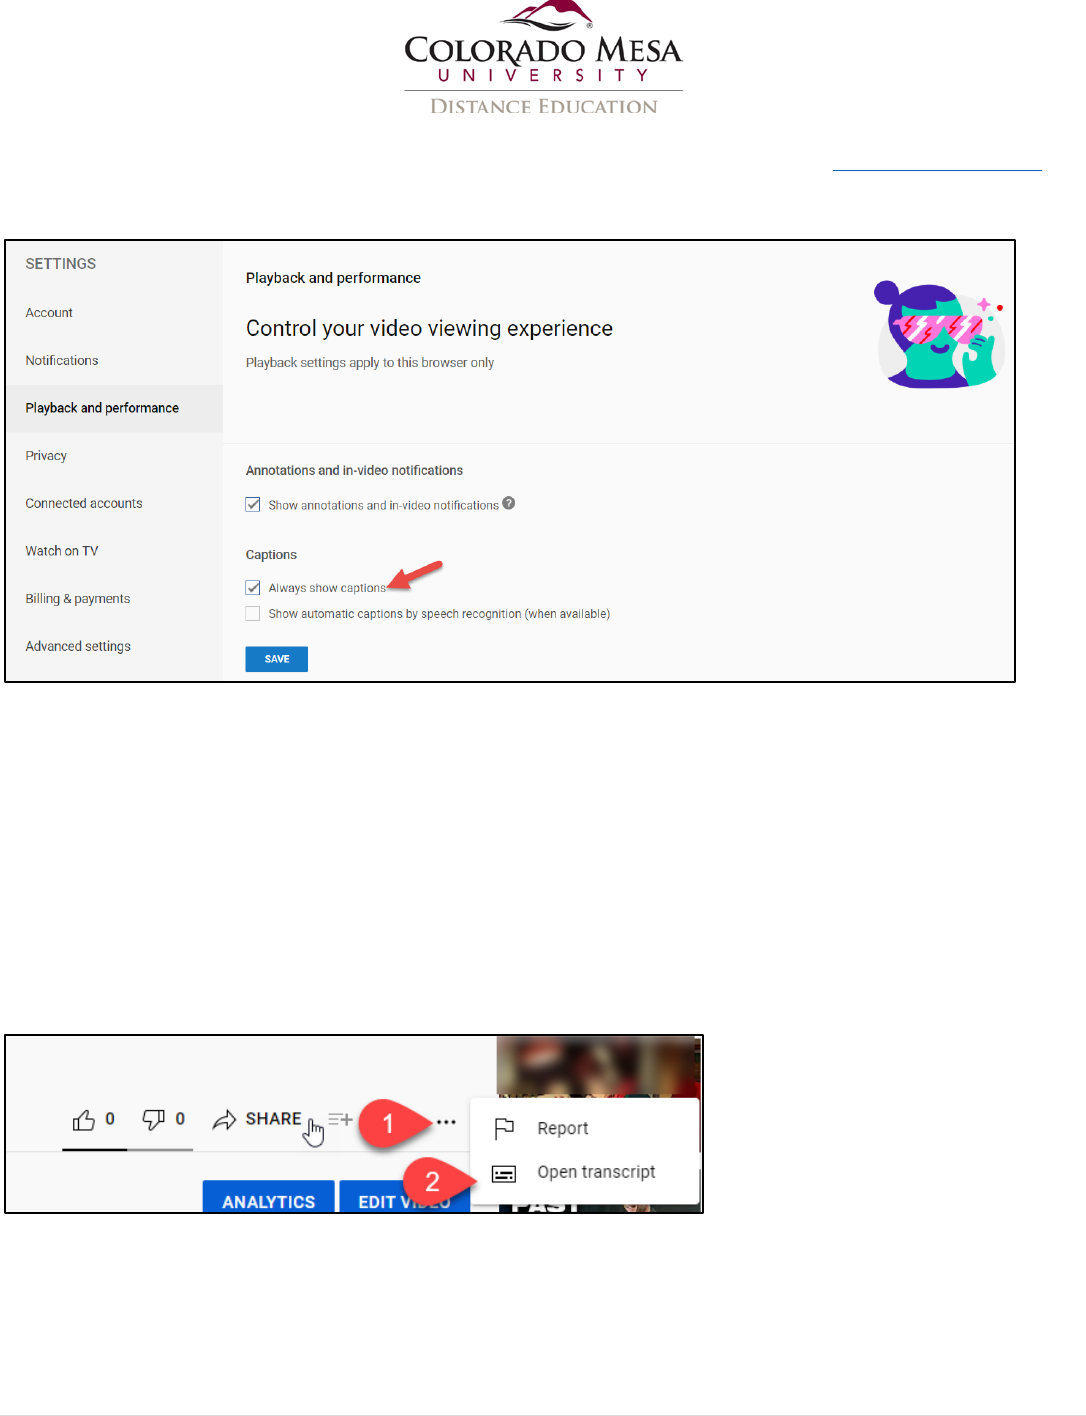
If you still don’t see captions, you may need to check your YouTube Playback settings
under Account Settings. In the Captions area, check the box for Always show captions
and click Save.
Note: Viewers will still have the option to toggle captions on or off while viewing. This
just displays captions automatically when the video starts.
Interactive Transcripts
In addition to captioning, YouTube also offers an interactive transcript feature.
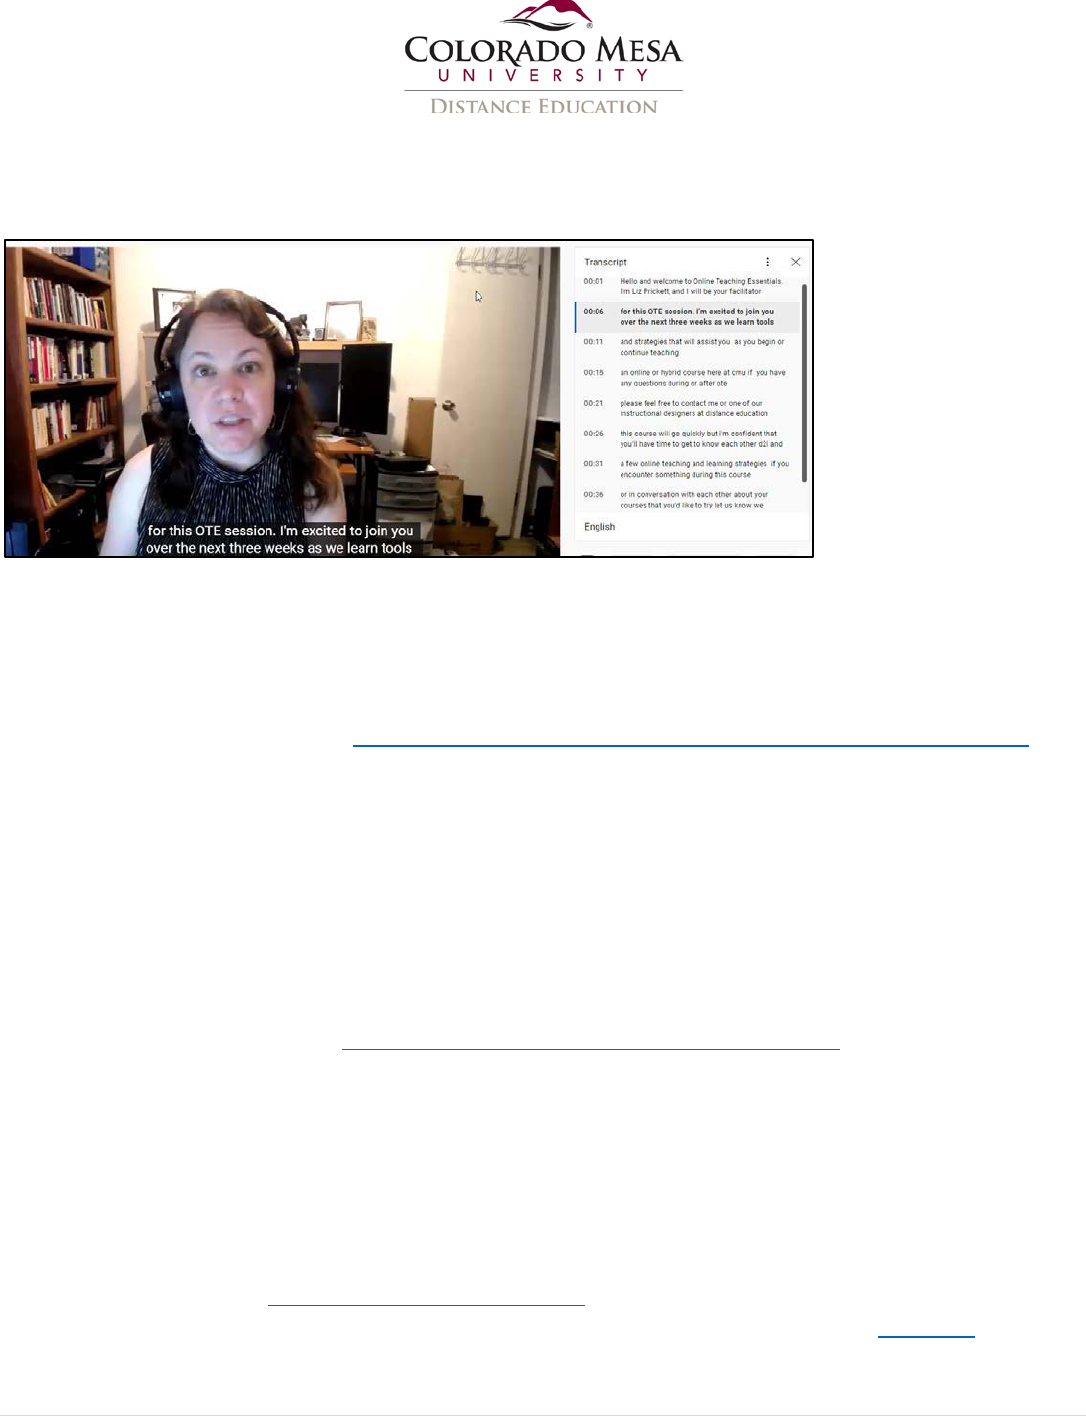
Viewers may view the transcript by clicking on the 3-dot menu and then selecting
Open Transcript. This menu is located below the video along with the other interactive
options where viewers can Like, Share, Save, etc. You have the option to view the
automatic transcript (if you didn’t unpublish it) or the English transcript (the one you’ve
just created.)
Updated: 8/23 /2021 Page 19 | 19
Viewers can view the captions and transcript at the same time, just captions, or just the
transcript. Viewers can also click on a line of text in the interactive transcript and the
video will jump to that section of the video.
Note: The interactive transcript feature only works when the video is played within the
YouTube player. It will not be visible if the video is embedded (i.e., embedded in D2L) or
if you are using the captions you created with YouTube elsewhere (e.g., VoiceThread,
Panopto, etc.). Panopto has its own version of an interactive transcript.
For more information on the Impact of Closed Captioning and Interactive Transcripts,
check out the research by the University of South Florida, St Petersburg.
Use your captions created with YouTube elsewhere (optional)
Maybe you don’t want to share your videos with students as YouTube videos. You still
have the option to use the captions you’ve created in other programs that use a .srt file
format. The .srt file doesn’t need YouTube to play, but you do need to have the .srt file
named the same as the video file to play properly in most instances.
If your program requires another file format, you’ll need to use a conversion tool. One
such free conversion tool is 3Play Media’s Captions Format Converter, which converts
.srt and/or .sbv file formats (outputs from YouTube) to other captioning formats.
You can also download a text transcript (.txt) from YouTube.
Create a Playlist (optional)
If you have multiple videos, you may want to create a Playlist. This allows you to group
videos together.
• YouTube Help’s Create & manage playlists
• YouTube Creators Academy provides lessons, including one on Playlists
