
WPL_U101
T r a i n i n g G u i d e
7 – Working with Libraries
Microsoft Windows 7
Microsoft Windows 7
© Learning and Development Service Page 2 Working with Libraries
WORKING WITH LIBRARIES
In this booklet we will show you how to:
gain an understanding of libraries
explore libraries
create folders in a library
create a library
change library views
delete folders from a library
delete a library.
Wouldn’t it be great if you could store all of your pictures in
the one folder, no matter where they are on your computer
or network? Or, how about keeping all of those important
project documents together in one folder, and being able to
access project team members’ documents from their
computer also?
Windows 7 makes this possible through the use of
libraries. A library is a virtual folder that stores links to
folders. So, for example, you might have your favourite
photos in several different locations across your computer,
but by accessing the Pictures library, you can immediately
view all of your photos without having to click through
various folders to find them.
INFOCUS
Microsoft Windows 7
© Learning and Development Service Page 3 Working with Libraries
What Happened To My Documents?
In previous versions of Windows, you would most likely store your personal folders and files
in the My Documents folder. Now you can access the Documents library instead. Although
My Documents still exists, it now sits in the Documents library. The My Pictures folder is
now in the Pictures library, the My Music folder in the Music library, and so on.
Saving Files In The Library
By default, when you save a document, such as in Word, Windows 7 assumes that you want
to save it into the My Documents folder. The same goes when you attempt to save pictures,
Windows 7 assumes you want to store them in My Pictures, and so on. Windows 7
recognises the file type you are saving and responds by asking you to save in the
corresponding folder. Any documents or files you save in the Documents library will
automatically be saved in My Documents; any pictures you save in the Pictures library will
be stored in My Pictures, and so on.
Creating Libraries
You can rename existing libraries or create your own libraries. Say, for example, that you
are working on a project with several team members, and each team member has
important documents on their computer related to the project. You could create a library
called Project and then include specific folders in that library, even your team members’
folders, assuming they are on the network. You might even have several folders on your
computer in several different locations that you could also include in the Project library. The
Project library now acts as a quick link to the folders you’ve specified to include.
UNDERSTANDING LIBRARIES
In Windows 7, a library is a collection of
folders and files that are stored in several
locations across your computer or network.
A library is considered a virtual folder, as
it only contains links to file and folder
locations on your computer, not the folders
and files themselves. Libraries can help you
to easily locate files and folders, no matter
where they are stored on your computer.
What Is A library?
You have probably already worked with the
Documents folder within Windows Explorer. And
you’d be forgiven for thinking that Documents is a
folder. Well, it isn’t! Not really, anyway. Although
Documents can hold files and folders, it is actually
called a virtual folder. This means that although it
acts like a folder, this is not its purpose. The
purpose of a library is to provide a central location
for folders and files scattered across your computer
or network. You can think of a virtual folder as
containing links or shortcuts to actual files and
folders on your computer.
A library is similar to a folder in some ways. When
you open a library, for example, you’ll see several
folders and/or files. However, the folders and files
are not actually stored in the library; rather, they
are gathered together in the library from one or
more locations on your computer or network. This
is an important difference between libraries and
folders: libraries contain folders and files from
various locations across your computer or network,
whereas a folder will only contain files or folders
that are stored in that folder.
In essence, libraries are designed to make it easier
to locate and organise files and folders no matter
where they are stored on your computer.
Microsoft Windows 7
© Learning and Development Service Page 4 Working with Libraries
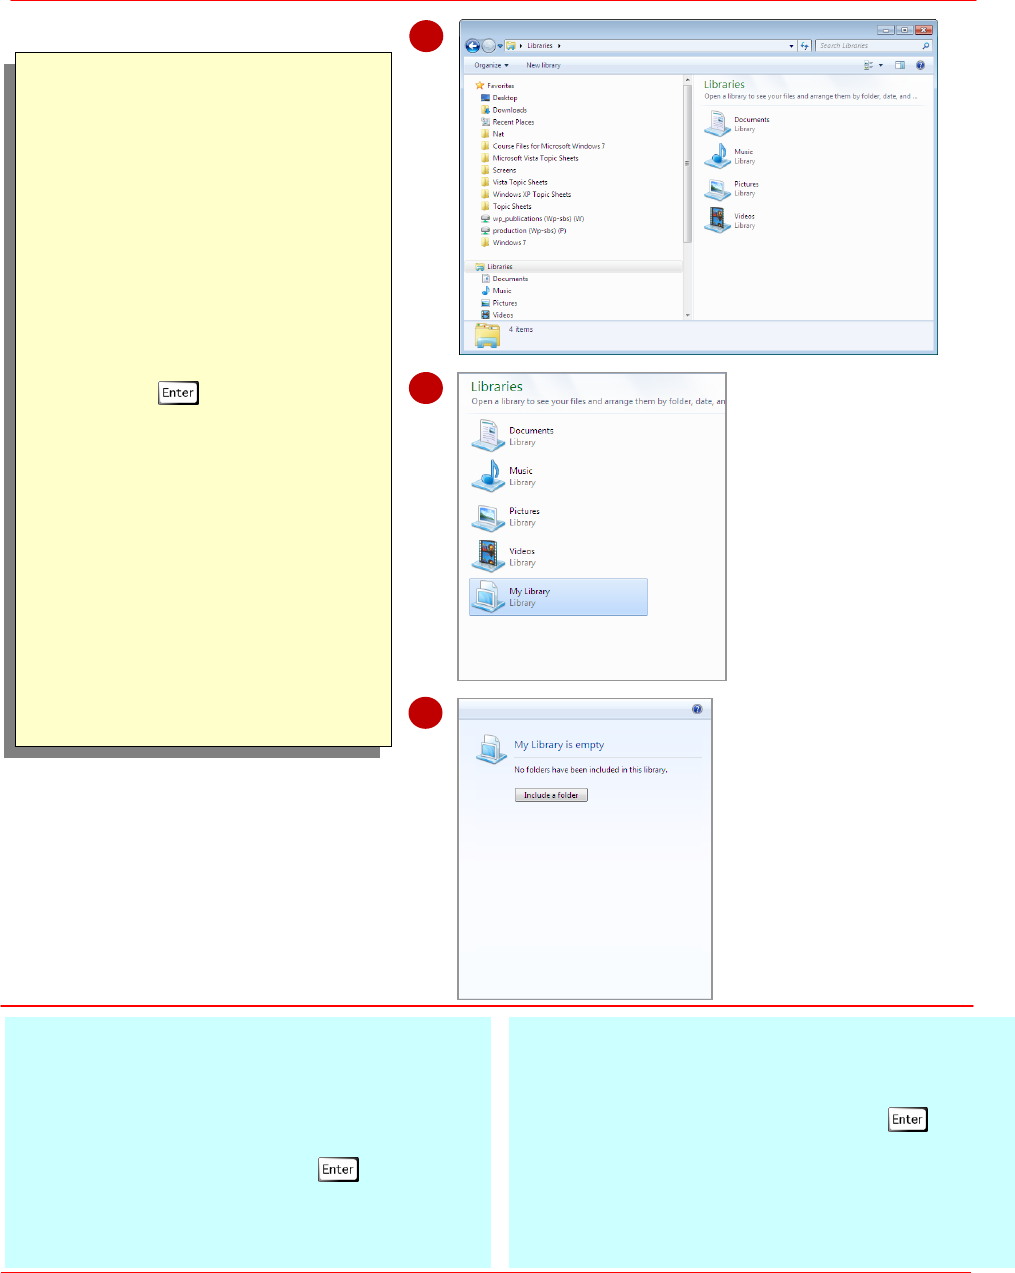
EXPLORING YOUR LIBRARIES
Libraries are collections of folders and
files on your computer gathered together
from various locations across your
computer and network (where applicable).
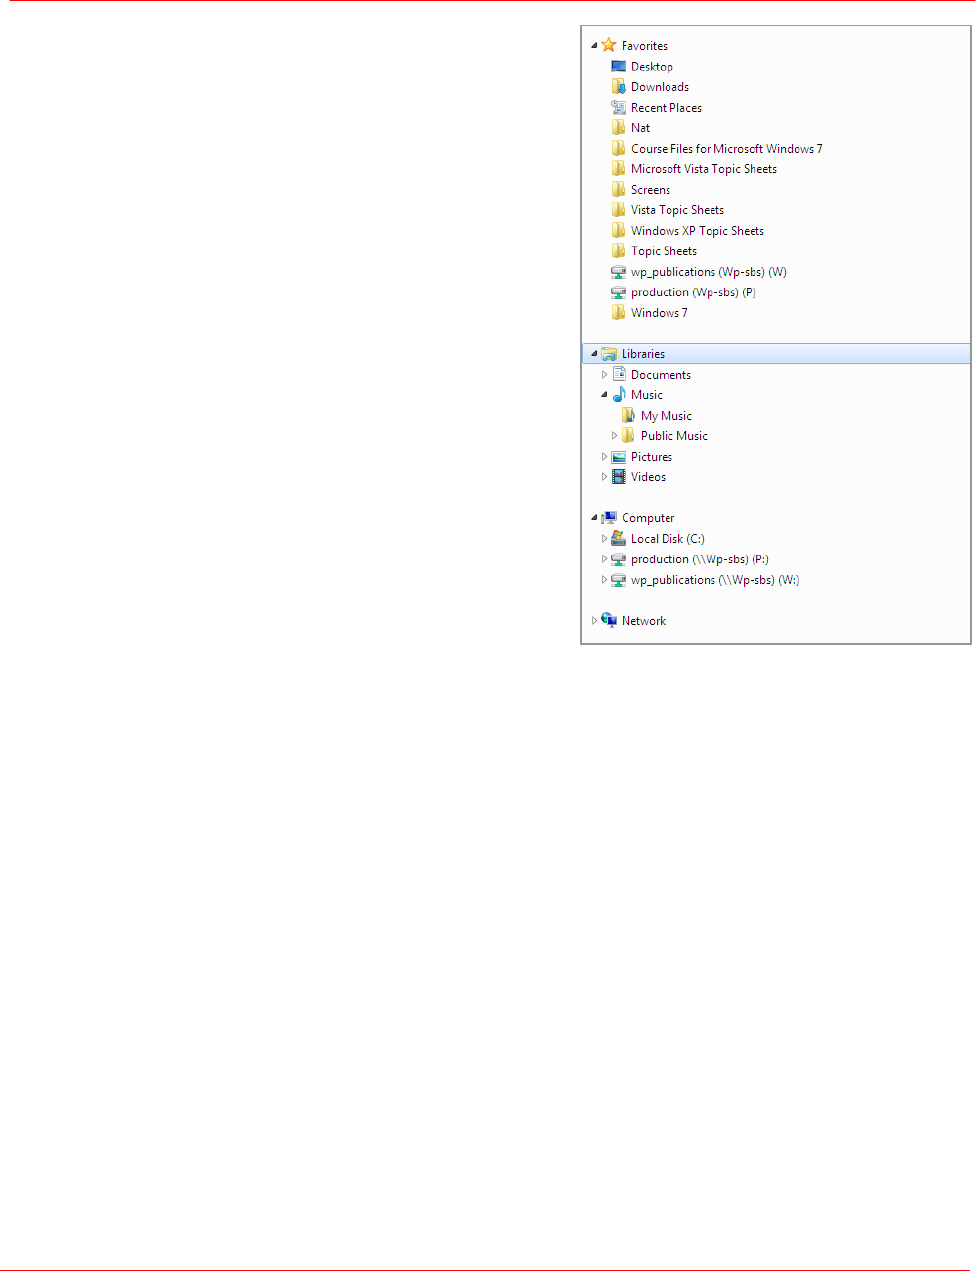
Libraries are accessible via the Navigation
pane in Windows Explorer. Four default
libraries exist in Windows 7: Documents,
Music, Pictures and Videos. By default,
Windows 7 will attempt to save your files
into these libraries.
For Your Reference…
To access your libraries:
1. Click on the Windows Explorer icon
in the Taskbar
2. Click on the required library in the
Navigation pane
Handy to Know…
You can rename existing libraries for
that more personal touch. To do this,
click on the library to select it, then
select [Organise] > Rename. Type
the new name and press to
confirm.
1
2
5
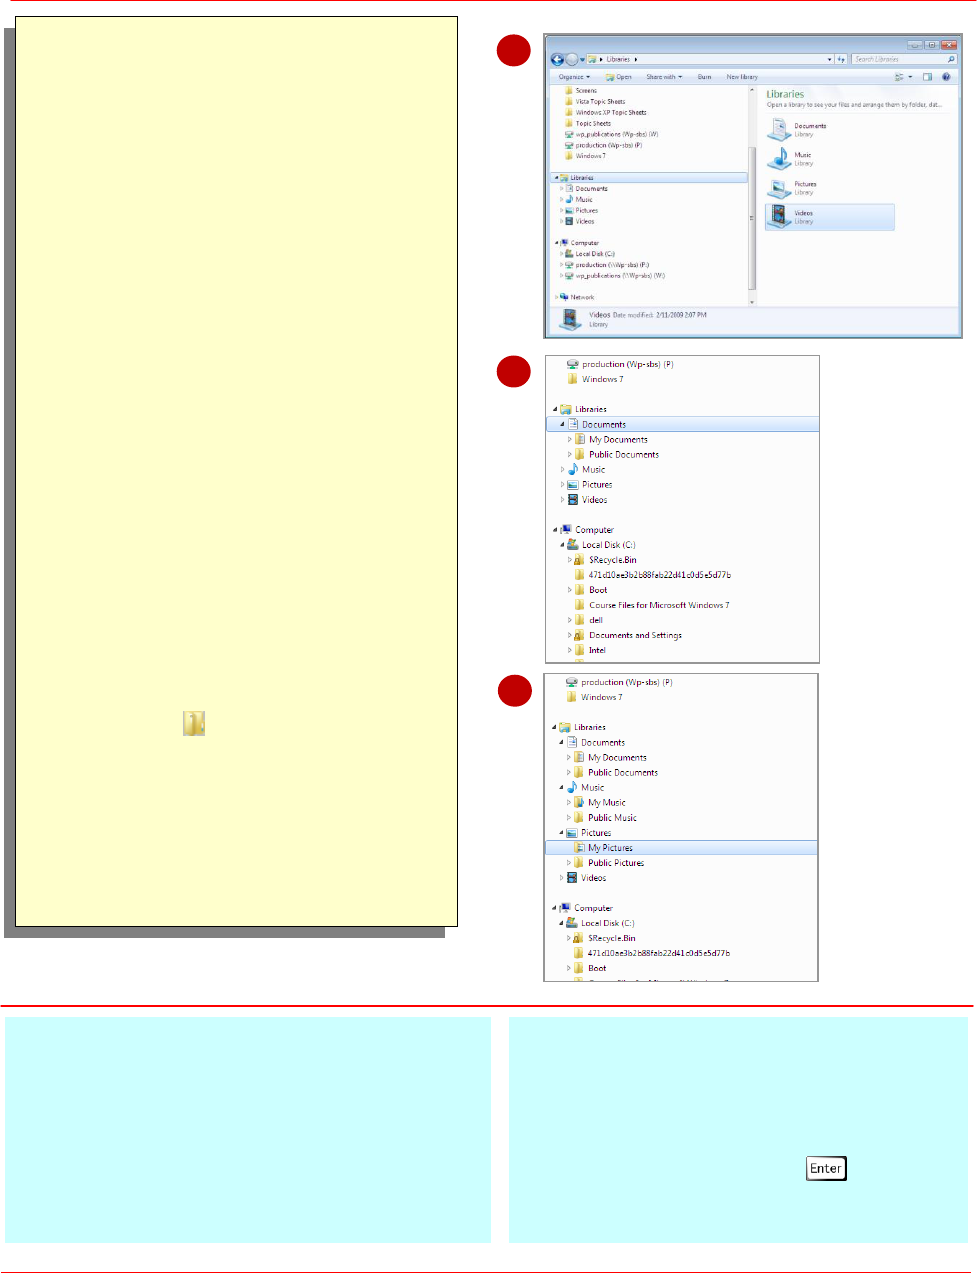
Try This Yourself:
Before starting this exercise
ensure you are viewing Windows
Explorer...
1
Click on Libraries in the
Navigation pane to display its
contents in the right pane
2
Double-click on Documents in
the Navigation pane to expand
this library
You’ll notice that the My
Documents folder sits within
Documents, as well as the Public
(network) folder...
3
Double-click on Music in the
Navigation pane to expand the
Music library
The My Music folder is listed
below Music in the Navigation
pane...
4
Double-click on Pictures in the
Navigation pane to expand the
Pictures library
5
Click on My Pictures in the
Navigation pane to select it
6
Click on at the very left of the
Address bar to view the actual
address (path) of the My
Pictures folder
The actual location of My
Pictures is
C:\Users\YourName\My
Pictures...
Microsoft Windows 7
© Learning and Development Service Page 5 Working with Libraries
CREATING FOLDERS IN A LIBRARY
As you work with your libraries, you’ll find
that you’ll want to create new folders in
your libraries to store working files. When
you create folders in Documents, for
example, they are actually stored within
the My Documents folder. Folders you
create in the Music library are stored within
My Music, and so on. You create folders in
libraries the same way as for creating folders
within folders.
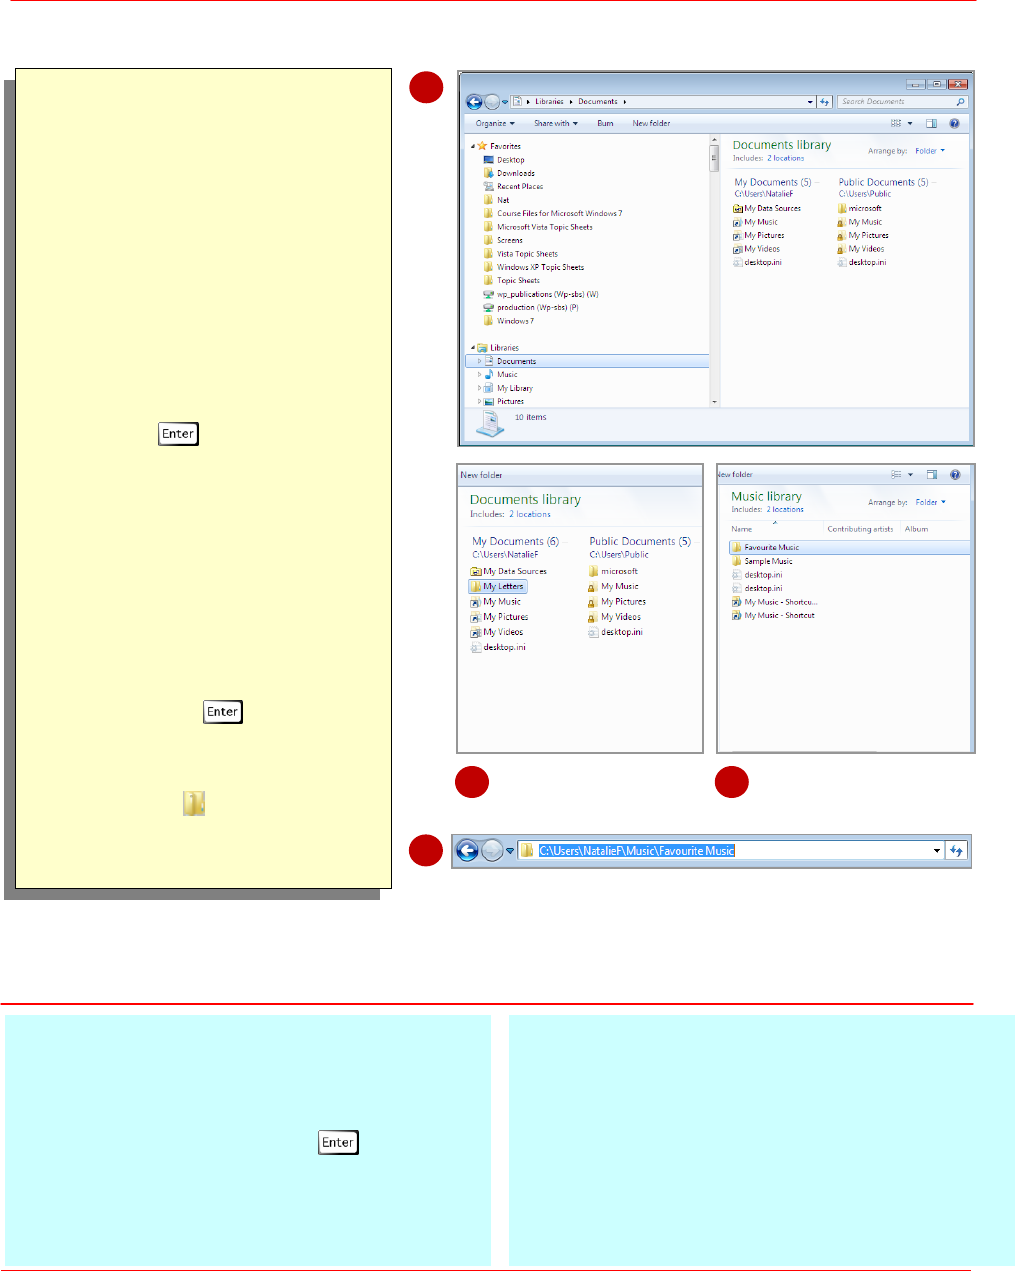
Try This Yourself:
Before starting this
exercise ensure you are
viewing Windows
Explorer...
1
Click on Documents in
the Navigation pane to
select the Documents
library
2
Click on [New folder] to
create a new folder
3
Type My Letters and
press
As you can see, My Letters
is now stored within the
My Documents folder...
4
Click on Music in the
Navigation pane to select
the Music library
5
Click on [New folder]
6
Type Favourite Music
and press
7
Double-click on Favourite
Music to open this folder
8
Click on
in the Address
bar to view the actual path
(location) of this folder
For Your Reference…
To create folders in a library
1. Click on the relevant library to select it
2. Click on [New folder]
3. Type a name and press
Handy to Know…
The first folder you add to a library becomes
the default save location. This means
that any files you save in your library will be
saved into that folder. To change the
default save location, right-click on the
library, select Properties, select the
desired folder and click on Set Save
Location. Click on [OK].
1
6
8
3
Microsoft Windows 7
© Learning and Development Service Page 6 Working with Libraries
CREATING A LIBRARY
Although Windows 7 has done a good job
of providing default libraries to suit the
range of files you will work with and save,
there may be times when it is easier to
create a new library for a specific purpose.
Files and folders can then be added to this
library from any other location across your
computer or network. You can create new
libraries in Windows Explorer.
Try This Yourself:
Before starting this
exercise ensure you are
viewing Windows
Explorer...
1
Click on Libraries in the
Navigation pane to select
it
2
Click on [New library]
3
Type My Library and
press
A fifth library has now
been added to the list of
libraries...
4
Double-click on My
Library to open the library
and view its contents
You are advised that the
library is empty and asked
to include folders and files
in this library. You won’t
include any folders at this
stage
For Your Reference…
To create a library:
1. Click on Libraries in the Navigation
pane
2. Click on [New library]
3. Type a name and press
Handy to Know…
You can create a new library by right-
clicking on Libraries, then selecting New >
Library. Type a name and press .
You can delete existing libraries that are not
required. To do this, right-click on the
library you want to delete and select
Delete. Click on [Yes] when asked to
confirm the deletion.
3
1
4

Microsoft Windows 7
© Learning and Development Service Page 7 Working with Libraries
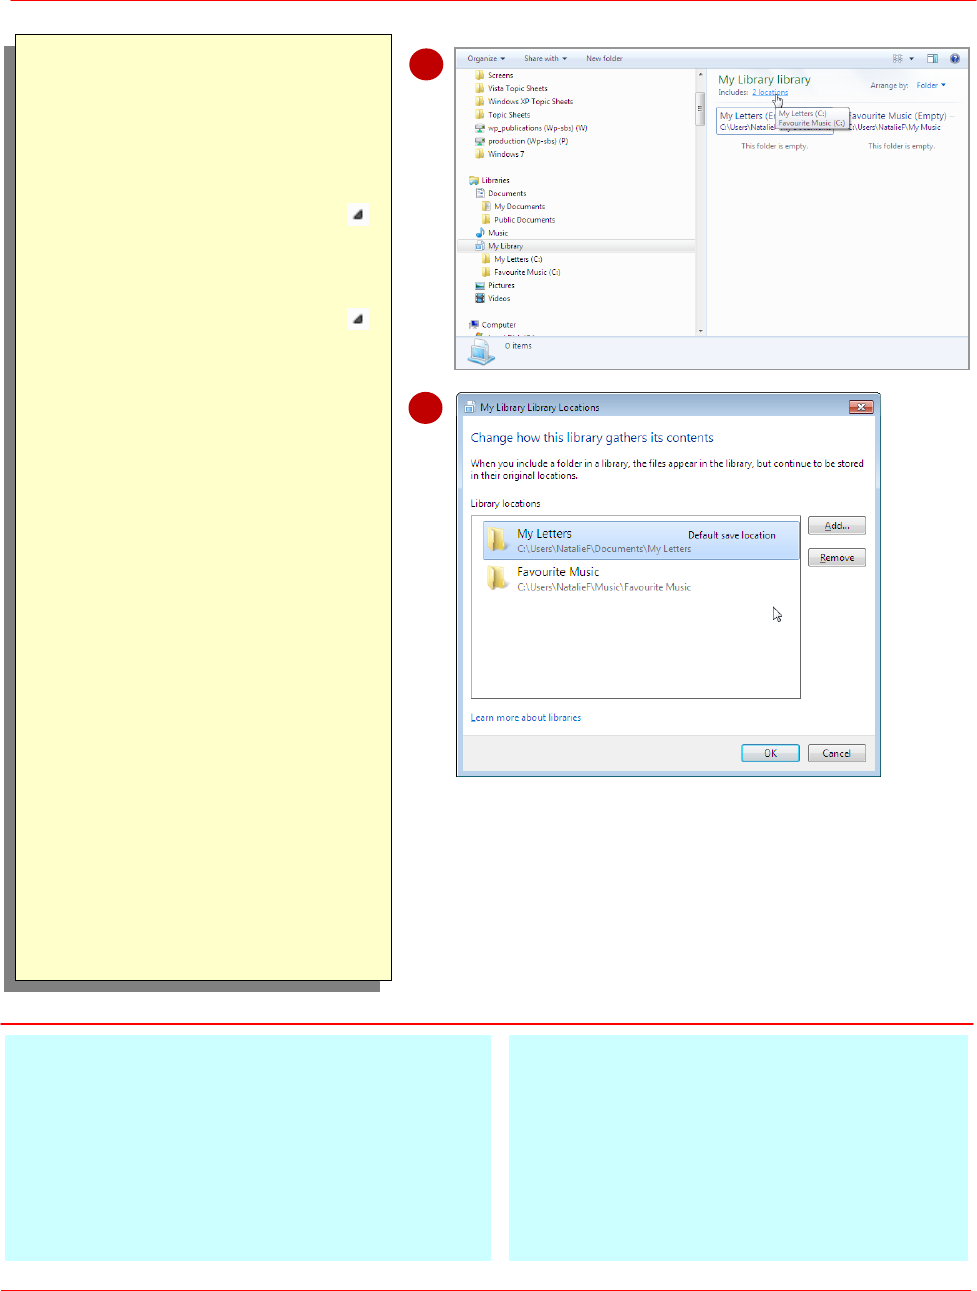
ADDING FOLDERS TO A LIBRARY
Probably one of the most common tasks
you’ll perform when it comes to using
libraries is adding existing folders to a
library. If you have created a library and
then opened that library, you will be
prompted to add folders to your new library.
Folders can be added to the default libraries
or to libraries that you create.
For Your Reference…
To add folders to a library:
1. Right-click on the library
2. Select Properties
3. Click on [Include a folder]
4. Navigate to and select the folder to add
5. Click on [Include folder] and click on
[OK]
Handy to Know…
You can add folders to include in your
library by clicking on the locations link
at the top of the right pane. When you
click on this link a dialog box appears
showing your current folder locations.
Click on [Add] to include more folders
(or locations).
1
5
6
Try This Yourself:
Before starting this exercise
ensure you are viewing
Windows Explorer...
1
Navigate to and click on My
Library within Libraries in
the Navigation pane
The right pane displays a
message advising you that
the library is empty...
2
Click on [Include a folder]
in the right pane
You now need to navigate to
the required folder...
3
Click on Documents in the
Navigation pane to open
this folder
4
Click on My Letters in the
right pane to select this
folder
5
Click on [Include folder]
You will now add another
folder using a different
method...
6
Right-click on My Library in
the Navigation pane and
select Properties
7
Click on [Include a folder]
8
Navigate to and select the
Favourite Music folder in
the Music library
9
Click on [Include folder]
and then click on [OK]
Microsoft Windows 7
© Learning and Development Service Page 8 Working with Libraries
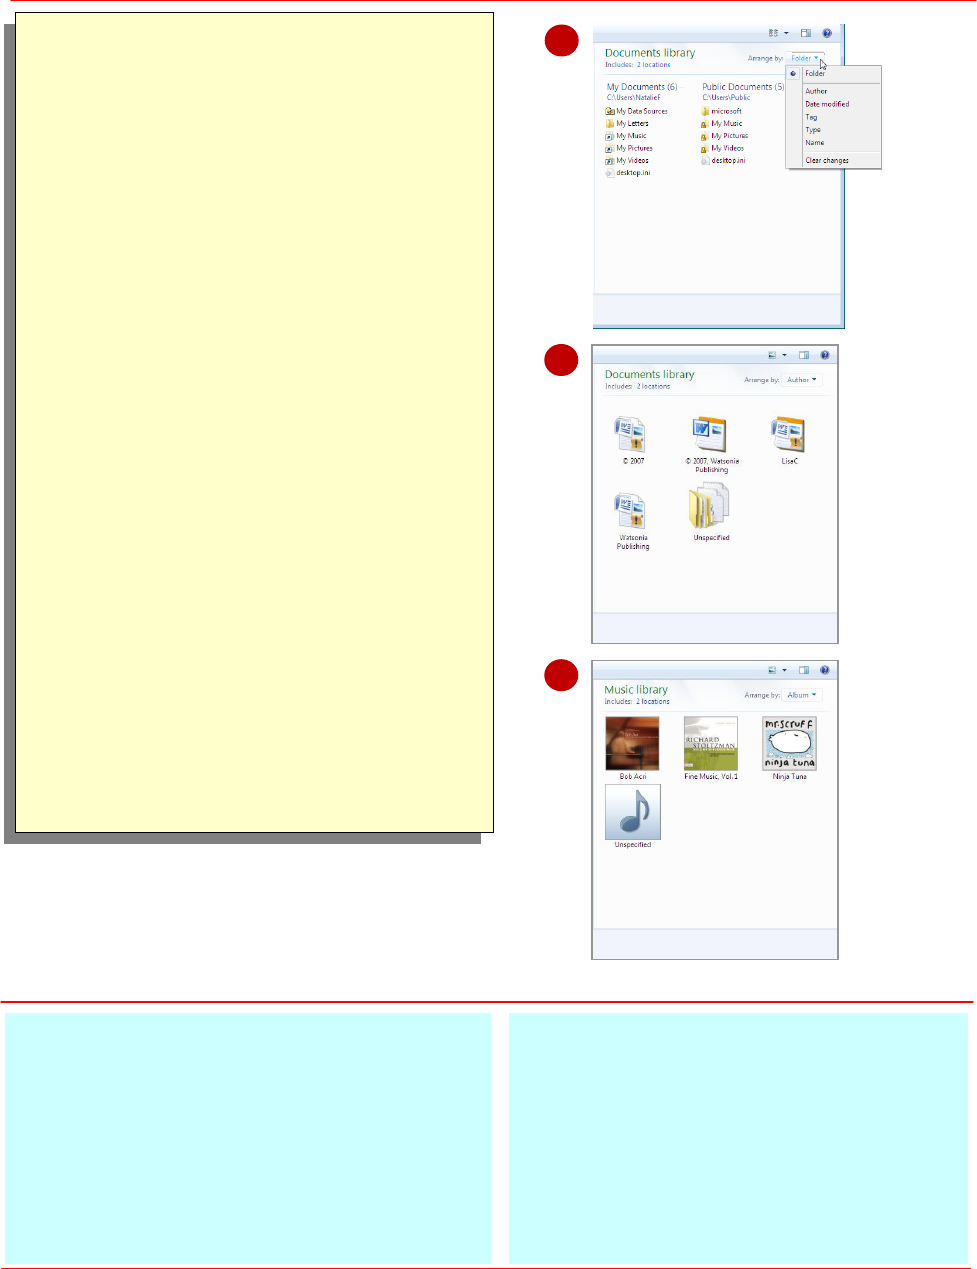
CHANGING LIBRARY VIEWS
You can change the way you view files in
your libraries. As each library will serve a
different purpose, such as one library will
contain documents while another library
will contain pictures, you can change the
view to suit the content within that library.
Different library types have different view
settings, and each library can be customised
according to its content.
For Your Reference…
To change the library view:
1. Select the library
2. Click on the drop arrow to the right of
[Arrange by] in the top right corner
of the right pane and select the desired
view
Handy to Know…
The default Windows 7 libraries have
been optimised to suit their content.
To optimise a library that you have
created, right-click on the library and
select Properties. In Optimise this
library for select the content that you
will store in the library, and then click
on [OK].
2
2
3
8
Try This Yourself:
Before starting this exercise ensure
you are viewing Windows Explorer...
1
Navigate to and click on My Library
to select it
2
Click on the drop arrow to the right
of [Arrange by] in the top right
corner of the right pane to display a
menu of view options
3
Select Author
The files within the folders are
arranged by Author...
4
Click on the drop arrow to the right
of [Arrange by] in the top right
corner of the right pane and select
Date Modified
Files are arranged by date...
5
Experiment using the other available
view options in the Documents
library to see the result
6
Click on Music in the Navigation
pane to view the Music library
7
Repeat step 4
to see the different
view options
8
Select Album from the menu to
view your music by album
9
Experiment using the other available
view options in the Music and
Pictures libraries to see the result
Microsoft Windows 7
© Learning and Development Service Page 9 Working with Libraries
DELETING FOLDERS FROM A LIBRARY
As you work with folders in your libraries,
you’ll want to remove folders when they’re
no longer needed. Deleting folders from a
library is similar to deleting other folders.
However, when you delete a folder from a
library, the subfolders and files within that
folder are not deleted from your computer,
only their link in the library is deleted.
For Your Reference…
To delete folders from a library:
1. Click on the locations link in the right
pane
2. Click on the folder to delete in the
Library Locations dialog box
3. Click on [Remove] to delete the folder
Handy to Know…
When you delete a folder from a library
that is marked as the default save
location, the next oldest folder will
automatically become the default save
location until you change the default
save location in the library Properties.
3
4
Try This Yourself:
Before starting this
exercise ensure you are
viewing Windows
Explorer...
1
Click on the black arrow
next to Libraries in the
Navigation pane to
expand Libraries...
2
Click on the black arrow
next to My Library to
expand this library
Ensure you are viewing the
contents of My Library in
Folder view...
3
Click on the link that says
2 locations in the right
pane
The Library Locations
dialog box is displayed...
4
Click on My Letters under
Library locations
5
Click on [Remove] to
remove this folder from
the library
6
Click on Favourite Music
under Library locations
7
Click on [Remove] to
remove this folder from
the library
8
Click on [OK] to exit the
dialog box
The My Library library is
now empty
Microsoft Windows 7
© Learning and Development Service Page 10 Working with Libraries
DELETING A LIBRARY
When a library is no longer needed, it’s
best to remove the library altogether. This
obviously prevents clutter in your filing
system, and helps to keep your folders and
files organised. Deleting a library in
Windows 7 is the same process as for
deleting folders. When you delete a library,
all folder links within that library are also
removed, but not the actual folders
themselves.
Try This Yourself:
Before starting this
exercise ensure you are
viewing Windows
Explorer...
1
Navigate to and select My
Library in the Navigation
pane
2
Right-click on My Library
in the right pane to display
a shortcut menu
3
Select Delete
You will be asked whether
you want to send the
‘folder’ to the Recycle
Bin...
4
Click on [Yes]
The library no longer
appears in your list of
Libraries
For Your Reference…
To delete a library
Right-click on the library and select
Delete
or
Select the library and press
Handy to Know…
You can hide libraries from the Navigation
pane. This is useful if you’re not ready to
delete a library but are not currently using
it. To do this, right-click on the library and
select Don’t show navigation pane. To
unhide a library, right-click on the library in
the right pane and select Show in
navigation pane.
2
4
3

Microsoft Windows 7
© Learning and Development Service Page 11 Working with Libraries
CONCLUDING REMARKS
Congratulations!
You have now completed the Working with Libraries booklet. This booklet was designed
to get you to the point where you can competently perform a variety of operations as
outlined in the task list on page 2.
We have tried to build up your skills and knowledge by having you work through specific
tasks. The step by step approach will serve as a reference for you when you need to repeat
a task.
Where To From Here…
The following is a little advice about what to do next:
Spend some time playing with what you have learnt. You should reinforce the skills
that you have acquired and use some of the application's commands. This will test
just how much of the concepts and features have stuck! Don't try a big task just yet if
you can avoid it - small is a good way to start.
Some aspects of the course may now be a little vague. Go over some of the points
that you may be unclear about. Use the examples and exercises in these notes and
have another go - these step-by-step notes were designed to help you in the
classroom and in the work place!
Here are a few techniques and strategies that we've found handy for learning more about
technology:
visit CLD’s e-learning zone on the Intranet
read computer magazines - there are often useful articles about specific techniques
if you have the skills and facilities, browse the Internet, specifically the technical
pages of the application that you have just learnt
take an interest in what your work colleagues have done and how they did it - we
don't suggest that you plagiarise but you can certainly learn from the techniques of
others
if your software came with a manual (which is rare nowadays) spend a bit of time
each day reading a few pages. Then try the techniques out straight away - over a
period of time you'll learn a lot this way
and of course, there are also more courses and booklets for you to work through
finally, don’t forget to contact CLD’s IT Training Helpdesk on 01243-752100
