
Copyright © 2024 Topaz Systems Inc. All rights reserved. For trademarks and patents, visit www.topazsystems.com/legal.
For more information on Topaz signature pads and software, visit www.topazsystems.com.
User Manual
pDoc Signer
Contents
Introduction ..................................................................................................................................................... 2
pDoc Signer ................................................................................................................................................................................................................. 2
pDoc Forms Designer ........................................................................................................................................................................................... 2
Installation ....................................................................................................................................................... 2
Basic Operation ............................................................................................................................................... 3
Electronic Signatures ...................................................................................................................................... 4
Insert and Sign ........................................................................................................................................................................................................... 4
Signature Capture Process ................................................................................................................................................................................ 5
Validation of Signatures ...................................................................................................................................................................................... 5
View Signed and Unsigned Signature Fields ........................................................................................................................................ 6
Sticky Note Comments ................................................................................................................................. 11
Text Comments ............................................................................................................................................. 13
Pencil Tool ...................................................................................................................................................... 15
Attachments ................................................................................................................................................... 15
Stamps ............................................................................................................................................................ 17
Securing Documents .................................................................................................................................... 20
Printing and Print Preview........................................................................................................................... 21
Merging and Splitting of PDF Documents ................................................................................................ 21
Command Line Arguments ......................................................................................................................... 23
Hotkey Facility for Toolbar Icons ................................................................................................................ 23
Making pDoc Signer the Default PDF Program ........................................................................................ 24

pDoc Signer User Manual
- 2 -
Introduction
pDoc Signer and the companion application pDoc Forms designer provides professional forms design
and signing tools for users of Topaz signature pads.
• pDoc Signer is supported for Windows 10 and higher.
• 30 MB free space on the hard drive.
• Before installing a new version of pDoc Signer, uninstall any older versions of pDoc Signer on your
machine.
pDoc Signer
pDoc Signer is designed for end users that fill out and sign electronic forms. pDoc Signer also provides
features including adding comments, pencil markups, and attachments. If required, pDoc Signer can
insert additional signatures using the Insert & Sign feature.
pDoc Forms Designer
pDoc Forms Designer is used by form authors to drag-and-drop form fields such as Text Boxes, Check
Boxes, Radio Buttons, List Boxes, Combo Boxes and Electronic Signature fields into electronic documents
for use by pDoc Signer.
Installation
SigPlus Install
pDoc Signer requires Topaz SigPlus Pro software to provide communication between the computer and
the signature pad. Visit www.sigpluspro.com to download.

pDoc Signer User Manual
- 3 -
pDoc Signer Install
Install pDoc Signer software by running the pDoc Signer installation file found at:
www.topazsystems.com/pdocsigner.html. During installation of pDoc Signer, an option screen for
installing pDoc Forms Designer will be provided. Install pDoc Forms Designer if you wish to also create
PDF forms for users to sign.
After installing, both programs can be found under: “Start Programs pDoc Signer”.
pDoc Signer Un-Install
To uninstall pDoc Signer, go to “Control Panel All Control Panel Items Programs and Features”. Select
pDoc Signer and click “Uninstall”. Follow the instructions to uninstall the software.
Basic Operation
Please note: pDoc Signer only allows one document to be opened at a time.
Page Zooming
The default zoom percentage used when opening any document in pDoc Signer is configurable. To set
the default zoom, go to “Tools Settings” and then select the “Default Zoom Level” in the “Zoom” tab.
This setting will be applied when you close the pDoc Signer application and re-open it.
Setting Font Options
To set font options for the entries displayed in form fields and comments, go to “Tools Preferences”.
Opening Certified PDF Documents
Certified PDF documents can be opened in pDoc Signer. Enabling/disabling of features/fields and
signing existing signature fields will depend on the permissions set during the certification of the PDF.

pDoc Signer User Manual
- 4 -
Cropped PDFs
pDoc Signer supports cropped PDF documents. Existing signature fields can be signed, form fields can be
filled and other features like text annotations, sticky note annotations, pencil markups, and affixing
stamps can be used with cropped PDFs. If the cropped PDF document is a secured document, enabling
and disabling of features will depend on the permissions on the document.
Filling Form Fields
When a PDF containing form fields is opened in pDoc Signer, pDoc Signer displays the form fields that
are available and supported: Electronic Signature Box, Text Box, Radio Button, Check Box, and List and
Combo Boxes. Any other types of form fields present in the PDF are not displayed in pDoc Signer.
Electronic Signatures
pDoc Signer allows inserting an electronic signature field and signing it immediately using the “Insert &
Sign” toolbar icon. This toolbar icon is displayed by default.
Insert and Sign
Select the “Insert and Sign” icon on the toolbar; drag the mouse on the document to the required size
and location of the signature field. Upon completion of the selection, the signature field is displayed and
the act-of-signing is initiated.

pDoc Signer User Manual
- 5 -
Signature Capture Process
During the signature capture process, additional information like First Name, Last Name and Email can be
input, or a pre-created signer can be selected. The signer can sign and clear if dissatisfied with the
signature, and sign again. Clicking “OK” accepts the signature and embeds it in the document.
Validation of Signatures
Validation is the process of checking if the document has been modified since it was signed and verifying
that a valid signing certificate was used and is trusted. By default, signatures are validated when you open
a PDF in pDoc Signer. An icon appears in the signature field on the document page to indicate the
signature status.
The
digital signature icon
along with the name of the field in the Signatures panel indicates
the presence of an unsigned signature field.
The
check mark icon
indicates that the signature has been validated.
The
red X icon
indicates that the signature is not currently validated.
The
caution triangle icon
indicates that the document appears to have been modified after
the signature was added.
The
question mark icon
indicates that pDoc Signer is not able to validate the signature. This
can show if the document was signed by a valid certificate, but it isn’t in the Adobe or users
trusted certificate list.
The “Signature Properties” dialog box can be opened either by clicking on the “Status” icon or by right-
clicking on the “Signature Field” and then selecting “Validate Signature”.

pDoc Signer User Manual
- 6 -
The status icons on the signed signature fields can be turned off by unchecking “Show signature
validation status tick marks” in the “Signature Field” tab of the pDoc Signer Settings screen.
View Signed and Unsigned Signature Fields
Click on the “Show/Hide List of Signatures” tool button in the left pane to open the signature panel.
Clicking on any of the signature fields in the list causes the corresponding blank or signed signature field
in the document to be highlighted. Close the signature panel by clicking again on the “Show/Hide List of
Signatures” tool button.

pDoc Signer User Manual
- 7 -
Viewing Previous Signed Document Versions
Each time a document is signed in pDoc Signer, a signed version is saved with the PDF. Each version is
saved as append-only so that it cannot be modified. In pDoc Signer, the corresponding signed version of
a signature can be viewed using the following two options:
1. OPTION ONE: In the “Signatures” panel, select the signature and click “View Signed Version”
available in the details of the signature.
2. OPTION TWO: Right-click on the signed signature field and select “View Signed Version”.
Specifying Signature Field Options
Each signature field must have a name associated with it. pDoc Signer can assign a name automatically
when a signature field is inserted into the PDF (if a “Prefix” for “Name” is supplied). Another alternative is
to provide a name for the signature field when inserted manually. These options can be set in the
“Signature Field” tab under “Tools Settings”.

pDoc Signer User Manual
- 8 -
Signature Capture Options
To set the signature capture options, go to “Tools Preferences Signature Capture”.
The default signature window background is “blank screen”. For a “custom signing image” background,
the user can select a custom bitmap image with resolution less than or equal to 1600x900.
The minimum number of signature points required to accept a signature can be set here, which can be
used to help detect and prevent inadvertent pen swipes from being accepted as signatures. This value
should be selected based on the sample (point) rate of the signing device being used; the default is 12.
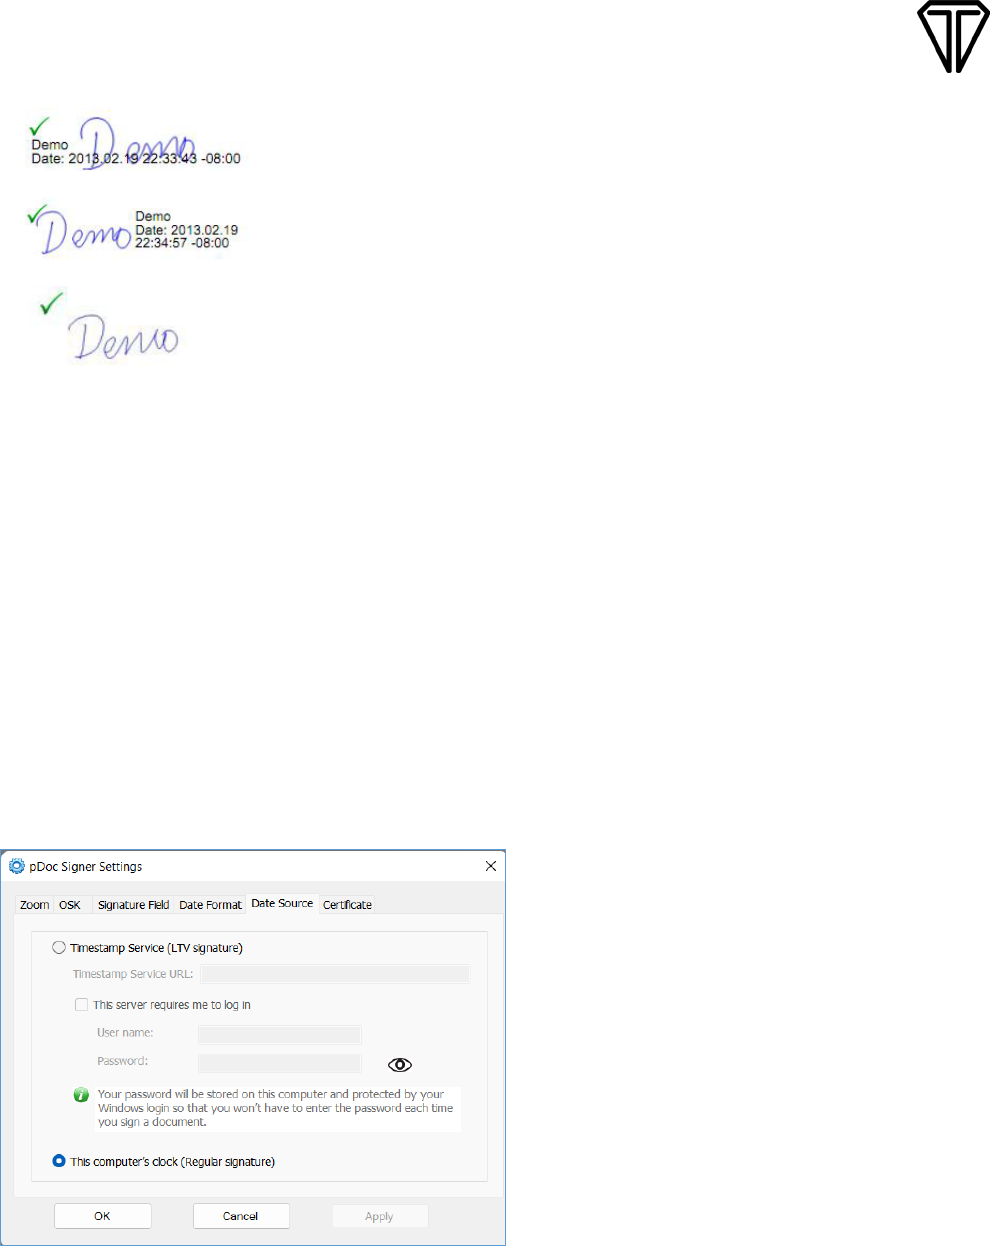
Signature Presentation
To set signature presentation options, go to “Tools Preferences Signature Presentation”.
Select the desired position of the signature details (the signer’s name and date/time the signature was
accepted).
pDoc Signer User Manual
- 9 -
If “Behind” is selected, the signature details are placed at the center of the
signature field with the signature squiggle behind the details.
If “Beside” is selected, the signature squiggle is shown on the left side of
the field and the details are shown on the right side of the signature field.
If “Image Only” is selected, only the signature squiggle is shown in the
Signature Field and details are not shown.
The Maximum enlargement feature and percentage can be specified in this menu, preventing the
signature from looking pixelated or jagged. The value of the maximum enlargement percentage can be
between 0 and 100. If a value of 0 is specified, the signature is not enlarged at all. If a value of 100 is
specified, the signature is enlarged to fit the complete destination.
Note: The display of Signature Title and the time/date stamp is on by default and non-removable for
“Behind” and “Beside” options. But, if the height of the signature field is less than 30 pixels or the width of
the signature field is less than 50 pixels, then the signature details (i.e., Signature Title and Date/time
stamp) are not printed on the signature.
Date Source Selection
pDoc Signer provides the capability to select the date/time source to apply to signatures from either a
standard internet TSA service (Time Stamp Authority) or the computer’s clock.
Regular signatures using the date/time from the computer’s clock are the default option; however, the
user has the option to select Long Term Validation (LTV) signatures, which use an internet TSA service as
the source for the date/time. Instead of using the standard TSA service, the user can also specify a specific
TSA URL and optionally provide the username/password log in information for the URL.

pDoc Signer User Manual
- 10 -
Signature Information
1. Creation of List of Signers:
This feature can be used to create a list of expected signers. To
create a profile, enter the required information and then click “Add”. A maximum of 10 profiles
can be created here for use while signing. To make a signer the default signer, select the signer
from the available list, and then click “OK”.
2. Remove a Signer:
To remove a signer from the list, select the signer from the available list and
click “Remove”.
Automatic Configuration of Certificate
pDoc Signer provides a default certificate for signing. The default certificate (i.e., pdocsignerTopaz.pfx)
will be configured automatically during the installation process. If a user wants to specify their own
certificate to be the default signing certificate, they can enter the certificate thumbprint during
installation. When pDoc Signer is opened, this certificate is selected as default in the “Other Certificate”
option in the “Certificate” tab under “Tools Settings”. If a user wants to change the certificate after
starting pDoc Signer, the user selects the certificate in the “Other Certificate” option as shown below in
the “Certificate Selection” section.
Certificate Selection
Signing in pDoc Signer requires the use of a digital certificate. During the standard installation process,
pDoc Signer automatically installs and configures the default certificate that is used for signing. This
default certificate expires on May 26, 2046.
Alternatively, the certificate used in previous versions of the software can be selected. This other
certificate (named “pDoc Signer”) has a shorter expiration interval. Additional certificates in the drop-
down list, installed by the users or their representatives, may be selected if desired.
Users have the option to select a different signing certificate from a list of certificates already installed in
the PC. To select another certificate for signing, go to the “Certificate” tab under “Tools Settings” and
select “Other Certificate” in the Certificate tab. Beneath “Other Certificate” is a drop-down list of
certificates that are already installed in the PC’s Windows certificate store and have a private key available
for signing; this includes external USB crypto tokens.

pDoc Signer User Manual
- 11 -
The first certificate in the Other Certificate list is named pDoc Signer, which is the certificate used in the
previous version of the pDoc Signer software package. Once a certificate has expired, it may no longer be
used to assist in the signing process, or to validate previously signed documents.
Additional certificates in the drop-down list, installed by the users or their representatives, may represent
the user’s organization.
If one of the other certificates has been selected when the pDoc Signer application is opened, the
application checks the certificate expiration date as follows:
• If the number of days to expiration is equal to or less than 40 days, then the application will
display a warning message.
• If the certificate has expired, then the application will display a certificate expired message and
change the certificate option to “Default Certificate”. If desired, the user can select another
certificate from the “Other Certificate” drop-down list.
Sticky Note Comments
Adding Sticky Note Comments
Click on the “Sticky Note Comment” tool button. Click on the document where the sticky note comment
field is required. A window is displayed wherein the user can add the text for the comment.

pDoc Signer User Manual
- 12 -
Upon acceptance, a sticky note comment icon will be displayed on the document at the specified
location which indicates that the sticky note comment field is added in that position.
Viewing Sticky Note Comments
Double-click on any sticky note comment icon on the document to view the corresponding notes in a
separate transparent window.
Deleting Sticky Note Comments
To delete a “Sticky Note Comment”, select the comment, right-click, and select “Delete”.
Note: You cannot delete a sticky note comment if the PDF document contains at least one signed
signature field or if the PDF is secured. These sticky notes become an integral part of the signed and/or
secured document.
pDoc Signer User Manual
- 13 -
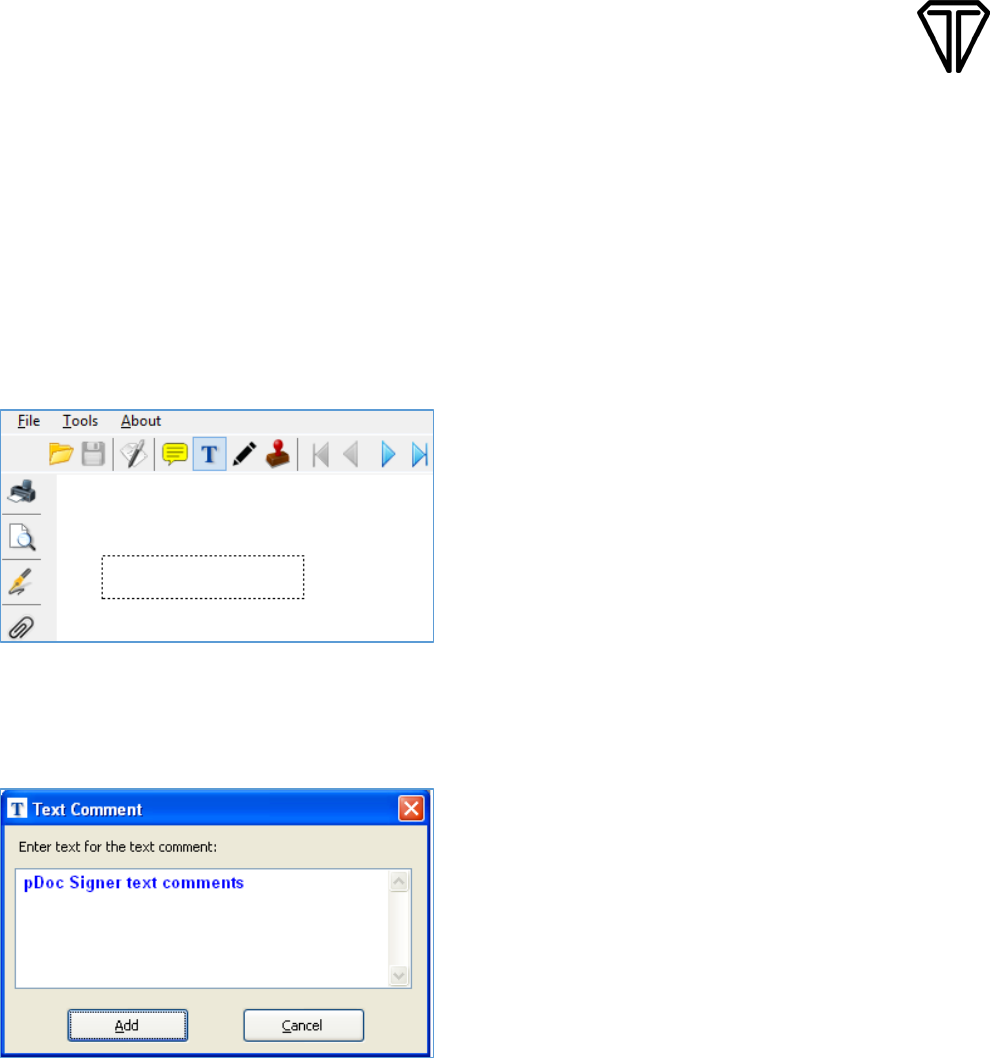
Text Comments
Adding Text Comments
Click on the “Text Comment” tool button. Drag the mouse on the document to the required size and
location of the text comments field. Upon completion of the selection, the text comments input window
is displayed.
Using the keyboard, enter the text for the comment. Font attributes specified in the “Preferences”
windows for comments are applied for the text entered in this window. Click on the “Add” button to add
the text comment to the PDF.
Note: Text lines that are longer than the width of the text field are truncated by standard convention;
they do not wrap to the next line, so the user should use line returns for multi-line comments.

pDoc Signer User Manual
- 14 -
Updating Text Comments
The existing text comments can be updated in pDoc Signer. Click on the text comment and alter the text
as required. The updated text is applied to the text comment when the PDF is saved.
Note: Text comments in place when the document is signed will not be editable after signing; after a
document is signed, new text comments can be added, but they cannot be modified after addition.
Deleting Text Comments
To delete a text comment, select the comment, right-click on it, and select “Delete”.
Note: Text comments can’t be deleted if the PDF document contains at least one signed signature field
or if the PDF is secured.
Editing Text Comments
To make text comments editable, go to “Tools Preferences”. Click on the “Text Comment” tab, select
“Make text comments in the document editable”, and click on “Apply”.
This option is applicable for existing text comments that are there when the document is opened, as well
as for new text comments that you insert during the session. If you insert new comments, they
immediately become editable or non-editable depending upon the settings.
pDoc Signer User Manual
- 15 -
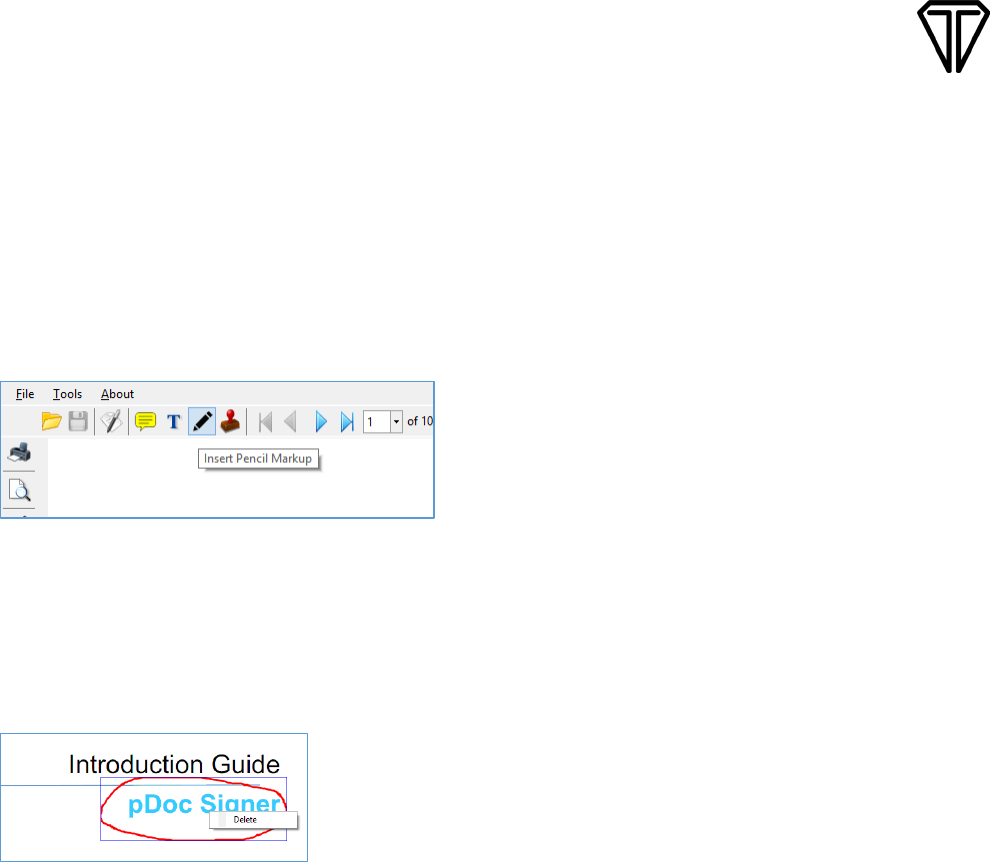
Pencil Tool
Draw Pencil Mark-Up
Click on the pencil tool. Drag where you want to begin drawing and release the mouse button where the
pencil line should end.
Delete Pencil Mark-Up
To delete a Pencil Markup, select the markup, right-click, and select “Delete”.
Pencil Tool Settings
To specify the line width and line color for pencil markups, go to “Tools Preferences”. Click on the
‘Pencil’ tab, select the pencil line color and width, and click “Apply”.
Attachments
PDF documents and other types of files can be attached to a PDF using pDoc Signer. If you move the PDF
to a new location, the attachments move with it.
Click on the “Attachments” tool button in the left pane to open the “Attachments” panel.

pDoc Signer User Manual
- 16 -
Adding Attachments
Clicking on “Attach” will open a file dialog. Select the file to be attached to the PDF document and click
“OK”. The selected file will be attached to the document and the attached file list will be updated.
Deleting Attachments
Select the attachment to be deleted from the list. Click “Delete” in the “Attachments” panel. The selected
file will be deleted, and the attached files list will be updated.
Note: Attached files cannot be deleted if the PDF document contains at least one signed signature field
or if the PDF is secured.
Viewing Attachments
To view an existing attachment, select the attachment and click “View” in the “Attachments” panel. If the
attachment is a PDF, it is opened in another instance of pDoc Signer. For other types of attachments, the
attachment is opened in their respective application.

pDoc Signer User Manual
- 17 -
Stamps
pDoc Signer supports insertion of stamps in a PDF document. A stamp can be either static or dynamic.
Configuring Stamps
To select the stamps that can be placed into a document:
1. Go to “Tools Preferences”; the “pDoc Signer Preferences” window will open.
2. Click on the “Stamp” tab; the “Stamp Information” window will appear.
3. Select the “Stamp Type”, either Static or Dynamic. The default is Static.
4. Configure the list of stamps as described in the following sections.
5. Click “OK”; the window will close.
Static Stamps
By default, pDoc Signer supports one static stamp named “Approved”. You can preview any stamp by
clicking the “Preview” button.

pDoc Signer User Manual
- 18 -
To add a new static stamp:
1. Click on “Add New”, and enter a name for the static stamp.
3. Click “Browse” and select the image containing the static stamp.
4. Click “Save”.
Note: The maximum size allowed for the static stamp images is 600 x 600 pixels.
To remove an existing static stamp:
1. Select the stamp in the list of stamps.
2. Click “Remove”.
3. Click “Yes” in the confirmation message.
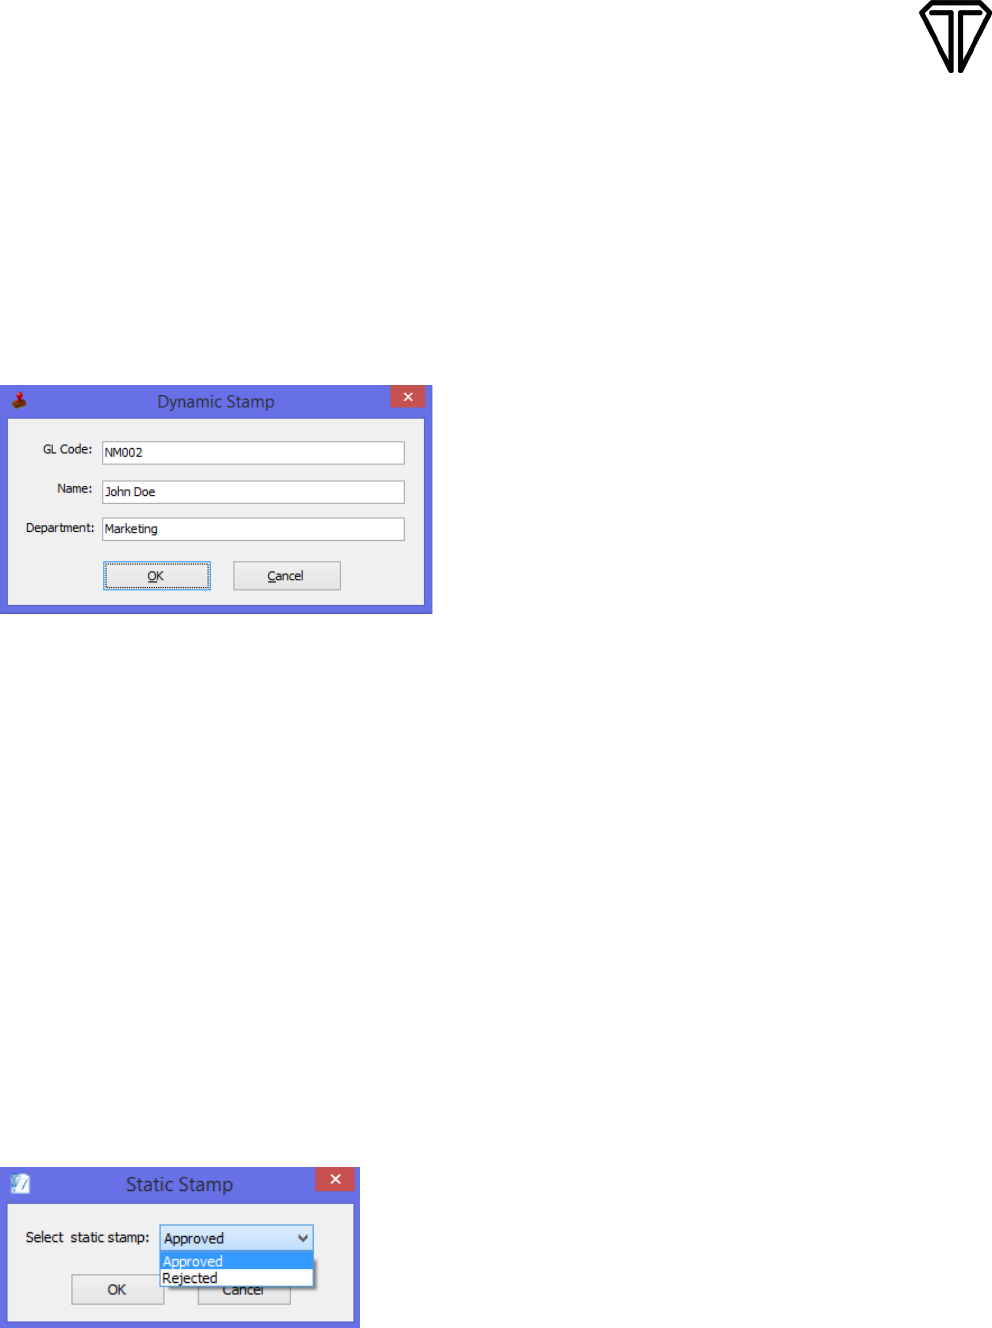
Dynamic Stamps
To specify the usage of the dynamic stamp feature, select the “Stamp Type” as “Dynamic”.
pDoc Signer User Manual
- 19 -
The dynamic stamp configuration contains the following steps:
1. Select the background image of the dynamic stamp. The maximum size allowed for the
background image is 600 x 600 pixels. If a background image is not specified, then the default
white background image (400 x 200 pixels) is used.
2. Specify the names for the fields to display in the dynamic stamp. Information for these fields will
be collected during the insertion of the stamp into the PDF document. The default names for the
fields are “GL Code”, “Name”, and “Department”.
3. To see the preview of the configured dynamic stamp, click “Preview”.
Note: The Dynamic Stamp should have either a background image or information in at least one of the
fields.
Inserting a Stamp
To insert the stamp into a document:
1. Open the document to the page where the stamp should be inserted.
2. Click on the stamp icon in the tool bar; the cursor will take the shape of the stamp icon.
3. Move the cursor to the location where the upper left corner of the stamp is to be inserted. Left
click on that position.
If a static stamp is selected and there is only one static stamp, pDoc Signer places the stamp at that
location. If a static stamp is selected and more than one static stamp exists, pDoc Signer displays a
window prompting the signer to select the static stamp to be used as shown below.

pDoc Signer User Manual
- 20 -
If a dynamic stamp is selected pDoc Signer opens a window with text boxes. The labels besides the text
boxes (e.g., GL Code, Name, and Department) are specified in the “Preferences” window. Fill in the text
boxes and click “OK” to place the stamp at that location.
Deleting a Stamp
To delete a stamp from a document, right-click on the stamp and click “Delete”.
Note: The stamp can’t be deleted if the PDF document contains at least one signed signature field or if
the PDF is secured.
Securing Documents
pDoc Signer can be used to secure an unsecured and unsigned PDF. To secure a document, go to “File
Secure Document”. Provide either “Permissions Password” or both “Open Password” and “Permissions
Password”. “Permissions Password” is mandatory.
Open Password: Password required to open the document.
Permissions Password: Required if permissions on the document need to be modified at a later point of
time in other PDF containers. Permissions password once provided cannot be changed in pDoc Signer.
Printing Allowed: “None”, “Allow Printing”, or “Changes Allowed”. If the user selects the “None” option in
the printing allowed, the secured documents are not allowed to print.

pDoc Signer User Manual
- 21 -
Opening Secured Documents
If an “Open Password” is set, the password must be provided to open the document. Features of pDoc
Signer are enabled or disabled based on the permissions set while securing the PDF. If the document
being opened has only the “Permissions Password”, the password dialog is not displayed, but features of
pDoc Signer are enabled or disabled based on the permissions set while securing the PDF.
Printing and Print Preview
To print the opened PDF document from pDoc Signer, click on “Print” tool in the vertical toolbar, or go to
“File Print”. To view the appearance of the printed document before printing it, select “Print Preview”.
In the vertical toolbar, or go to “File Print Preview”.
Merging and Splitting of PDF Documents
Extract Pages
To extract (copy) pages from the opened PDF document, go to “Tools Manipulate Pages Extract
Pages”. In the “Extract Pages” window, select the page range (i.e., starting page to ending page) and click
“OK”. A dialog prompting the user to select the folder where the new PDF should be created is displayed.
Once the folder is specified, the selected pages will be embedded into a new PDF with the same name as
the original PDF and a suffix “_Extract”. If the option “Extract Pages as Separate Files” is selected, each
individual page is exported into a new PDF document, and the page number is appended to the file
name for each page in the document.
Note: All signature fields (both unsigned and signed) existing in the page are removed from the page
during the extraction process. Signature fields should be inserted again, if required.
pDoc Signer User Manual
- 22 -
Delete Pages
To delete pages from the opened PDF document, go to “Tools Manipulate Pages Delete Pages”. In
the “Delete Pages” dialog, select the page range (i.e., starting page to ending page) and click “OK”. Upon
clicking “OK”, the selected pages will be permanently deleted from the opened PDF.
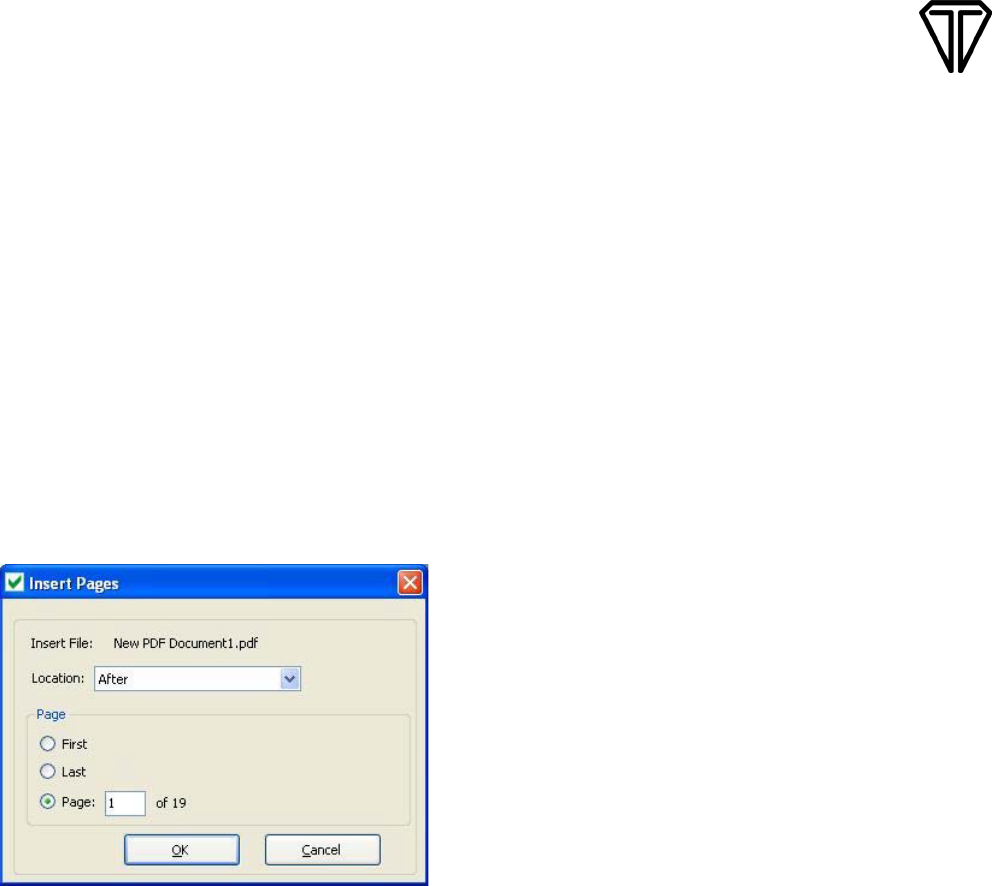
Insert Pages
To insert pages into the opened PDF document, go to “Tools Manipulate Pages Insert Pages”. Select
the PDF file containing the pages to be inserted. The “Insert Pages” dialog will be opened; select the
location at which the page will be inserted (before or after). Then, select the page number at which the
pages will be inserted. The selected PDF pages will be inserted in the specified location.
Replace Pages
To replace the pages in the opened PDF document with the selected pages from another PDF
document, go to “Tools Manipulate Pages Replace Pages”. Select the document that contains the
replacement pages and click “Open”. Once the document containing the replacement pages is selected,
the “Replace Pages” dialog will be opened.

pDoc Signer User Manual
- 23 -
In the “Replace Pages” dialog, under “Original”, specify the pages to be replaced. Under “Replacement”,
specify the beginning page.
Command Line Arguments
pDoc Signer can also be invoked from the command prompt or from other applications by running the
pDoc Signer executable located in the pDoc Signer installation folder. The pDoc Signer application
accepts “FilePath” as a command line argument. Any third-party application that wants to invoke pDoc
Signer can run the pDoc Signer executable using the Windows API and provide the path of the file to be
opened as a command line argument. For example, clicking on “Start Run”, and then running the
command “C:\Program Files\pDoc Signer\pDoc Signer.exe” “C:\Sample.pdf” runs the pDoc Signer
application and opens “C:\Sample.pdf” automatically. The above command assumes that pDoc Signer is
installed in the “C:\Program Files\pDoc Signer” folder. This feature is particularly useful for custom third-
party applications to invoke pDoc Signer from their application.
Hotkey Facility for Toolbar Icons
pDoc Signer provides hotkeys for the following icons on the toolbar:
1. Electronic Signature – Ctrl + E
2. Sticky Note Comments – Ctrl + C
3. Text Comments – Ctrl + T
4. Pencil Tool – Ctrl + P
5. Stamp – Ctrl + S

pDoc Signer User Manual
- 24 -
Making pDoc Signer the Default PDF Program
1. Right-click on a PDF document icon and select “Open With”.
2. Click on “Choose Default Program...”. An “Open With” window will open.
3. Click “Choose another app” and check “Always use this app to open PDF file”.
4. Click “pDoc Signer” and “Open”.
If pDoc Signer is not shown as an option in the “Choose another app” menu, click "Look for another app
for this PC", then continue below:
1. Click C:\ drive or local disk and double-click “Program Files” or “Program Files (x86)”.
5. Double-click “pDoc Signer”.
6. Click “pDoc Signer.exe” and “Open”.
7. The “Open With” window will disappear, and pDoc Signer will open displaying the document.
After this, when you double click on a PDF document icon, pDoc Signer will open and display the
document.
