
Ariba Contract
Management
™
Contract
Authoring Guide
Release 9r1
Document Version 7
March 2013
9r1a.0022.en_us
Copyright © 1996–2012 Ariba, Inc. All rights reserved.
This documentation, as well as the Ariba software and/or services described in it, contain proprietary information. They are provided under a license or other
agreement containing restrictions on use and disclosure and are also protected by copyright, patent and/or other intellectual property laws. Except as permitted
by such agreement, no part of the document may be reproduced or transmitted in any form by any means, electronic, mechanical or otherwise, without the
prior written permission of Ariba, Inc.
Ariba, Inc. assumes no responsibility or liability for any errors or inaccuracies that may appear in the documentation. The information contained in the
documentation is subject to change without notice.
Ariba, the Ariba logo, AribaLIVE, SupplyWatch, Ariba.com, Ariba.com Network and Ariba Spend Management. Find it. Get it. Keep it. and PO-Flip are
registered trademarks of Ariba, Inc. Ariba Procure-to-Pay, Ariba Buyer, Ariba eForms, Ariba PunchOut, Ariba Services Procurement, Ariba Travel and
Expense, Ariba Procure-to-Order, Ariba Procurement Content, Ariba Sourcing, Ariba Savings and Pipeline Tracking, Ariba Category Management, Ariba
Category Playbooks, Ariba StartSourcing, Ariba Spend Visibility, Ariba Analysis, Ariba Data Enrichment, Ariba Contract Management, Ariba Contract
Compliance, Ariba Electronic Signatures, Ariba StartContracts, Ariba Invoice Management, Ariba Payment Management, Ariba Working Capital
Management, Ariba Settlement, Ariba Supplier Information and Performance Management, Ariba Supplier Information Management, Ariba Discovery, Ariba
Invoice Automation, Ariba PO Automation, Ariba Express Content, Ariba Ready, and Ariba LIVE are trademarks or service marks of Ariba, Inc. All other
brand or product names may be trademarks or registered trademarks of their respective companies or organizations in the United States and/or other countries.
Ariba Sourcing solutions (On Demand and software) are protected by one or more of the following patents, including without limitation: U.S. Patent Nos.
6,199,050; 6,216,114; 6,223,167; 6,230,146; 6,230,147; 6,285,989; 6,408,283; 6,499,018; 6,564,192; 6,871,191; 6,952,682; 7,010,511; 7,072,061; 7,130,815;
7,146,331; 7,152,043;7,225,152; 7,277,878; 7,249,085; 7,283,979; 7,283,980; 7,296,001; 7,346,574; 7,383,206; 7,395,238; 7,401,035; 7,407,035; 7,444,299;
7,483,852; 7,499,876; 7,536,362; 7,558,746; 7,558,752; 7,571,137; 7,599,878; 7,634,439; 7,657,461; and 7,693,747. Patents pending.
Other Ariba product solutions are protected by one or more of the following patents:
U.S. Patent Nos. 6,199,050, 6,216,114, 6,223,167, 6,230,146, 6,230,147, 6,285,989, 6,408,283, 6,499,018, 6,564,192, 6,584,451, 6,606,603, 6,714,939,
6,871,191, 6,952,682, 7,010,511, 7,047,318, 7,072,061, 7,084,998; 7,117,165; 7,225,145; 7,324,936; and 7,536,362. Patents pending.
Certain Ariba products may include third party software or other intellectual property licensed from a third party. For information regarding software or other
intellectual property licensed from a third party, go to http://www.ariba.com/copyrights.cfm.

Ariba Contract Authoring Guide iii
Table of Contents
Chapter 1 About Contract Authoring . . . . . . . . . . . . . . . . . . . . . . . . . 5
About Contract Authoring . . . . . . . . . . . . . . . . . . . . . . . . . . . . . . . . . . . . . . . . . . . . . . . . . . . . . 5
Contract Authoring Features. . . . . . . . . . . . . . . . . . . . . . . . . . . . . . . . . . . . . . . . . . . . . . . . 6
Using Contract Authoring . . . . . . . . . . . . . . . . . . . . . . . . . . . . . . . . . . . . . . . . . . . . . . . . . . . . . 8
Planning Contract Document Structures . . . . . . . . . . . . . . . . . . . . . . . . . . . . . . . . . . . . . . . . . . 8
Chapter 2 Working with Assembled Documents . . . . . . . . . . . . . . . . 11
About Working with Assembled Documents. . . . . . . . . . . . . . . . . . . . . . . . . . . . . . . . . . . . . . 11
Microsoft Word Track Changes Features Supported with DFS . . . . . . . . . . . . . . . . . . . . 11
Cleansing Microsoft Word Documents . . . . . . . . . . . . . . . . . . . . . . . . . . . . . . . . . . . . . . . . . . 12
Loading Assembled Documents . . . . . . . . . . . . . . . . . . . . . . . . . . . . . . . . . . . . . . . . . . . . . . . 13
Accessing the Outline View . . . . . . . . . . . . . . . . . . . . . . . . . . . . . . . . . . . . . . . . . . . . . . . . . . . 13
Working in the Outline View Tab. . . . . . . . . . . . . . . . . . . . . . . . . . . . . . . . . . . . . . . . . . . . . . . 13
About Sections and Clauses in the Outline View . . . . . . . . . . . . . . . . . . . . . . . . . . . . . . . 13
Actions You Can Perform from the Outline View . . . . . . . . . . . . . . . . . . . . . . . . . . . . . . 14
Synchronizing the Outline View and Microsoft Word. . . . . . . . . . . . . . . . . . . . . . . . . . . . . . . 16
Substituting a Clause from The Clause Library. . . . . . . . . . . . . . . . . . . . . . . . . . . . . . . . . . . . 17
Deleting Clauses . . . . . . . . . . . . . . . . . . . . . . . . . . . . . . . . . . . . . . . . . . . . . . . . . . . . . . . . . . . 17
Promoting a Clause to a Section . . . . . . . . . . . . . . . . . . . . . . . . . . . . . . . . . . . . . . . . . . . . . . . 18
Conditionalizing Clauses . . . . . . . . . . . . . . . . . . . . . . . . . . . . . . . . . . . . . . . . . . . . . . . . . . . . . 19
Making Assembled Documents Final . . . . . . . . . . . . . . . . . . . . . . . . . . . . . . . . . . . . . . . . . . . 20
Chapter 3 Using Bookmarking . . . . . . . . . . . . . . . . . . . . . . . . . . . . . . 21
About Bookmarking Contract Documents. . . . . . . . . . . . . . . . . . . . . . . . . . . . . . . . . . . . . . . . 21
Bookmarking Sections and Clauses in Contract Documents. . . . . . . . . . . . . . . . . . . . . . . . . . 21
Naming Bookmarks in Contract Documents . . . . . . . . . . . . . . . . . . . . . . . . . . . . . . . . . . 22
Bookmarking a Clause . . . . . . . . . . . . . . . . . . . . . . . . . . . . . . . . . . . . . . . . . . . . . . . . . . . 22
Bookmarking a Section. . . . . . . . . . . . . . . . . . . . . . . . . . . . . . . . . . . . . . . . . . . . . . . . . . . 23
Using Partial Bookmarking (Bookmarking Sections Only) . . . . . . . . . . . . . . . . . . . . . . . 23
Example . . . . . . . . . . . . . . . . . . . . . . . . . . . . . . . . . . . . . . . . . . . . . . . . . . . . . . . . . . . . . . 24
Bookmarking Rules for Contract Documents . . . . . . . . . . . . . . . . . . . . . . . . . . . . . . . . . . . . . 25
Automatic Bookmark Cleanup. . . . . . . . . . . . . . . . . . . . . . . . . . . . . . . . . . . . . . . . . . . . . . . . . 25
Editing Documents with Bookmarks . . . . . . . . . . . . . . . . . . . . . . . . . . . . . . . . . . . . . . . . . . . . 26
Understanding Bookmark Validation. . . . . . . . . . . . . . . . . . . . . . . . . . . . . . . . . . . . . . . . . . . . 26
Chapter 4 Working With the Clause Library . . . . . . . . . . . . . . . . . . . 29
About the Clause Library. . . . . . . . . . . . . . . . . . . . . . . . . . . . . . . . . . . . . . . . . . . . . . . . . . . . . 29
Accessing the Clause Library . . . . . . . . . . . . . . . . . . . . . . . . . . . . . . . . . . . . . . . . . . . . . . 29
Clause Use in the Clause Library . . . . . . . . . . . . . . . . . . . . . . . . . . . . . . . . . . . . . . . . . . . 30
Using the Clause Library . . . . . . . . . . . . . . . . . . . . . . . . . . . . . . . . . . . . . . . . . . . . . . . . . . . . . 30
Using the Overview Tab . . . . . . . . . . . . . . . . . . . . . . . . . . . . . . . . . . . . . . . . . . . . . . . . . . 30
Using the Clauses Tab. . . . . . . . . . . . . . . . . . . . . . . . . . . . . . . . . . . . . . . . . . . . . . . . . . . . 31

iv Ariba Contract Authoring Guide
Table of Contents
Loading The Clause Library . . . . . . . . . . . . . . . . . . . . . . . . . . . . . . . . . . . . . . . . . . . . . . . . . . 33
Folders. . . . . . . . . . . . . . . . . . . . . . . . . . . . . . . . . . . . . . . . . . . . . . . . . . . . . . . . . . . . . . . . 34
Clauses . . . . . . . . . . . . . . . . . . . . . . . . . . . . . . . . . . . . . . . . . . . . . . . . . . . . . . . . . . . . . . . 34
Adding Individual Clauses to the Clause Library. . . . . . . . . . . . . . . . . . . . . . . . . . . . . . . 34
Adding Multiple Clauses to the Clause Library . . . . . . . . . . . . . . . . . . . . . . . . . . . . . . . . 36
Updating Clauses in the Clause Library . . . . . . . . . . . . . . . . . . . . . . . . . . . . . . . . . . . . . . 37
Designating Fallback and Alternate Clauses . . . . . . . . . . . . . . . . . . . . . . . . . . . . . . . . . . 37
Clause Descriptions and Comments . . . . . . . . . . . . . . . . . . . . . . . . . . . . . . . . . . . . . . . . . 38
Inactivating Clauses in the Clause Library . . . . . . . . . . . . . . . . . . . . . . . . . . . . . . . . . . . . . . . 39
Searching for Clauses. . . . . . . . . . . . . . . . . . . . . . . . . . . . . . . . . . . . . . . . . . . . . . . . . . . . . . . . 40
Using Clause Level Approval . . . . . . . . . . . . . . . . . . . . . . . . . . . . . . . . . . . . . . . . . . . . . . . . . 40
Using Changes Require Approval By. . . . . . . . . . . . . . . . . . . . . . . . . . . . . . . . . . . . . . . . 41
Using Use Requires Approval By. . . . . . . . . . . . . . . . . . . . . . . . . . . . . . . . . . . . . . . . . . . 42
Exporting and Importing the Clause Library . . . . . . . . . . . . . . . . . . . . . . . . . . . . . . . . . . . . . . 42
Maintaining Links Between Templates and Clauses . . . . . . . . . . . . . . . . . . . . . . . . . . . . 43
Preserving Folder and Clause Order . . . . . . . . . . . . . . . . . . . . . . . . . . . . . . . . . . . . . . . . . 43
Exporting the Clause Library . . . . . . . . . . . . . . . . . . . . . . . . . . . . . . . . . . . . . . . . . . . . . . 44
Importing the Clause Library . . . . . . . . . . . . . . . . . . . . . . . . . . . . . . . . . . . . . . . . . . . . . . 44
Chapter 5 Using Style Mapping . . . . . . . . . . . . . . . . . . . . . . . . . . . . . 47
About Style Mapping . . . . . . . . . . . . . . . . . . . . . . . . . . . . . . . . . . . . . . . . . . . . . . . . . . . . . . . . 47
Using Style Mapping with Clauses. . . . . . . . . . . . . . . . . . . . . . . . . . . . . . . . . . . . . . . . . . 48
Setting Up Style Mapping . . . . . . . . . . . . . . . . . . . . . . . . . . . . . . . . . . . . . . . . . . . . . . . . . . . . 48
About Paragraph and Character Formats . . . . . . . . . . . . . . . . . . . . . . . . . . . . . . . . . . . . . 49
Chapter 6 Using Contract Fields as Document Properties . . . . . . . . . 51
About Document Properties. . . . . . . . . . . . . . . . . . . . . . . . . . . . . . . . . . . . . . . . . . . . . . . . . . . 51
Read Only Properties . . . . . . . . . . . . . . . . . . . . . . . . . . . . . . . . . . . . . . . . . . . . . . . . . . . . 51
Editable Properties . . . . . . . . . . . . . . . . . . . . . . . . . . . . . . . . . . . . . . . . . . . . . . . . . . . . . . 52
Enabling Additional Contract Fields for Use as Document Properties . . . . . . . . . . . . . . 52
Using Document Properties . . . . . . . . . . . . . . . . . . . . . . . . . . . . . . . . . . . . . . . . . . . . . . . . . . . 53
Step 1: Setting Up Document Properties . . . . . . . . . . . . . . . . . . . . . . . . . . . . . . . . . . . . . 53
Step 2: Inserting Fields for Document Properties in Text. . . . . . . . . . . . . . . . . . . . . . . . . 56
Step 3: Generate or Regenerate the Document. . . . . . . . . . . . . . . . . . . . . . . . . . . . . . . . . 56
Example: Adding the Supplier as Document Property Field . . . . . . . . . . . . . . . . . . . . . . 57
Working with Editable Properties . . . . . . . . . . . . . . . . . . . . . . . . . . . . . . . . . . . . . . . . . . . . . . 58
Viewing Editable Document Property Fields . . . . . . . . . . . . . . . . . . . . . . . . . . . . . . . . . . 59
Moving Editable Document Property Fields . . . . . . . . . . . . . . . . . . . . . . . . . . . . . . . . . . 59
Modifying an Editable Document Property in Microsoft Word . . . . . . . . . . . . . . . . . . . . 60
Index. . . . . . . . . . . . . . . . . . . . . . . . . . . . . . . . . . . . . . . . . . . . . . . . . . . . . 61

Ariba Contract Authoring Guide 5
Chapter 1 About Contract Authoring
• “About Contract Authoring” on page 5
• “Using Contract Authoring” on page 8
• “Planning Contract Document Structures” on page 8
About Contract Authoring
Ariba Contract Management supports three types of contract documents:
• Non-assembled documents
Non-assembled documents can be created with any application (including Microsoft Word, Microsoft
Excel, Microsoft PowerPoint, or a plain text editor). Ariba Contract Management handles each
non-assembled document as a single component or a flat file with no internal structure or subcomponents.
• Assembled contract documents
Assembled contract documents (also referred to as assembled documents) must be Microsoft Word
documents. An assembled document can have multiple subcomponents, or sections and clauses. A clause
is one or more paragraphs treated as a single unit. Clauses can be stored and retrieved from the Ariba
Contract Management Clause Library. You can create sections in an assembled document to organize the
clauses. Ariba Contract Management provides an outline view that shows the section structure and
clauses and enables you to edit the section structure, and to move, add, replace, or delete clauses.
When you load or create an assembled document, you select if it is a Main Agreement or a Contract
Addendum. A template or a contract workspace can have only one Main Agreement, but can have
multiple Contract Addenda.
Using assembled documents in a contract workspace is not required. You can load all documents in a
workspace as non-assembled documents. However, assembled documents enable you to use contract
authoring features. Contract authoring features are a set of features that provide additional functions for
working with assembled documents and are supported only with assembled documents.
• Assembled PDF documents
Assembled PDF documents (also referred to as PDF documents) can be created from single or multiple
documents in a contract workspace.
This guide describes how to use contract authoring features with assembled documents. For information
about features that can be used with all document types, see the Ariba Contract Process Management Guide.

6 Ariba Contract Authoring Guide
Contract Authoring Features
Ariba Spend Management supports the following contract authoring features:
• Clause Library
Ariba Contract Management enables you to create and manage a Clause Library. The Clause Library is a
tool for storing and managing paragraphs of text for contracts as contract clauses. The Clause Library
enables your organization to standardize and regulate text used in contracts while enabling contract
authors to select and exchange clauses as needed.
The Clause Library enables users to:
• Provide a single source for standardized contract text. Text can be written and approved once, then
reused in multiple contracts. For example, you can create a clause with your company’s legal
disclaimer. All users can incorporate this disclaimer from the Clause Library when writing contracts.
• Provide fallback or alternate versions for contract clauses that users can select according to their needs.
For example, you can create one clause for legal disclaimers in the European Union and an alternative
clause for legal disclaimers in the United States.
• Manage clause versions and automatically require approvals when text in clauses is changed.
• Determine the source of clauses in a contract document. The outline view indicates which clauses are
inherited from the template document, replacement clauses from the Clause Library, edited, and added
from external sources.
• Use conditions to create templates that automatically select clauses according to information such as
contract region or commodity type.
• Find all templates and workspaces that use a specified clause. Ariba Contract Management provides a
"Search Where Used" feature that enables you to find all workspaces and templates that use a given
clause.
• Create reports about clause with information such as how frequently a clause is used.
• Document Properties
Document properties automatically generate and update contract text from contract workspace fields. For
example, you set up the supplier’s or customer’s name and address as document properties and
automatically import this information from the contract workspace and include it in the text of the Main
Agreement.
You can also use document properties to change contract workspace field values by changing text fields in
Main Agreements or Contract Addenda.
•Style Mapping
Style mapping enables you to enforce a uniform corporate look and feel for all contract documents. With
style mapping, you link Microsoft Word paragraph styles to section titles and content in a Main
Agreement or Contract Addendum. One of the primary usages style mapping is to apply automatic
numbering to paragraph styles, which enables the system to correctly number clauses regardless of where
it is used in different contract documents.
Microsoft Word Requirements
The contract authoring and Microsoft Word integration features in Ariba Contract Management require
Microsoft Word 2000 (or later versions) on all client and supplier machines. These features do not function
properly if you use Microsoft Word 97.

Ariba Contract Authoring Guide 7
• Mixing usage of Microsoft Word 2000, 2002, 2003, 2007, and 2010 can yield unexpected results. Not all
Microsoft Word versions are completely compatible, especially when comparing and merging redlined
documents, For example, Microsoft Word might lose information or text if you attempt to compare a
document authored in Microsoft Word 2003 with one authored in Microsoft Word 2000.
• When working with assembled contract documents (Main Agreement and Contract Addendum
documents), all authors editing a given document and its clauses must use the same version of Microsoft
Word.
• It is possible to edit a document using a Microsoft Word version that is higher than the version used to
create it, but all subsequent authors must edit the document using the higher Microsoft version level. For
example, a Microsoft Word 2003 document can be edited by a user with Microsoft Word 2007 (in
compatibility mode), but if a user then attempts to edit the document using Microsoft Word 2003, errors
can occur, or the action will fail.
• Ariba Contract Management supports the use of Microsoft Word 2010; however, if you must merge
documents created in earlier versions of Microsoft Word that are supported with documents created in
later versions, you should perform the merge in the later version. For example, if you must merge
documents created in Microsoft Word 2003 or Microsoft Word 2007 with documents created in Microsoft
Word 2010, you should perform the merge in Microsoft Word 2010 and not any other version of the
product. This is due to a Microsoft restriction. For additional information, contact Microsoft.
• In addition, Microsoft APIs do not support the operations needed to assemble contract documents that
include clauses authored in a version of Microsoft Word that is higher than the version used for the
contract document. For example, you cannot generate a contract document using Microsoft Word 2003 if
it uses clauses created or edited using Microsoft Word 2007 or later.
• Users cannot have multiple versions of Microsoft Word installed on their systems. The presence of
multiple versions in the system registry can cause runtime problems with the Microsoft APIs.
Removing the Microsoft Word Converter MSWord6.wpc
If you are using Microsoft Word 2007, remove the Microsoft Word converter MSWord6.wpc (mswrd632)
from your system registry. If you do not remove this converter from your registry, you might have problems
using the Review Changes feature when processing reviews or when using the clause library.
The registry entry to remove is as follows:
HKEY_LOCAL_MACHINE\SOFTWARE\Microsoft\Shared Tools\Text Converters\Import\MSWord6.wpc
Refer to the Microsoft documentation for instructions on removing system registry entries. In addition, the
following Microsoft support article related to the security update MS09-073 includes a link (
Fix this
problem
) to remove the entry for you and instructions for removing the entry manually:
http://support.microsoft.com/kb/973904
The security update MS09-073 is not required or related to Ariba Spend Management. MS09-073 and Ariba
Spend Management are similar in that users with either the security update or Ariba Spend Management can
experience problems if the MSWord6.wpc converter is not removed.

8 Ariba Contract Authoring Guide
Using Contract Authoring
W To use contract authoring:
1 Plan your contract document structure. Determine if you will add to or use clauses in the Clause Library
and which documents will be assembled documents. See “Planning Contract Document Structures” on
page 8.
2 Cleanse the Microsoft Word documents. See “Cleansing Microsoft Word Documents” on page 12.
3 (Optional) Add bookmarks to the Microsoft Word documents that will be loaded as Main Agreement or
Contract Addendum documents. See “Using Bookmarking” on page 21.
If you do not bookmark the documents, Ariba Contract Management loads each document with one
global section and creates a clause for each paragraph. Bookmarking enables you to create subsections
and to create clauses with multiple paragraphs.
4 Load the prepared Microsoft Word documents to a template or contract workspace as Main Agreement or
Contract Addendum documents. See “Loading Assembled Documents” on page 13.
5 (Optional) Set up the Clause Library. A designated user must populate the Clause Library with contract
clauses for other users to incorporate into contract workspaces. See “Working With the Clause Library”
on page 29.
6 (Optional) Add or replace clauses in the assembled documents with clauses from the Clause Library. See
“Working in the Outline View Tab” on page 13 and “Substituting a Clause from The Clause Library” on
page 17.
7 (Optional) Apply style mapping to the paragraph styles in the assembled documents. See “Using Style
Mapping” on page 47.
8 (Optional) Set up document properties and add document property fields to the assembled documents.
See “Using Contract Fields as Document Properties” on page 51.
Planning Contract Document Structures
To plan the document structure for a template or workspace:
• Determine if you will use the Clause Library and select text you want to include in the Clause Library.
Clauses in the library are typically sections of text that are reused in multiple contracts.
• Determine clause boundaries. Determine fallback and alternative clauses (clauses with the same or similar
function, but with alternative text for differences such as contract location, contract term, or commodity
type).
• Determine which documents will be created or loaded as assembled documents (Main Agreement or
Contract Addendum documents). Keep in mind the following points:
• A Main Agreement or Contract Addendum must be a Microsoft Word document.
• A template or project workspace can have only one Main Agreement document and can have multiple
Contract Addendum documents.
• If you will not use any contract authoring features with a document, you can load the document as a
non-assembled document.
• Determine file boundaries. Keep in mind the following points:
• The maximum size file that you can upload is 20MB.

Ariba Contract Authoring Guide 9
• The time needed to load a Microsoft Word contract document is proportional to the size of the
document, so longer documents can take longer to load.
• If your company negotiates very large contracts, consider breaking the documents up into smaller
documents to improve performance.

10 Ariba Contract Authoring Guide

Ariba Contract Authoring Guide 11
Chapter 2 Working with Assembled Documents
• “About Working with Assembled Documents” on page 11
• “Cleansing Microsoft Word Documents” on page 12
• “Loading Assembled Documents” on page 13
• “Accessing the Outline View” on page 13
• “Working in the Outline View Tab” on page 13
• “Synchronizing the Outline View and Microsoft Word” on page 16
• “Substituting a Clause from The Clause Library” on page 17
• “Deleting Clauses” on page 17
• “Promoting a Clause to a Section” on page 18
• “Conditionalizing Clauses” on page 19
• “Making Assembled Documents Final” on page 20
About Working with Assembled Documents
You must enable Desktop File Sync (DFS) to use the full functionality of the contract authoring tools
described in this guide. See the Ariba Contract Process Management Guide for information on enabling
DFS.
You work on the assembled documents (Main Agreement and Contract Addendum) in the Outline View tab.
This tab displays the sections and clauses of a document. Non-assembled documents do not have this tab.
Microsoft Word Track Changes Features Supported with DFS
The following Ariba Spend Management operations use Microsoft Word Track Changes features and are
supported with Microsoft Word documents when DFS is enabled:
• The Compare Versions operation. This operation is available in the Documents tab and enables you to use
the Microsoft Word Track Changes to compare a document with changes from the previous version with
the changes highlighted.
• The Review Change operation. This operation is available when working with review and approval tasks.
It enables you to use the Microsoft Word Track Changes feature to view changes from reviewers (or
approvers) and accept or reject individual changes within the file.
Note: All changes and revisions are shown inline. Ariba Spend Management does not support the Microsoft
Word option to show revisions using balloons.

12 Ariba Contract Authoring Guide
Cleansing Microsoft Word Documents
All Microsoft Word documents contain embedded data used for formatting and other operations. The
embedded data may vary depending on the Microsoft Word version used, and opening a document created
using one version of Microsoft Word with a newer version of Microsoft Word does not update all the
embedded data to the newer version.
Before loading a Microsoft Word document as a Main Agreement or Contract Addendum document, Ariba
strongly recommends that you remove all embedded data by using the following procedure:
1 Open the file using Microsoft Word.
2 Select all the data (CTL+A) and copy it (CTL+V).
3 Paste the data into a plaintext editor, such as Microsoft Notepad.
4 Select all the data from the plaintext editor and copy it.
5 Paste the data from the plaintext editor into Microsoft Word.
In addition, you must:
• Remove any password protection. Ariba Contract Management cannot synchronize changes made in
password-protected documents.
Ariba also recommends that you:
• Remove any manual (literal) paragraph numbering if you are loading the document into the cause library
or want to replace, delete, or add clauses. Instead, you can use style mapping or numbering in the
paragraph style to automatically number paragraphs as needed.
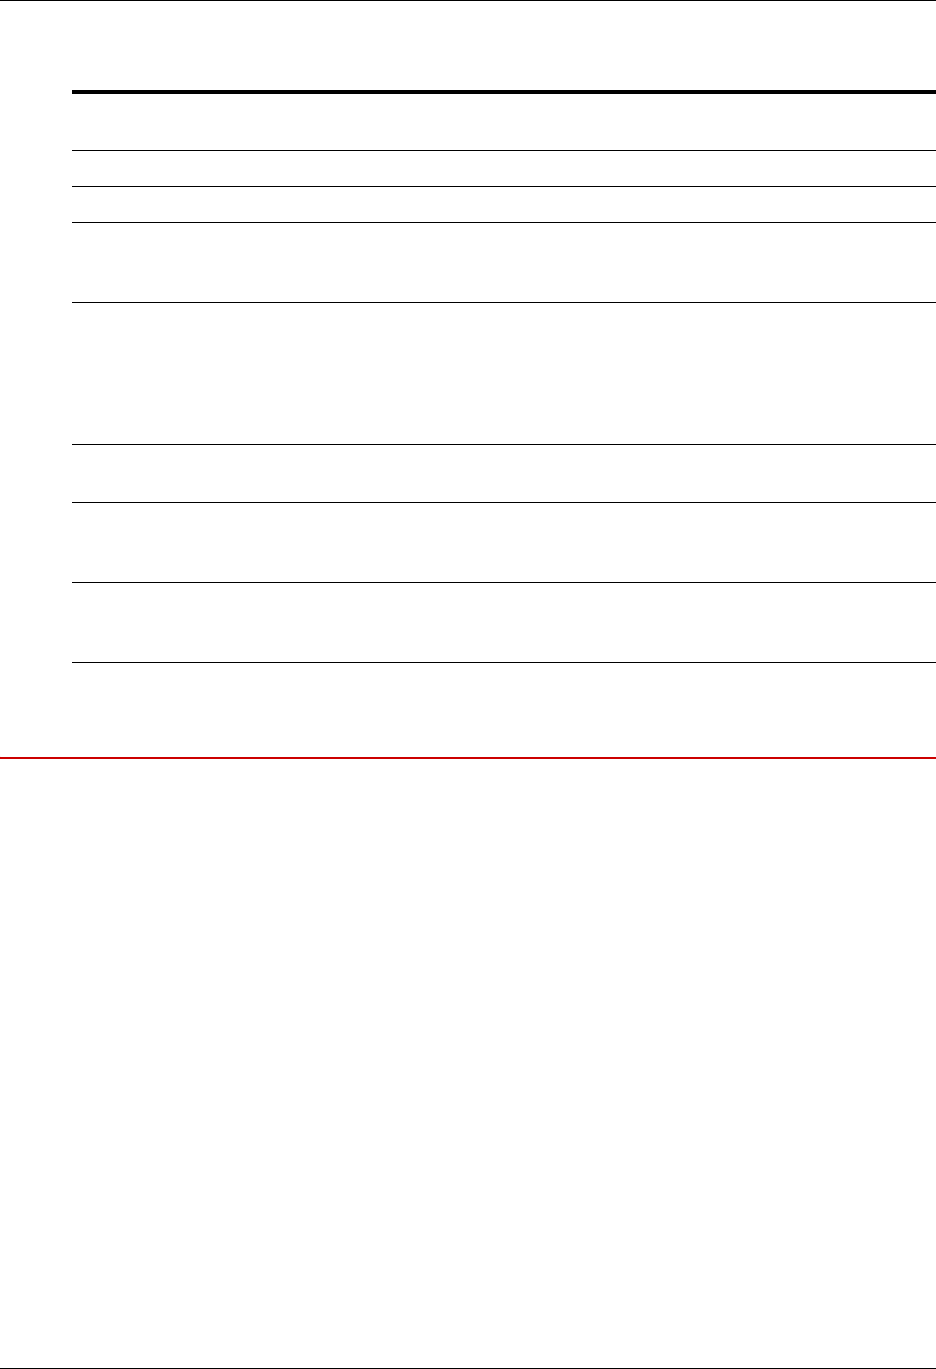
• Remove soft returns within paragraphs that will be clauses. Assembled documents do not support soft
returns, or page breaks inside clauses. Soft returns are created when users type
SHIFT+Enter into a
Microsoft Word document. Soft returns might also appear in contract documents with text copied from an
HTML web page, or another format with markup syntax. The following graphic shows the difference in
how Microsoft Word displays both a normal return character and a soft return character:
• Manually update references in assembled documents. Ariba Contract Management does not automatically
update any references in contract documents. References are sometimes used in contract documents to
refer to a clause or section from a different part of the document. If you make clause changes to a
document in the course of a negotiation, you must make sure to manually update any references in the
document.

Ariba Contract Authoring Guide 13
Loading Assembled Documents
If you are loading a large document, Ariba recommends that you do this at a time when you do not need to
use your desktop for any other Microsoft related processes. Do not attempt to use Microsoft Word and
Microsoft Outlook applications while loading documents on the client machine.
W To load an assembled document:
1 Choose the Microsoft Word document you want to use as a basis for the Main Agreement or Contract
Addendum.
2 Cleanse the document as described in “Cleansing Microsoft Word Documents” on page 12.
3 Navigate to the Documents tab of the template or contract workspace.
4 Click Actions and select Create > Main Agreement or Create > Contract Addendum.
5 Enter the name of the file you want to use.
6 Click Create.
Accessing the Outline View
W To access the Outline View tab for an assembled document:
1 Navigate to the Documents tab.
2 Click the document title of an assembled document and choose View Details.
3 Click the Outline View tab.
Note: Do not attempt to use Replace Document in the Documents tab to replace an assembled document with
another assembled document, unless you are sure the bookmarks match exactly.
Working in the Outline View Tab
You can work on the documents directly in this tab, and synchronize the changes to Microsoft Word. From
this tab, you can add clauses to the assembled document from the Clause Library.
About Sections and Clauses in the Outline View
The contents of the Outline View tab are organized into sections and clauses.
Sections
Sections allow you to create a hierarchical organization in a contract document. Sections exist only on a per
contract document basis, and you cannot add them to the Clause Library. In this hierarchy, sections are
primary (and act as folders) and clauses are secondary (and act as the content in the folders). There is no
limit to the number of sections or nesting section levels a contract document can contain, although
performance might be affected when you work with large, deeply nested contract documents.
Never use the following special characters in section titles:

14 Ariba Contract Authoring Guide
\/:?“<>|
Section titles with these characters can cause synchronization errors between Microsoft Word and the
Outline View.
Clauses
When working with Microsoft Word contract documents, you might see these clause types in the Outline
View:
• Template: Clause was part of the original template.
• Library: Clause that you substituted from the Clause Library.
• Nonstandard: Clause that you modified by manually editing the text.
•Ad Hoc: Clause you add from an external source.
Each clause is stored in the Clause Library as a separate Microsoft Word document. Clauses are listed inside
sections in the completed contract document, but can also exist outside a section. A clause consists of one or
more paragraphs, but two clauses cannot exist in the same paragraph.
Individual clauses are intended for use in multiple contract documents, so they do not have titles in the
Outline View. Instead, Ariba Contract Management displays the first 200 characters of each clause in the
Outline View.
Note: Your company’s current contract clauses might have a clause/subclause structure. This structure is not
supported by Ariba Contract Management.
Actions You Can Perform from the Outline View
The following table lists the actions you can perform from the Outline View tab.
To do this... Choose...
Filter clause display the Clause Type menu and choose a clause type. This filters the clauses you see in the
Outline View. You can choose All to show all clauses.
Add a new section to the
document
Actions > Add New Section to add a new section to the document. You can drag and drop
the new section to position it, and drag clauses into the new section.
Add a new clause or
several new clauses to the
document
Actions > Add Clause(s) to access the Clause Library. Expand the folders in the Clause
Library and select the check boxes for the clauses you want to include.
Save a new version of the
document
Actions > Save as New Version to save a new version of the document. You must assemble
the document before you can save a new version.
Set up styles for your
document
Actions > Set Up Style Mapping to define any text style element supported by Microsoft
Word for each indentation level in the contract document. See “Using Style Mapping” on
page 47 for details.
Add fields that are
updated automatically in
your document
Actions > Set Up Document Properties. Document properties are fields that Microsoft
Word inserts into your assembled document and updates when you update the contract
workspace. These can include editable properties, such as an effective date, or non-editable
properties, such as a suppler name.
Do not insert carriage returns into a document property. This causes DFS synchronization
errors.

Ariba Contract Authoring Guide 15
Synchronize the
document in Outline View
with the Microsoft Word
document
Actions > Synchronize Document to synchronize the document in Outline View to the
Microsoft Word document. This synchronization works only one way, and uploads the
changes that you make on the desktop version of the document. It does not download
changes from the Outline View to the desktop.
Choosing Fully Synchronize Document uses the Microsoft Word document on your
desktop to modify the section and clause structure in the Outline View. The amount of time
necessary to perform a full synchronization is comparable to the amount of time necessary
to load a document. Use the full synchronization only if the Microsoft Word document on
your desktop gets out of synchronization with the Outline View.
Merge two versions of a
document
Actions > Merge Document to merge the content of the current document with another
Microsoft Word document. You can also merge the current document with a Microsoft
Word document not in the project by browsing for it on the Custom tab, and clicking
Merge.
Ariba Contract Management uses the Microsoft Word document merge functionality to
allow you to compare and merge assembled documents to manage various document
versions during negotiations or reviews. You must enable DFS to perform a document
merge.
For example, you can send a document to an offline reviewer (such as a a supplier or
customer) by making that reviewer an email reviewer. The reviewer changes the document
and returns it as an attachment to you, the task owner. You then review the changes and
merge them into the current version of the assembled document.
Document merge also allows you to combine two assembled documents into one
document. You can merge a document from within Ariba Contract Management or choose
to merge a document from an external source.
Note: Ariba Contract Management merges only assembled Microsoft Word documents.
Generate a clean version
of the document
Actions > Generate Clean Version to generate a version of the document that does not
contain redlines or document properties. Use this to create a clean, text only, version of a
document to share with offline reviewers.
Display or hide
navigation
Actions> Show/Hide > Outline/Document Navigation.
Compare two versions of
the document
Actions > Show/Hide > Compare Versions Filter. This filter allows you to compare two
versions of a document. Select the versions to compare from the Compare Versions
Between menus, or click Compare in Microsoft Word. Using this filter add the Change
column, which lists the type of changes to the various clauses. You can also select Actions
> Edited Clause(s) Only to filter the document further and display only the modified
clauses.
Control the columns
displayed in Outline View
the table icon and choose Show/Hide Columns > Clause, Owner, Conditions, Type,
Comments, or Action to display or hide these columns. See “Conditionalizing Clauses” on
page 19 for details on making individual clauses conditional.
Expand collapsed
sections, or collapse
expanded sections
the table icon and choose Outline Expansion > Expand All or Collapse All.
Export a list of clauses to
Microsoft Excel
the table icon and choose Export to Excel > Export all Rows.
Add a subsection the section name and choose Add New Section to create a subsection.
To do this... Choose...
16 Ariba Contract Authoring Guide
Synchronizing the Outline View and Microsoft Word
When working with assembled documents, you can synchronize them to ensure that the version you see in
the Outline View tab matches the Microsoft Word document that is stored on your desktop.
You can modify a Main Agreement and Contract Addendum by:
• Working on the Microsoft Word document directly. If you work on the Microsoft Word document
directly, you receive this message when you save it and return to Ariba Contract Management:
You have made changes to the document: What do you want to do?
Click the link to review the changes, save them, discard them, or save them to a new version.
• Accessing the Microsoft Word document through the Outline View tab (double clicking a clause name)
If you access the document by double clicking a clause name, the clause is highlighted in the Microsoft
Word document. Do not change the clause by typing to replace the highlighted text. If you want to replace
the highlighted text, delete the unwanted text first, and then add the new text.
• Making changes to the document in the Outline View tab itself (adding sections or clauses)
If you add clauses or sections through the Outline View tab, you must assemble the document.
W To assemble a document:
1 Return to the Documents tab.
2 Click the icon for the document you want to assemble. The document opens in Microsoft Word.
Add a clause to the
section
the section name and choose Add Clause(s).
Delete a section the section name and choose Delete.
Edit a section the section name and choose Edit.
Edit a clause the clause and choose Actions > Edit to edit the clause. Choose Actions > Fully Synchronize
Document to synchronize Outline View with the Microsoft Word document after you are
done editing the clauses.
Substitute a clause the clause and choose Actions > Substitute to select a substitute clause from the Clause
Library. When you substitute a clause, the document on your desk top and the Outline
View update.
See “Substituting a Clause from The Clause Library” on page 17 for additional
information.
Convert a clause into a
section
the clause and choose Actions > Promote to Section to convert a clause into a section
heading. See “Promoting a Clause to a Section” on page 18
View versions of a clause the clause and choose Actions > View Versions to view the versions of a clause. You can
select the clause name and Replace Document to replace a one version of a clause with
another.
Delete a clause the clause and choose Actions > Delete to delete a clause. Ariba Contract Management
replaces this clause with the text “Clause intentionally deleted.” See “Deleting Clauses” on
page 17 for additional information.
To do this... Choose...

Ariba Contract Authoring Guide 17
Substituting a Clause from The Clause Library
Before you can substitute one clause for another in contract documents that reside in templates and contract
workspaces, you must set up your Clause Library as described in“Loading The Clause Library” on page 33.
In the following example, both Fallback and Alternate clauses are available. See “Designating Fallback and
Alternate Clauses” on page 37 for details on these clause types.
If you substitute a clause in a template, its type does not change. If you substitute a pre-approved clause into
a contract workspace from the Clause Library, the Type changes to Library.
When you substitute a clause, you also see an information icon that you can click to display the clause
description, which helps the contract author use the proper clause for a specific purpose. To change the
description, edit the clause in the Clause Library.
Deleting Clauses
During the course of a contract negotiation, certain clauses in a contract document frequently become
irrelevant, and you must remove them from the contract document.
To delete a clause from a contract document, you can:
• Delete a clause from the Outline View tab
• Delete a clause in Microsoft Word
There are two types of clause deletion, hard deletion and soft deletion.
Hard Clause Deletion
This section explains the system behavior when your site has Soft Clause Deletion disabled.
When you delete a clause (either through Outline View or in Microsoft Word) with soft clause deletion
disabled, Ariba Contract Management completely removes the clause from the document, including its
bookmark. Removing a clause completely from the document might have adverse effects on the numbering
of clauses in the document and prevent reviewers from referring to clauses in the original versions of the
document based on numbers alone.

18 Ariba Contract Authoring Guide
Soft Clause Deletion
This section explains the system behavior when your realm has Soft Clause Deletion enabled.
When you delete a clause (either through the Outline View or in Microsoft Word) with soft clause deletion
enabled, Ariba Contract Management substitutes the Empty Clause for the former clause contents. Because
Ariba Contract Management does not remove the bookmark itself from the contract document, the clause
numbering in the Microsoft Word document (which is done using styles) does not renumber. This is intended
to preserve the numbering in the clause document, to prevent invalid written references to particular section
or clause numbering in the assembled document.
Note: Ensure that the Clause Library only has one Empty Clause, and that the clause is Published. If your
Clause Library does not contain an Empty Clause, Ariba Contract Management can display unexpected
behavior when you delete clauses. For example, you might appear to be unable to delete a clause from the
Outline View, or see that clauses deleted through Microsoft Word do not delete in the Outline View.
Because Ariba Contract Management manages clause content through the use of bookmarks in contract
documents, if you delete all of the content inside a clause bookmark without deleting the actual bookmark
itself, the clause displays the -empty- string in the Outline View (instead of clause intentionally deleted,
which appears when you delete the entire clause, including its bookmark).
Promoting a Clause to a Section
Promoting a clause to a section allows you to change a clause to a section in the Outline View.
All ad hoc content, whether it has bookmarks or not, that you add to a contract document in Microsoft Word
during a negotiation is added as a clause. If new sections are incorrectly displayed as clauses in the Outline
View of the contract document, you can use Promote to Section to change to change the clauses to sections.
Bookmarking does not affect this promotion.
Restrictions When Promoting a Clause to a Section
The following points apply if you promote a clause to a section:
• After you promote a clause to a section in the Outline View, you cannot reverse the action. If you promote
a clause in error, you must delete the section from the Outline View and add the text again as a clause.
• The character limit display in the Outline View for sections is 255 characters. If the clause you are
promoting to a section is longer than 255 characters, not all of the characters appear in the Outline View.
All of the characters display in the Microsoft Word document, however. Section titles do not wrap in the
Outline View.
• The section you promote remains in the same place as the originating clause. You must use drag and drop
to reposition it.
• If you need to promote multiple clauses to sections, you should promote them all and then drag and drop
clauses into them. If you make significant changes to the document structure, you can promote no more
clauses. At this point, you must regenerate the document, and then return to the Outline View and promote
the rest of the clauses to sections.
• Each time you promote a clause to a section, you are changing the structure of the document. Ariba
Contract Management recalculates the relationship between the sections and clauses for each section
promotion. This process can be slow for lengthy documents.

Ariba Contract Authoring Guide 19
W To promote a clause to a section:
1 Navigate to the Outline View of a contract document in either a template or a contract workspace. Make
sure the document is not published.
2 Choose Actions > Promote Clause to Section to the right of the clause you want to promote.
3 Drag and drop the section to the proper location in the Outline View, and drag appropriate clauses into it.
Conditionalizing Clauses
You can design templates for contract workspaces that include or exclude individual clauses. For example,
you could include a certain clause only if the region is set to APAC, or include a clause only for a particular
supplier or customer.
W To add a condition to an individual clause:
1 Enable DFS.
2 Navigate to the Template Editor for the template containing the assembled contract document. Make sure
the template has the status of Draft.
3 Define the condition for the clause on the Conditions tab. See the Ariba Contract Process Management
Guide for details on setting conditions for templates.
4 Navigate to the Documents tab of the template.
5 Click the contract document name and choose View Details.
6 Click Actions and choose Conditions to display the Conditions column in the Outline View of the contract
document.
7 In the Conditions column for the clause you want to conditionalize, click (none) and select the condition
you defined in step 3.
You can also conditionalize a section. By conditionalizing a section, you automatically conditionalize all
clauses in that section. Ariba Contract Management indicates the clauses in the section as inherited in the
Conditions column, as shown in the following graphic:
If the clause appears in the contract document Outline View, you cannot use conditionalization to exclude
it. In that case, you must set a condition to include the clause if true, or include the empty clause if false.

20 Ariba Contract Authoring Guide
You use the empty clause type to inform those who read the contract that a clause is deleted. The default
text in the empty clause provided by Ariba Contract Management contains the text “Clause intentionally
deleted”. You can change this text by editing the Microsoft Word document for the empty clause in the
Clause Library.
Making Assembled Documents Final
You can specify that a published assembled document remain unchanged (“final”) in terms of the body of
the document and the document attributes. You can use this feature if you are working on or amending a
contract workspace and your assembled documents are in a state that you do not want to change, either
manually, by programmatic update of document attributes.
W To make an assembled document final:
1 In the Documents tab of your contract workspace, select the published assembled document name.
2 Choose Action > Finalize. The status of the document changes to Finalized.
You can later make the document modifiable by selecting
Action > Make Draft. You can select Make Draft
while you are still working in the contract workspace, or during an amendment. This returns the document to
the Draft status. You can modify the document, assemble and publish it, and then finalize it again as needed.
When you create a new assembled document, you can specify that the document is finalized automatically
when the contract workspace is published by selecting the Yes radio button on the document creation page:
Auto Finalize on Publish is also available for documents that are added as part of a template.

Ariba Contract Authoring Guide 21
Chapter 3 Using Bookmarking
• “About Bookmarking Contract Documents” on page 21
• “Bookmarking Sections and Clauses in Contract Documents” on page 21
• “Bookmarking Rules for Contract Documents” on page 25
• “Automatic Bookmark Cleanup” on page 25
• “Editing Documents with Bookmarks” on page 26
• “Understanding Bookmark Validation” on page 26
About Bookmarking Contract Documents
Ariba Contract Management uses bookmarks in Microsoft Word to tag and track all text in an assembled
contract document. Bookmarks are a feature in Microsoft Word, but are used in a specific way by Ariba
Contract Management to facilitate transitions between editing a document in the Outline View and in
Microsoft Word.
Bookmarking contract documents is optional. If you do not bookmark a document before loading it as a
Main Agreement or Contract Addendum, Ariba Contract Management creates:
• One global section that contains the entire document.
• One clause for each paragraph. Each clause is contained in the global section.
Adding bookmarks to a document before loading enables you to create sections within the global section and
to create clauses that contain multiple paragraphs.
For details on adding bookmarks, search for “Add a bookmark” in the Microsoft Help. For complete
information on bookmarking in Microsoft Word, consult the Microsoft documentation.
Note: The Microsoft Word Undo command (Ctrl+Z) can cause your bookmarks to become inaccurate. If you
use the Undo command, verify your bookmarks afterward.
Bookmarking Sections and Clauses in Contract Documents
This section explains how to define the structure of a contract document using bookmarks so Ariba Contract
Management can interpret the structure of your document properly.
Note: Bookmarks on sections and clauses must be placed only on text. Bookmarks on text that include blank
spaces (carriage returns or spaces) before/after the text, and on cells of an inserted table instead of the text in
the table/cell are likely to cause errors.

22 Ariba Contract Authoring Guide
Naming Bookmarks in Contract Documents
You must use the following syntax when naming Microsoft Word bookmarks to have Ariba Contract
Management process the bookmarks and create sections and clauses:
After the system creates sections and clauses, it replaces
uniquename with number, where number is a unique
number string generated by the system.
Bookmarking a Clause
A typical element in a contract document to bookmark is a single, one paragraph clause. To bookmark a
single paragraph clause, highlight the clause and add the bookmark. The following graphic shows a single
paragraph clause being bookmarked:
When bookmarking clauses, place the end the bookmark before the paragraph marker at the end of the
clause. If you do not, users who put the cursor at the end of a clause and press Enter to add a new clause see
the clause entered in the Outline View as an addition to the previous clause, not as a new clause.
If you load a document with a clause with ending bookmark after the ending paragraph marker, the system
automatically moves the bookmark to the proper location. The following graphic shows the proper
positioning for clause end bookmarks:
Bookmark Type Bookmark Name Format in Word
Entire Document
sectionGlobalContract
Section
sectionAriba_uniquename, where
uniquename is a unique, user-specified
text string.
Clause
clauseAriba_uniquename, where
uniquename is a unique, user-specified
text string.

Ariba Contract Authoring Guide 23
Bookmarking a clause with multiple paragraphs is exactly the same as bookmarking a single paragraph
clause except you highlight both paragraphs before adding the bookmark.
Bookmarking a Section
Bookmarking sections is functionally identical to bookmarking a clause, except you must highlight all
clauses inside the section. The following shows a section bookmark being added which includes two
clauses. When loaded, the two clauses are contained in the section.
When you add section bookmarks to a document, place the end of the bookmark after the paragraph marker
for the last line in the section.
Retaining Microsoft Word Section Break Formats
Microsoft Word documents can contain section breaks, which define boundaries for page formatting. To
retain formats and boundaries for Microsoft Word section breaks, match section bookmarks with section
breaks. Enclose all paragraphs within a given section break in the same section bookmark.
Using Partial Bookmarking (Bookmarking Sections Only)
When you load complex contract documents into Ariba Contract Management, you can include bookmarks
so Ariba Contract Management correctly interprets the section and clause structure and the Outline View
accurately reflects the document structure.
You do not have to completely bookmark contract documents. Ariba Contract Management supports partial
bookmarking. When you use partial bookmarking, Ariba Contract Management uses the bookmarks you
provide in the sections and automatically loads each unbookmarked paragraph as a separate clause. This
reduces your implementation effort, because all you have to do is bookmark the section hierarchy of the
document and define the
sectionGlobalContract bookmark. The load time for a partially bookmarked
document is also typically faster than the load time for a document with each clause bookmarked.

24 Ariba Contract Authoring Guide
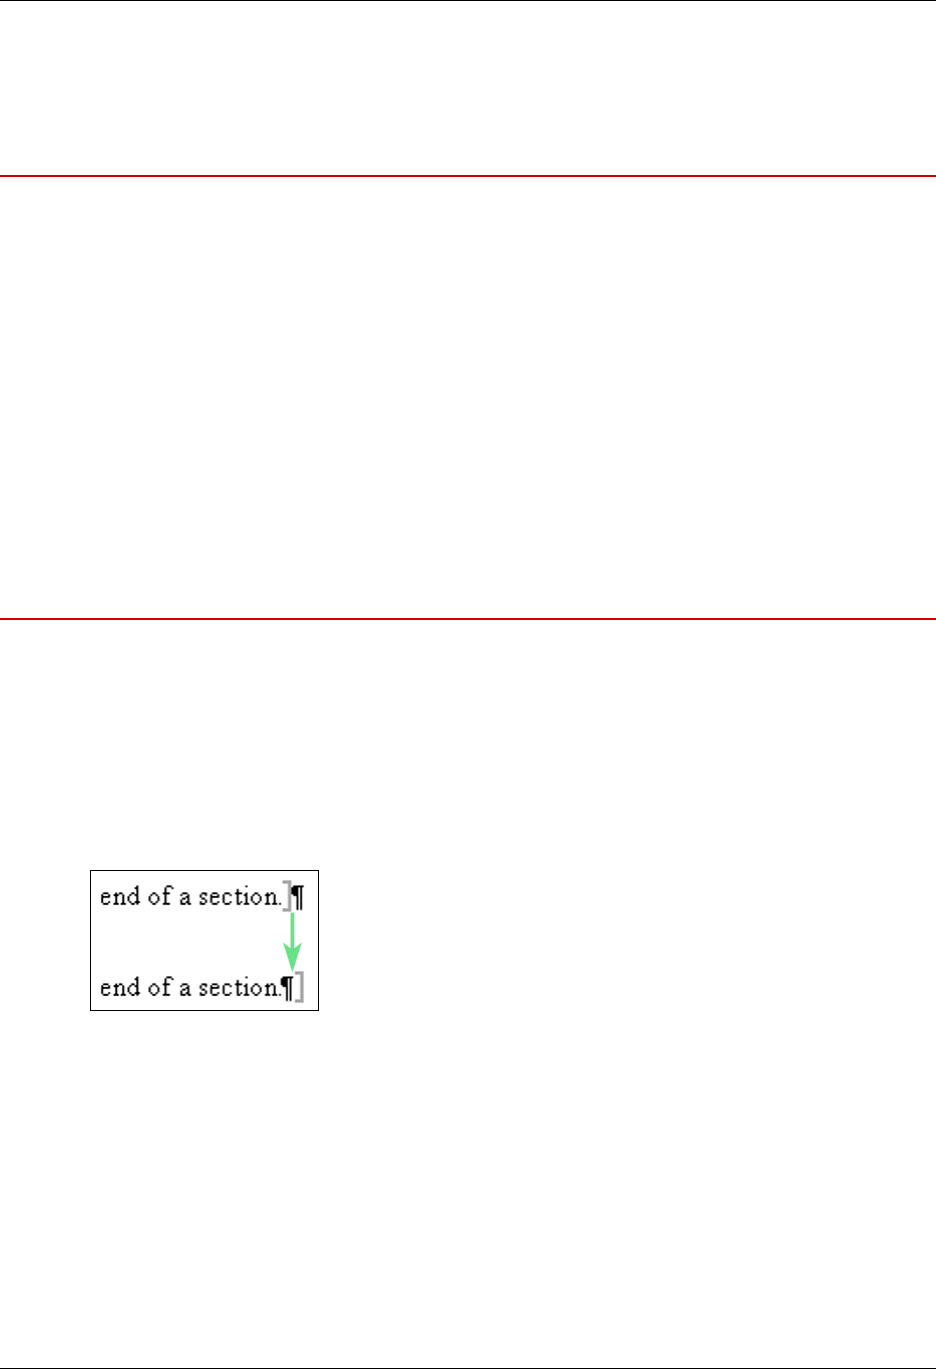
Example
In the following example, the user adds only three section bookmarks:
• 1. Scope of Agreement
• 1.1 Subsection of Scope of Agreement
• 2. Period of Agreement
You see the following in the Outline View when you load the document.
Notice that with only three user-specified section bookmarks, Ariba Contract Management correctly created
clauses for the paragraphs within the sections. The user did not have to bookmark each of the six clauses
within in the sections.
You only need to bookmark individual clauses in the following situations:
• A clause consists of more than one paragraph
Ariba Contract Authoring Guide 25
• A clause contains anything besides text. For example an image, a table, or any other non-text objects.
Bookmarking Rules for Contract Documents
The following rules detail how the Ariba Contract Management interprets bookmarks in a contract
document.
• If a particular paragraph is not explicitly bookmarked, the system treats it as a clause. This means the
system interprets all ad hoc or un-bookmarked text (paragraphs) as clauses, and you must use the promote
to section action in the Outline View to change that text to a section. All text in a given paragraph is
treated as a single clause, regardless of formatting.
• If you manually bookmark a section, the system interprets all text in the first paragraph as the section title,
and all other content in the section bookmark interpreted using the normal bookmarking rules.
• Every Microsoft Word contract document in Ariba Contract Management must have only one
sectionGlobalContract bookmark which marks what text in the document is managed by Ariba Contract
Management. Any information you enter outside the
sectionGlobalContract bookmark is not tracked.
You cannot have breaks inside the
sectionGlobalContract bookmark.
Automatic Bookmark Cleanup
The following is a list of the automatic bookmark cleanup the system performs:
• If a file being uploaded does not have a
sectionGlobalContract bookmark, the system creates one that
includes the entire document.
• The system automatically moves the end of section bookmarks after the paragraph marker for the end of
the section. If the bookmark for the end of the section is left inside the paragraph marker, moving to the
end of the line and pressing
RETURN inserts the next ad hoc clause outside the section.
Section bookmark cleanup works as follows:
• The system automatically moves the end of clause bookmarks before the paragraph marker for the end of
the clause. If the bookmark for a clause is left after the carriage return marker, moving to the end of the
line and pressing
RETURN modifies the clause with a new paragraph instead of creating a new clause.
• Any text after the end of a clause bookmark but before the carriage return at the end of the clause is
automatically be added to the clause.
• If there is no space after the end of the
sectionGlobalContract bookmark, the system adds paragraph
markers. This helps make sure users do not accidentally add clauses outside the
sectionGlobalContract
bookmark. The system ignores all bookmarks outside the
sectionGlobalContract bookmark. Text outside
the
sectionGlobalContract bookmark remains in the document but is not shown in the outline view.

26 Ariba Contract Authoring Guide
• When the sectionGlobalContract bookmark and the first clause or section of the document start at same
location, the system automatically inserts a new paragraph. This helps prevent accidentally adding a
clause above the
sectionGlobalContract.
Editing Documents with Bookmarks
When using Microsoft Word to edit documents that have bookmarks for sections and clauses, keep in mind
the following points:
• If there is no paragraph marker at the end of a contract document other than the marker that denotes the
end of the final clause paragraph, Ariba Contract Management inserts a final paragraph that is formatted
like the previous paragraph. For example, if the previous paragraph was part of a numbered set, the
inserted empty paragraph is also numbered. To avoid having Ariba Contract Management insert a final
paragraph, make sure your document includes a final paragraph marker after the end of the paragraph for
the last clause.
• It is possible to unintentionally delete bookmarks when rejecting proposed changes to a document. If the
view of the document in the Outline View does not match the most recent modifications to the document,
you may need to manually reset bookmarks in the modified area.
• Microsoft Word supports dragging and dropping highlighted text within a document. If you drag and drop
entire clauses or sections, make sure you highlight the bookmark beginning and end. If you do not, and
you drag all the text from a bookmark without taking the bookmark with it, the system interprets your
changes as a deleted clause and a newly added ad hoc clause. If you delete (or remove through dragging)
all text from a clause bookmark, the Outline View displays -empty- to indicate your deletion.
Understanding Bookmark Validation
During both initial upload and document synchronization during negotiations the system displays error and
warning messages if the document has any incorrect bookmarking.
The system prevents you from loading any contract document with any bookmarking issue considered an
error. Documents with bookmarking issues that only cause warning messages are allowed into the system,
but you must click the
Ignore Warnings button to do so.

Ariba Contract Authoring Guide 27
The following graphic shows a document with several errors and warnings:
Ariba Contract Management treats the following behavior as either a warning or an error when you load or
synchronize a bookmarked contract document:
Bookmarking Error Description
Unbookmarked text This message helps prevent unbookmarked text from entering the contract document during
synchronization. The system does not support unbookmarked text inside the
sectionGlobalContract bookmark.
Overlapping bookmarks This error message prevents you from loading or synchronizing a document with two
bookmarks that overlap each other. The following graphic is an illustration of one bookmark
overlapping another:
Contained bookmarks This error prevents you from loading a clause bookmark that completely contains another
clause bookmark. The system does not allow clause nesting. The following graphic is an
illustration of one bookmark containing another:
Two or more bookmarks
begin at the same location
This error prevents you from loading or synchronizing a contract document containing two
or more bookmarks beginning in the same paragraph in the contract document. The
exception to this rule is the
sectionGlobalContract bookmark. You must correct this
situation before loading or synchronizing the document.

28 Ariba Contract Authoring Guide
Two or more bookmarks
end at the same location
This error prevents you from loading or synchronizing a contract document containing two
or more bookmarks ending at the same location in the contract document. You must correct
this situation before loading or synchronizing the document.
Text exists outside the
SectionGlobalContract
bookmark
This warning alerts you if any text is added outside the
sectionGlobalContract bookmark.
Any text added outside
sectionGlobalContract is allowed, but is not tracked my the
system. If text exists outside the sectionGlobalContract, make sure you understand why it
is there. This warning displays only during synchronization, not during an initial load of a
document.
Unrecognized bookmark
name
This warning message informs you if you have any bookmarks the system does not
recognize. This error helps you eliminate misspelled bookmarks.
In certain cases, this message displays for bookmarks you do not want to use for clauses. In
those cases, you can safely ignore this warning message, by clicking Ignore Warnings on the
Document Errors and Warnings page.
System generated
bookmark names found
during initial load
This warning helps prevent you from loading bookmarks in
ClauseDPI1234 format.
ClauseDPI bookmarks are system generated, and cannot be used for loading clauses
initially.
Could not find a particular
bookmark on the server
This error helps eliminate bookmarks unintentionally left in a document after you copy a
document. If you see this error, navigate to the bookmark indicated in the error and remove
it.
A bookmark name is
reserved
This message keeps you from uploading or synchronizing any bookmark with a reserved
name.
Unbookmarked text
before or after a
bookmark
This error helps you keep your bookmarks in order. In practice, this error rarely displays
because the system corrects most common errors. For more information on what actions the
systems takes to clean bookmarks, see “Automatic Bookmark Cleanup” on page 25.
Section bookmark does
not enclose the last
clause’s end of paragraph
marker
This error prevents you from loading or synchronizing a document with the end of a section
bookmark before the paragraph end of the last clause in that section.
Section Item is null This error occurs if a bookmark exists in the contract document but not in the system. This
can occur if you:
• Paste text from another document that contains bookmarks
• Perform a negotiation merge of a document that came from another contract workspace
and has bookmarks
• Delete a section, synchronize and then undelete the section
To continue to work on your contract document, revert to the first previous version of the
document that does not have the error. Edit more slowly, doing fewer edits at a time and then
synchronizing. Perform text moves and deletes separately.
Bookmarking Error Description

Ariba Contract Authoring Guide 29
Chapter 4 Working With the Clause Library
• “About the Clause Library” on page 29
• “Using the Clause Library” on page 30
• “Loading The Clause Library” on page 33
• “Inactivating Clauses in the Clause Library” on page 39
• “Searching for Clauses” on page 40
• “Using Clause Level Approval” on page 40
• “Exporting and Importing the Clause Library” on page 42
About the Clause Library
The Clause Library is the central repository for clauses. It is intended to help you manage and reuse contract
clauses. Before authoring contract documents with Ariba Contract Management you must populate the
Clause Library with clauses to use in your company’s contract documents. You can organize the clauses in
the Clause Library in folders for ease of location.
The Clause Library is a knowledge repository, and as such, is located in the Knowledge Areas. To add
clauses to the Clause Library (or to edit anything in the Clause Library) you must be a member of Clause
Library team, which is listed on the Clause Library Team tab.
Accessing the Clause Library
If you are a member of any group on the Team tab of the Clause Library workspace, click the Clause Library
link in the Common Actions area of the Dashboard. Otherwise, you access the Clause Library by performing
the following steps.
W To navigate to the Clause Library:
1 In the Search area on the Dashboard, click Search.
2 Click Vault in the upper right of the page.
The Vault is the root level directory for all workspaces in the system.
3 Click the name of the Knowledge Areas folder and choose Action > Open.
4 Expand the Clause Library.

Using the Clause Library Chapter 4 Working With the Clause Library
30 Ariba Contract Authoring Guide
Clause Use in the Clause Library
When you load clauses into the Clause Library, Ariba Contract Management prompts you to choose a clause
type. Clause types help identify the use for each clause in a contract document. These three clause types are
useful in most typical contract negotiations:
• Preferred: Use for clauses you prefer to use at the start of your supplier or customer negotiations.
•Alternate: Use if there is alternate, but equally correct language for a Preferred clause.
• Fallback: Use if a supplier or customer rejects the language in either a Preferred or Alternate clause.
There is no functional difference between these types of clauses. Use the types to help you organize the
clauses in your library. Types are only important during clause selection from either a template, or a contract
workspace. For example, you might substitute a clause from the Clause Library, and see the choice of an
Alternate or Fallback clause. Contract authors do not see the type of a clause in the Outline View of a
contract document.
Depending on how you design your templates, you can also designate particular clauses as Fallback clauses
for other clauses. For information on how to implement this, see “Loading The Clause Library” on page 33.
Empty Clauses
In addition to the three clause types described in this section, each Clause Library must have a single clause
of the type Empty Clause. There should only be one empty clause in the Clause Library, and contract authors
use it when deleting a clause. For more information on deleting clauses see “Deleting Clauses” on page 17.
Although there is no validation prevent you from creating multiple empty clauses, you should only have one
in the Clause Library. Locate the Empty Clause anywhere in the Clause Library.
Using the Clause Library
The Clause Library is modeled like a contract workspace project, and contains the Overview, Clauses, Tasks,
and Team tabs. The Tasks and Teams tabs function similarly to these tabs in contract workspaces. See the
Ariba Contract Process Management Guide for details on these tabs.
Using the Overview Tab
The Overview tab displays information that applies to the entire Clause Library. This tab is divided into
several areas:
• Overview
• Process
• Quick Links
• Announcements

Ariba Contract Authoring Guide 31
Chapter 4 Working With the Clause Library Using the Clause Library
• Overview Area: In this area you see the project state, version, description, and other information about
the project. The following table lists the tasks available from the Actions menu in this area.
• Process Area: This area lists task phases, follow-on or predecessor projects, and milestones to provide
visibility for these items. Click
All Tasks to access the Tasks tab.
• Quick Links: This area lists documents that you want to access quickly. On the Documents tab, create a
Quick Link by clicking a document name and choosing
Open > Add to Quick Links.
• Announcements: This area displays the announcements pertaining to the Clause Library. These are
intended for the entire contract workspace team. Click
New to add a new announcement, or Details to view,
edit, or delete announcement details.
Using the Clauses Tab
The Clauses tab lists all of the clauses in the Clause Library. You can expand clause folders to access the
individual clauses. Since all clauses in a folder are automatically designated as alternates of each other, the
way you organize your clauses in folders affects how they are used. See “Loading The Clause Library” on
page 33 for more details.
The following table lists the actions you can perform from the Clauses
tab. The actions you see might vary
depending on the status of the clause folders and clauses.
To do this... Choose...
Edit overview
information
Actions > Edit Overview to edit the overview information.
View details for the
Clause Library
Actions > View Details. This information displays on three tabs: Overview, Documents,
and Version History.
Click the Overview tab to view the project states, status, and other details. You can change
this information by clicking Actions > Edit Attributes. You can also lock and unlock
documents, or save a new version.
Click the Documents tab to view the clauses in the Clause Library.
Click the Version History tab to view the version history for the Clause Library.
Display the Clause
Library in compact or full
view
Actions > Full View or Compact View. Full View displays the Clauses, Tasks, and Team
tabs for the Clause Library. Compact View displays the Clause Library without tabs.
Add the Clause Library to
a list of projects that
might need your attention
Actions > Add to Watched Projects. Lists the Clause Library on the Watched Projects
content area on the dashboard.
To do this... Choose...
View details for a clause
folder
the folder name and choose Action > Open > View Details. The details are displayed in the
Overview, Documents (lists the clauses in the folder), and Version History tabs.
Search for clauses in a
folder
the folder name and choose Action > Search to search for clauses in a folder.

Using the Clause Library Chapter 4 Working With the Clause Library
32 Ariba Contract Authoring Guide
Edit folder attributes the folder name and choose Action > Edit Attributes. This allows you to edit the title,
description, owner, and access control and choose to save the folder to a new version, or
retain the original version.
If it is important to you to restrict access between users who can create sales contract
workspaces and procurement contract workspaces, then you can apply these access
controls to folders containing the clauses or to the specific clauses:
• Private to Procurement Contract Users
• Private to Sales Contract Users
Move a clause folder the folder name and choose Action > Move to move a clause folder.
Add a clause folder to
Quick Links
the folder name and choose Action > Add to Quick Links.
Lock or unlock a clause
folder
the folder name and choose Action > Lock Documents or Unlock Documents. This prevents
others from editing the clause folder and the clauses in it until you unlock it.
Save a clause folder to a
new version
the folder name and choose Action > Save as New Version.
Create tasks for a clause
folder
the folder name and choose Action > Create New Task > To Do, Review, Approval, or
Negotiation. You can also create these tasks for individual clauses.
Upload a supporting
document to a clause
folder
the folder name and choose Action > Upload > Supporting Document. This allows you to
upload a non-clause document pertaining to the folder. A supporting document in the
Clause Library can help explain the clauses around it, provide helpful information or notes
to clause authors, or provide process documents for clause approval.
Supporting documents are only accessible by and visible to users with access to the Clause
Library.
Export clauses to a
Microsoft Excel file.
the folder name and Action > Export.
Import clauses from a
Microsoft Excel file.
the folder name and Action > Import.
Create a subfolder the folder name and choose Action > Create Folder. This allows you to create a subfolder in
a clause folder.
Create an analytical
report on your clauses
the folder name and choose Action > Analytical Report. See the Ariba Contract
Management Reporting and Analysis Guide for detail on reporting.
Provide a Microsoft Excel
template
the folder name and choose Action > Create > Reporting Excel Template.
Create a compound report
on your clauses
the folder name and choose Action > Compound Report. See the Ariba Contract
Management Reporting and Analysis Guide for detail on reporting.
Create a new clause the folder name and choose Action > Create > Clause. See “Loading The Clause Library”
on page 33 for details.
Open a draft of a clause the clause name and choose Action > Open Draft.
Publish a clause the clause name and choose Action > Publish. After you publish a clause, contract authors
can use it in assembles documents in contract workspaces.
Open the last published
version of a clause
the clause name and choose Action > Download Last Published
to open the last published
version of the clause in Microsoft Word.
To do this... Choose...

Ariba Contract Authoring Guide 33
Chapter 4 Working With the Clause Library Loading The Clause Library
Loading The Clause Library
The Clause Library can contain folders and clauses.
View details of a clause the clause name and choose Action > View Details. The details are displayed in the
Overview and Version History tabs.
Search for instances of a
specific clause in
documents
the clause name and choose Action > Search Where Used, which allows you to find where
the clause is used. This search returns a list of documents that contain the clause, including
the section in the document, its title, the project associated with the document, the clause
type, and a summary of the contents of the clause. See “Searching for Clauses” on page 40
for details on searching.
Edit clause attributes the clause name and choose Action > Edit Attributes. This allows you to edit the title,
description, owner, and access control, approvers and choose to save the clause to a new
version, or retain the original version.
If it is important to you to restrict access between users who can create sales contract
workspaces and those who create procurement contract workspaces, then you can apply
these access controls to specific clauses:
• Private to Procurement Contract Users
• Private to Sales Contract Users
See “Using Clause Level Approval” on page 40 for details on clause approval.
Copy a clause the clause name and choose Action > Copy. Enter a new name for the copy of the clause.
Move a clause the clause name and choose Action > Move.
Add a clause to Quick
Links
the clause name and choose Action > Add to Quick Links.
Lock your clause so no
one else can change it
the clause name and choose Action > Lock. You can later unlock the clause.
Remove a clause from use
in the Clause Library
the clause name and choose Action > Inactivate. If you delete a clause from the Clause
Library which is currently in use in any templates, the clause is not immediately removed
from the template, rather the clause type is changed to Inactive to reflect the fact that clause
is no longer used. You can later choose Action > Reactivate to use the clause again.
Delete a clause the clause name and choose Action > Delete.
Delete an old version of a
clause
the clause name and choose Action > Delete Old Versions.
Replace a clause the clause name and choose Action > Replace Document.
Merge a clause the clause name and choose Action > Merge Document.
To do this... Choose...

Loading The Clause Library Chapter 4 Working With the Clause Library
34 Ariba Contract Authoring Guide
Folders
When populating the Clause Library with your company’s clauses, it is important organize the clauses in
folders. Each standard clause in the Clause Library should have its own folder. If there is more then one
clause in a folder, you see the ALT icon whenever you reference any standard clause.
For more information on folders that contain multiple published clauses, see “Designating Fallback and
Alternate Clauses” on page 37.
Folder names cannot contain the following characters:
\/:?“<>|
Do not use long folder names in the Cause Library. Microsoft Word has a file and folder path limit of 255
characters. You cannot open the clause if the folder names exceed this limit.
For better performance when searching and loading clauses, Ariba recommends that you do not create
folders with more than 50 clauses. If you have more than 50 clauses in a folder, create additional folders.
Clauses
The same document can have standard clauses from the same section in the Clause Library, so name your
standard clauses carefully so you know which clause you are using when you choose them for a contract
document. Short, descriptive names for each clause help you easily identify clauses and use them properly.
It is not necessary to load every clause your company uses. Load only clauses that contract authors will use
more than once, or clauses you want to report on. If you do not load clauses into the Clause Library, then
Ariba Contract Management cannot provide usage data to reporting.
There are two ways to populate clauses into the Clause Library:
• Adding Individual Clauses to the Clause Library
• Adding Multiple Clauses to the Clause Library
Adding Individual Clauses to the Clause Library
The simplest way to add clauses to the Clause Library is to add them one at a time using the user interface.
This process is useful for adding only one or two clauses to the Clause Library.
Clauses must not have any extra carriage returns after the end of the text. If there are extra carriage returns,
Ariba Contract Management adds that space to documents that use the clause. Make sure none of the clause
documents have the following special characters in their names:
\/:?“<>|
Manually loaded clauses cannot contain any Ariba recognized bookmarks (they are ignored in this case),
and, in general, should not contain styles or formatting. For more information on bookmarks, see “Using
Bookmarking” on page 21. Styles and formatting are most often controlled at the template or workspace
level, and adding any custom formatting might cause problems when contract authors use the clause.

Ariba Contract Authoring Guide 35
Chapter 4 Working With the Clause Library Loading The Clause Library
The following diagram illustrates the process of adding clauses manually to the Clause Library:
W To manually add a clause to the Clause Library:
1 Log in as a user who is a member of the Clause Library workspace team.
2 Enable DFS.
3 Create a Microsoft Word document containing text for a single clause. Do not format the clause in any
way. You do not need to remove background information such as headers and footers if they exist. Ariba
Contract Management ignores all bookmarks in a clauses you load manually.
4 Navigate to the Clause Library.
5 On the Clauses tab, click Actions > Create Clause.
6 On the Create New Clause page, Browse your desktop for the .doc file, enter a description of the clause,
and choose the clause type
Preferred, Alternate, or Fallback. See “Designating Fallback and Alternate
Clauses” on page 37 for details.
7 By default, all new clauses appear at the root (top) level of the Clause Library and you must move them to
the correct location.
New clauses are in Draft status and are not immediately available for use in templates or as a substitute for
clauses in existing contract workspaces. Also notice the description of the clause. For more information
on the clause description, see “Clause Descriptions and Comments” on page 38.
8 Move the clause to the appropriate folder.
9 Publish the clause for use. To publish the clause, click the clause name and choose Action > Publish.
You can edit the clause at any time by viewing the details of the clause, clicking
Edit, and changing the
appropriate fields. For information about modifying the contents of a clause, see “Inactivating Clauses in
the Clause Library” on page 39.
Clause Library
Single Clause
No Bookmarks
Choose Clause Type:
Preferred, Alternate, Fallback

Loading The Clause Library Chapter 4 Working With the Clause Library
36 Ariba Contract Authoring Guide
Adding Multiple Clauses to the Clause Library
This method of adding clauses to the library assumes you have formatted contract documents in Microsoft
Word from which you want to extract clauses, and have bookmarked them accordingly. For more
information on bookmarking, see “Using Bookmarking” on page 21.
The following diagram shows the steps taken when you add multiple clauses to the
Clause Library:
When adding clauses to the Clause Library, especially during the initial implementation, it is often useful to
load clauses as a part of a larger document with many clauses and then publish them to the Clause Library
after verifying their formats.
You must publish clauses from templates; you cannot publish clauses to the Clause Library from a contract
workspace. Also, you must enable DFS and generate the document containing the clauses before you can
publish to the Clause Library from a template.
To publish clauses to the Clause Library, load them to a template as described in “Using Bookmarking” on
page 21 and choose
Actions > Publish to Clause Library on the Outline View tab for the contract document.
The documents you load must be synchronized using DFS. If you do not see the Publish to Clause Library
command on the Actions menu, use DFS to update the documents. You can only publish one clause at a time
to the Clause Library.
It is important to change the default title (New Clause) and add useful titles for clauses. Keep the titles brief
and descriptive to help contract authors identify clauses they want to use. The title displays in reports and
search results.
Title names cannot contain the following characters:
\/:?“<>|
The clause description is also important. For more information on the uses of the clause description, see
“Clause Descriptions and Comments” on page 38.
Clause Library
Template(for building
Contract Workspaces)
Multiple Clauses and
Sections
Ad Hoc
Choose Clause Type:
Preferred, Alternate, Fallback

Ariba Contract Authoring Guide 37
Chapter 4 Working With the Clause Library Loading The Clause Library
Any clause you publish to the Clause Library from a template is, by default, added to the root level (top) of
the Clause Library, and you must reposition it in the folder you choose by dragging and dropping.
Updating Clauses in the Clause Library
Over time, you update and modify clauses in the Clause Library. Here are some ramifications of editing
clauses in the Clause Library:
• If you update a clause in the Clause Library and publish it, all templates contract authors use to create
contract documents with that clause automatically use the new version for all contract workspaces created
with that template.
• When you view the template, the clause shown on the Outline View tab of the contract document remains
as the old version (despite the fact that the newer clause appears when you create a contract workspace)
until you create a new version of the template.
Designating Fallback and Alternate Clauses
Ariba Contract Management models the clause structure within Main Agreements and other contract
documents using folders in the Clause Library. For example, the clause organization for contract documents
pertaining to Services Agreements might be as follows:
To make clauses available for use as a fallback or alternate for a clause in a contract workspace, make sure
that the clause resides in the same folder in the Clause Library as the clause it can replace, and that it is
published.
If a Clause Library folder contains multiple published clauses, Ariba Contract Management displays an ALT
icon to the right of those clauses in the template and the contract workspace.
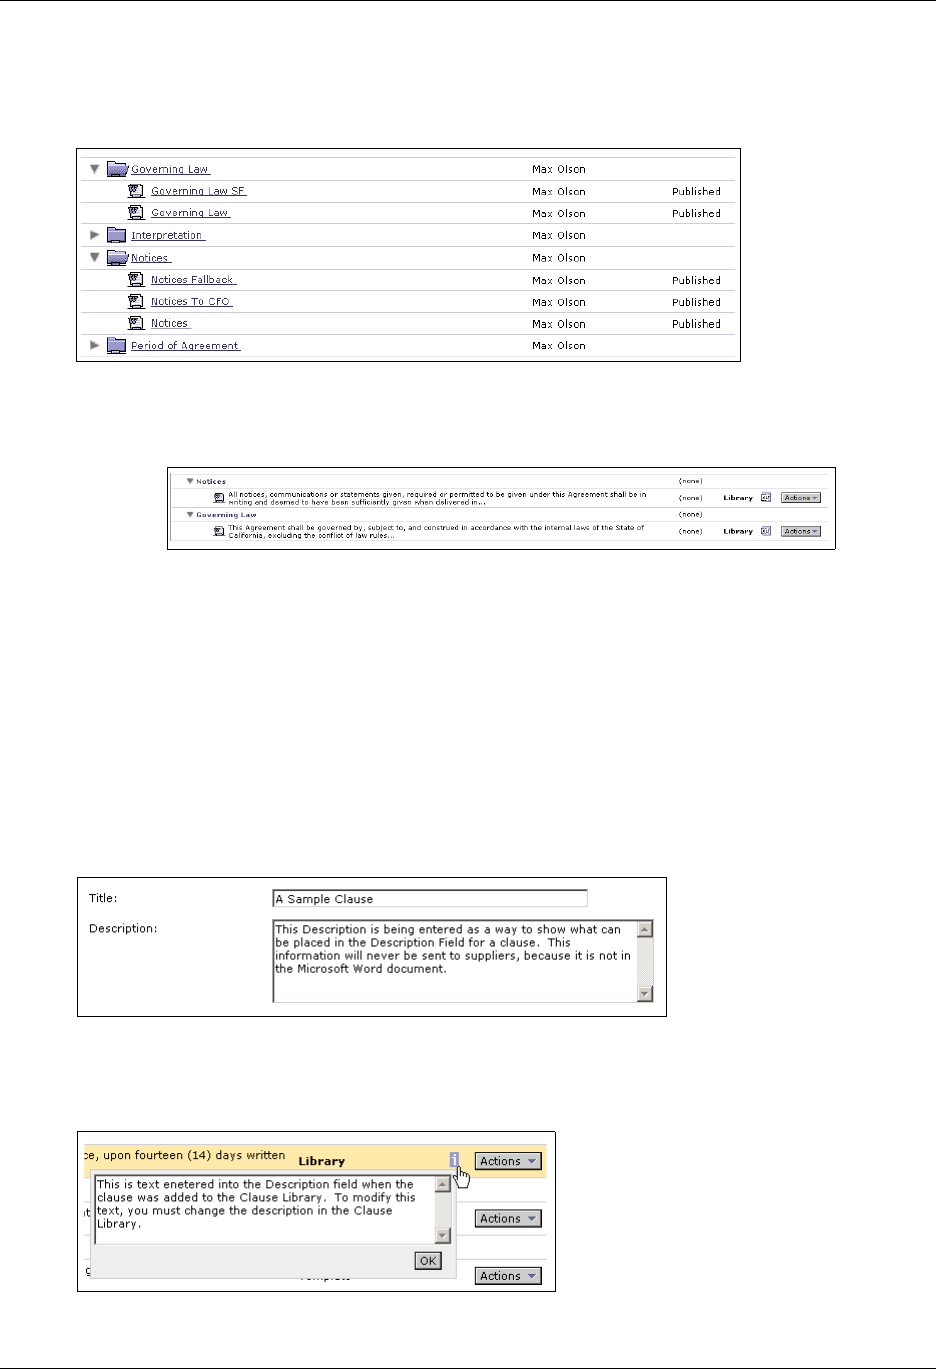
Loading The Clause Library Chapter 4 Working With the Clause Library
38 Ariba Contract Authoring Guide
For example, if the Clause Library has the following folder and clause structure for documents used in
Simple Purchase Agreements, the ALT icon appears in the Outline View of any contract document that uses
one of those clauses.
All clauses in the Notices and Governing Law folders are published. In the following example, you see the
ALT icons in Outline View for the Main Agreement.
If you click the ALT icon in either the template or the contract workspace, Ariba Contract Management
takes you directly to the folder in the Clause Library that contains the clause. The ALT icon appears
regardless of whether the other clauses in the folder in the Clause Library are Alternate, Fallback, or
Preferred.
Clause Descriptions and Comments
If you add text to the clause Description field, that text can appear in the Outline View of a contract
document containing that clause to help contract authors better understand when they should use certain
clauses, or help them understand risks with particular language.
If you add any text to the description field for a clause in the Clause Library, when contract authors use that
clause in a contract document, you see an information icon, as shown in the following graphic:
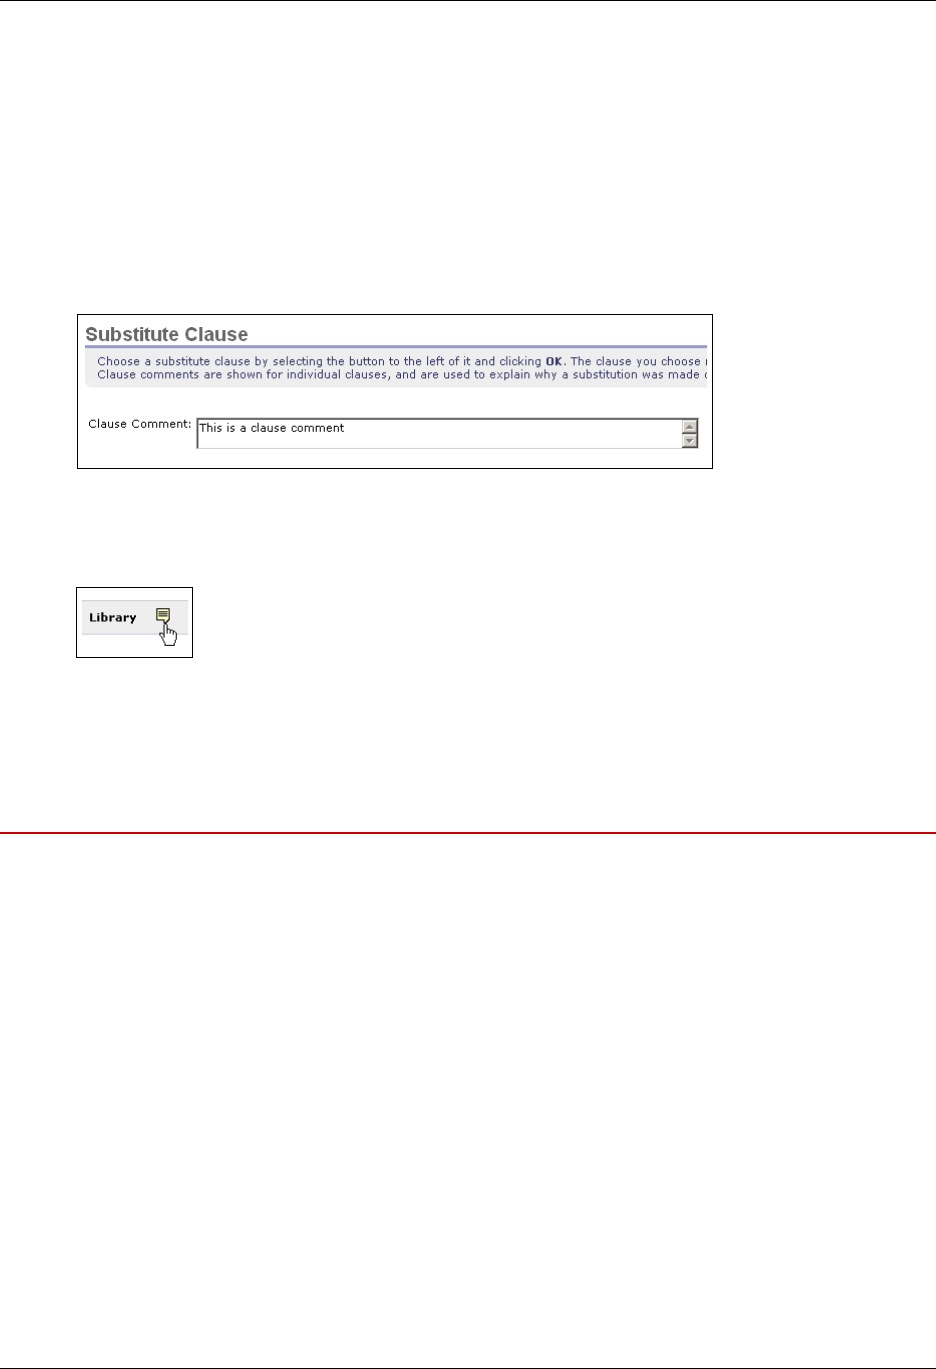
Ariba Contract Authoring Guide 39
Chapter 4 Working With the Clause Library Inactivating Clauses in the Clause Library
The text in the description field is visible by the contract author at any time during a contract negotiation by
clicking the information icon.
Note: Ariba Contract Management never adds the text in the clause description field to Microsoft Word
documents, because this text is only accessible through the Outline View and the Clause Library. Suppliers,
customers, or external users do not see clause description text.
You can also make comments when you add, substitute or delete a clause using the comments icon. To add a
comment to describe a clause substitution by entering text in the Comment box at the top of the page when
choosing a clause to substitute from the Clause Library.
To view a comment on a clause in the Outline View, click the clause comment icon to the right of the clause
summary.
Clause comments can help leave an audit trail of why particular language was chosen, or why certain
alternatives were chosen.
Inactivating Clauses in the Clause Library
If your organization will no longer use a clause in the Clause Library, or the owner of the Clause Library
does not want that particular clause to be used in any subsequent contract documents, you can delete a clause
from the Clause Library. If you delete a clause from the Clause Library which is currently in use in any
templates, the clause is not immediately removed from the template, rather the clause type is changed to
Inactive to reflect the fact that clause is no longer used. Any tasks associated with the inactivated clause
remain in the Tasks tab. You can mark these tasks as complete, or otherwise manage them.
If the template owner does not remove the inactivated clause, and authors create contract workspaces from
the template after the clause has been inactivated, the clause is still included in the resulting contract
workspace, but is marked as Template (Inactive).
The inactivation of the clause, which no longer appears in the Clause Library, is complete when no
templates use the clause in any contract documents (in current versions) and all contracts currently using the
clause are completed or closed.
Note: When a user who inactivates clauses from the Clause Library to notify relevant template owners that
the clause is being inactivated.

Searching for Clauses Chapter 4 Working With the Clause Library
40 Ariba Contract Authoring Guide
Searching for Clauses
Searching for clauses works similarly to searches for other documents. You can search within folders, in
contract workspaces, or just in the Clause Library. Search results allow you to see which templates and
documents use specific clauses.
You can search within the Clause Library only if you have group access to view the Clause Library. Search
in the Clause Library by clicking
Actions and choosing Search on the Clauses tab.
Because clause titles are often very similar for slightly different clauses, a search for documents of type
Contract Clause returns search results with the first 200 characters of the clause itself to help in
identification.
For example, you might see search results as follows. Notice the Summary column, which shows an
example of what language each clause can contain:
If you are searching for normal documents using the Search Documents search, you only see clauses as a
result if you specify that you want to search Contract Clause documents explicitly.
Searching Where Clauses Are Used
You can also search for clauses where they have been used. This search allows you to see which templates
and contract workspaces use a specific clause, including the section where it is used.
You search for clauses where used in the Clause Library by clicking the clause and choosing
Search Where
Used
on the Clauses tab.
By default, when you search for where a clause has been used, the results list the contract workspaces where
the clause is used, but you can widen the search to include templates and other projects.
Using Clause Level Approval
In Ariba Contract Management, it is often desirable to have clause inclusion trigger a specific approval. For
example, if your business case requires a particular member of the legal team to be added to the contract
workspace to approve a clause substitution only if a particular fallback clause is used, this can be facilitated
with clause level approval.
Access clause approval by clicking a clause name and choosing
Action > Edit Attributes.

Ariba Contract Authoring Guide 41
Chapter 4 Working With the Clause Library Using Clause Level Approval
Using Changes Require Approval By
Adding a user or group to the Changes Require Approval By field affects the workflow in different ways
depending on whether the clause is accessed in the Clause Library or used in a contract workspace or
template with a document that includes the clause.
Using Changes Require Approval By - in the Clause Library
Adding a user or group to the
Changes Require Approval By field means that every new version of that clause
in the Clause Library must have approval before you publish it for use in contract workspaces. Approval is
required if a user edits a clause in Microsoft Word, or edits it is manually edited through the user interface.
Deletion of a clause does not trigger approval of the clause in the Clause Library.
Clauses are approved by either adding the users specified in the
Changes Require Approval By field to an
existing clause level approval task or by creating a new approval task for the clause if one does not exist.
Keep in mind the following when using the
Changes Require Approval By field in the Clause Library:
• The first time a clause is edited, if there is not already an approval task defined that includes that clause, a
new approval task is created on the Tasks tab of the Clause Library.
• If a user is specified in the
Changes Require Approval By field for a clause, the clause cannot be published
for use until the approval task on the Tasks tab of the Clause Library workspace has been completed.
• Any approval task created for clause level approval in the Clause Library is required.
• There is no limit to the number of users, either directly or through groups, that can be added to the
Changes Require Approval By field on a clause.
• A user is never added more than once to an approval task no matter how many clauses that user is
associated with.
Changes Require Approval By - in Contract Workspaces
Adding a user or group to the
Changes Require Approval By field for a clause means that if any of the following
actions are performed on that clause, approval is required by that user:
• The clause is manually edited by any user in Microsoft Word
• The clause is manually edited through the Outline View
If a change is made to the clause in a contract document, all users specified in the
Changes Require Approval By
field for that clause are added to any approval task including that clause. Any of the following are examples
of approval tasks that would have approval flows appended by this action:
• An approval task on the contract document that contains the clause
• An approval task on a folder containing the contract document that contains the clause
• An approval task on an entire contract workspace that contains the contract document that contains the
clause
Note: No approval tasks are ever created in a contract workspace for clause approval. Users can only be
added to the approval flow of existing approval tasks.

Exporting and Importing the Clause Library Chapter 4 Working With the Clause Library
42 Ariba Contract Authoring Guide
If a user is added to the Changes Require Approval By field for a clause, and the clause is included in the
contract document in a contract workspace by default (before any editing and substitutions), no approval is
required. The template itself should have previously been approved, so adding approval in a contract
workspace for a clause that was already approved in the Clause Library is not needed.
Using Use Requires Approval By
Adding a user or group to the Use Require Approval By field affects the workflow in different ways depending
on whether the clause is accessed in the Clause Library or used in a contract workspace or template with a
document that includes the clause.
Use Requires Approval By - in the Clause Library
Adding a user or groups to the
Use Requires Approval By field on a clause has no function within the Clause
Library.
Use Requires Approval By - in Contract Workspaces
Adding users or groups to the
Use Requires Approval By field on a clause in a contract workspace has the same
effect as adding a user or group to the
Changes Require Approval By field for a clause except the approval is
triggered by a substitution as opposed to a change.
The user or group added to the
Use Requires Approval By field will be added to an existing Approval task at the
document level or at the project level. If the user or group already exists within project, the approval flow
will not be further modified. A limitation of this functionality is that only tasks in the Not Started state will
have the approval flow modified. If existing approval tasks are in the In Approval state, the approval flow
will not be modified. If an approval task does not exist at the document or project level, an approval task is
not created.
Exporting and Importing the Clause Library
If you are the Clause Library Project Owner, or if you are on the Clause Library team and a member of the
Contract Administrator group, you can export the Clause Library to a ZIP file. Clause Library export and
import allows you to use a Clause Library that has been developed in another environment without having to
manually re-create it. For example, you can develop your Clause Library in a test environment, export it, and
then import it into a production environment when it is complete. You can also export the Clause Library
from your production environment and import it into your test environment to test changes.
You can perform a full export or import of all of the clauses in the Clause Library, or a partial export or
import of selected folders. You can only export or import clauses in folders; you cannot export or import
individual clauses, although you can move them manually.
Be sure to save all clause document changes before attempting to export or import clauses. During Clause
Library export and import, you will not be notified if you have unsaved changes to clause documents, and
those unsaved changes will be lost. Clause Library export and import is intended to help you populate your
destination Clause Library; it is not designed for managing changes to individual clauses.
See “Maintaining Links Between Templates and Clauses” on page 43 for details on maintaining the
relationship between clauses and templates during Clause Library import and export.

Ariba Contract Authoring Guide 43
Chapter 4 Working With the Clause Library Exporting and Importing the Clause Library
Note: Ariba Contract Management does not export or import the translations of folders and clauses during
Clause Library export and import.
Maintaining Links Between Templates and Clauses
Since contract workspace templates use clauses, there is a relationship between the template and the clause
in the Clause Library. You can maintain this relationship during Clause Library export and import by
following these guidelines:
• Export the Clause Library from the source environment and import it to the destination environment
before you export and import the associated templates. Otherwise, links between templates and clauses
will be lost.
• Perform a full export from the source environment and a full import into the destination environment the
first time you use Clause Library export and import.
Performing a full export and import of the Clause Library ensures that the entire clause folder structure is
imported into the new environment. This is important because if you perform a partial export and import
and miss one or more folders, then import the applicable template, any links between the template and
clauses in the missing folder or folders will be lost. If those links are lost, you must manually reconstitute
them by removing each clause from the template and then adding each clause back to the template.
Exporting and importing the entire clause folder structure prevents the unintentional loss of links between
templates and clauses.
• Perform partial exports and imports for subsequent updates to your destination Clause Library.
• Import clauses with Published status. Clauses must have this status to be used in a template. Links
between templates and clauses imported in Draft status will be lost.
• Make sure that all in-process clause changes in the source environment are completed before Clause
Library export. In-process clause updates that have not been completed will not be exported.
Preserving Folder and Clause Order
Exporting a Clause Library maintains nested folder and clause structure but does not maintain the order in
which folders and clauses appeared in the source Clause Library. When you import an exported Clause
Library, each nested level of folders and clauses is ordered numerically and then alphabetically as illustrated
in the following diagram:
W To preserve folder and clause order during Clause Library export and import:
Before exporting the Clause Library, rename clause folders and documents numerically and then
alphabetically in the order in which you want them to appear in the destination Clause Library.
If you do not wish you rename your clauses and folders before export, you can restore content in the
destination Clause Library to its original order after import by dragging and dropping folders and
documents.
D Folder
C Folder
1 Folder
Subfolder X
SubFolder A
1 Folder
Subfolder X
SubFolder A
C Folder
D Folder

Exporting and Importing the Clause Library Chapter 4 Working With the Clause Library
44 Ariba Contract Authoring Guide
Exporting the Clause Library
You can perform a full library export, or a partial export of selected top-level folders. You export only the
latest version of the clauses; any previous versions that exist in history are not exported.
When you export all or part of a Clause Library, individual clauses are copied into XML files in a ZIP file.
The ZIP file preserves the folder hierarchy that exists in the source Clause Library.
Note: Your Clause Library might include ZIP files that contain, for example, supporting documents. Since
Clause Library export creates a ZIP file that contains the entire Clause Library, it cannot contain nested ZIP
files of Clause Library content. Attempting to export and import a Clause Library that contains ZIP files will
result in empty ZIP files. To preserve the contents of ZIP files in the Clause Library, temporarily move the
files to your local disk. You can later manually upload the ZIP files after you have completed the Clause
Library import to the destination environment.
W To export all or part of a Clause Library:
1 Navigate to the Clauses tab on the Clause Library page.
2 Begin export of either the full Clause Library or selected folders:
• To export the full Clause Library, click
Actions and choose Export > Clause Library.
• To export a top-level folder and its contents, click the folder and choose
Export > This folder and content.
The folder itself and all of its contents are exported in a ZIP file.
3 Click the Include Supporting Documents check box to include supporting documents in the export.
4 Click Export.
5 Click Save and save the exported ZIP file to the location of your choice.
By default, an exported ZIP file for the entire Clause Library is named
ClauseLibrary.zip, while a ZIP
file for a folder export is named for the folder, for example,
ServiceAgreements.zip. You can rename
these ZIP files as needed.
Importing the Clause Library
You can perform a full library import, or a partial import of selected folders. The import ZIP file retains the
folder structure that existed when the Clause Library content was exported from the source Clause Library,
and imports clauses in that structure. Supporting documents retain their original status when you import
them into the Clause Library.
You might be importing clauses into an empty Clause Library. However, if you are importing clauses into a
Clause Library with existing content, it is important to understand how imported clauses interact with
existing clauses in the destination library:
• Clause Library import will not replace any clause that has been locked by its owner.

Ariba Contract Authoring Guide 45
Chapter 4 Working With the Clause Library Exporting and Importing the Clause Library
• Clause Library import will not replace any clause that has an Approval task in a pending state, and will
issue a warning for every attempt to replace a clause with a non-approved Approval task during import.
• Existing clauses that are replaced during Clause Library import are updated with a new version. This new
version indicates that it was created from a bulk import, has the status specified at import (Published,
Draft, or the status exported from the source Clause Library), and maintains any existing links to
templates and supporting documents.
• If you import a new version of an existing folder, you must import it to the same location in the folder
structure. For example, if you are importing a new version of the Agreement folder, which is currently
located in Clause Library > Service Agreements, you cannot import it into the Clause Library folder. You
must import it into the same folder, Clause Library > Service Agreements.
W To import all or part of a Clause Library:
1 Navigate to the Clauses tab on the Clause Library page.
2 Begin import of either the full Clause Library or selected folders:
• To import the full Clause Library, click
Actions and choose Import > Clause Library content.
• To import a folder and its contents, click the folder into which you want to import it and choose
Import
> Clause Library content
.
3 Click the appropriate radio button to import the clauses in Published status, Draft status, or the status in
which they were exported.
If the imported clauses are used in templates, import them in Published status so that they retain their
links to templates. If you do not import them in Published status, you will need to reconstitute the links
between clauses and templates by manually removing the clauses from the template and re-adding them.
4 Click Browse and navigate to the location of the Clause Library ZIP file you want to import.
5 Click Import.

Exporting and Importing the Clause Library Chapter 4 Working With the Clause Library
46 Ariba Contract Authoring Guide

Ariba Contract Authoring Guide 47
Chapter 5 Using Style Mapping
• “About Style Mapping” on page 47
• “Setting Up Style Mapping” on page 48
About Style Mapping
Style mapping enables you to enforce a uniform corporate look and feel for all contract documents. With
style mapping, you link Microsoft Word paragraph styles to section titles and content in a Main Agreement
or Contract Addendum (you can view a document’s section levels in an outline view).
Contract Management provides a label for the title and the content for each section that you can link to a
Microsoft Word style. For example, a contract document with two section levels within the global section
has the following labels:
•
Content Level 0 (text within the sectionGlobalContract bookmark but not in a lower-level section)
•
Title Level 1 (titles of first-level sections)
•
Content Level 1 (content within first-level sections, with exceptions for clauses; see “Using Style Mapping
with Clauses” on page 48)
•
Title Level 2 (titles of all second-level sections)
•
Content Level 2 (content within second-level sections, with exceptions for clauses; see “Using Style
Mapping with Clauses” on page 48)
A document with additional section levels would have a
Title Level n and Content Level n label (where n is the
level number) for each level.
You can map only one style only per section title or content level. You cannot map section titles or content at
the same level with different styles.
The Microsoft Word paragraph style can specify characteristics such as:
• Numbering
• Spacing
• Fonts
Although fonts and styles are useful, the major reason Contract Management supports style mapping in
Microsoft Word documents is clause and section numbering.
Tip: To use style mapping with automatic paragraph numbering, you must define numbering properties for
the Microsoft Word paragraph styles. Do not use directly-applied numbering for individual paragraphs.
For example, to define numbering properties for a paragraph style using Microsoft Word 2003, select
Format > Styles and Formatting. Right-click the name of the paragraph style you want use for numbering.
Click
Modify. In the Modify Style pane, click Format > Numbering. Click the tab for the type of numbering
style you want to use and then select a specific numbering style.

Setting Up Style Mapping Chapter 5 Using Style Mapping
48 Ariba Contract Authoring Guide
Using Style Mapping with Clauses
When using style mapping with clauses, the system applies the mapped style to only the first paragraph in
a clause. As the clauses in the
Clause Library can be shared across many different contract documents, Ariba
recommends that you do not to enter a number as part of a individual clause; instead, use style mapping with
a Microsoft Word paragraph style that has automatic numbering to automatically add numbering to the first
paragraph of a clause.
Setting Up Style Mapping
W To set up style mapping for a contract document:
1 Define the styles you want in the Microsoft Word document. For details on creating styles, search for
“Create a new style” in the Microsoft Help. For complete information on styles in Microsoft Word,
consult the Microsoft documentation.
2 Navigate to the template containing the contract document in which you want to define style mappings.
3 Enable DFS.
4 Navigate to the Documents area and open the contract document in Microsoft Word. When you open the
document, Contract Management synchronizes the available styles with the styles in the Microsoft Word
document.
5 Update any changes to the template.
6 View the details of the contract document.
7 On the Outline View tab, choose Actions > Set Up Style Mapping.
8 Choose a label for a section title or section content (for example, Content Level 1) and Select Style.

Ariba Contract Authoring Guide 49
Chapter 5 Using Style Mapping Setting Up Style Mapping
The styles that are available depend on the format styles defined in the Microsoft Word document. If the
style you are looking for does not exist, go back to the Microsoft Word document and define it.
To the right of the
Set Up Style Mapping page, Contract Management displays a dynamic guide highlighting
the level you have chosen on a sample document. The image shown does not actually represent the
document you are working with, but is intended as a guide to prevent the confusion of levels.
9 Click OK.
10 Open the contract document in Microsoft Word to verify the new styles.
About Paragraph and Character Formats
Keep the following rules in mind while defining styles and modeling your business’s visual style of clauses
and sections in contract documents.
• Define any specific character formatting (for example, bold or italics) in the clause itself in the
Clause
Library
. This helps ensure consistent clause appearances in generated contract documents.
• Define paragraph formatting only at the contract document level by applying style mappings to the entire
document.
Note: In certain cases, the paragraph formatting imposed at the document level can override character
formatting imposed at the clause level. In these cases, you must reapply the desired character formatting in
the generated contract document.

Setting Up Style Mapping Chapter 5 Using Style Mapping
50 Ariba Contract Authoring Guide

Ariba Contract Authoring Guide 51
Chapter 6 Using Contract Fields as Document
Properties
• “About Document Properties” on page 51
• “Using Document Properties” on page 53
• “Working with Editable Properties” on page 58
About Document Properties
This chapter describes how to use contract attributes as document properties in Main Agreements and
Contract Addenda. Document properties contain data that can be used as fields to provide dynamic text in a
Microsoft Word document.
For example, you can configure the Supplier Name contract attribute as a document property. Next, you
insert this document property as a field (a document property field) in the Main Agreement document. When
the Supplier Name attribute is set or changed in the contract workspace, the system updates the Main
Agreement with the new value for the Supplier Name when it next generates the document.
You can use document properties in a Main Agreement or Contract Addendum contained in a template or in
a contract workspace. In most cases, template authors set up document properties in template documents,
rather than having contract authors or contract project owners set document properties in workspace
documents. However, in cases where users add contract addenda in a workspace or supplier paper is used,
users might want to set up document properties in workspace documents.
You can create document versions with literal text in place of document property fields. This is useful when
sending a document to external users for review and can be set up as an automatic process when creating a
review task in a template. You can also manually create a clean version by selecting
Actions > Generate Clean
Version
from the Outline View tab for a document.
Ariba supports two types document properties for contract attributes:
• Read-only properties
The system only reads the contract attribute values to set the document property values. The contract
attribute values are not affected by any document changes.
• Editable properties
The system can read and modify the contract attribute values using the document property values.
Changing the field value in the document also changes the corresponding contract attribute value.
Read Only Properties
By default, you can configure the following contract attributes as read-only document properties:
• Contract ID
• Contract Status
• Contract Title

About Document Properties Chapter 6 Using Contract Fields as Document Properties
52 Ariba Contract Authoring Guide
• Commodity
• Region
• Client
• Buyer Name
• Buyer Address - Lines (the street address lines)
• Buyer Address - City
• Buyer Address - State
• Buyer Address - Postal Code
• Supplier Name
• Supplier Address - Lines (the street address lines)
• Supplier Address - City
• Supplier Address - State
• Supplier Address - Postal Code
You can insert a read-only document property field multiple times in the same document. For example, you
can insert the document property field for the Supplier Name multiple times in a Main Agreement.
Editable Properties
By default, you can configure the following contract attributes as editable document properties:
• Agreement Date
• Effective Date
• Expiration Date
Editable document properties are also known as For m Fi e lds in Microsoft Word. Editable document
properties also have the following characteristics:
• If an editable document property (form field) is defined for a particular document, there must be one and
only one instance of it in the document.
• If you define an editable document property for a particular contract document and the field has not
already been inserted into the document, the field is inserted automatically at the end of the document,
immediately after the
sectionGlobalContract bookmark. You must manually move the field to the
appropriate location, as described in “Working with Editable Properties” on page 58.
Enabling Additional Contract Fields for Use as Document Properties
By default, you can set up the contract fields listed in “Read Only Properties” on page 51 and “Editable
Properties” on page 52 as document properties. For information on enabling additional contract fields to be
set up as document properties, see the Ariba Upstream Platform Customization Guide.

Ariba Contract Authoring Guide 53
Chapter 6 Using Contract Fields as Document Properties Using Document Properties
Using Document Properties
W To use document properties:
1 Set up the document properties. There are two ways you can do this:
• By using the Ariba Contracts Solution interface to select the contract attribute fields. No typing is
required, but you cannot set an initial or placeholder value to appear in the document before the
attribute value is set.
For more information, see “Setting Up Document Properties Using Ariba Contracts Solution” on
page 53.
• By using the Microsoft Word Properties pane. You must manually type the correct document property
name. This method enables you to set an initial or placeholder value to appear in the document before
the attribute value is set. This feature is useful when adding document properties to a template
document to help you identify document property fields when working with documents before a
workspace is created (attribute values are typically set in workspaces but not in templates).
For more information, see “Setting Up Document Properties Using Microsoft Word” on page 54.
Note: Ariba recommends that you set up the document properties using either Microsoft Word or the
Ariba Contracts Solution interface, but not both. Either method is acceptable, and you might find one
easier than the other, depending on your personal preferences.
2 Insert a field for the document property in the Main Agreement or Contract Addendum. For more
information, see “Step 2: Inserting Fields for Document Properties in Text” on page 56.
3 Generate a new version of the Main Agreement or Contract Addendum. For more information, see “Step
3: Generate or Regenerate the Document” on page 56.
Step 1: Setting Up Document Properties
Ariba recommends that you set up the document properties using either Microsoft Word or the Ariba
Contracts Solution interface, but not both. Either method is acceptable, and you might find one easier than
the other, depending on your personal preferences.
Setting Up Document Properties Using Ariba Contracts Solution
W To set up document properties using Ariba Contracts Solution:
1 Make sure DFS is Enabled.
2 In the contract template or workspace, click View Details for the contract document for which you want to
set up document properties.
3 Assemble the document if the state is Not Assembled. The state must be Assembled to make the Set up
Document Properties
option available in the Actions menu.
4 On the Outline View tab for the contract document, click Actions > Set up Document Properties.
5 On the Set Up Document Properties page, specify the contract attribute fields you want to use as document
properties.
The screen is split into
Read Only and Editable sections. Select the fields you want to use in the document
and use the arrow keys to move them under the
Available for use in Microsoft Word area.

Using Document Properties Chapter 6 Using Contract Fields as Document Properties
54 Ariba Contract Authoring Guide
In this example, the user selected the read-only field Supplier Name. The system shows the selected field
name followed by the corresponding Microsoft Word property name (
caSupplier in this example).
Setting Up Document Properties Using Microsoft Word
W To set up document properties using Microsoft Word:
1 Open the Main Agreement or Contract Addendum using Microsoft Word. One way to do this is by
navigating to the document in the Ariba Contracts Solution interface and clicking the Microsoft Word
icon.
2 Make sure the document has been marked Unprotected in Microsoft Word.
When a document is marked unprotected, the
Tools menu displays the option Protect Document. If a
document is marked protected, mark it unprotected by clicking
Tools > Unprotect Document.
3 Click File > Properties.
4 In the Properties window that appears, navigate to the Custom tab.
5 In the Name field, enter the document property name that corresponds to the contract attribute you want to
use in the Microsoft Word file.
Read-only document property names have the following format:
cafieldname
Editable document property names have the following format:

Ariba Contract Authoring Guide 55
Chapter 6 Using Contract Fields as Document Properties Using Document Properties
_cafieldname
Where fieldname is the field name.
The following tables list the contract attributes available by default and the corresponding read-only or
editable document property names:
In this example, the document property name is
caStatus.
6 Enter a starting value in the Value field. This value appears in the document if the corresponding contract
attribute value is not set. If you do not have a starting value, type spaces or other placeholder characters in
this field.
7 Click Add to add the document property to the Properties list.
8 Click OK to close the Properties window.
9 Save the Microsoft Word file.
Read-Only Document Properties
To use this contract attribute... Enter this name for the read-only document property...
Contract Status
caStatus
Contract Title
caTitle
Commodity
caCommodity
Region
caRegion
Client
caClient
Buyer Name
caBuyer
Buyer Address - Lines
caBuyer.CorporateAddress.PostalAddress.Lines
Buyer Address - City
caBuyer.CorporateAddress.PostalAddress.City
Buyer Address - State
caBuyer.CorporateAddress.PostalAddress.State
Buyer Address - Postal Code
caBuyer.CorporateAddress.PostalAddress.PostalCode
Supplier Name
caSupplier
Supplier Address - Lines
caSupplier.CorporateAddress.PostalAddress.Lines
Supplier Address - City
caSupplier.CorporateAddress.PostalAddress.City
Supplier Address - State
caSupplier.CorporateAddress.PostalAddress.State
Supplier Address - Postal Code
caSupplier.CorporateAddress.PostalAddress.PostalCode
Editable Document Properties
To use this contract attribute Enter this name for the editable document property
Agreement Date
_caAgreementDate
Effective Date
_caEffectiveDate
Expiration Date
_caExpirationDate

Using Document Properties Chapter 6 Using Contract Fields as Document Properties
56 Ariba Contract Authoring Guide
Step 2: Inserting Fields for Document Properties in Text
After you have set up a document property for a contract attribute, you insert a field for the document
property in the text.
W To insert fields for document properties in text:
1 Open the Main Agreement or Contract Addendum using Microsoft Word. One way to do this is by
navigating to the document in the Ariba Contracts Solution interface and clicking the Microsoft Word
icon.
2 (Optional) Set your Microsoft Word options to display fields as shaded text. By default, Microsoft Word
does not highlight or shade read-only document property fields. You might want to set your options to
always show fields with shading to flag these fields.
Click
Tools > Options and select the View tab. Select Always in the Field shading menu. Click OK to close the
Options pane.
3 Position the cursor at the place in the Microsoft Word contract document where you want to insert the
field for the document property.
4 Choose Insert > Field.
5 In the Field window, set Categories to (All).
Highlight
DocProperty in the Field Names chooser.
Select the property you want to insert into the contract document. Click
OK to insert the property.
You can insert an editable document property only one time in a given document.
You insert a read-only document property as many times as you like inside a given document. For example,
to use the
Supplier name field in multiple clauses throughout the main agreement, as well as the header,
insert the field in multiple places.
Step 3: Generate or Regenerate the Document
To update document property fields with new or changed values from contract attributes and to update
contract attributes with new values from editable document property fields, you must generate or regenerate
the Main Agreement or Contract Addendum. To generate or regenerate a document, the document status
must be Not Generated.
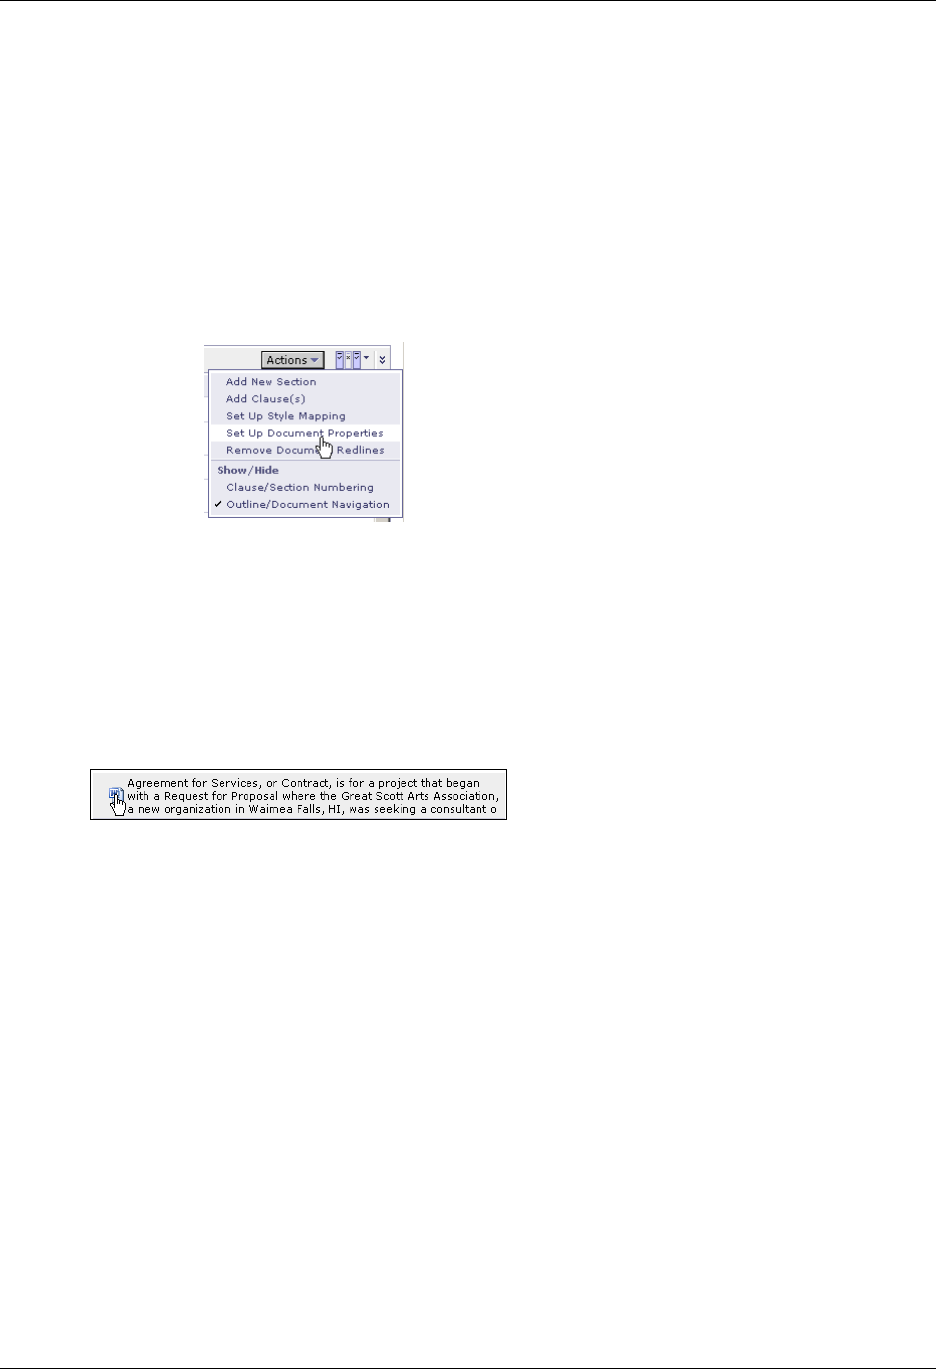
Ariba Contract Authoring Guide 57
Chapter 6 Using Contract Fields as Document Properties Using Document Properties
Inserting a new document property field in a document might not be sufficient to change a document’s status
to Not Generated. If you want to change the status to Not Generated, you also have to add text to the
document (you can add a blank space). Save the document in Microsoft Word, and update the document
version in the Ariba system. Click the document title and select
Action > Open and Generate from the menu.
Example: Adding the Supplier as Document Property Field
1 Make sure DFS is Enabled.
2 Click the document name and select View Details.
3 On the Outline View tab for the contract document, click Actions > Set up Document Properties.
This option is only available from the
Actions pull-down menu if you have DFS enabled.
4 On the Set Up Document Properties page, select the fields you want to use in the document and use the
arrow keys to move them to the Available for use in Microsoft Word area. In this example, the user
selected the read-only field Supplier Name. The system shows the selected field name followed by the
corresponding Microsoft Word property name (
caSupplier in this example).
5 Open the contract document in Microsoft Word. You can do this by double clicking the Microsoft Word
icon next to any clause:
6 In Microsoft Word, choose File > Properties. Navigate to the Custom tab.
7 Verify that property appears in the list of Properties and click OK to close the Properties window in
Microsoft Word.

Working with Editable Properties Chapter 6 Using Contract Fields as Document Properties
58 Ariba Contract Authoring Guide
For example, the property for the Supplier field appears as follows:
8 Position the cursor at the place in the Microsoft Word contract document you want to insert the field for
the document property.
9 In Microsoft Word, choose Insert > Field.
10 In the Field window, highlight DocProperty in the Field Names chooser.
Select the property you want to insert into the contract document. Click
OK to insert the property.
11 Generate or regenerate the document.
Working with Editable Properties
Working with editable properties is similar to working with read-only properties, with the differences
described in the sections that follow.

Ariba Contract Authoring Guide 59
Chapter 6 Using Contract Fields as Document Properties Working with Editable Properties
Viewing Editable Document Property Fields
Microsoft Word displays and handles fields for editable document properties as bookmarks. If you
double-click an editable document property in a Microsoft Word document, you see a window similar the
following:
Note: Microsoft Word uses bookmarks for editable properties, and as such, any editable document properties
you define in your contract document appear in the bookmark list. Ariba Contracts Solution ignores
bookmarks used for editable document properties when processing clauses. Moving Editable Document
Property Fields
Moving Editable Document Property Fields
If Ariba Contracts Solution inserts an editable document property at the end of a contract document, you
must manually move it to the appropriate location. To properly move an editable document property, you
must:
1 Record (write down or copy) the bookmark name.
2 Copy and paste the editable document property to the new location in the document.
3 Double-click the moved field and enter the bookmark name you recorded.
Important: Dragging and dropping, or simply cutting and pasting an editable document property without
re-entering the original bookmark name results in an unusable document property.

Working with Editable Properties Chapter 6 Using Contract Fields as Document Properties
60 Ariba Contract Authoring Guide
Modifying an Editable Document Property in Microsoft Word
W To modify an editable document property in Microsoft Word:
1 Double-click the field in the Microsoft Word document.
2 Microsoft Word opens a field options window similar to the following:
3 Enter the new value in the default text field. For dates, use the format appropriate for your locale
(
mm/dd/yyyy or dd/mm/yyyy).

Ariba Contract Authoring Guide 61
A
accessing the Clause Library 29
adding a clause as a Quick Link 33
adding a new section 14
adding a subsection 15
adding clauses from the Clause Library 14
adding individual clauses 34
adding multiple clauses 36
ALT icon 34, 38
alternate clauses 30
arranging sections 14
assembled documents
Contract Addendum 5
Main Agreement 5
Outline View tab 11
synchronizing 16
automatic cleanup of bookmarks 25
B
bookmark names 22
bookmarking 21
automatic cleanup 25
clauses 22, 36
effect of the undo command 21
error messages 26
hard returns 12
how Contract Management interprets bookmarks 25
names of bookmarks 22
partial bookmarking 23
rules 25
sectionGlobalContract 23
sections 23
soft returns 12
validation 26
warning messages 26
C
carriage returns in clauses 34
clause comments 39
clause descriptions 38
clause folders 31
adding Quick Links 32
creating clauses in 32
creating tasks for 32
editing attributes 32
exporting and importing 42
locking and unlocking 32
Microsoft Excel templates 32
moving folders 32
saving a folder to a new version 32
searching for clauses in 31
subfolders, creating 32
uploading supporting documents 32
viewing details 31
clause level approval 40
Clause Library
accessing 29
adding a clause as a Quick Link 33
adding clauses to contracts 14
adding individual clauses 34
adding multiple clauses 36
ALT icon 34
announcements 31
assembled documents and 13
carriage returns in clauses 34
clause comments 39
clause descriptions 38
clause folders 31
clause level approval 40
clause types 14, 30
copying clauses 33
criteria for loading clauses 34
defined 29
deleting clauses 33
deleting old versions of clauses 33
editing attributes 33
editing clauses 37
editing overview information 31
exporting and importing 42
inactivating clauses 39
locating fallback and alternate clauses 37
location of 29
manually loading single clauses 35
merging clauses 33
moving clauses 33
naming clauses 34, 36
no bookmarks in manually loaded clauses 34
no special characters in document names 34
open last published clause 32
opening a draft clause 32
organizing clauses in folders 34
populating 34
publishing a clause 32
publishing clauses 35
Quick Links 31
Index

62 Ariba Contract Authoring Guide
Index
replacing clauses 33
rules for folder names 34
searching for clauses 40
searching for clauses in documents 33
substituting a clause from 16
substituting clauses 16, 17
supporting documents in 32
version history 31
clause types 14
alternate 30
fallback 30
preferred 30
clauses
bookmarking 22
conditionalized 19
converting to sections 16
deleting 16
editing 16
empty 18
promoting to sections 18
soft delete 18
substituting 16, 17
viewing versions of 16
Clauses tab 31
comparing document versions 15
conditionalizing
clauses in templates 19
sections 19
Contract Addendum 5
contract authoring
adding a new section 14
adding a subsection 15
adding clauses from the Clause Library 14
bookmarking 21
comparing document versions 15
conditionalized clauses 19
controlling column display in list of clauses 15
defined 5
deleting a section 16
deleting clauses 16
deleting clauses, hard and soft delete 17
editing clauses 16
editing sections 16
exporting a list of clauses to Microsoft Excel 15
filtering clauses
filtering by type 14
generating a clean version 15
integration with Microsoft Word 6
merging documents 15
preliminary steps 8
promoting a clause to a section 16
saving a new document version 14
setting up document properties 14
setting up style mapping 14
showing or hiding navigation 15
style mapping 47
substituting clauses 16
synchronizing your document 15
viewing versions of clauses 16
converting a clause to a section 16
copying clauses 33
creating tasks for a clause folder 32
criteria for loading clauses into the Clause Library 34
D
defining automatically populated fields 14
defining indentation levels 14
defining text styles 14, 47
deleting clauses 16, 17, 33
deleting old versions of clauses 33
deleting sections 16
deprecated clauses 33
Document Properties, Editable 58
Document Properties, Read Only 53
document properties, setting 14
Draft status for new clauses 35
E
editing clauses 16, 37
editing sections 16
empty clause 18
purpose of 20
single instance 30
enabling DFS to publish clauses 36
error messages due to bookmarking 26
exporting list of clauses to Microsoft Excel 15
exporting the Clause Library 42
F
fallback clauses 30
filtering clauses by type 14
Form Fields 52
G
generating a clean version 15
I
importing the Clause Library 42
inactivating clauses 39
L
loading single clauses 35
location of clauses in Clause Library 31
locking clause folders 32
M
Main Agreement
as an assembled document 5

Ariba Contract Authoring Guide 63
Index
manually loaded clauses, no bookmarks in 34
mapping styles 47
merging clauses 33
merging documents 15
moving clauses 33
multiple clauses in a folder (ALT icon) 34
N
naming clauses, importance of names 36
navigation in Contract Authoring 15
O
Outline View tab 11
P
partial bookmarking 23
preferred clauses 30
promoting a clause to a section 16, 18
publishing clauses 32, 35, 36
enabling DFS 36
R
replacing clauses 33
rules for bookmarking 25
S
saving a new version of an assembled document 14
searching for clauses 40
searching for clauses in documents 33
searching for clauses in folders 31
sectionGlobalContract bookmarks 23
sections, bookmarking 23
sections, deleting 16
sections, editing 16
setting up document properties 14
setting up style mapping 14
soft delete of clauses 18
soft returns
inadvertent insertion 12
special characters in clause document names 34
style mapping 47
rules for defining styles 49
subsections, adding 15
substituting clauses 16, 17
synchronizing
assembled documents 16
documents in the Outline View with Microsoft Word
15
T
templates
Clause Library import/export and 43
conditionalized clauses and 19
U
undo command and bookmarks 21
unlocking clause folders 32
uploading supporting documents 32
using folders to organize clauses 34
V
validation of bookmarks 26
viewing details on a clause folder 31
viewing versions of clauses 16
W
warning messages due to bookmarking 26

64 Ariba Contract Authoring Guide
Index
