MV2677B (092019)
Page 1 of 3
Class 4 Restricted Pre-Trip Inspection
Passenger vehicle pre-trip inspection — Class 4 (restricted)
The next pages detail the suggested pre-trip inspection of a restricted class 4 vehicle.
You should be able to complete this pre-trip inspection in less than 15 minutes.
Left side
Rear
Right side
Front
1. Under hood
As you approach, look under the vehicle for leaks. Check the following:
Licence plate
• check for licence plate
Fluids
•
check fluid levels and condition (for example, colour, smell) including: engine oil,
engine coolant, power steering fluid, brake fluid and windshield washer fluid
Belts
• ensure any drive belts have good tension with no cracks, frayed cord or missing teeth
Hoses
• ensure hose connections are secure with no kinks, leaks, cuts, abrasions or cracks
Battery
• check for visible corrosion or leaks • terminal connections are secure
• battery is securely mounted • battery fluid level (if accessible)
Engine compartment
• check for fuel, oil or coolant leaks
Close and secure hood.
2. In passenger compartment
Seats, seatbelts
• check driver’s seat is adjusted for you and that seatbelt is in working order
• check that all seatbelts are in good condition and work well • seats and passenger
compartment is clean
Mirrors
• ensure they’re adjusted for you and that they’re clean and free of cracks
Windows/windshield
• ensure they’re clean and free of cracks and that they open and close
Documentation
Ensure that all documentation is in the vehicle and is valid and up-to-date including:
• vehicle licence, registration and insurance
• logbook (if required)
• CVIP inspection report (if required)
• CVIP inspection decal on windshield (if required)

MV2677B (092019)
Page 2 of 3
Start engine, check the following:
Instrument panel
Ensure that all gauges and warning lights are working properly, and that they respond
properly as the engine is started and warms up:
• charge rate indicator or gauge — ensure voltmeter or ammeter works properly and
the charge is good
• oil pressure indicator or gauge — ensure that it indicates normal pressure soon after
engine starts
• coolant temperature indicator or gauge — check that indicator rises to normal
operating temperature — light should go off after engine starts
• fuel gauge — indicates sufficient fuel
• instrument lights — ensure they work
Windshield wipers/
washers
• ensure wipers and washers work
Heater/defroster
• ensure heater and defroster controls work including fan, in heater and defroster positions
Interior lights
• ensure they work
Four-way flashers
• check that both indicators on dashboard work (the exterior lights will be checked
later as part of checking the turn signals)
Horn
• ensure it works
Engine noises
• listen for unusual sounds
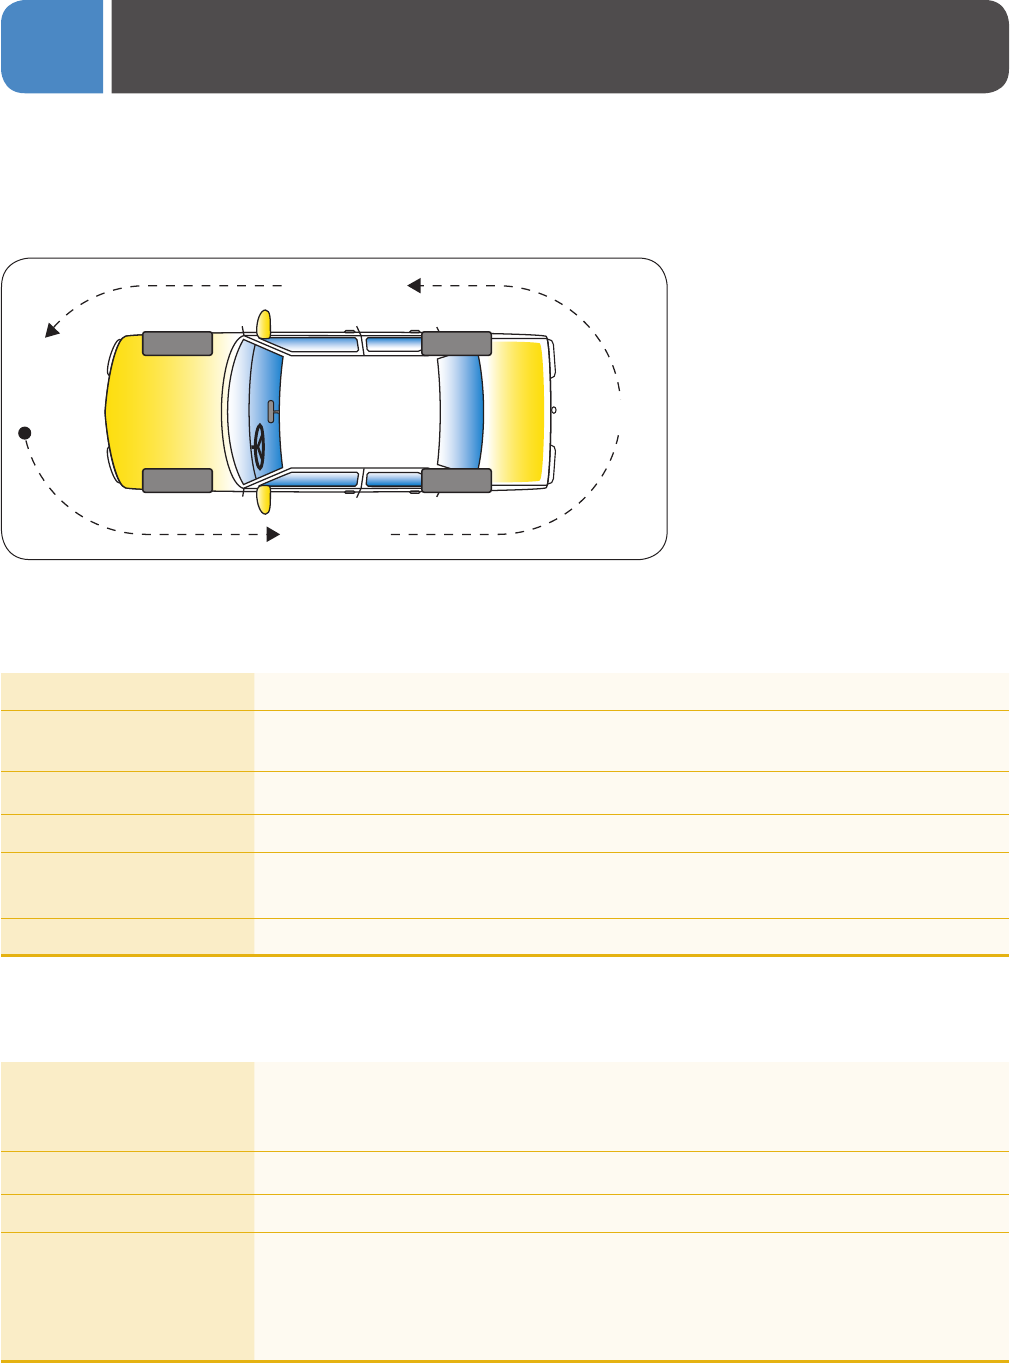
3. Circle check
Turn on left-turn signal and low-beam headlights.
Walk to the front of vehicle to begin circle check.
• Conduct circle check by walking counter-clockwise to face traffic. Be particularly cautious when you’re walking with your
back to traffic.
Lights
As you inspect the vehicle, check all lights:
• ensure they work • lenses are clean and not cracked • lenses are correct colour
• Check that left-turn signal, low-beam headlights, tail lights and licence plate lights are working.
Return to driver’s seat.
Turn on right-turn signal and high-beam headlights.
Lights
• check right-turn signals, high-beam headlights, licence plate light and brake lights
Mirrors
• ensure they are securely attached
Doors
• ensure they open and close securely
Exhaust system
• ensure it’s in good condition • no leaks • muffler is securely fastened
Fuel cap
• ensure it’s present and secure
Body
• check for body damage
Tires/wheels
• check tires for inflation, signs of bulges, sidewall separation, cuts to cord, exposed or
frayed belts • adequate tread depth • check wheels for damage • ensure wheel lugs
are secure, not missing, broken or loose (if visible)
Licence plate
• check for licence plate and decal
Trunk
• ensure trunk lid opens and closes securely • check spare tire and jack
• ensure propane tank, if present, is secure and not leaking
Return to driver’s seat. Turn off headlights and right-turn signal.

MV2677B (092019)
Page 3 of 3
4. Brake response tests
Perform these steps:
1. Depress brake pedal.
2. Shift transmission into low gear.
3. In low gear, gently tug against the parking brake. The brake should hold the vehicle.
4. Release the parking brake.
5. Move the vehicle ahead and apply the foot brake to check brake response.
Note: Whenever possible, have an assistant check the brake lights for you.
As you circle the vehicle conducting the pre-trip
inspection, check each tire and wheel.
driving tip
