
Guides.turnitin.com
Feedback Studio Instructor Guide
Enabling and Disabling Feedback Studio
Setting up Your Turnitin Account
Logging In
Resetting Your Password
Joining an Account
The Instructor Homepage
Student Enrollment
Managing Classes
Class Calendar
Master Classes
Managing Assignments
Creating a Paper Assignment
Email Non-Submitters
Submitting Papers
The Assignment Inbox
The Libraries Page
Viewing, Downloading, and Moving Papers
Viewing Late Submissions
Viewing Submission Information
Grading Tools
Commenting Tools
Grade Book
Multiple Markers
QuickMark Manager
Rubrics and Grading Forms
The Similarity Report
Interpreting the Similarity Report
Viewing the Similarity Report
Global Anonymous Marking
Navigating the Document Viewer
1


Enabling and Disabling Feedback Studio
You can switch between Feedback Studio and Turnitin Classic as many times as you wish. Simply follow the instructions
below to learn how to do this. Switching between the two will not affect a student's Similarity Score or any feedback you
may have left on a student's paper.
Toggling between Feedback Studio and Turnitin Classic
1.1. To enable or disable Feedback Studio from the document viewer, you can use the quick links provided.
1a.1a. If your administrator has enabled Feedback Studio, but you'd like to return to Turnitin Classic, you can
simply navigate to the bottom footer of Feedback Studio and click
Return to Turnitin Classic.
This will
reload the document viewer in Turnitin Classic.
Media, iframe, embed and object tags are not supported inside of
a PDF.
4
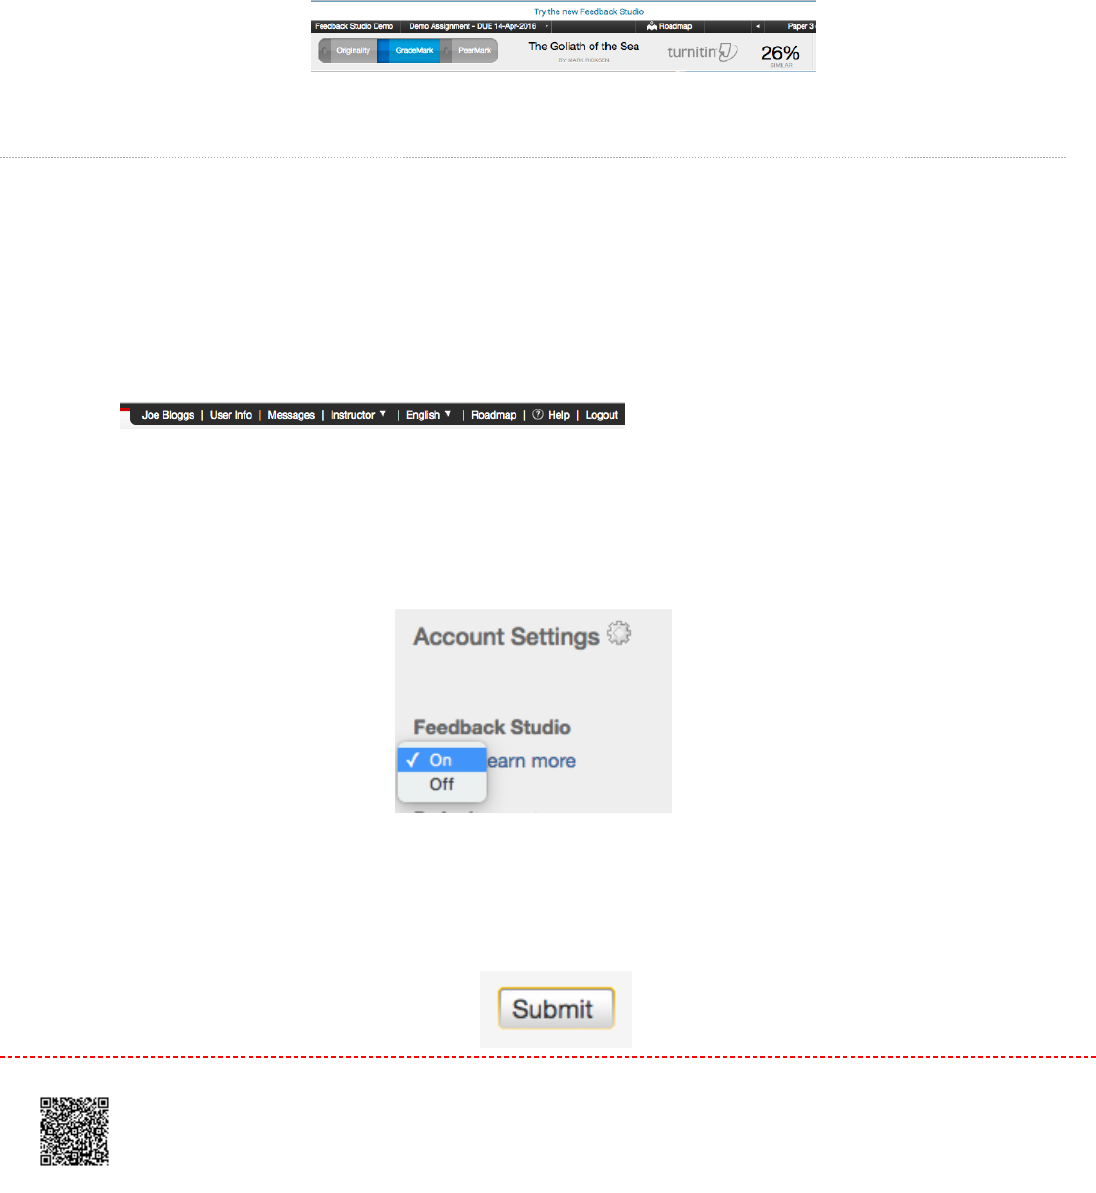
1b.1b. If you'd like to switch to Feedback Studio from Turnitin Classic, navigate to the top of the document
viewer and click
Try the new Feedback Studio.
This will reload the document viewer in Feedback Studio.
Toggling Feedback Studio in User Info Settings
1.1. To enable or disable Feedback Studio from your Turnitin dashboard, simply click
User Info
from the black
navigation bar at the top of the page. This will open the User Information/Account Settings page.
2.2. From the User Information/Account Settings page, select
On
from the Feedback Studio drop-down list, which
will enable Feedback Studio. Similarly, select
Off
to disable Feedback Studio.
3.3. To save this change, click the
Submit
button at the bottom of the page.
5

4.4. Your changes will be confirmed via the red banner at the top of the page.
6

Setting up Your Turnitin Account
All users must create a user profile. However, if you are an existing Turnitin user, please skip to guidance on Logging In.
There are two ways for an instructor to access Turnitin:
An administrator may add the instructor to the account, where the instructor will receive an email asking them to
create their password.
An administrator may provide the instructor with an account ID and join password, allowing the instructor to join an
account via the Turnitin website.
WarningWarning: Each Turnitin account must be assigned a unique email address in the Turnitin system. Users who have
previously created a Turnitin account must log in with the email address and password originally provided.
Setting up Your Account from Your Welcome Email
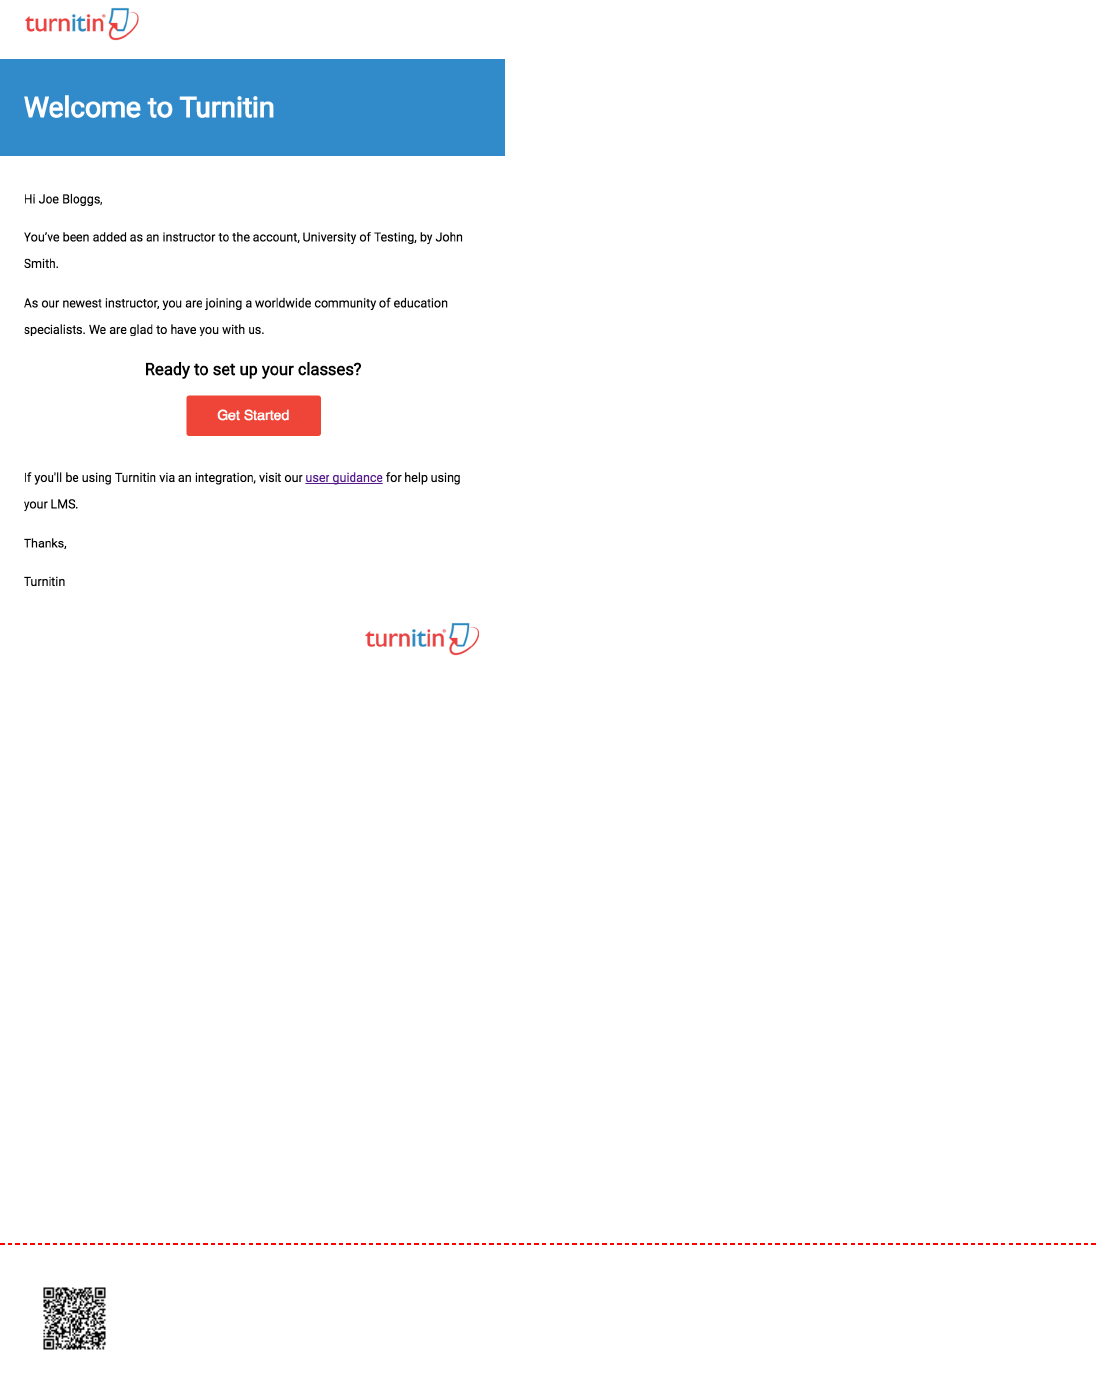
If you have received a welcome email from Turnitin, this confirms that your institution's Turnitin administrator has added
you to their account, allowing you to begin creating classes, adding students, and creating assignments.
Note:Note: If you believe that an administrator has added you as an instructor, but you have not received a welcome
email from Turnitin, please check your spam or junk folder. Alternatively, contact your administrator to check that
your email address has been typed correctly.
To access your Turnitin account, please follow the instructions below.
1.1. Click the
Get Started
button from your Turnitin welcome email.
7
2.2. You will be directed to a quick 4-step introduction to Turnitin, with useful guidance to familiarize you with class
and assignment creation, as well as adding your students. You can save this page for later reading, too.
At the bottom of Turnitin's Getting Started page, click the
Create Password
button to access Turnitin's account
setup pages.
8
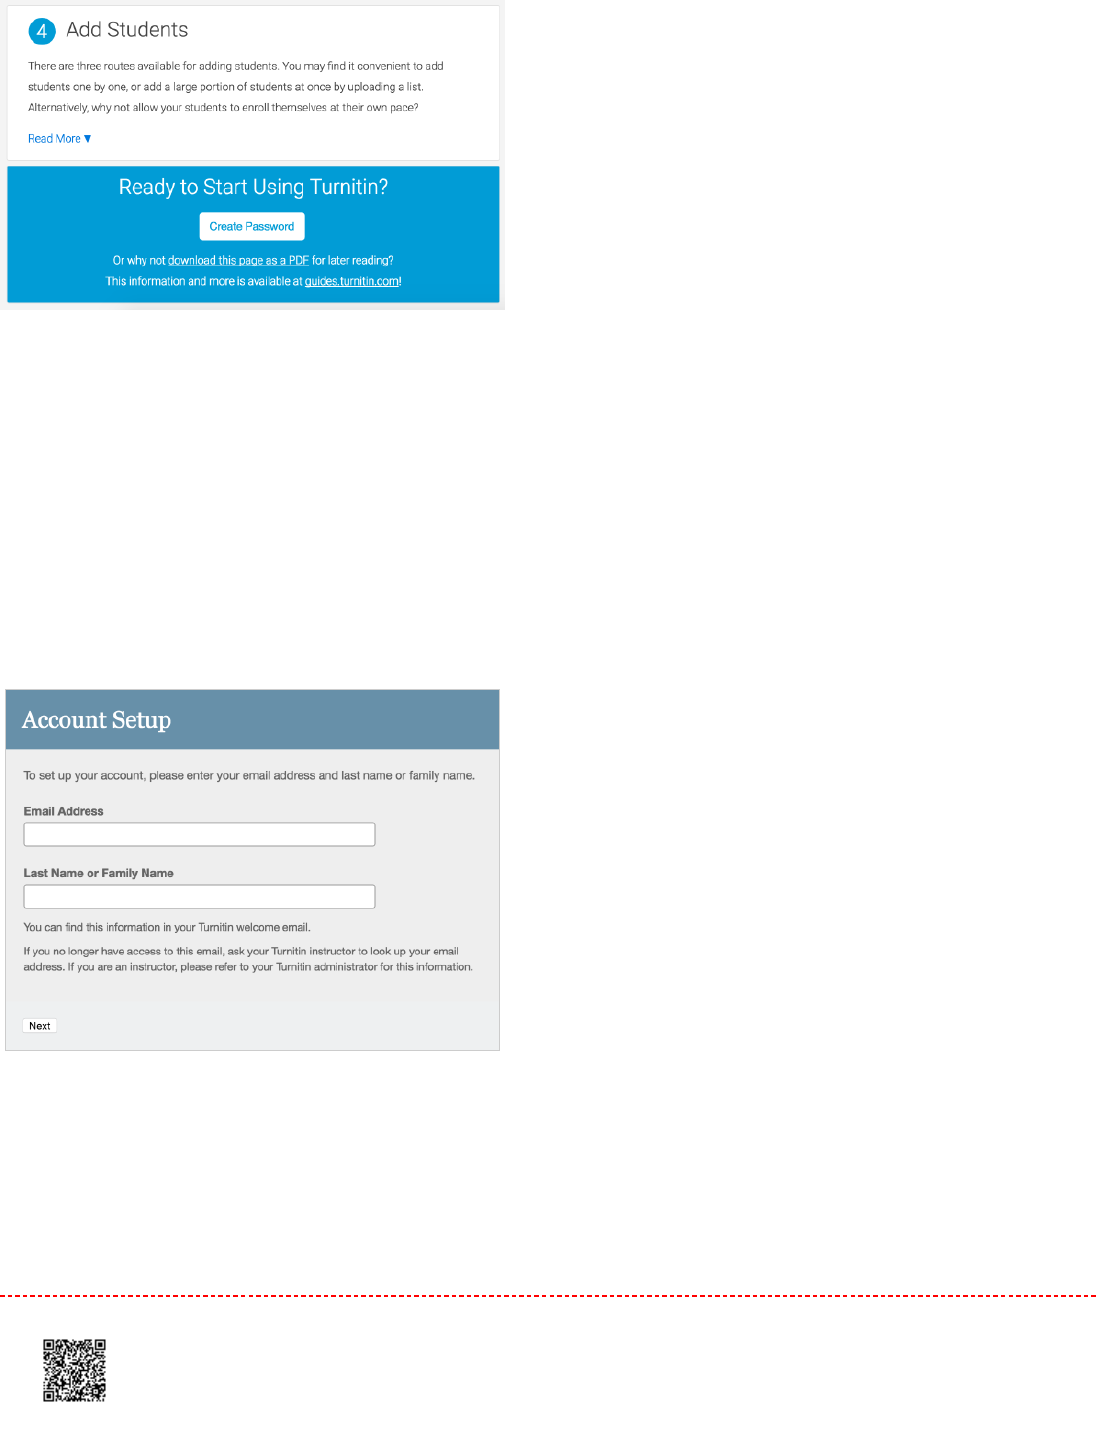
3.3.
3a.3a. To create your password, enter your email address (this must be the same email address to which
your Turnitin welcome email was sent), along with your last name or family name.
3b.3b. Click
Next
to continue.
4.4. Turnitin will send you an email to validate your account, with the subject:
Set up your Turnitin Account
. Return
to your email inbox, ensuring you check your email client's spam or junk folder for this email.
9
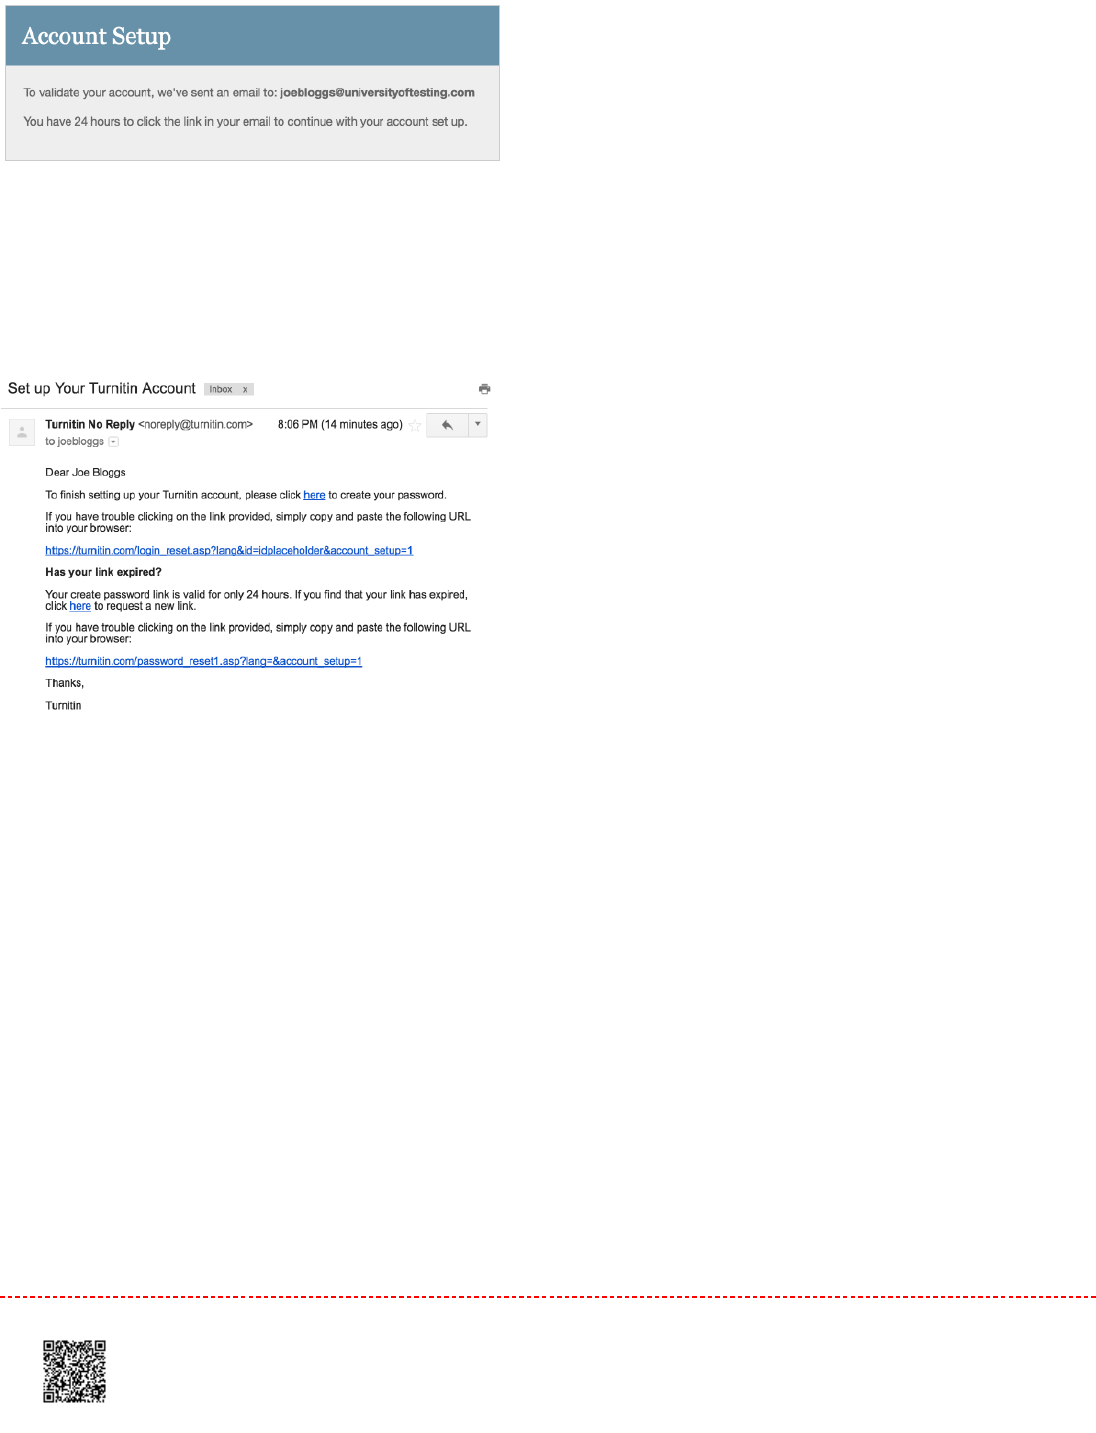
5.5. Follow the instructions in your email to finish setting up your Turnitin account. This will direct you back to
Turnitin's account setup pages.
Note:Note: The create password URL included in your email contains a unique ID and will expire if you fail
to click it within 24 hours. If your
create password
link is no longer working, click the link under
Has your
link expired?
to request a new email.
6.6.
6a.6a. Enter and confirm your new password. Your password must be between 6 and 12 characters,
containing at least one letter and one number.
6b.6b. Click the
Create Password
button to finish the account setup process. Alternatively, click
Cancel
to
abort.
10

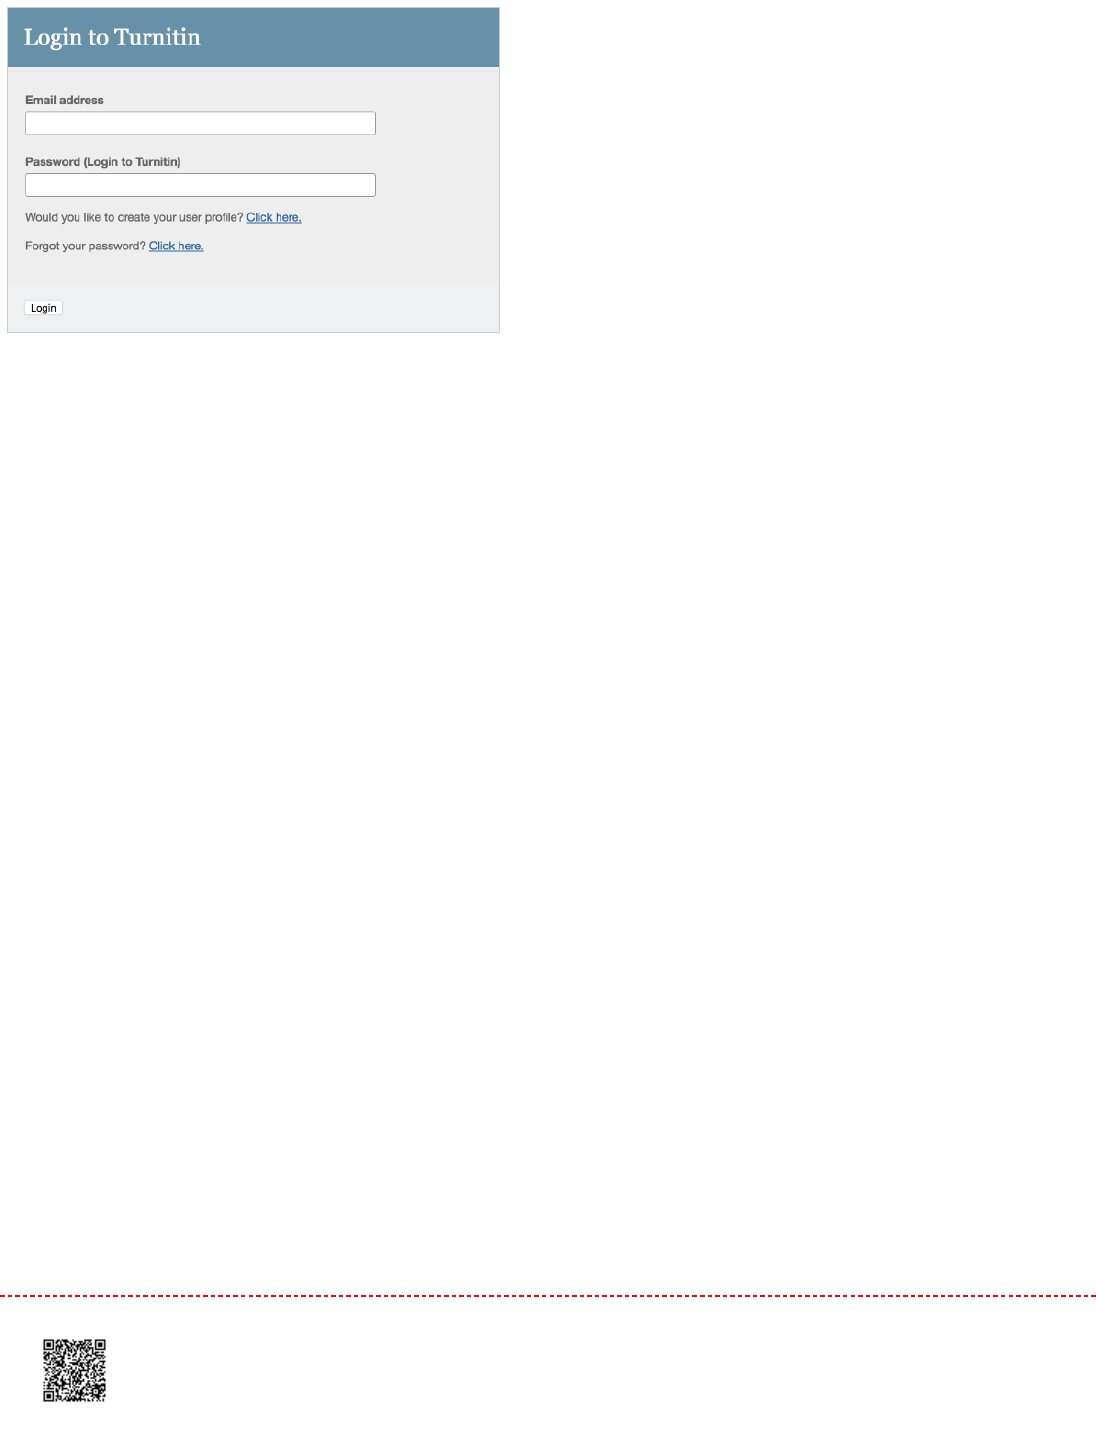
7.7. Your account setup is now complete; an email will also be sent to confirm this setup. You can now log in to
Turnitin to set your security question and answer and begin using the service.
Click the
Log in Now
link.
8.8. Using your email address and newly created password, enter this information in the login fields provided.
11
9.9. After login, you have the opportunity to amend your name and email address, should any of this information
have been entered incorrectly.
9a.9a. You will be asked to provide an answer to a security question, should you need to reset your Turnitin
password.
9b.9b. Click
Next
to continue.
12

10.10. Click the
I Agree -- Continue
button to accept Turnitin's user agreement and enter the Turnitin service.
Alternatively, click
I Disagree -- Logout.
13

Setting up Your Account Using a Join Password
If you are new to Turnitin and have not been added to an account by your account administrator, you must create an
instructor profile. To create your own instructor account, your account ID and account join password are required.
NoteNote: The account ID and account join password is needed to ensure you have authorization to join an account,
and can only be obtained from your account administrator
.
Instructors wishing to access Turnitin must contact the
appropriate personnel at the institution to receive the account ID and join password. Turnitin staff cannot
distribute this information to any user.
Account administrators may distribute this data or may add instructors to a Turnitin account themselves, which
will send an automatic welcome email, allowing access to the account.
11. Go to www.turnitin.com and click on the
Create Account
link
22. Click on the
instructor
link
14

33. The
Create a New Instructor Account
form must be completed
44. Enter the account ID number and account join password for the institutional account
55. Enter the user first name, last name, and a valid e-mail address to use as the login for Turnitin
15
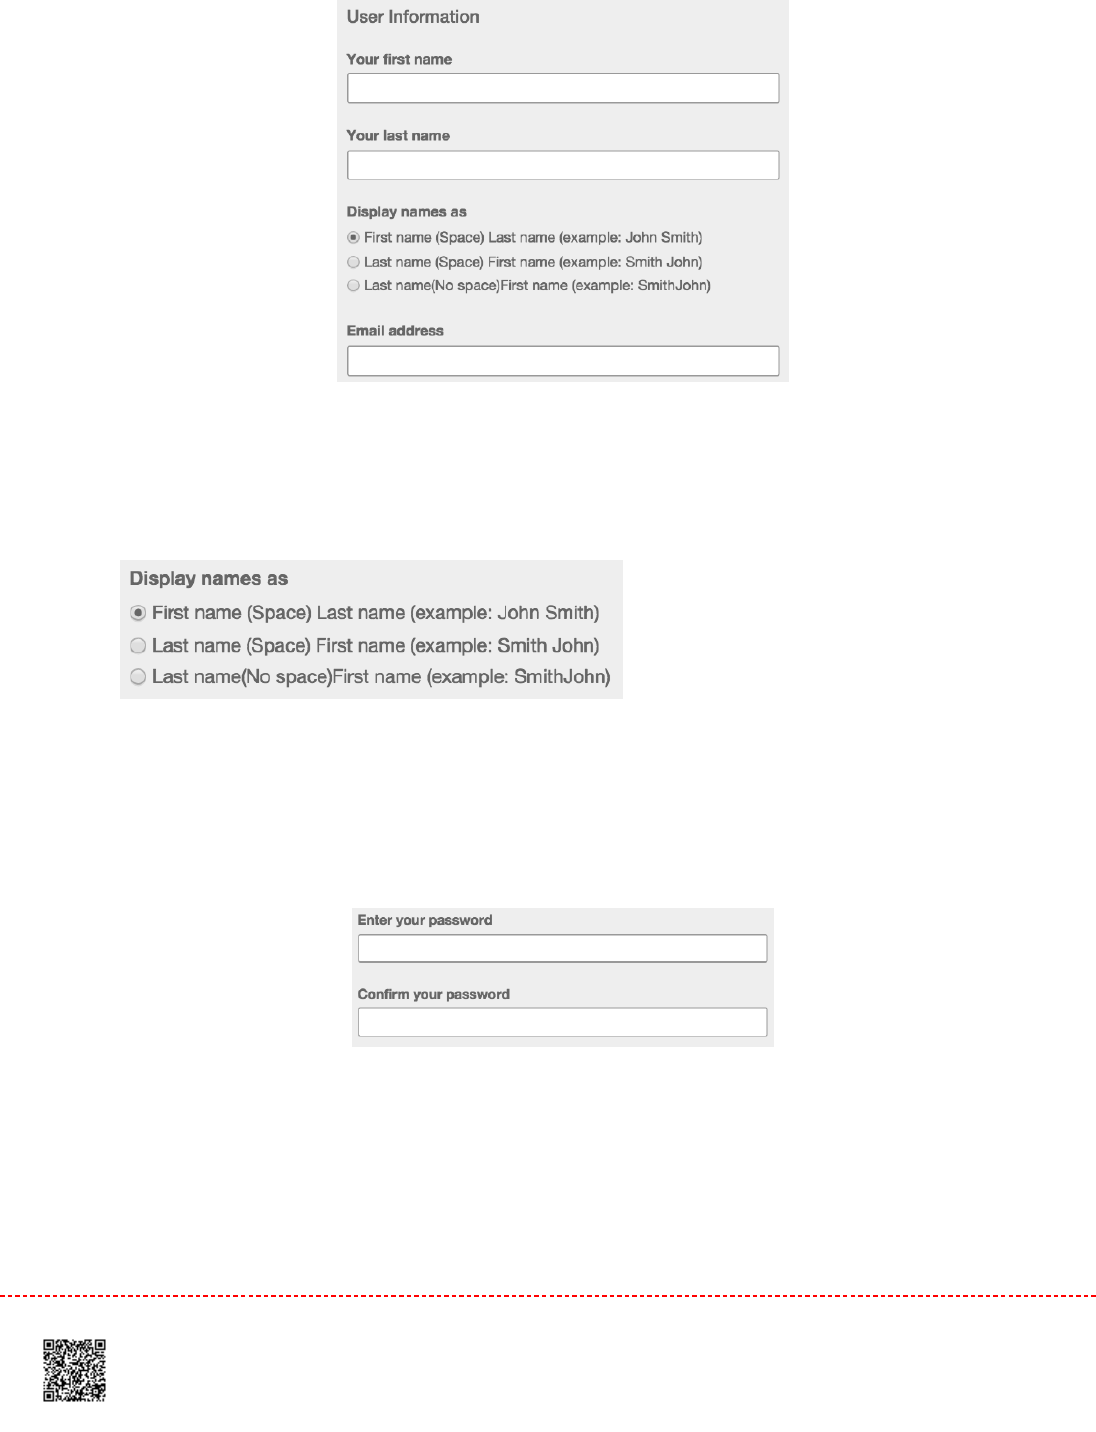
5b5b. You can also chose what format you would like your name to be displayed within Turnitin
66. Select a password for logging in. The password must be six to twelve characters including at least one
letter and one number. The password is case sensitive.
77. Select a secret question from the pull down menu and enter the answer. This answer is not case sensitive.
Click on next to continue
16
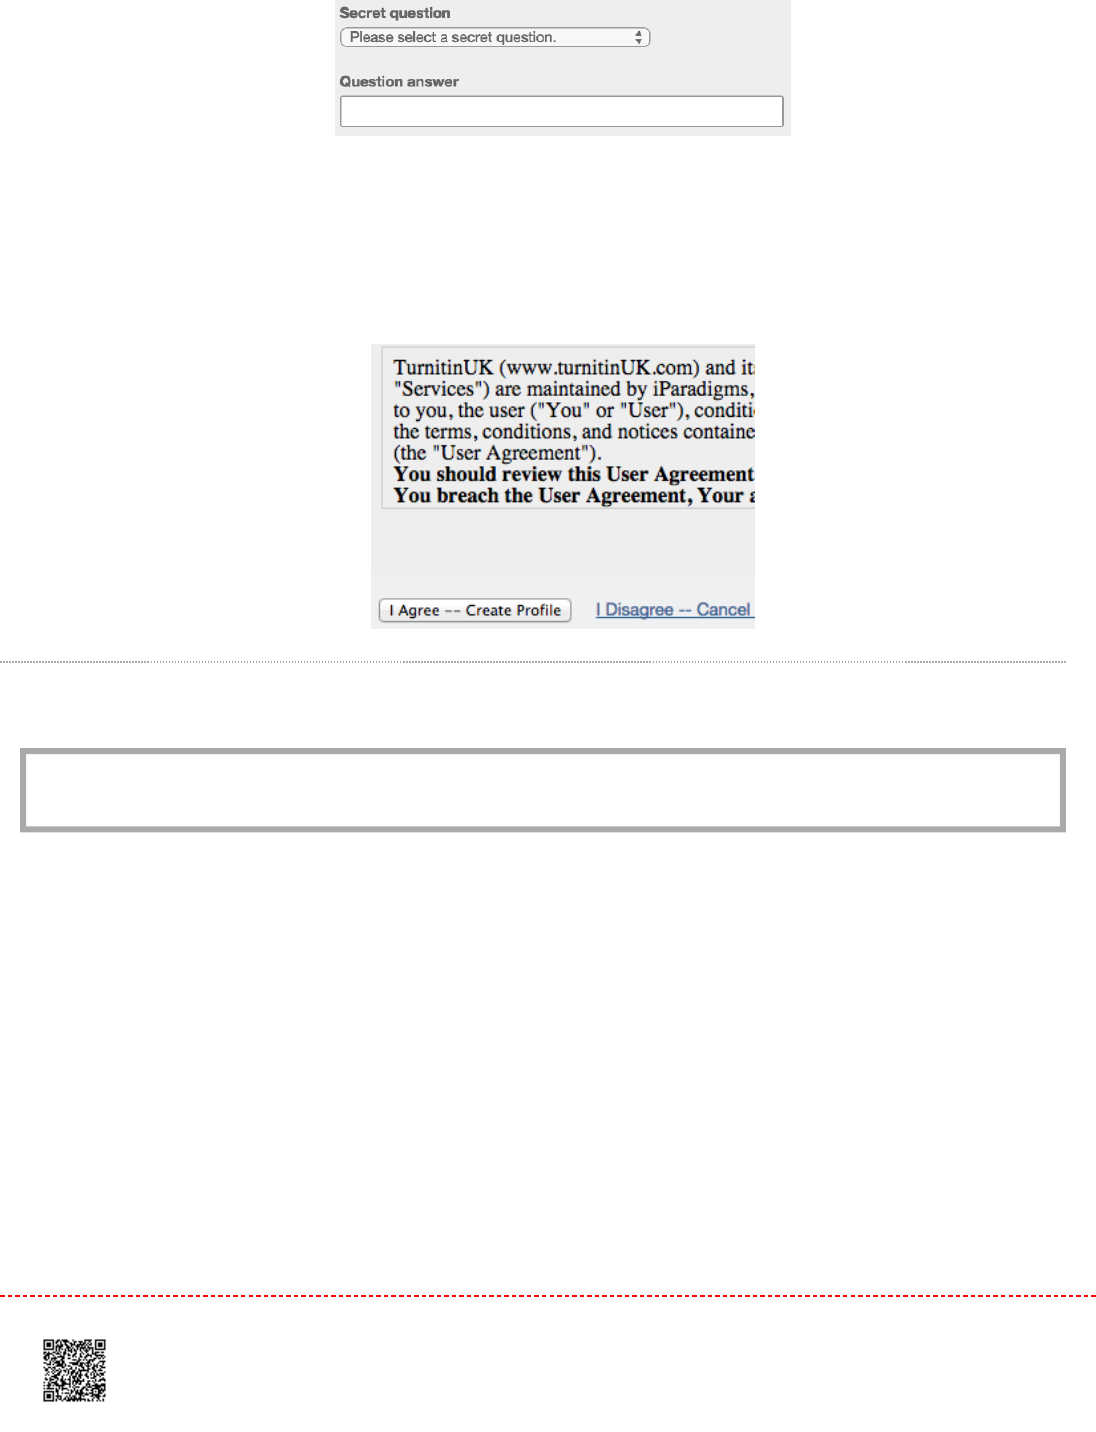
88. At the bottom of the screen you will find the User Agreement for Turnitin. To continue using Turnitin, the
user must click on the
I agree - - create profile
to access Turnitin
Training Video: Creating a New User Profile
Media, iframe, embed and object tags are not supported inside of a PDF.
17


Joining an Account
The
join account
and
join account (TA)
tabs allow an instructor to join an additional Turnitin account. Some instructors
may need to join multiple departmental or campus accounts or may be employed by multiple institutions.
If upon first login, there are no accounts available in the Instructor homepage, you must join an account in order to
create a class and assignment.
Join an Account as an Instructor
1.1. To join an account as an instructor, click the
Join Account
tab from any page
2.2. Enter the Account ID and Join password via the Join a Turnitin Account form. You must have the Account ID
and Join password to hand in order to proceed. The ID and password is available from your account administrator
only.
20

3.3. Once you have entered the Account ID and Join password, click
Submit,
where you will be redirected back to
the Instructor homepage, where the account will now be accessible
Joining an Account as a TA
1.1. To join an account as a TA, click the
Join Account (TA)
tab from any page
2.2. Enter the Account ID and Join password via the Join account as a teaching assistant (TA) form. To add a new
section type class to a master class set, the TA must have the master class ID and TA join password for the
master class. This information is available from the master class instructor.
21

3.3. Enter the Section name or number and Section enrollment password. The Section enrollment password is
chosen by you and should be distributed to anyone wishing to join this class in the future.
4.4. Click
Submit
to proceed or
Cancel
to abort the procedure
5.5. Turnitin will confirm your chosen section name or number and section enrollment password. Click
Continue
to
get started
22
Note:Note: If you would like students to enroll themselves in this class, they will need both the enrollment password
you have chosen and the unique class ID generated by Turnitin.
NoteNote: Should you ever forget the class ID, it is the number to the left of the class name on your class list. You can
view or change your enrollment password by editing the class.
Training Video: Joining an Account
Media, iframe, embed and object tags are not supported inside of a PDF.
23
The Instructor Homepage
After logging in, you will be directed to the Instructor homepage. The Instructor homepage provides access to many
Turnitin features. The Instructor homepage lists the accounts and classes the instructor has created and any class
sections which the instructor has been assigned as the Teaching Assistant (TA) for.
If there are no accounts listed, visit the Joining an Account page for details on how to join an account as an instructor.
Home
The
Home
link leads back to the instructor homepage list of all accounts and classes controlled by the instructor.
User Info
A user profile contains personal information and account settings. Click the
User Info
button on the system bar to open
the user profile options. The system bar can be located from the top of any page.
User information area is separated into two sections: personal information and account settings.
24

Personal Information
In the personal information section of the user information page, there are a number of fields - many of which are
optional and can be filled at your own discretion.
The following is a list of required fields:
User name (Email address)
Password
Confirm password
Secret question
Question answer
Last name
First name
All other areas of the personal information section are optional.
Account Settings
The account settings section of a user profile affects how information within the profile account is presented and sets
defaults for commonly used functions. Account settings include:
Default user type – select the type of user access to default to upon login
Default submission type – select a default submission type: single file upload, multiple file upload, cut and paste
upload, or zip file upload
Items per page – select the number of items you would like displayed per page
Show page info – toggles the info messages at the top of each page on and off
Send me Email updates – choose yes to receive Email updates from Turnitin
Use homepage link – choose yes to create a homepage link. To set up a link, enter a link name and URL below.
Default language - select the language in which Turnitin will display by default for this user when logged in
25
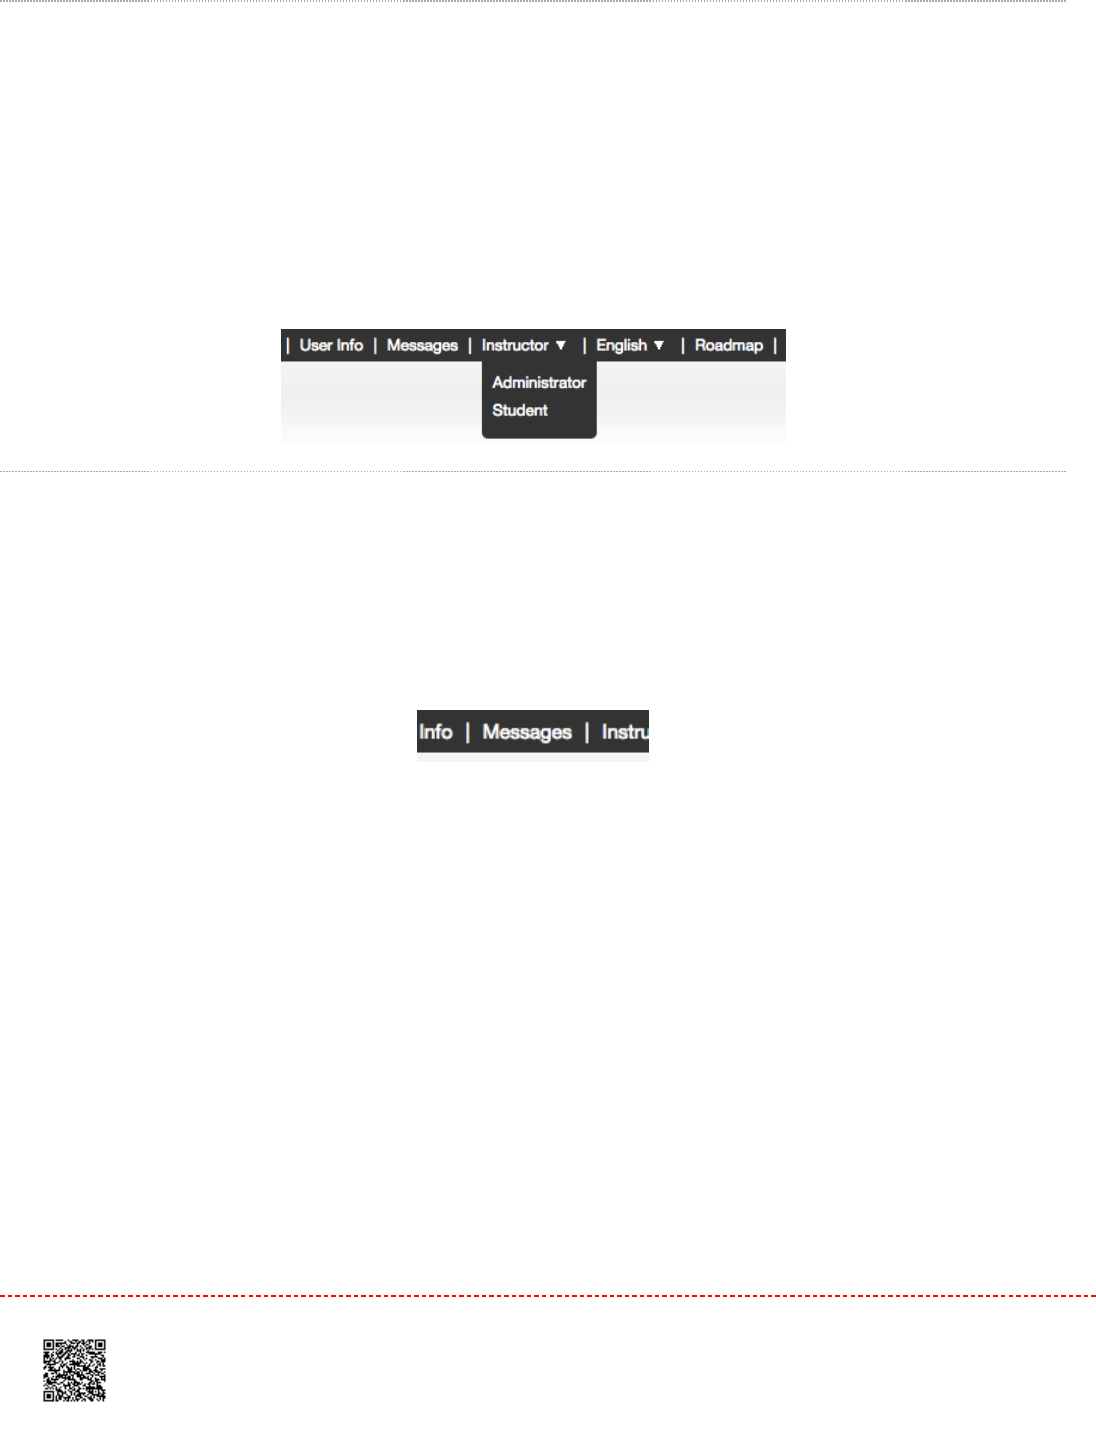
Changing User Types
A single user profile can access multiple roles on any Turnitin account, including instructor, student, and administrator
functions. To access the student or administrator homepage, you will need to change your user type in the top left
hand corner of the web page. For more information on using the system as a specific user type, please refer to the
corresponding User Guide.
Messages and Announcements
To view important Turnitin messages and announcements, click on the messages button on the system bar.
WarningWarning: Urgent notifications may appear both on the messages page and on the Turnitin user homepage. These
include messages announcing scheduled downtimes.
26

Student Enrollment
Once a class and assignment have been created, the instructor or students are ready to begin submitting papers and
using Turnitin. If the instructor is planning to do the submissions of papers, please skip to the next section,
Submitting
Papers
.
WarningWarning: It is strongly recommended that students submit papers themselves. This will save time and enable the
use of the PeerMark, GradeMark and Gradebook products. PeerMark, GradeMark and Gradebook products.
Enrolling Students
Students must be enrolled in a class to submit papers, access grades, or access peer review assignments. Students
can self-enroll by creating a user profile using the class ID number and class enrollment password. You can enroll
students in a class one by one or by uploading a list of e-mails and student names.
If you choose to add students to the class directly, each student added to the class will be automatically e-mailed and
provided with instructions on how to create their password. If the e-mail address entered when adding a student is not
valid, the student will not receive an e-mail. For this reason, students who do not possess valid e-mail addresses must
enroll themselves using the class ID and enrollment password.
Allowing Students to Self-Enroll
Students self-enrolling into a Turnitin class must have the numeric class ID and the case sensitive class enrollment
password. This provides a student user with authorization to access the class on Turnitin. Please do not post the class
ID and password on a publicly accessible website; this is to ensure only your students enroll in your class.
27

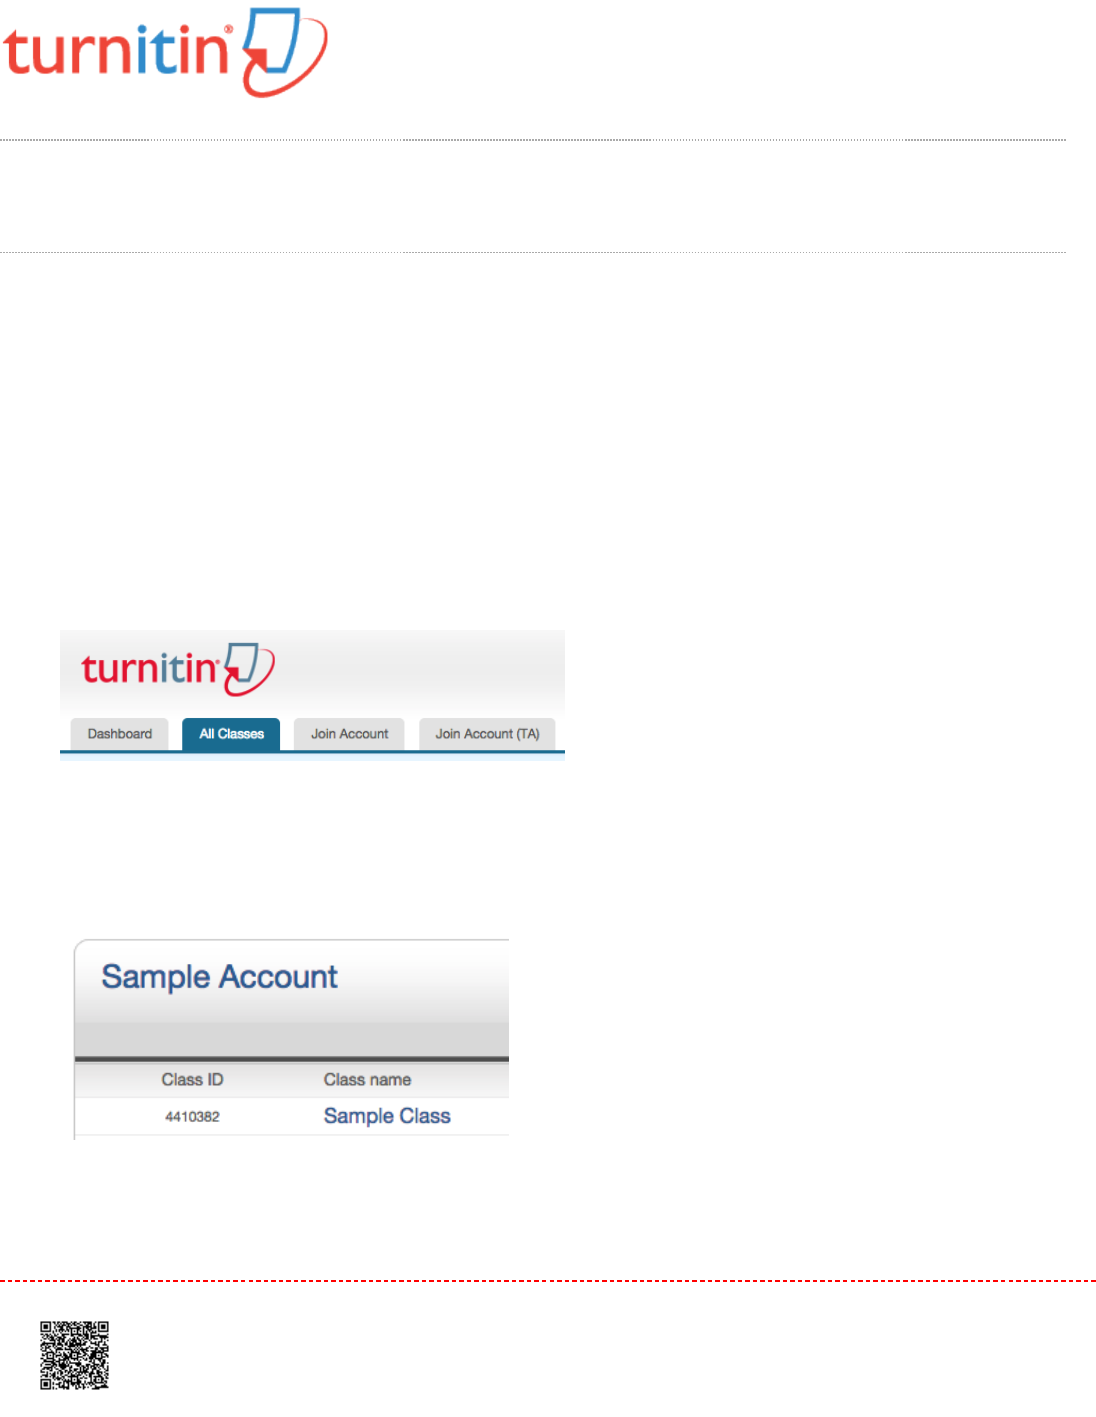
1.1. To confirm the class ID and enrollment password, click on the statistics icon next to the class name under the
statistics column on the Turnitin instructor homepage.
2.2. The class ID and enrollment password are displayed as part of the class statistics.
If needed, you can change the enrollment password to remove accidental capitalization or spaces that may be causing
student enrollment issues. Changing the enrollment password after student enrollment is completed also prevents
students with forgotten passwords from enrolling multiple times and causing confusion.
To change the enrollment password, click on the edit icon for the class on the Turnitin instructor homepage. Update the
enrollment password and click on submit to save the change.
28
For step by step student oriented instructions or student self-enrollment information, please view the Turnitin Student
User Manual, Student Quick Start Guide, or Student training video.
Enrolling Students Manually
An instructor may add students individually to the class. You must provide first name, last name, and e-mail address for
the user. A welcome e-mail will be sent to the student being added to the class.
If the e-mail address provided already exists on a user profile on Turnitin, the user welcome e-mail indicates only that
the user has been added to a class as a student.
If the Email address provided by the instructor has never been used to create a Turnitin profile before, a new user
welcome e-mail is sent. The student is provided with a temporary password for logging into Turnitin to complete the user
profile.
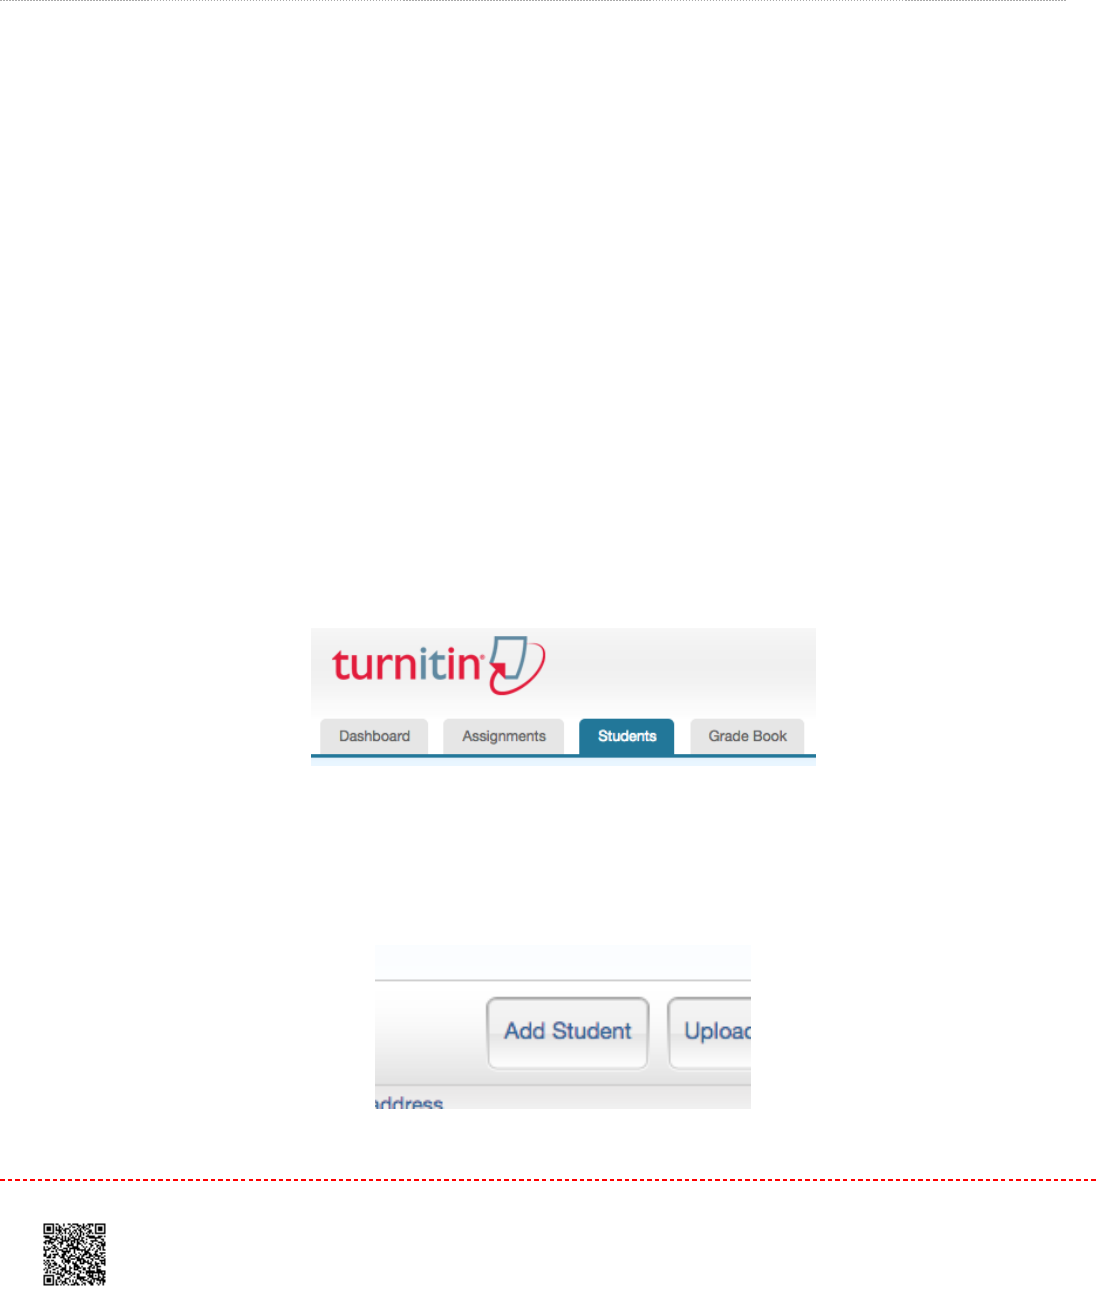
1.1. From the class homepage click on the
students
tab to open the student list for the class
22. Click the
add student
button
29
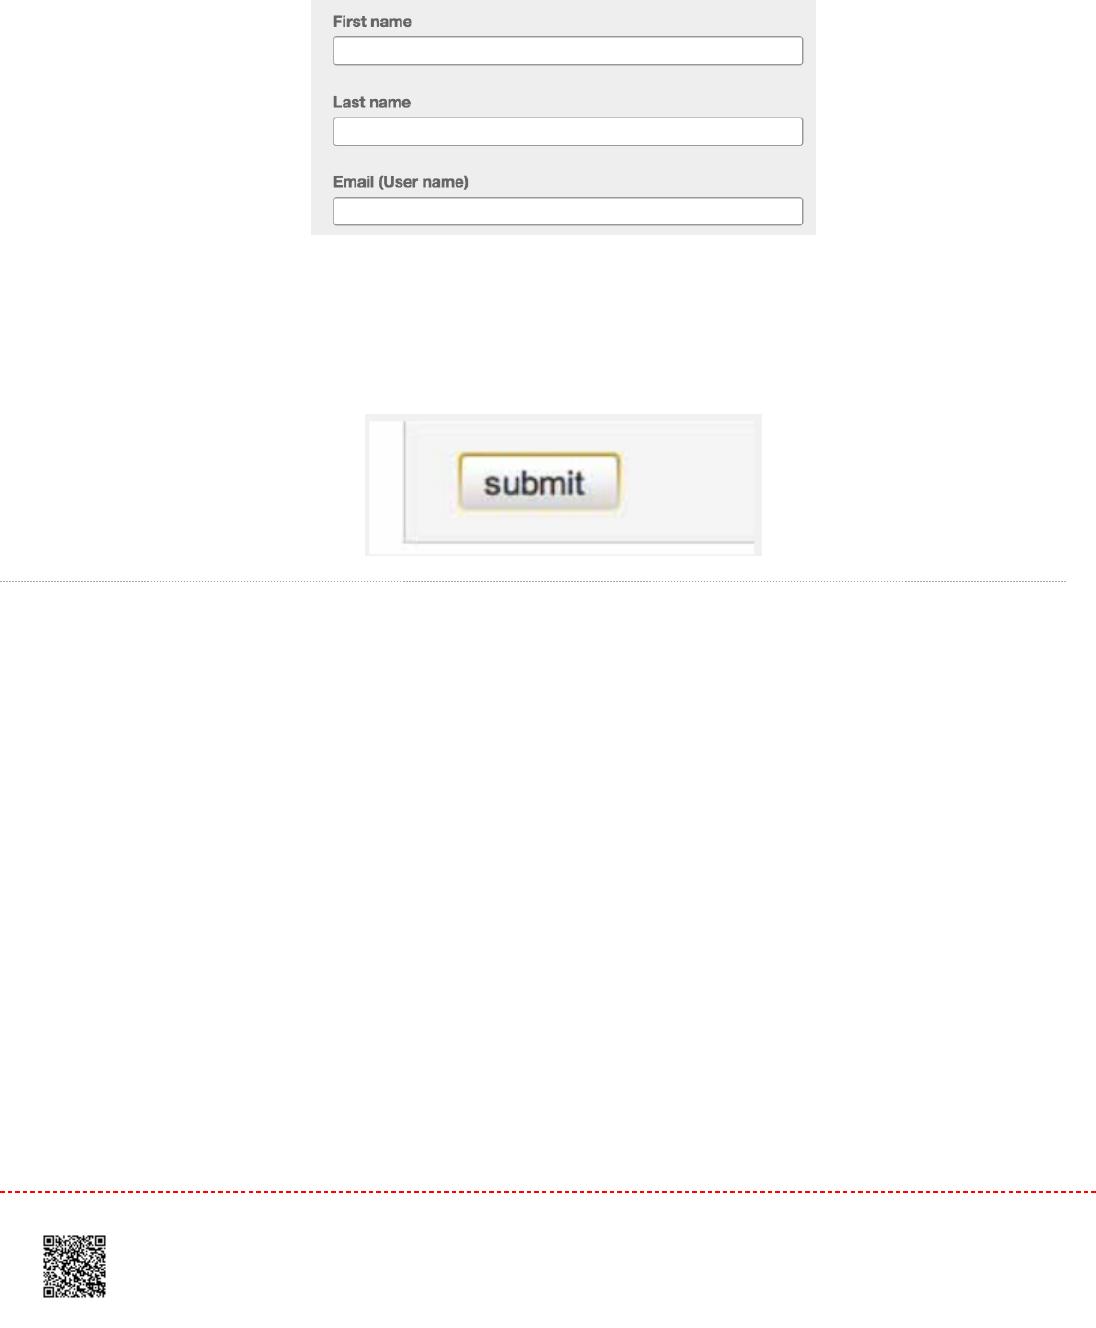
33. Enter the required information - the student first name, last name, and Email address
4.4. Click
submit
to enroll the student. A welcome Email will be sent to the user.
Enrolling Students From a List
You may upload a student list to add to a course. The student list must be one hundred (100) entries or less. Larger
classes may be separated into multiple lists, each of which can be uploaded individually.
The list must be a Microsoft Word, Microsoft Excel, or plain text (.txt) file. The first name, last name, and Email address
for each student must be provided. The formatting must be as follows:
Microsoft Word or Plain Text: John,Doe,[email protected]
Microsoft Excel:
30
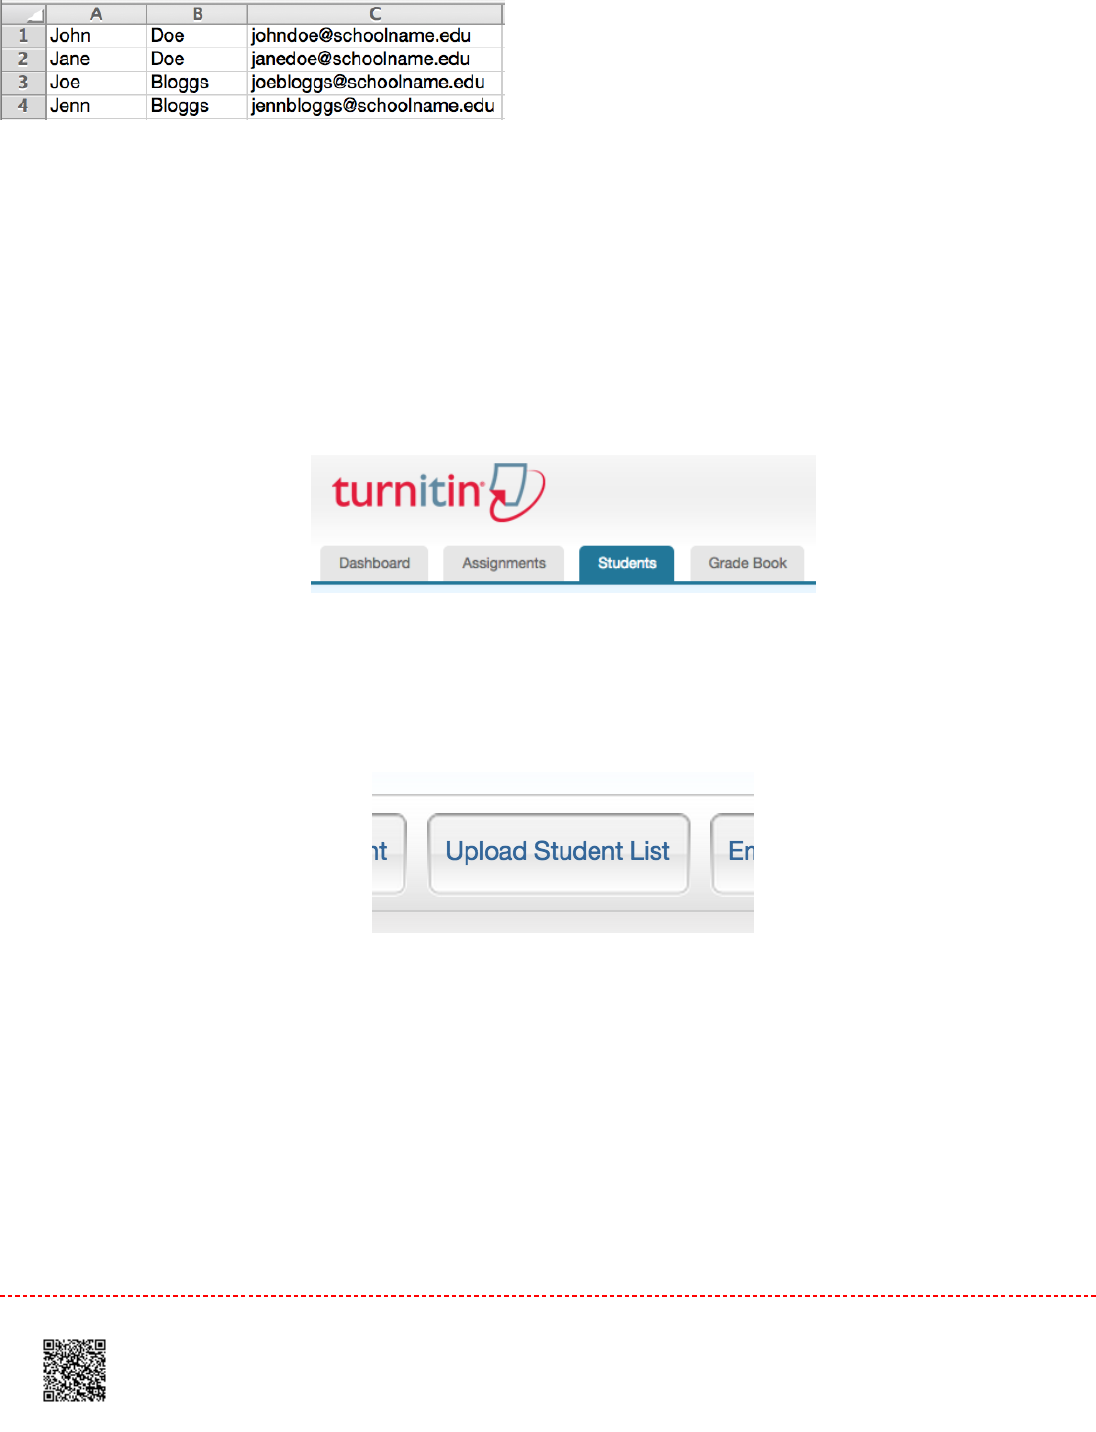
Once the student list is available, the list may be uploaded from the student page of the class.
11. From the class home page, click on the
students
tab
22. Click the
upload student list
button
33. Click the
Choose File
button and locate the file containing the student list on your computer.
31
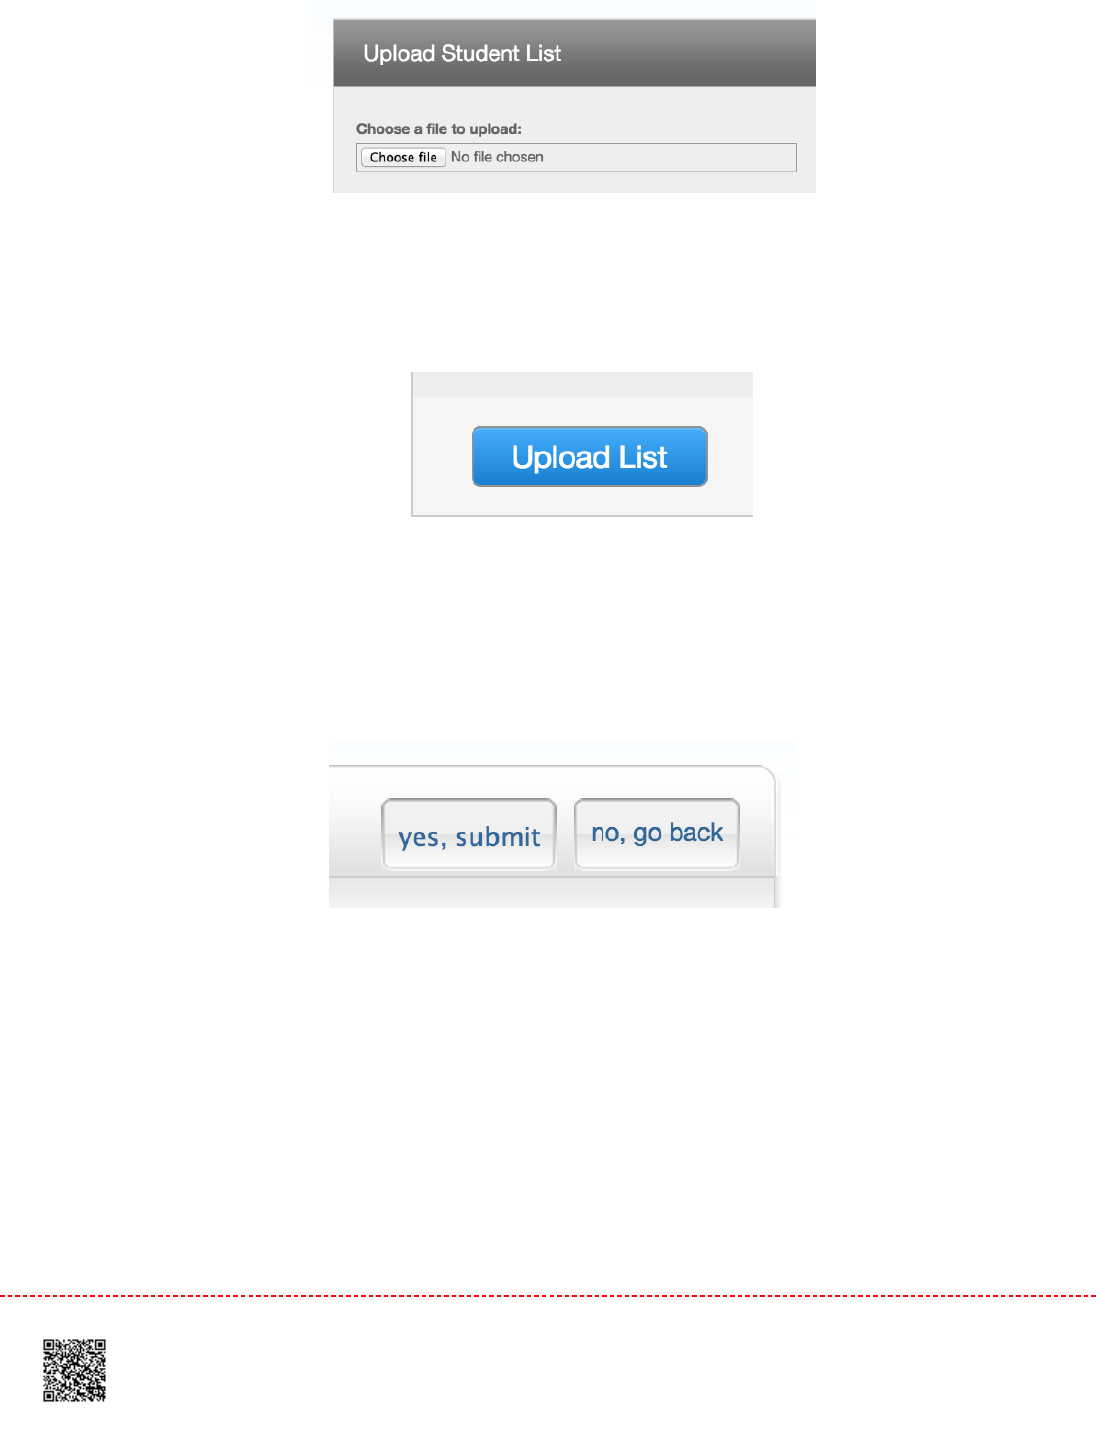
44. Click
submit
to upload the student list file
55. The student list will be displayed. Check the displayed list for errors. To submit this list, click
yes, submit.
If you
find any errors, or the incorrect file was selected, choose
no
, go back and make the necessary changes or select
a different file for step 3step 3
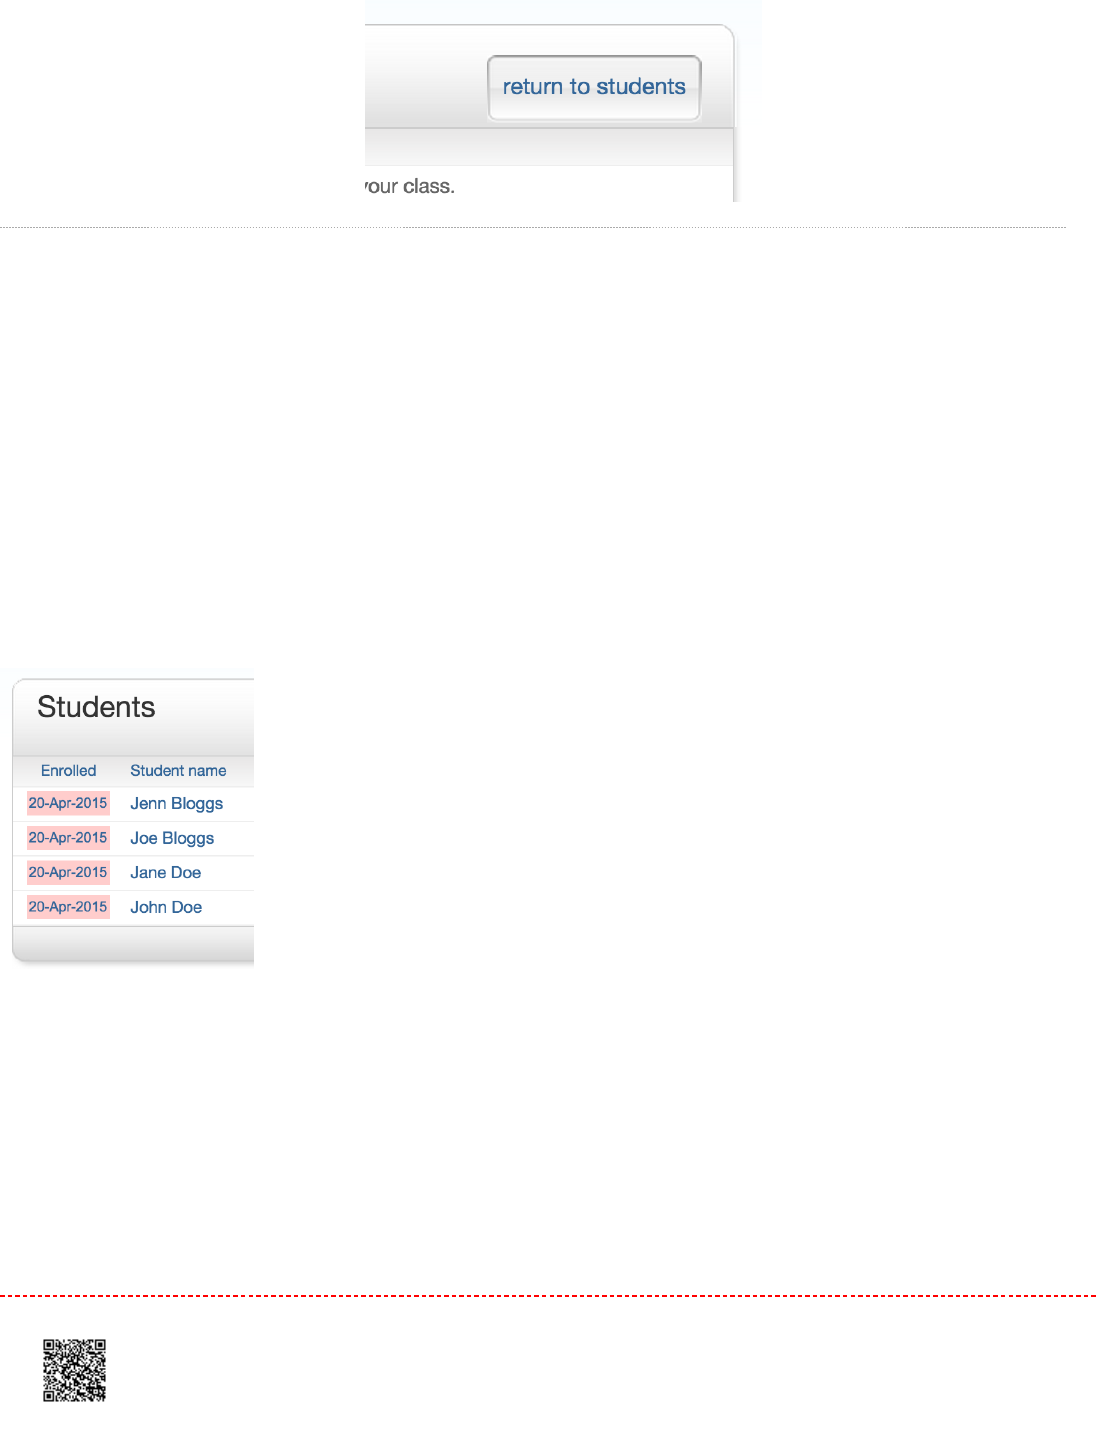
66. Once
yes, submit
has been selected the final screen will display the newly enrolled list of student users. To
return to the class student page
, click the
return to students
link in the top right-hand corner
32
Enrollment Emails
As soon as students are added to a class a confirmation Email is sent to the Email address provided. If the student has
an existing user profile, the confirmation Email contains only notification of the new class enrollment. If the Email
address used was not for an existing student user in the Turnitin system, the confirmation Email will allow the student to
create their password.
New student user profiles that have never logged in are indicated with a pink highlight over the enrollment date to the left
of the student name on the student list page.
Re-sending New User Enrollment E-MailRe-sending New User Enrollment E-Mail
You can re-send the welcome Email to student users who have not yet logged into Turnitin. You can also change the
Email address or name information to fix any incorrect information in the event that a student no longer has access to
the Email address used initially for the user profile.
33
Students who did not receive the enrollment Emails will need to check junk mail or any other mail filters (such as
parental filters on Email account) and ensure that they are able to receive Emails from [email protected] and
[email protected] before the welcome Email is re-sent.
Student users who have logged into Turnitin one or more times cannot have this information reset by yourself and must
use the Forgot Your Password? link on the Turnitin homepage.
How to Re-Send a Welcome E-mailHow to Re-Send a Welcome E-mail
You can re-send welcome e-mails from the student list page of a class. To reach the student page, click on the class
name and then the gray student tab above the assignment list.
On the students page, any students who have never logged in and completed the information on the user profile will
have a pink highlight over the date in the enrolled column to the left of the student name.
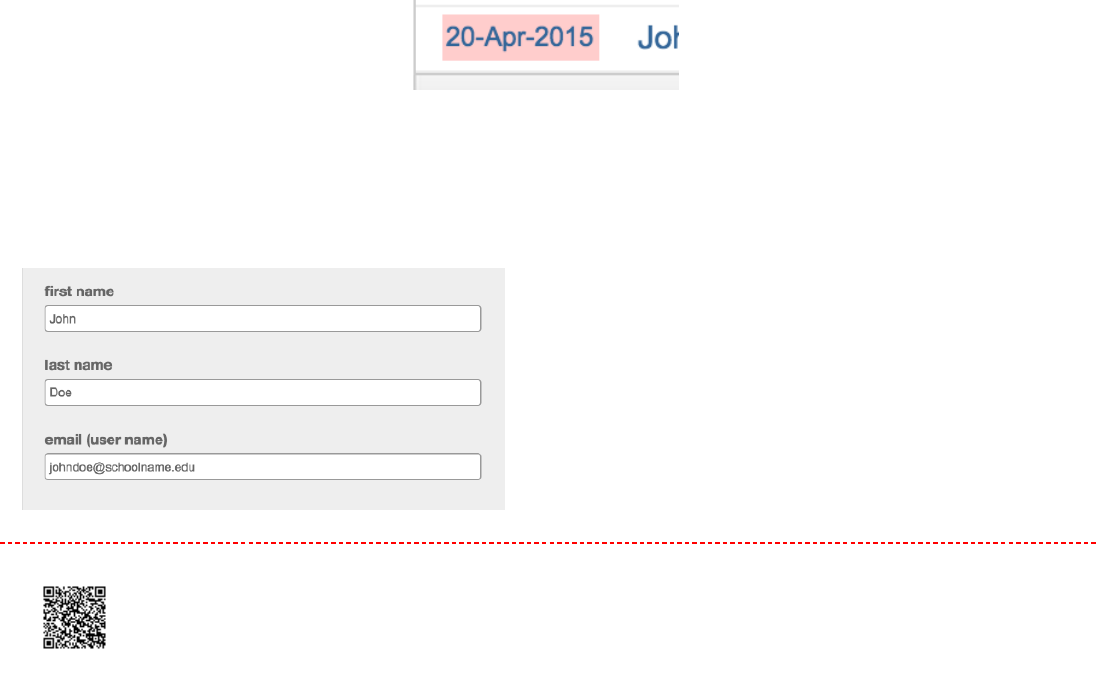
To re-send the activation Email, click on the pink highlighted date to the left of the student name.
Check the user information and make any needed changes to this information.
34

To send the new user confirmation and welcome Email, click on
submit
. A new copy of the welcome e-mail, including
temporary password, will be sent.
Training Video: Adding Students to a Class
Media, iframe, embed and object tags are not supported inside of a PDF.
35
Managing Classes
Creating a Class
The creation of a class or classes on the Turnitin system is the first step in allowing an instructor and students to access
and use the services available at their institution. Most instructor and student activity on Turnitin occurs within the class
or classes created by an instructor.
The class is used by the instructor to organize students and student submissions into groups. A single class may be
used for multiple courses, but is typically not recommended due to the additional challenges this can create in
organization. A class and its assignments are fully available to the instructor between the date of the class creation and
the selected expiration date. Once a class has expired, the information and assignments in the class are viewable, but
no new submissions or assignments may be made. The instructor is capable of extending the expired class to reactivate
it.
New classes should be created each semester or school year when a new group of students is in a course.
Assignments can be easily imported to a new class using the directions under the Libraries section of this user guide.
This allows users to easily add assignment sets in a new course.
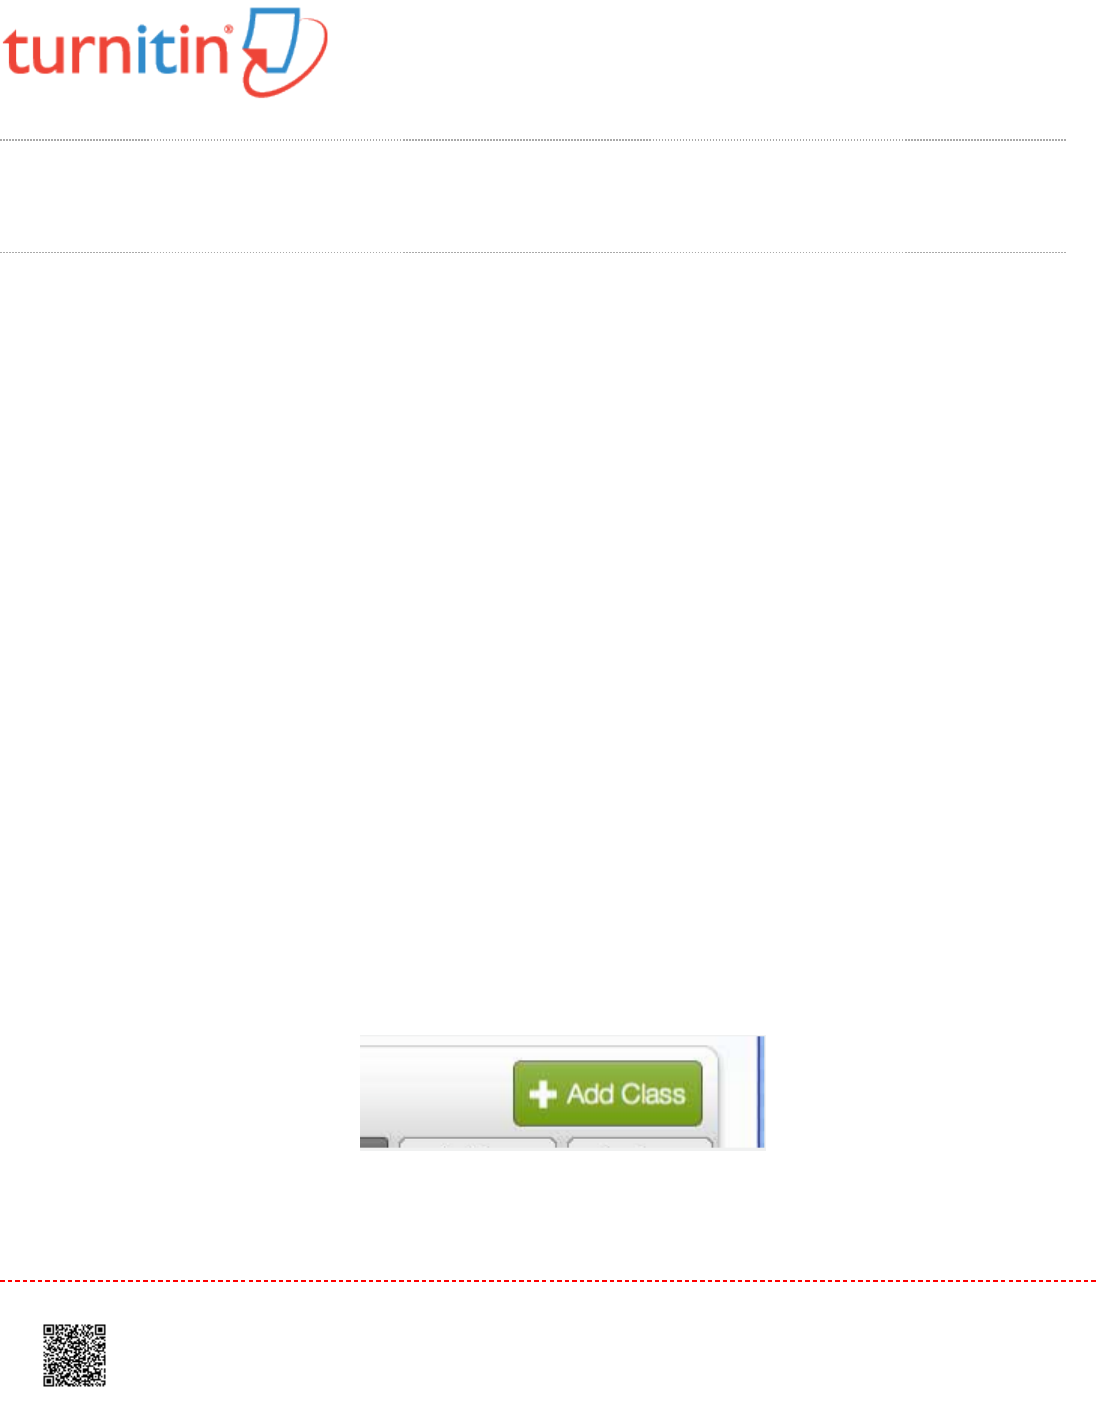
11. Click the
Add Class
button on your instructor homepage
36
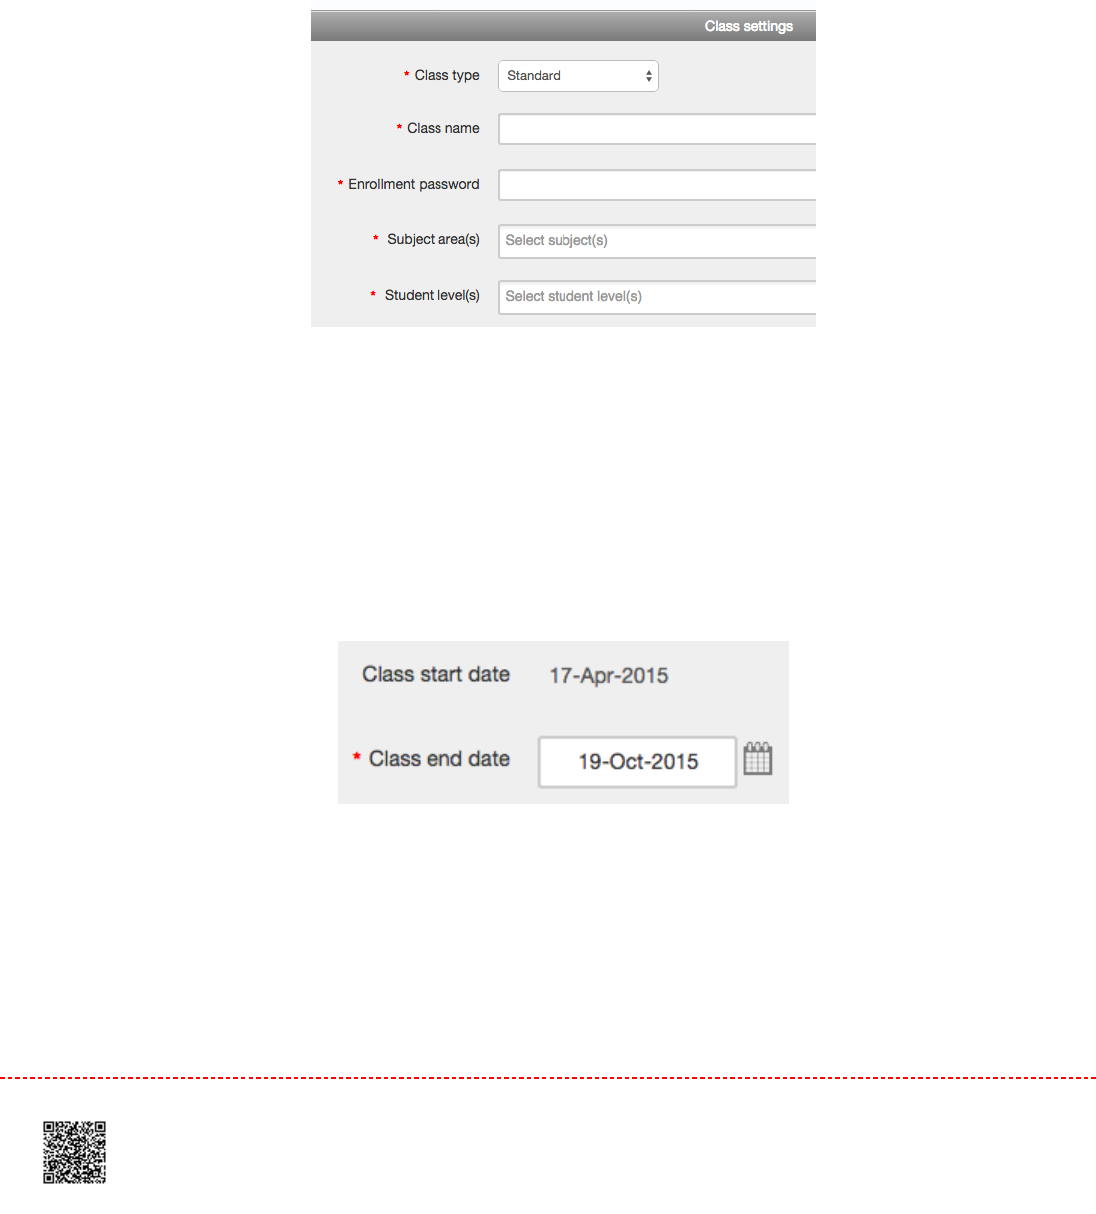
22. On the next screen, enter the following information:
Class name
Enrollment password
Subject area(s) e.g. science
Student level(s) e.g. postgraduate
NoteNote: Your class name should be between 2 and 100 characters long.
33. Select the end date for the class. Once the end date has passed, the class will not be accessible for
submissions unless the class is reactivated.
44. Click
submit
to add the class. Class information will be displayed in a pop-up window containing the ID
and enrollment password for confirmation
37
Training Video: Creating a Class
Media, iframe, embed and object tags are not supported inside of a PDF.
Expired Classes
Every class created on Turnitin has an end date. When the end date is reached, the class expires and is limited to read-
only access and will no longer appears on the active classes list.. The students and instructor will no longer be able to
submit papers or peer reviews, create assignments, or mark any of the papers using GradeMark.
To view expired classes only, click on the E
xpired classes
tab on the Turnitin instructor homepage. The A
ll Classes
tab,
to the left of the Expired Classes tab, will list both active and expired classes.
Reactivating an Expired Class
An expired class can be only reactivated by the instructor. The edit icon can be used to reactivate the course by giving it
a new end date. The instructor can change the end date of the class from the class update screen. Once the end date
has been changed, the instructor must click on
submit t
o save the new end date and reactivate the class.
38

Copying a Class
Turnitin allows instructors to easily copy classes for reuse in another semester or year. When a class is copied the
instructor is prompted to enter a new class name, enrollment password, and the start date for the first assignment in the
class. The remaining assignment and discussion dates for the class will automatically be set based on the start date you
set for this assignment.
11. Click on the class copy icon to the right of the class name
22. On the next screen, edit the following information:
Class name
Enrollment password
33. Select the start date and time for the first assignment for the class
39
44. Click
Save
to copy the class or
Cancel
to abort the process
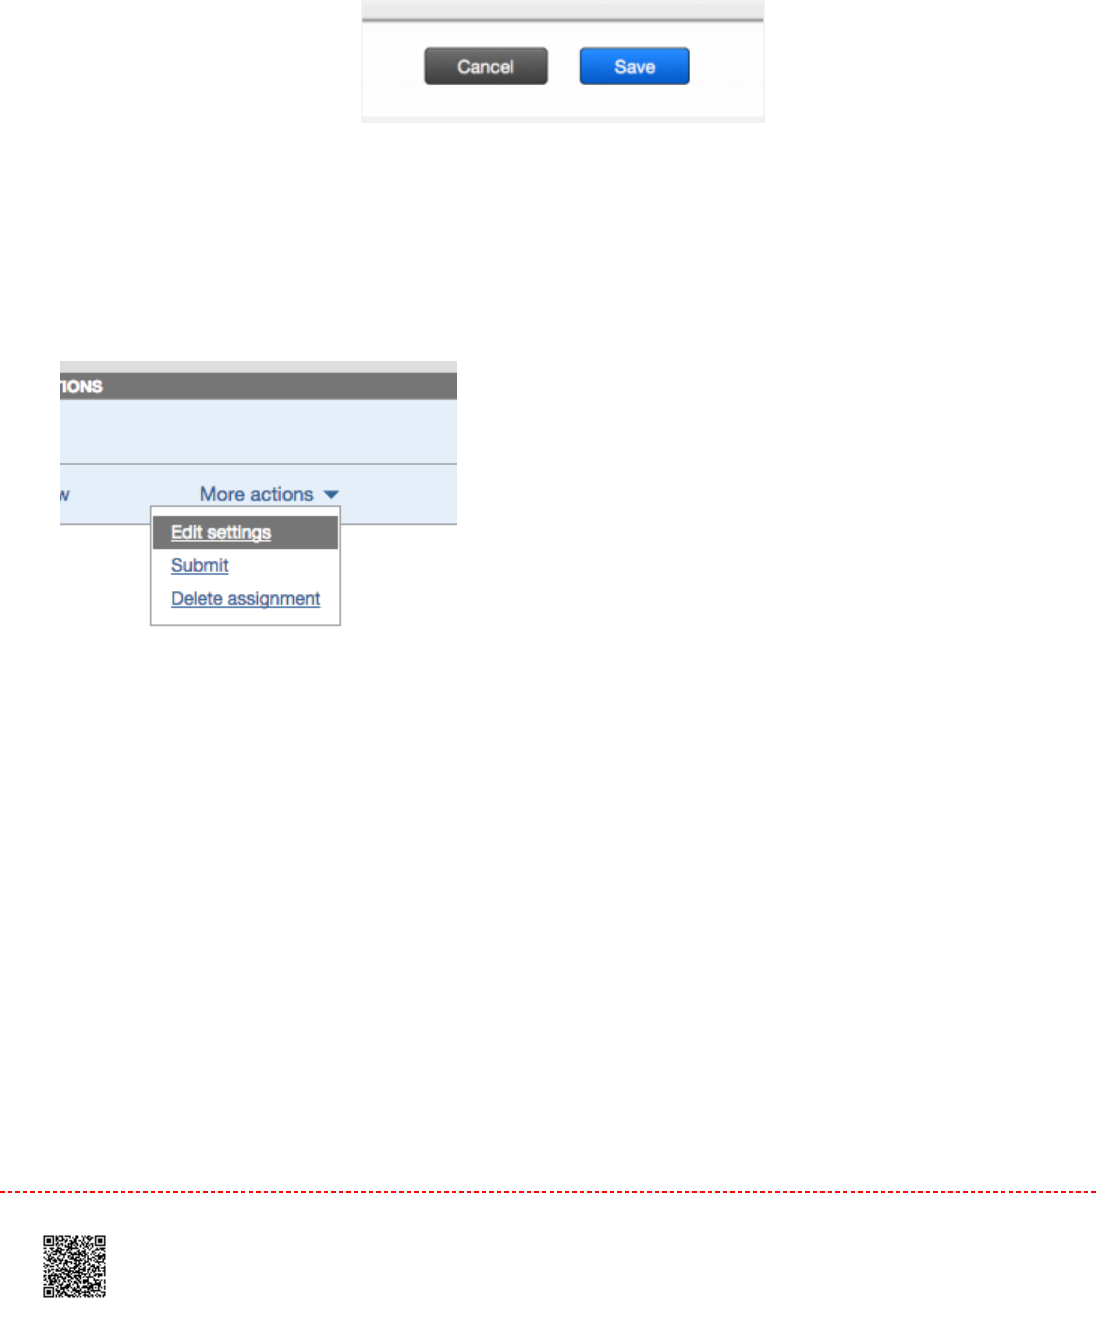
5.5. You will then be directed to the copied class' page, where you can review the dates for the assignments in the
copied class. Edit any assignment dates by clicking on the
More actions
link to the right of the assignment, and
then select
Edit settings
from the dropdown menu.
40
Class Calendar
The class calendar automatically tracks important dates for the Turnitin assignments created in a class. It also allows an
instructor to add class notes, announcements, and holidays. If an instructor has prepared a syllabus document for the
class, the instructor can also upload the class syllabus to the calendar area. Turnitin assignments created in a class. It
also allows an instructor to add class notes, announcements, and holidays. If an instructor has prepared a syllabus
document for the class, the instructor can also upload the class syllabus to the calendar area.
Students access information posted to the class calendar from the student class calendar option that is available to
students on the class homepage.
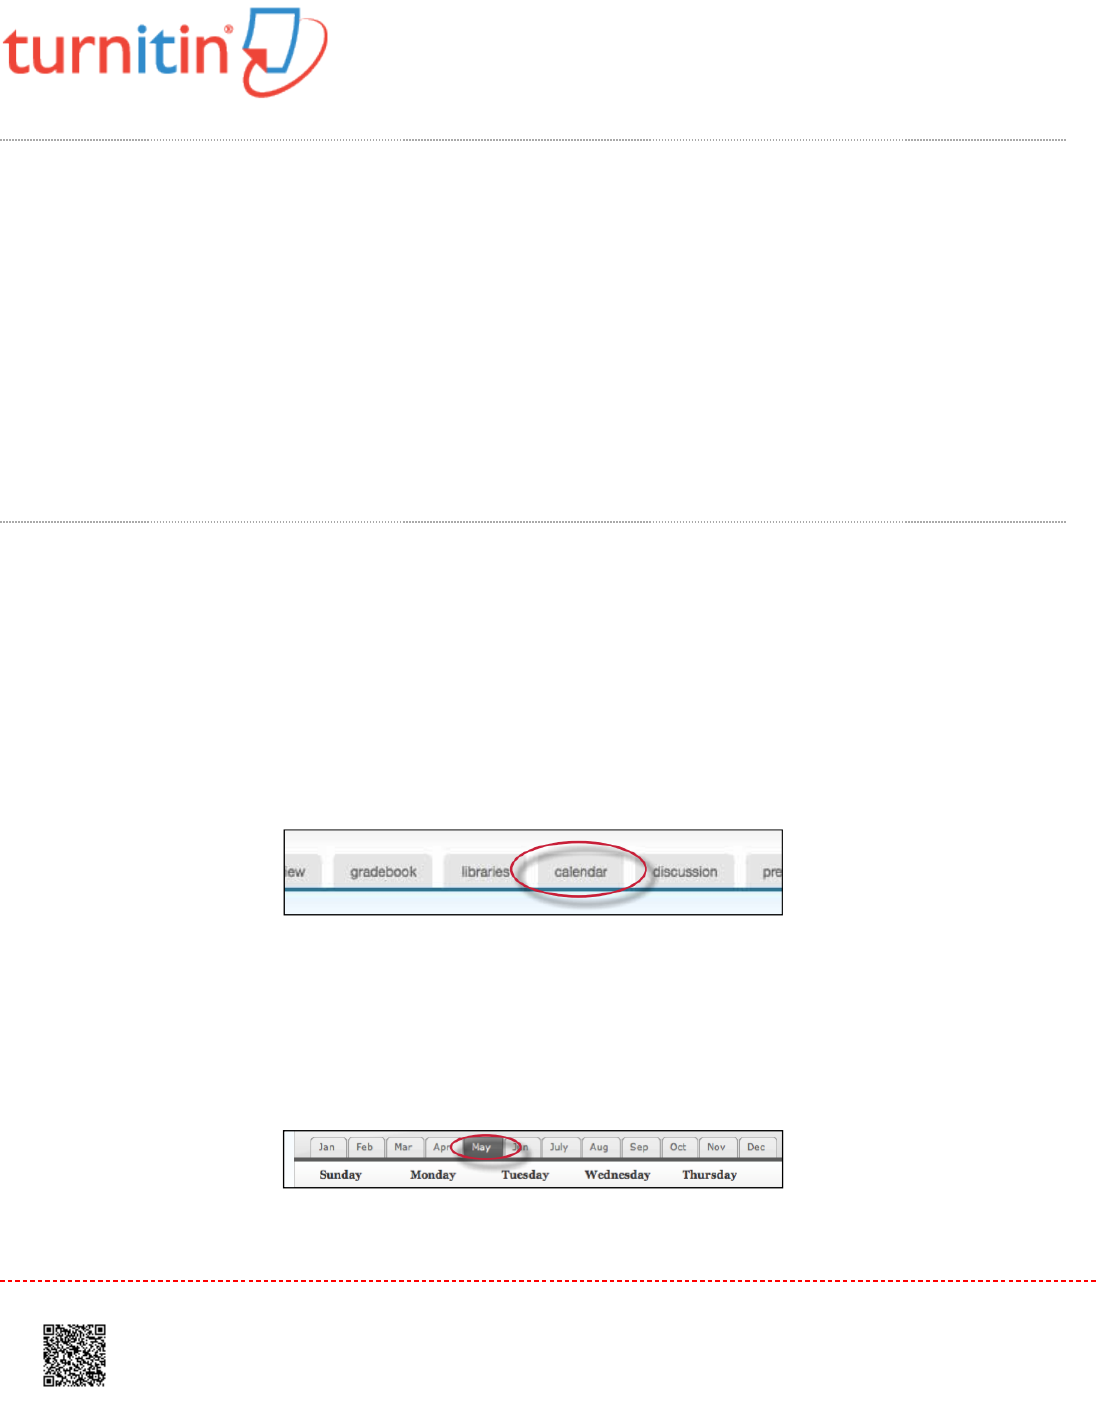
Accessing the Class Calendar
To access the class calendar, the instructor must log into Turnitin and click on the class name to enter the class. Once
the class is open, click on theTurnitin and click on the class name to enter the class. Once the class is open, click on the
calendar
tab to open the class calendar.
When the calendar opens it will display the current month and year. The instructor can move between months of the
year by clicking on the month tabs along the top of the calendar.
41
To change the year view, use the
year
pull down menu to select a year to view.
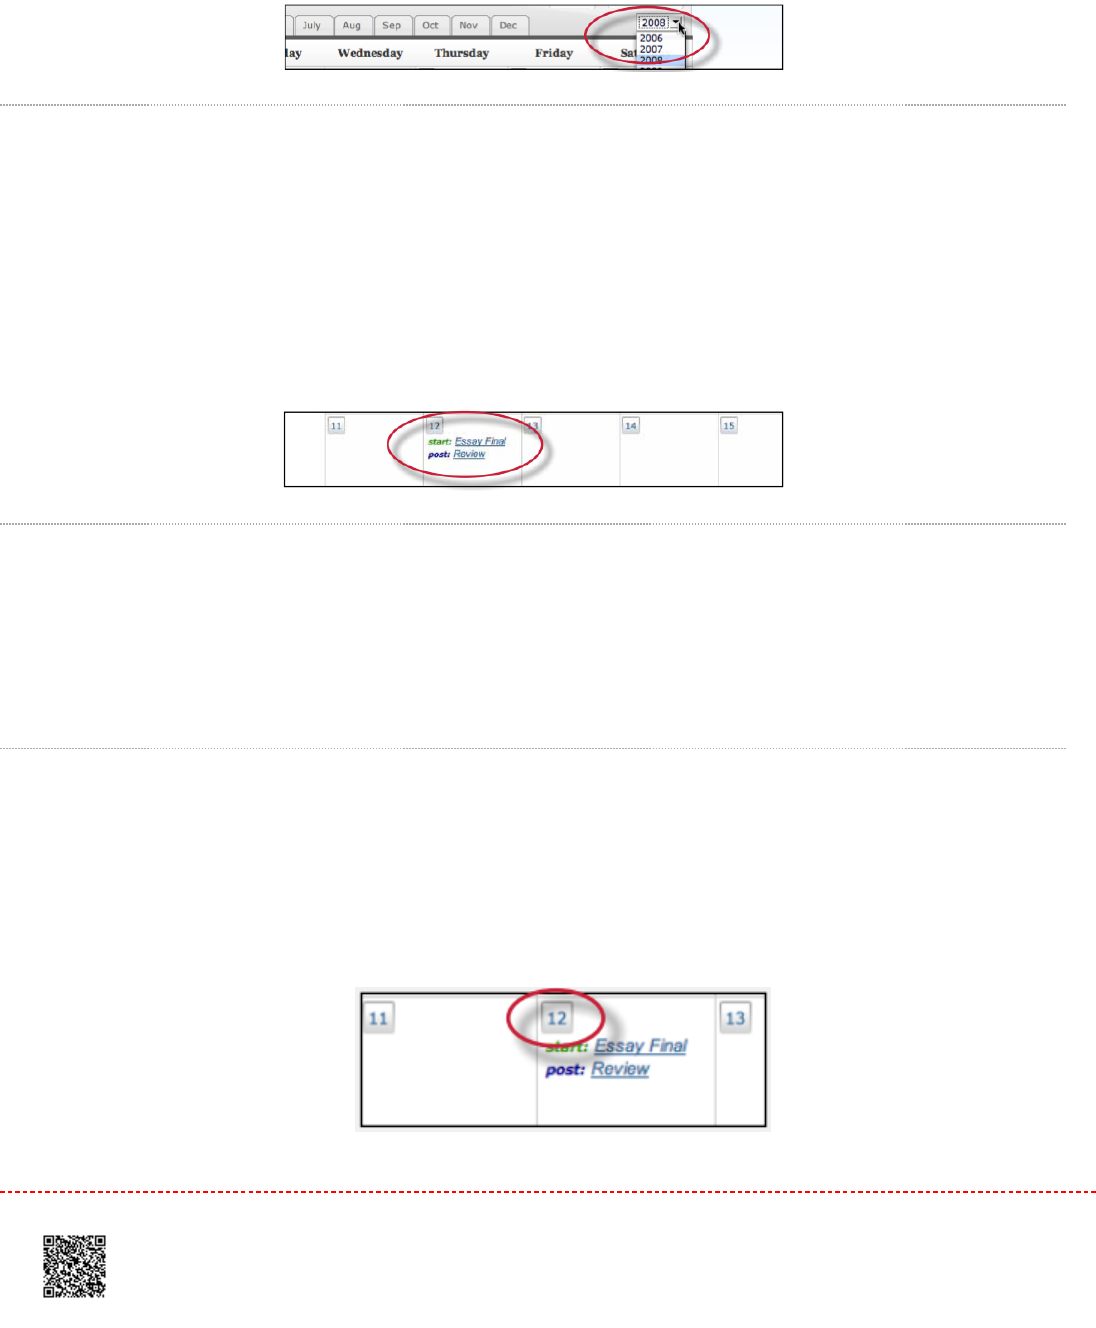
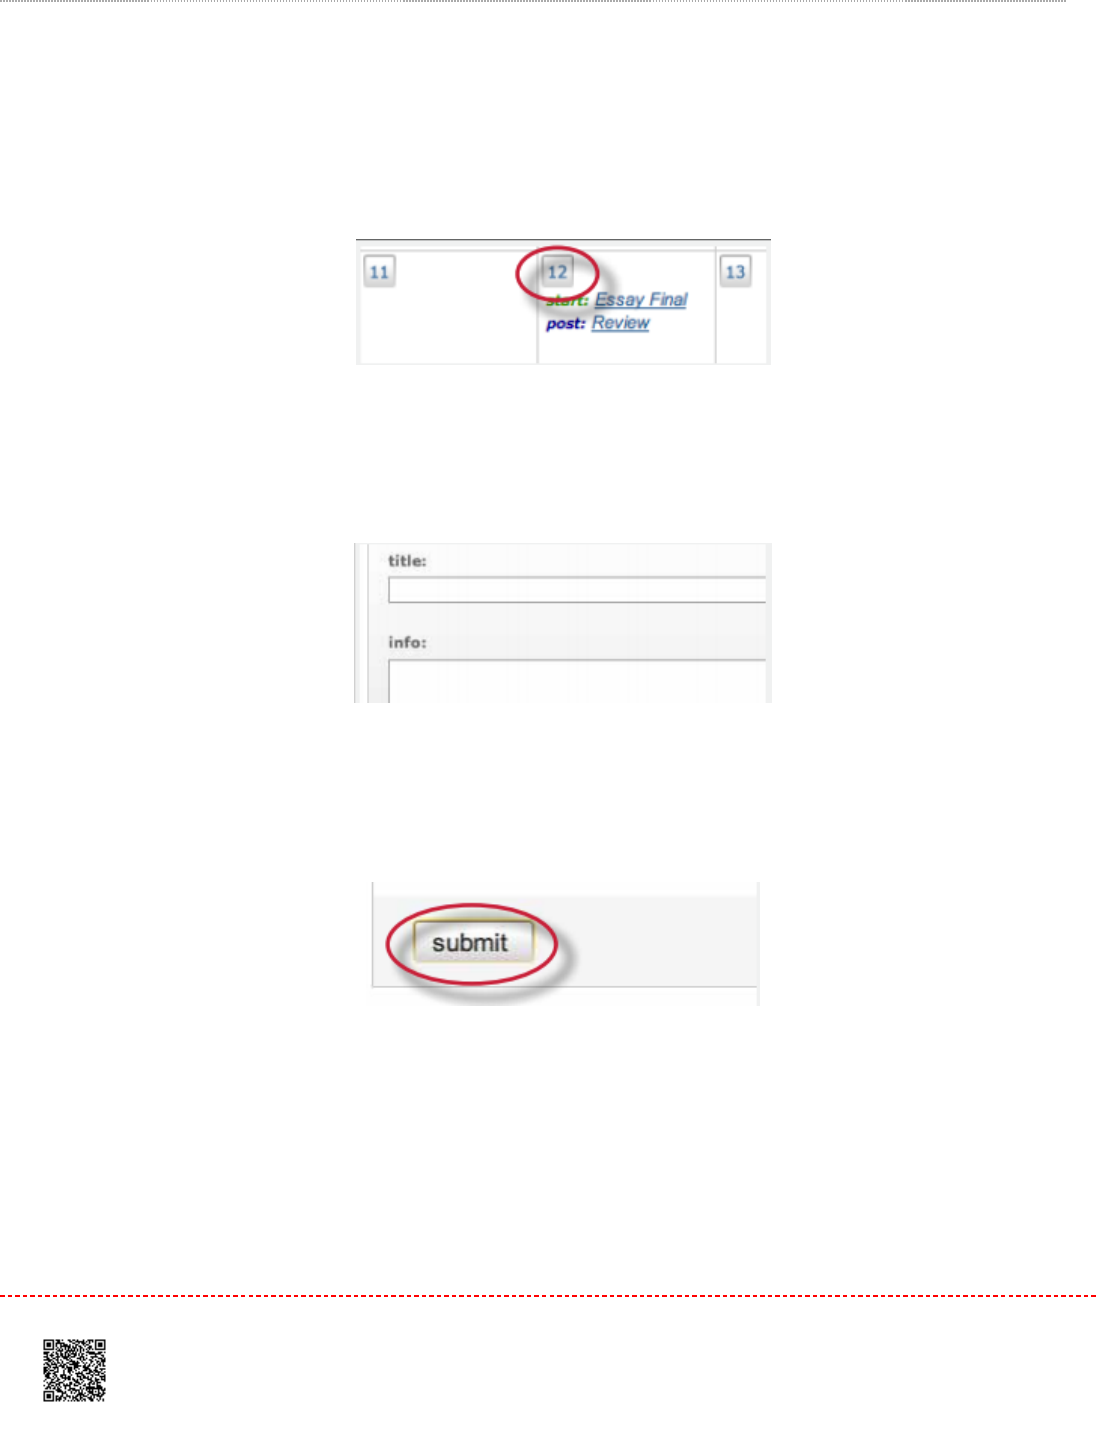
Assignment Dates
Assignments and peer reviews created by an instructor automatically become part of the class calendar. A link appears
for each assignment’s date. The link displays the assignment or peer review title. To view a summary of an assignment
or review, click on the assignment or review title on the class calendar.
Calendar Entries
Class NotesClass Notes - class notes uploaded to the calendar are accessible to students enrolled in a class. The instructor can add
a single set of notes to a calendar date or can upload notes for multiple dates using the bulk upload feature.
To add a single class note document
11. Click on the
date
on the calendar for the day the note pertains to
42

22. From the calendar entry page, click
Browse
to select a note document to upload. Accepted file types
are Microsoft Word, Corel WordPerfect, RTF, PDF, plain text, and HTML
33. Click
submit
to upload the note to the class calendar
A notes icon will appear on the appropriate date on the class calendar for each set of notes that were submitted.
To display a note, click on the note pad icon for a date.
Announcements
Announcements can be added to the class calendar by the instructor. Students will see an announcement icon and be
able to view the announcement by clicking on the icon after the student accesses the class calendar page for the class.
43
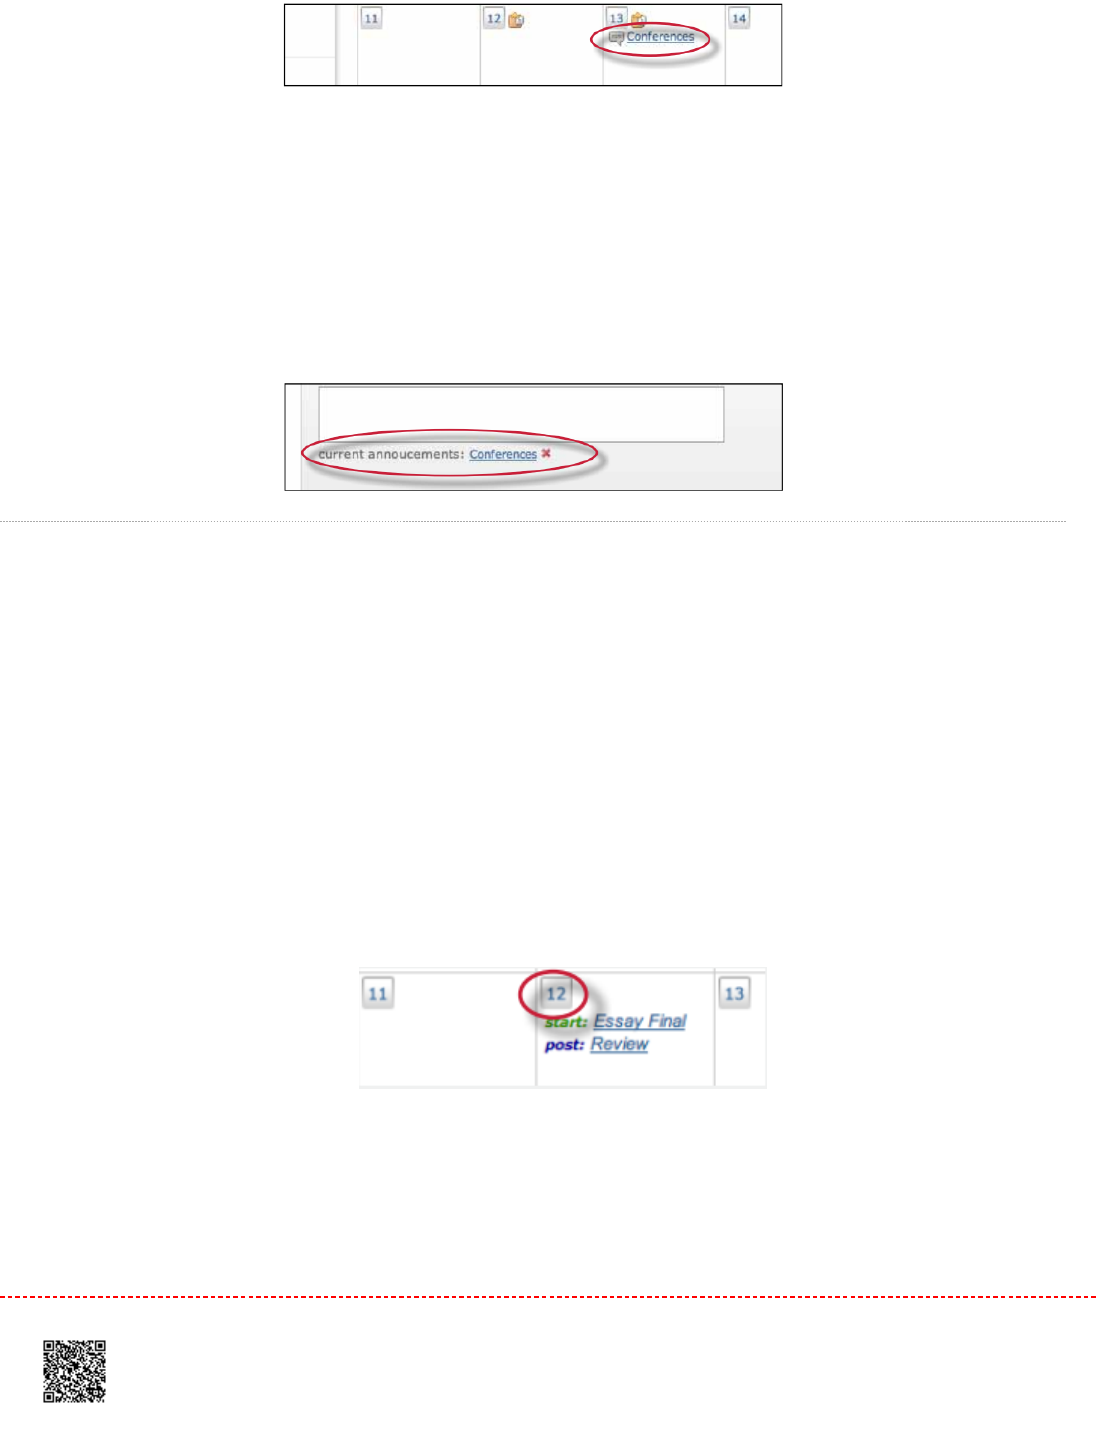
Adding an announcement to the calendar
11. Click on the
date
on the calendar for the day the announcement pertains to
22. On the calendar entry page, enter a title and additional information for the announcement
33. Click
submit
to add the announcement to the class calendar
An announcement icon will appear on the class calendar along with a linked announcement title. Students or the
instructor can view the full announcement detail by clicking on the link.
44
To delete an existing announcement, click on the date of the announcement. The screen will display all announcements
that have been added to the selected date.
To delete an announcement click on the red xx icon to the right of the announcement.
Holidays
From the entry page, holidays can be added to the class calendar. If the class does not meet on a specified holiday, it
can be designated as a day off.
To add a holiday to the calendarTo add a holiday to the calendar
11. Click on the
date
on the calendar for the day the holiday pertains to
22. On the calendar entry page, enter a name for the holiday in the holiday field
45
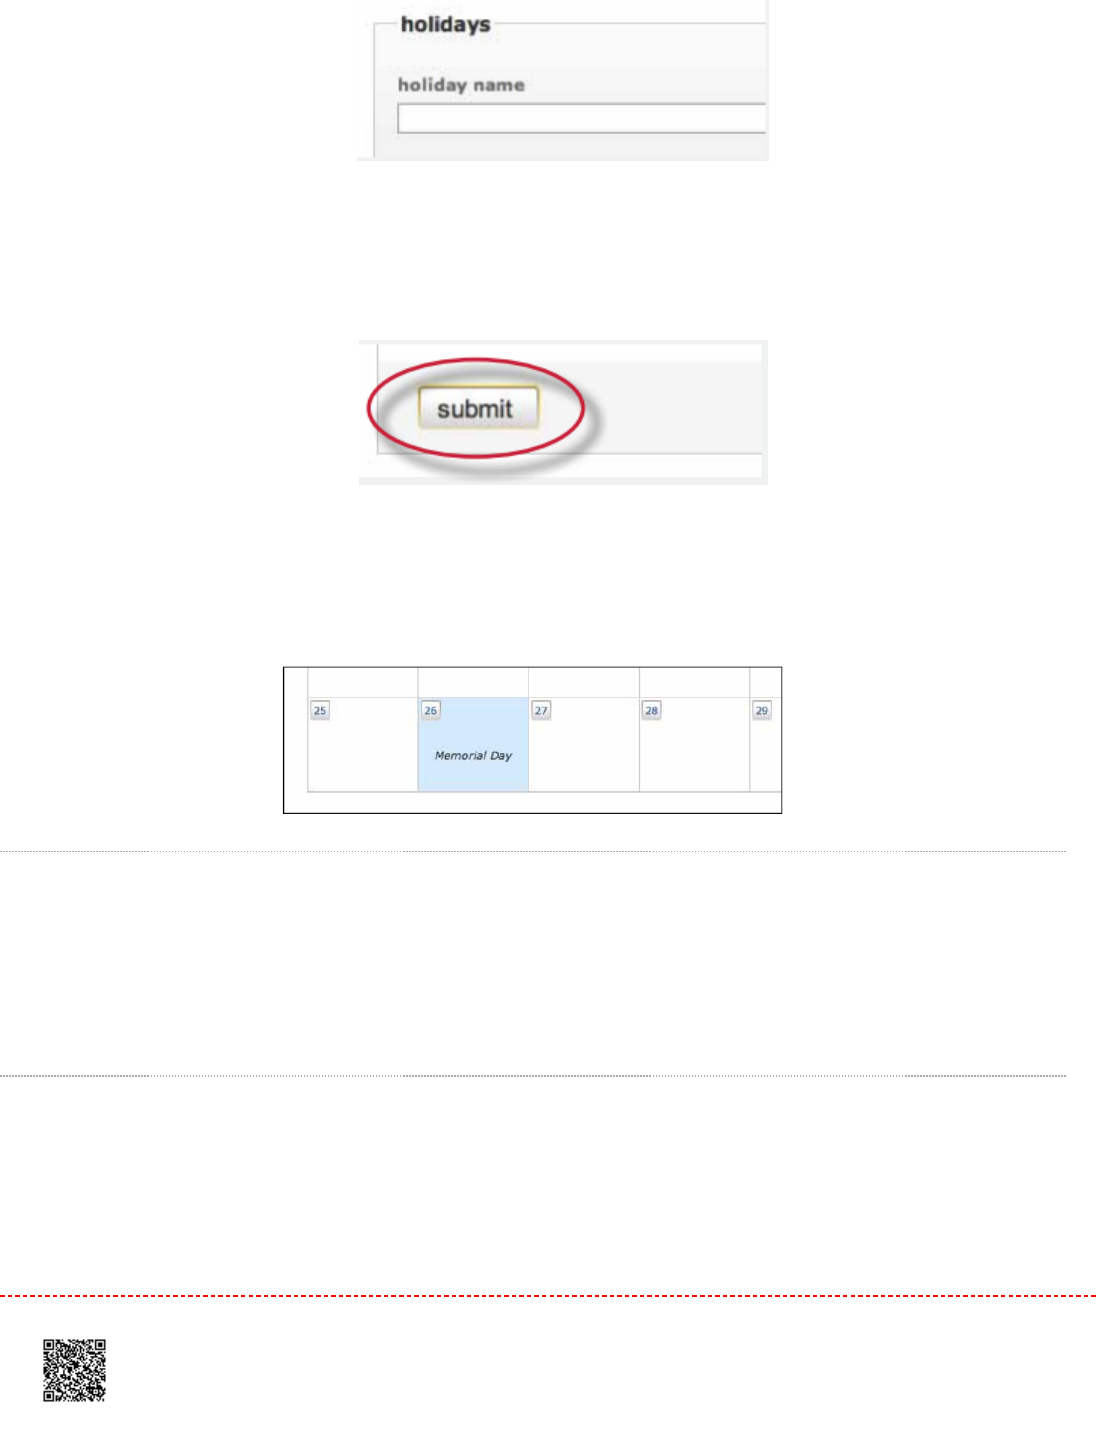
33. Click submit to save the holiday onto the calendar
The name for the holiday will appear on the class calendar and the day will be given a light blue highlight for emphasis.
Uploading a Syllabus
If a class syllabus has been written, an instructor can upload it to the class calendar. Students can view and download
the syllabus from the student view of the class calendar.
To upload a syllabus
11. Click the
syllabus
button on the class calendar page
46

22. From the syllabus page click the Browse button and locate the file to upload. Accepted file types are Microsoft
Word, Corel WordPerfect, RTF, PDF, plain text, and HTML
33. Click submit to add the document as the class syllabus
The syllabus will be posted to the syllabus page. If another syllabus is posted it will replace and overwrite the current
syllabus. Only a single document at a time will be available on the class syllabus page.
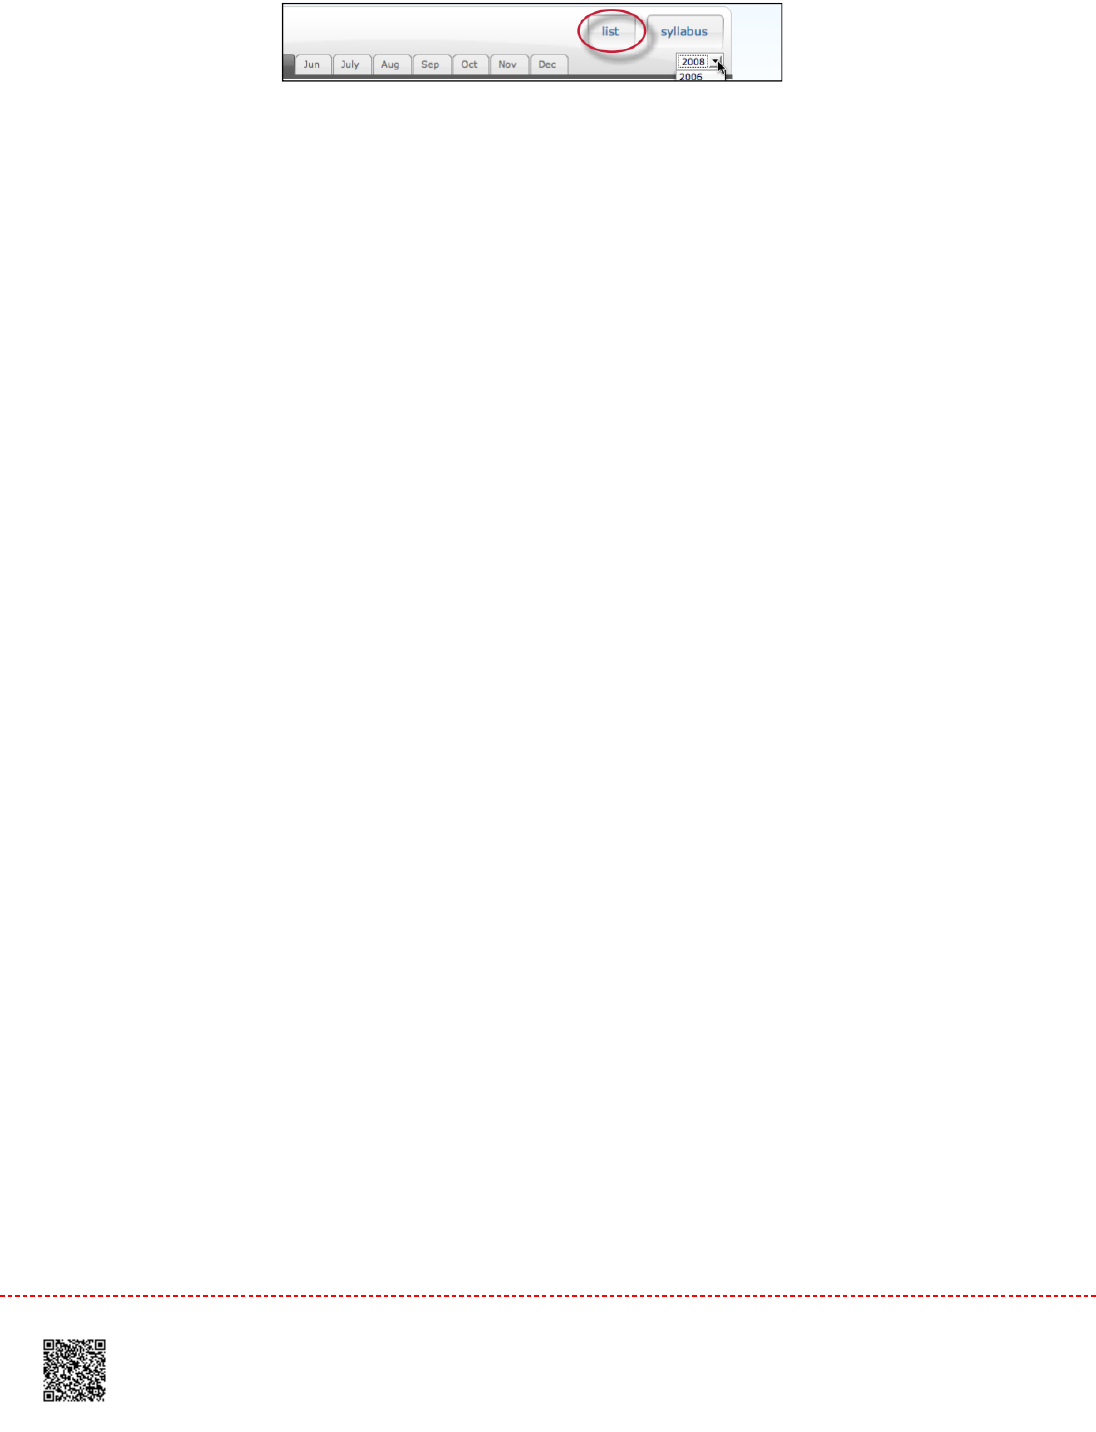
Calendar List
The calendar can also be viewed in list mode. The list mode displays all assignments and entries for the current
calendar year. Dates that do not have assignments or entries are excluded from the list.
To switch to the calendar list, click the list button on the calendar.
47
The calendar list mode works similarly to the calendar mode. Any item can be viewed by clicking on it. To update an
item, click the
update
icon to the right of the item.
To switch back to the calendar view, click the
calendar mode
button.
48
Master Classes
If sections of a class are taught by other instructors or by teaching assistants, a class with sections can be created on
Turnitin. A top-level master class is created to oversee the section classes. From the master class, the instructor
creating the master class can set up sections for the other instructors. These instructors are referred to in the master/
section class system as Teaching Assistants (TA’s).
The master class instructor can set up sections for each TA, or each TA can create a section by using the master class
ID and a TA join password set by the master class instructor. The master class instructor can set class preferences,
create and ‘push’ assignments to the sections, reassign a section to a new TA, or access the section.
Each TA can only access a single section of a master class. The same TA user may be added to multiple sections if
needed.
Adding a Master Class
There are two ways for an instructor to add a master class: creating a master class from scratch, or converting an
existing standard class into a master class.
Creating a New Master Class
To create a new master class from scratch, click on the add a class button on the instructor homepage of Turnitin.
49
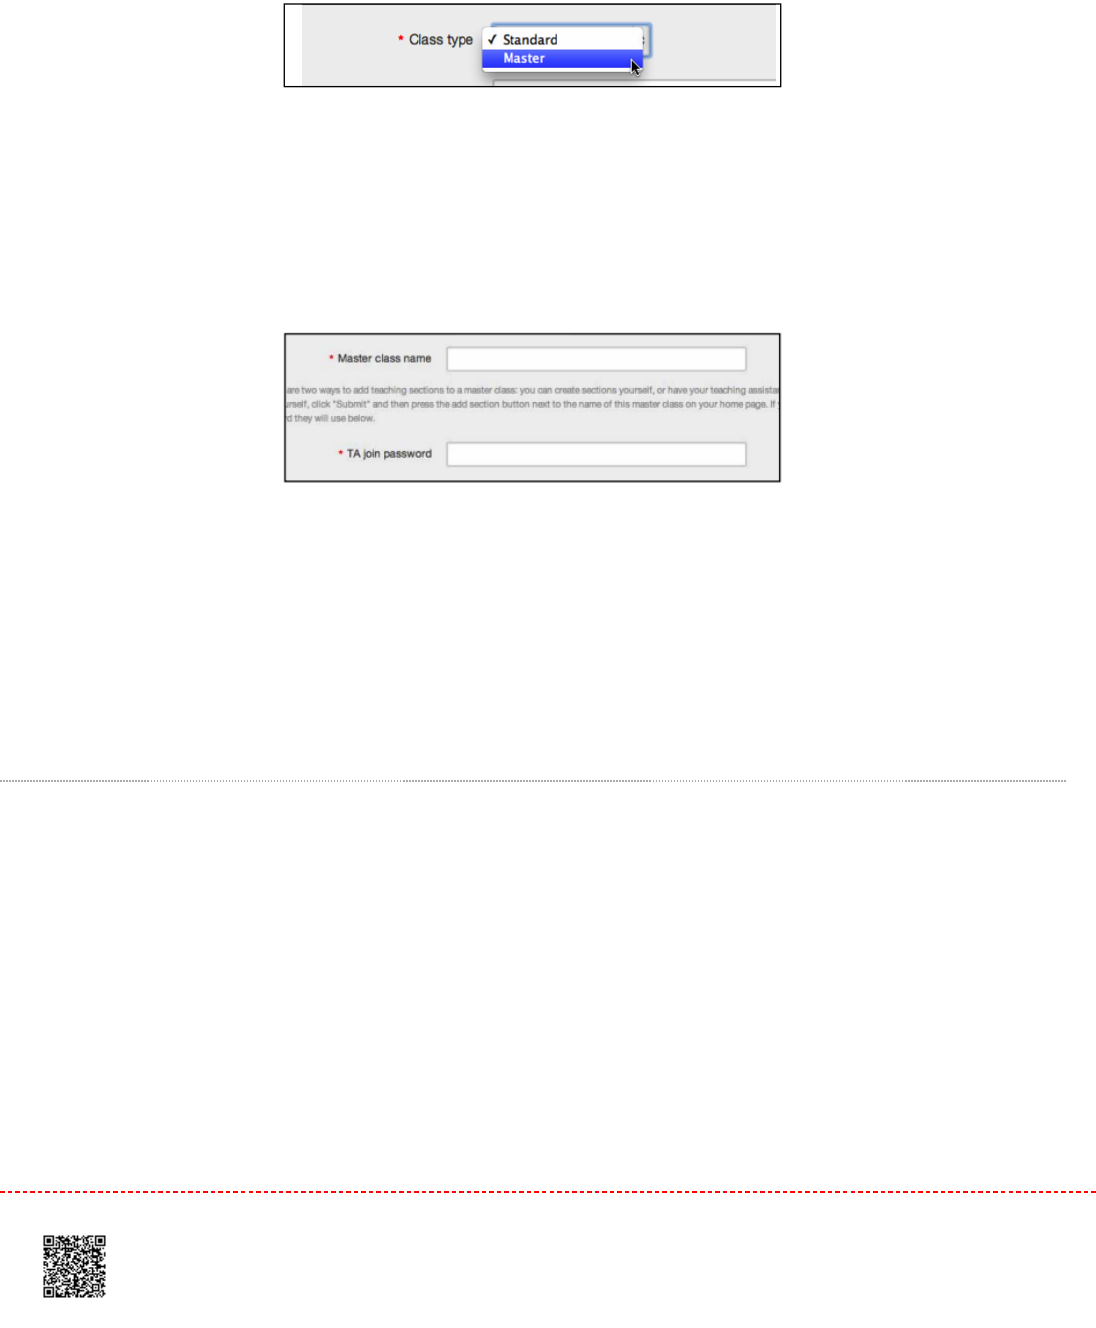
On the add a class page, use the
class type
: pull down menu and select
master class.
Enter a name for the master class and a TA join password. The TA join password is provided only if TA’s are creating
their own sections in the master class. The TA join password, combined with the master class ID number, should only
be provided if a TA is joining manually.
WarningWarning: Do not provide the TA join password or master class ID to students. Each section will have an individual
section class ID and section enrollment password that is used if students are manually joining the class on Turnitin.
Click the submit button and a new master class will be created. New master classes created from scratch do not have
any sections. To create sections, please see AddingAdding SectionsSections in this chapter.
Converting a Standard Class to a Master Class
An existing standard class can also be converted to a master class. The assignments and any papers, students, and
grade information in the standard class are placed in an automatically created section of the master class.
To convert a regular class into a master class, click the edit icon to the right of the class name on the instructor
homepage.
50
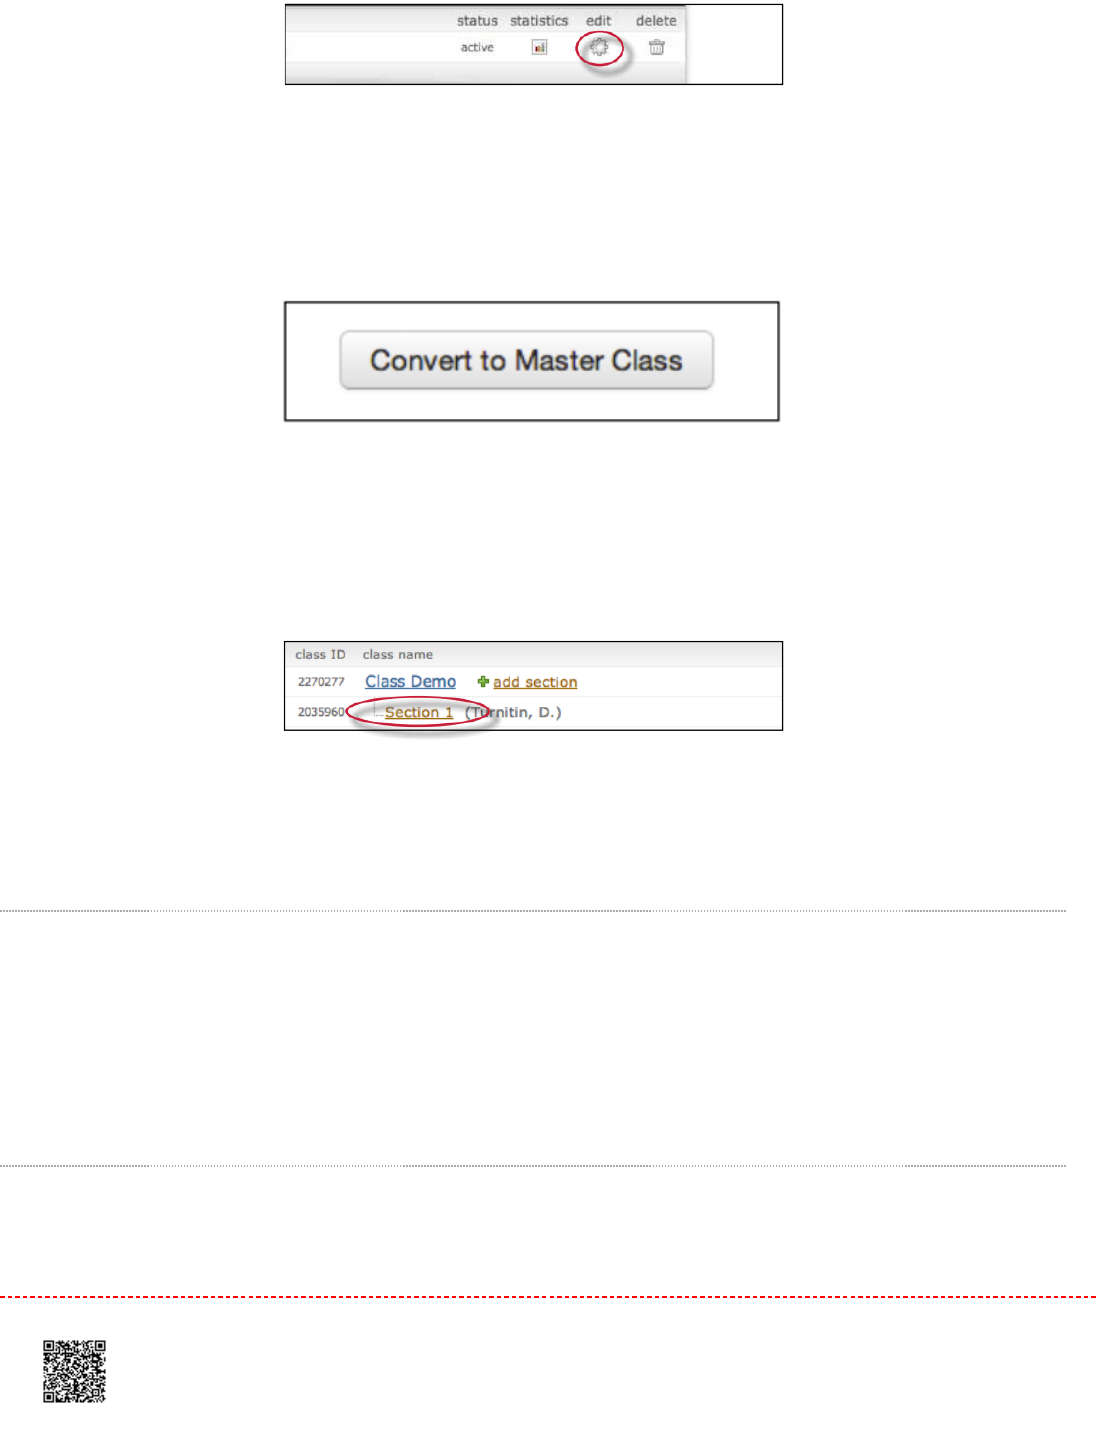
Ensure the correct class is being converted by checking the class name. To convert the class immediately into a master/
section class, click the convert to master class button at the bottom of the page.
Any existing students, papers, grades, and assignments from the standard class are moved to a newly created section
beneath the new master class. To access the existing information, click on the name of the section.
The master class instructor is automatically assigned as the TA of the converted class. The TA or other class
information can be changed by clicking on the update icon to the right of the newly created section class.
Adding Sections
New sections can be added to a master class in two ways. A section can be manually created by the instructor of the
master class, or the master class ID and TA join password can be distributed to the TA’s, which will allow the TA’s to join
themselves to the master class and create their own sections.
Manually Creating New Sections
51

New sections can be manually created by the master class instructor. TA users can be assigned one or more sections
which they will be able to access through Turnitin. Only one TA can be assigned per section. Only the master class
instructor will be able to view the submissions in the sections.
To create a section and add a TATo create a section and add a TA
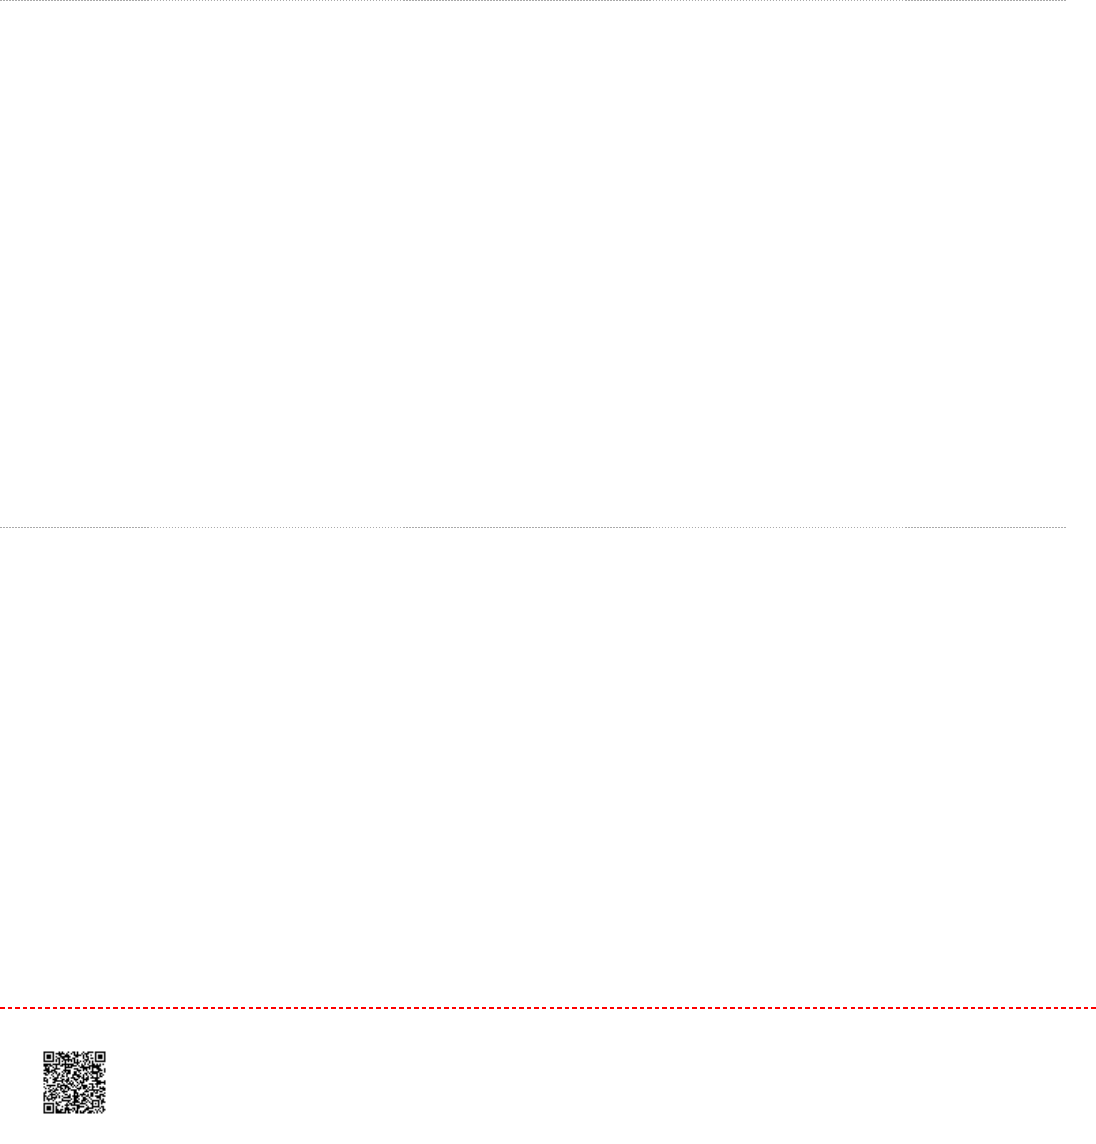
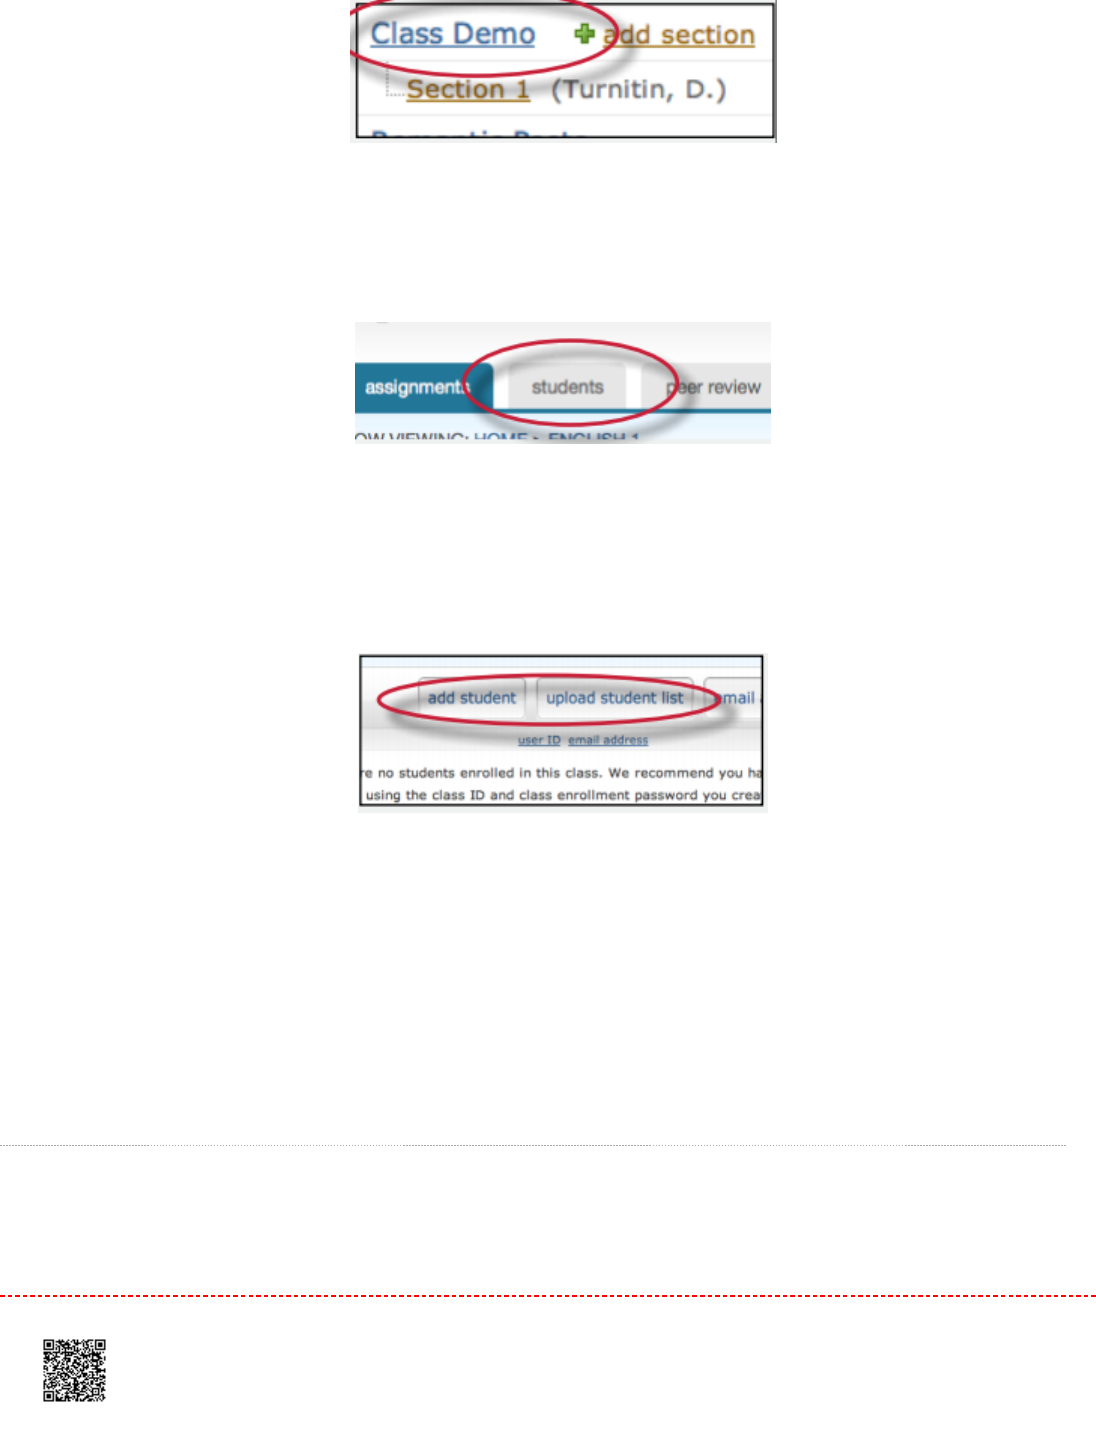
11. Click the
add section
link to the right of the name of the master class
22. On the add section screen, enter all of the following information:
TA’s first name
TA’s last name
TA’s e-mail address (for notification or new user password e-mails)
33. Click Submit to continue
52
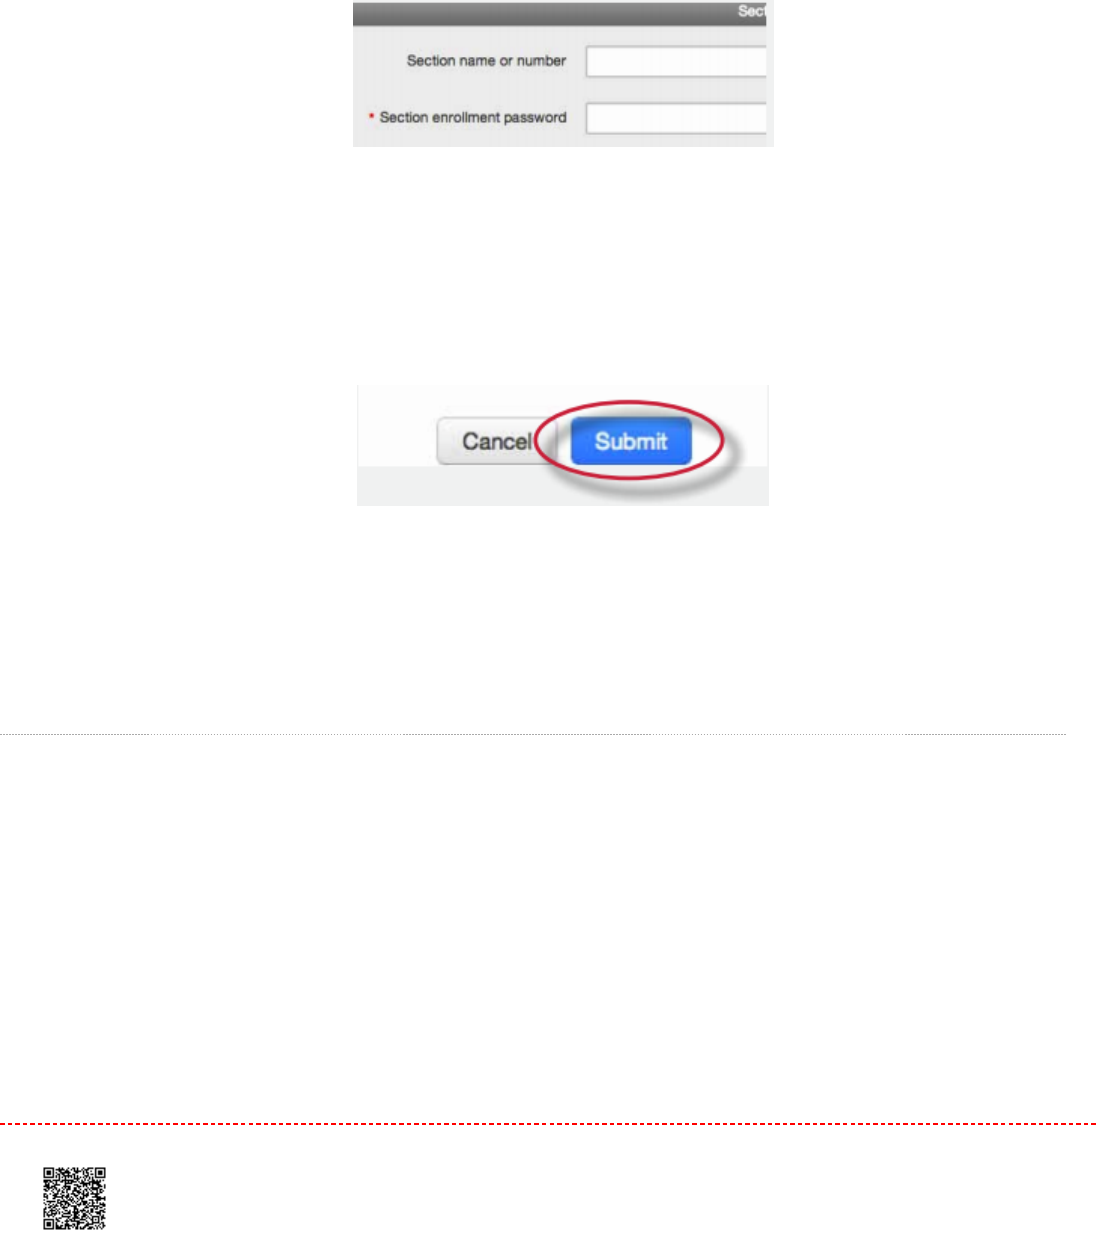
44. On the next page enter the required section information:
section enrollment password
name for the section
55. Click
submit
to add the section to the master class and send the assigned TA a welcome notice or new user
notification e-mail. The TA will only be e-mailed a password if they have no user profile existing under the e-mail
provided for them in the TA information section
Each new section will appear on the instructor homepage for the master class instructor, listed in smaller print beneath
the master class. When a section is added, an e-mail with the section information will be sent to the TA. If the TA does
not have a user profile with Turnitin under the e-mail address that was provided, Turnitin will generate a new user profile
for the TA and include the new user password in the e-mail sent to the TA.
Allowing TAs to Create Sections
To allow TA’s to create their own sections under a master class, the TA’s must be provided with the master class ID
number and the TA join password set for the master class.
For new TA users who do not have an existing Turnitin profile, the TA will use the standard instructor join process. When
prompted for an account or class ID and join or enrollment password the TA will provide the master class ID and TA join
password.
53
For users who have an existing instructor profile on Turnitin but need to join a master class as a TA, an existing profile
can join a class as a TA.
To join a class as a TA with an existing Turnitin user profile, the instructor will log in and click on the join class (TA) link
on the instructor homepage. The instructor is then prompted to enter the master class ID and TA join password for the
course, after which the instructor will be able to set up a TA section in the master class.
Administering a Master Class
The master class instructor is provided with many options for handling assignments in the sections and the master class
itself. These options include:
creating template assignments that become part of the class assignment library. The TA’s with sections in the
master class can then create their own assignments or select the template assignments from the class assignment
library
create complete assignments and add them to some or all of the sections of a master class
create partial assignments (e.g. assignments containing selected preferences but no dates) and add them to some
or all sections to accommodate different class schedules
creating assignments that are ‘locked’ against changes by section TA’s and adding these assignments to the
sections of the master class
Creating Assignments in a Master Class
Assignments that are intended to be used in many or all sections of a class should be created by the master class
instructor within the master class. For an overview on assignment creation, please see the section on creating
assignments in Chapter 1.
To access the master class assignment page, click on the name of the master class on the instructor homepage.
54
Adding Assignments to Sections
After creating an assignment from the assignment creation page, the push assignments to sections window will load.
From this page, the assignment can be pushed to the sections of the master class.
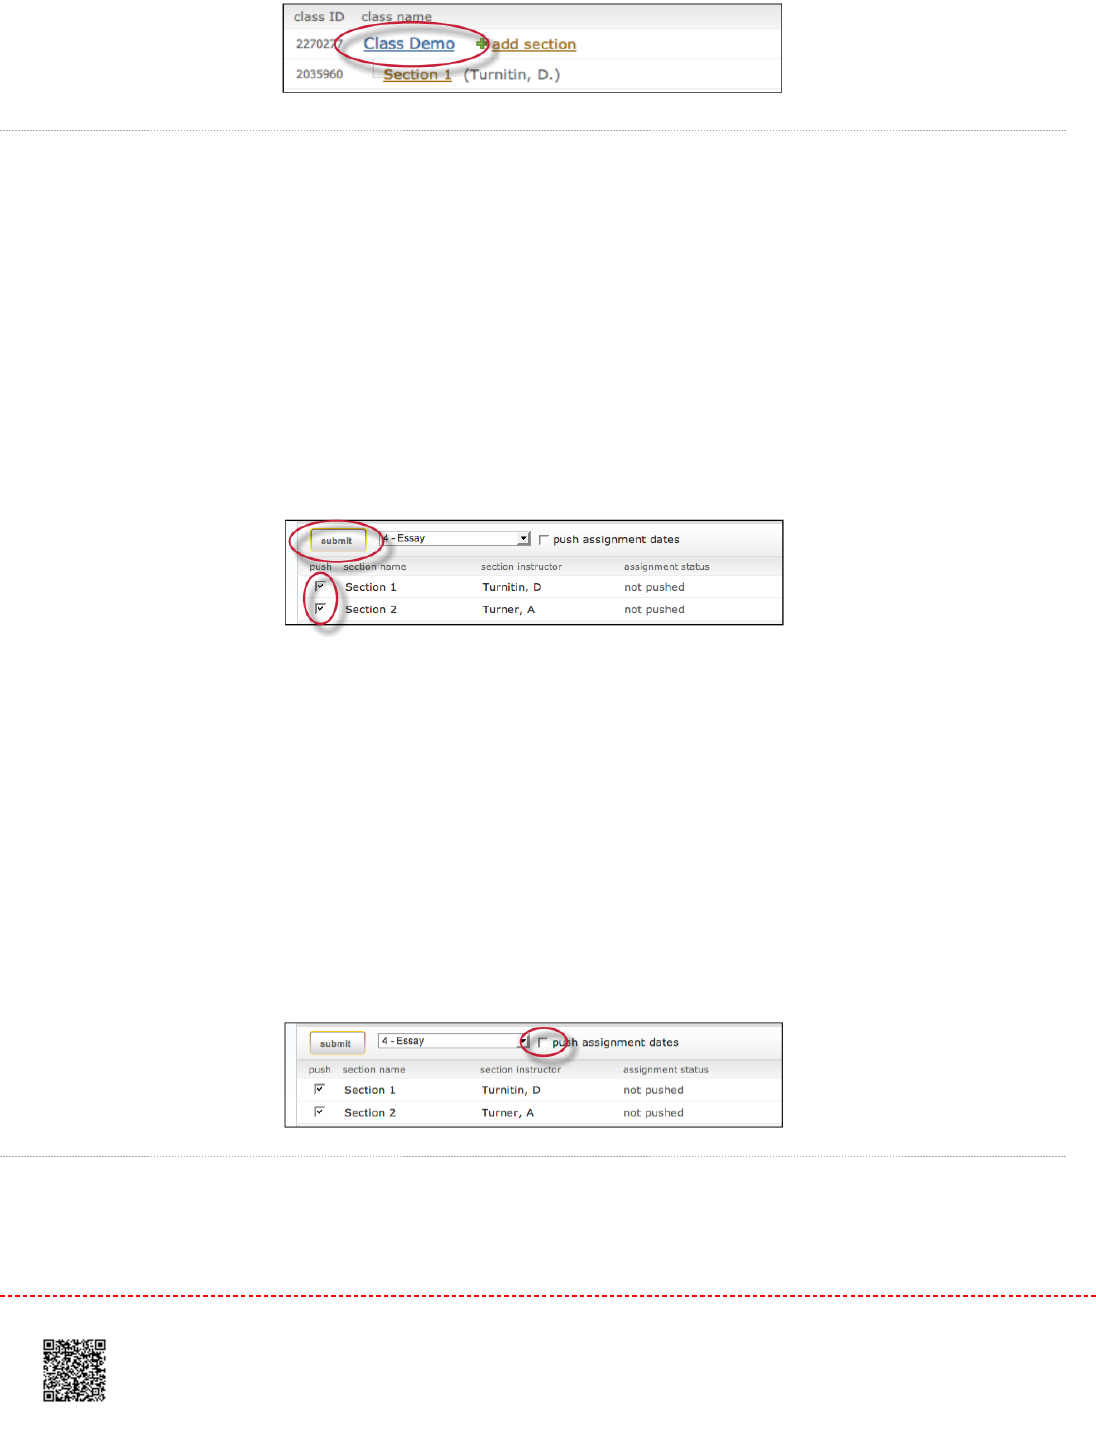
To add an assignment to one or more sections, place a check mark in the check box next to the section name and click
on
submit
to push the assignment to the selected sections.
By default, all sections are marked to receive the assignment. To not have the assignment pushed to a section remove
the check mark from the check box before clicking submit. The assignment will not be pushed to that section.
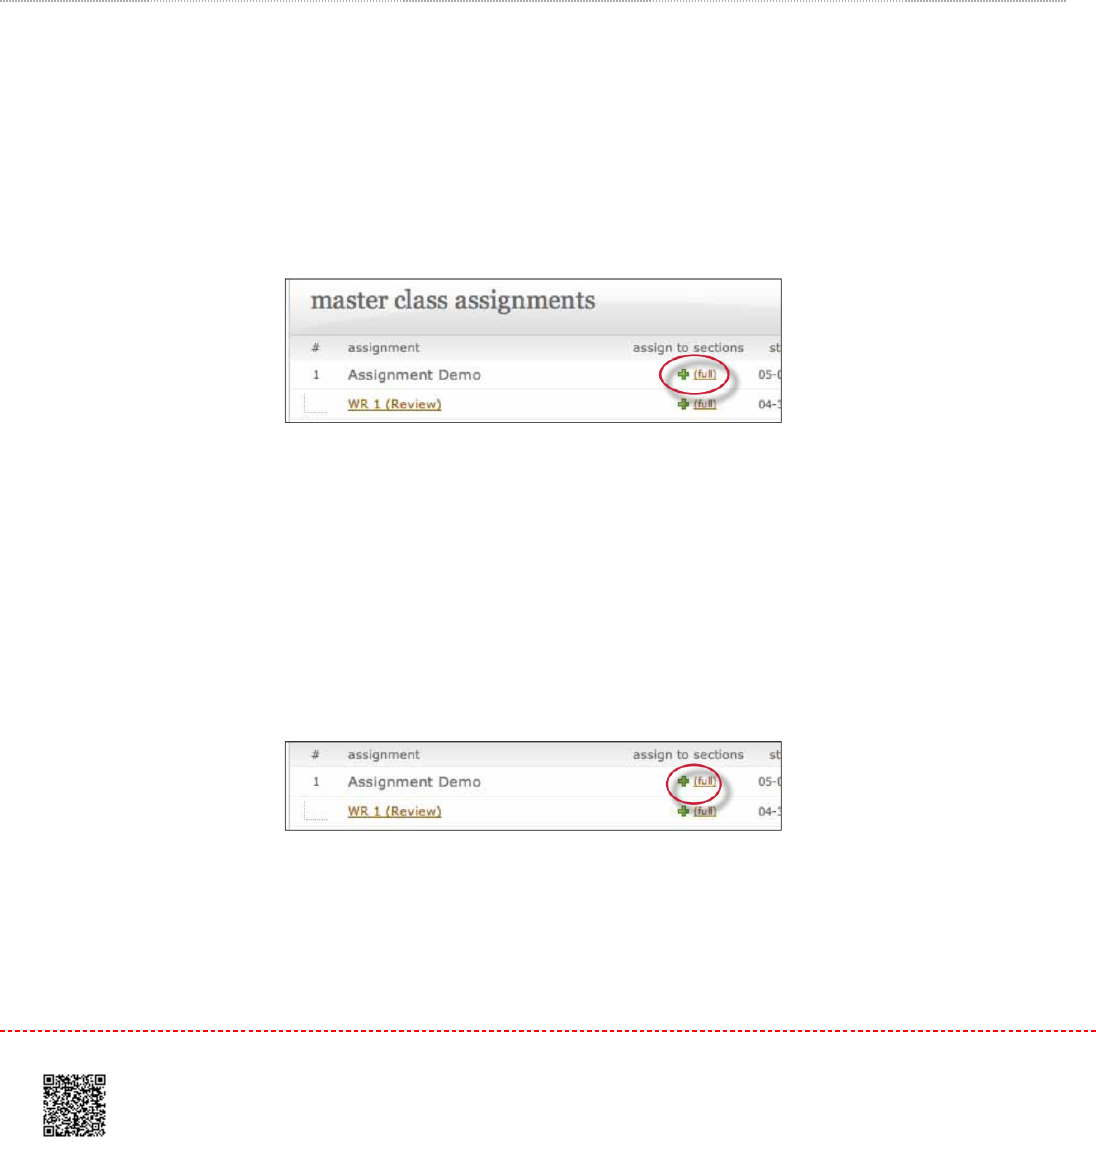
The master class instructor has the option of allowing the Section TA’s to choose their own assignment dates or to push
the assignment dates the instructor set in the assignment creation process. The default is to not push assignment dates.
If the instructor decides to push assignment dates, place a check mark in the check box next to the
push assignment
dates
option. Click on
submit
to save the assignment and push the assignment to all the checked sections.
Adding Assignments Without Dates
55
Assignments created in the master class can be pushed to the sections without dates. Assignments pushed without
dates must be given a date by the class TA before the assignment becomes active and available for students. Students
will not be able to submit papers or use the assignment until the assignment is given dates. Assignments without a date
appear in the section class highlighted in red.
To push an assignment without dates, ensure that you un-check the box next to the option
Push with dates
?.
Assignments pushed when this box is un-checked will not have dates within the sections.
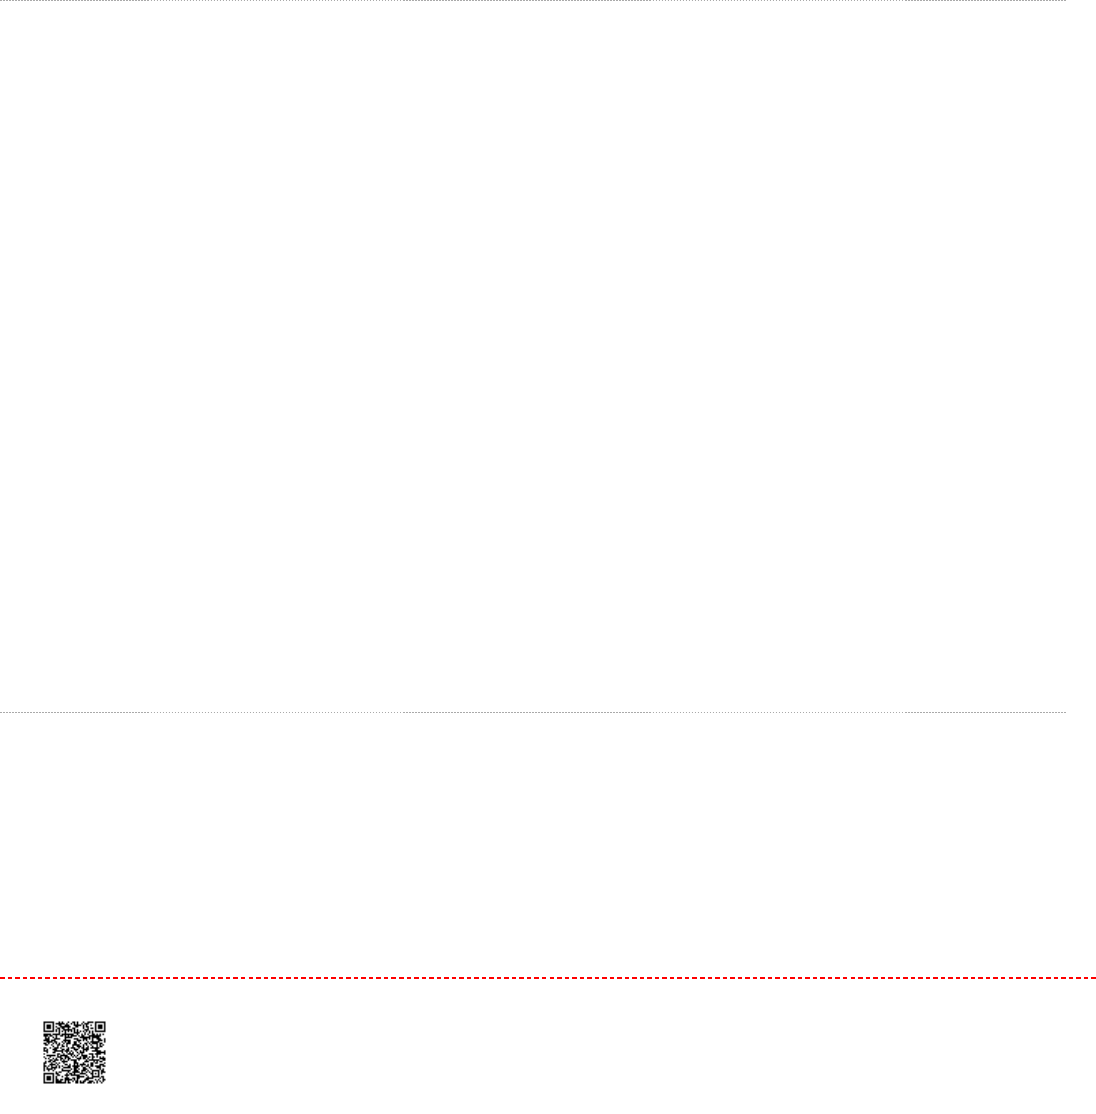
The Master Class Homepage
The master class homepage displays all assignments created in the master class. The
assign to sections
column shows
whether an assignment has been pushed to sections and whether it has been pushed to all or only selected sections.
not pushed
indicates that an assignment has not been pushed to any sections
partial
indicates that an assignment has been pushed to at least one section but not to all sections of a master class
full
indicates an assignment has been pushed to all sections of a master class
The assignment push page can be returned to by clicking the push to sections button next to an assignment at any time.
If an assignment has been previously added to a section, the assignment can be pushed to the section a second time
with any new changes made to the assignment. This is only available if the assignment has not been modified by the TA
and if no students have submitted to the assignment.
56
If the TA has made any changes to the assignment or students have submitted a paper, the assignment is locked. The
messages on the push page next to each assignment will inform the master class instructor if an assignment is
unmodified or if it has been locked.
Note:Note: If changes must be made to a locked assignment, access the assignment through the section or sections it has
been pushed to and make any necessary changes through the sections directly. Changes cannot be made from the
master class.
Student Enrollment
The master class does not allow students to enroll. Student enrollment is handled in each section individually - students
can even be enrolled in multiple sections of the same master class, and will see each section as a separate class.
Student enrollment into sections can be handled in the same ways as students enrolling into standard classes. The
student users can be provided with the section ID and the section enrollment password, or can be manually enrolled by
the instructor. Providing students with the section ID and section enrollment password may save the most time for the
instructor. Students enrolling in a section class on Turnitin use the standard steps for joining a class, which can be found
in the Student User ManualStudent User Manual or the Student QuickStart GuideStudent QuickStart Guide.
Students can also be added to the section class by the TA or by the master class instructor. Students can be added one
by one or as a list. Step by step instructions for adding students individually or creating a student list for upload can be
found in Chapter 1: Getting Started in this manual under Enrolling StudentsEnrolling Students.
The master class instructor may also add students to sections by using the master class student page interface. The
master class instructor can then upload individual students or a list of students to be added to a specific section of a
master class.
To add students from a master class
11. Click on the name of the master class to add students in
57
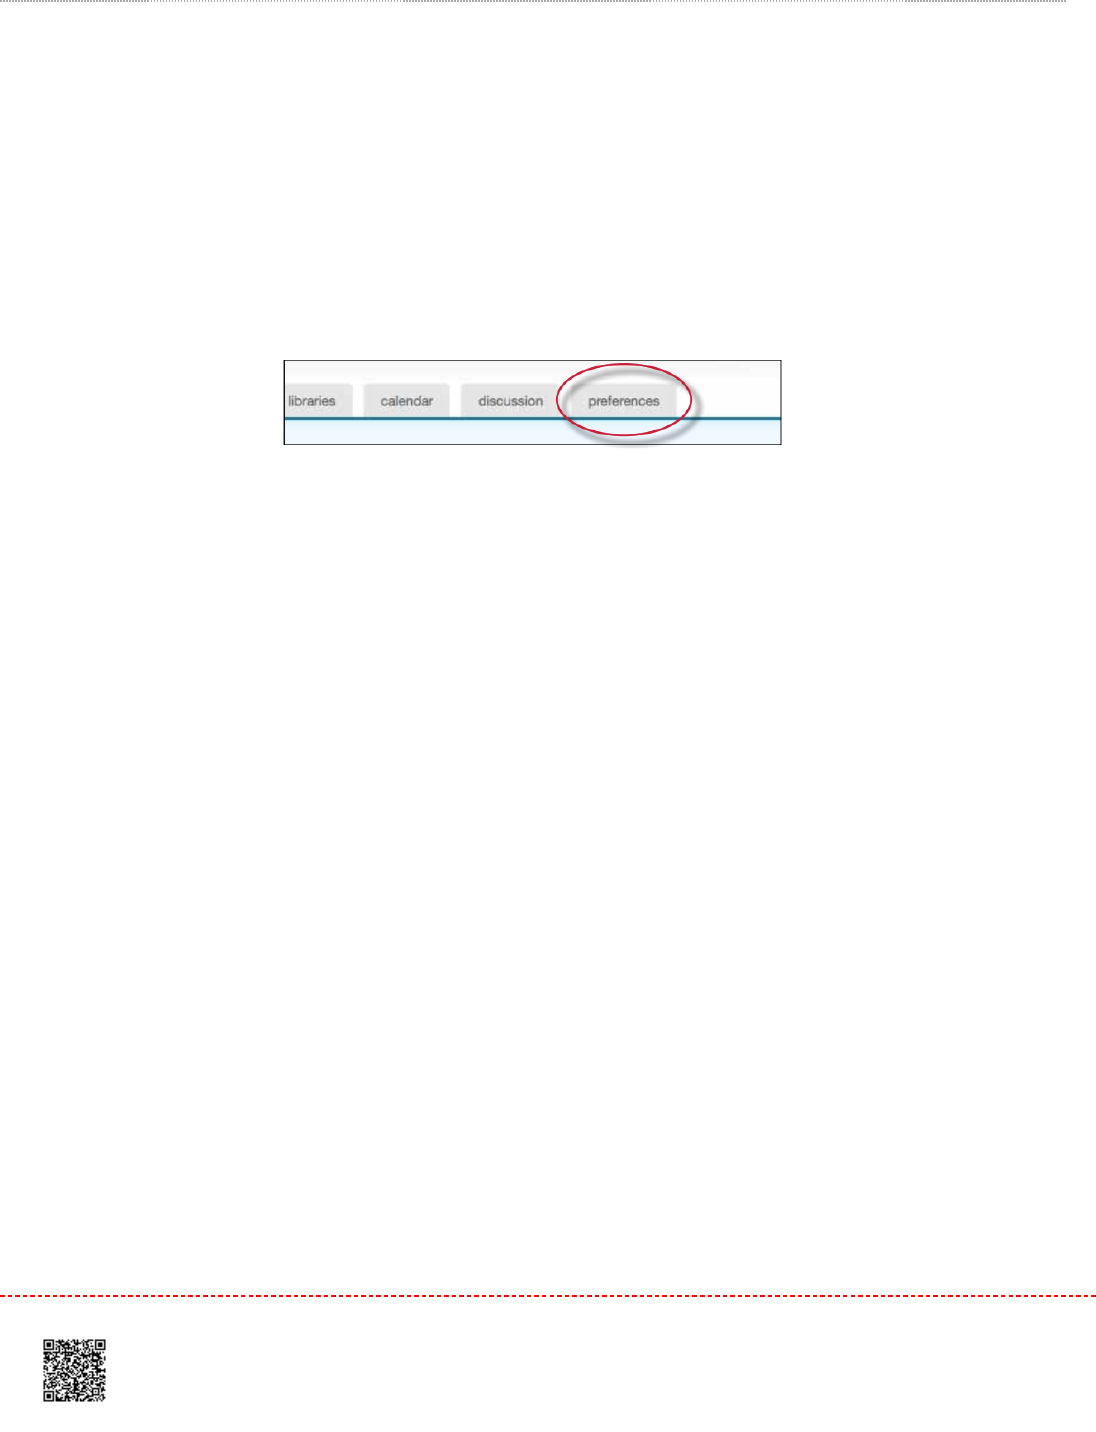
22. Click on the
students
tab on the master class homepage
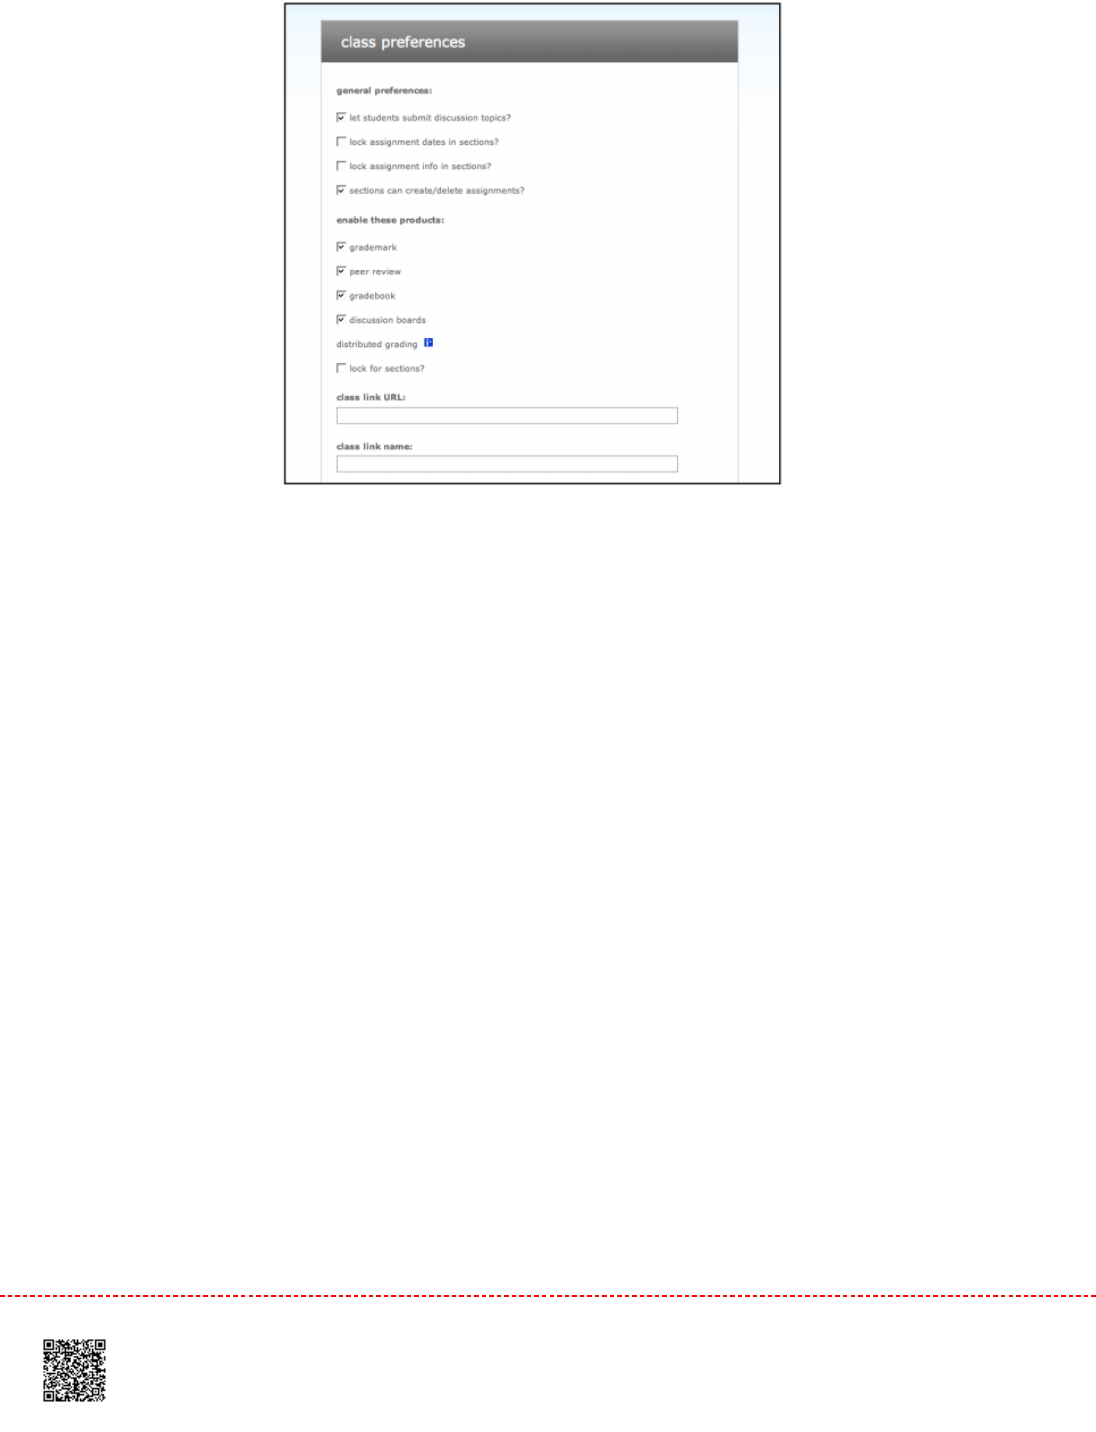
33. Click on
add student
or
upload student list
button as appropriate for the method of adding students
the instructor wishes to use at this time
44. Continue with the standard process of adding a student as outlined in Chapter 1, section Enrolling StudentsEnrolling Students in
this manual
The student or list of students will be added to the master student list and the section class student list. New students
will be e-mailed a new user welcome notification. Students with an existing profile will receive a notification e-mail that a
new class has been added to their student user homepage.
Grade Book
58

If the Turnitin grade book product has been purchased for the account, the grade book tab on the class navigation bar is
available. Click on the gradebook tab and get a quick overview of the grades in the sections of the master class.
To view detailed grade information for a student or section, click on the student or section name to jump to the
appropriate section’s grade book page.
Calendar
The master class calendar functions similarly to the class calendar. For more information, please see the section on the
class calendar in this manual.
Any announcements, notes, or holidays that are added to the master calendar will appear in the calendars of all sections
of the master class.
To view the master class calendar page, click on the calendar tab in the class navigation bar.
59
Preferences
The master class preferences page allows a master class instructor to determine which Turnitin products or features are
available in section classes and set limits to the capabilities assigned to TA’s for all sections of the master class.
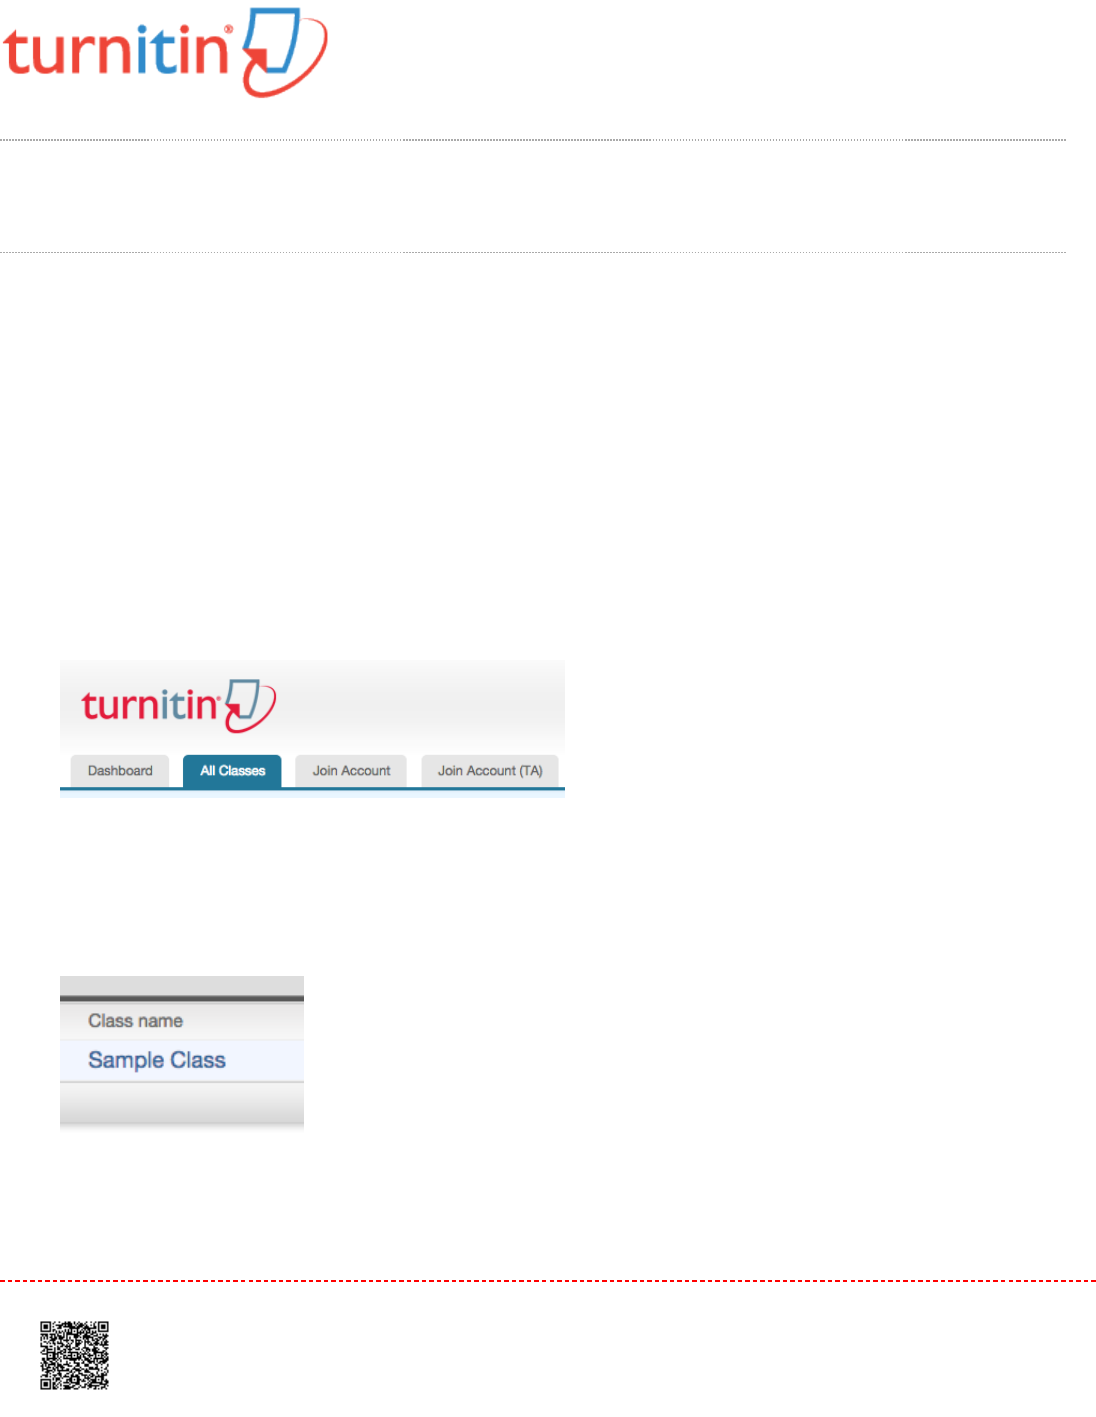
To access the master class preferences page, click on the preferences tab on the master class homepage.
In addition to the standard class preference options, the master class instructor can select to:
lock assignment information on sections
lock assignment dates on sections
allow or disallow section TA ability to create or delete assignments
lock settings for sections
60
These settings allow the master class instructor to enable or disable certain capabilities of the TA users in the sections
of the master class. This can be used to prevent changes from being made to required settings on assignments. Click
on the submit button to save any changes made to the class preferences.
61

Creating a Paper Assignment
Creating an Assignment
All submissions by students are made to assignments in a Turnitin class. Assignments for a given class are created,
displayed, and modified from the class homepage.
1.1. To reach the class homepage, you must firstly access the main homepage by clicking the
All Classes
tab from
the top of any page
2.2. From the main homepage, the instructor must click on the name of the class to view the class portfolio
NoteNote: An instructor with GradeMark or grade book available, will be required to set a post date on an assignment.
This post date and time must be after the start date, but can be set before the due date of the assignment.
63
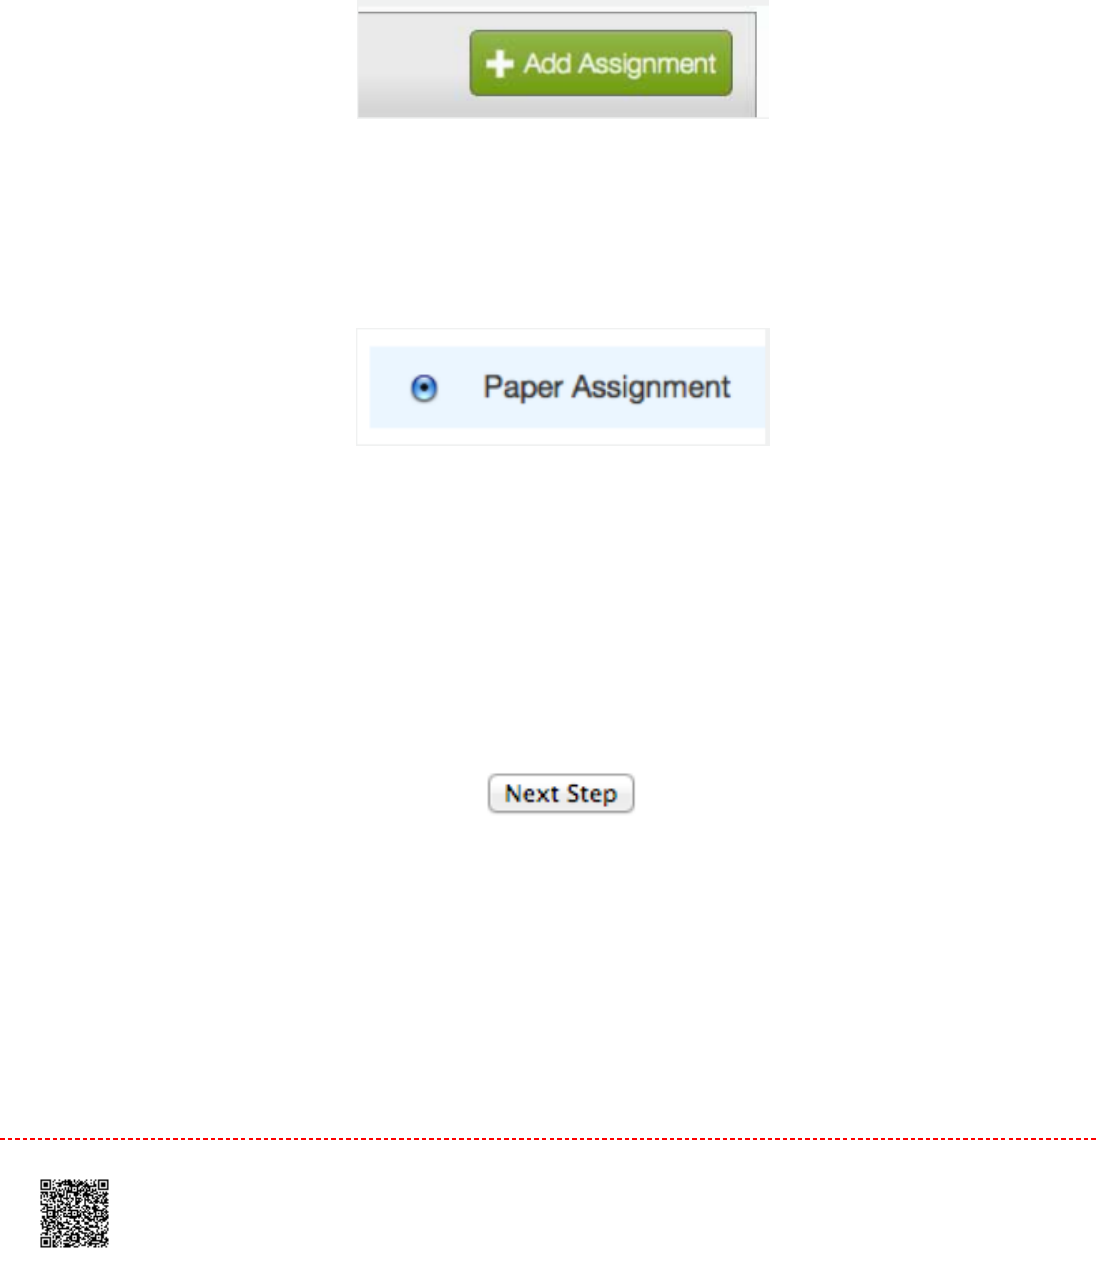
33. In the class portfolio, click on the
Add Assignment
button
22. If you have not yet created an assignment for this class, please continue to Step 4Step 4. If an assignment has
been created, select Paper Assignment by clicking on the radio button next to Paper Assignment
The paper assignment type is the base assignment for all other assignments types (PeerMark, Revision, and
Reflection). When creating a paper assignment, there are three dates that instructors will need to set: the start
date, the due date, and the post date.
33. Click on the
Next Step
button
44. On the next page, enter the Assignment title.
If you are a grade book user, you may also enter an option point value. This is the maximum number of points a
student can receive from an assignment. E.g. 100. By setting a point value, this allows the grade to be set by
rubrics (if used) and be sent to the grade book
64
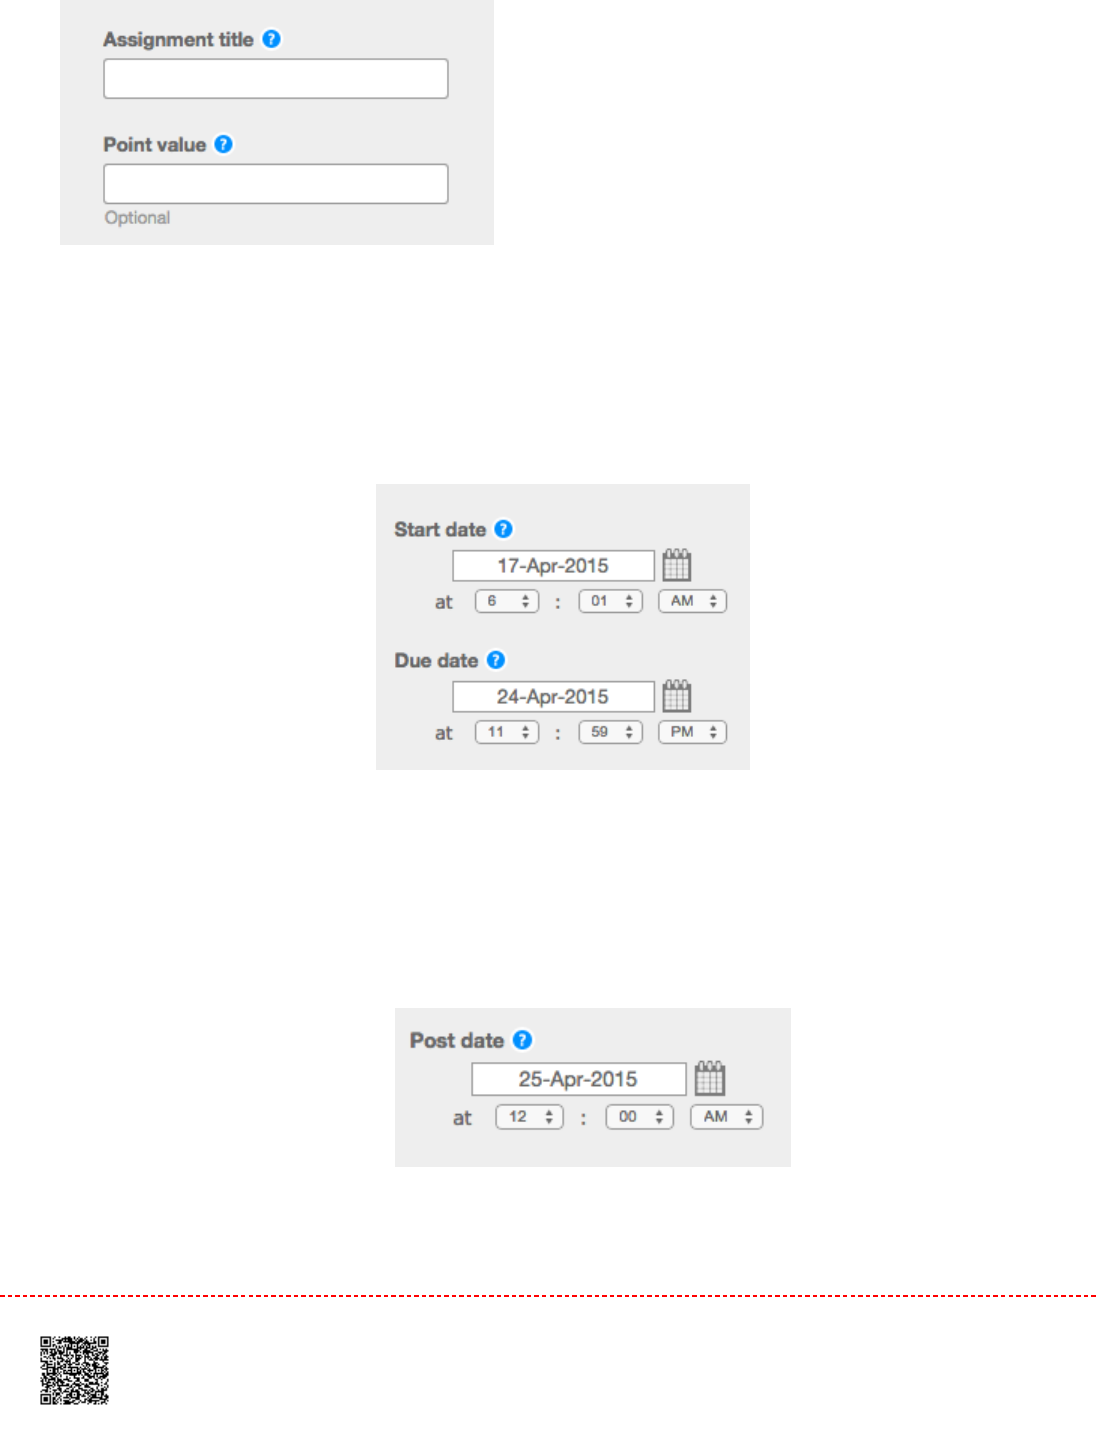
55. Select the start and due dates for the assignment. Specific times are also selected. Students are only able to
submit once the start date and time has passed. After the due date and time, students will be blocked from
submitting papers, unless late submissions are enabled
5a5a. GradeMark and Grade book users must select apost datefor the assignment. The post date is the date
and time that students can begin viewing the comments and grades that you have left on their papers in
GradeMark. The post date can be set before the due date
65

66. Select whether the assignment will require Originality Reports for submissions or whether any file type can be
uploaded. The default option is to
Allow only file types that Turnitin can check for originality
. For assignments that
do not require Originality Reports, you can can select
Allow any file type.
This allows instructors to
leave feedback on every file type.
Training Video: Creating an Assignment
Media, iframe, embed and object tags are not supported inside of a PDF.
Advanced Assignment Options
When creating a paper assignment, the user may select to view and change any of the advanced assignment options.
The advanced assignment options are viewed by clicking the
+ Optional Settings
link.
11.. Enter special instructions to your students about the assignment
66
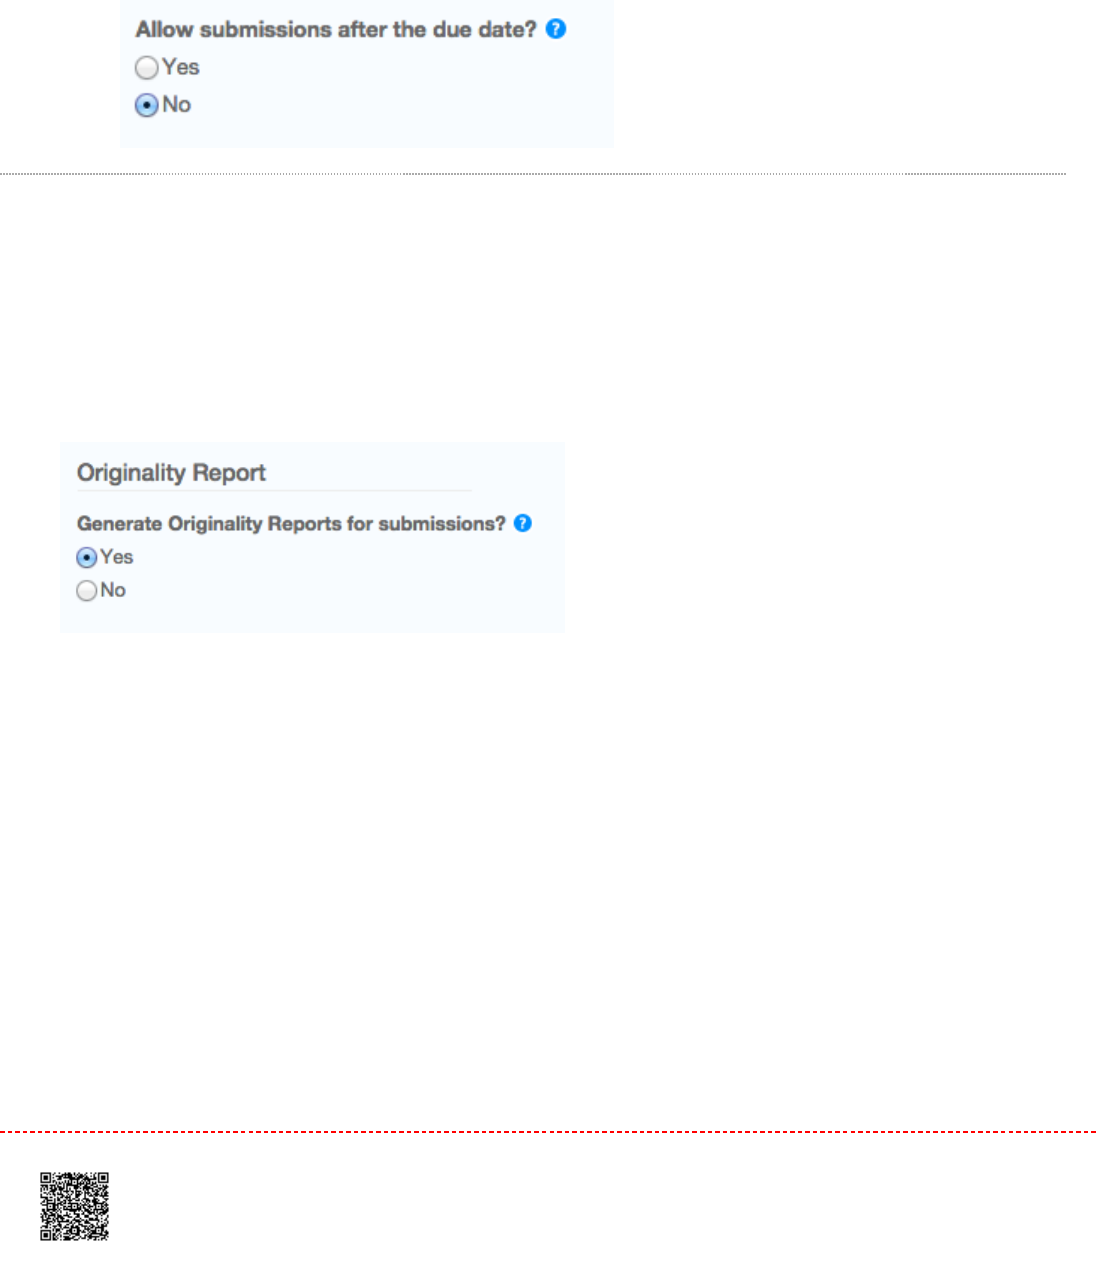
2.2. Select whether you wish to allow submissions after the due date of the assignment. If set to
Yes
, students will
be able to submit to the assignment after the due date, providing they have not previously made a submission. If
set to
No
, students will not be able to submit after the due date of the assignment.
Originality Report Settings
Select whether you would like Originality Reports to be generated for submissions to the assignment. If you have
chosen to set this to
Yes,
continue to step 2.step 2. If you prefer to set this option to
No,
please skip to stepstep 33.
If the assignment is set to accept any file type Turnitin will only generate Originality Reports for the following file types:
Microsoft Word, PowerPoint, WordPerfect, PostScript, PDF, HTML, RTF, OpenOffice (ODT), Hangul (HWP), Google
Docs (submitted via the Google Drive submission option), plain text files.
Report Generation andReport Generation and Resubmission OptionsResubmission Options
Select from the dropdown list when, after student submission, that you would like Originality Reports to be
generated. There are three options for this assignment setting:
67
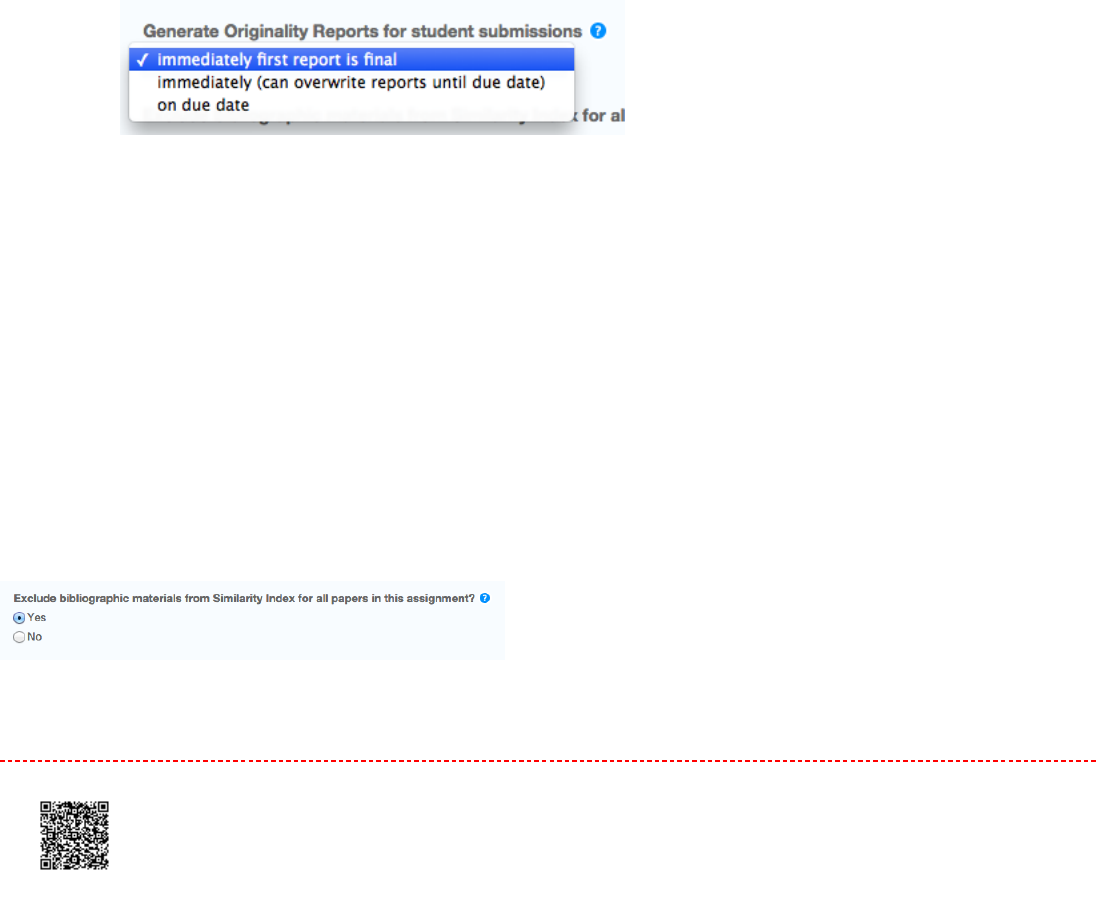
Immediately (first report is final)Immediately (first report is final) - Originality Reports for all submissions will be generated immediately. Students
cannot resubmit papers. Submissions must be deleted by the instructor to enable resubmission.
Immediately (can overwrite reports until due date)Immediately (can overwrite reports until due date) - Originality Reports for the initial submission by each student
user to this assignment will be generated immediately. Students may resubmit as often as the student wishes
until the assignment due date. Originality Reports for the second or subsequent submission will require a 24
hour delay before the Originality Report begins processing. Only the latest submission is available to the
instructor or student. Previous versions are removed. Originality Reports will regenerate within an hour of the
due date and time to allow student submissions to compare against one another within the assignment. A
change in the Originality Report similarity index may result from the regeneration of the reports. This option is
typically used when students are self-reviewing and revising their submissions and able to view the Originality
Report. No resubmissions are allowed after the due date and time of the assignment.
On due dateOn due date - Originality Reports will not be generated for any submission until the due date and time of the
assignment. Students may resubmit as many times as needed until the due date and time without receiving
reports. Resubmissions may not be made after the due date and time of the assignment.
NoteNote: If an instructor chooses to grade without a student submission and the Immediately first report is final is
selected, students will not be able to submit to the assignment once the Grading Template is created.
Excluding the BibliographyExcluding the Bibliography
Select whether you would like text appearing in the bibliography, works cited, or references sections of assignments to
be excluded from being checked for matches in the Similarity Index when generating Originality Reports. This setting
can be overridden in individual Originality Reports.
68
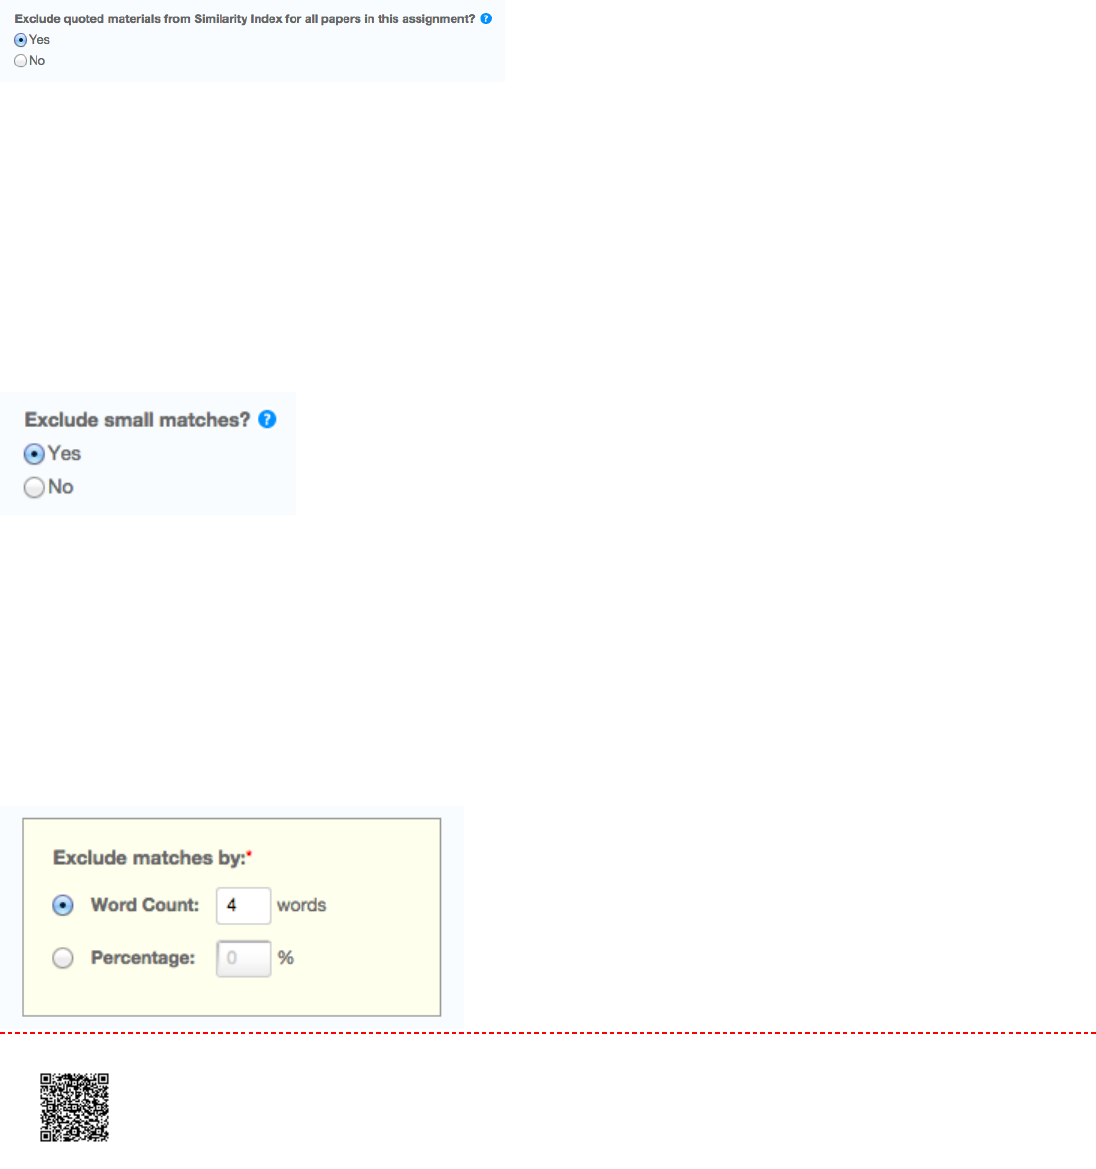
Excluding QuotesExcluding Quotes
Select whether you would like text appearing in the quotes of an assignment to be excluded from being checked for matches in
the Similarity Index when generating Originality Reports. This setting can be overridden in individual Originality Reports.
Excluding Small MatchesExcluding Small Matches
Select whether you would like to exclude matches that are not of sufficient length (determined by yourself) from being
considered when generating Originality Reports. This setting can be overridden in individual Originality Reports. If you
have chosen to set this to
Yes,
continue to step 8bstep 8b. If you prefer to set this option to
No,
please skip to stepstep 1010.
Once
yes
has been selected, a yellow box will appear. Here, you can exclude matches by word count, through entering
the amount of words that you would like to exclude from being considered when generating Originality Reports.
Alternatively, you can also exclude matches by percentage, through entering the percentage of words that you would
like to exclude from being considered when generating Originality Reports.
69
Instructors can adjust the exclude small matches assignment setting at any time by clicking on the
edit
icon to the right
of the assignment name. The excluding small matches feature can also be adjusted within each Originality Report. With
this feature, instructors have greater control over sifting out smaller matches, allowing them to focus on larger, more
problematic and suspect matches within Originality Reports.
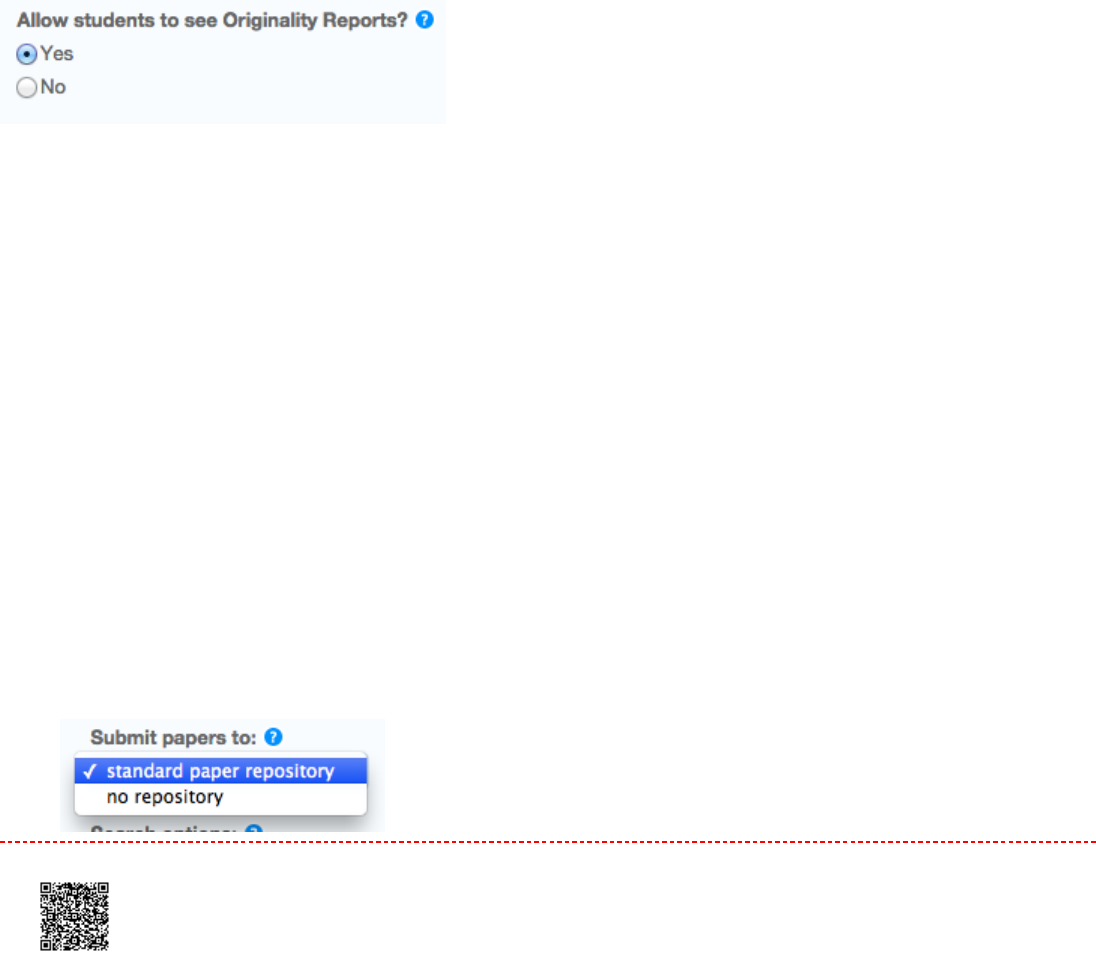
Allowing Access to Originality ReportsAllowing Access to Originality Reports
Choose whether you would like your students to view the Originality Reports for their submissions to this
assignment. This option gives instructors more flexibility and control when creating assignments.
Repository OptionsRepository Options
If the repository options are enabled for an instructor by the administrator, two or four options will appear within the
Submit papers to
dropdown list. Select from the dropdown list where you would like papers to be submitted
to. The settings provide you with the ability to select whether papers are stored in a Turnitin standard paper repository,
your institution's paper repository, the student's choice of paper repository, or no repository at all.
The benefit of submitting papers to the standard paper repository is that student papers submitted to the assignment are
checked against other institutions' student submissions. However, by selecting to submit papers to the institution's paper
repository, this means that the assignment will only be checked against other students' submissions within the
institution. If you select
no repository
, your students' papers will not be stored in the Turnitin standard paper repository or
the institution's paper repository, therefore meaning that the papers will not be checked for collusion between students of
the same or different institutions.
70

or
The search options setting allows you to select which Turnitin repositories students' submissions will be checked against
when processing Originality Reports for papers. This allows an instructor to disregard a source type if the comparison
against this type of source is not needed. The similarity index percentage may decrease if a repository option is de-
selected.
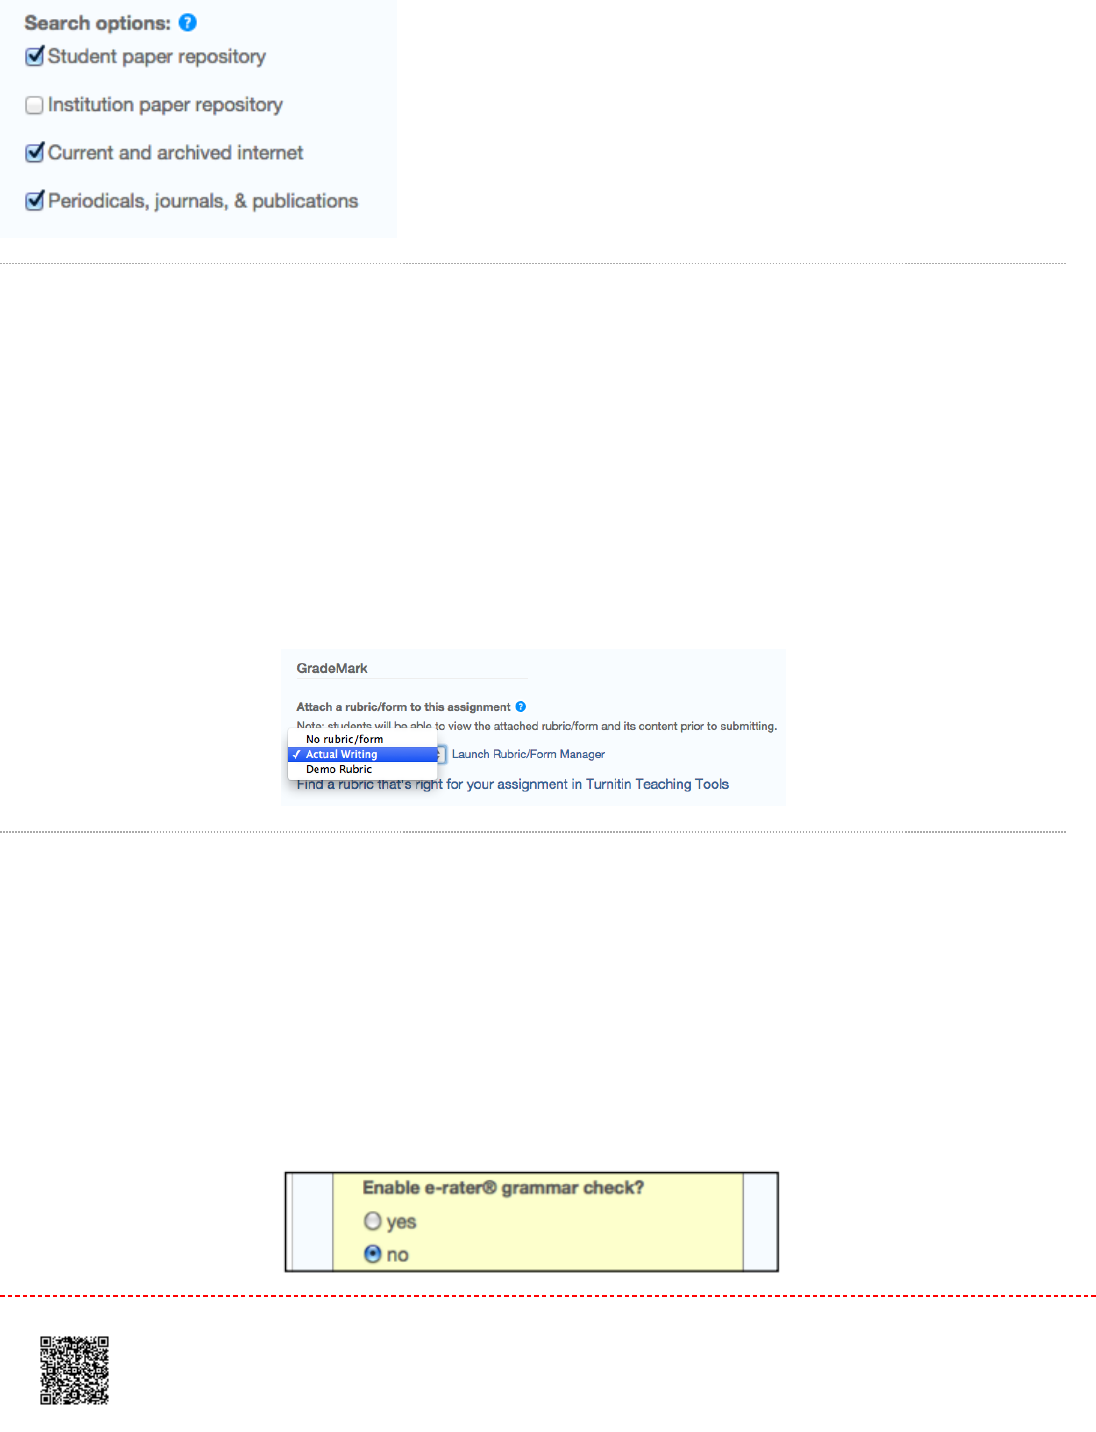
The available search targets are listed under
Search options
. The targets with a check mark are those that will be
searched. To remove a search target repository, click on the check box to remove the check mark. Clicking on an empty
selection box next to the repository will re-add the repository as a search target. This selection will not alter any currently
generated Originality Reports or Overall Similarity Index scores.
The currently available search targets are:
Student paper repositoryStudent paper repository - works previously submitted in classes and assignments on Turnitin
Institution paper repositoryInstitution paper repository - a repository of student papers for the institution
Current and archived internetCurrent and archived internet - a repository of archived and live publicly available internet pages containing
billions of pages of existing content and tens of thousands of new pages added daily
Periodicals, journals, & publicationsPeriodicals, journals, & publications - third party periodical, journal, and publication content including many major
professional journals, periodicals, and business publications
71
GradeMark Settings
Attach a rubric to the assignmentAttach a rubric to the assignment
If you would like to use a rubric to grade the papers submitted to the assignment, you may use the rubric list drop down
menu to select a previously created or imported rubric, or you can launch the rubric manager by clicking on the
Launch
Rubric Manager
link and create a new rubric to attach to the assignment.
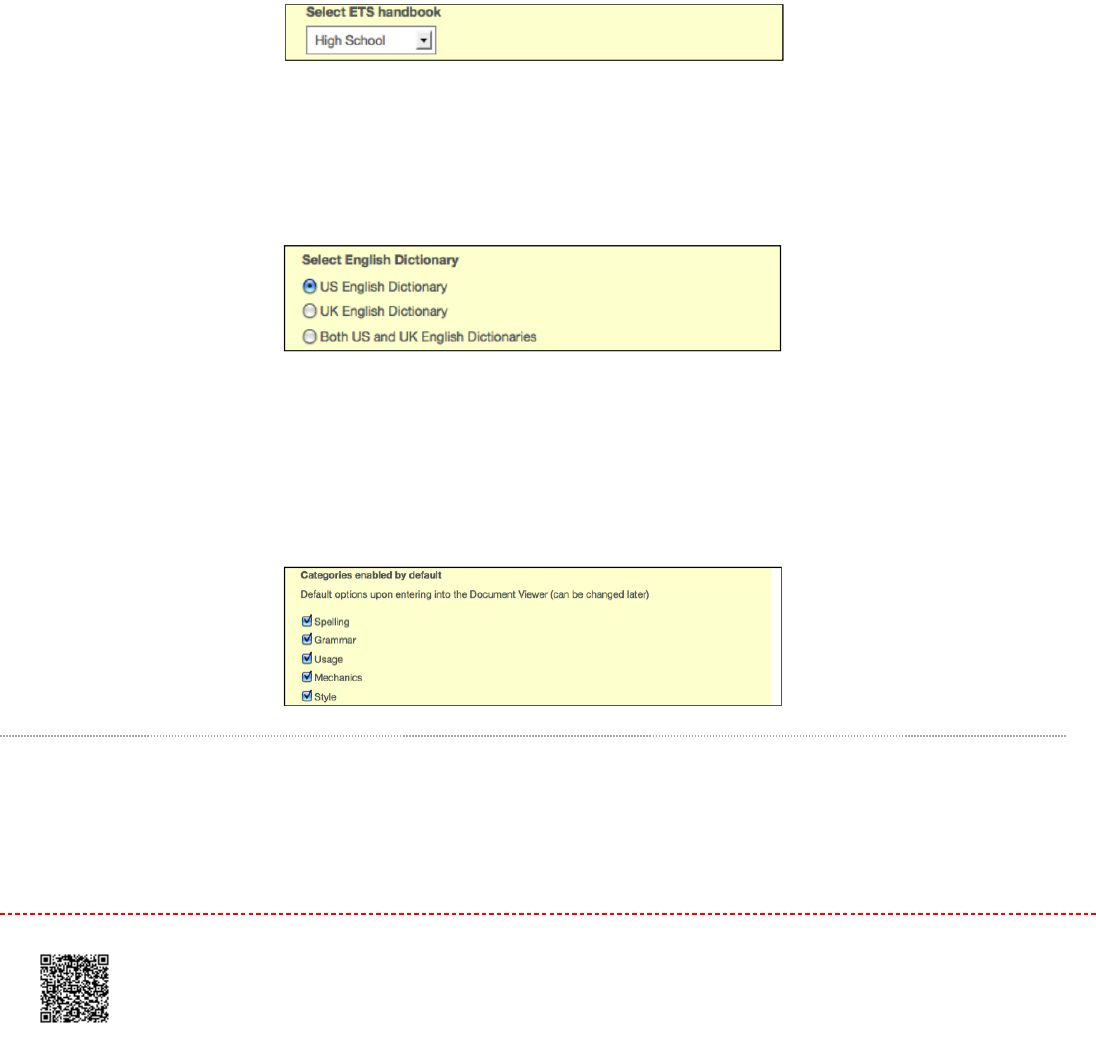
Enable e-rater® grammar check?
This feature of assignment creation provides instructors with the option to enable the
e-rater
grammar and spelling
check for all submissions to the assignment. When enabled student submissions receive detailed grammar feedback in
GradeMark automatically through the
e-rater
technology. Select
yes
to enable the
e-rater
engine for the assignment. If
this assignment option is not available then the e-rater grammar check is disabled for the account. Contact your Turnitin
account administrator to enable the
e-rater
grammar check for the account.
72
NoteNote:
e-rater
grammar and spelling check comments are not automatically shown to the student. These
comments are released, with all other comments, on the assignment post-date. Students will also not see
e-rater
comments if the assignment has not been opened by the instructor and if no comments have been left on the
paper. This is to ensure that all comments
e-rater
has generated have been approved by the instructor.
Optional:Optional: Select the ETS handbook level from the drop down menu. The ETS handbooks provide students with in
depth information about the grammar errors the
e-rater
technology finds in their paper.
Select the dictionary used for the spelling check
The
Categories enabled by default
option allows instructors to choose which categories of feedback are enabled when
viewing assignment submissions in GradeMark. The default is to show the feedback for every category.
Changing Advanced Assignment Option Defaults
If any changes have been made to the advanced assignment options, an additional option will be available at the bottom
of the options panel. The instructor is asked
Would you like to save these options as your defaults for future
73
assignments
? Select
yes
to have all future assignment creations use the advanced assignment options that have been
selected as the default setting. Select
no
to continue with the previous default advanced assignment option settings.
The default settings can be changed at any time when creating a new assignment or updating an existing assignment.
74


Submitting Papers
Instructors joined to a Turnitin account can submit papers using the four available methods. Instructor uploads may be
submitted by:
Single file uploadSingle file upload - A single file submission selected by the instructor.
Cut and pasteCut and paste - Submission of text copied and pasted into a Turnitin submission box. May be used to submit from a
file format that is not accepted. No images or non-text information can be copied and pasted - only plain text can be
accepted.
Multiple file uploadMultiple file upload - Multiple files selected one by one. Similar to adding multiple attachments to an e-mail
Zip file uploadZip file upload - Submit a standard zip file containing multiple papers. May contain up to 200MB or 1,000 files. Zip
file uploads of significant size may require additional time to complete
File Types and Size
Turnitin currently accepts the following file types for upload into an assignment that has the
Allow only file types that
Turnitin can check for originality
enabled:
Microsoft Word® (DOC and DOCX)
Corel WordPerfect®
HTML
Adobe PostScript®
Plain text (TXT)
Rich Text Format (RTF)
Portable Document Format (PDF)
OpenOffice (ODT)
Hangul (HWP)
Powerpoint (PPT)
76
When "Accept any file type" is enabled for an assignment, Turnitin will accept any file type submission as long as file
requirements are met.
The file size may not exceed 40 MB. Files of a larger size may be reduced in size by removal of non-text content. Files
that are password protected, encrypted, hidden, system files, or read only files cannot be uploaded or submitted to
Turnitin.
NoteNote: Text only files may not exceed 2 MB.
NoteNote: If your class is set up to only accept files in which Turnitin can generate a originality report PDF documents
must contain text to be submitted. PDF files containing only images of text will be rejected during the upload
attempt. To determine if a document contains actual text, copy and paste a section or all of the text into a plain-
text editor such as Microsoft Notepad or Apple TextEdit. If no text is copied over, the selection is not actual text.
NoteNote: Users whose text files are saved in a file type that is not accepted by Turnitin when the assignment is set to
Allow only file types that Turnitin can check for originality
will need to use a word processing program to save the
file as one of the accepted types. Rich Text Format and Plain Text file types are nearly universally available in
word processing software. Neither file type will support images or non-text data within the file. Plain text format
does not support any formatting, and rich text format supports only limited formatting options.
WarningWarning: Users who are converting to a new file format will need to save their file with a name different than the
original. Any file should be saved with a new file name when converting to plain text or rich text formats to
prevent permanent loss of the original formatting or image content of a file.
Single File Upload
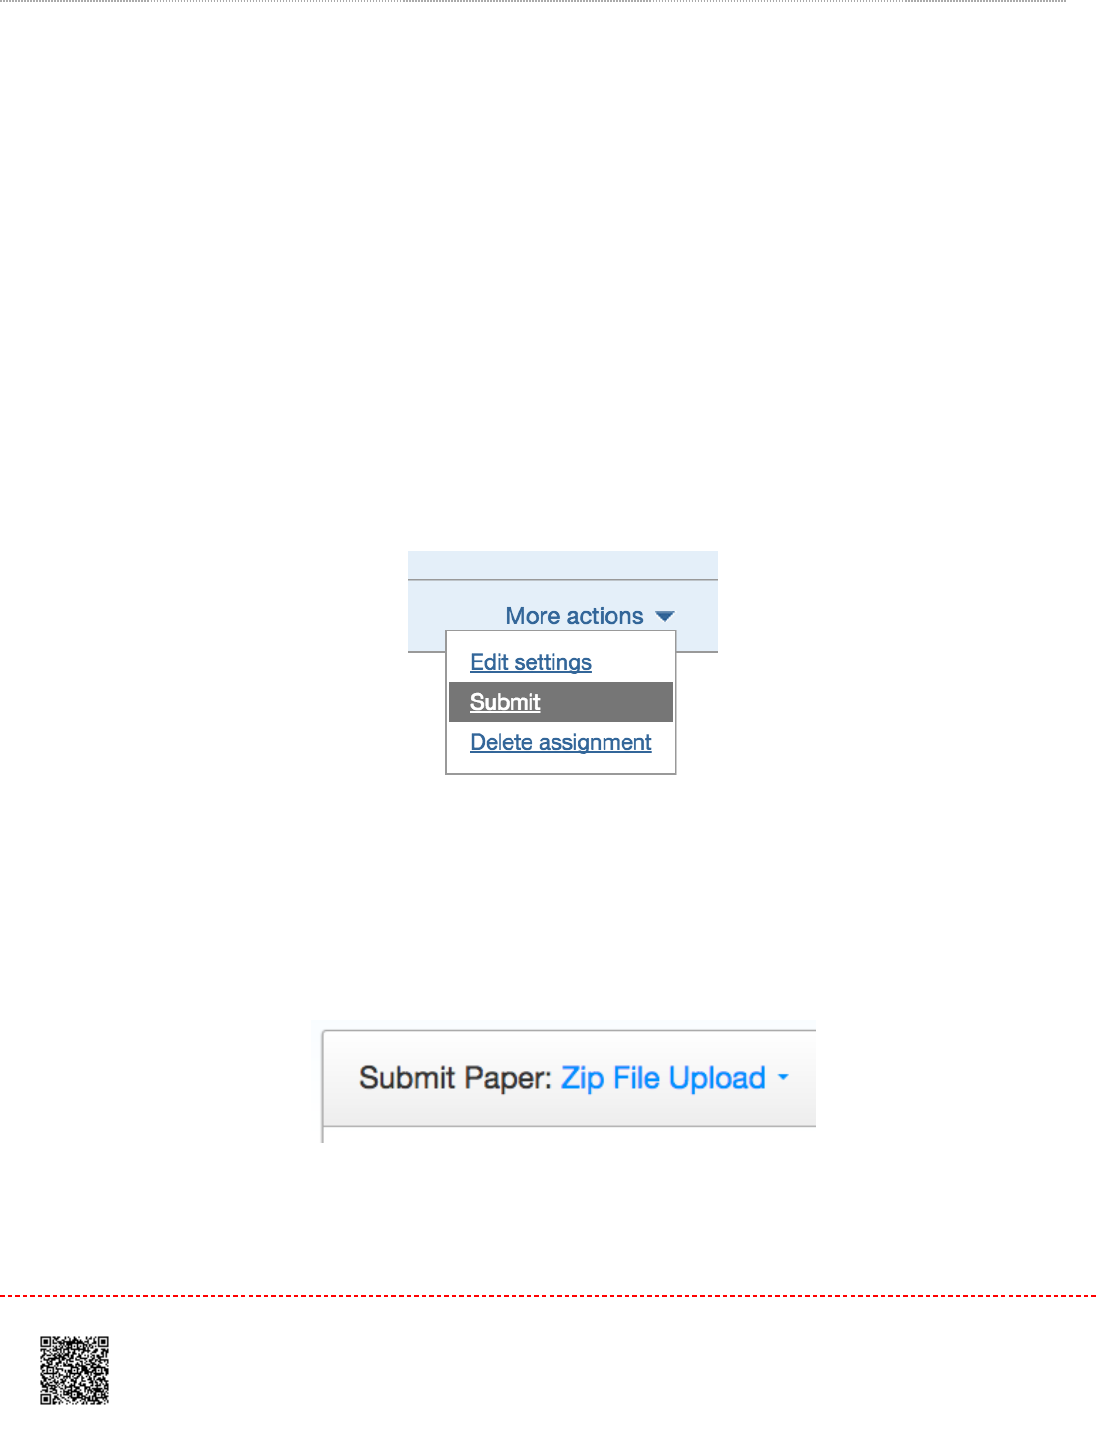
11. On the class homepage, click on the
More actions
link next to the Paper assignment that you would like to
submit to and select
Submit paper
77

2.2. If needed, select
Single File Upload
from the
Submit
drop down menu. File upload is the default submission
type for new users
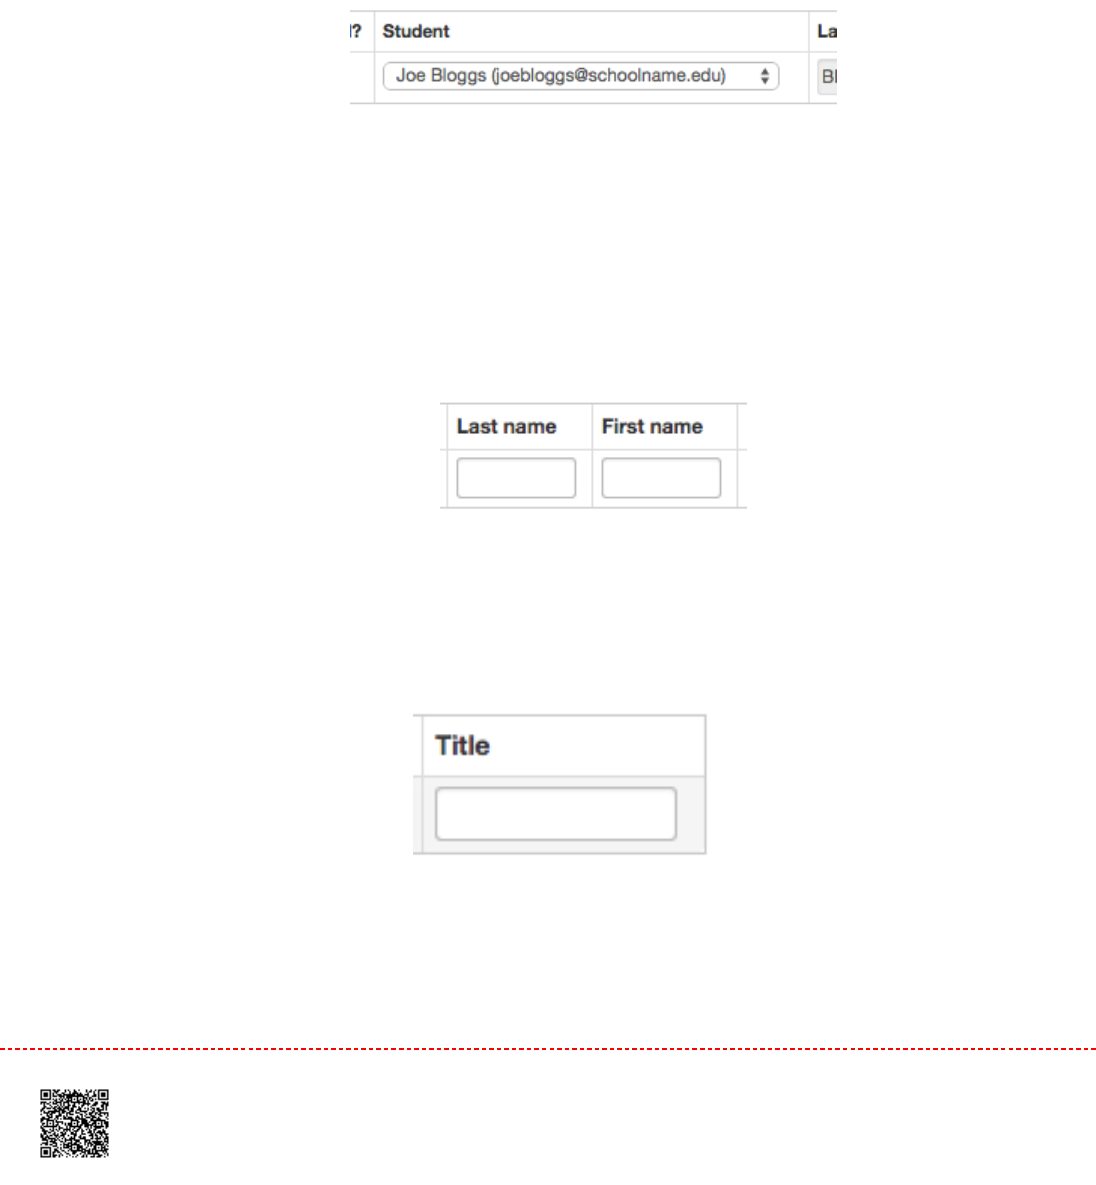
33.
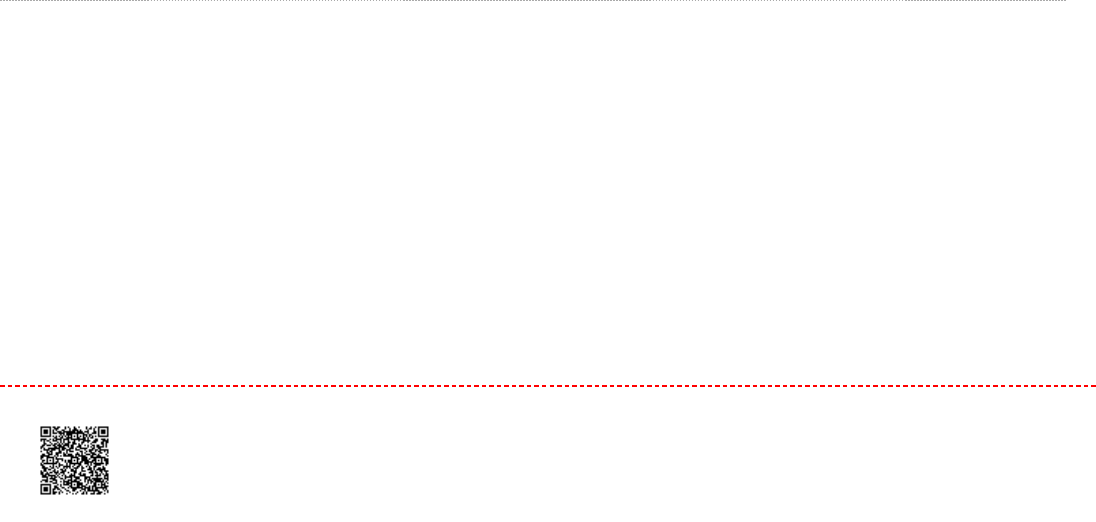
3a3a. Select an enrolled student name using the author pull down menu on the submission page. Papers
submitted by an instructor on behalf of a student will appear in the student portfolio just as if the student
made the submission
3b3b. You must enter the first and last name when the non-enrolled student is selected from the author
dropdown menu
78
Warning:Warning: Papers you submit for non-enrolled students cannot be graded or marked for paperless return to
students
3c3c. Enter the title for the paper
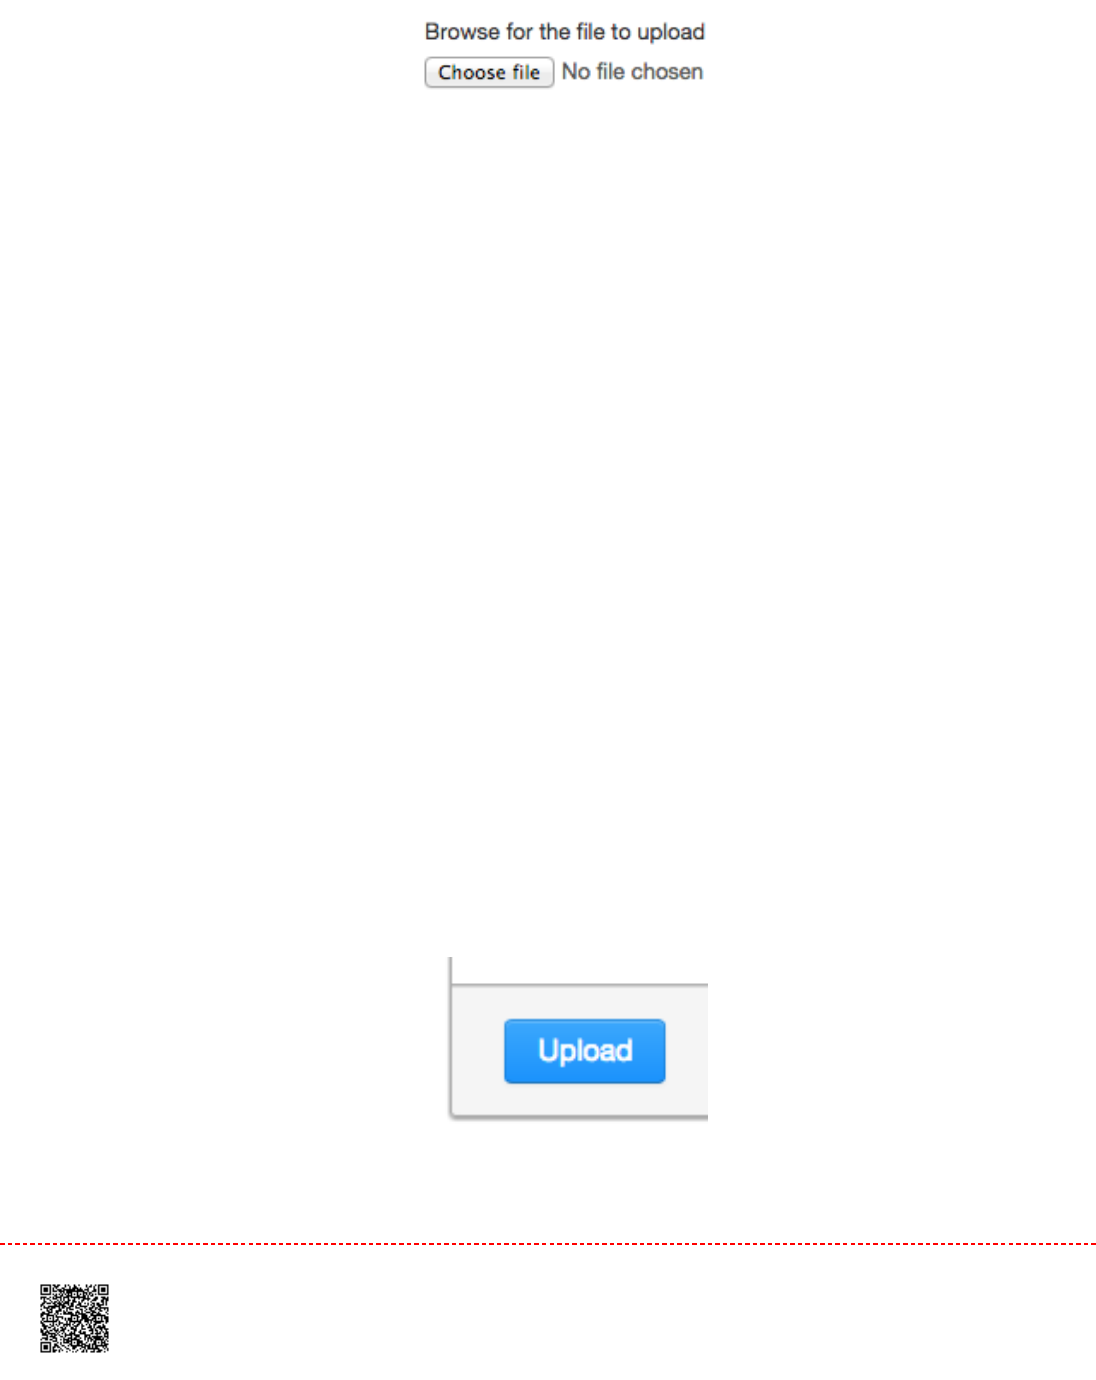
55. Once the requirements for single file upload have been reviewed, you have a choice to upload a file from:
A computer
Dropbox
or Google Drive
Click one of the submission buttons and then locate the file you would like to upload
79
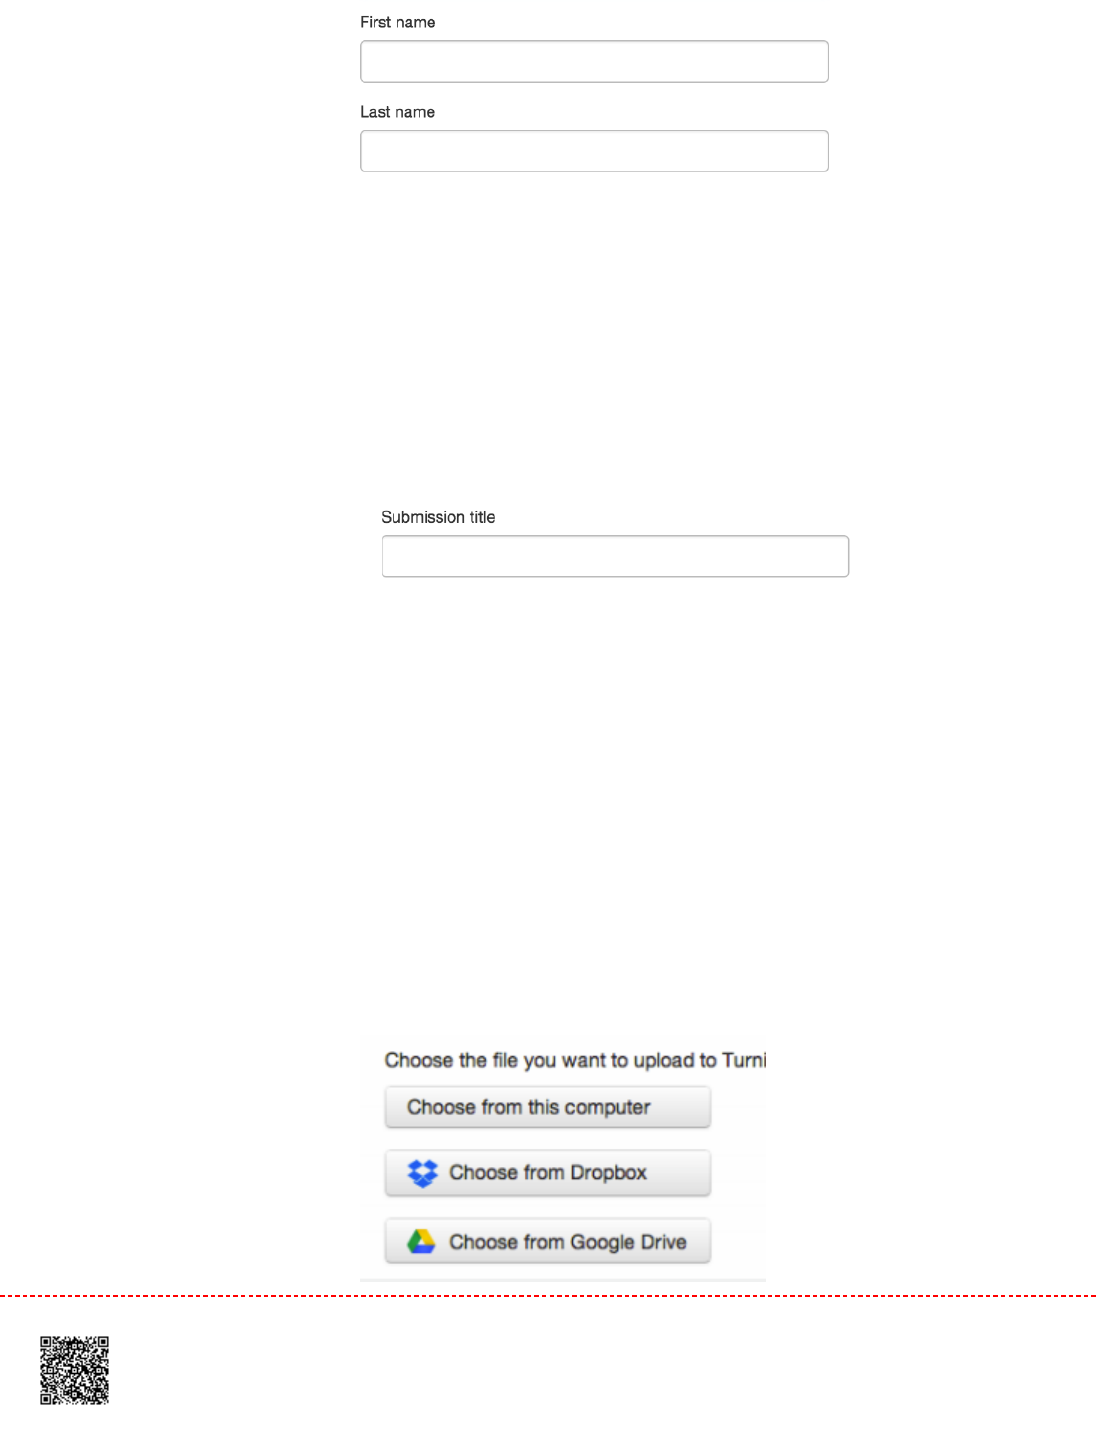
66. Click
Upload
to upload this file.
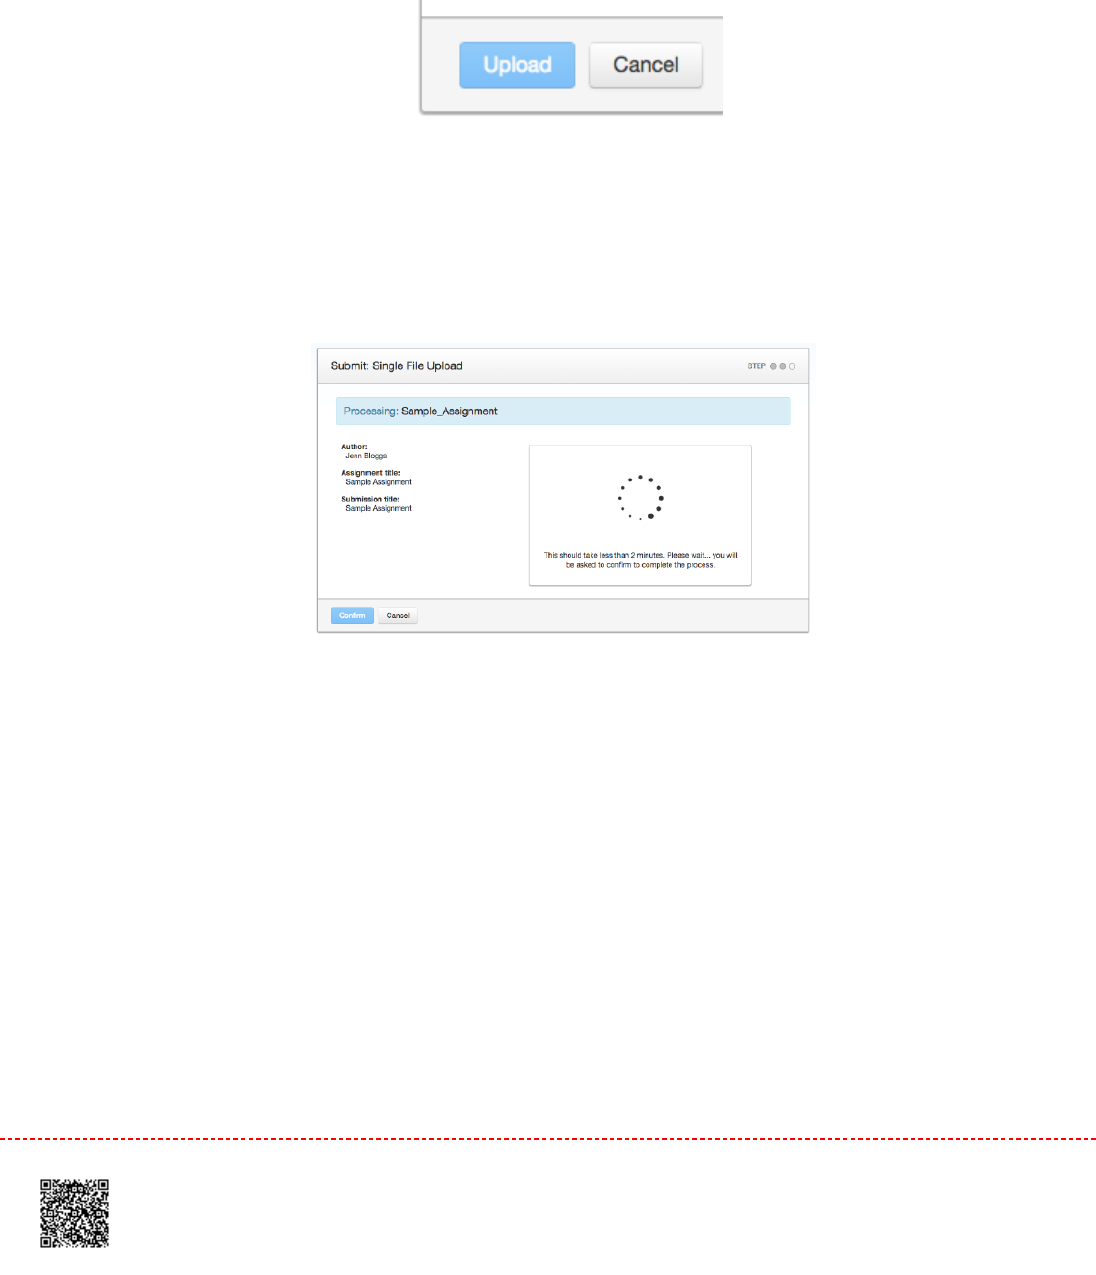
77. The upload will begin processing on the submission preview page and will indicate the upload progress of
the selected file. Once the file is processed the first page of the file will be displayed
88. Once the paper has been uploaded, the first page of the paper being submitted is displayed. Review the text to
confirm the correct file was selected. Use the arrows above the document preview to check any further pages in
the document
80
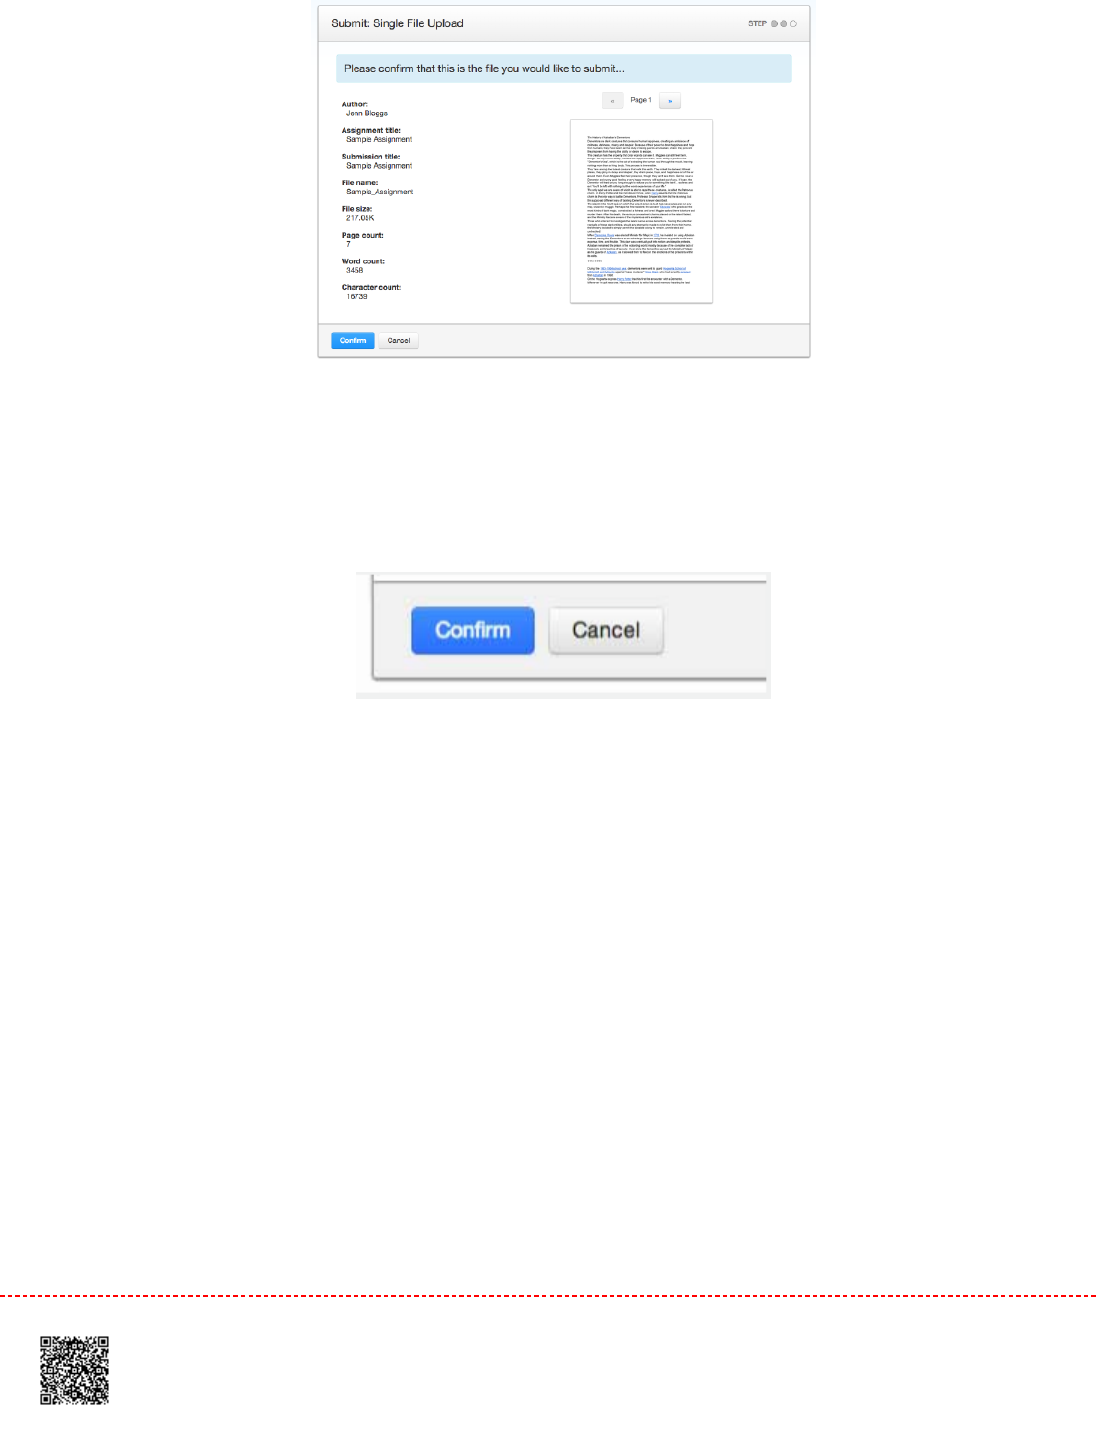
99. To complete the file upload, click on the
Confirm
button at the bottom of the page. If the wrong file was
loaded, click on
Cancel
and re-submit with the correct file
1010. Once the submission is complete, the digital receipt is displayed. The submission ID on the digital receipt is a
unique number assigned to this submission. A copy of the digital receipt is available for download within
the document viewer print option.
81
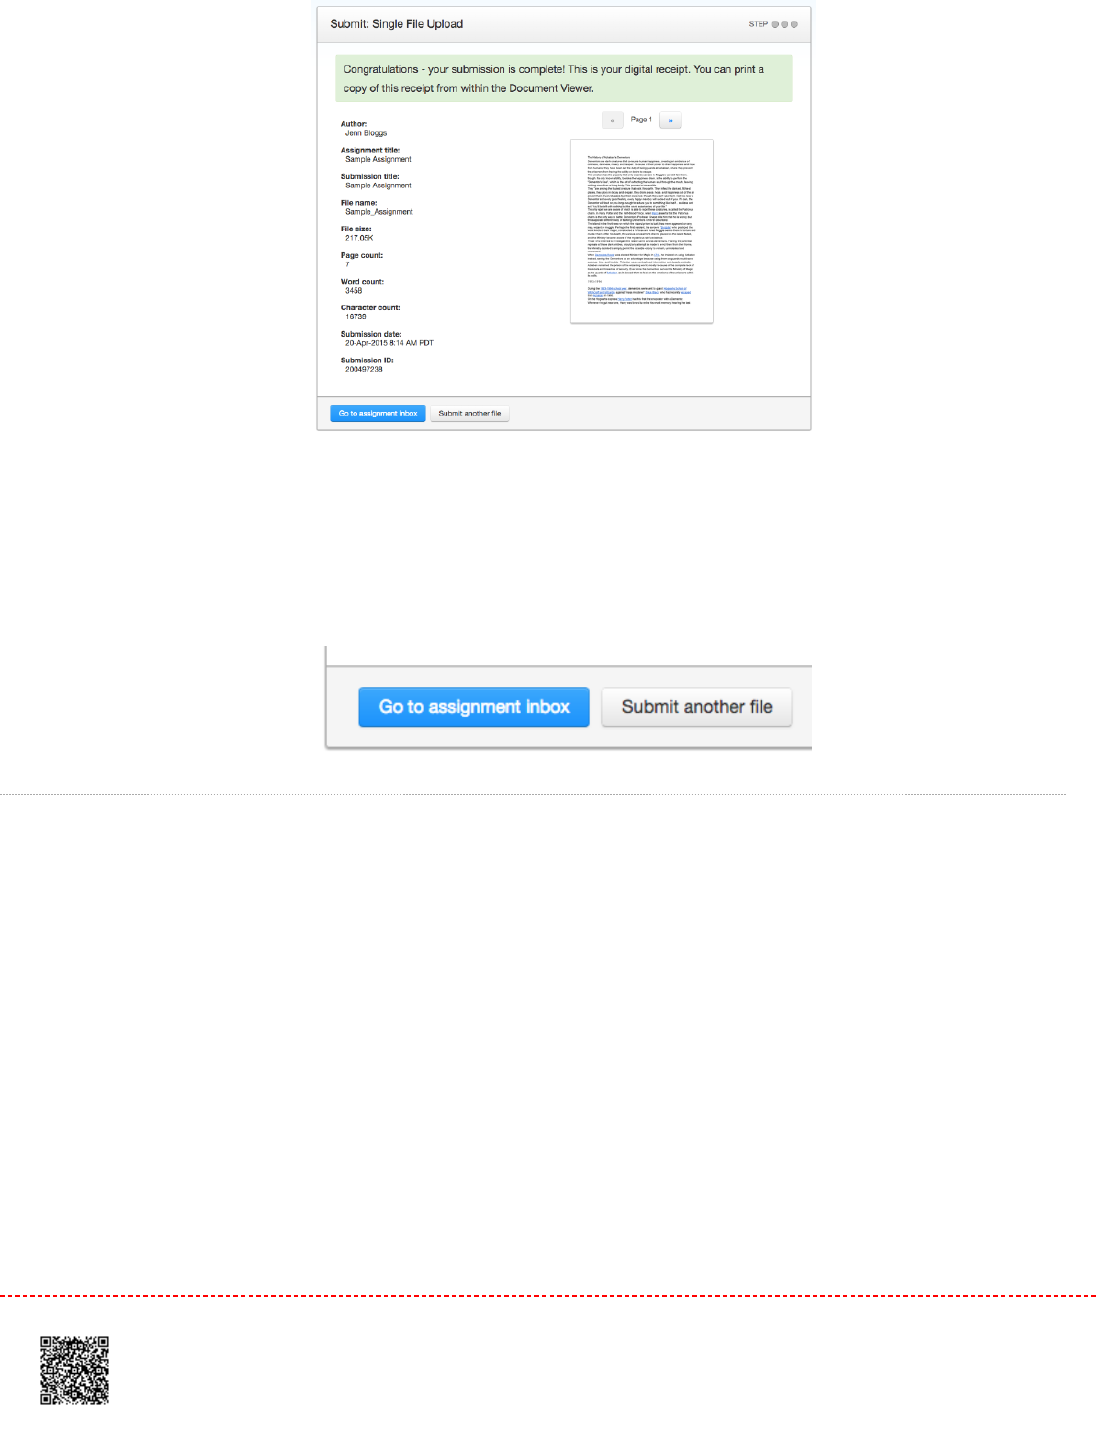
11.11. Click
Go to assignment inbox
to view the list of current student submissions, or click
Submit another file
to
continue submitting as a student
Multiple File Upload
The multiple file upload submission option allows you to upload multiple files simultaneously.
11. On the class homepage, click on the
More actions
link next to the Paper assignment that you would like to
submit to and select
Submit paper
82
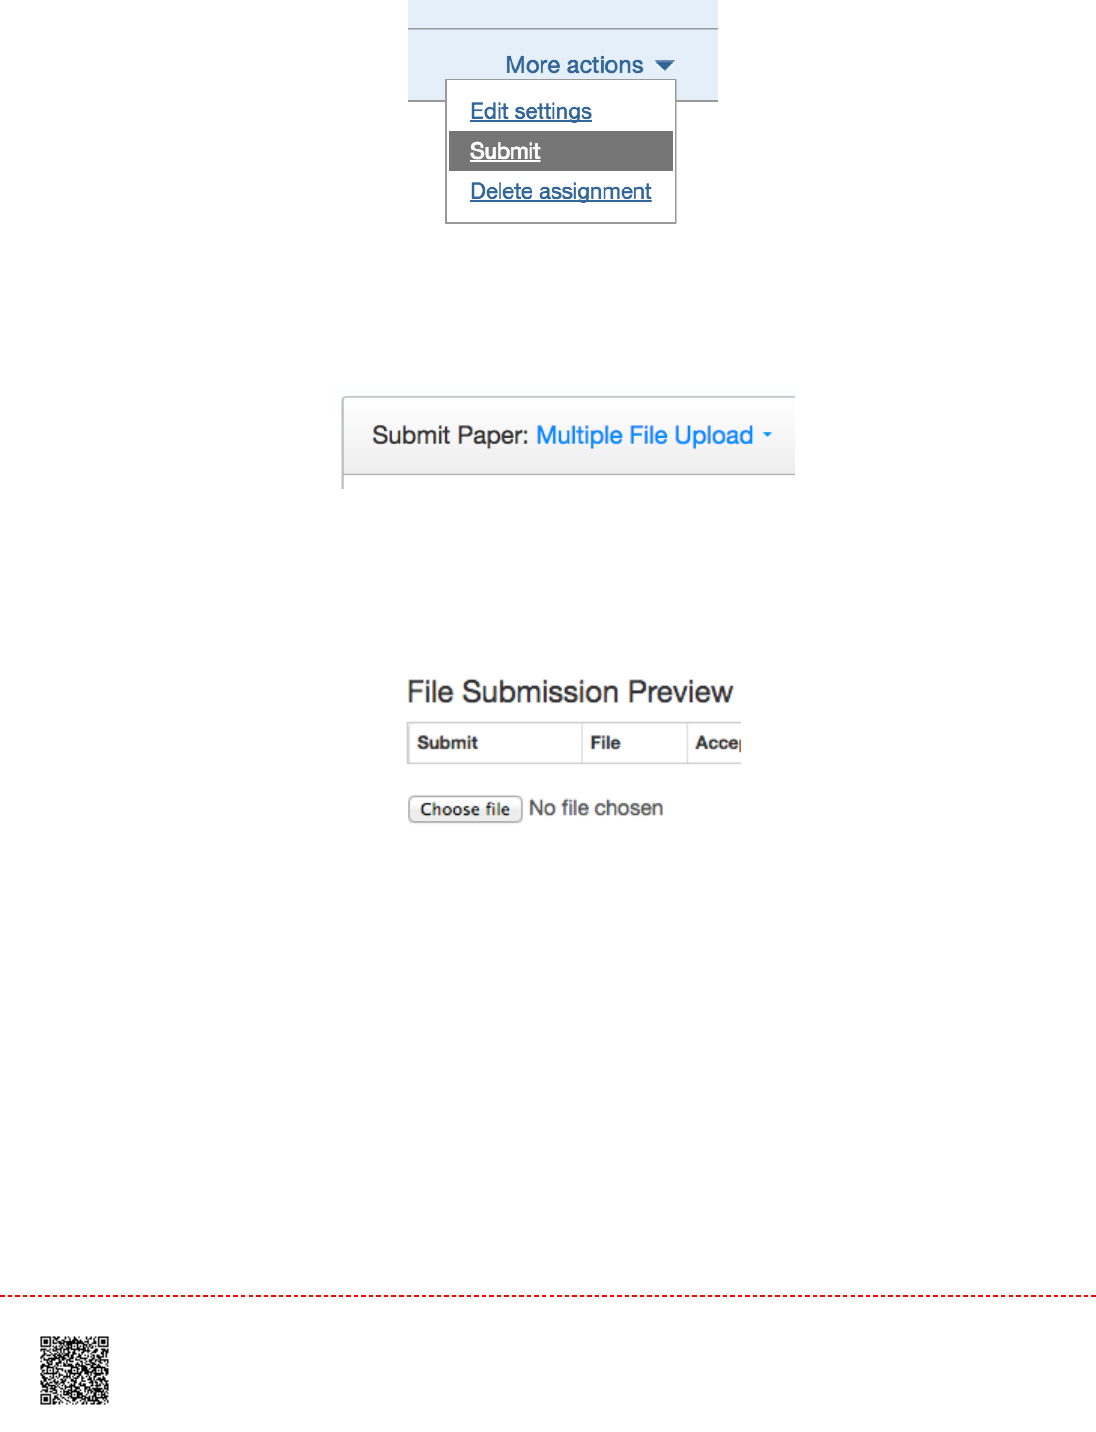
22. Select
Multiple File Upload
from the
Submit:
drop down menu.
Single file upload
is the default submission type.
33. Click on
Choose File
and locate the file from your computer to attach to the File Submission Preview list
Each file must be less than 40 MB
If your file contains images, you may remove the images or save the file as a rich text or plain text file to
make the file smaller. If your file is a PDF and exceeds the 40 MB restriction: (1) copy the text in the
document, (2) change the upload process to 'copy and paste', and (3) paste the text in the body field.
The maximum paper length for each file is 400 pages
All file types are allowed and can receive marks in GradeMark and PeerMark; however, only Microsoft Word,
PowerPoint, WordPerfect, PostScript, PDF, HTML, RTF, OpenOffice (ODT), Hangul (HWP), Google Docs, and
plain text files with at least 20 words of text will be eligible to receive Originality Reports
44.
83

4a.4a. Once your first file has been successfully uploaded, the file will appear within the File
Submission Preview list. Select an enrolled student name using the dropdown menu on the submission
page. Papers submitted by an instructor on behalf of a student will appear in the student portfolio
4b4b. Once your first file has been successfully uploaded, the file will appear within the File
Submission Preview list. To submit on behalf of a non-enrolled student, ensure that "non-enrolled student"
is selected from the
Student
dropdown list, and enter their last and first name in the respective text boxes.
Papers submitted by an instructor on behalf of a student will appear in the student portfolio
55. Enter the title for the paper. If no paper title is entered, the title defaults to the file name for the submitted file
66. Repeat steps 3steps 3 - 6- 6 for each paper being submitted as part of the upload
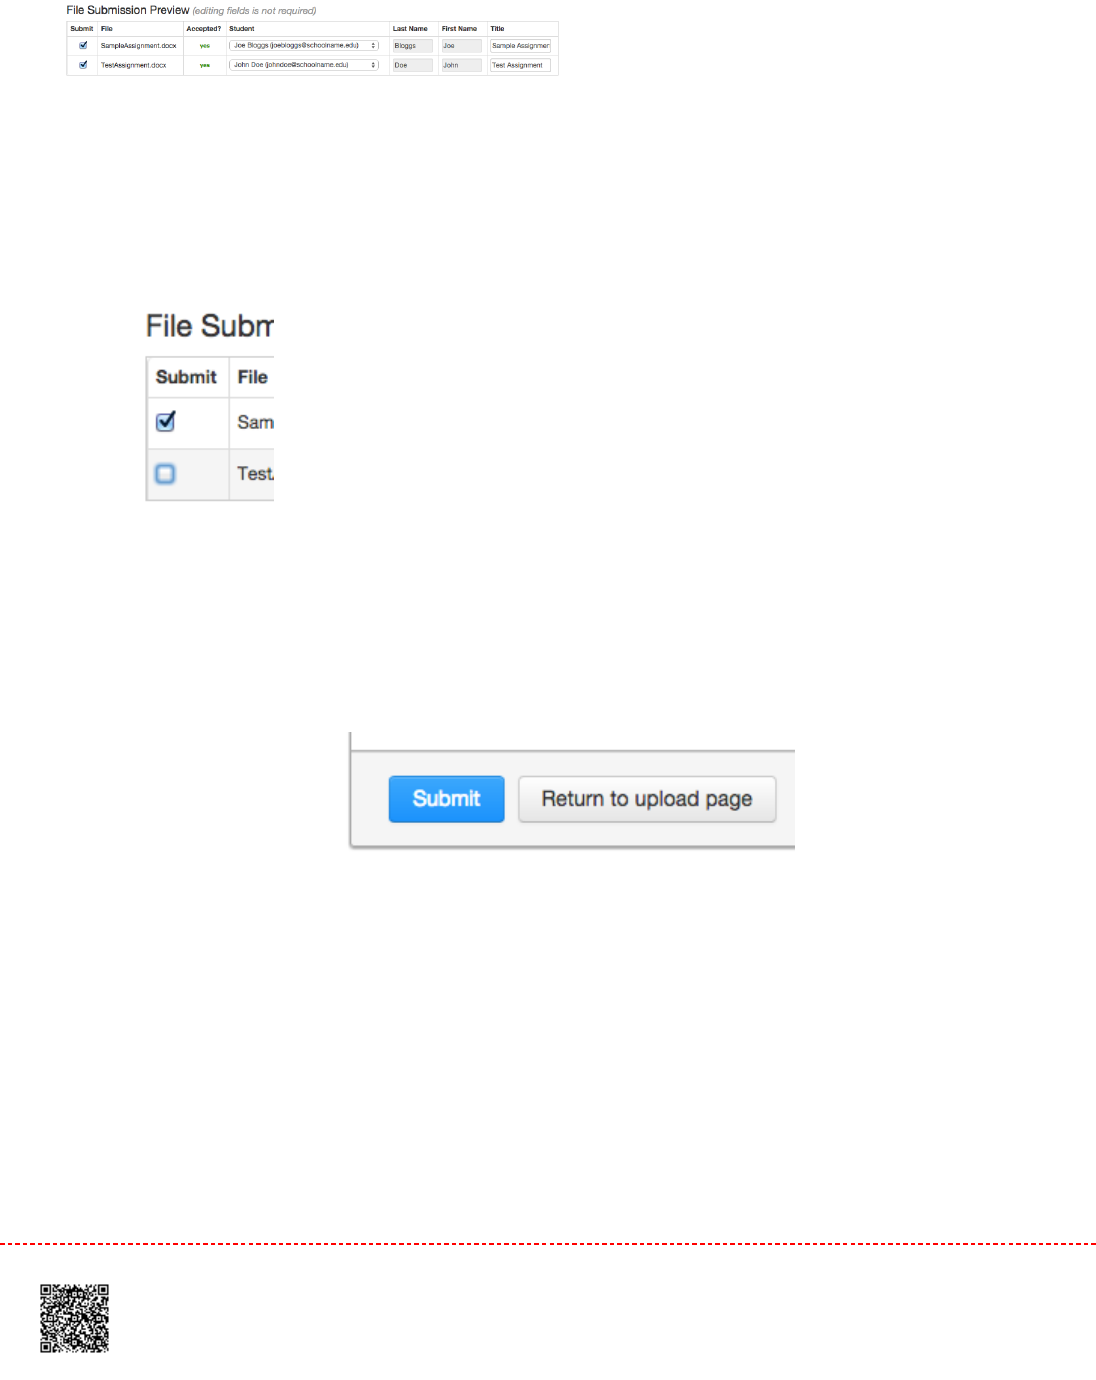
77.
7a.7a. When all the desired files are attached, review the student names and assignment titles
84
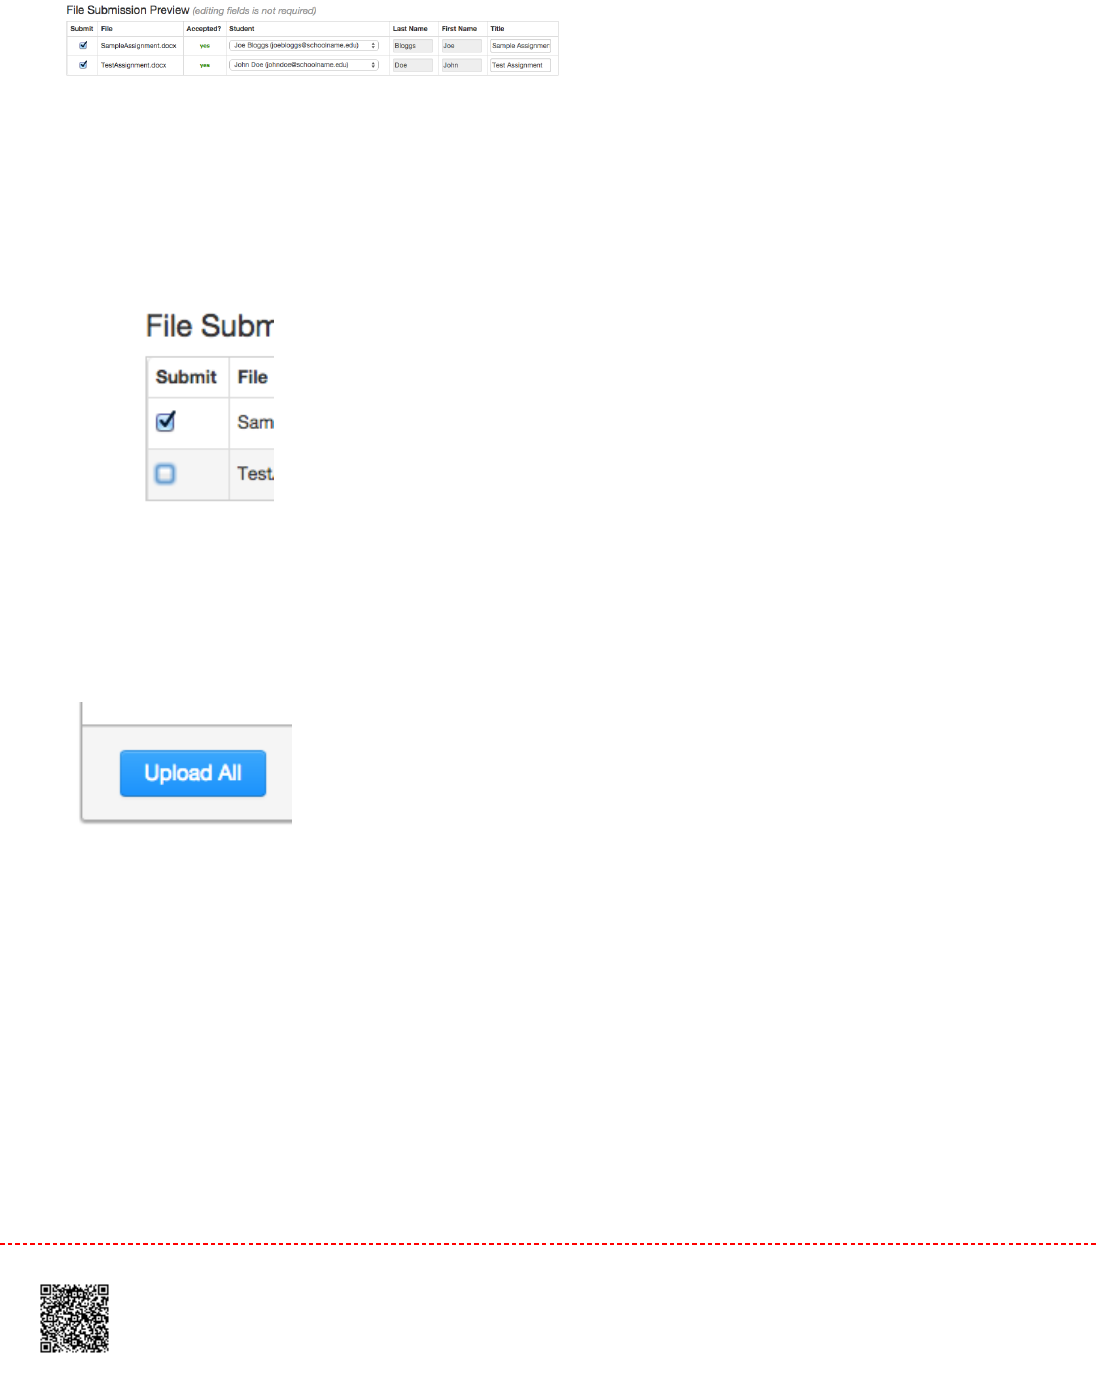
7b.7b. Files can be excluded from the upload by removing the check from the check box to the left of the file
name under the
Submit
column.
88.
8a.8a. Click
Upload All
to upload the files
8b.8b. You can remove all uploaded files from the File Submission Preview list by clicking on the
Delete all
link located below the list to the right. A dialog box will ask you to confirm the deletion. This will clear the
list and allow you to restart the upload process.
85
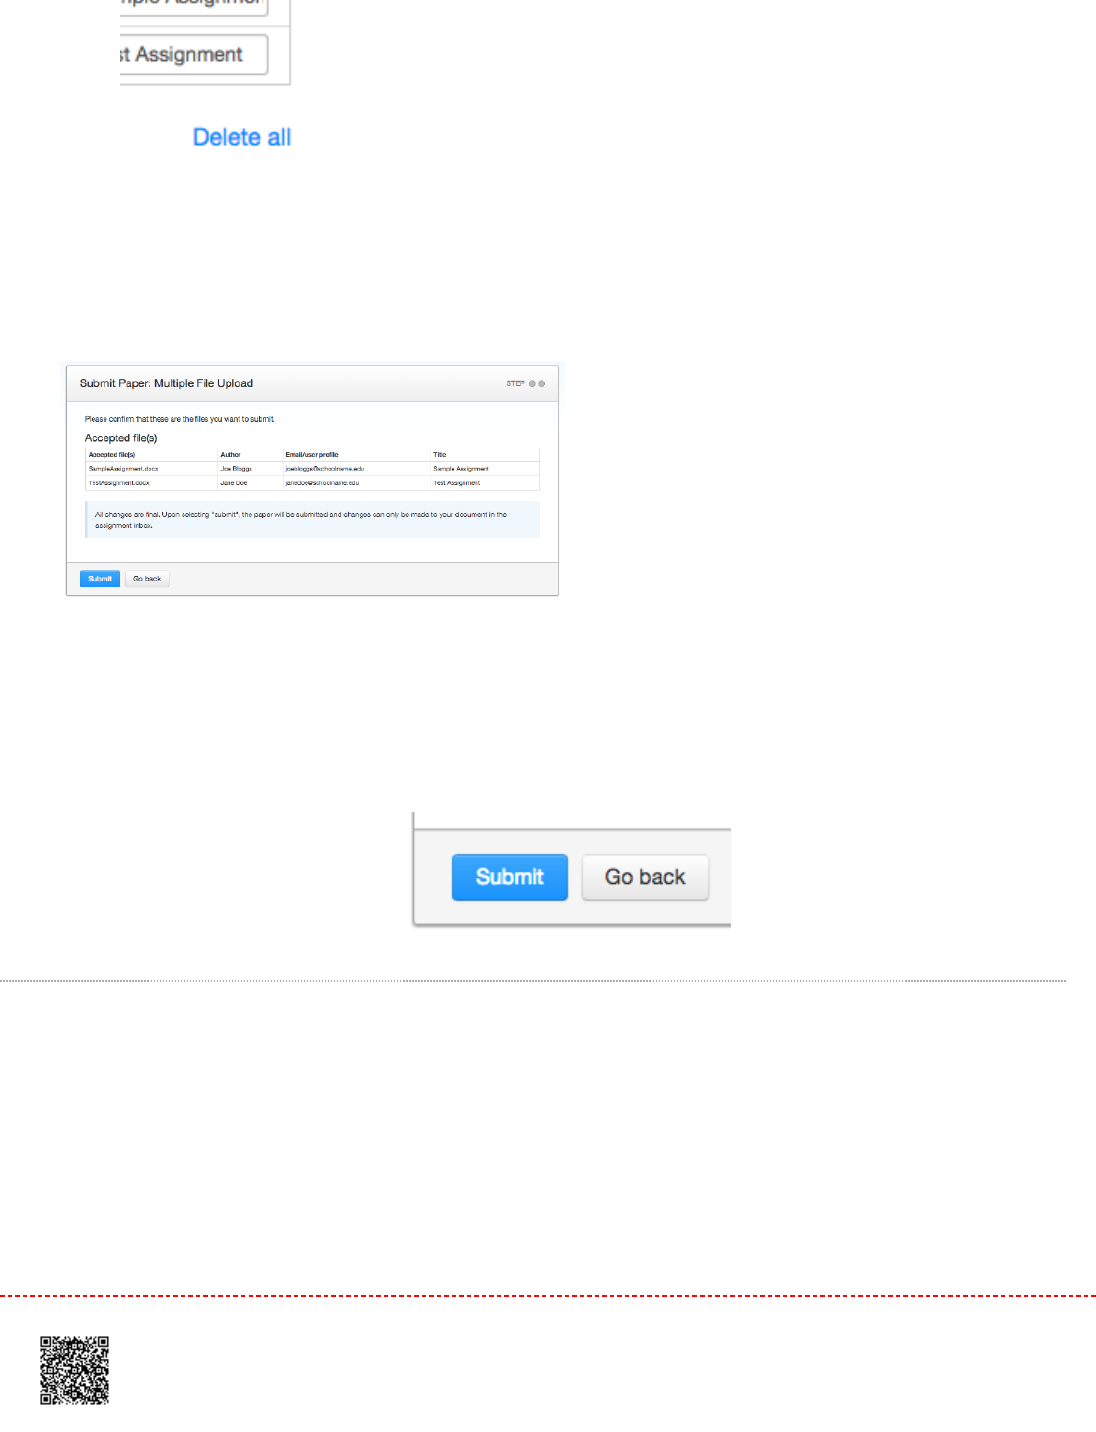
9.9. On the accepted files page, please review the files to be uploaded
10.10. Click S
ubmit
to submit all uploaded files to Turnitin, or click
Go back
to make changes to the multiple file
upload
Cut and Paste Submissions
The cut and paste submission option allows users to submit information from non-supported word processors or file
types, or to only submit specific parts or areas of a document that may need an Originality Report generated.
86
Please note that only text can be submitted via the cut and paste method - any graphics, graphs, images, and formatting
are lost when pasting into the text submission box.
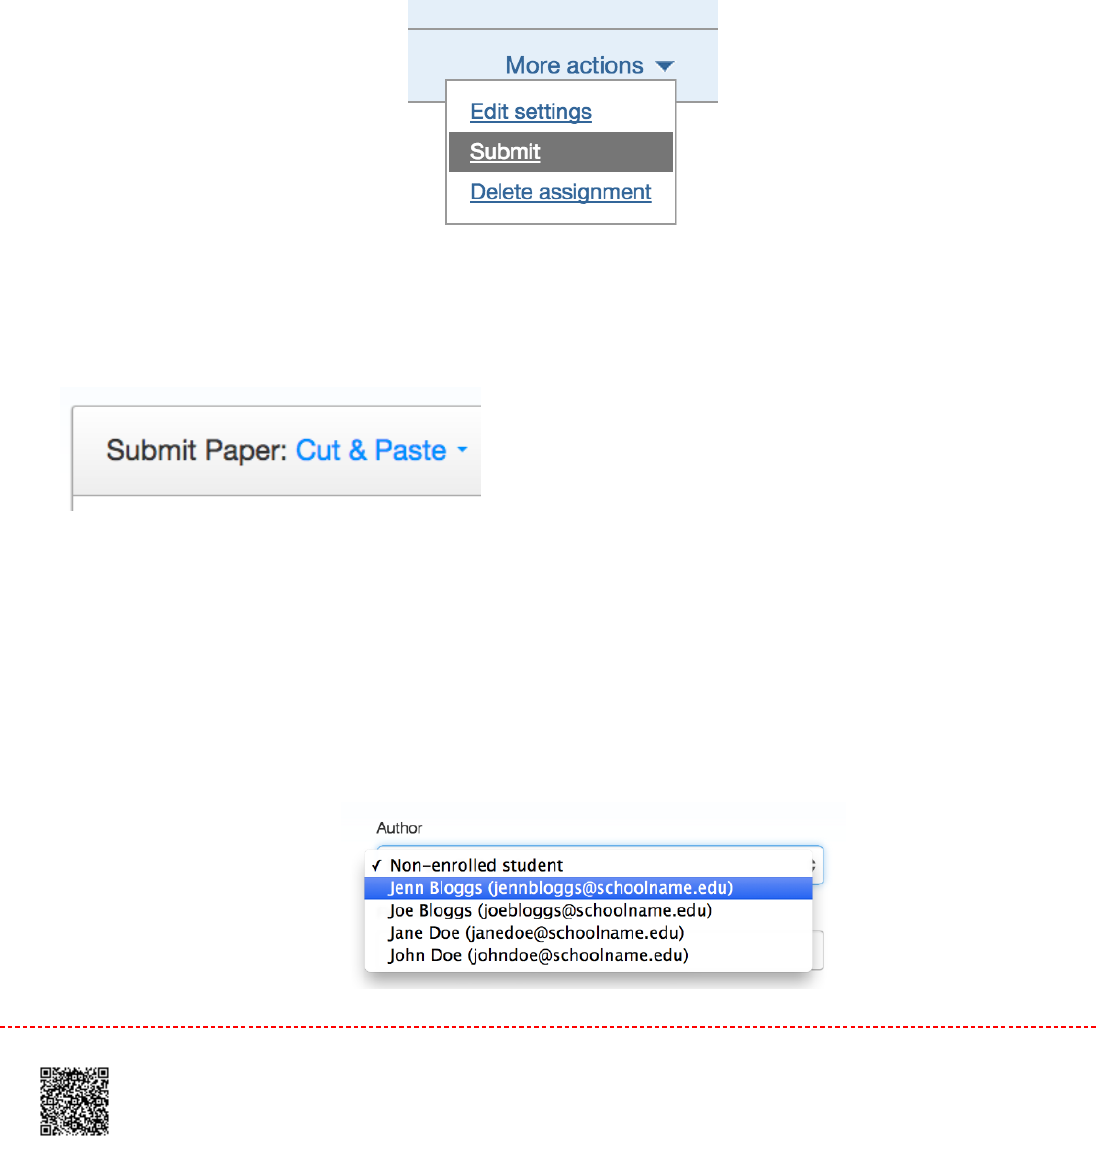
11. On the class homepage, click on the
More actions
link next to the Paper assignment that you would like to
submit to and select
Submit paper
2.2. Select
Cut and paste
from the Submit Paper: pull down menu. Single file upload is the default submission type
3.3.
3a3a. Select an enrolled student name using the author pull down menu on the submission page. Papers
submitted by an instructor on behalf of a student will appear in the student portfolio just as if the student
made the submission
87
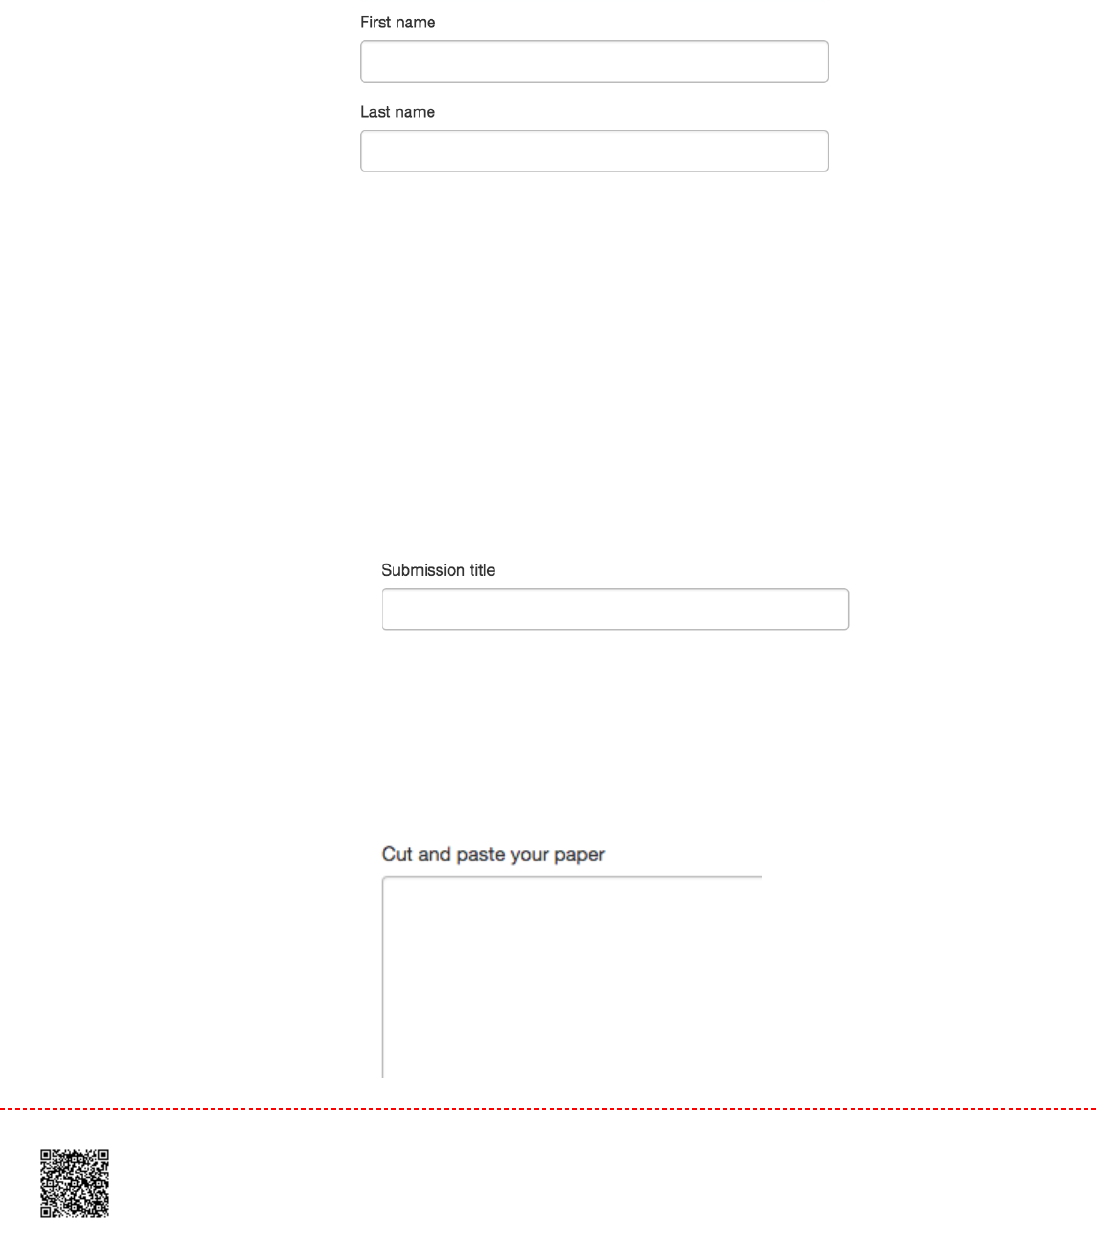
3b3b. You must enter the first and last name when the non-enrolled student is selected from the author
dropdown menu
WarningWarning: Papers you submit for non-enrolled students cannot be graded or marked for paperless return to
students
44. Enter the title for the paper.
55. Copy and paste the selected text into the text box
88
TipTip: To copy and paste text, highlight the text to submit in a word processing or text editing program and select
copy
from the
edit
menu. To transfer the text into the text box on Turnitin, click inside the text box of the
submission page and select
paste
from the browser
edit
menu
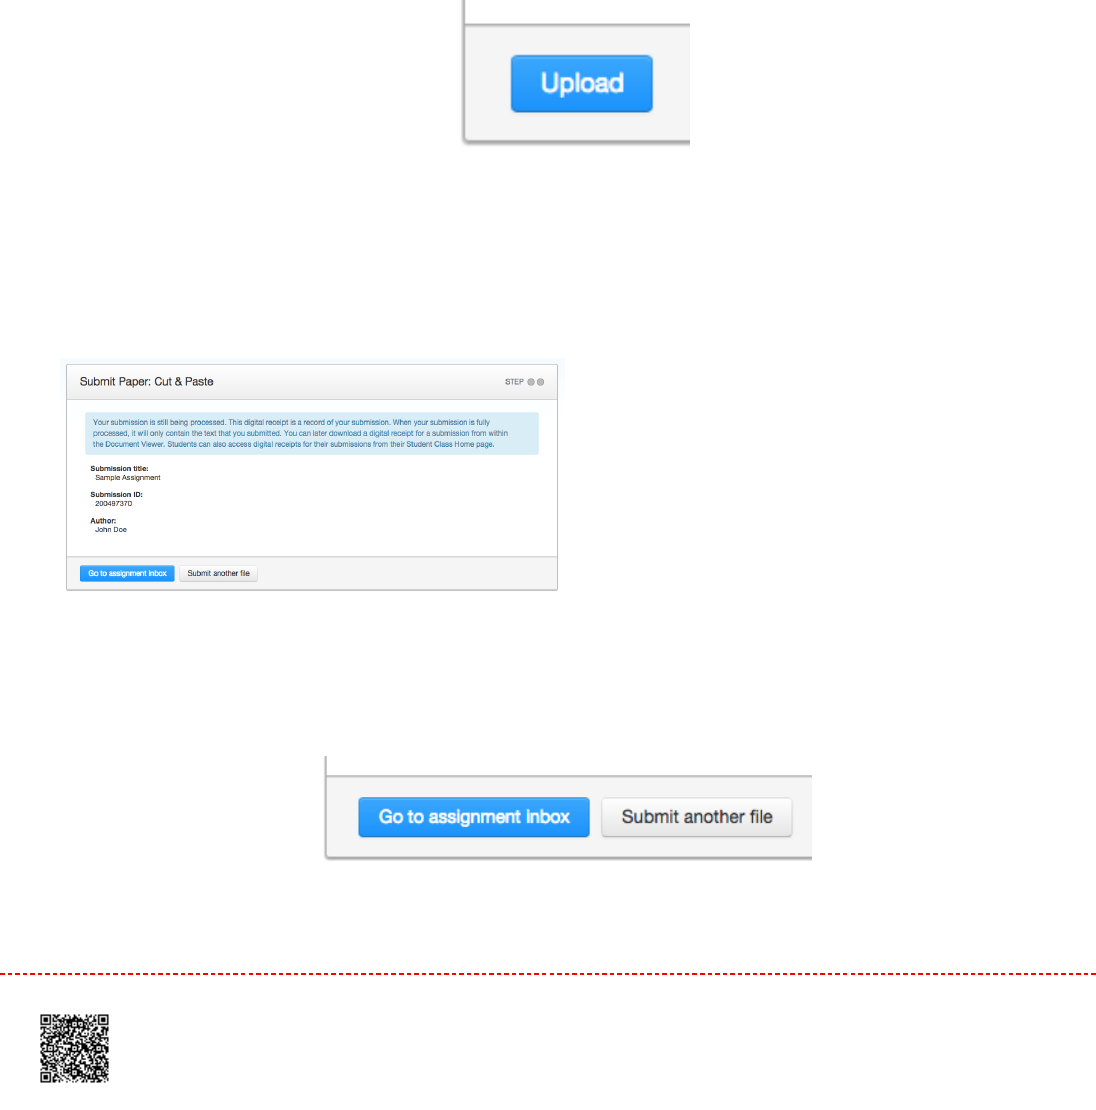
66. Click on
Upload
to submit the text.
7.7. Once the submission is complete, the digital receipt is displayed. The submission ID on the digital receipt is a
unique number assigned to this submission. A copy of the digital receipt is available for download within
the document viewer print option.
8.8. Click
Go to assignment inbox
to view the list of current student submissions, or click
Submit another file
to
continue submitting as a student
89
Zip File Uploads
Instructors are able to upload a zip file of papers to a Turnitin assignment. The zip file may be any size up to
approximately 200MB and contain up to 1000 individual files. If the zip file exceeds either limit it will be rejected.
In uploading zip files, you are advised to ensure that no unacceptable file types are contained within the zip file and to
be careful of duplicate copies of the same file within the zip file. Turnitin will attempt to detect duplicate or invalid files
and warn you of any duplicate or unacceptable files.
11. On the class homepage, click on the
More actions
link next to the Paper assignment that you would like to
submit to and select
Submit paper
22. Select
Zip file upload
from the
choose a paper submission method:
pull down menu. Single file upload is the
default submission type for new users.
33. Click on
Choose File
and select the zip file that will be uploaded
90
Zip files can contain a max of 1000 papers
Please check the contents of your zip file. Check the number of documents in the zip file, if it contains
more than 1000 papers, the system will take a minimum of an hour to detect the error and the zip file will
not be uploaded.
The zip file must be less than 200 MB
Individual files must be less than 40 MB each
If your file contains images, you may remove the images or save the file as a rich text or plain text file to
make the file smaller. If your file is a PDF and exceeds the 40 MB restriction: (1) copy the text in the
document, (2) change the upload process to 'copy and paste', and (3) paste the text in the body field.
The maximum paper length for individual files is 400 pages each
All file types are allowed and can receive marks in GradeMark and PeerMark; however, only Microsoft Word,
PowerPoint, WordPerfect, PostScript, PDF, HTML, RTF, OpenOffice (ODT), Hangul (HWP), Google Docs, and
plain text files with at least 20 words of text will be eligible to receive Originality Reports
44. Click
Upload
to load the zip file and view the list of papers. A status bar indicating upload progress should
be shown. Once uploaded the paper will be redirected to the File Submission Preview page
55.
91
5a.5a. Once your zip file has been successfully uploaded, the individual files within the zip file will appear in
the File Submission Preview list. Select an enrolled student name using the dropdown menu on
the submission page. Papers submitted by an instructor on behalf of a student will appear in the student
portfolio
5b5b. Once your first file has been successfully uploaded, the file will appear within the File
Submission Preview list. To submit on behalf of a non-enrolled student, ensure that "non-enrolled student"
is selected from the
Student
dropdown list, and enter their last and first name in the respective text boxes.
Papers submitted by an instructor on behalf of a student will appear in the student portfolio
66. Enter the title for the paper. If no paper title is entered, the title defaults to the file name for the submitted file
77.
7a.7a. When all the desired files are attached, review the student names and assignment titles
92
7b.7b. Files can be excluded from the submission by removing the check from the check box to the left of the
file name under the
Submit
column.
6.6. Once the files to submit from the zip file have been selected and (if needed) assigned name and title
information, you must click on
Submit
to continue the upload of papers into the assignment. I
77. A confirmation screen will be shown listing all file names, author names, Email user profiles, and
submission titles. Any fields containing Anonymous or Not Entered are not required, but may be set by using the
Go back
button to return to the previous screen
Click
Submit
to finalise the zip file upload into the assignment. Otherwise, click
Go back
to make any necessary
amendments. A progress bar will display the remaining time for the upload
93
Training Video: Submitting a Paper or File
Media, iframe, embed and object tags are not supported inside of a PDF.
94
The Assignment Inbox
Accessing the Assignment Inbox
Each assignment in a class has an assignment inbox. The assignment inbox contains any submissions that have been
made by students or the instructor to the assignment.
1.1. To access the assignment inbox, click the
All Classes
tab, which will direct you to the Instructor homepage.
2.2. From the Instructor homepage, click on the class name of the assignments you wish to access. You will be
directed to the class homepage
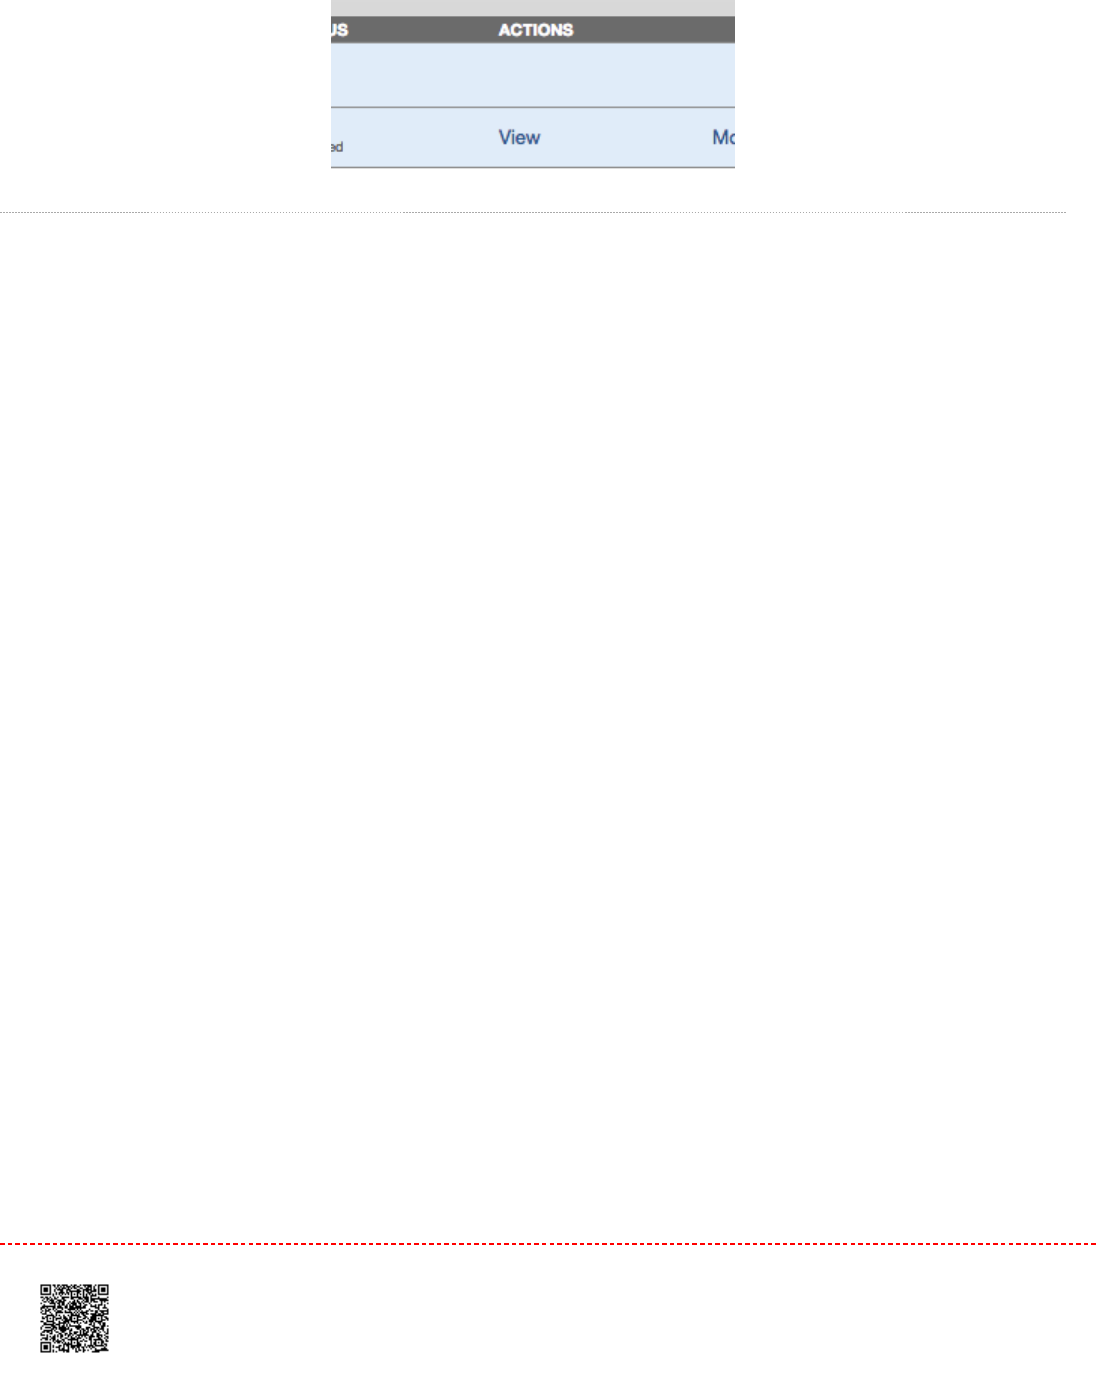
3.3. From the Class homepage, click on the
View
link under the Actions column next to the assignment that you
wish to access
95
Elements of the Assignment Inbox
The assignment inbox is a sorted list of columns containing information regarding submissions in an assignment. The
assignment inbox can be organized by any of the criteria listed - for example, clicking on the column heading name of
author will sort the contents of the assignment box by author last name from A to Z. Clicking the column heading again
will sort it again by the reverse of the criteria, from Z to A.
The column headings in the assignment inbox are:
AuthorAuthor - A column containing the names of any enrolled students and the names given for any non-enrolled
instructor uploaded papers in the assignment. Clicking on the name of the author opens the class portfolio page for
any enrolled students. Enrolled student names are underlined and lettered in blue
TitleTitle - The title given for any paper submitted. If there is no submission for a user, this field will list "no
submission". Clicking on the title of a paper will open a text version of the paper with submission information, but no
Originality Report data, to allow an instructor to view the student paper
SimilaritySimilarity - The Similarity column contains the Similarity Report icon. The icon contains a percentage indicating the
overall similarity of the paper to information in the Turnitin repositories: 100% being ‘fully similar’, 0% indicating ‘no
similarity’. The icon is rectangular and contains the percentage number and the corresponding color. If only a
grayed out icon is available, the report is not ready. A dash in the report column indicates no submission or that no
Similarity Report is generated based on assignment settings. For more information, see the Viewing
Similarity Reports section of this guide
GradeGrade - The grade column indicates GradeMark image availability. A blue pencil icon indicates that a paper is ready
to be graded, but has not yet been graded. A grey pencil icon that no submission was made or that GradeMark
digital assessment is not available for the class or account. Once a paper is graded, the point value given to the
paper will replace the pencil icon in the grade column
96

ResponseResponse - The response column provides instructors with insight on which students have viewed their graded
papers. A grey icon of a person with a check mark notifies the instructor that their student has viewed their graded
paper in GradeMark for over 30 seconds. If the student does not view GradeMark for more than 30 seconds, the
response column will not update. By hovering over this icon, you will be advised of the date and time that your
student viewed GradeMark
FileFile - A page icon will appear in the file column if a submission has been uploaded to Turnitin. If there was no
submission made, a dash will appear. Click on the page icon to download a copy of the submission as originally
uploaded by the student to the assignment
Paper IDPaper ID - The unique numeric ID number assigned to every submission made to Turnitin. This column contains a
dash if no submission was made. The paper ID is also provided to students or instructors when submitting by file
upload or copy and paste as part of the digital receipt
DateDate - The date of a submission. Any dates shown in red indicate a late submission made after the due date and
time of an assignment. The format is day-month-year. If no submission was made after the due date/time for a
student, this column shows (
late
) in red. If the due date has not passed, students in the class with no submissions
have a dash in this column.
The assignment inbox also contains a number of items in the assignment inbox panel at the top of the assignment
inbox. The items are:
All papersAll papers
Marked papersMarked papers
Viewed papersViewed papers
New papersNew papers
These allow an instructor to select which folder of an assignment inbox to view. By default, all papers are in the new
papers folder. Papers can be moved between folders in the assignment inbox by using the
move to
function. Papers
only can be placed in a single folder. Selecting a folder will display only that folder unless
all papers
is selected,
which shows every submission in an assignment
97
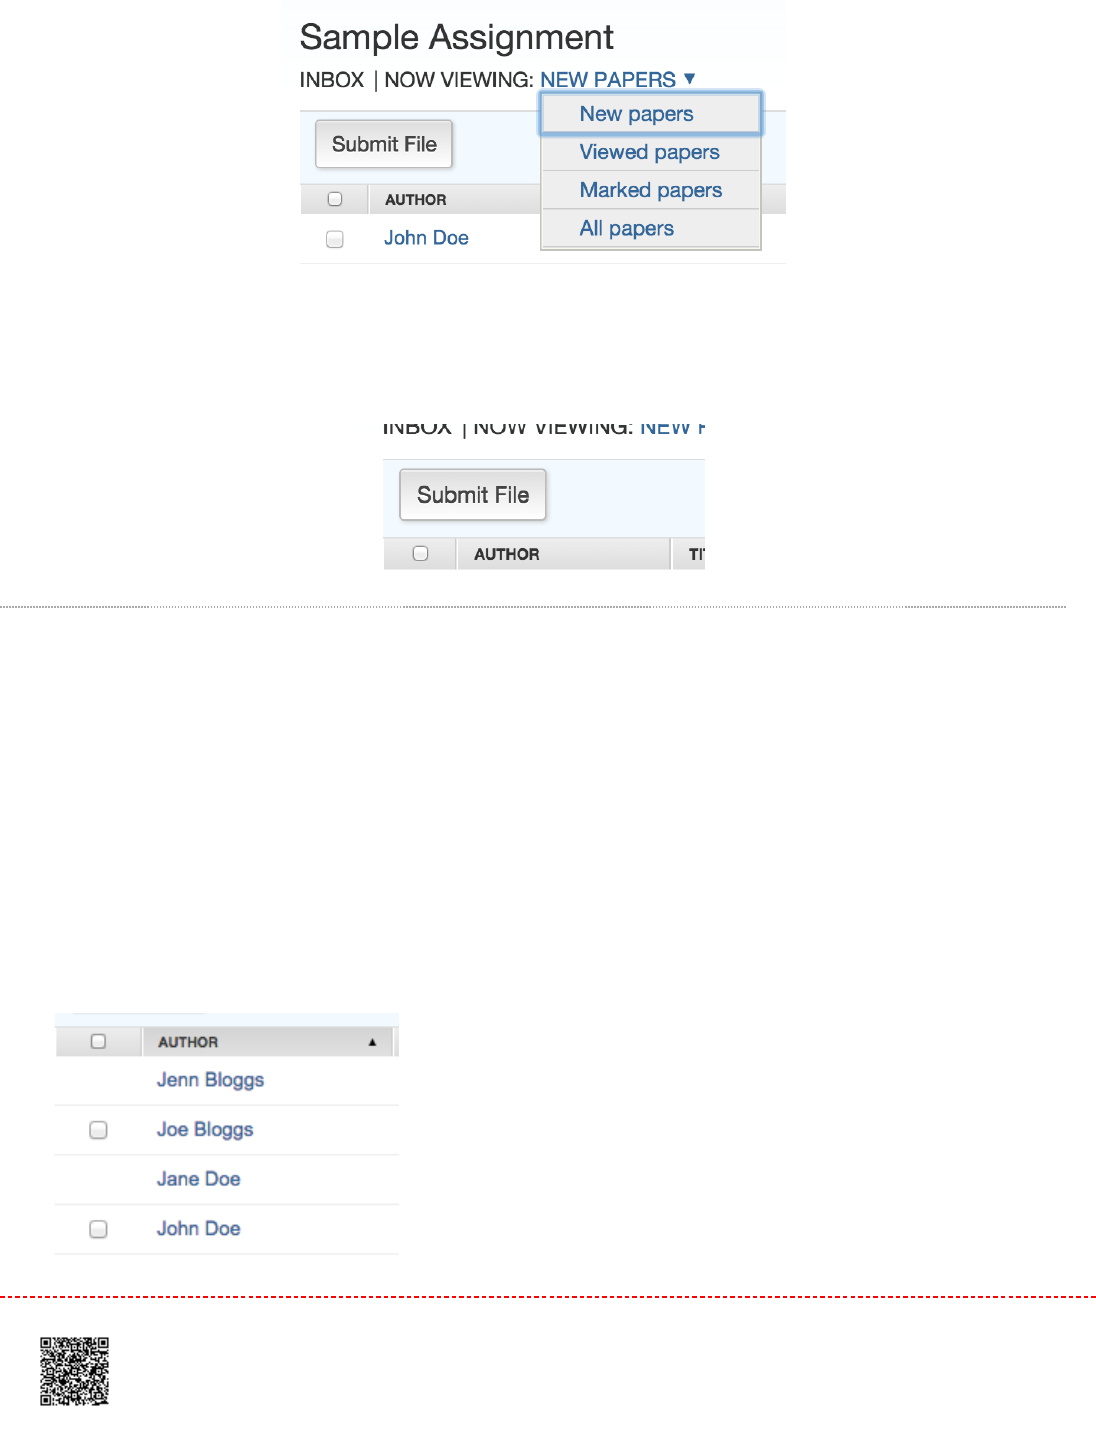
Submit buttonSubmit button - Allows an instructor to begin submitting a paper or papers to this assignment
Organizing the Assignment Inbox
Turnitin offers the instructor user many methods to organize papers in the assignment inbox to assist with handling large
classes or simply to quickly sort the submissions and Originality Reports in an inbox.
The following are the ways an instructor is able to organize the assignment inbox:
Sorting by column headerSorting by column header - Click any of the following column names to sort the inbox by that column: author, title,
similarity, grade, paper ID and date. Click a second time to re-sort in the opposite direction
98
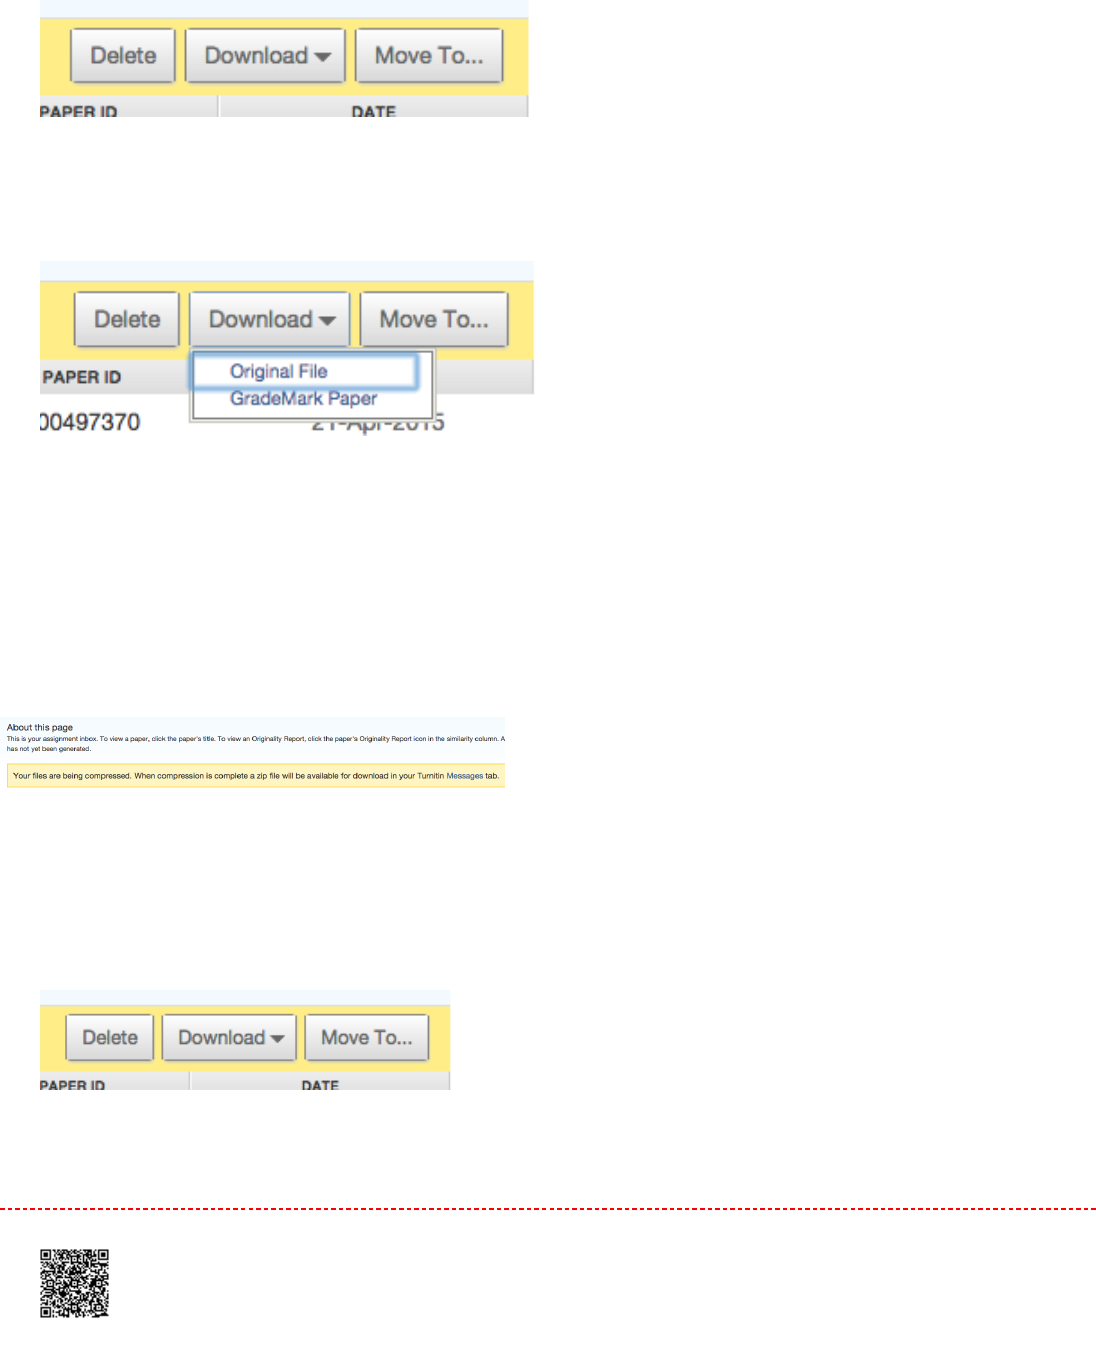
DeleteDelete - By ticking the checkbox for a particular paper, the delete option will appear above. This will allow you to
delete the paper
DownloadDownload - By ticking the checkbox for a particular paper, the download option will appear above. Select from
the
Download
dropdown list whether you would like to download the original paper or the GradeMark paper
In selecting Original File, a dialog box will appear advising you that the file will be compressed and downloaded
to your computer. Click
OK
to accept, or
Cancel
to abort the procedure
In selecting GradeMark paper, a dialog box will appear advising you that this action will compress the selected
files into a zip file. You will be notified in your Turnitin Messages tab when the zip file is available for
download. Click
OK
to accept, or
Cancel
to abort the procedure. This process is confirmed through a yellow
notification at the top of the page. Select the
Messages
link to If view and download the zip file
MoveMove toto - By ticking the checkbox for a particular paper, the move to... option will appear above. This button will
allow you to move papers to the viewed or marked folders. You will be directed to the move paper(s) page, where
you can select the destination folder and destination assignment from their respective dropdown lists.
Click
submit
to confirm this move
99
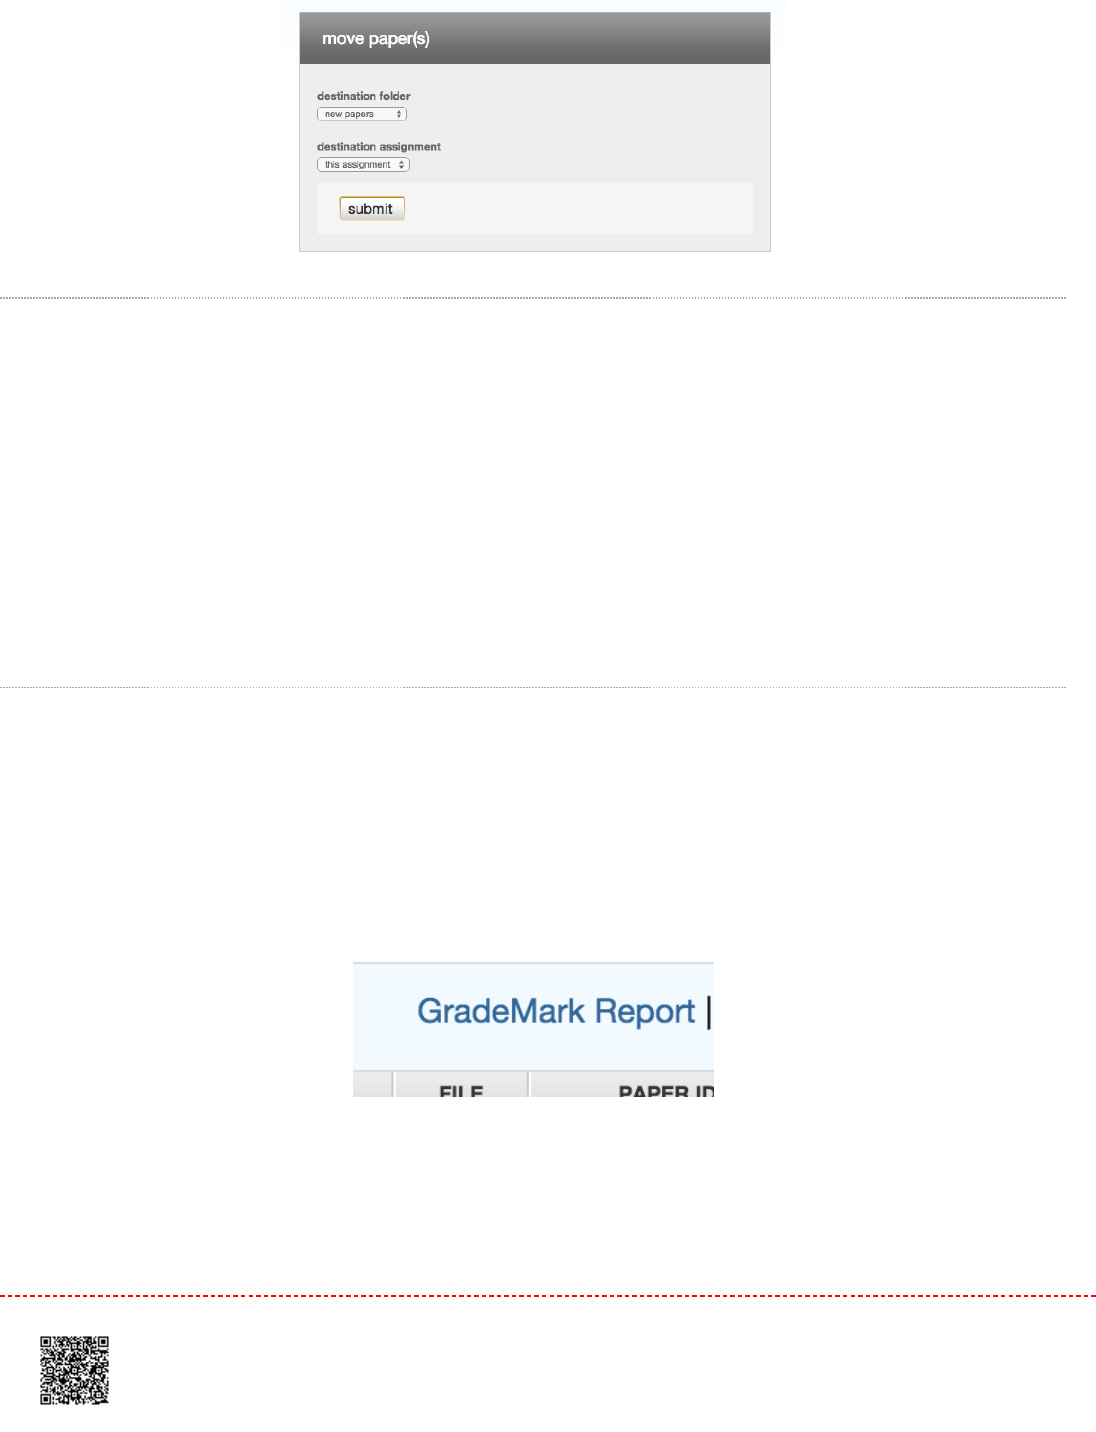
Viewing and Exporting a GradeMark Report
GradeMark Report provides information on how many times each QuickMark was used on and each rubric criterion
rating given for each graded paper in an assignment. This allows instructors to more quickly identify learning patterns
among their students and determine which rubric criteria or writing skills their students show strengths or weaknesses in.
Within the GradeMark report there are two main viewing options: the rubrics tab or the QuickMarks tab. If e-rater
grammar check is turned on for an assignment a third tab will appear titled e-rater® Marks.
QuickMark Report
1.1. To view the GradeMark Report summary click on the
GradeMark Report
button.
2.2. By clicking on the Q
uickMarks
tab, this will display the QuickMark sets used in grading the papers within the
assignment and the number of QuickMark editing marks used in each paper from each QuickMark set.
100
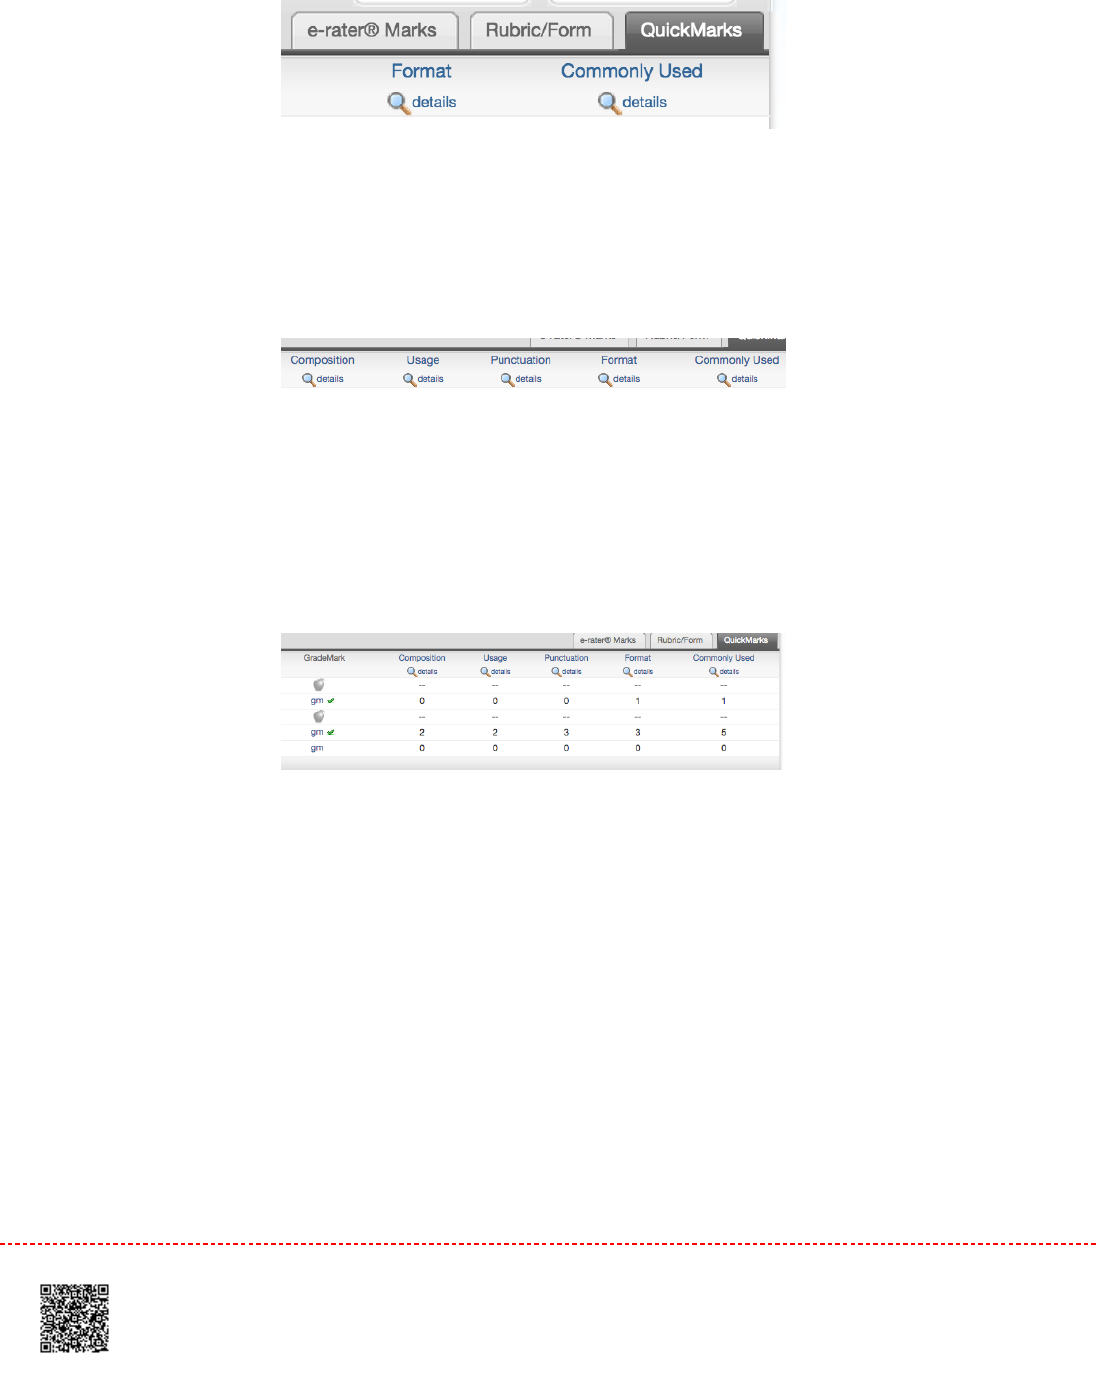
3.3. To view the specific QuickMark editing marks that were used from each QuickMark set, click on the
details
link
under the QuickMark set that you would like to view
4.4. GradeMark report tracks and records each QuickMark used within a students paper. This information is located
underneath the QuickMark symbol column header to the right of the student name and paper title. Use the
QuickMark set name tabs to navigate between QuickMark sets.
5.5.
5a.5a. To make any changes to the GradeMark report, click on the
gm
link under GradeMark, which will open
GradeMark. Once you have made these changes, close the GradeMark window
101
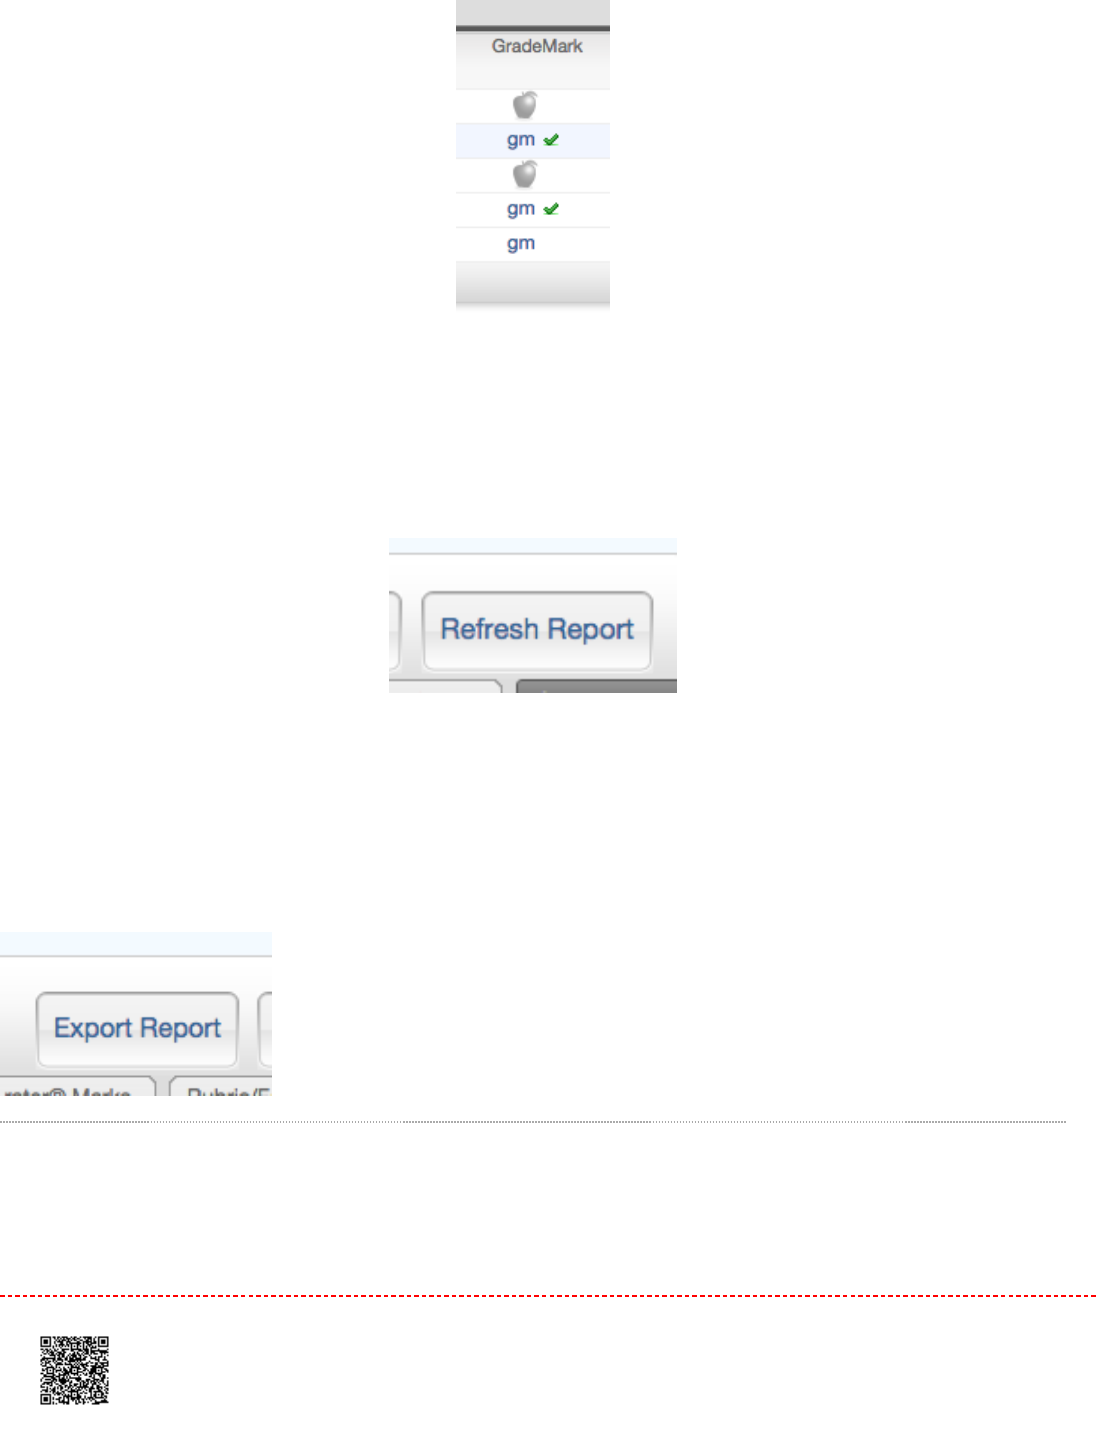
5b.5b. For the aforementioned changes to update in the GradeMark report, click on the
Refresh Report
button
in the top right corner of the GradeMark report page. This will update the changes made
5c.5c. To export the GradeMark report click on the
Export Report
button in the top right corner of the
GradeMark report page. Whichever page of the GradeMark report you are currently viewing will be
exported to an excel file.
Rubric/Form Report
1.1. Select the
Rubric/Form
tab to open the rubric portion of the GradeMark report.
102

2.2. There are two viewing options for the rubrics tab: numerical scores or qualitative scores. Use the
View as
drop-
down menu to move between the two options.
3.3. Ensure the rubric or form scores are showing for each criterion. If the values aren't appearing, simply click
the
Refresh Report
button.
3.3. Click
Export Report
to download the current view of the rubric/form report
103
Training Video: Accessing the Assignment Inbox
Media, iframe, embed and object tags are not supported inside of a PDF.
104
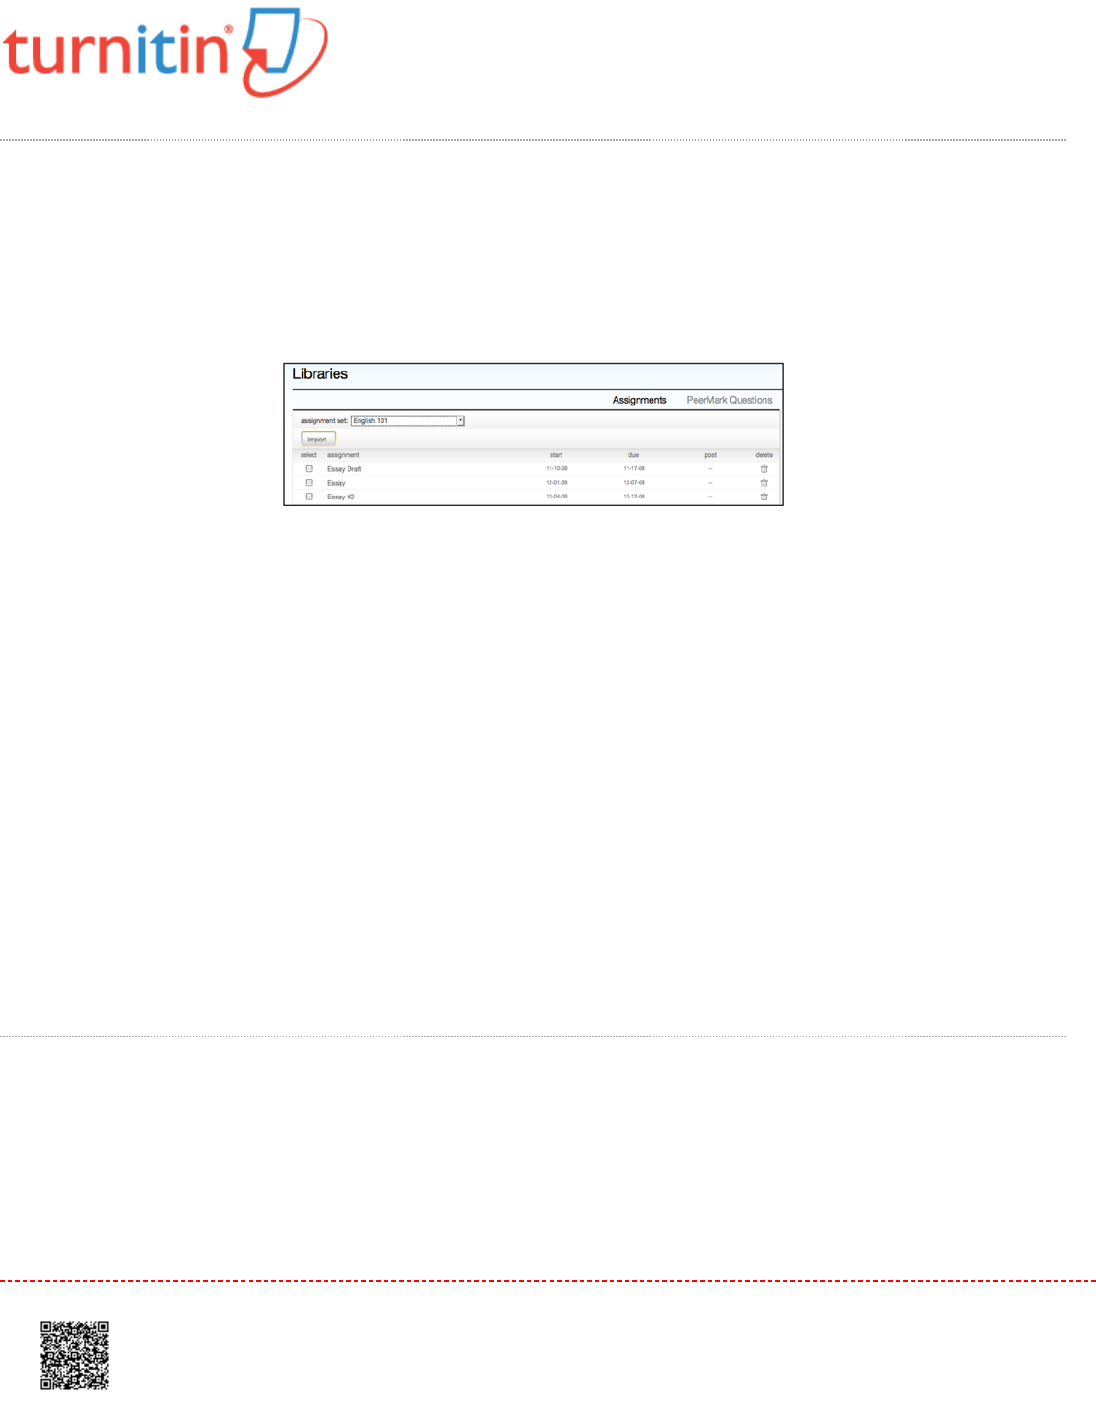
The Libraries Page
The Turnitin libraries page is separated into four pages accessible by using the appropriate tab. The initial page is the
assignments library.
The areas of the library page are:
AssignmentsAssignments - a list of assignments created in any class controlled by the instructorQuickMark Manager - a list of the
instructors QuickMark sets, allows instructors to create new QuickMark sets and QuickMark comments, and manage
their QuickMark sets
Rubric ManagerRubric Manager - contains list of the instructors rubrics, allows instructors to create new rubrics, export or share their
rubrics
PeerMark QuestionsPeerMark Questions - a list of the instructors current PeerMark question libraries, allows instructors to create new
PeerMark libraries and to manage or create PeerMark Questions within a library
Assignments Library
The assignments library assists an instructor in managing the assignment sets created in all of the instructor’s classes
on Turnitin. When an assignment is created for a class, the assignment is added to that class’ assignment set.
105
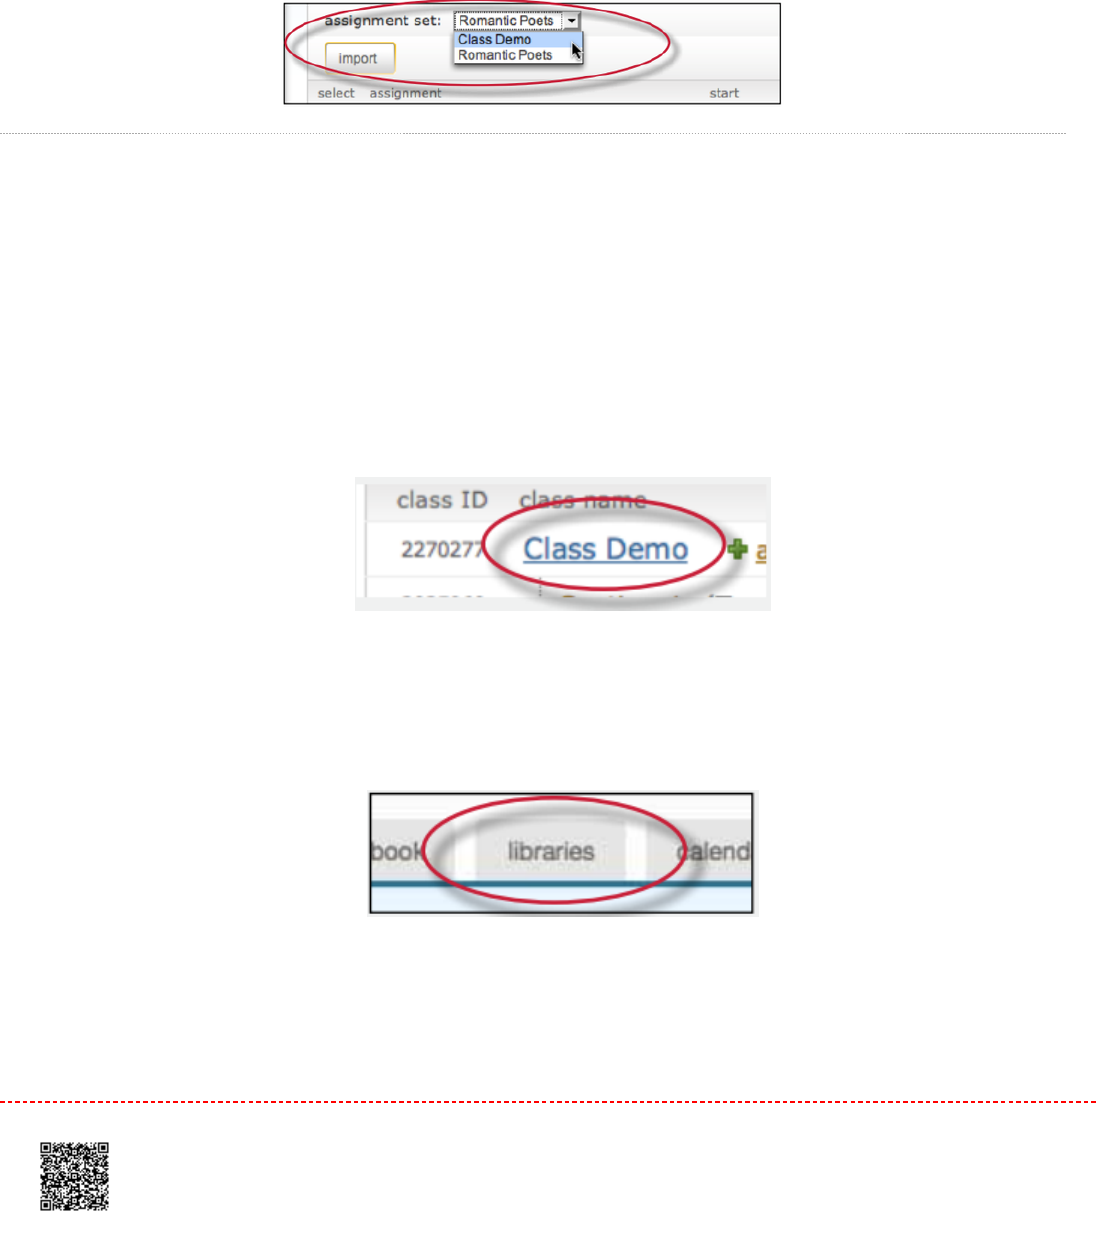
When the library page is opened, the assignment library displays the assignment set for the current class by default. To
select a different class assignment set to view, use the pull down menu labeled
select assignment
set and choose the
name of a class. The assignment set for the selected class will be displayed.
Importing Assignments
From the assignment library, an instructor can import assignments to copy them from one class to another.
11. Log into Turnitin and click on the name of the class to import an assignment or set of assignments into
22. Click on the
libraries
tab in the class
33. Use the
select assignment set
pull down menu to choose a class to import assignments from
106
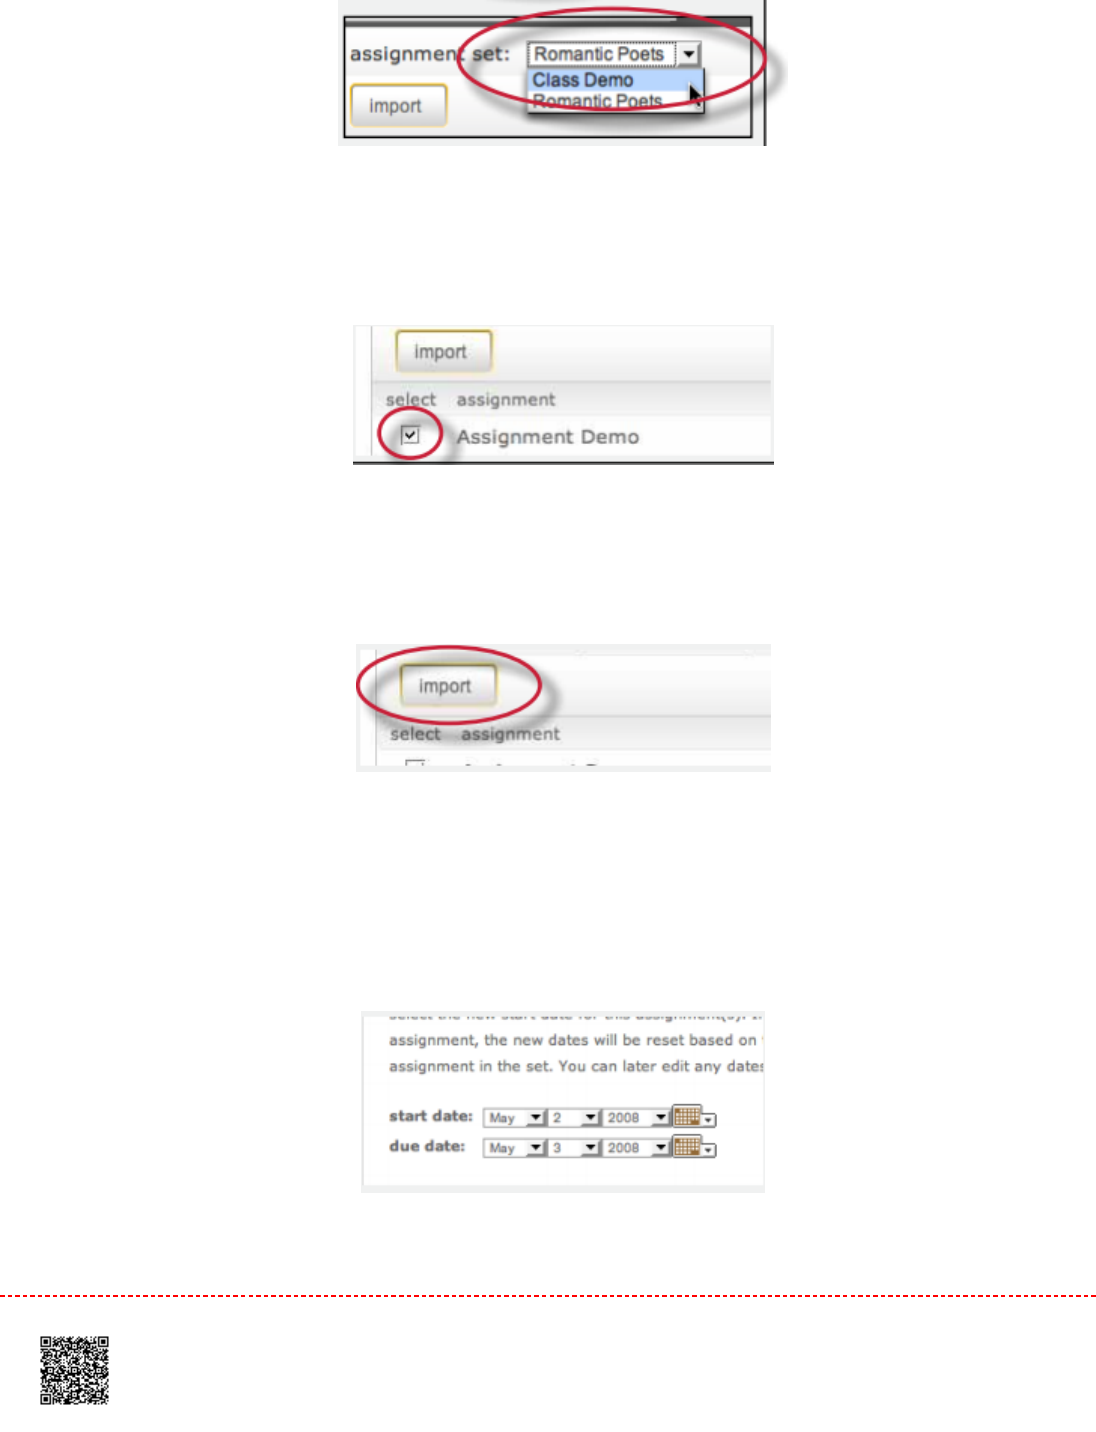
44. Click the check box to the left of the assignment(s) to import to another class
55. Click the
import
button above the assignment name list
66. Select whether to use the assignment dates existing in the library or to enter new dates. To use library dates,
click the
preserve dates
link. To enter new dates for a new school year or semester, enter the start and due dates
and click
submit
107

77. The assignment(s) selected will be imported into the current class
NoteNote: If more than one assignment is being imported, the selected dates are applied to all assignments imported at the
same time. Dates can be edited later for individual assignments by clicking on the assignment update button. The user
may also import assignments one by one, selecting new dates for each assignment.
108
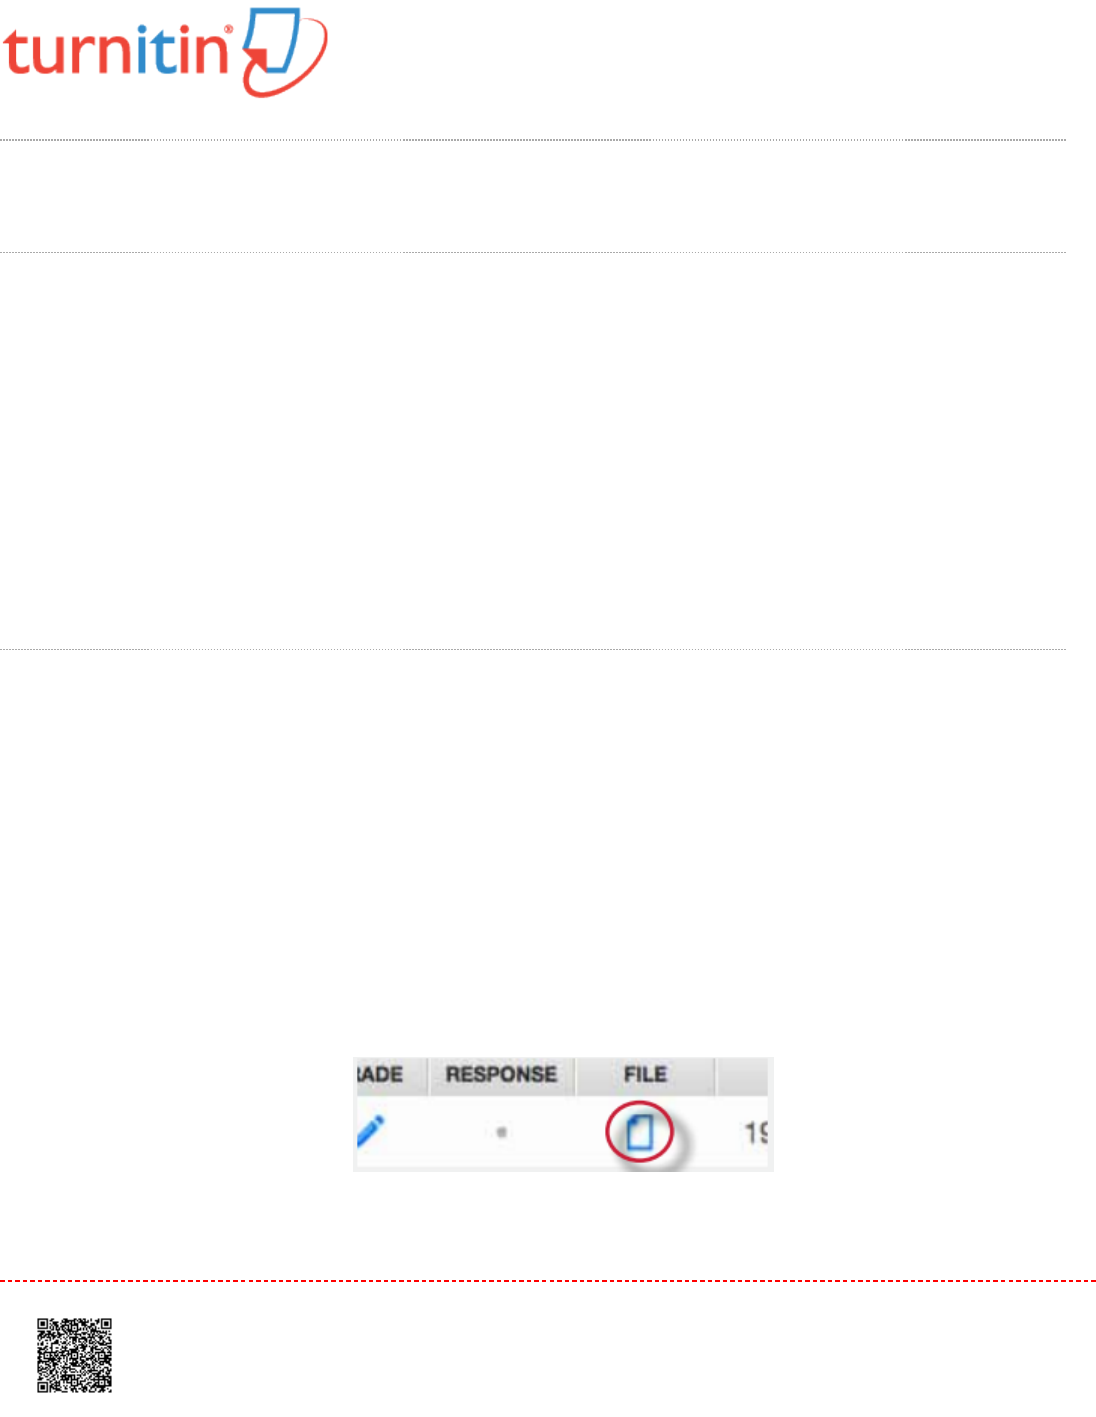
Viewing, Downloading, and Moving Papers
Viewing Papers
Every text or image-based submission made to an assignment can be viewed online. To view a paper through the
Turnitin website, simply click title of the paper in title column of the Assignment Inbox; this will open the paper in the
Document Viewer.
Note:Note: Media files cannot be played within the Document Viewer, but can be downloaded from the Document Viewer.
Click here to view guidance on downloading media files.
Downloading Papers
You can download and save papers submitted to an assignment one by one, or in bulk, as a zip file. If the GradeMark or
Peer Review products are active on your account, you will have the option of downloading a PDF version of the
submission, or the file in its original format.
11. Click on the icon under the
File
column for the paper to download.
109
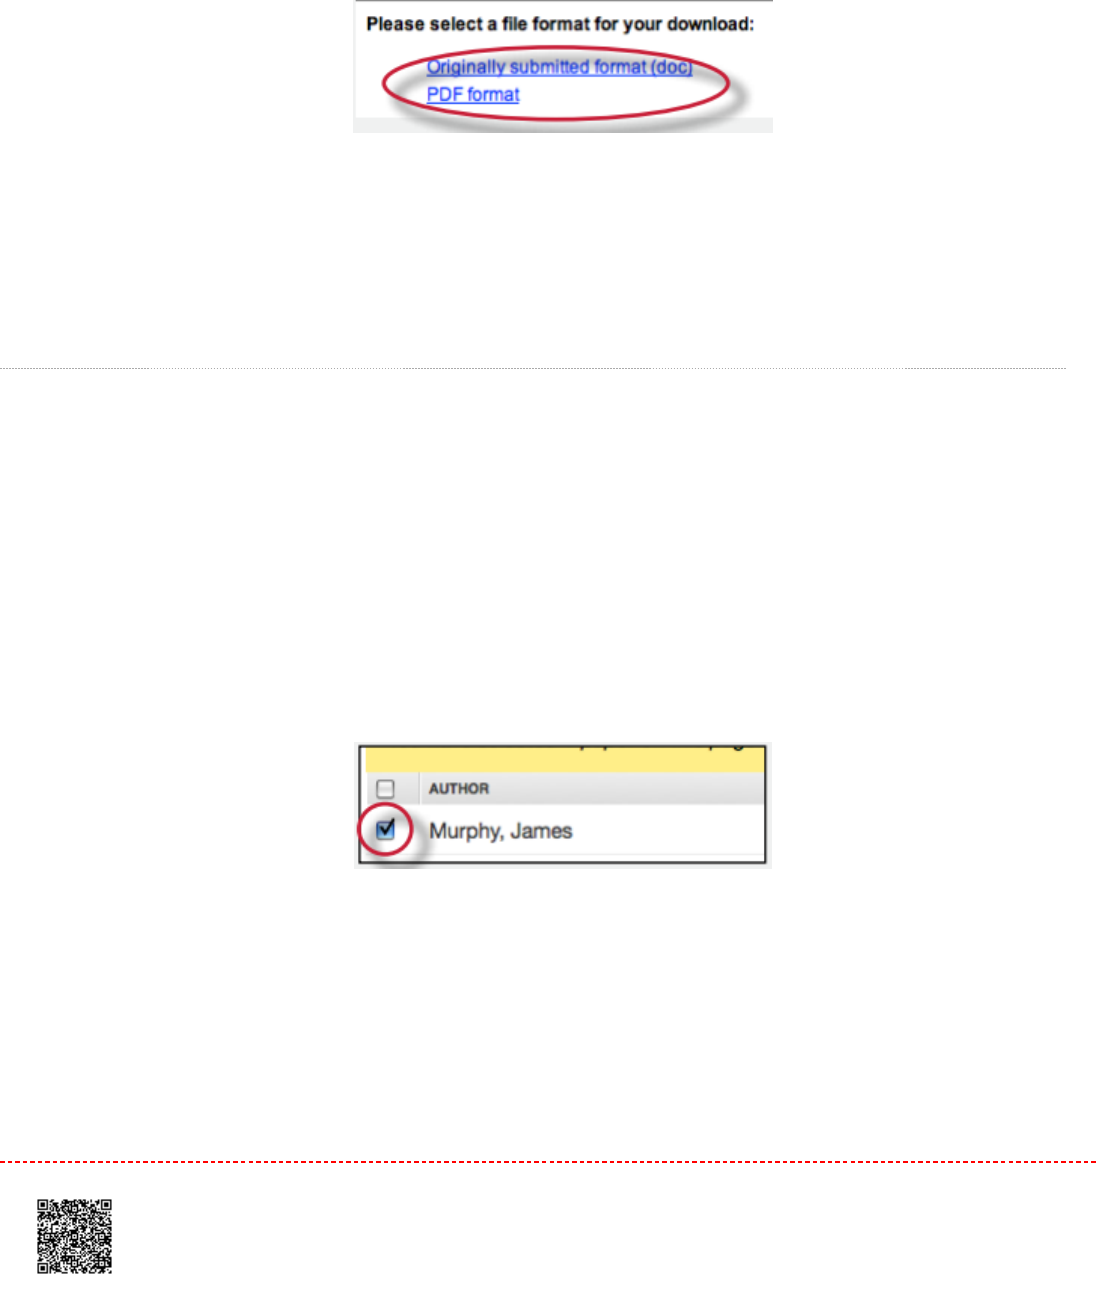
22. For Peer Review and GradeMark accounts, a pop-up window will prompt you to opt to download the
submission in its originally submitted format, or in PDF format
33. The file will download automatically to your device
Note:Note: Media files can only be downloaded in their original format.
Bulk Downloading Papers
You can also download papers in bulk into a zip file, either in the submission's original file format or in GradeMark
format.
11. From the Assignment Inbox, check the boxes alongside the papers that you would like to download
1a1a. The user may also check box in the column heading to download all papers from all pages of an
assignment inbox
110
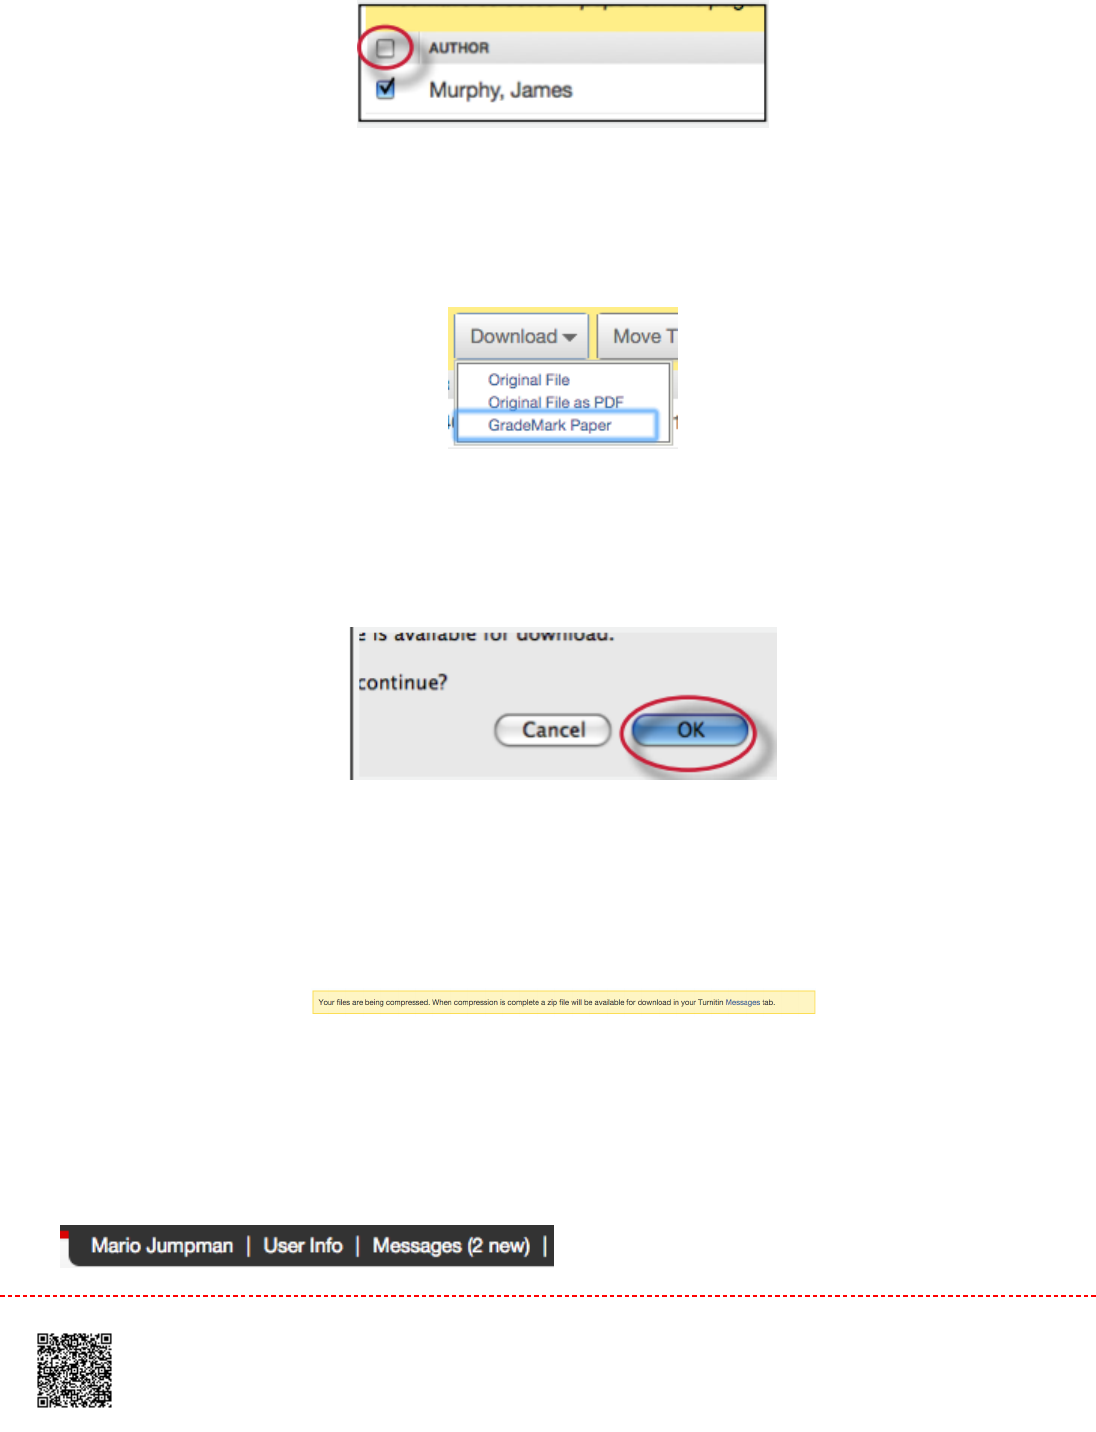
22. Click the
Download
button above the author column and select the format you'd like to use
3.3. Click on
ok
to accept the download
44. We'll now work away in the background creating a zip file with your requested files. Feel free to use Turnitin as
normal while we process your files.
55. We'll send you a notification once your files have finished processing in the Messages tab. You can find the
Messages tab in the top right corner of Turnitin.
111

66. Inside your Messages tab you will have a new notification from us. Open the message to find your download
link.
77. Click the download link contained in the message to download your files.
Note:Note: Media files can only be downloaded in their original format.
Downloading Files in the Document Viewer
Files can also be downloaded directly from the Document Viewer
1.1. Click the paper title from the
Title
column in the Assignment Inbox; this will open the Document Viewer in a
new browser
112
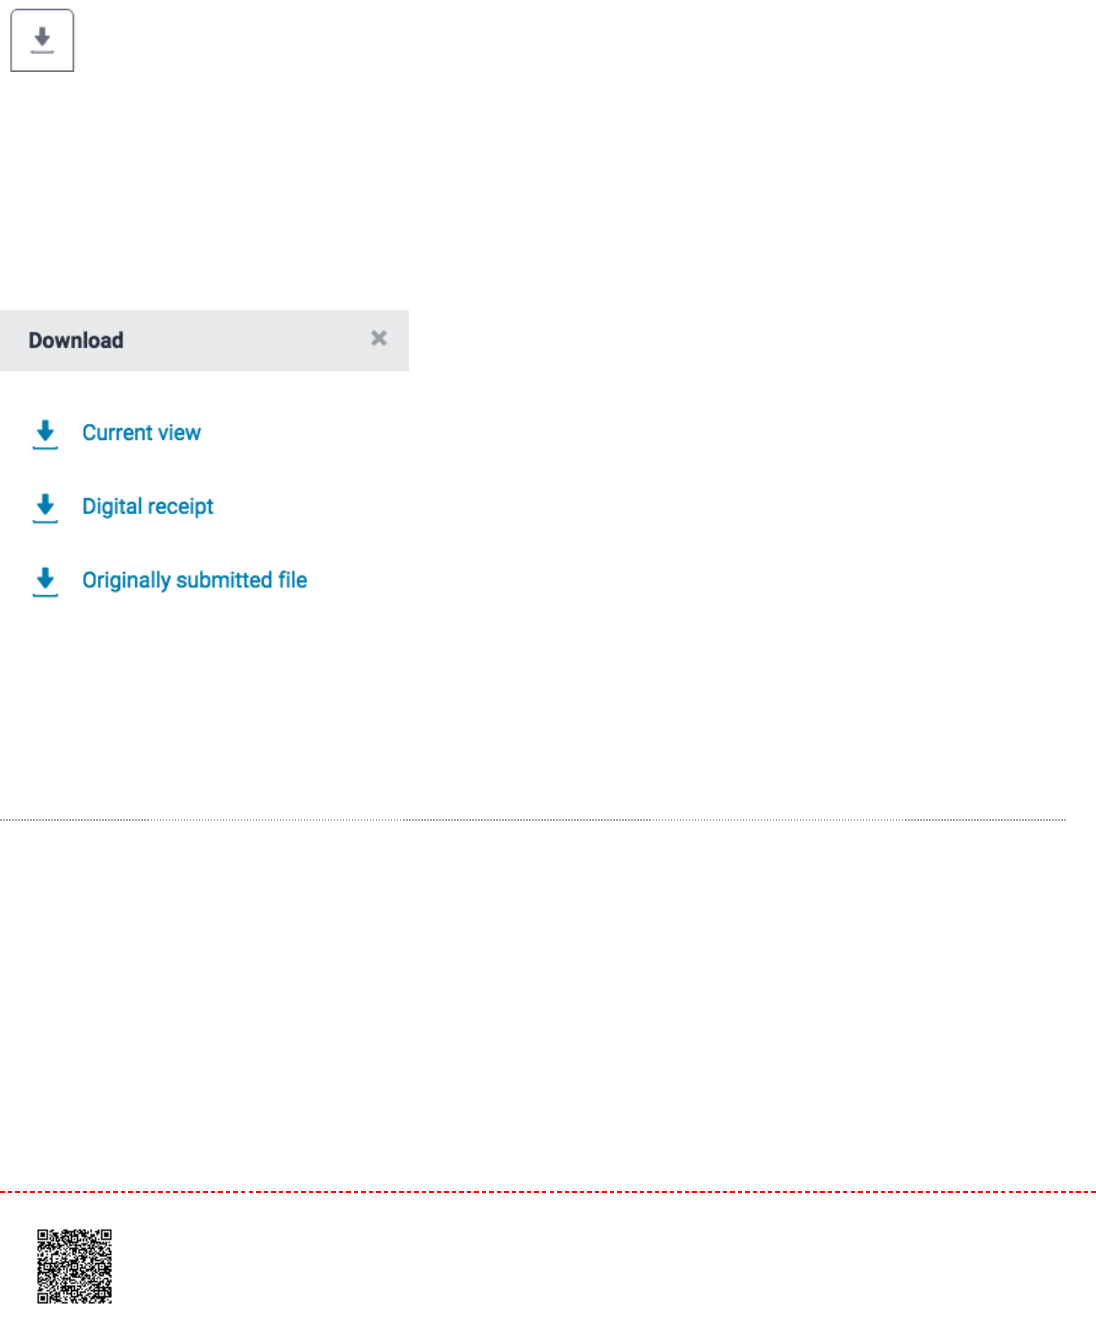
22. Click on the download icon in the Submission Tools section of the product toolbar
33. A box will appear with download options. From here, you can download the current view of a paper (with
QuickMarks included), the paper as it was originally submitted to Turnitin, and the digital receipt for the
submission.
Note:Note: By clicking
Download PDF of the current view for printing
when dealing with a media file submission, only
the submission information and comments added in GradeMark will appear within the PDF.
Downloading Media Files in the Document Viewer
When opening a media file submission in the Turnitin Document Viewer, you will immediately be prompted to download
the file in its original format. From here, you can provide feedback on the submission in GradeMark using the blank
paper provided.
1.1. Click the title of the paper from the
Title
column in the Assignment Inbox; this will open the paper in the
Document Viewer
113
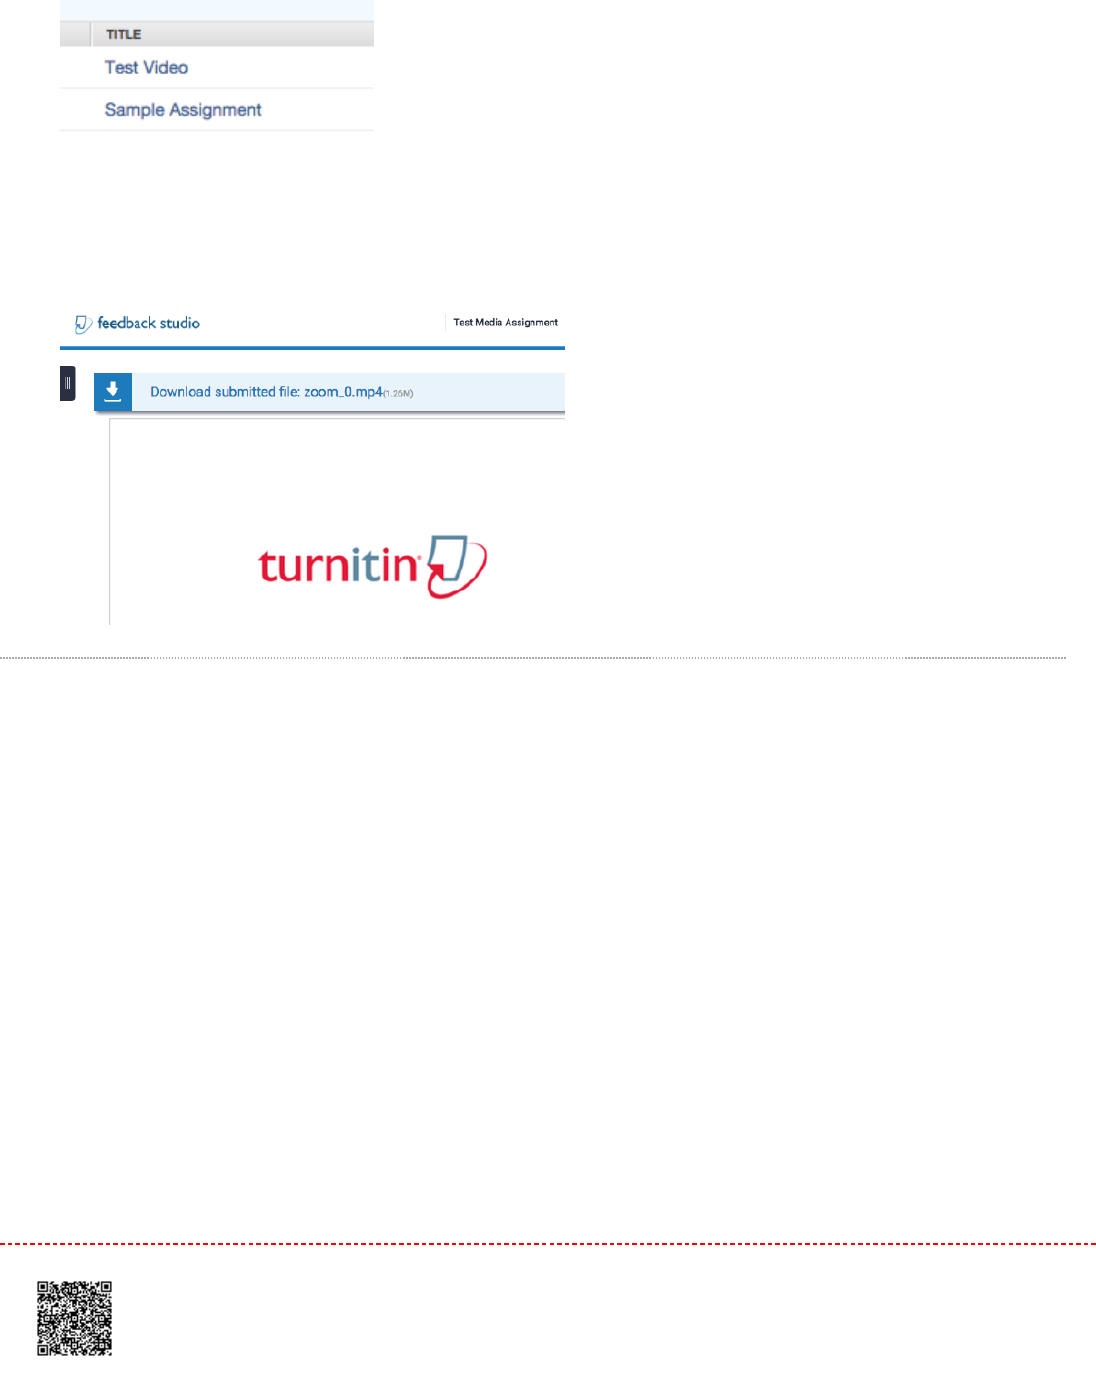
2.2. Click anywhere in the
Download submitted file:
banner at the top of the Document Viewer to download your
student's media submission in its original format. The file will download to your device automatically
Moving Papers Between Assignments
If an assignment has been accidentally submitted to the wrong assignment within a class you can easily change this.
NoteNote: Any grades you have already applied to the submission will also be transferred with the paper
11. From the class homepage navigate to the assignment with the incorrect submission
114
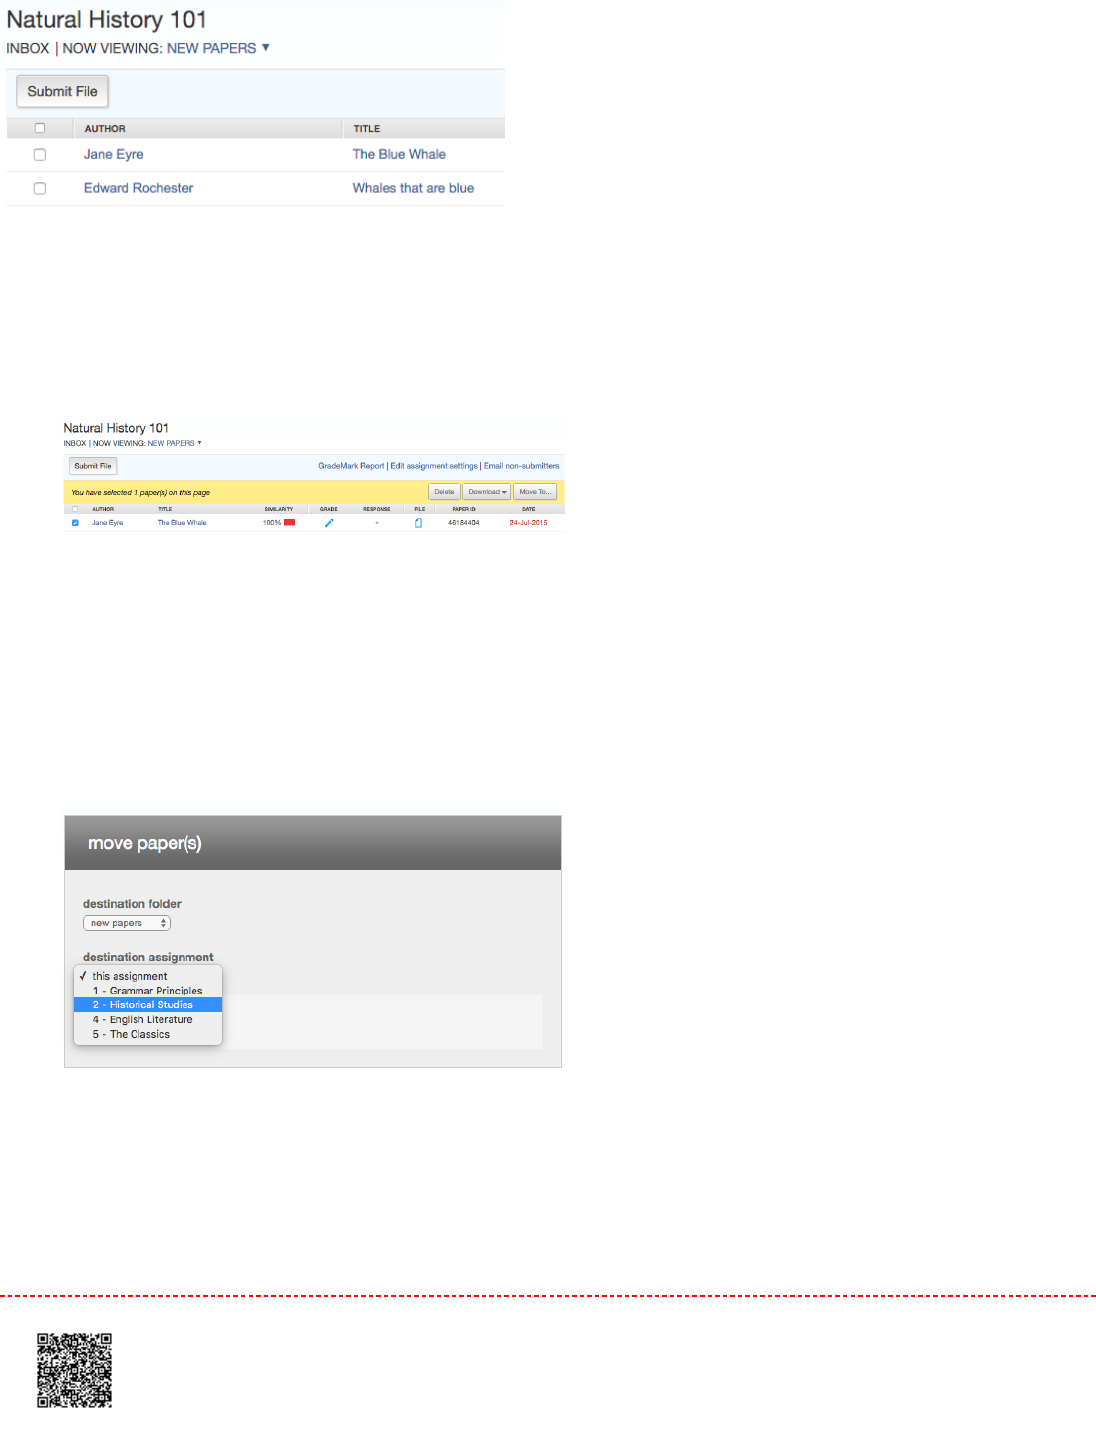
22. Using the check boxes in the first column select the student submissions that you would like to move. A yellow
bar will appear confirming the amount of papers you have selected. Click the
Move To...
button.
33. Using the
destination assignment
drop down select the assignment you'd like to move the submission into
NoteNote: You are only able to move papers between assignments within the same class
44. Click
Submit
to move the papers
115


Commenting Tools
The In-Context Marking Tool
The in-context marking tool allows you to choose between all of the different marking types that Turnitin offers. Click
anywhere on a paper to reveal the in-context marking tool, where you can then click on the relevant icon to leave a
mark on the page.
Inline Comments
Inline comments allow you to leave text directly on top of your student's paper. From the in-context marking tool, choose
the T icon and then begin typing your comment. The comment will automatically be saved.
Media, iframe, embed and object tags are not supported inside
of a PDF.
119

Note:Note: You can move a comment by clicking and dragging it to where you would like to place it.
DeletingDeleting an Inline Commentan Inline Comment
11. To delete an inline comment, hover over the comment with your mouse and click the
trash can
icon that
appears above the comment.
33. If you accidentally remove a comment, you can undo this change by clicking
Undo
in the notification that
appears upon deletion, located at the top of the paper.
Strikethrough Text
By selecting a piece of text, you have the option to strike through a piece of text, instead of adding an inline comment.
Choose the SS icon to strike through.
120
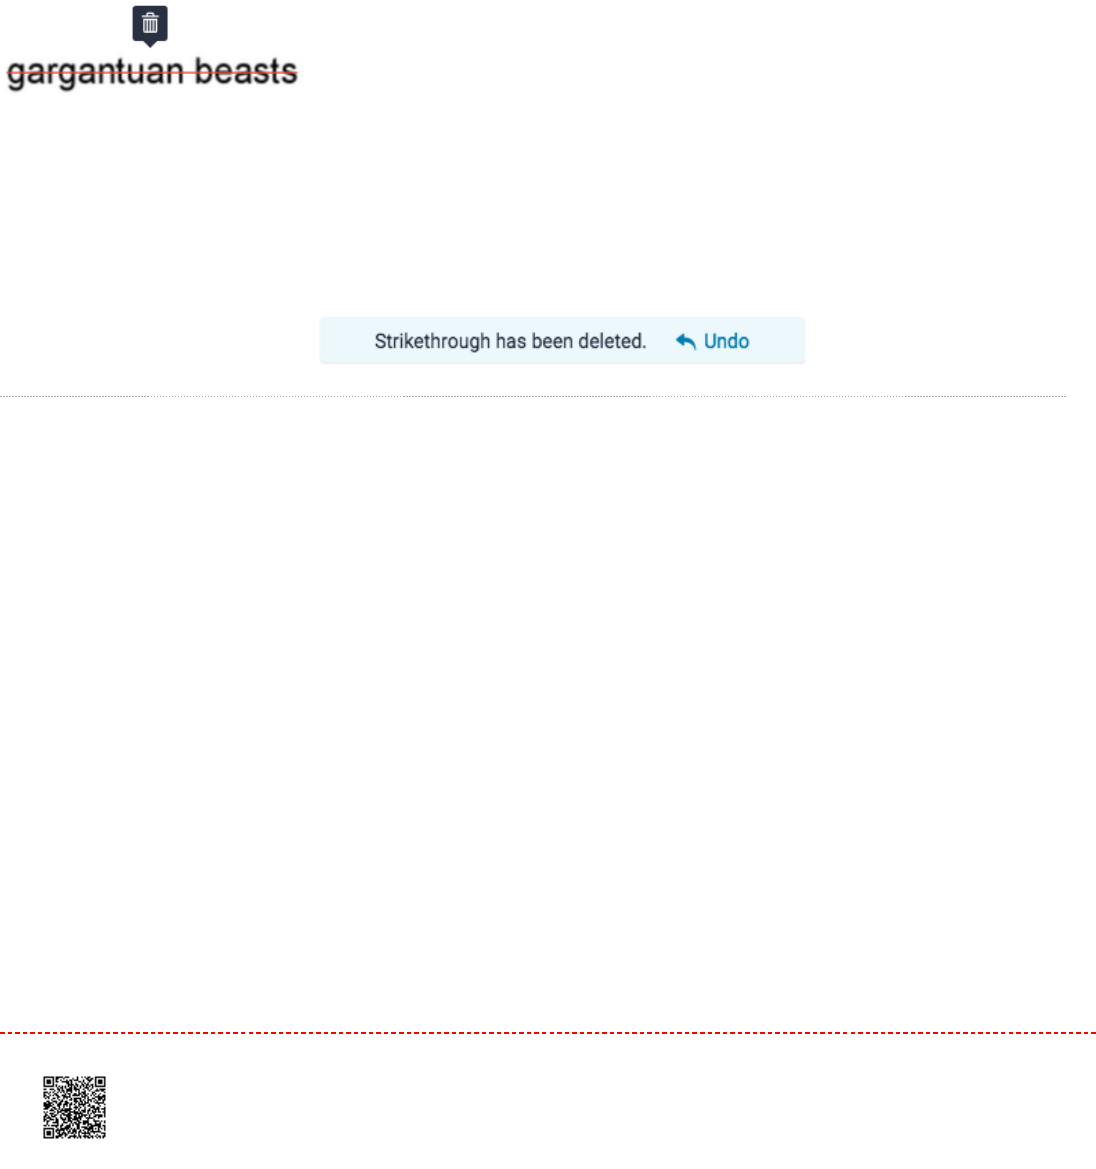
DeletingDeleting a Strikethrougha Strikethrough
11. To remove the strikethrough from a piece of text, hover over the text with your mouse and click the
trash can
icon that appears above.
22. If you accidentally remove a comment, you will be able to undo the change by clicking
Undo
in the notification
that appears upon deletion.
Bubble Comments
11. Bubble comments can be left in two ways. You can leave a bubble comment by clicking directly on the page or
by selecting a portion of text.
1a.1a. Click directly on the paper, then select the speech bubble icon from the in-context marking tool to leave
a bubble comment.
121
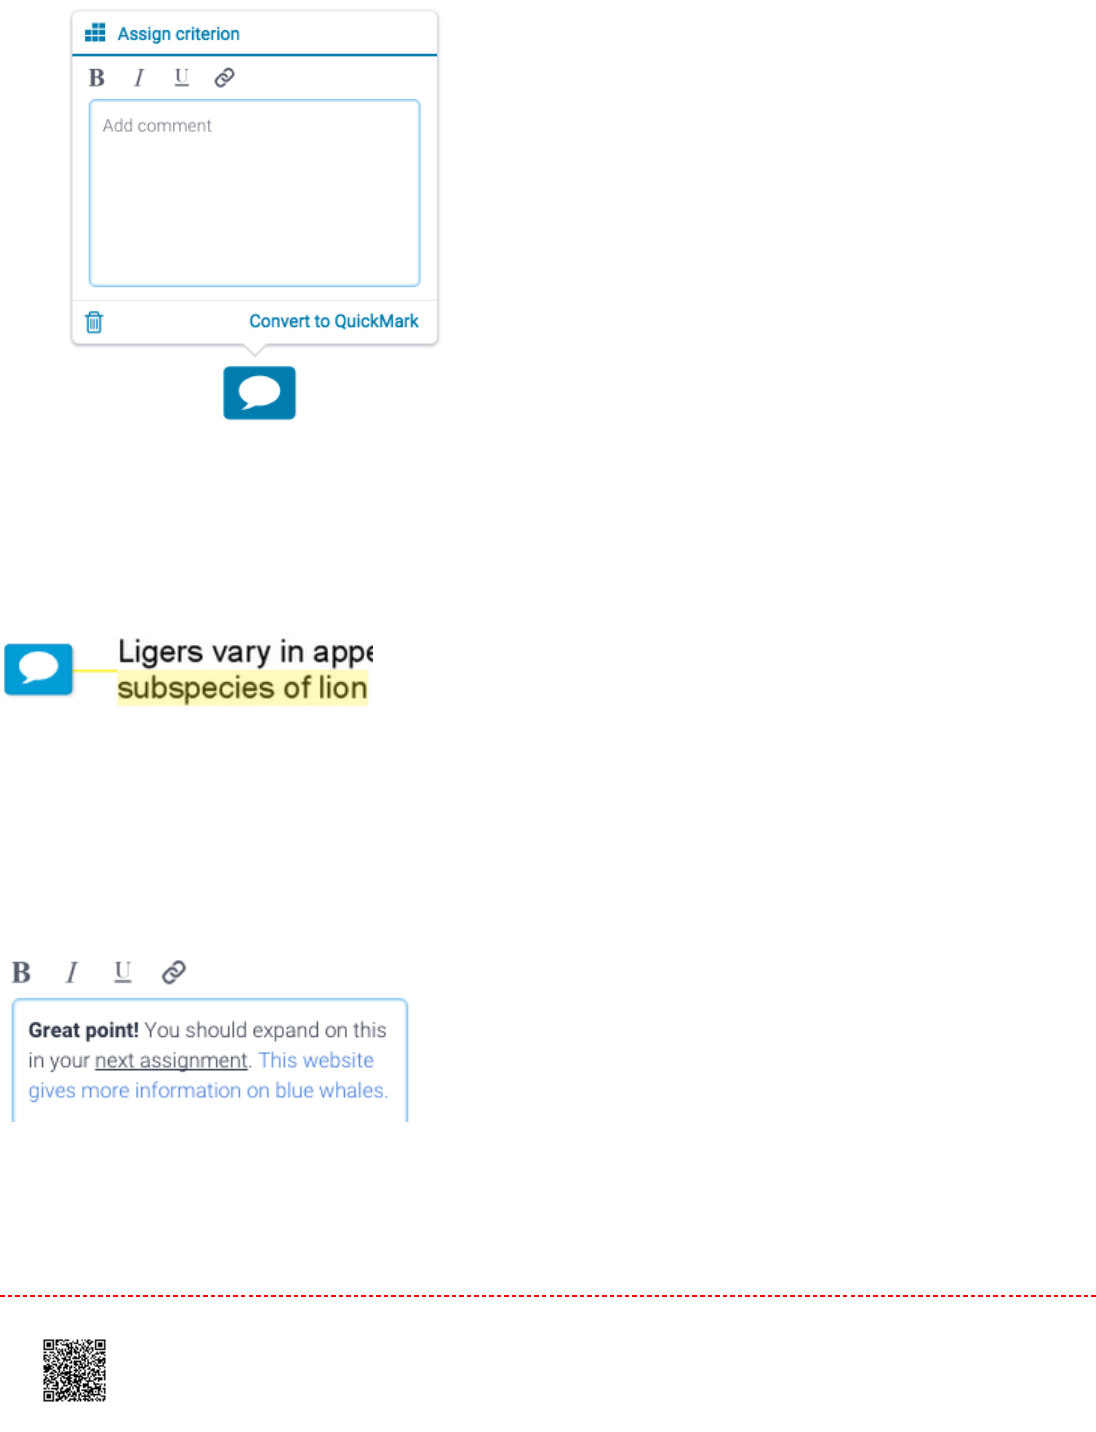
1b1b. Alternatively, select a section of text, then select the speech bubble icon from the in-context marking
tool. This will connect the bubble comment to your chosen text.
22. With bubble comments, you can add text, convert text to hyperlinks, and apply simple formatting to
your comment. Highlight the text you wish to format and use the formatting tool to bold, italicize, underline, or
hyperlink.
Assigning a Criterion to a Bubble CommentAssigning a Criterion to a Bubble Comment
122

Please note that the
Assign Criterion
option will only appear within the bubble comment options if a rubric is attached to
the assignment. Learn how to attach a rubric to an assignment here.
11. Click the
Assign Criterion
button at the top of a bubble comment box. This will reveal a list of criterion, from
which you can choose to assign an individual criterion to the bubble comment.
2.2. The
Assign Criterion button
will then change to the criterion name, confirming the assignment.
3.3. A criterion assigned to a bubble comment is identifiable by the criterion icon placed inside a speech bubble.
Converting a Bubble Comment to a QuickMarkConverting a Bubble Comment to a QuickMark
11. For easy reuse in this assignment or other assignments, you can convert your bubble comment into a
QuickMark. Click
Convert to QuickMark
from the bottom right-hand corner of the bubble comment box.
123
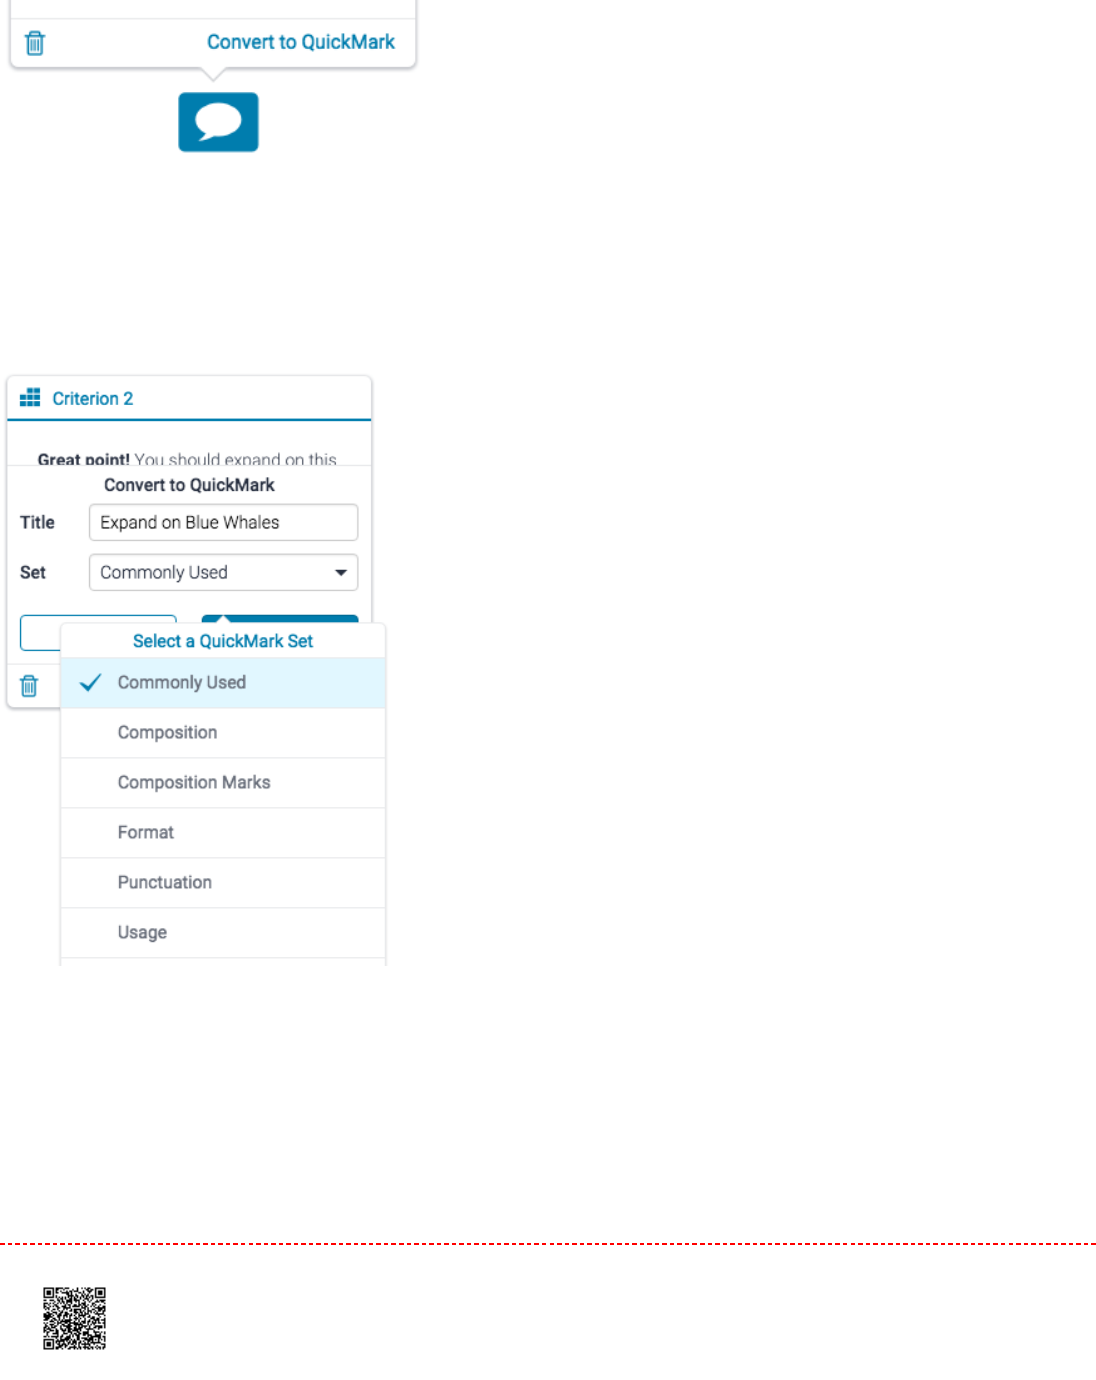
22. A menu will appear within the bubble comment box. Here, you can set a title and assign the QuickMark to a
specific set.
3.3. Click the
Save
button to convert your bubble comment to a QuickMark.
124
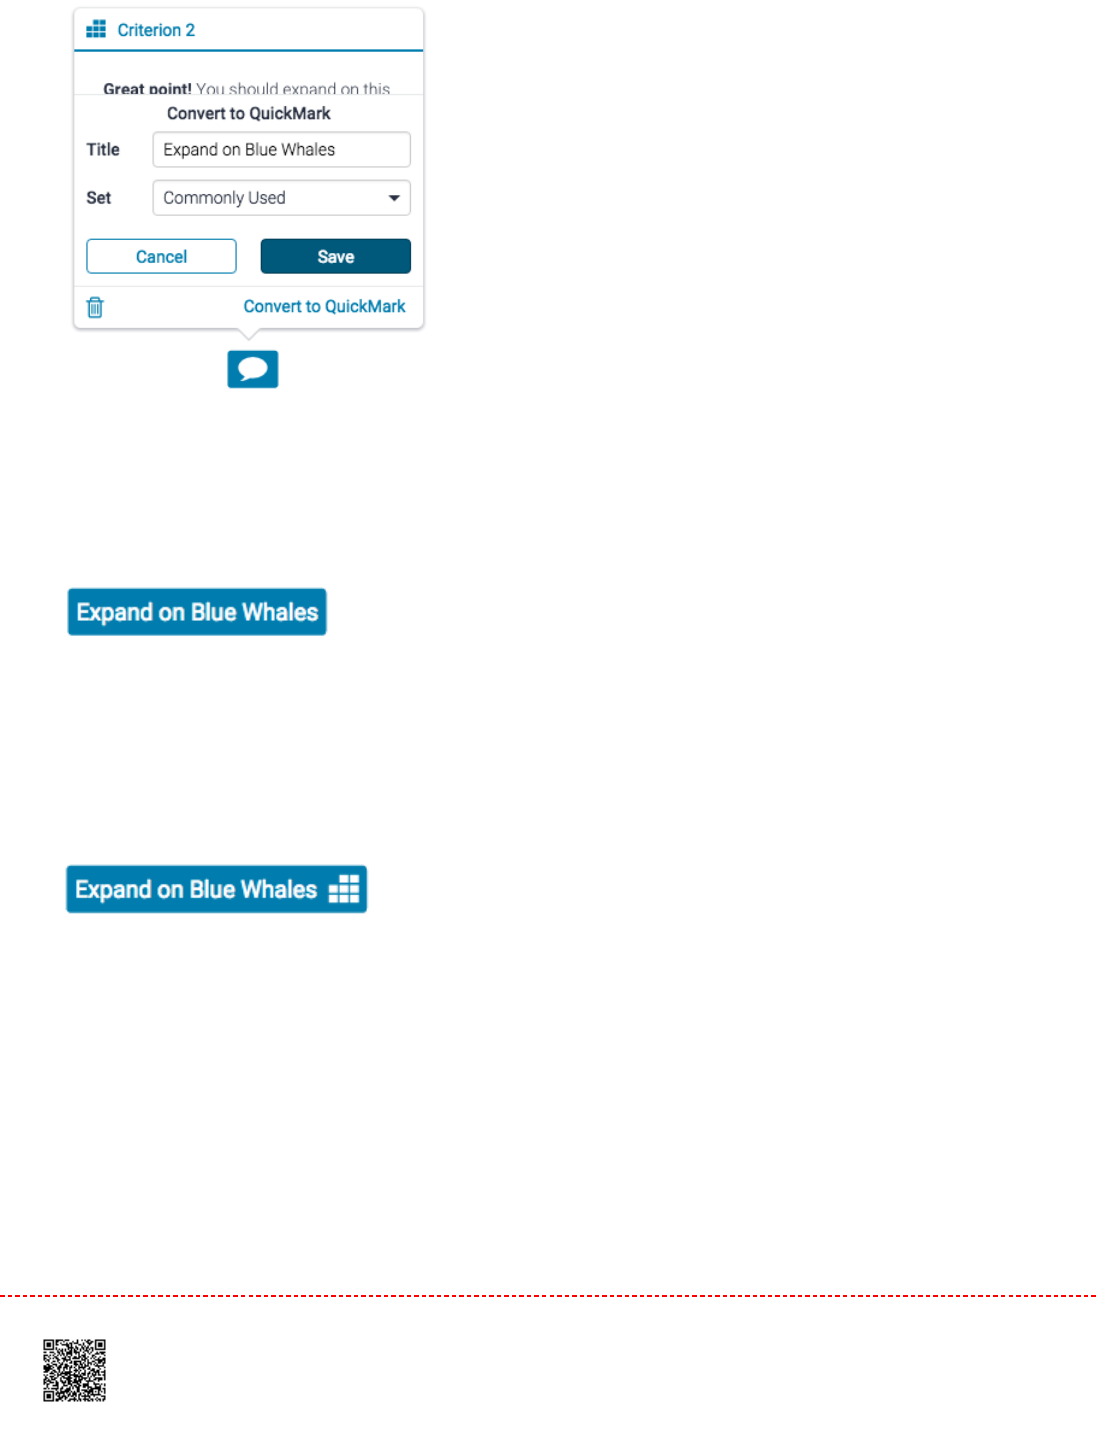
4.4. Your QuickMark title will now appear on the paper.
4a.4a. If your QuickMark has a criterion assigned to it, the criterion icon will appear alongside the QuickMark
title.
Note:Note: To edit the description of the QuickMark, navigate to the QuickMark manager and edit it from within the set
you have just assigned, visit the QuickMarks Manager guidance for further instruction.
DeletingDeleting a Bubble Commenta Bubble Comment
1.1. To remove a bubble comment from the paper, click the blue bubble comment, and click the
trash can
icon in
the bottom left-hand corner of the bubble comment box.
125
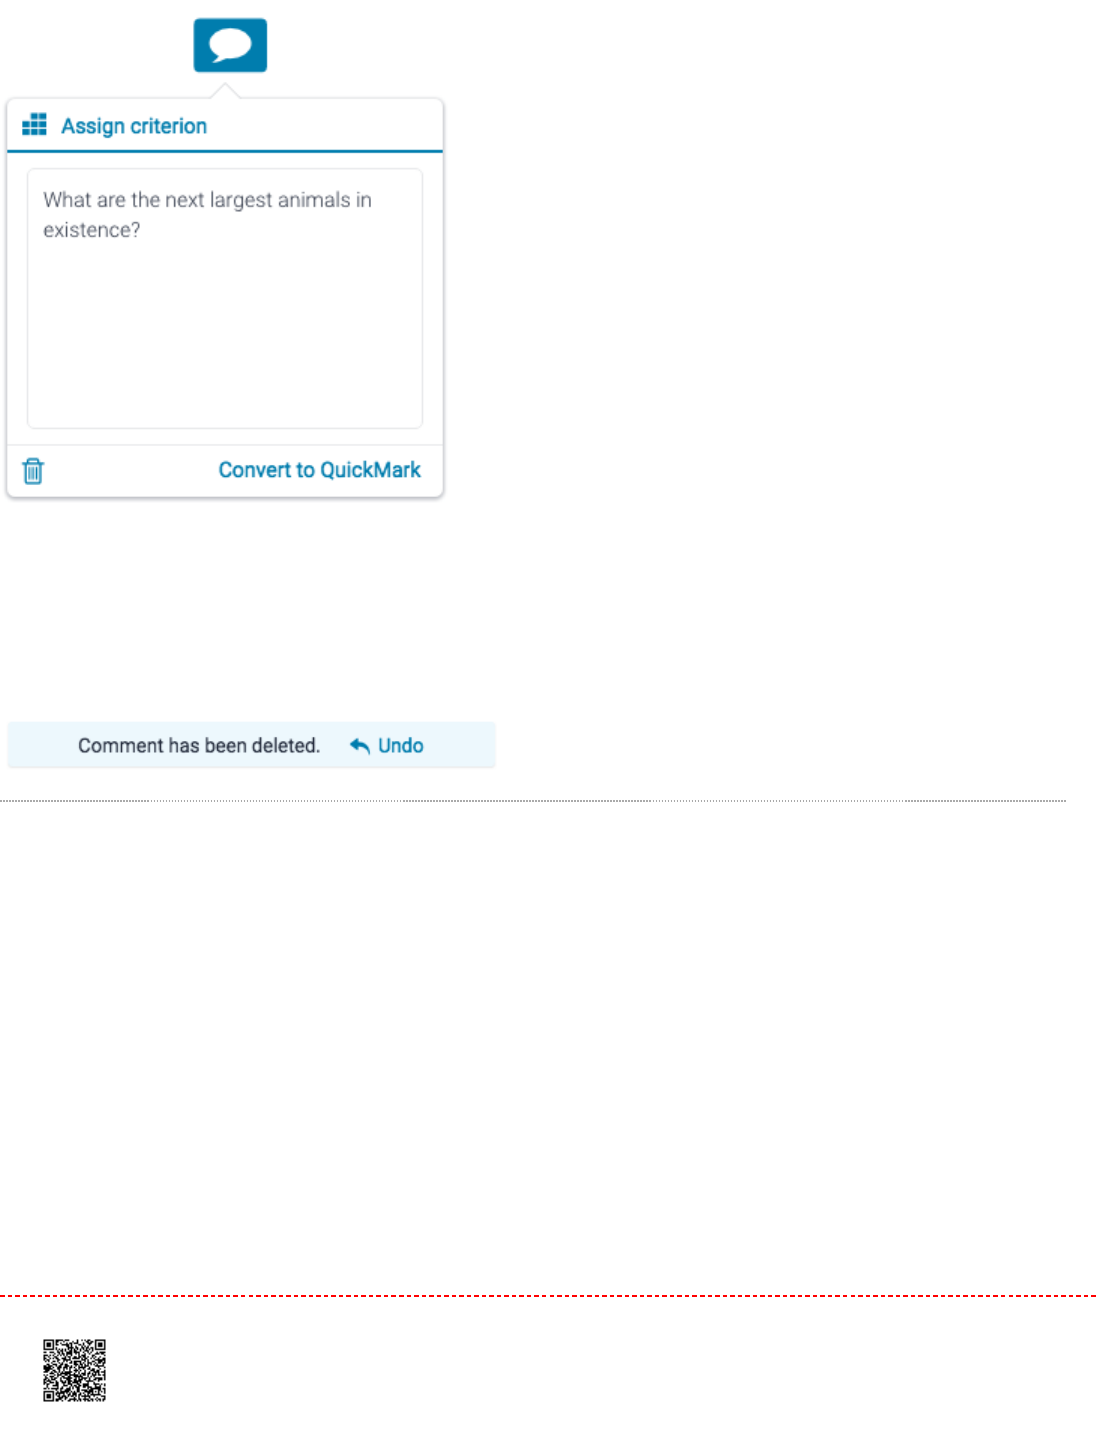
22. If you accidentally remove a comment, you will be able to undo the change by clicking on the
Undo
notification
that appears upon deletion.
QuickMarks
QuickMarks allow you to create a library of feedback that might be applicable, on multiple occasions, to multiple
students, across multiple classes and assignments.
Adding a QuickMarkAdding a QuickMark
1.1. You can add a QuickMark to both a selection of text or on the full paper.
126

1a.1a. To add a QuickMark to the full paper, click on the paper and select the
QuickMark
icon from the in-
context marking tool. This will allow you to choose a QuickMark to leave on the paper.
1b.1b. To add a QuickMark to a selection of text, highlight the section of text you would like to associate the
QuickMark with, and click the
QuickMark
icon from the in-context marking tool. This appears as a
tick inside a rectangular box.
2.2. By clicking the set title at the top of the QuickMark box, this will reveal a dropdown list, allowing you to change
the active library.
127
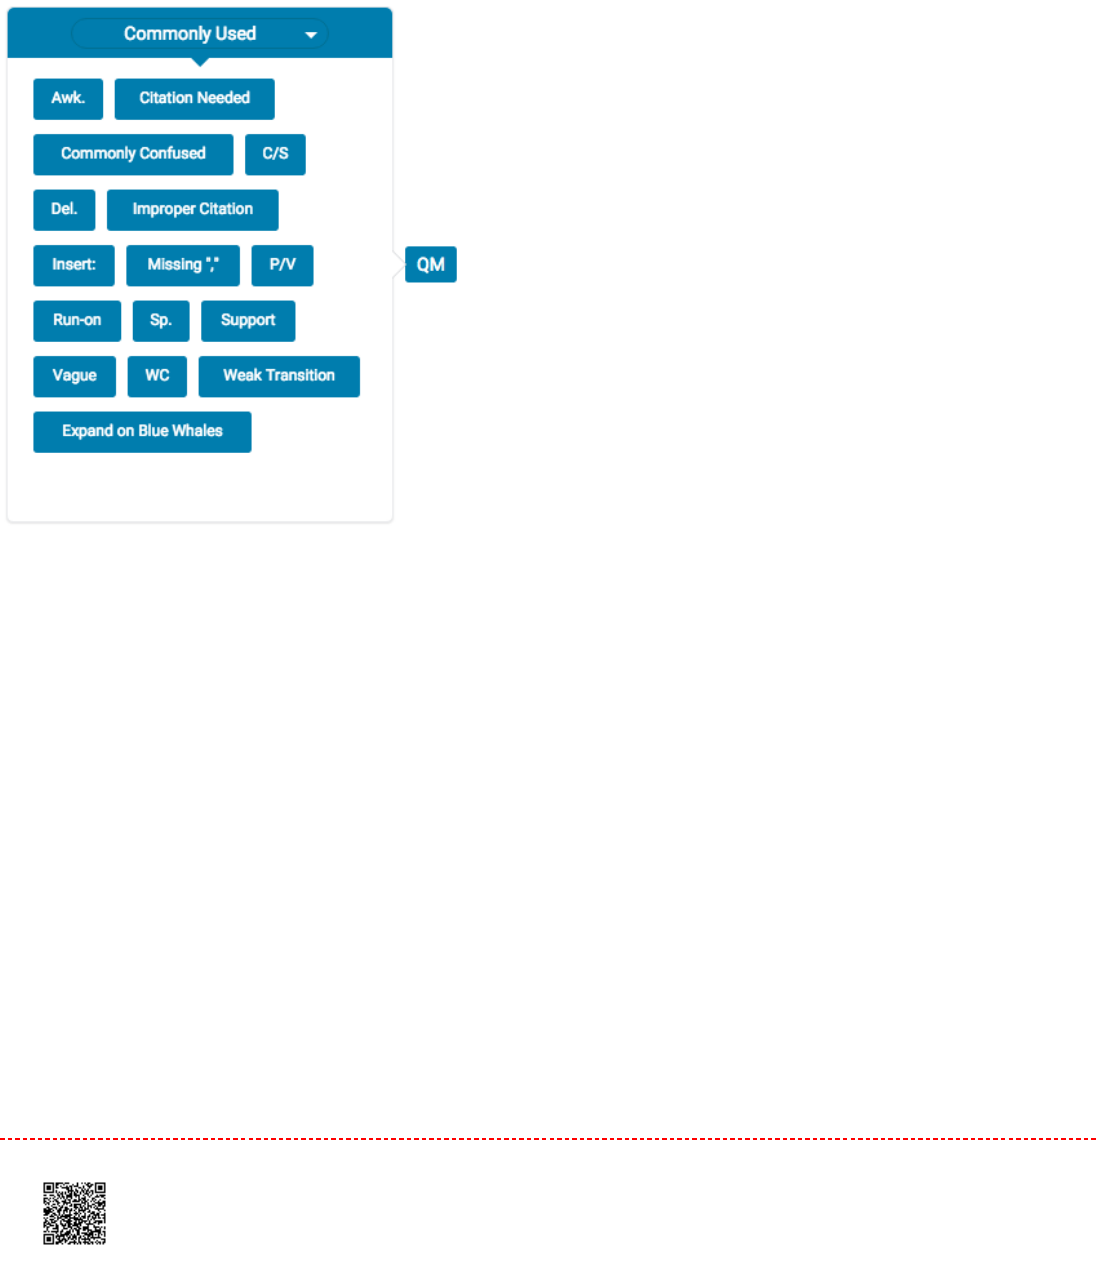
3.3. Click any of the QuickMarks within the library to leave that particular QuickMark on the paper.
3.3. To leave a comment alongside your QuickMark, click your QuickMark title from the paper. Scroll to the bottom
of the QuickMark information and click in the
Add comment
field to begin typing.
128
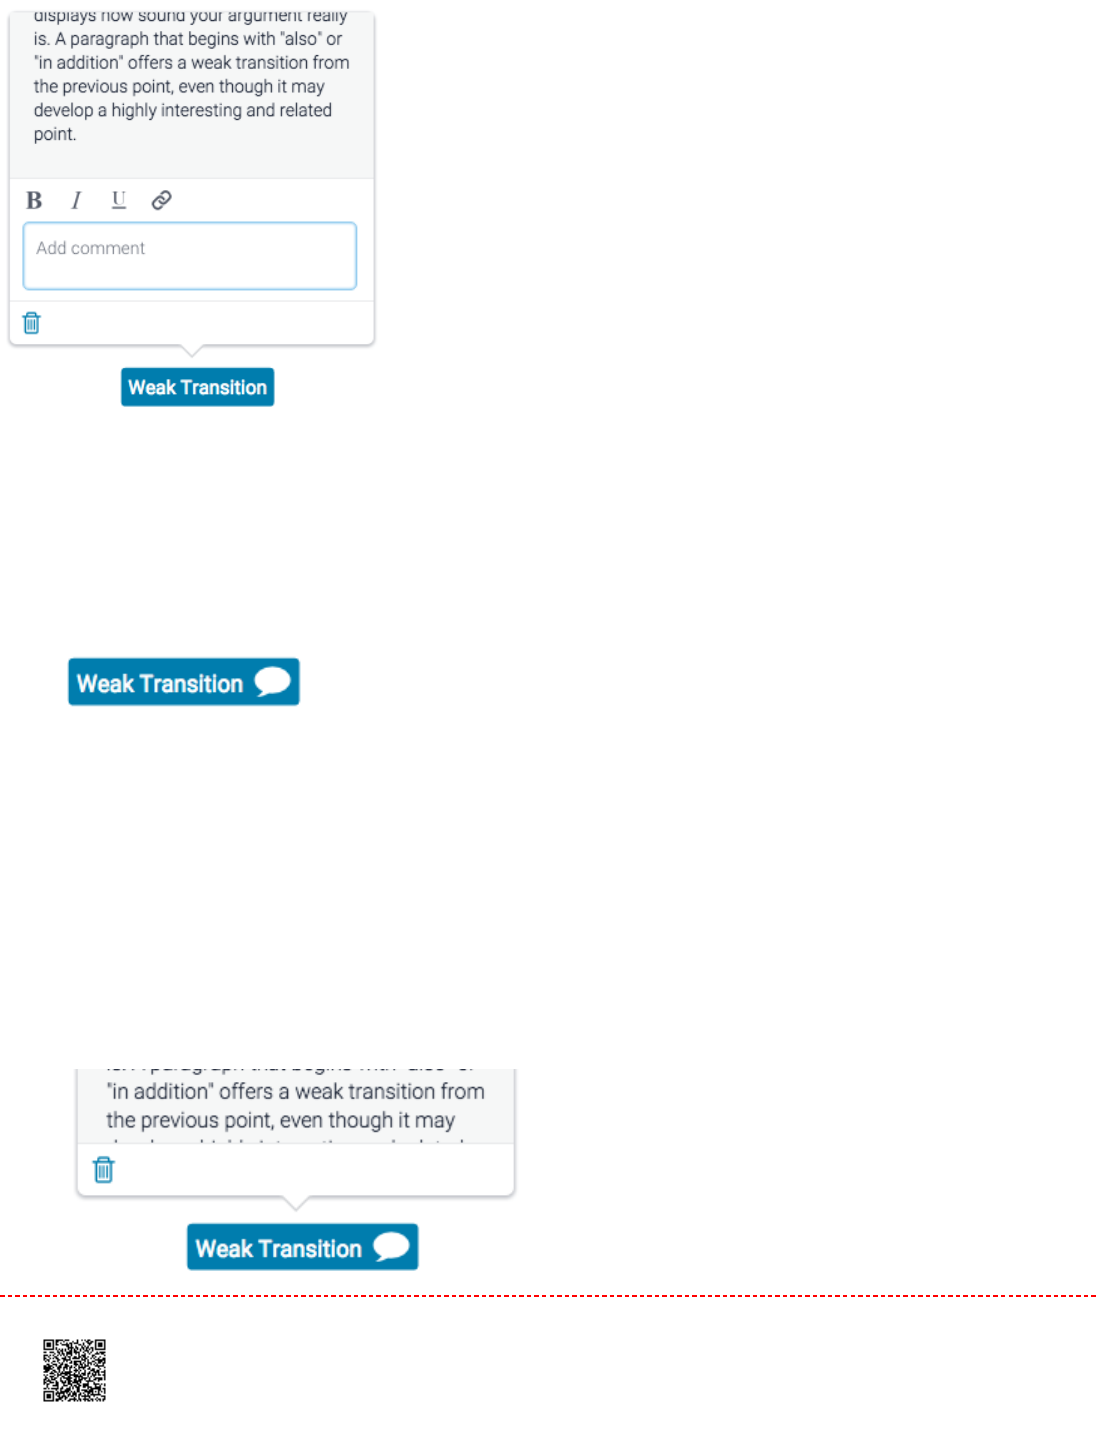
4.4. Click anywhere outside of the comment field to save your comment.
5.5. A comment left alongside a QuickMark is identifiable by a speech bubble alongside the QuickMark title
Deleting a QuickMarkDeleting a QuickMark
1.1. Click the QuickMark title to open the QuickMark.
2.2. Click the
trash can
icon in the bottom left-hand corner of the QuickMark box.
129
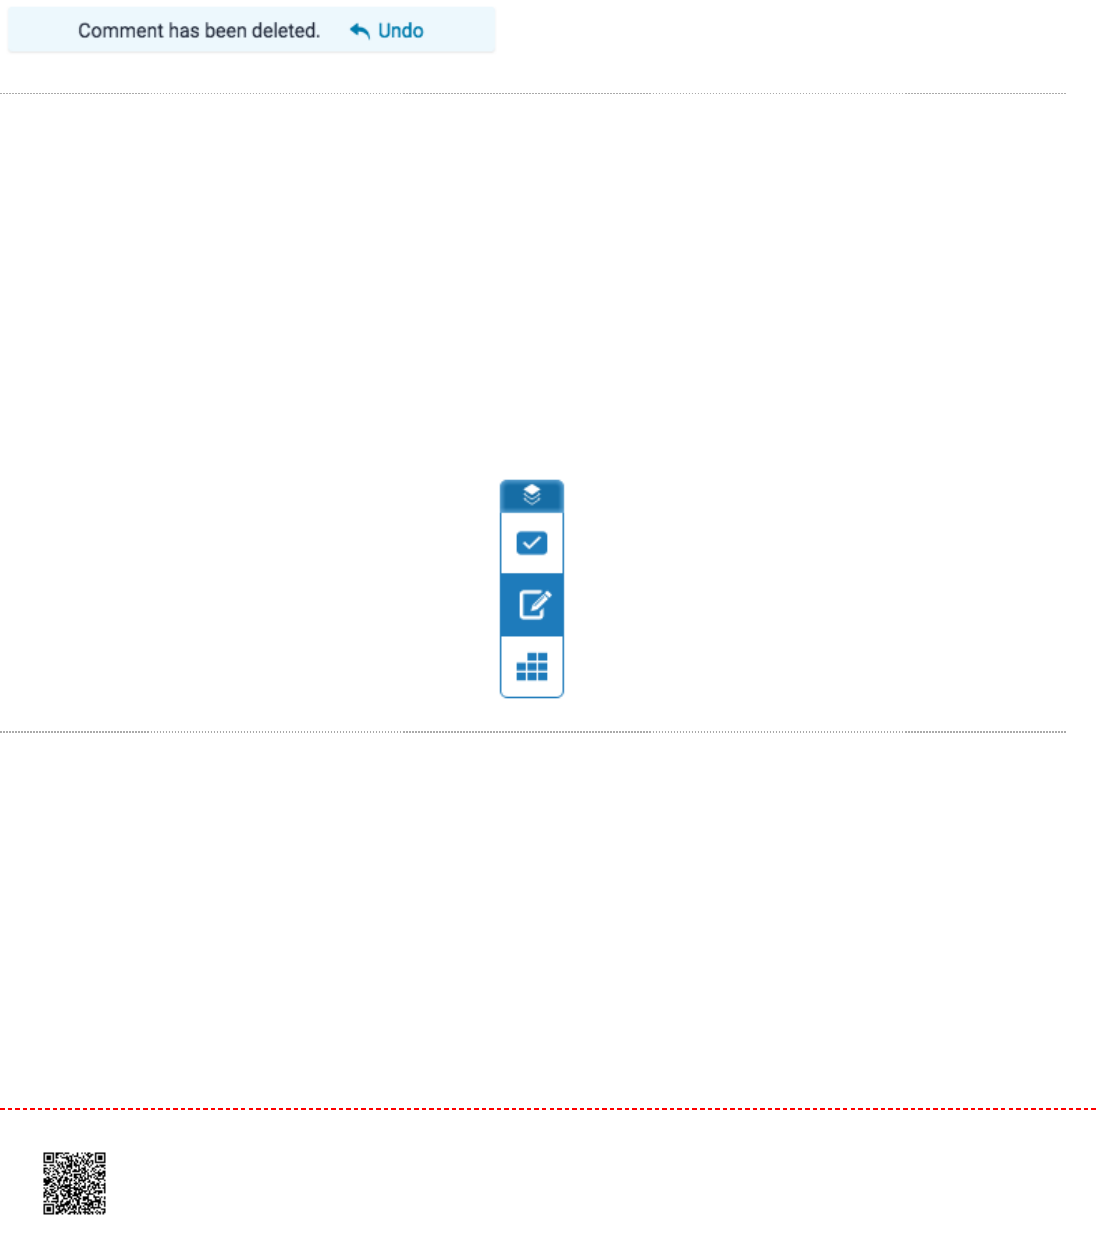
3.3. A banner confirming your deletion will appear at the top of your paper. If you change your mind, just
click
Undo
from the banner to reinstate your QuickMark.
Feedback Summary
Text and voice comments can be accessed from the
Feedback Summary
side panel. This side panel allows you to
provide overall feedback on a paper.
From the online grading toolbar, select the feedback summary icon to open the
Feedback Summary
side panel.
Voice Comments
11. A voice comment can be up to three minutes long. Click the
record
button (the leftmost button) to start
recording.
130
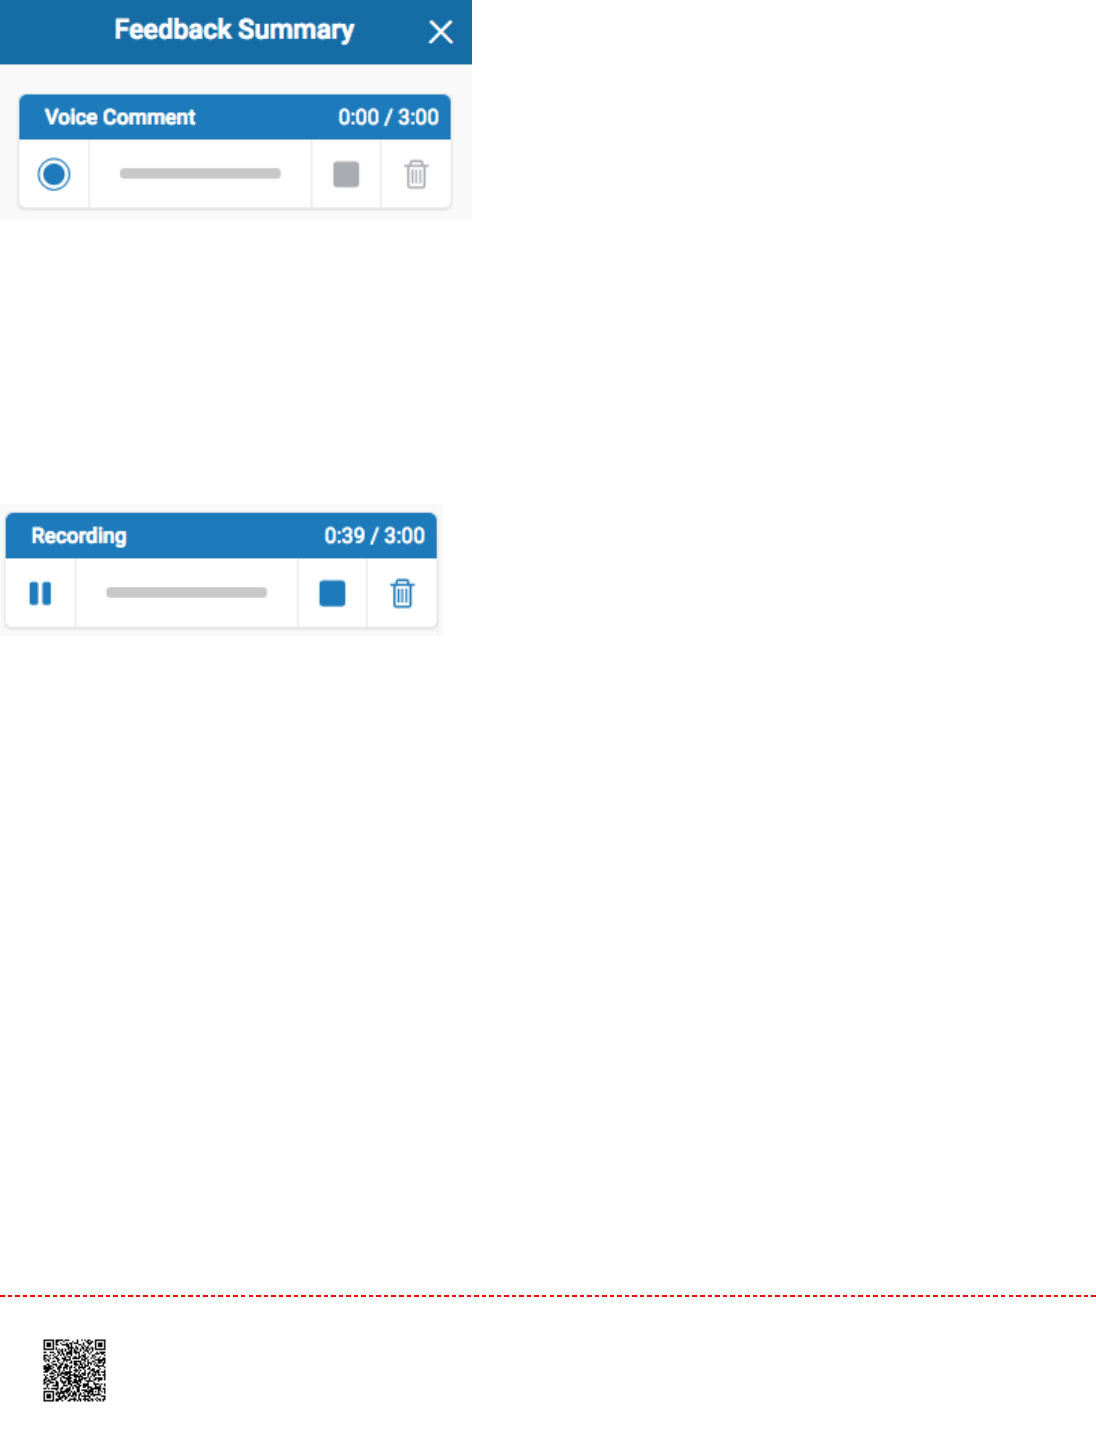
Note:Note: You may have to authorize the use of your computer's microphone before you can begin recording.
22. During recording, the
record
button will change to a
pause
button. Click
pause
to pause the recording.
3.3.
3a.3a. Should you wish to resume your recording later, click the
record
button to continue.
WarningWarning: Changing the active paper, or closing the page, will abandon any partially completed
audio comment.
3b.3b. To finalize your voice comment, click the
stop
button.
3c.3c. Alternatively, click the
trash can
icon to delete your current voice comment.
131
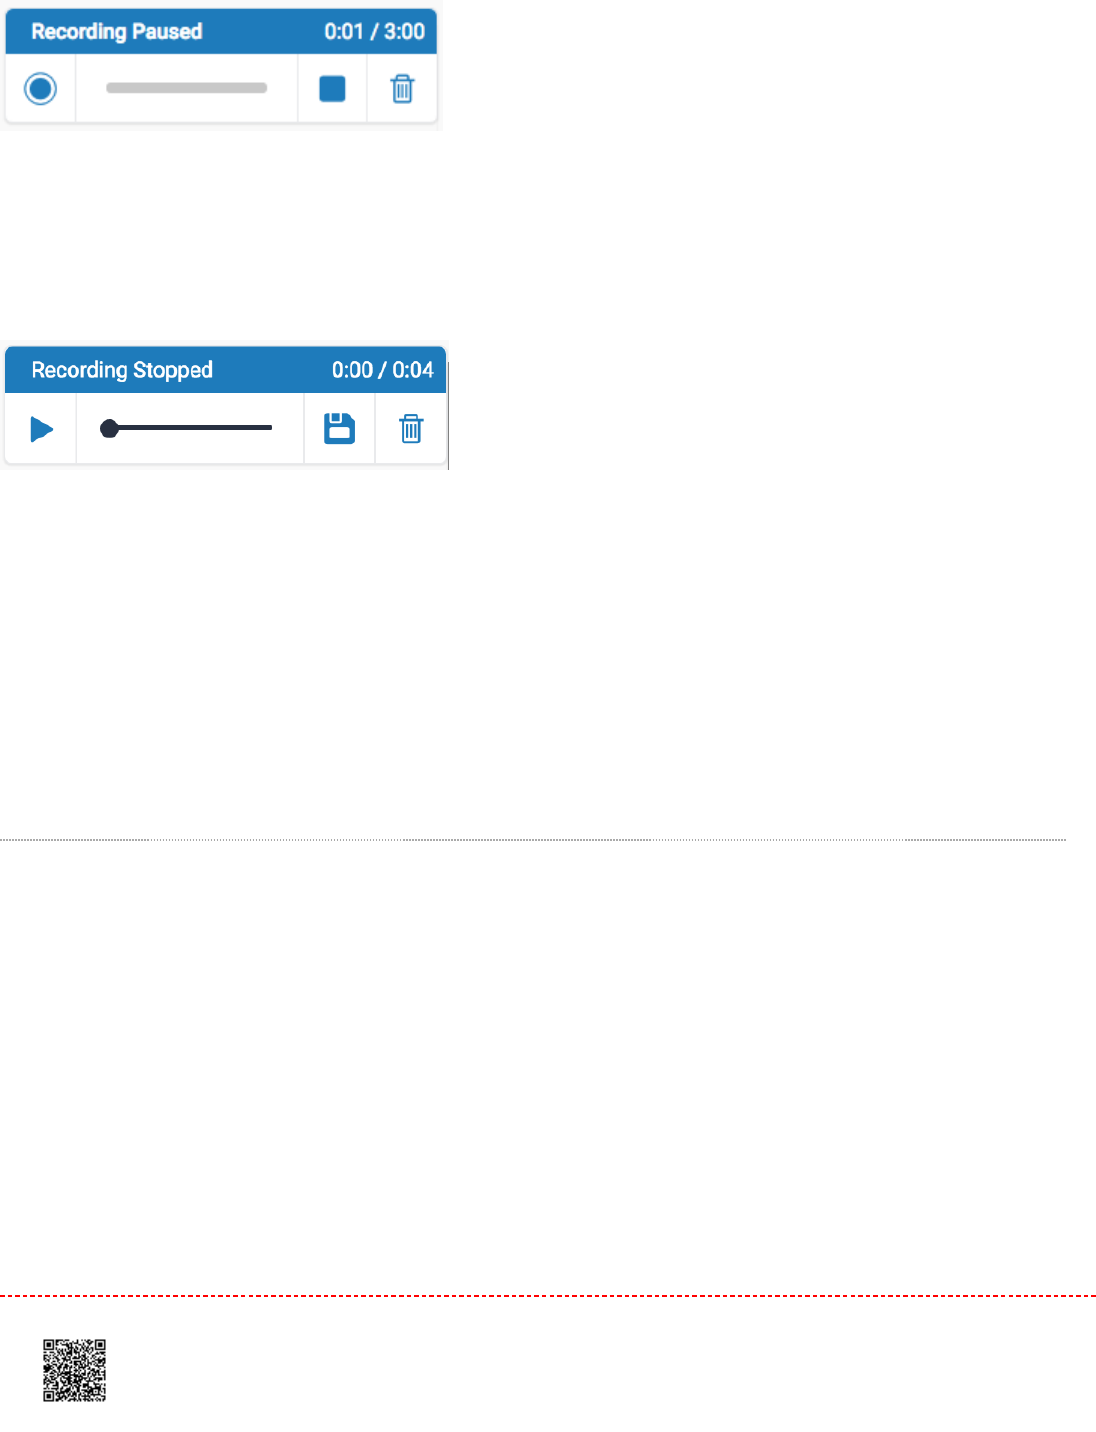
4.4. Once you have stopped recording completely, your comment will then be available for playback and can also
be saved by clicking the
Save
icon.
4a.4a. Click the
play
button to check your recording.
4b.4b. Click the
save
button to save your recording.
4c.4c. If you need to reset the audio comment and start again, click the
discard
button (the rightmost
button) at anytime. This will deletedelete your current voice comment.
Text Comments
11. You can leave a text comment by navigating to the Feedback Summary side panel. To leave a text comment,
simply click in the text box provided, and begin typing.
132
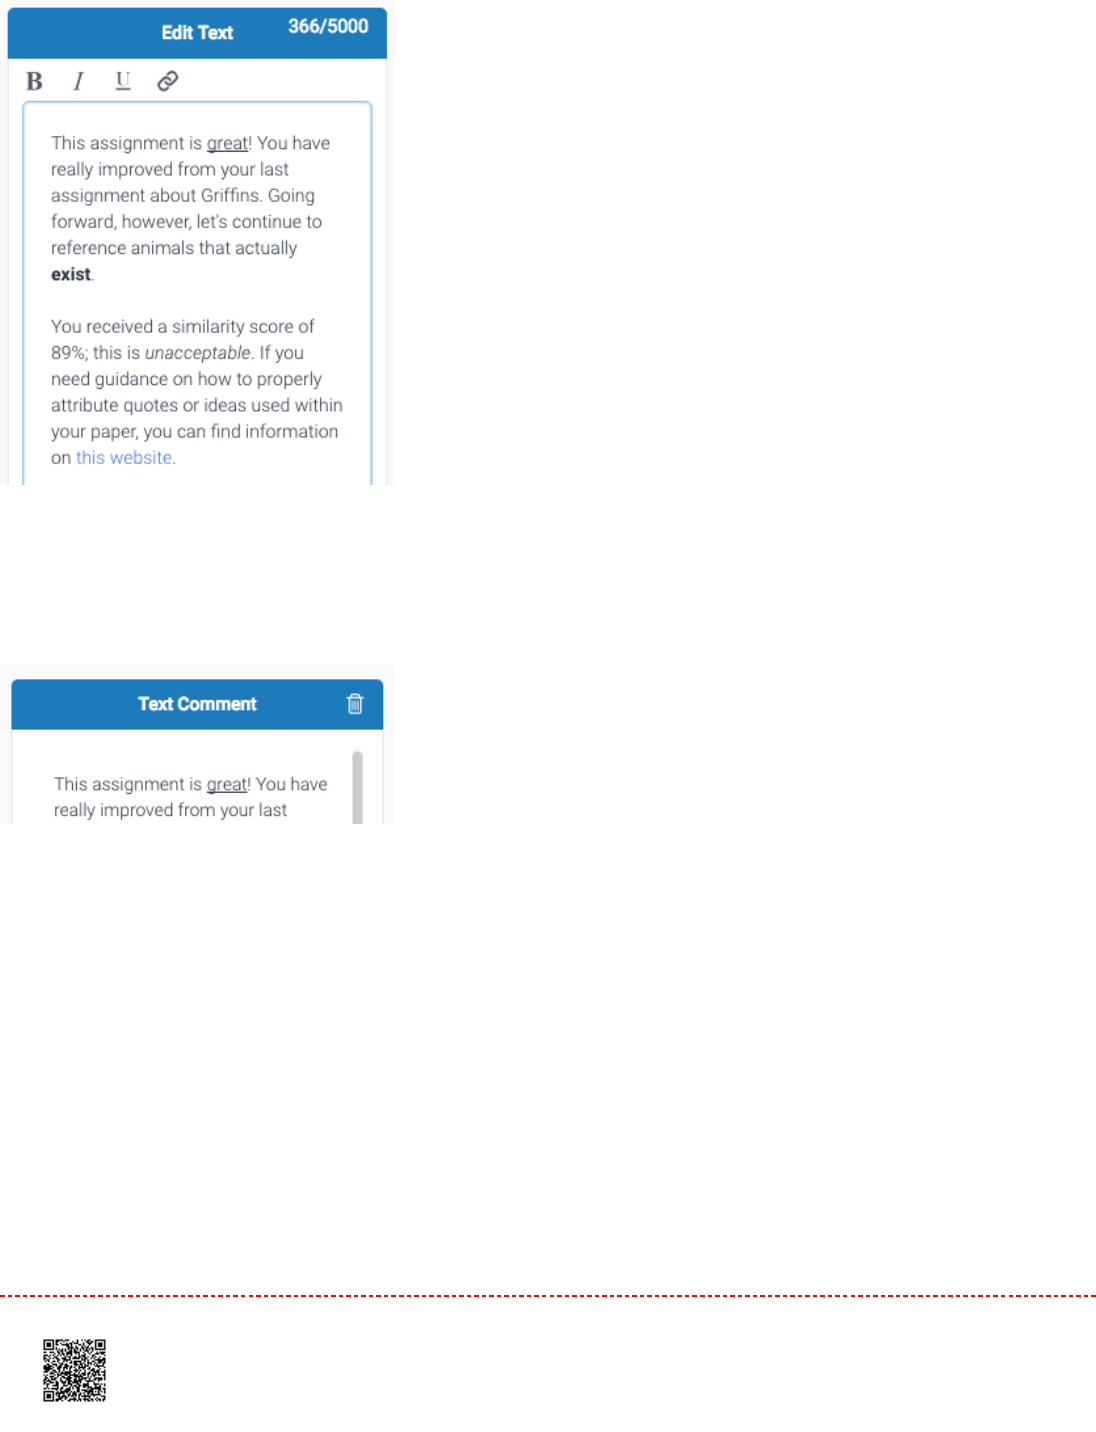
22. (optional) To delete a comment, click the
trash can
icon in the top right-hand corner of the Text Comment.
NoteNote: Your comment will automatically save, so you don't have to worry about being timed out.
133
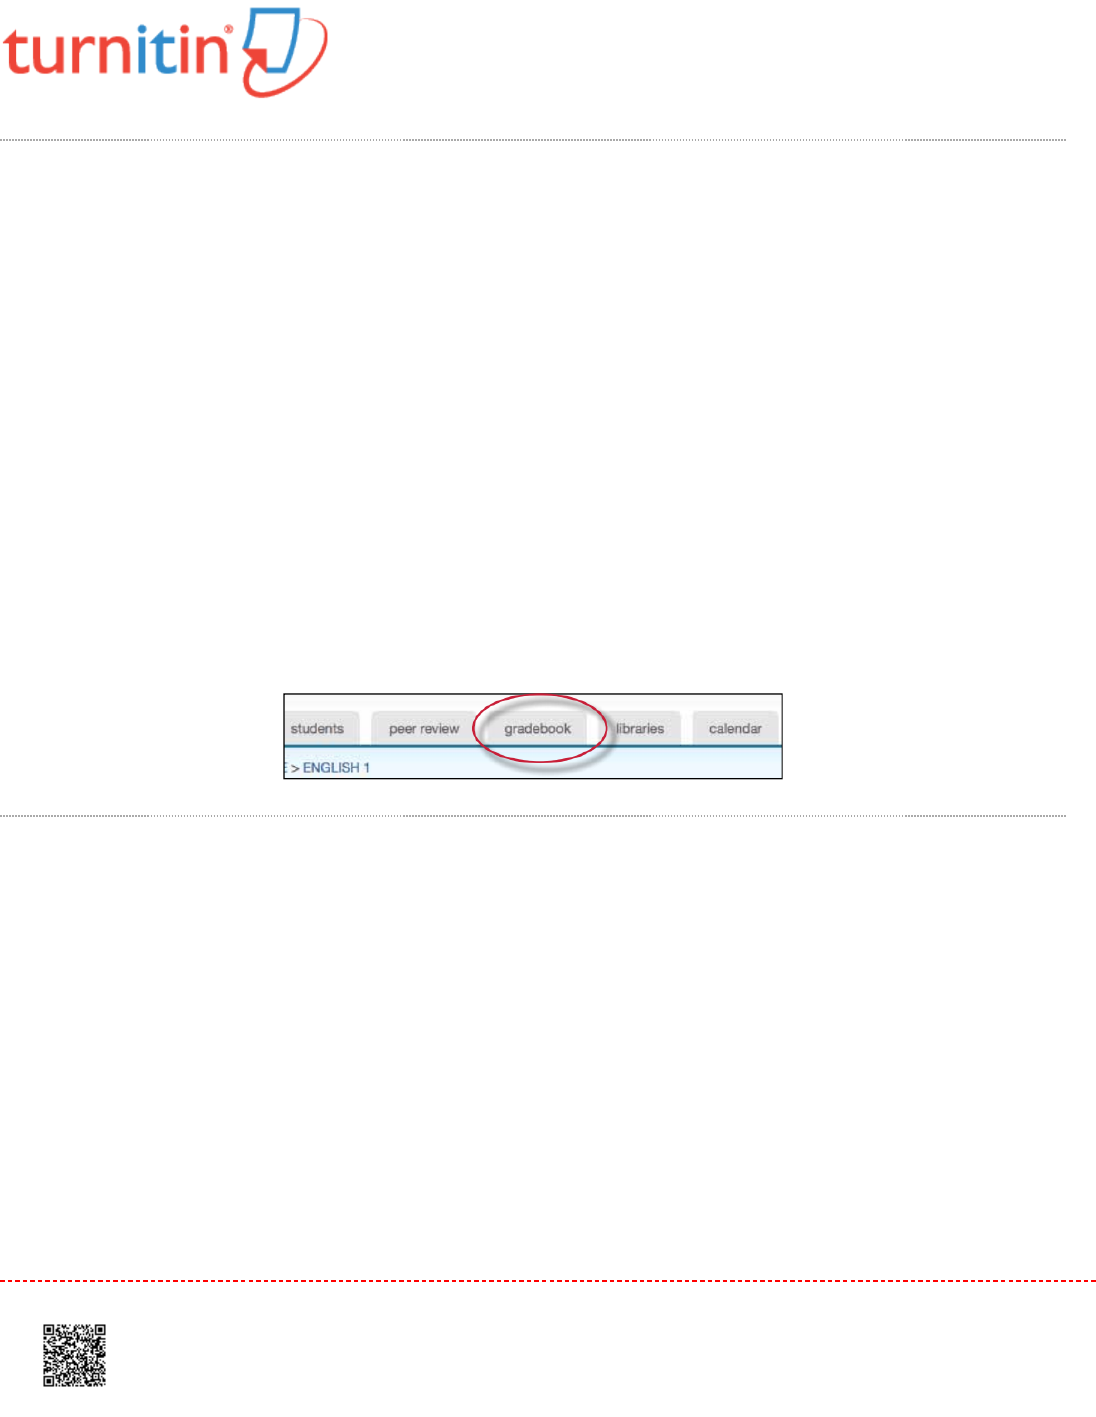
Grade Book
The grade book product allows an instructor to track student grades and attendance for a class. To access the grade
book, click on the grade book tab. Students enrolled in the class appear in the left column of the class grade
book. Turnitin assignments for the class are listed along the top of the grade book view.
There are multiple methods that allow an instructor to enter grades into the grade book. Grades may be entered directly
from the grade book from the main grade book window or from the assignment and student pages.
The grade book will also accept grades entered for papers and peer reviews outside of the grade book. For example, an
instructor can enter grades using GradeMark, a GradeMark rubric scoring card, or for Peer Review assignments.
Student grades may also be entered when viewing a student paper from the assignment inbox.
Areas of the Turnitin Grade Book
attendanceattendance - instructors can check a box indicating an absence or late arrival for a student on a specific date
add entryadd entry - create a new entry on Turnitin for an assignment not created in Turnitin
prefsprefs - instructors may set the specific grading format for a course
keykey - opens an informative pop-up window that displays the meaning of all information on the grade book page
graphsgraphs - statistical graphs that can be used to display student and class performance
scalescale - used by an instructor to weigh the value of assignments as part of the possible total number of points in the
class
exportexport - download a Microsoft Excel spreadsheet version of the current grade book
gradegrade - access to the grading page for a specific assignment
134
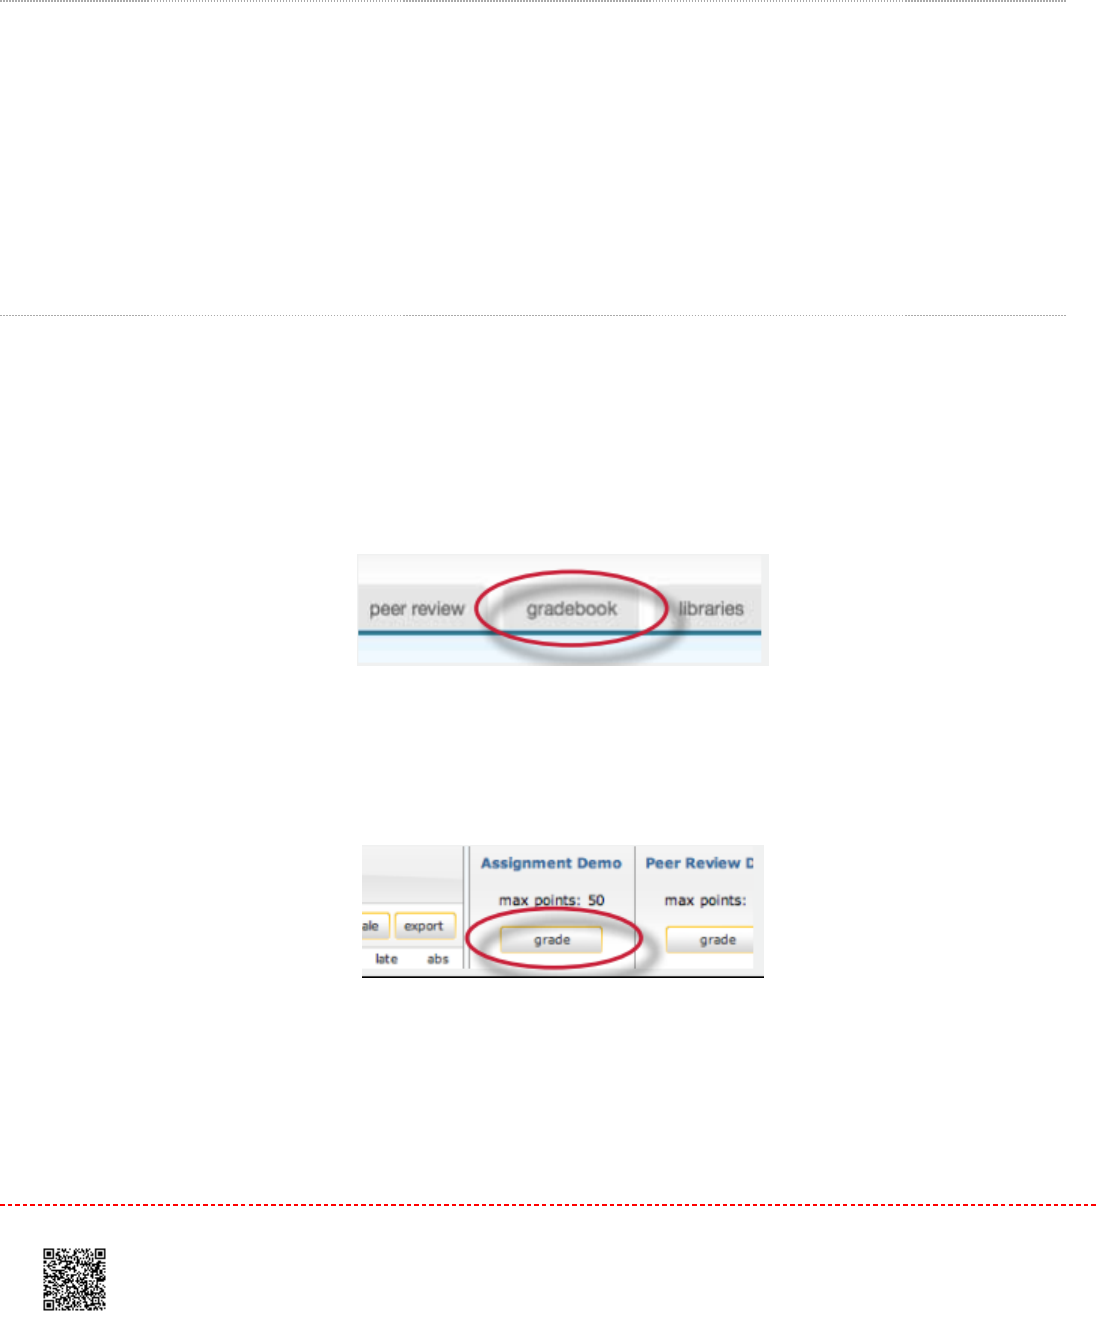
assignment nameassignment name - click on an assignment name to access further information about this assignment and the
grades given in the assignment as well as statistics
Point Values
Each assignment in grade book carries an assigned point value. From the grade book, an instructor can add a point
value to an assignment or adjust the point value for an assignment at any time.
The grade book assignment point value can be overridden by the GradeMark rubric scorecard point value. Please see
more information under Chapter 4: GradeMark, in the Rubric Scorecard section.
To add or modify the point value of an existing assignment
11. Enter the grade book for the class by clicking on the
grade book
tab
22. Click the
grade
button beneath an assignment to open the grade book assignment page
3.3. Enter the desired value in the maximum points field
135
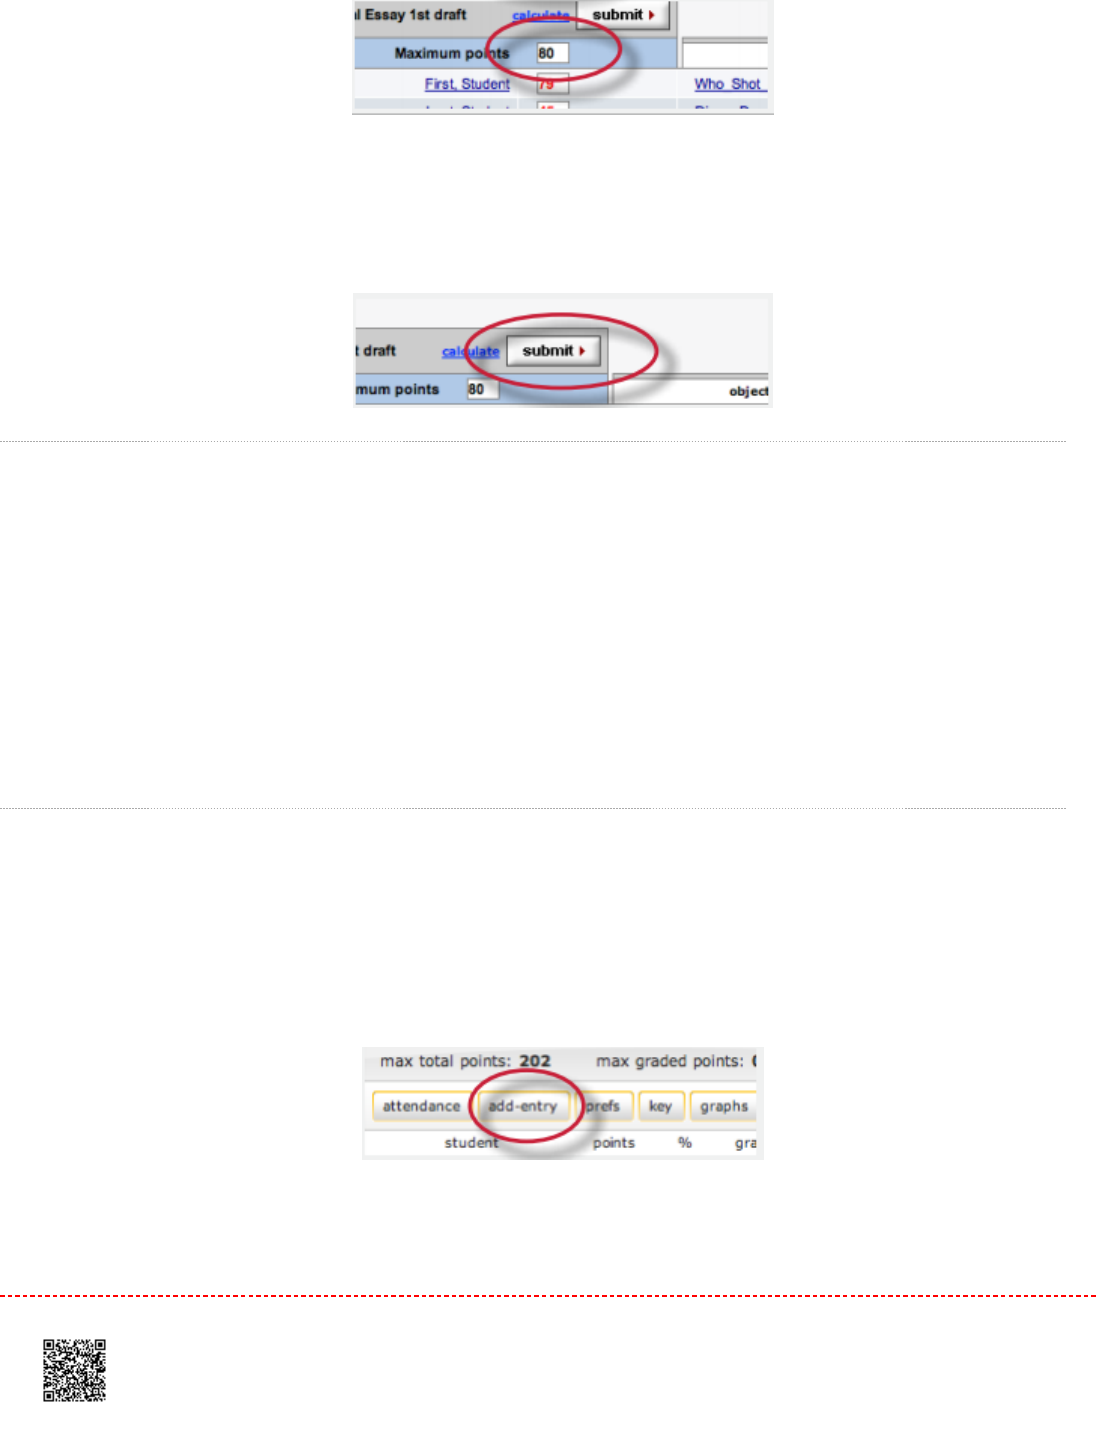
44. Click submit to save the new assignment value
Adding Entries
Assignments that have been added to Turnitin such as paper assignments, peer reviews, and revision assignments are
automatically assigned a grade book entry. Any additional entries, such as in-class exams or presentations, must be
added manually by the instructor.
This allows instructors to track and save grades in a single location through Turnitin and automatically return this
information to the students on the post dates for the assignments that have been graded.
Adding an entry to Grade Book
11. Click the
add entry
button
22. On the add entry page, fill in:
136
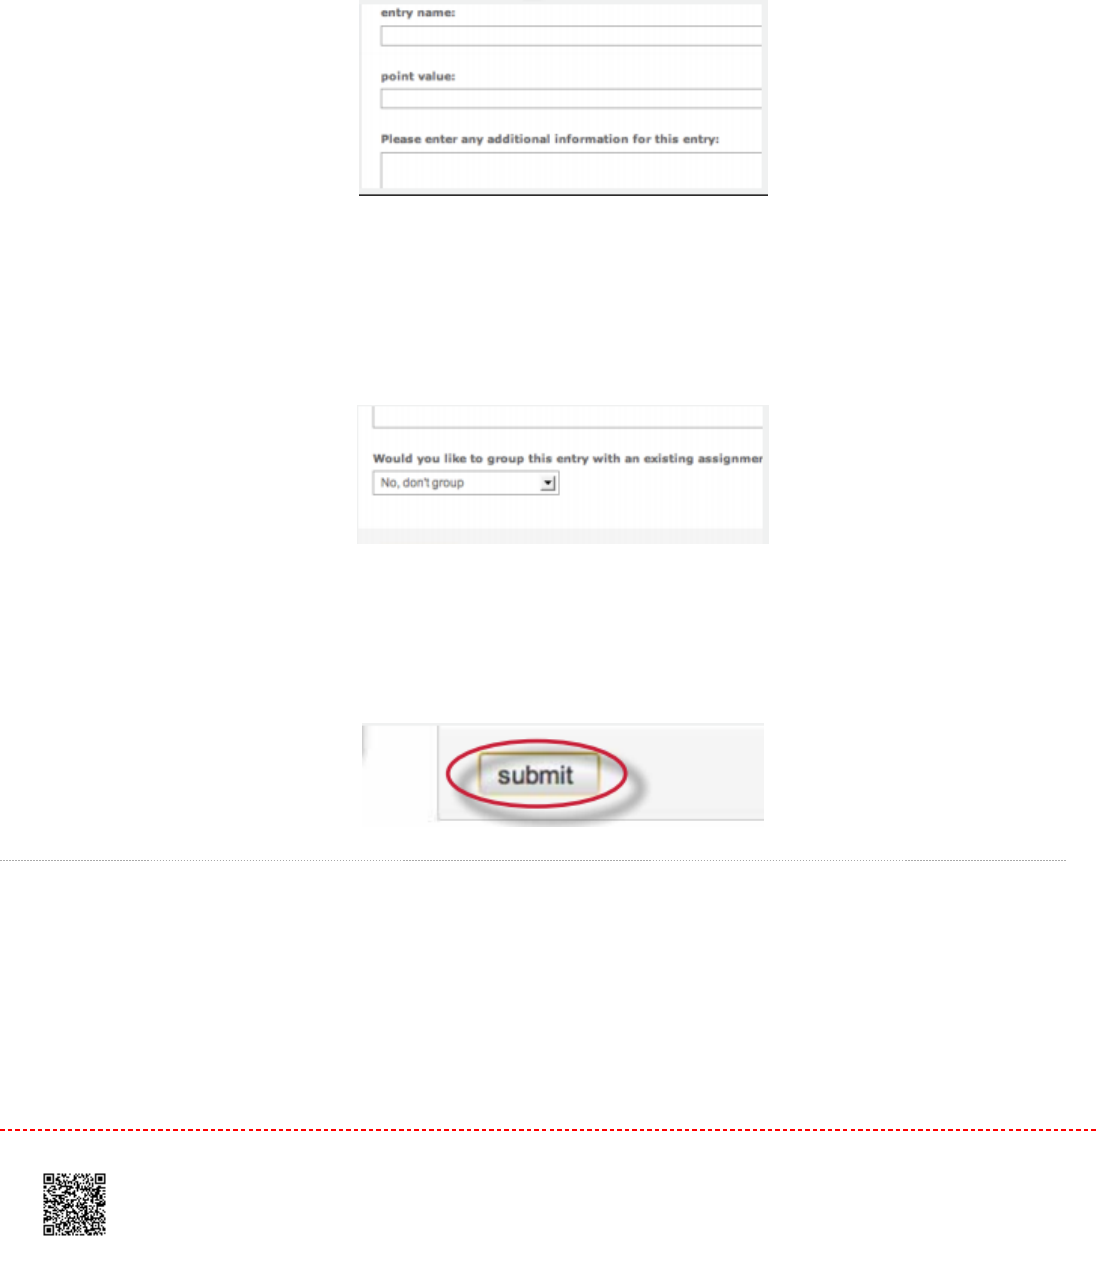
an entry name
a point value for the entry
(optional) additional information for the entry
33. (Optional) To group the new entry with an existing assignment, use the pull down menu to select the
assignment. Grouping an assignment places the entry in the grade book as a subset of the assignment selected
4.4. Click submit to save the entry and add the entry to the grade book
Grade Book Preferences
The preferences page allows an instructor to control the format in which the grades in the class are displayed. The
available grade display options are letter, point, scale, or custom. This area also allows instructors to customize the
percentage values that equate to any given grade, for example: A = 92-100%, C+ = 78-79%.
137
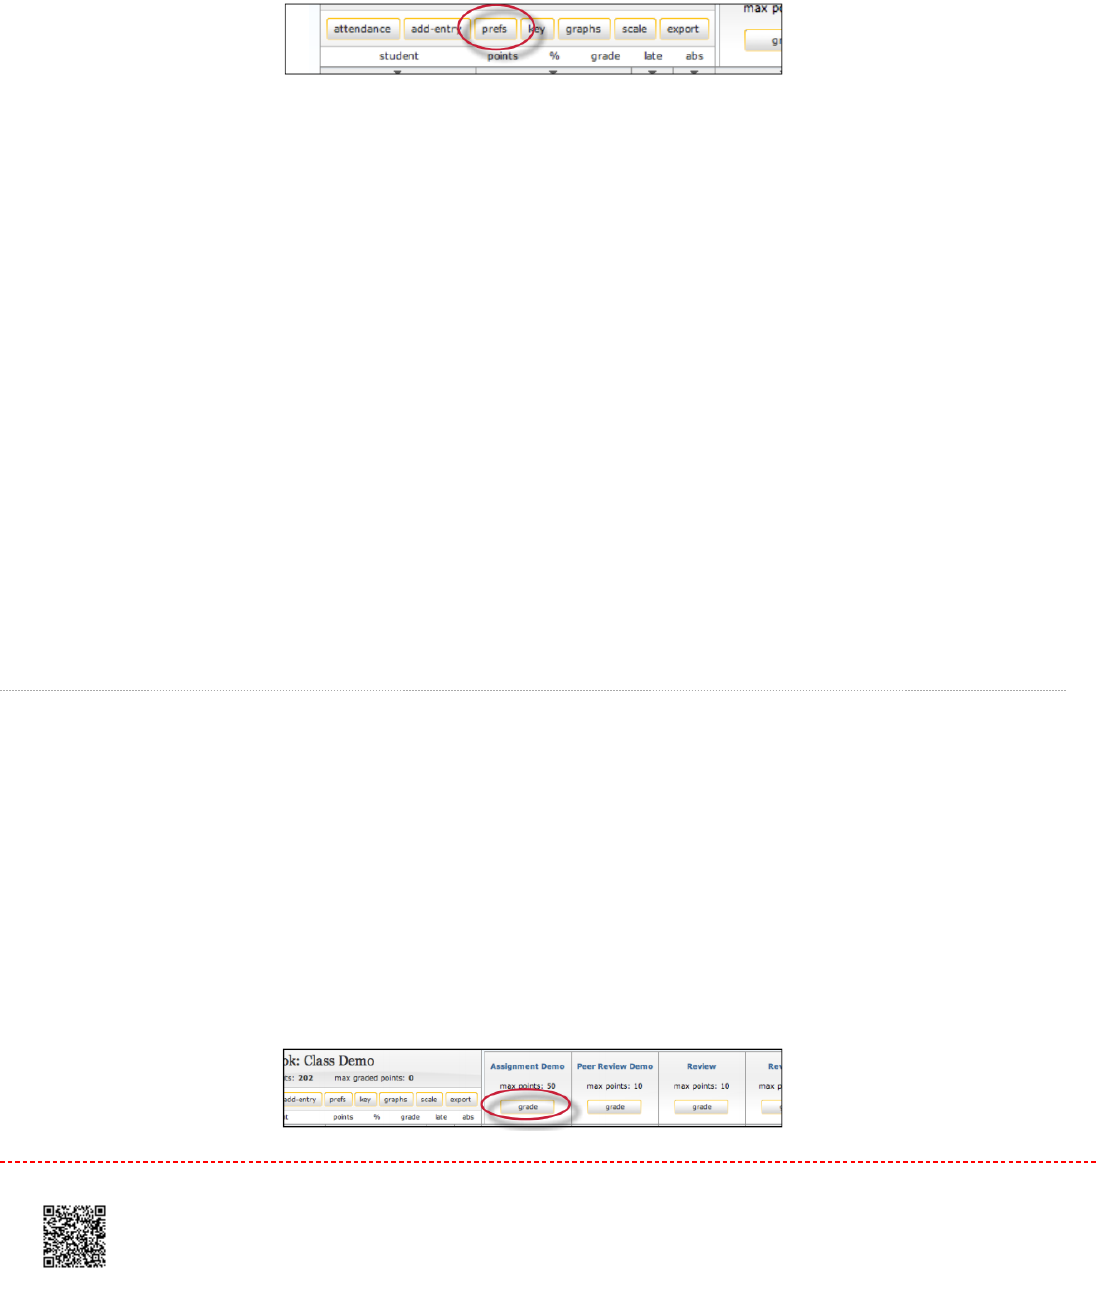
To open the grade book preferences page, click the
prefs
button.
From the preferences page the instructor can select and customize how grades are displayed and the percentage value
used to determine the grades. The instructor can choose to display grades as a percentage, a letter grade, or using a
4.0 scale.
If using a different grading system, the instructor can create their own grading format by selecting other and entering the
percentage breakdowns and grades desired for the class.
WarningWarning: When creating a customized grading scale, be certain that all possible ranges of percentage are
accounted for. If there are any gaps, an error message will be generated.
Once a format has been selected for the grades, determine the breakdown that should be used for each grade. If the
instructor would like to import the values from another class, use the pull down menu to select the class. When the
modifications are completed, click on submitsubmit to return to the grade book.
Entering Grades
Grades can be entered from the grade book assignment or grade book student pages.
The grade book
assignment page
lists all student submissions to an assignment. To open an assignment page, click the
grade
button beneath an assignment.
138
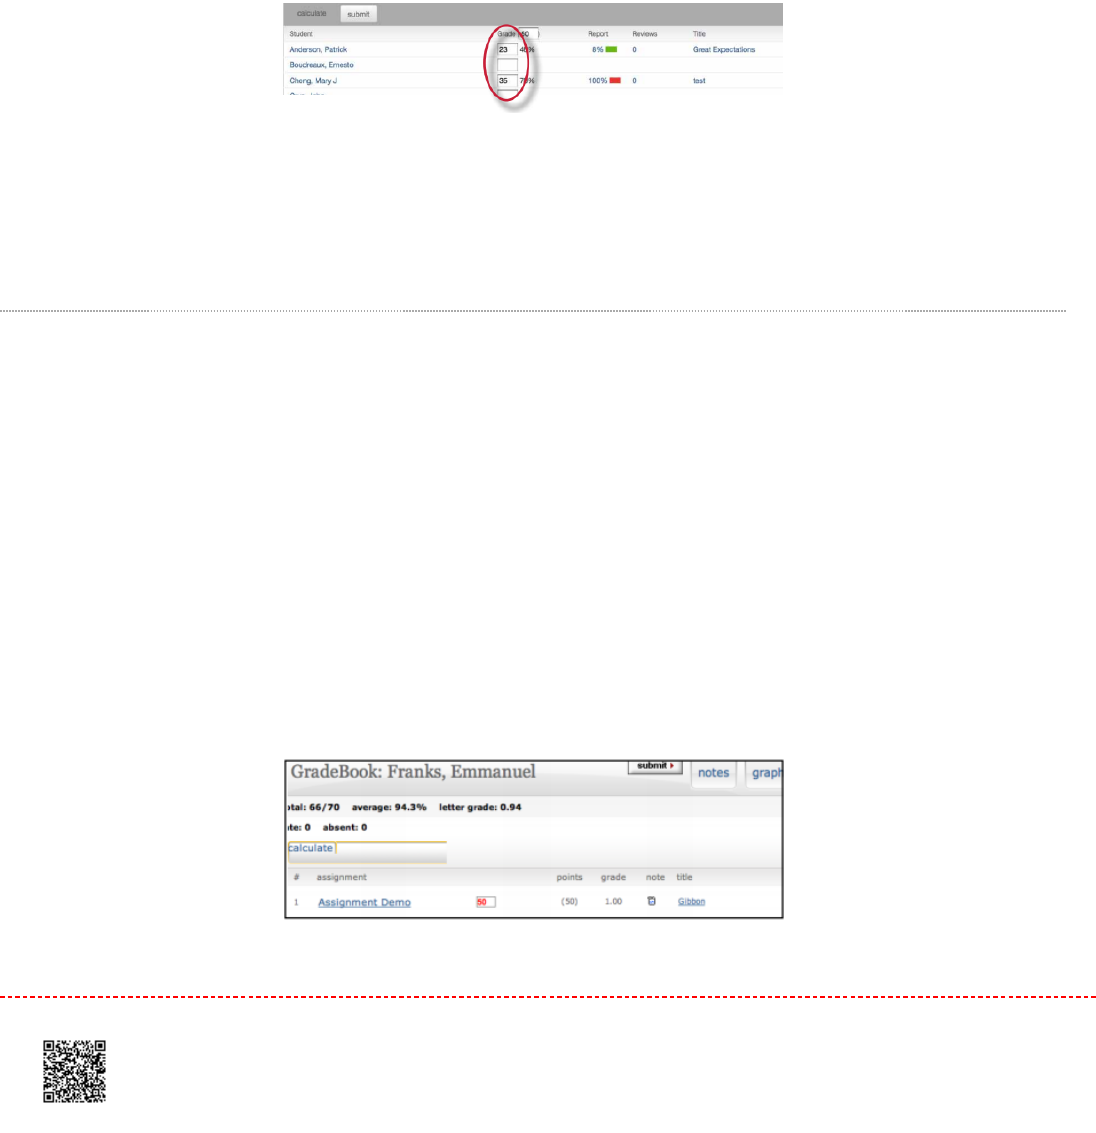
The grade book
student page
shows a selected student’s submissions and grades. To open a student page, click on a
student’s name.
To grade a submission, enter an integer point value next to the submission. To view the grades before submitting them
to grade book, click the
calculate
link.
When point values are entered, click the submit button. The grades will be entered into the grade book and the instructor
will be returned to the grade book main page. The main page will display the point values entered along with the
corresponding grades.
Grade Book Student Page
The top of the student grade page gives the instructor a summary of a student’s grades and attendance. If the grades in
the class have been scaled, an asterisk will show up next to the student’s overall grades indicating that the values are
scaled values.
The view can be toggled between scaled and natural grade values by using the
show totals based on
: pull down menu
to select
scaled values
or
natural values
. Refer to Scaling and Dropping GradesScaling and Dropping Grades in this chapter for more information on
how scaled grades work in grade book.
139
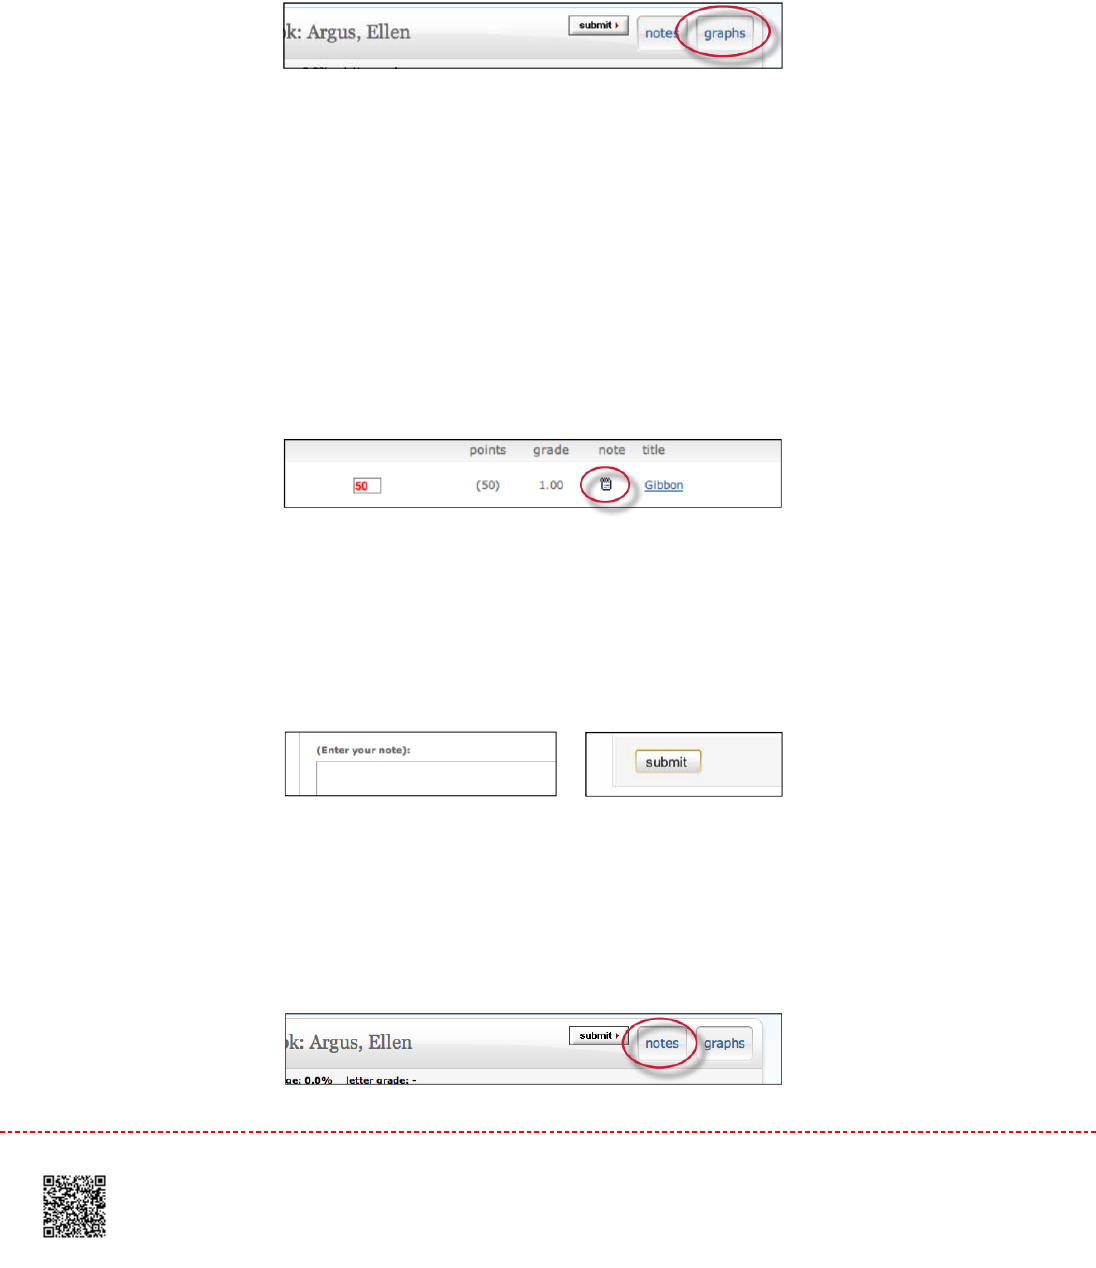
The instructor may also view the student’s grades in a variety of graphical formats using our graphic tools. To access the
graph displays, click on the
graphs
button for the student. For more information on using grade book’s graph tools,
please refer to the section Graphing ToolsGraphing Tools in this chapter.
NotesNotes
The instructor is able to send a note to a student for the grade given to the student for their submission in a particular
assignment.
To enter a note for a student on an assignment, click on the note icon next to a submission.
On the note page, enter the text of the note for the student in the text box provided. Once this is complete, click
submit
to save the note making it viewable for the student.
The instructor is also able to enter a general note for a student from the student notes page. To open the note page,
click the
notes
button.
140
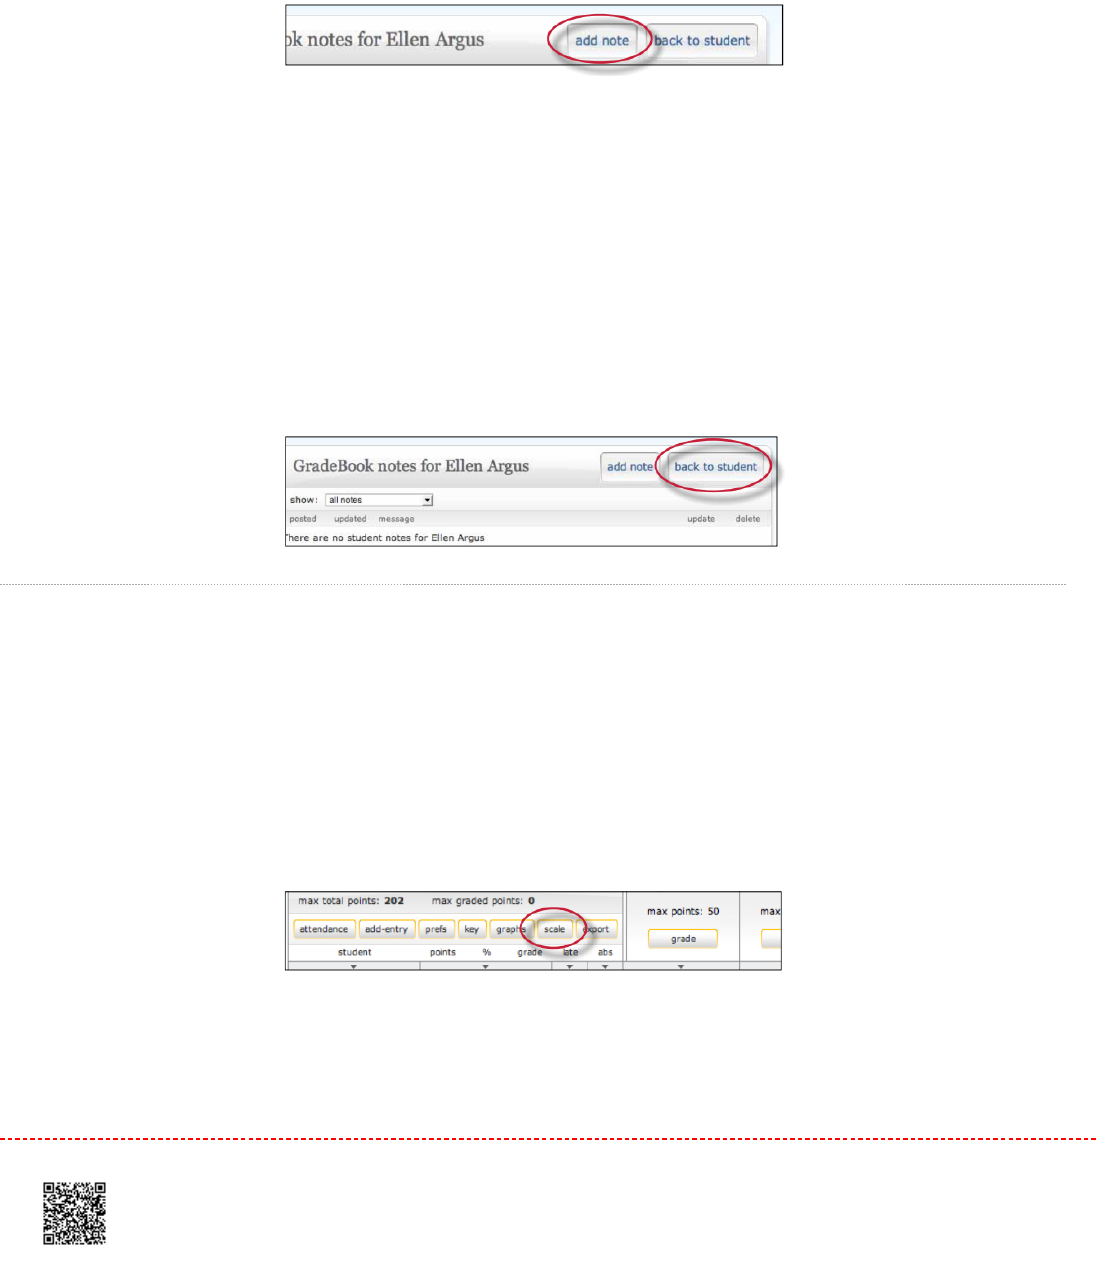
From the student notes page, add a general note by clicking the
add note
button.
From the student notes page, the instructor can also perform these actions:
toggle between viewing assignment specific and general notes using the show pull down and selecting
all notes,
assignment notes only,
or
class notes only
update and delete notes by clicking on the icons under the update or delete columns
return to the student’s grade page by clicking on the back to
student
button
Scaling and Dropping Grades
With grade book the instructor can scale grades in the class and recalculate them instantly. The instructor may also
select whether to drop the lowest grade for each student in the class. To open the scale page, click the
scale
button on
the grade book main page.
141
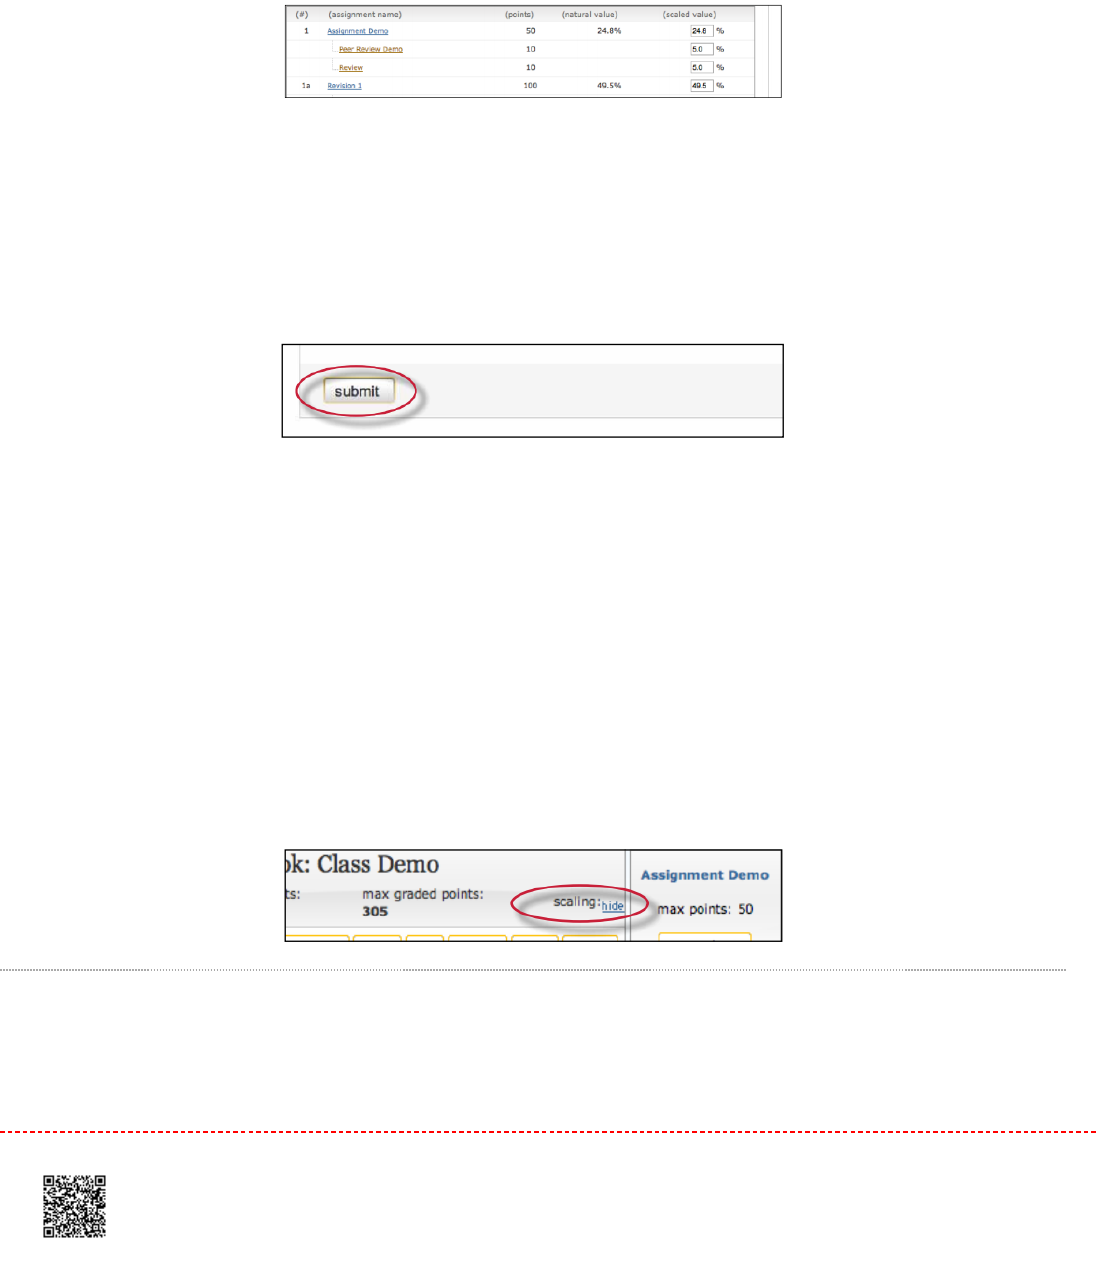
The scale pages shows all of the instructor’s assignments and entries along with the assignment point values. The
natural value column shows the value of the assignment without scaling. For example, if the grade book shows four
assignments each with a 100 point value, the natural value of each would be 25%.
To increase or decrease value of an assignment, enter a new value in the scaled value field. Make sure the values total
to 100% by the end of the class. To view the new scaled grades, click on
submit
to be returned to the main grade book
view where the scaled values are now displayed.
WarningWarning: Scaling grades does not change the point values of assignments. Scaling grades creates new values
for assignments relative to each other and the total value of all assignments in the class. These relative values
are reflected in the total percentage and final grades only.
The grade book will now display grades based on the new scaled values entered by the instructor. To view the grades
based on their natural value, click the
scaling: hide
link. Changes can be made to scaled values by returning to the scale
tab and adjusting the grading scale.
Dropping Grades
142
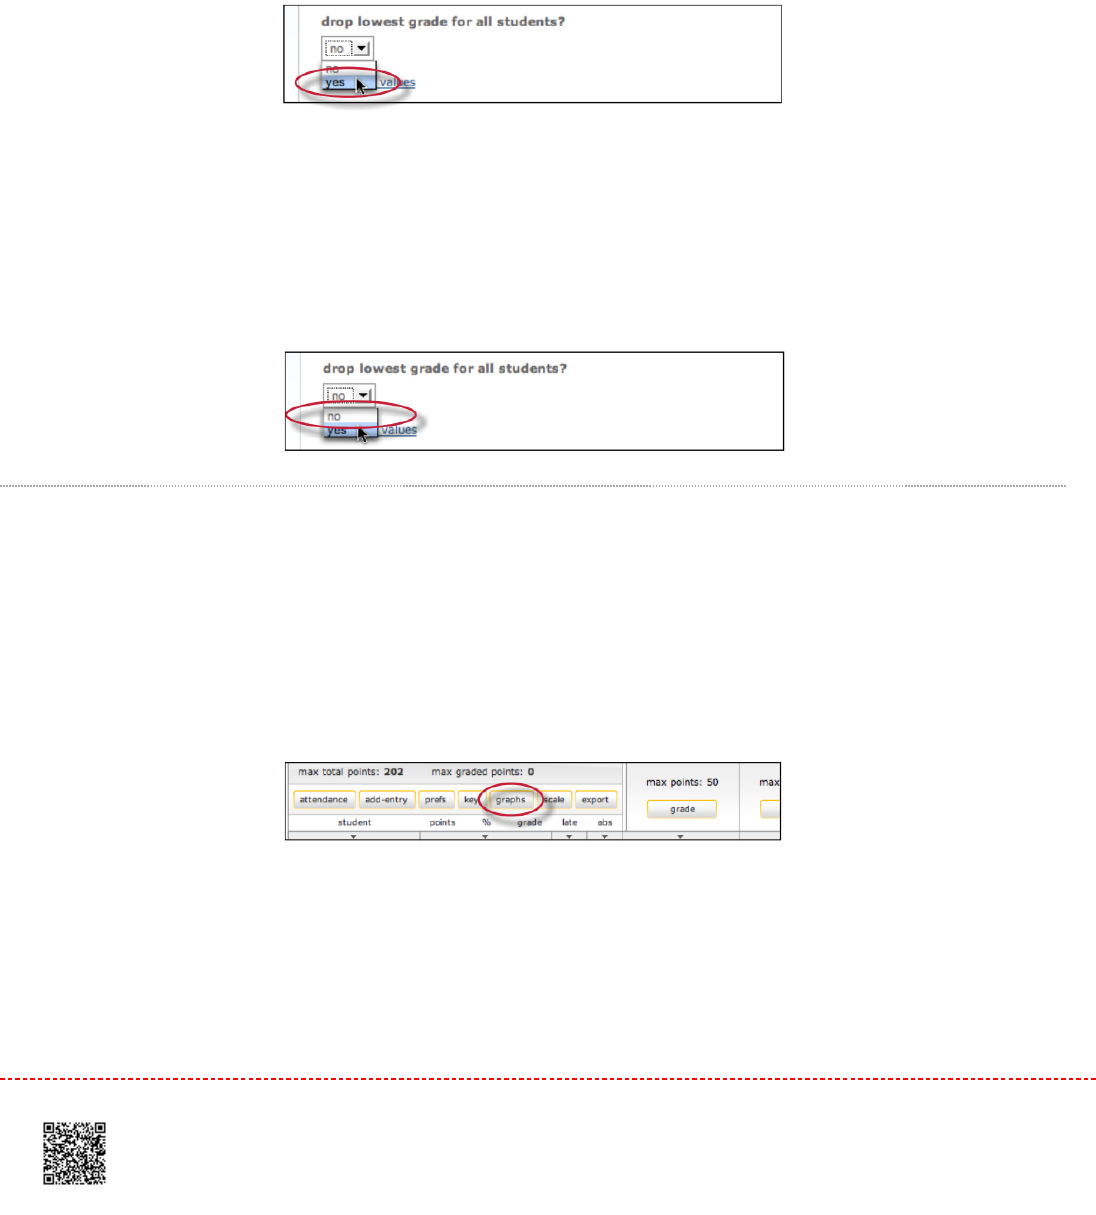
An instructor can automatically drop the lowest grade for all students in a class.
To drop the lowest grade, go to the scale page and from the drop down menu labeled
drop lowest grade for all
students?
select
yes
.
When the lowest grade has been dropped, each student’s lowest grade is marked in grade book by placing the grade in
a highlighting square. These grades can be reinstated at any time by returning to the scaling page and changing the
drop lowest
grade for all students
drop-down menu to
no
.
Graphing Tools
With Turnitin’s graphing tools, an instructor can effectively track class and student performance. To access grade book’s
graphing tools, click the
graphs
button on the main page of the grade book for the class.
On the graphs page, use the show: pull down menu to choose what type of graph to display. The graph types available
are:
graphs showing class performance for all assignments
graphs showing class performance for one assignment
143
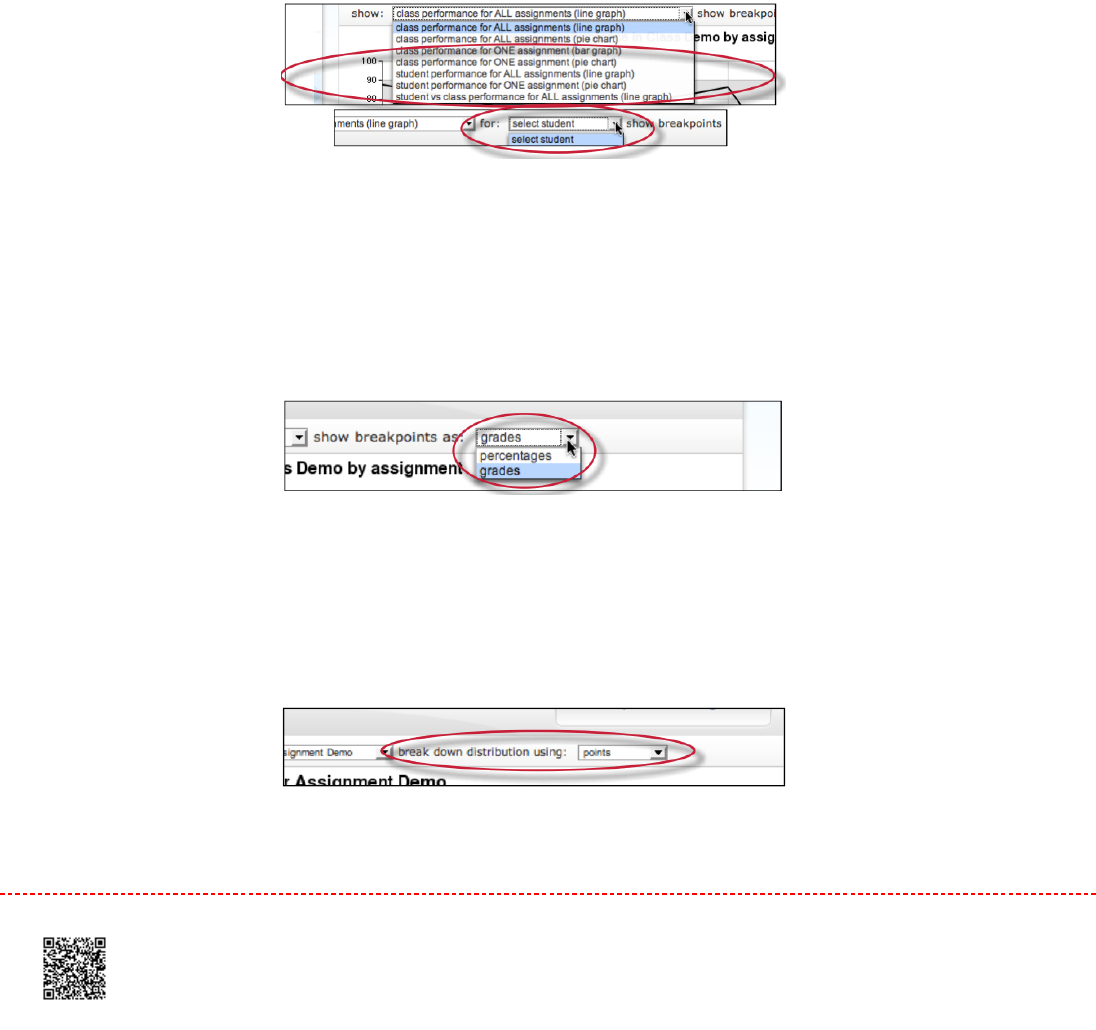
graphs showing performance of a student for all assignments or one assignment
a graph comparing the performance of a student to the rest of a class
Most graphs are available in a line graph or as a pie chart.
When a graph for student performance or assignment performance is selected, a new pull down menu will appear
labeled as
for:
, and the instructor will need to select a student or assignment to display, depending on the graph type
that is being viewed.
When viewing a line graph, the user has the option of showing grades instead of showing percentages. To show grades,
use the
show breakpoints
as: pull down menu and select
grades
. To hide the grades and only display percentages,
select percentages.
When viewing a bar graph for class performance in an assignment, an option is provided for viewing percentages or
points. Use the
break down distribution using
: pull down and select
percentages
or
points
to change this option.
144
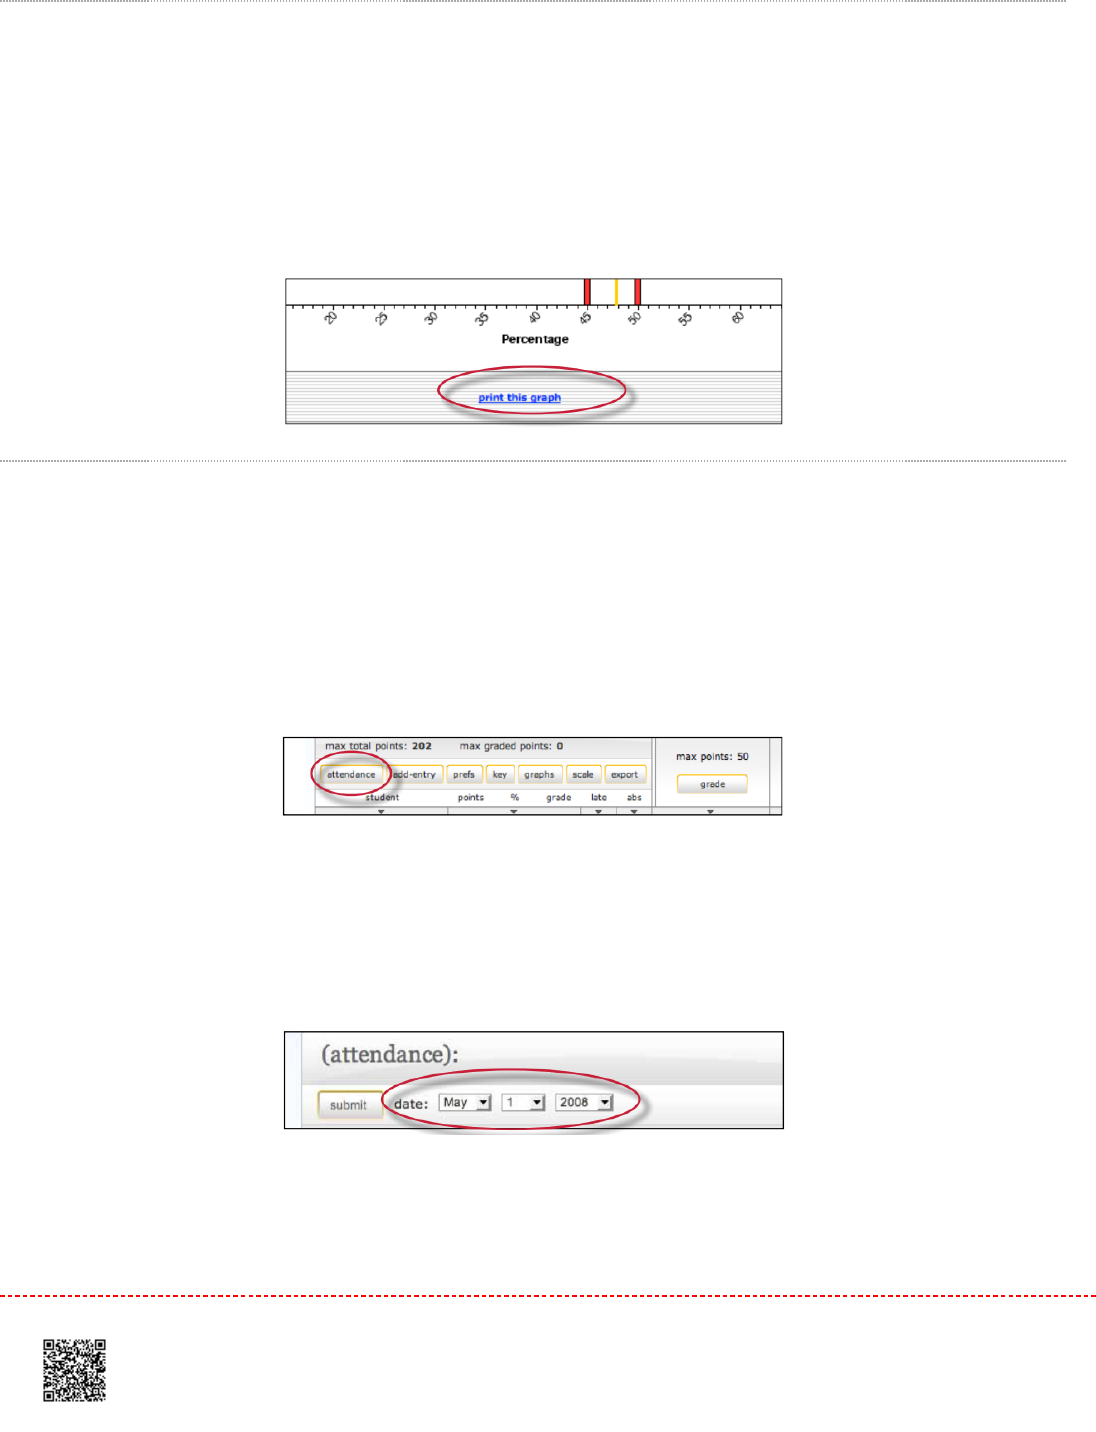
Printing Graphs
All of the grade book graphs are printer friendly. To view a graph in print format, click the
print view
link below the graph.
This will open a separate window. Use the browser print command to print the selected graph.
Attendance
An instructor can use the grade book to track student late arrivals and attendance by using the attendance page. To
open the attendance page, click the attendance button on the grade book main page.
The attendance form lists students enrolled in the class. The top of the form shows the current date. To mark an
absence or tardy for a different date, use the pull down menus to select the date to record attendance or late arrivals for.
To mark a late or absent student, click the check-box to the right of the student name in the correct column.
145
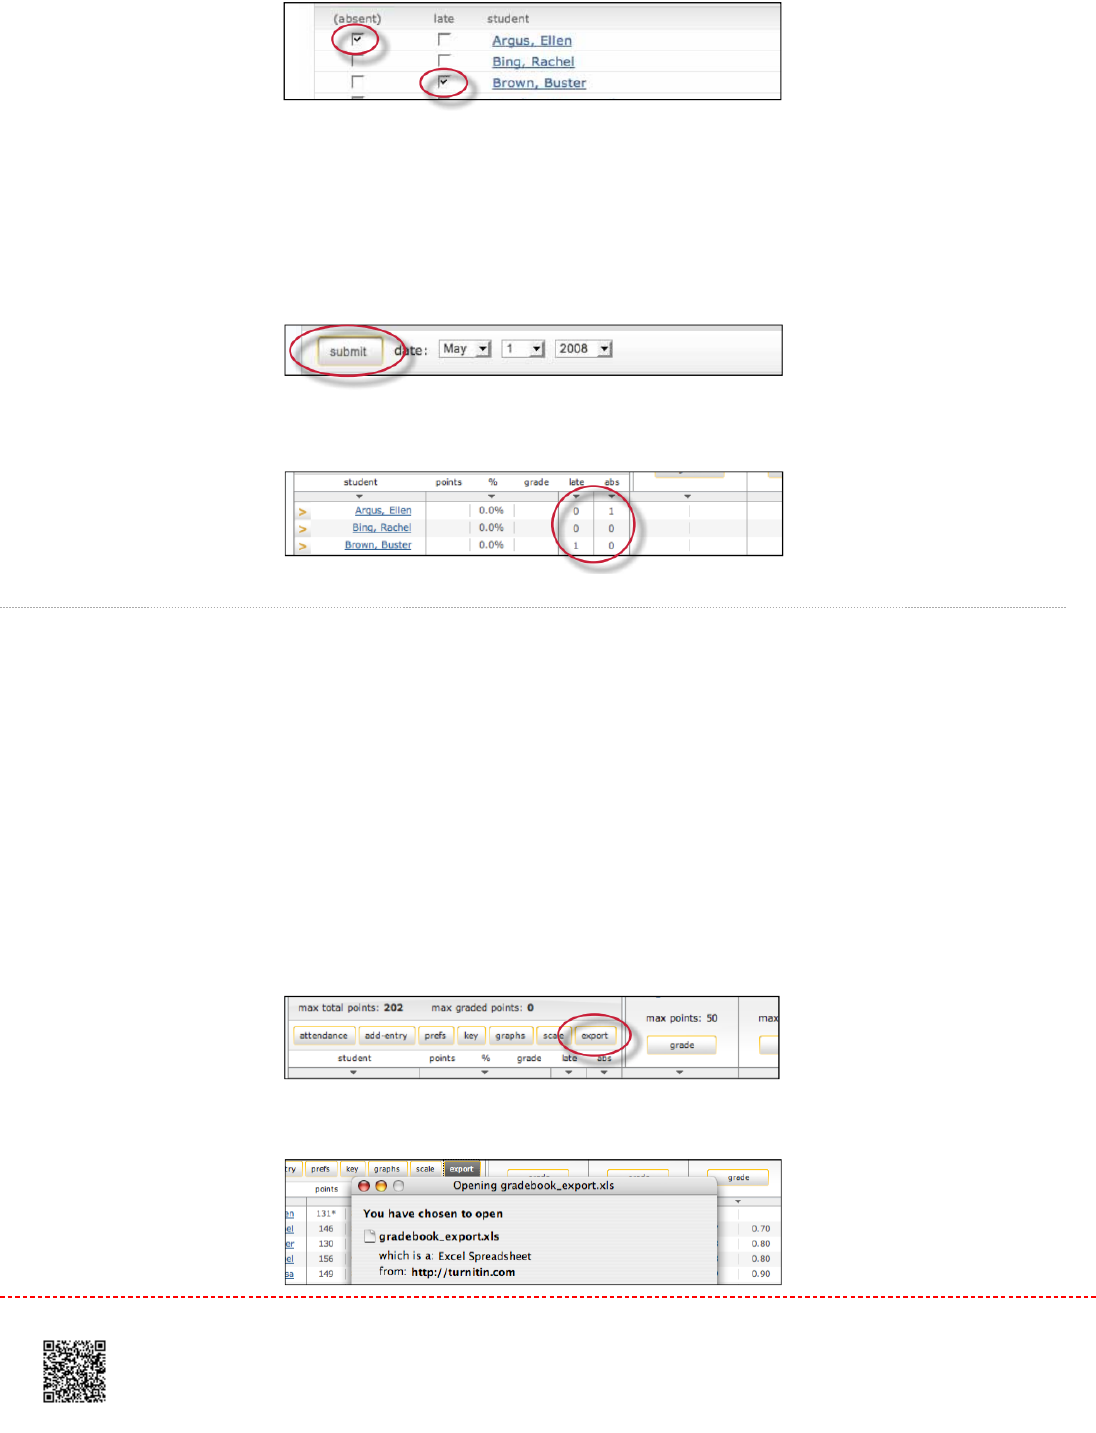
Once all student absence or late arrivals are recorded for the selected date, click on the submit button to save the
information. Absences and late arrival totals show up on the grade book main page for all students.
Exporting from Grade Book
An instructor can save an offline copy of the grades entered in the Turnitin grade book for a class. The grade book
information can be exported as a Microsoft Excel® spreadsheet.
To export grade book information, click the
export
button on the grade book menu page. This will create the spreadsheet
and initiate a download of the grade book data to the instructor’s computer.
146
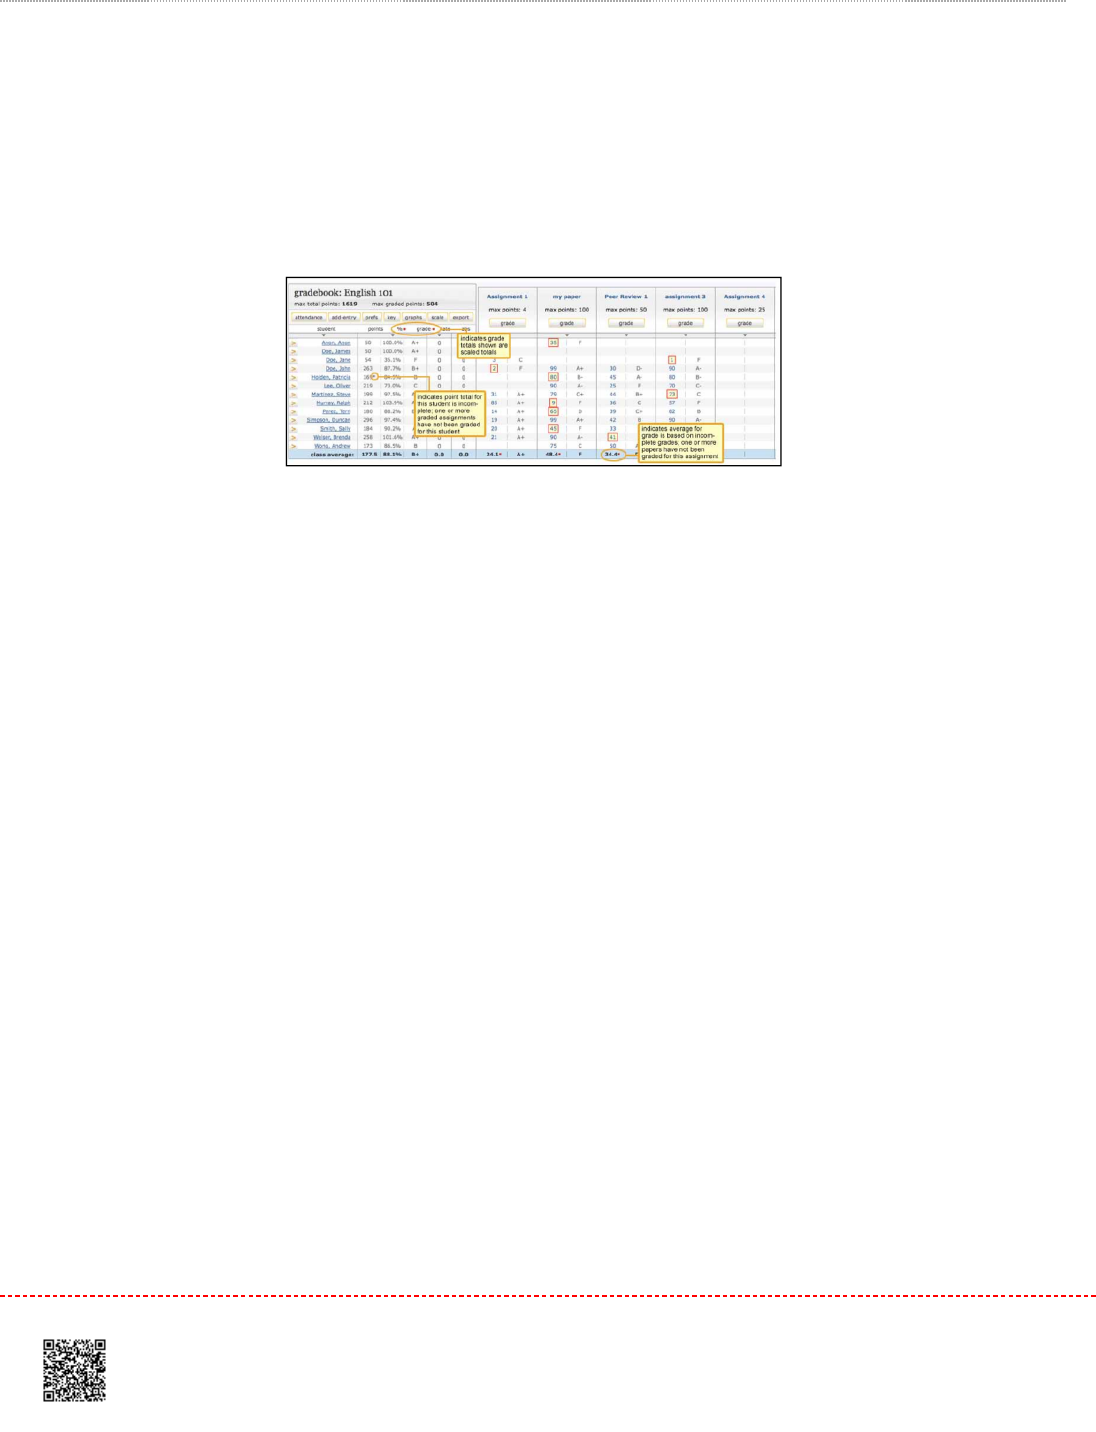
Grade Book Key
Click the key tab to view a visual key explaining the meaning of the asterisks and other indicators that can appear on the
grade book page for an instructor.
147


QuickMark Manager
A QuickMark is the Turnitin term for 'reusable comments', allowing instructors to use the same mark across their classes
and assignments, without the need to recreate it.
The QuickMark Manager stores every QuickMark that has been created by you, and also stores any QuickMarks that
other instructors have shared with your account. The Turnitin Feedback Studio provides QuickMark sets ready for use
when you first create your account: Composition, Composition Marks, Format, Punctuation, and Usage. Each set
contains a multitude of comments to assist you as you provide student feedback.
You can perform the following actions in the QuickMark Manager:
create new QuickMark sets;
create new QuickMark comments;
edit sets or comments;
delete sets;
delete comments from sets;
upload and download sets; and
archive comments.
Accessing the QuickMark Manager
The QuickMark Manager can be accessed from two areas within the Turnitin Feedback Studio.
Accessing QuickMarks from the Side Panel
149
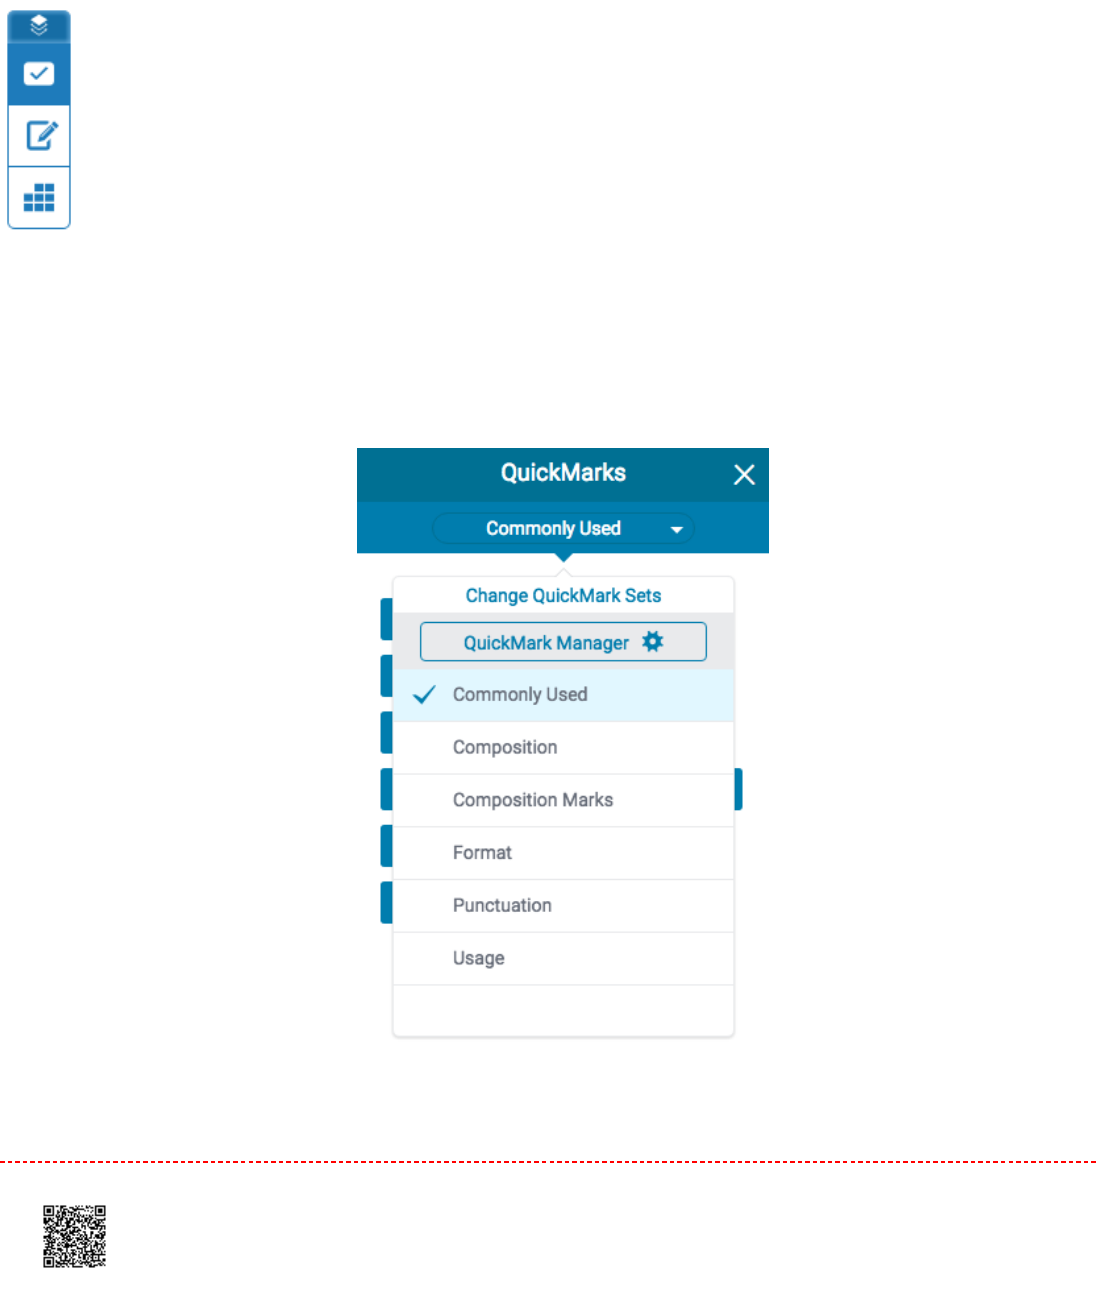
1.1. Click the
QuickMark
icon from the online grading toolbar to open the
QuickMarks
side panel. This will show the
currently open QuickMark set.
2.2. Click the name of the currently open QuickMark set, revealing a drop-down list. From here, click the
QuickMark
Manager
button.
150
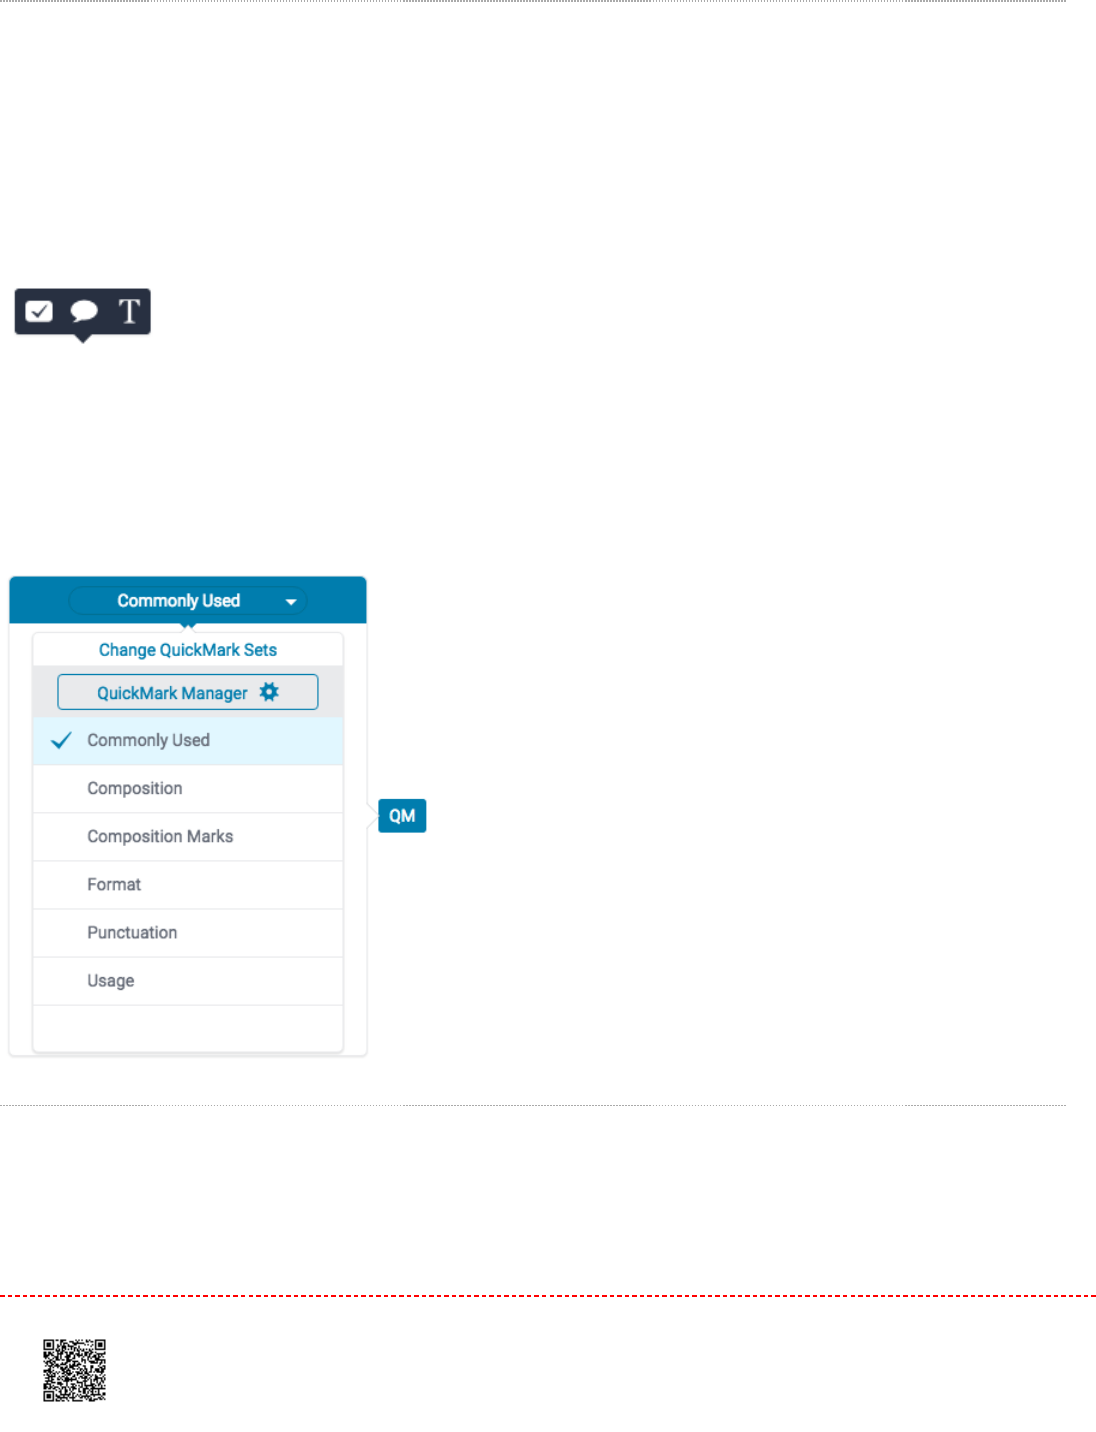
Accessing QuickMarks On-Paper
1.1. Click anywhere inside the paper to reveal the in-context marking tool. Click the QuickMark icon, which appears
as a tick inside a rectangle.
2.2. Click the name of the currently open QuickMark set, revealing a dropdown list. From here, click the
QuickMark
Manager
button.
Creating a New QuickMark Set
151
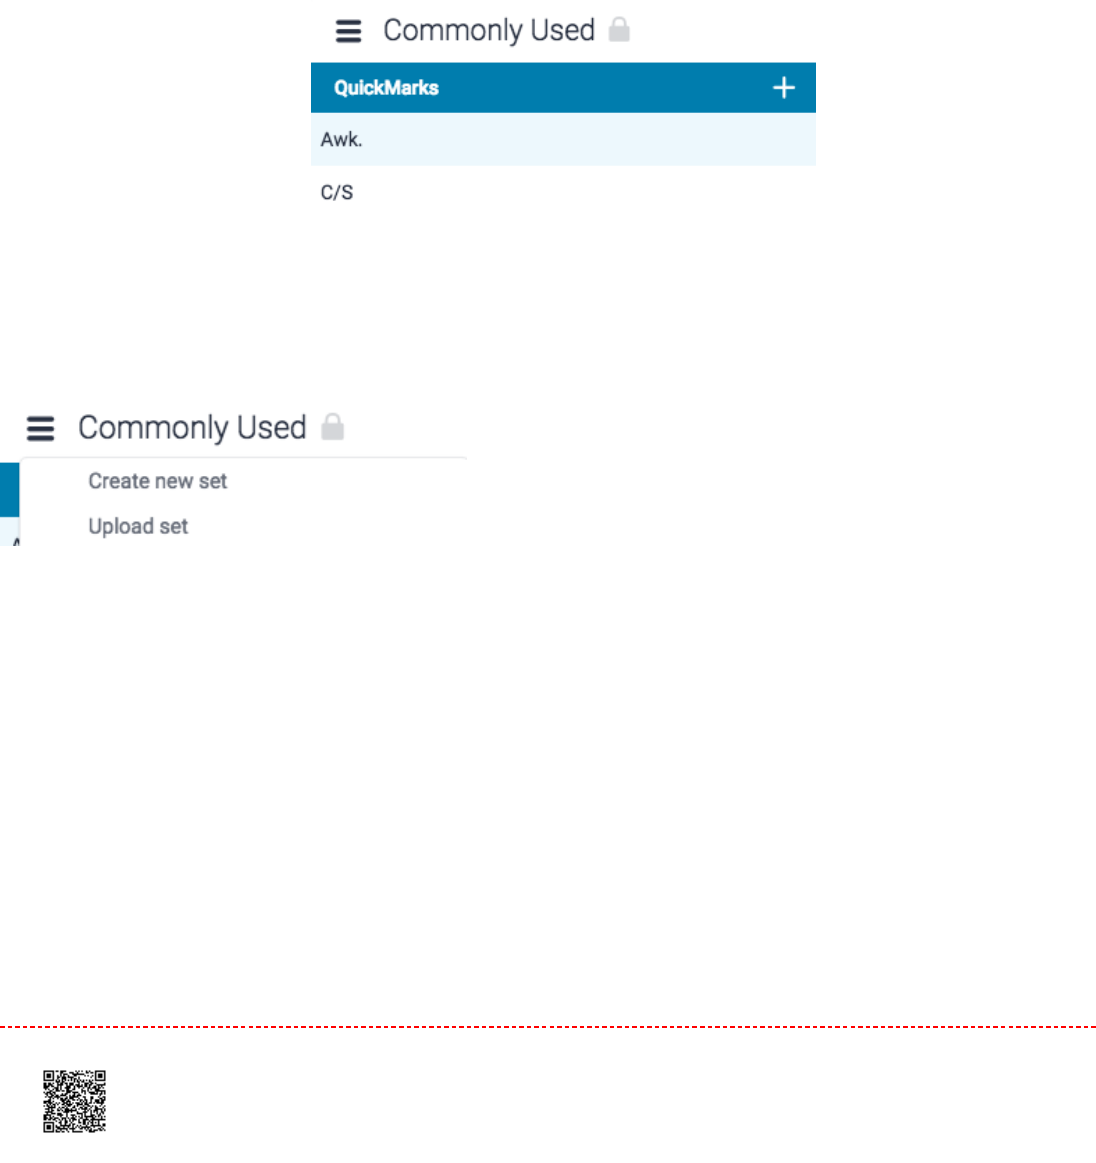
11. Access the QuickMark Manager from the in-context marking tool or
QuickMarks
side panel, as detailed in
guidance for Accessing the QuickMark Manager.
22. Click the
menu
icon in the top left-hand corner of the QuickMark Manager. This can be found next to the set
title.
33. Click
Create new set.
44. Enter a title for the QuickMark set in the text box, and then click
Save.
Alternatively, click
Cancel
to select
another item from the menu.
152

Creating a New Set from Existing QuickMarks
11. Access the QuickMark Manager from the in-context marking tool or
QuickMarks
side panel, as detailed in
guidance for Accessing the QuickMark Manager.
22.
2a.2a. If you'd like to add multiple QuickMark(s) to your new set, hold the Ctrl key (Cmd on Mac) to select
multiple marks, then select the
+ Add to Set
button.
153
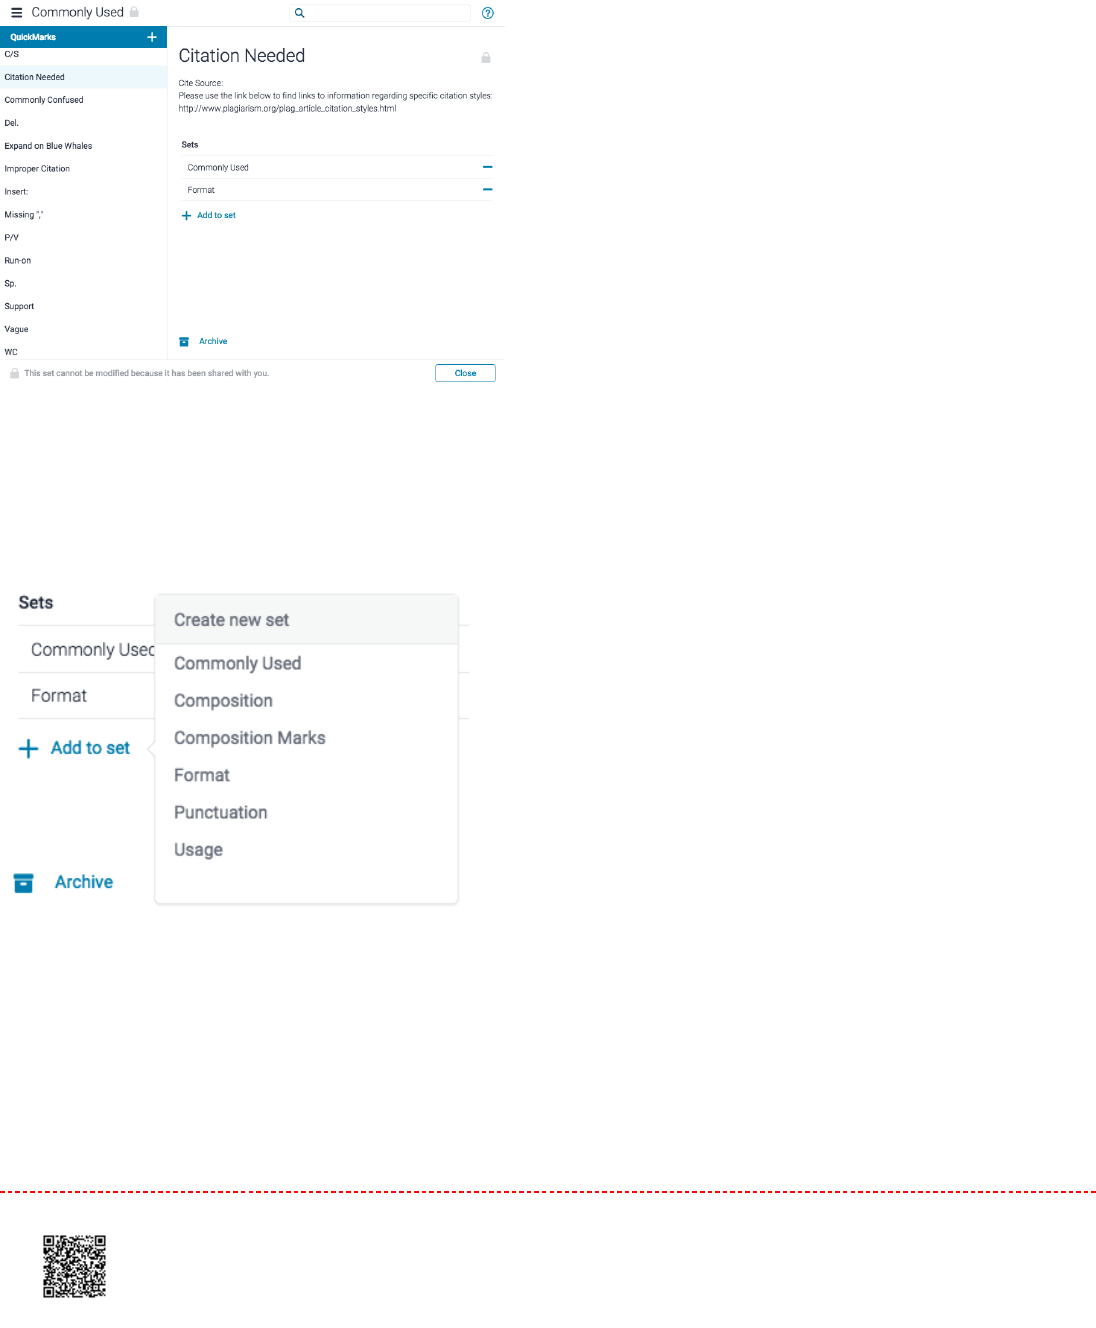
2b2b. Alternatively, you can click on any single mark and then click
+ Add to set
44. Click
Create new set.
55. Add a title for the new set in the text box provided. Click
Save
to create the set.
154
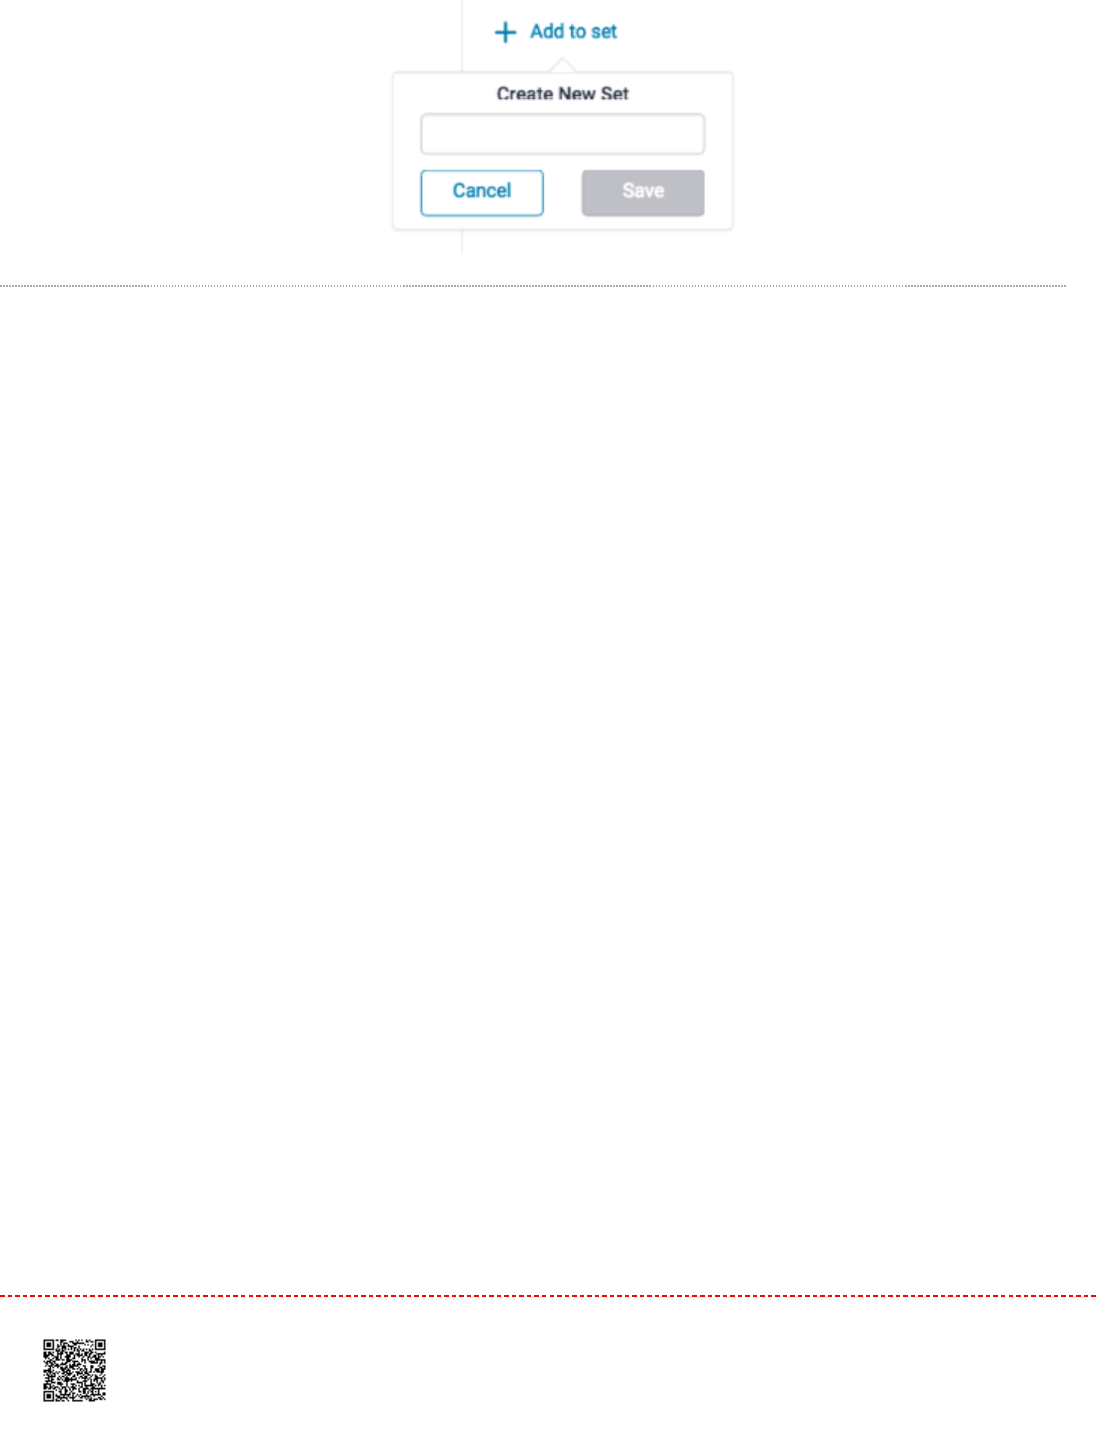
Creating QuickMarks
You can create your own QuickMark comments in the QuickMark Manager. This allows you to create class or curriculum
specific marks that may not be part of the sets provided by Turnitin or the account administrator.
11. Access the QuickMark Manager from the in-context marking tool or
QuickMarks
side panel, as detailed in
guidance for Accessing the QuickMark Manager.
22. Ensure the QuickMark set that you would like to add the new QuickMark to is selected. To navigate to another
set, click the
menu
icon in the top, left-hand corner of the QuickMark Manager. From the list, choose the set you
would like to add to.
155
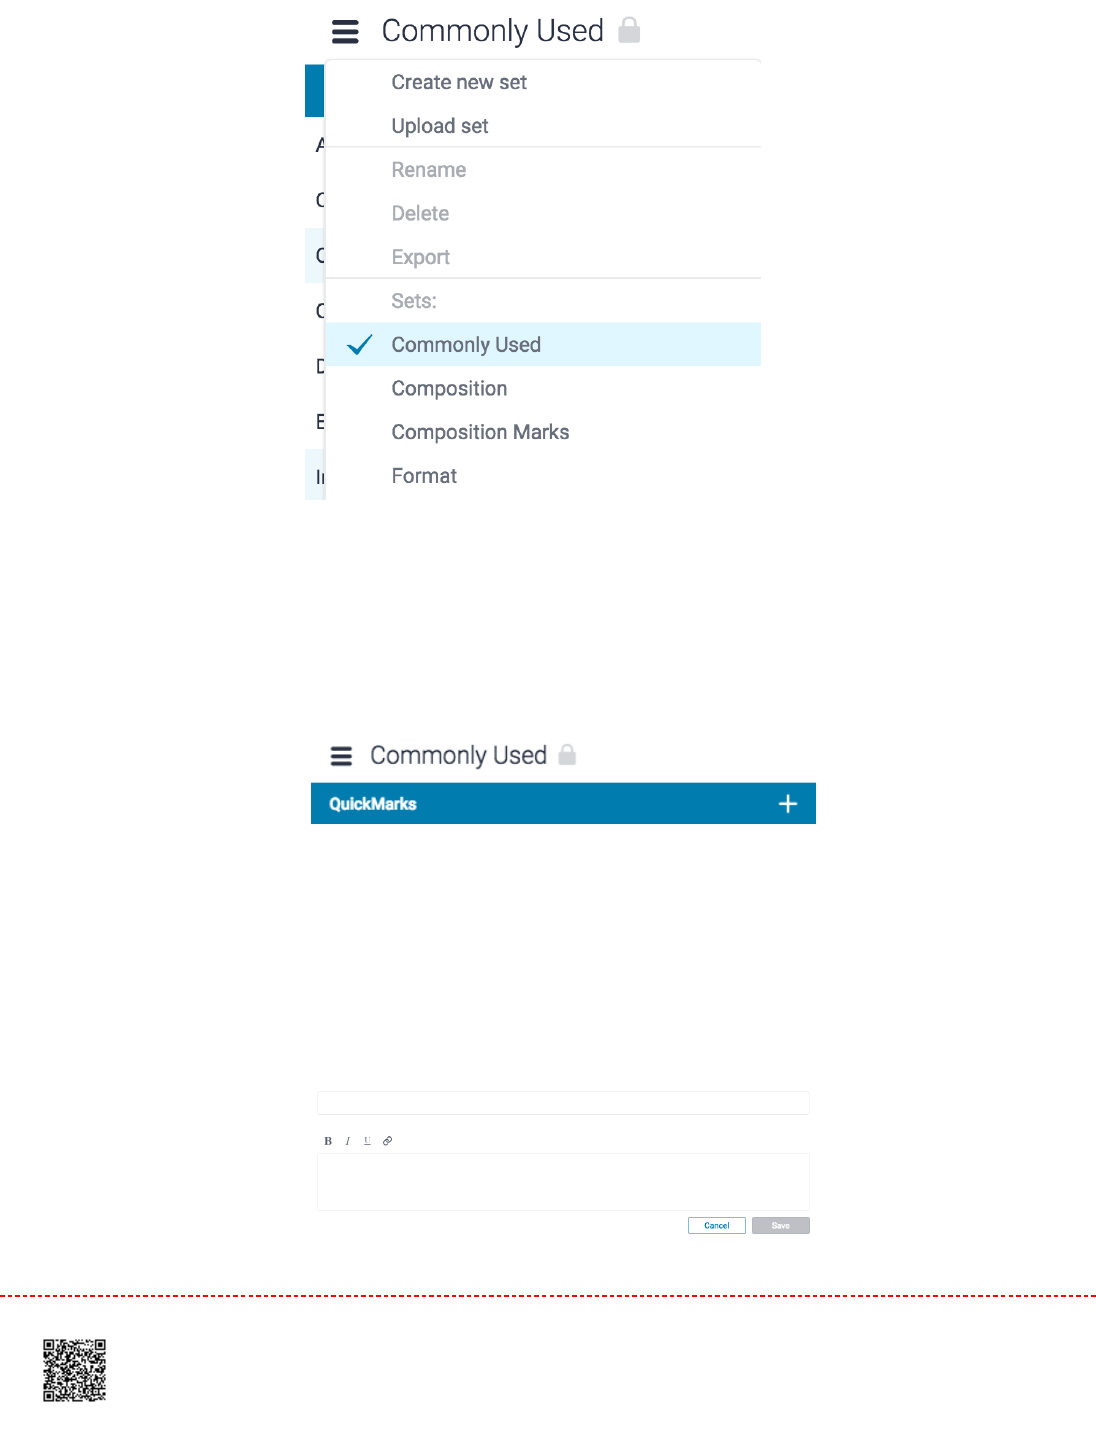
33. Click the
+
icon in the QuickMarks column header
44. Enter a title and a description into the fields provided. Formatting and hyperlinks are available for your
QuickMark's description, too.
156
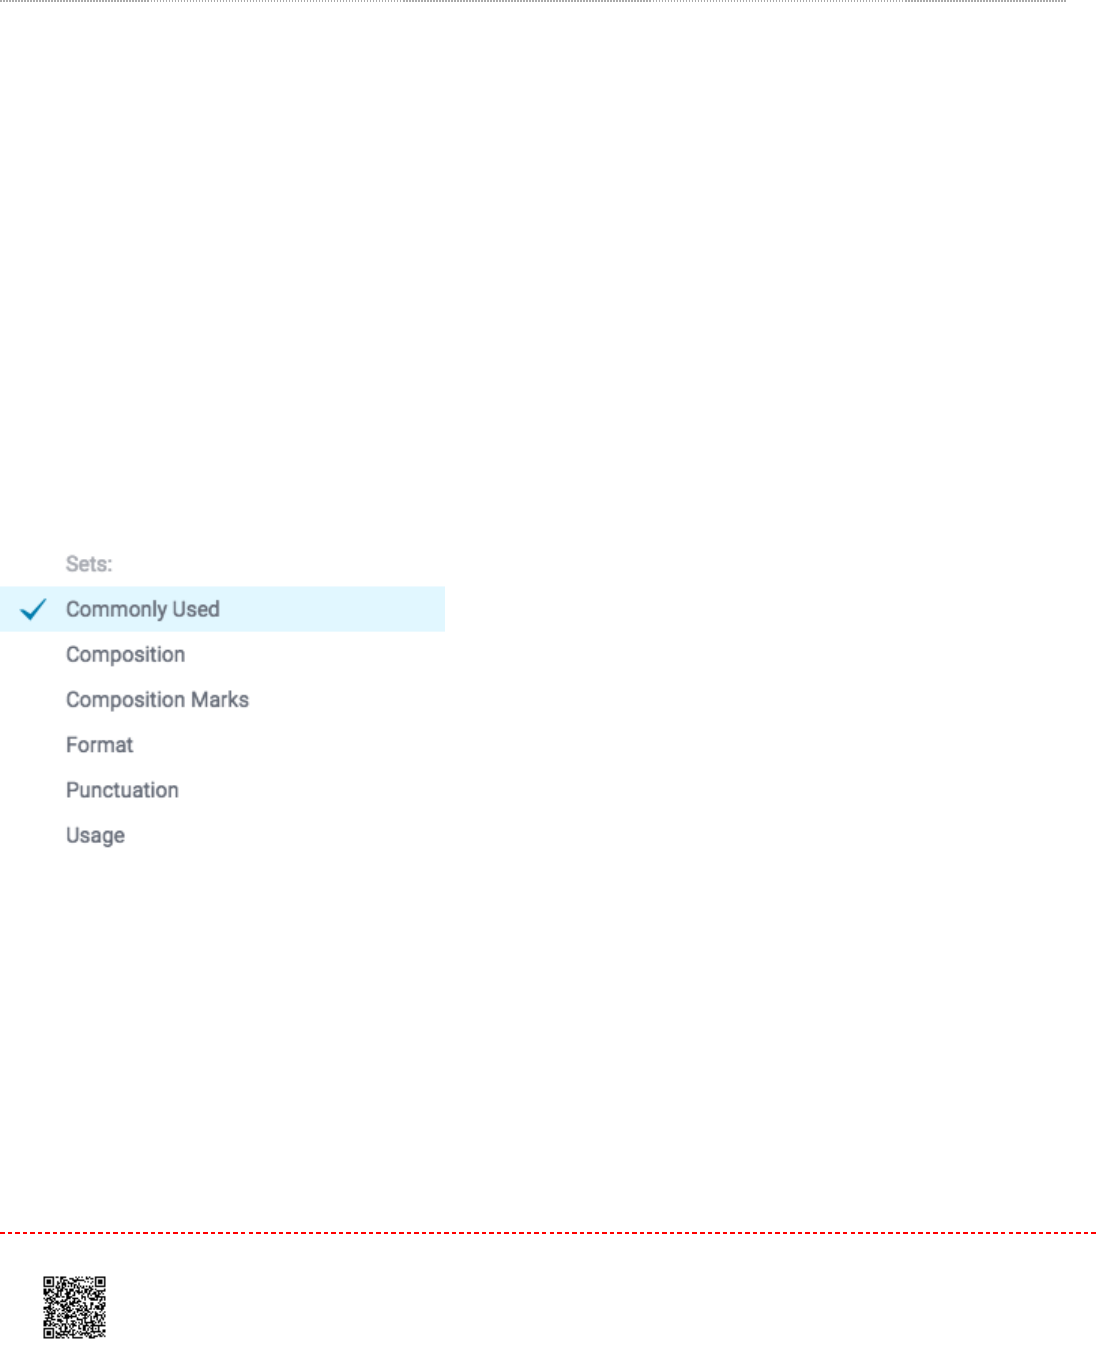
55. Click
Save
to create the new QuickMark or
Cancel
to abort.
Editing QuickMarks
QuickMark comments can be edited from within the QuickMark Manager. Any edits that are made to a QuickMark are
applied to every instance where this mark appears in your students’ papers.
11. Access the QuickMark Manager from the in-context marking tool or
QuickMarks
side panel, as detailed in
guidance for Accessing the QuickMark Manager.
22. Ensure the QuickMark set from which you would like to edit a QuickMark comment is selected. To navigate to
another set, click the
menu
icon in the top, left-hand corner of the modal. Click the title of the relevant set.
3.3. Select the name of the QuickMark you would like to edit.
157

33. Click the pencil icon in the top right-hand corner of the QuickMark manager. This will allow you to edit your
QuickMark
44. You can now edit the QuickMark by altering the information in the fields provided.
158
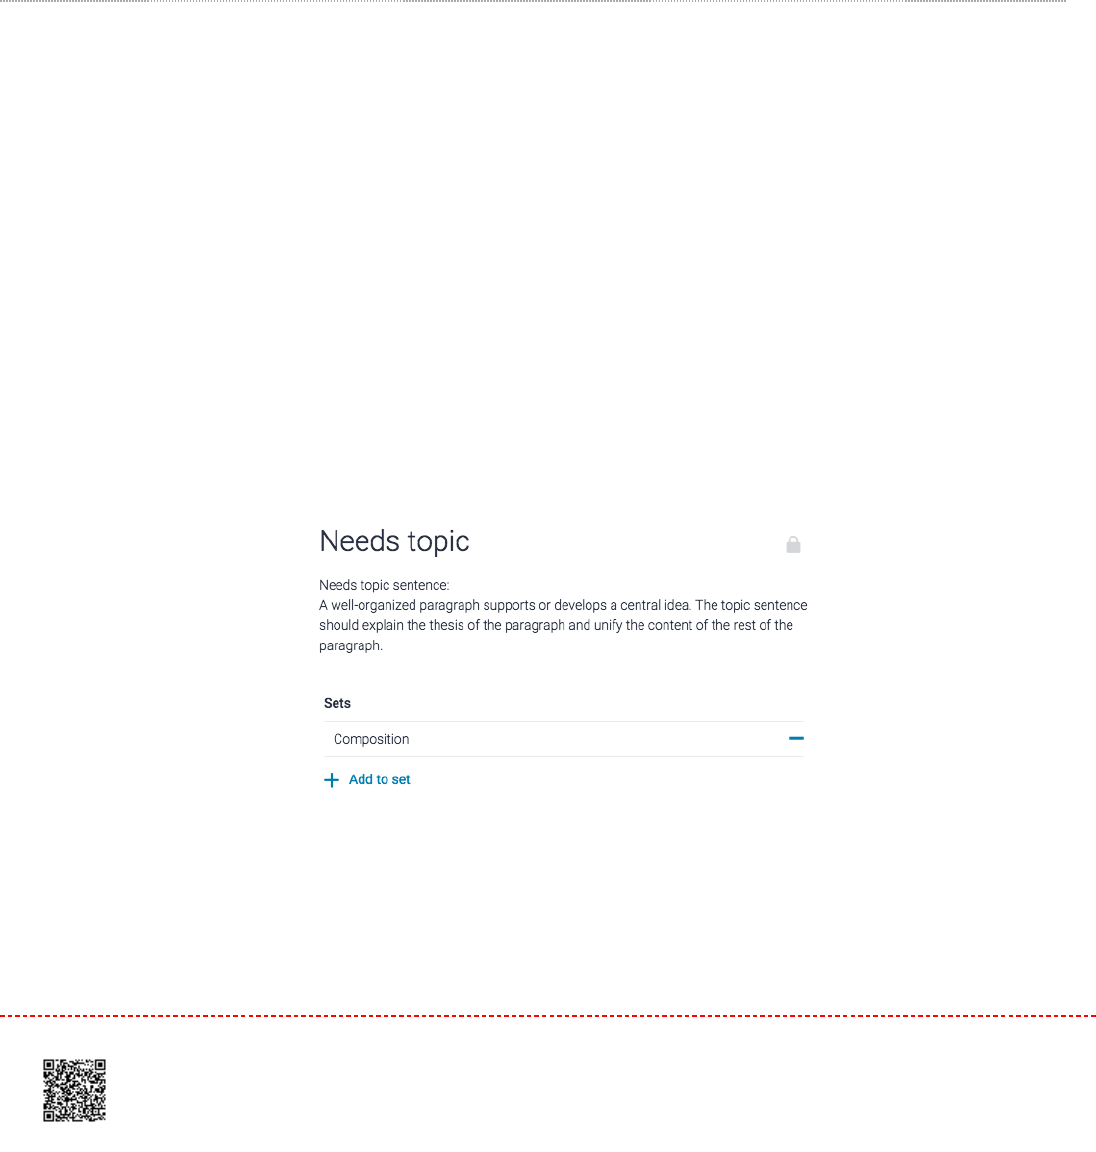
55. Click
Save
to confirm your changes. Click
Cancel
to discard any changes.
Note:Note: Instructors may only edit QuickMark sets and marks that they have created. QuickMark sets with a
lock icon to the right of the set name cannot be modified, as they are provided by Turnitin or the
account administrator.
Copying QuickMarks to an Existing Set
Marks within a QuickMark set can be copied into other sets, allowing you to reuse QuickMarks across multiple situations
that you may face whilst grading.
11. Access the QuickMark Manager from the in-context marking tool or
QuickMarks
side panel, as detailed in
guidance for Accessing the QuickMark Manager.
22. Navigate to the QuickMark that you would like to add to another set.
33. Click
+ Add to set,
then click the QuickMark set you'd like to add to.
159
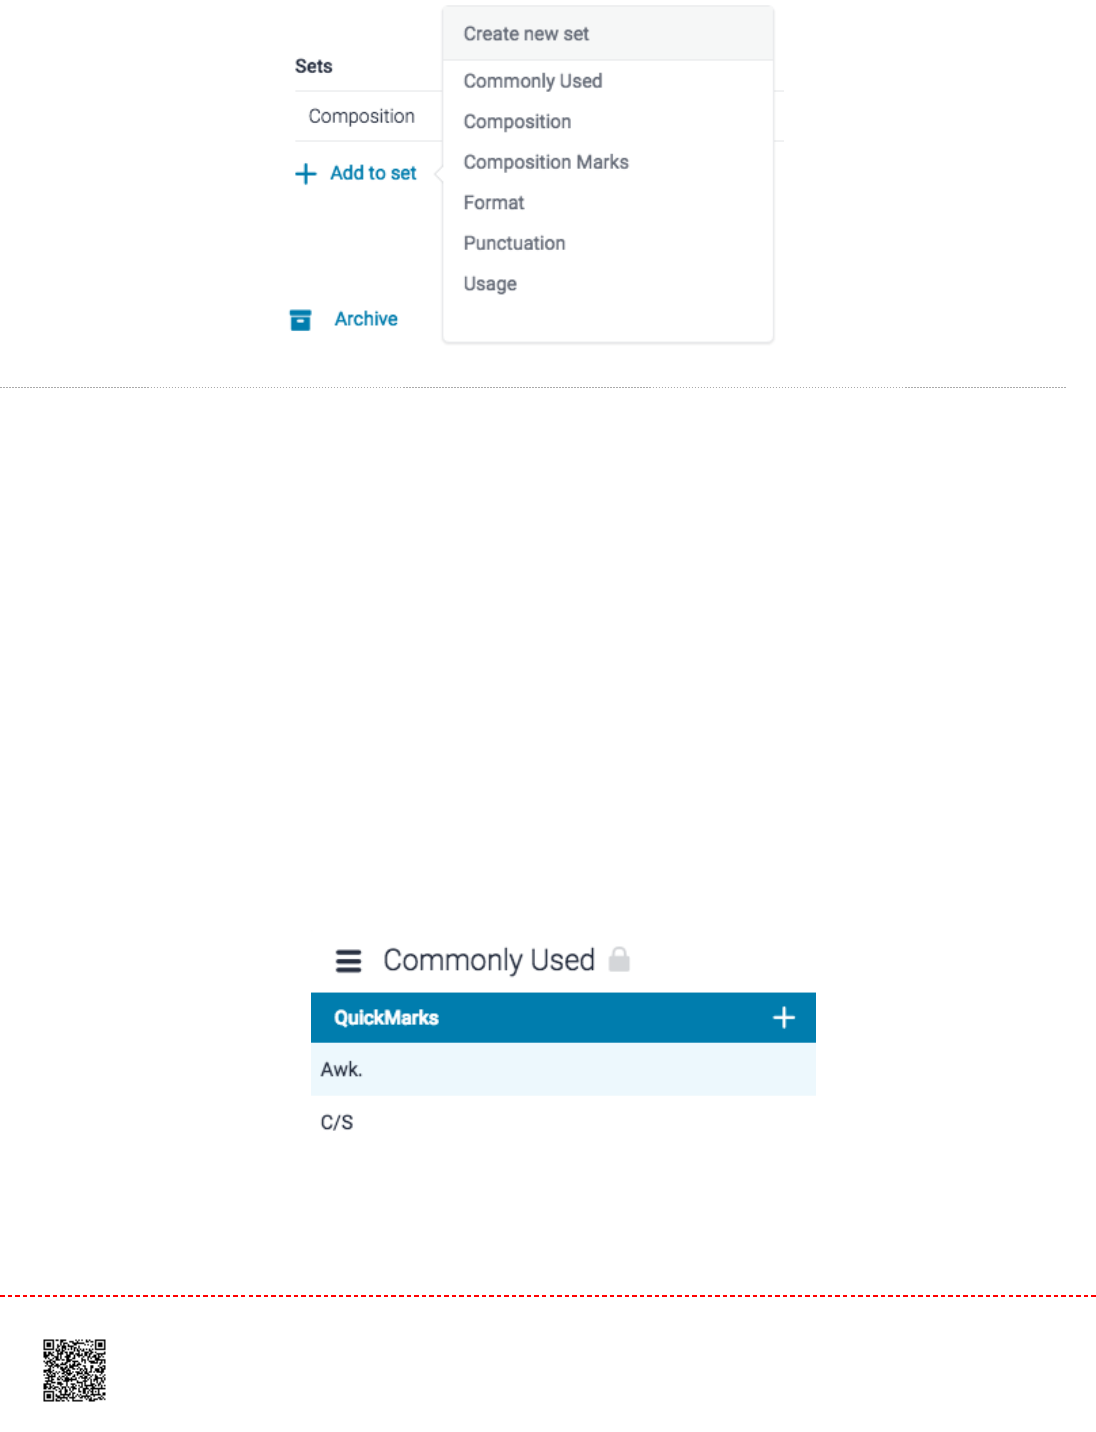
Archiving QuickMarks
Archiving a QuickMark will remove it from all the QuickMark sets and assignments in which it currently resides. The
QuickMark archive can be revisited at any time to restore a QuickMark, avoiding any accidental, permanent deletions.
11. Access the QuickMark Manager from the in-context marking tool or
QuickMarks
side panel, as detailed in
guidance for Accessing the QuickMark Manager.
22. Ensure the QuickMark set from which you would like to archive a QuickMark from is selected. To navigate to
another set, click the hamburger menu icon in the top, left-hand corner of the modal.
22. Click on the name of a QuickMark set.
160
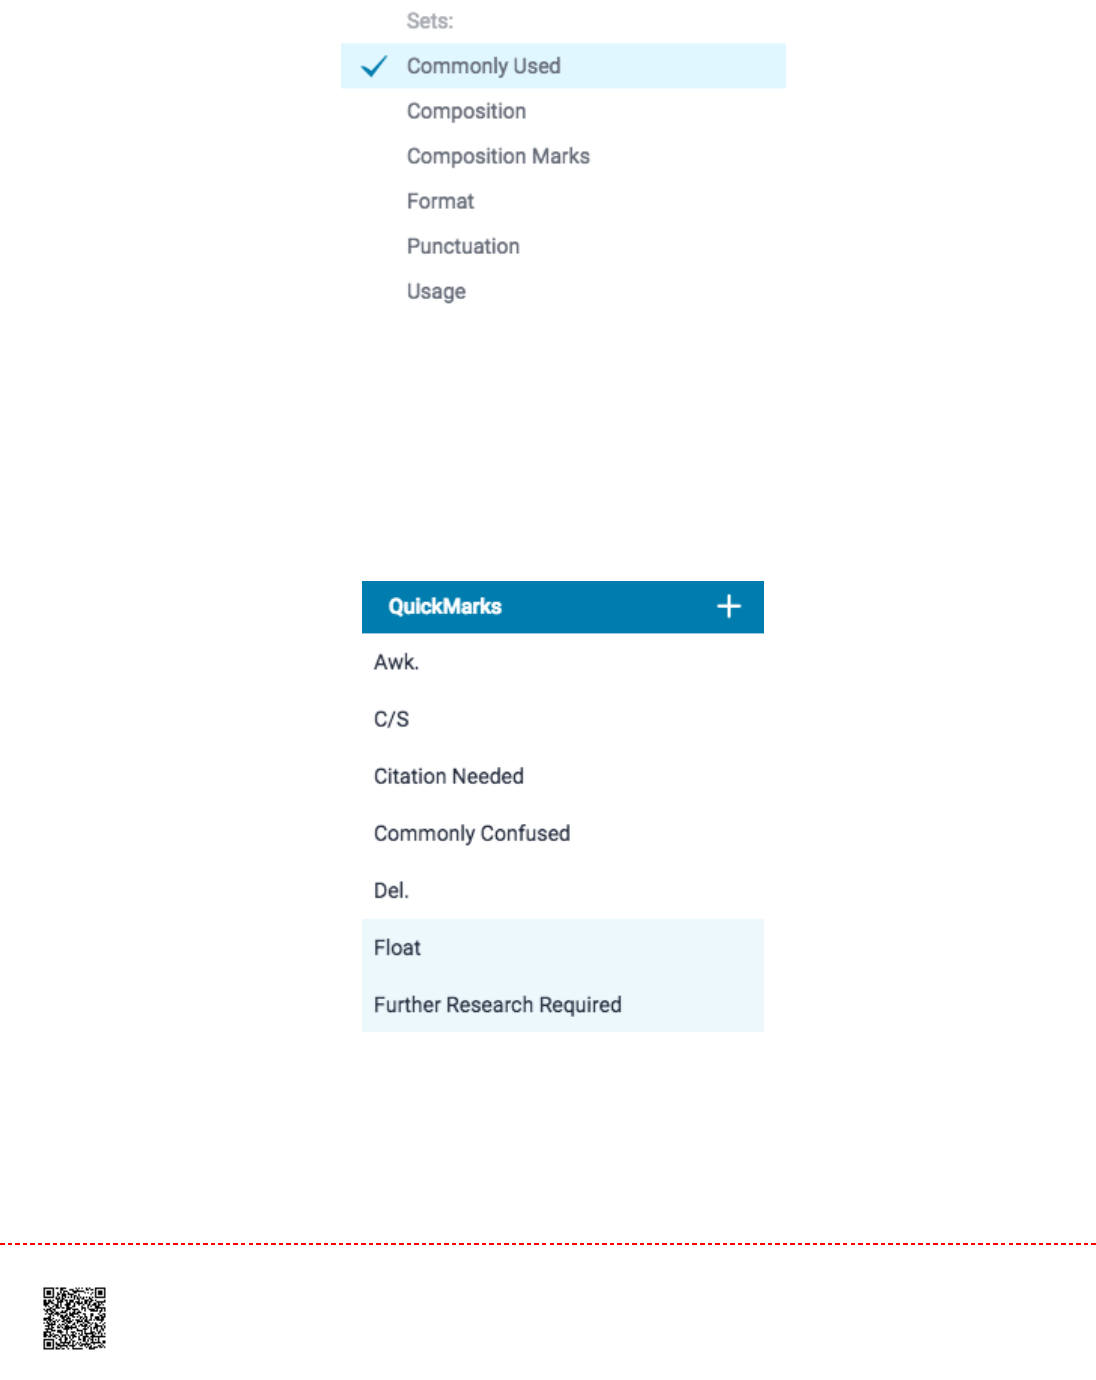
33. Click on the QuickMark(s) that you would like to archive. Hold the Ctrl key (Cmd on Mac) to select multiple
marks. Selected marks will change to blue.
44. Click the
Archive
button in the bottom center of the QuickMark manager to archive your selected QuickMark(s).
161
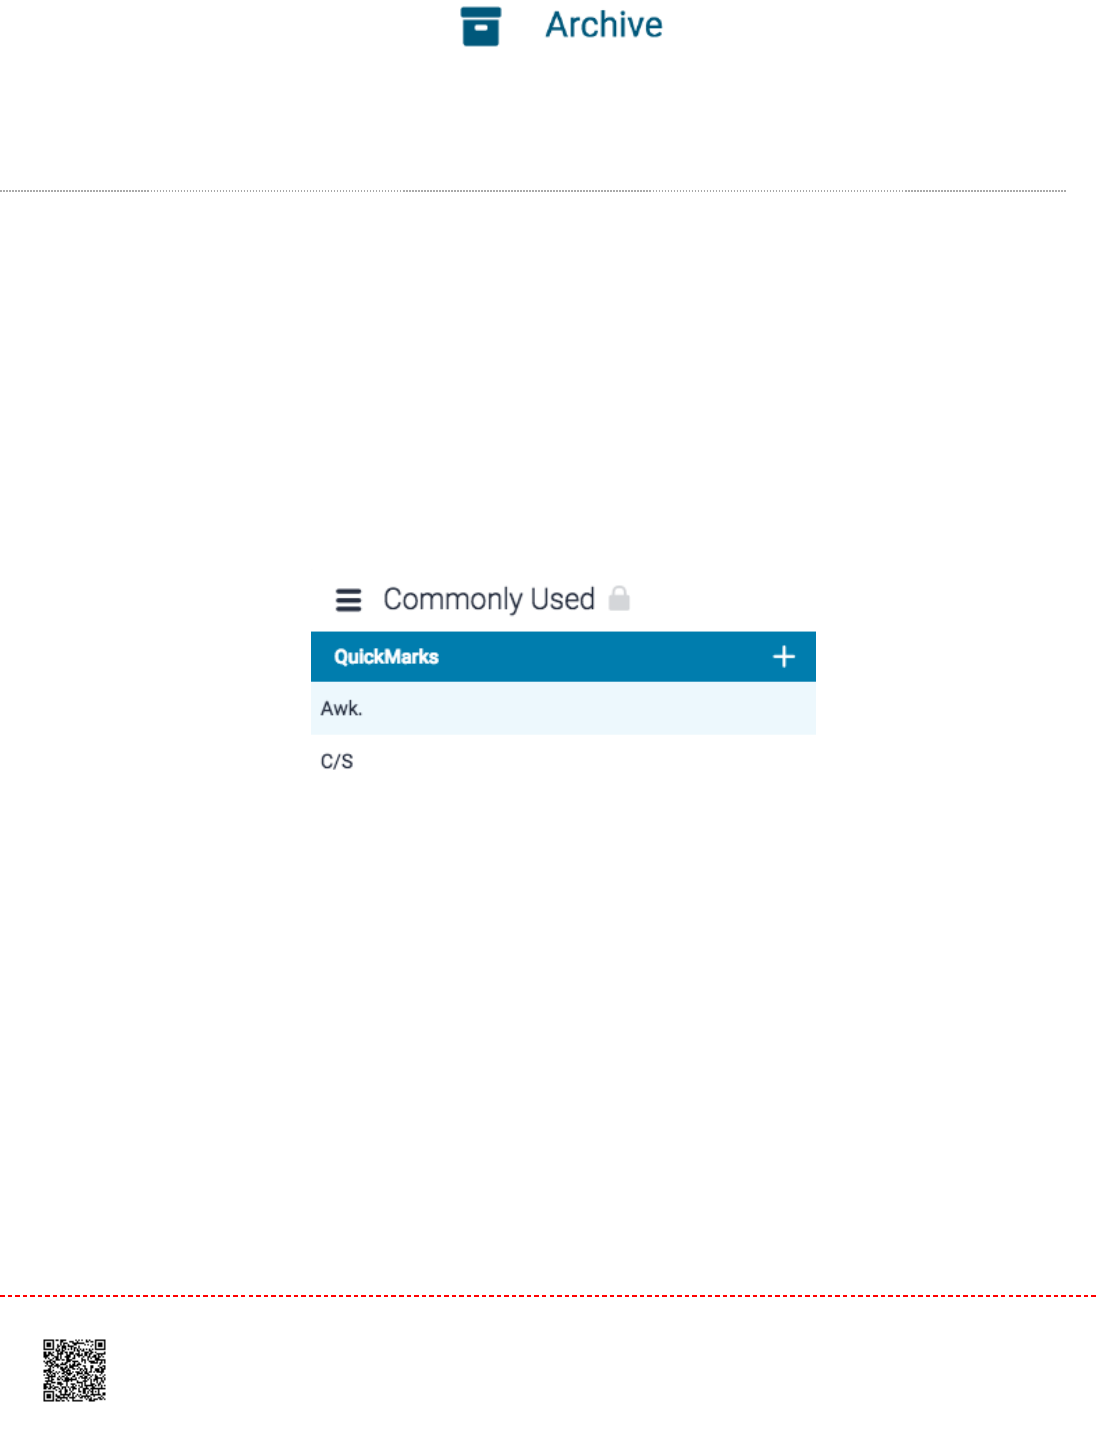
Warning:Warning: Archiving a QuickMark will remove it from all sets in the QuickMark Manager.
Restoring a QuickMark
11. Access the QuickMark Manager from the in-context marking tool or
QuickMarks
side panel, as detailed in
guidance for Accessing the QuickMark Manager.
2.2. Click the
menu
icon in the top, left-hand corner of the QuickMark Manager.
3.3. Select
Archived
from the bottom of the menu.
162
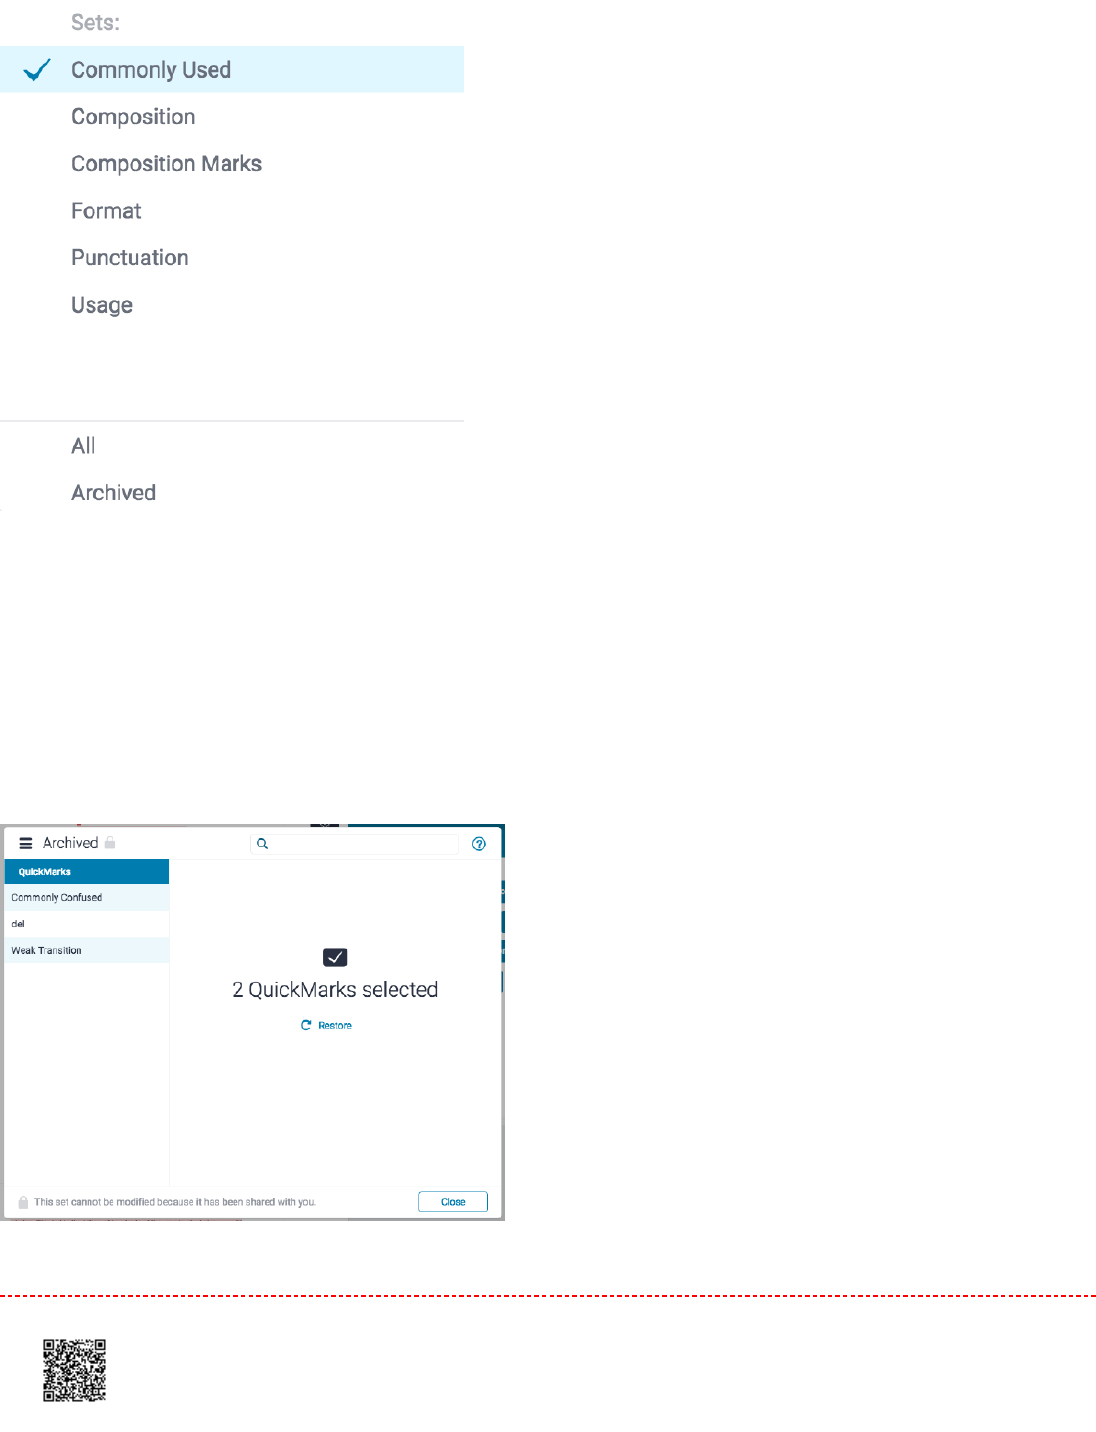
44.
4a.4a. If you'd like to restore multiple QuickMark(s), hold the Ctrl key (Cmd on Mac) to select multiple marks,
then click the
Restore
button.
163
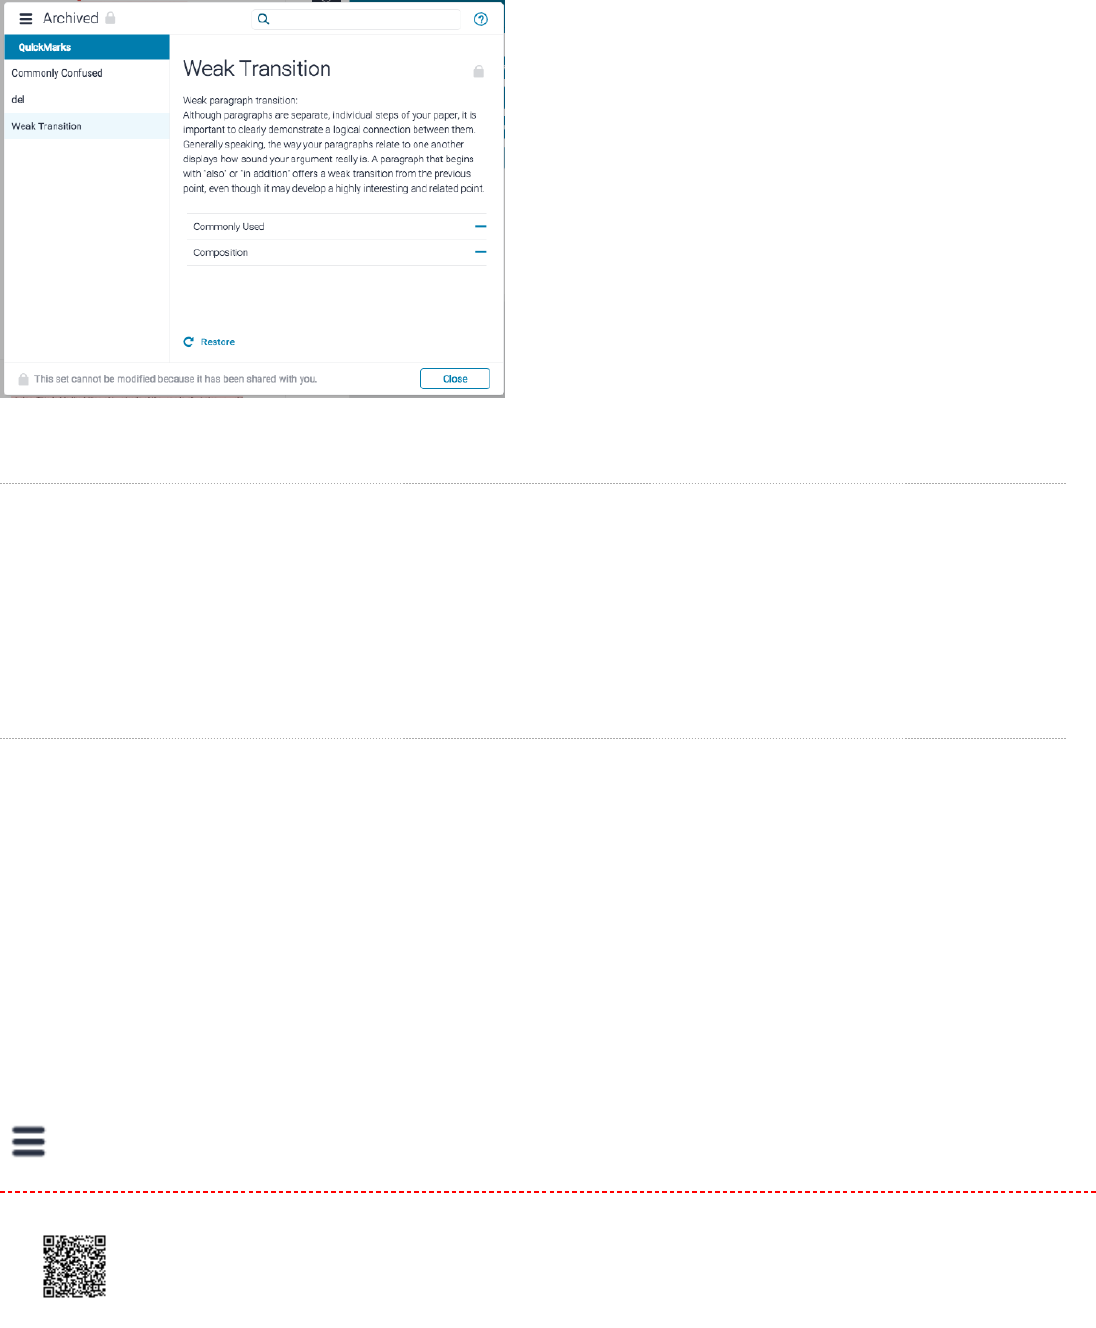
4b4b. Alternatively, you can click on any single mark and then click
Restore.
5.5. Your QuickMarks can now be found in their respective sets.
Uploading and Downloading QuickMark Sets
Within the QuickMark Manager, you can download QuickMark sets to distribute to other instructors, or upload
QuickMark sets to use when grading papers. Once a QuickMark set has been uploaded, you own this set, meaning you
can make any desired changes to the QuickMark comments.
Uploading a QuickMark Set
11. Access the QuickMark Manager from the in-context marking tool or
QuickMarks
side panel, as detailed
in Accessing the QuickMark Manager guidance.
2.2. Click the
menu
icon in the top left-hand corner of the QuickMark Manager.
164
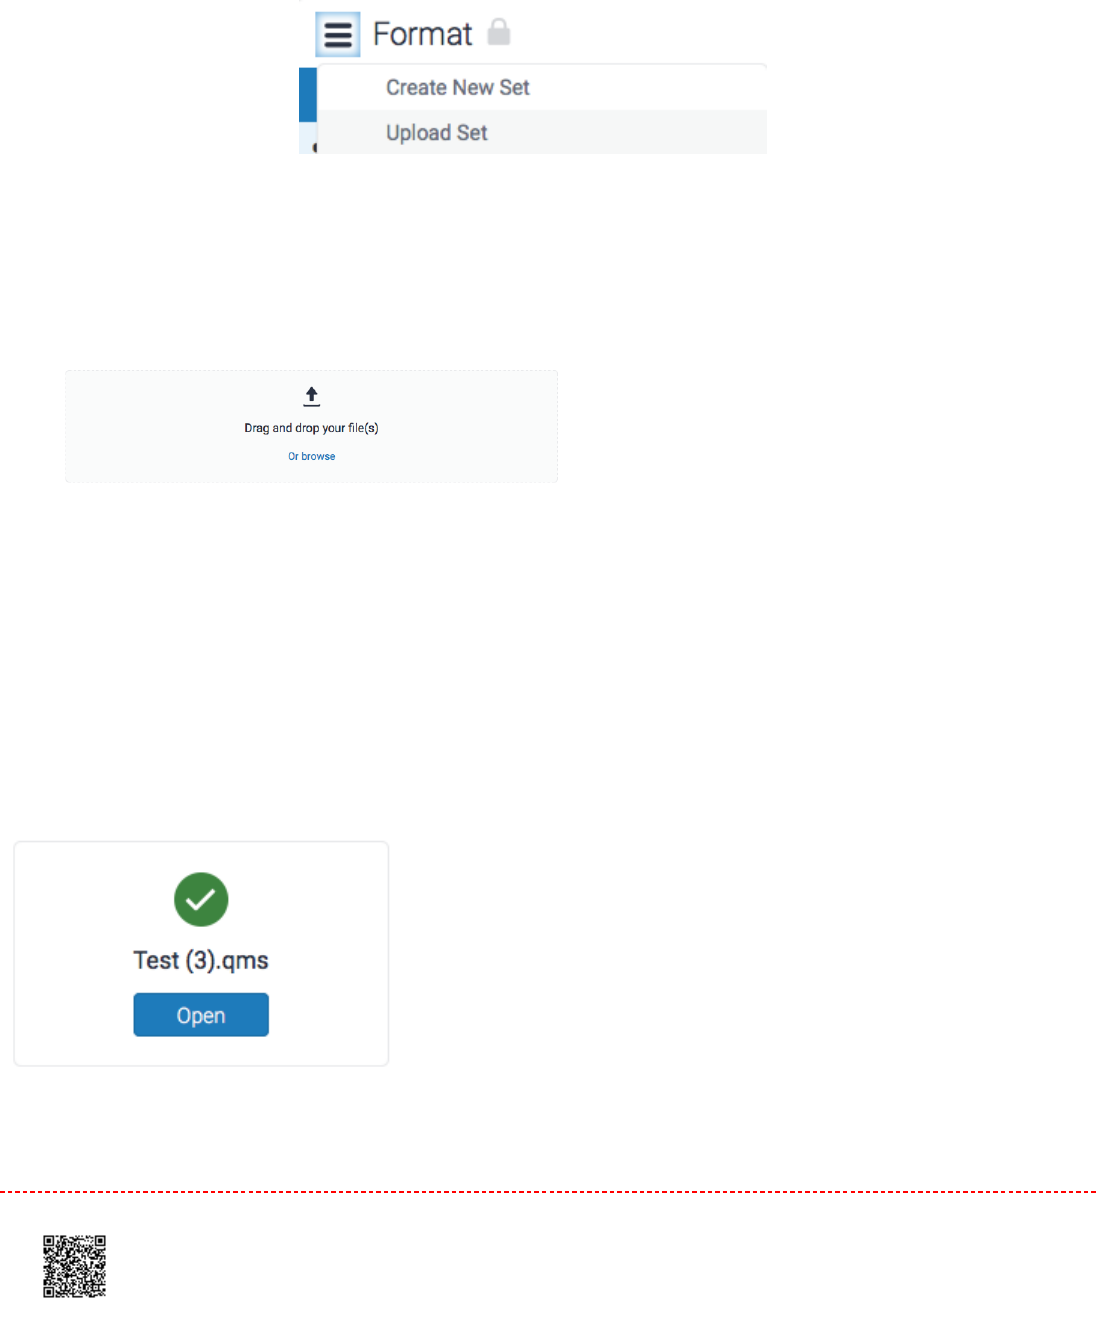
3.3. Click
Upload Set.
4.4. Either drag and drop your QuickMark set into the QuickMark Manager or click
Or browse
to locate the file on
your device.
Note:Note: Only .qms files can be uploaded to the QuickMark manager. .qms files can only be produced in the
Turnitin QuickMark manager. This feature allows you to upload a QuickMark set created by another
instructor in Turnitin.
5.5. Once your upload is complete, click the
Open
button to view your imported QuickMark set.
165

Downloading a QuickMark Set
11. Access the QuickMark Manager from the in-context marking tool or
QuickMarks
side panel, as detailed in
Accessing the QuickMark Manager guidance.
22. Ensure the QuickMark set that would like to download is selected. To navigate to another set, click the
menu
icon in the top left-hand corner of the QuickMark Manager.
3.3. Click the title of the relevant set.
3.3. Click the
menu
icon in the top, left-hand corner of the QuickMark Manager and click
Download
from the top of
the list.
166
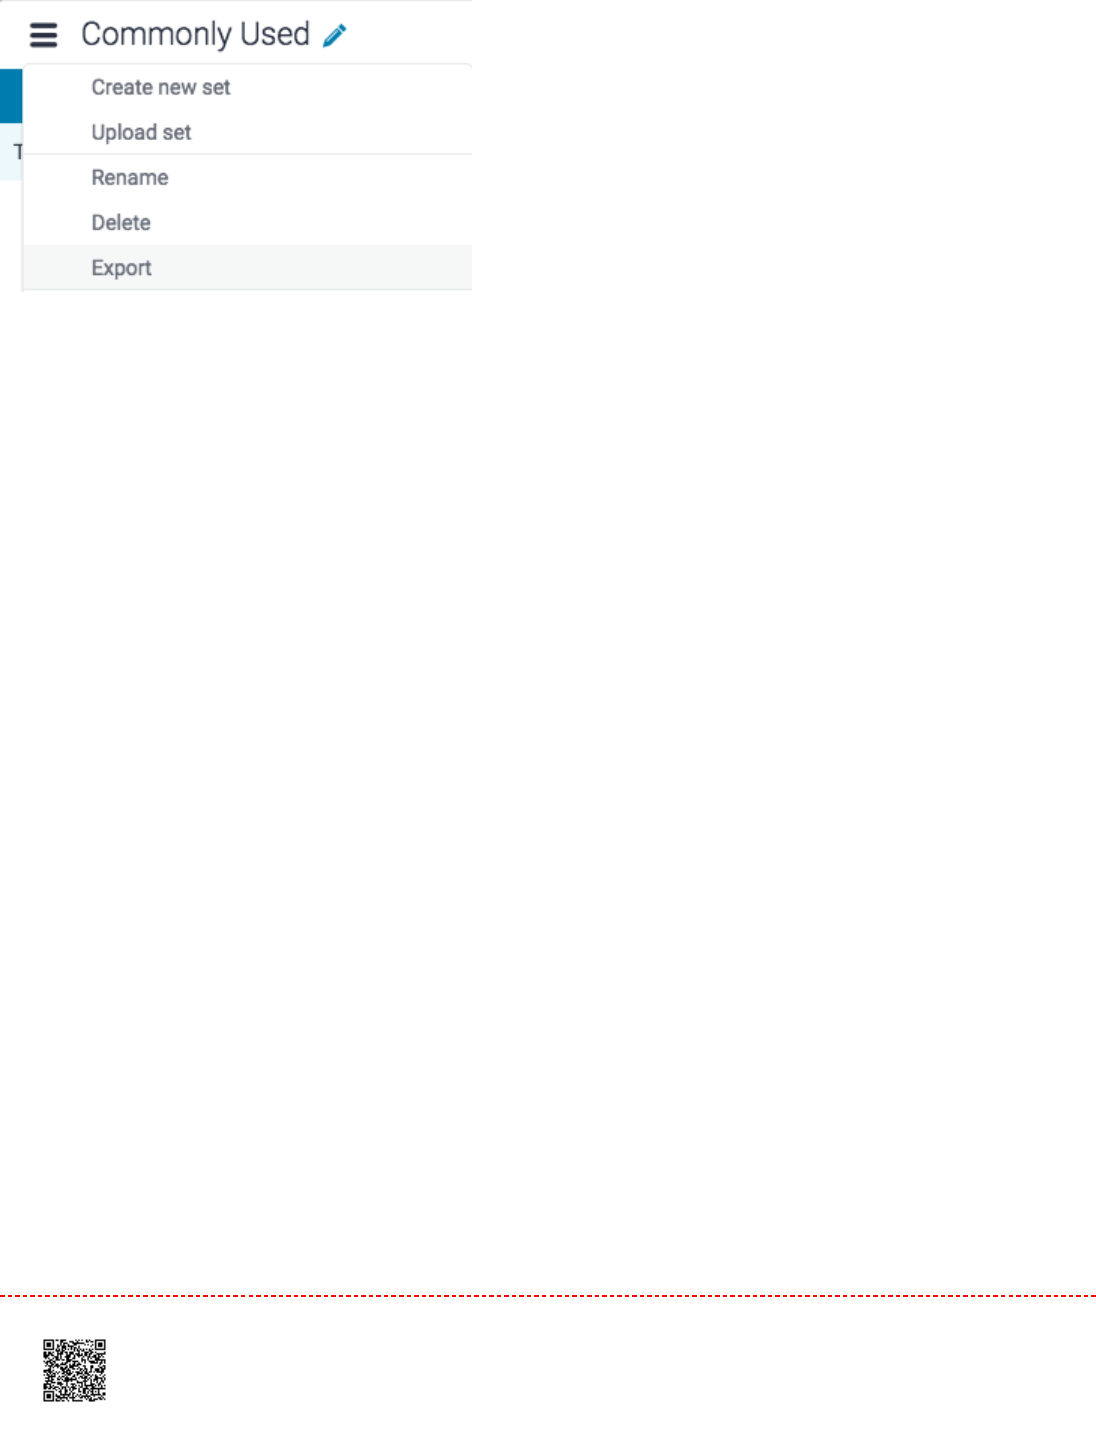
4.4. The QuickMark set will download to your device as a .qms file.
167

Rubrics and Grading Forms
The Feedback Studio toolbar offers rubrics and grading forms within the grading service. With the grading tools side
panel active, switch to the
Rubric/Grading Form
section. From here, you can pick from a set of rubrics that you have
used previously or launch the
Rubric and Form Manager
to create your own.
Rubrics
Rubric scorecards help to evaluate student work, based on defined criteria and scales. Rubric scorecards can be
created by your account administrator and shared to all instructors on an account. Instructors can also create and share
rubric scorecards, allowing you to upload a scorecard provided by another instructor for use in your own classes.
There are three rubric scorecard types:
Standard rubricStandard rubric - allows you to enter scale values and criteria percentages. The maximum value for the standard
rubric will be the same as the highest scale value entered.
Qualitative rubricQualitative rubric - allows you to create a rubric that has no numeric scoring.
Custom rubricCustom rubric - allows you to enter any value directly into the rubric cells. The maximum value for the custom
rubric will be the sum of the highest value entered in each of the criteria rows.
Creating a Standard Rubric Scorecard
11. From the online grading toolbar, select the rubric icon to open the
Rubric
side panel.
168

22. Click the title of the currently assigned rubric from the
Rubric
side panel. If no rubric is assigned, click
No
Rubric.
This will reveal the
Rubrics and Forms
dropdown list. Click the
Rubric and Form Manager
button.
33. Click on the
menu
icon in the top left of the Rubric and Form Manager.
169
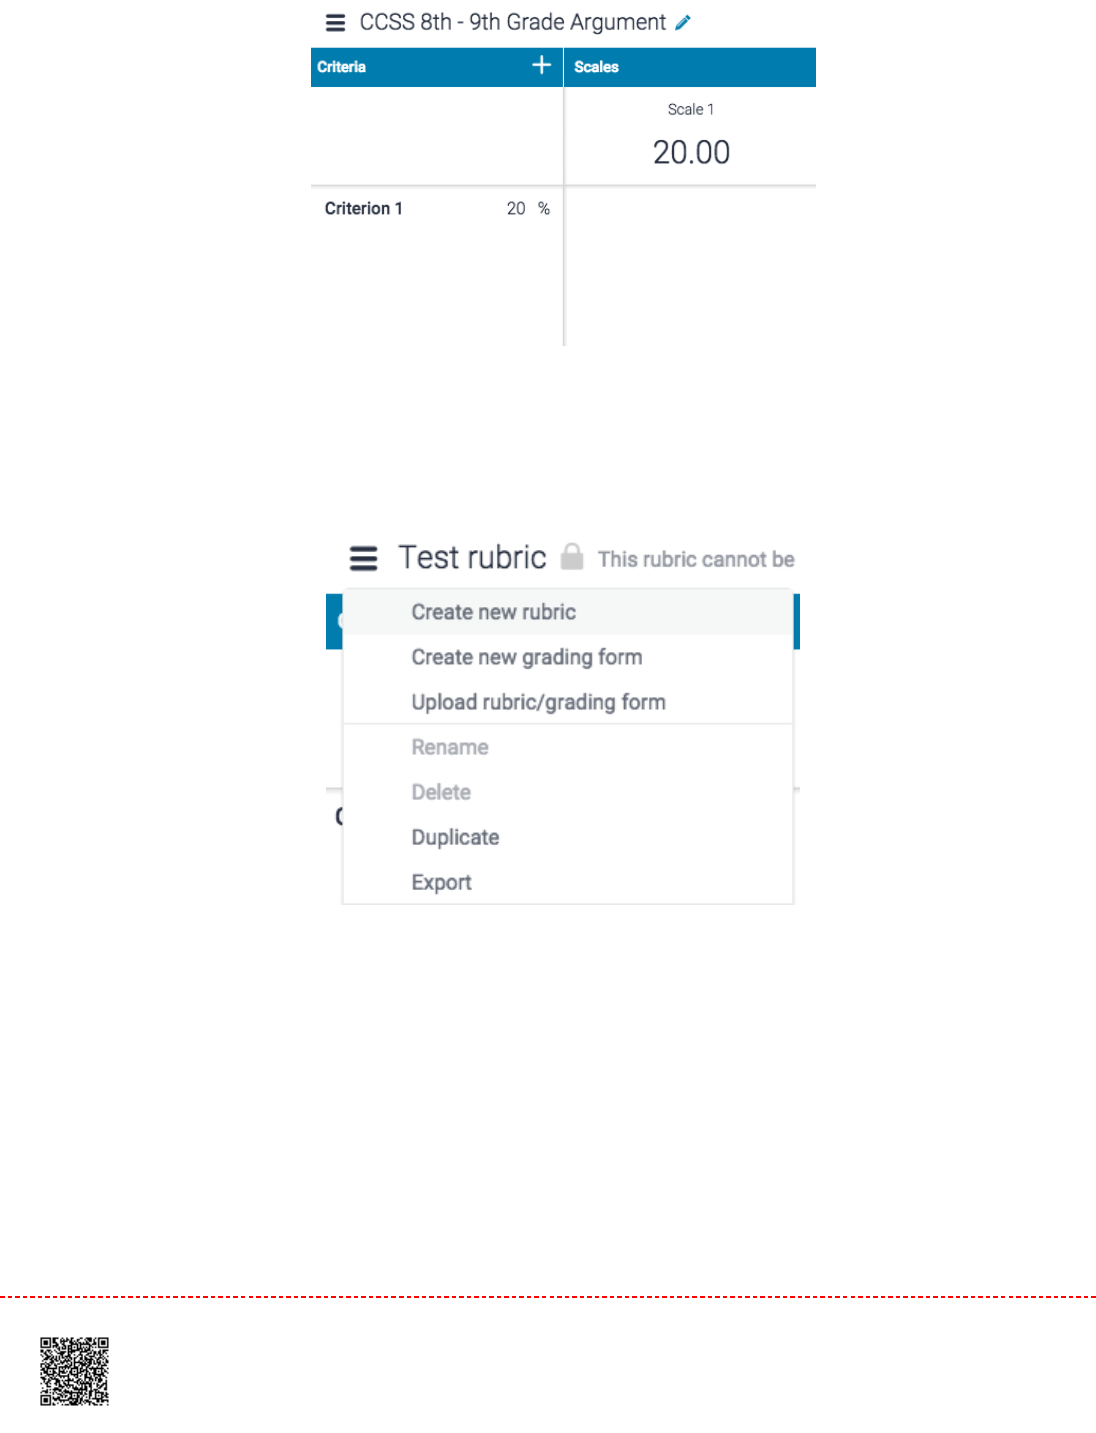
44. Click
Create new rubric
at the top of the menu dropdown list.
55. Click on the
Scoring
link in the top right-hand corner of the Manager. You can select the rubric you'd like to
create from the dropdown list: Standard, Qualitative or Custom.
170
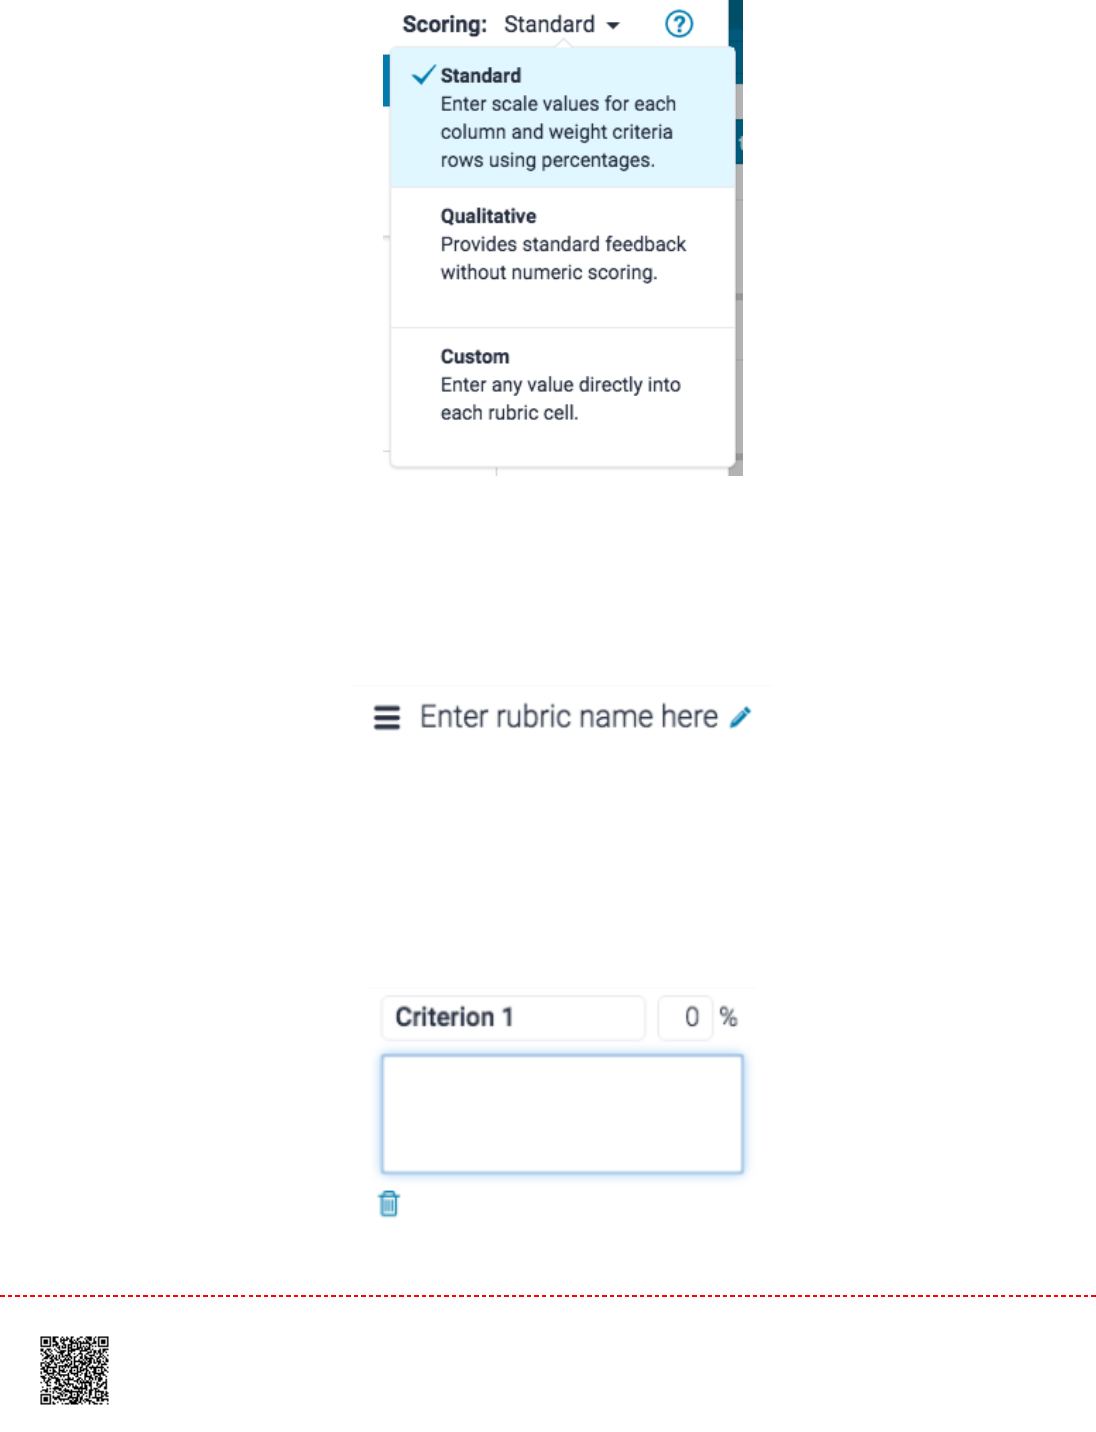
66. Enter a name for your rubric by clicking on
Enter rubric name here
in the top left of the Rubric and Form
Manager. To save your title, click anywhere outside of the text field.
77. To edit the name, description, or percentage value of a criterion, click directly onto the relevant field and begin
typing. Press enter or click anywhere outside of the text field to finish editing. You can also click the
trash can
icon in the bottom left to remove a criterion.
171
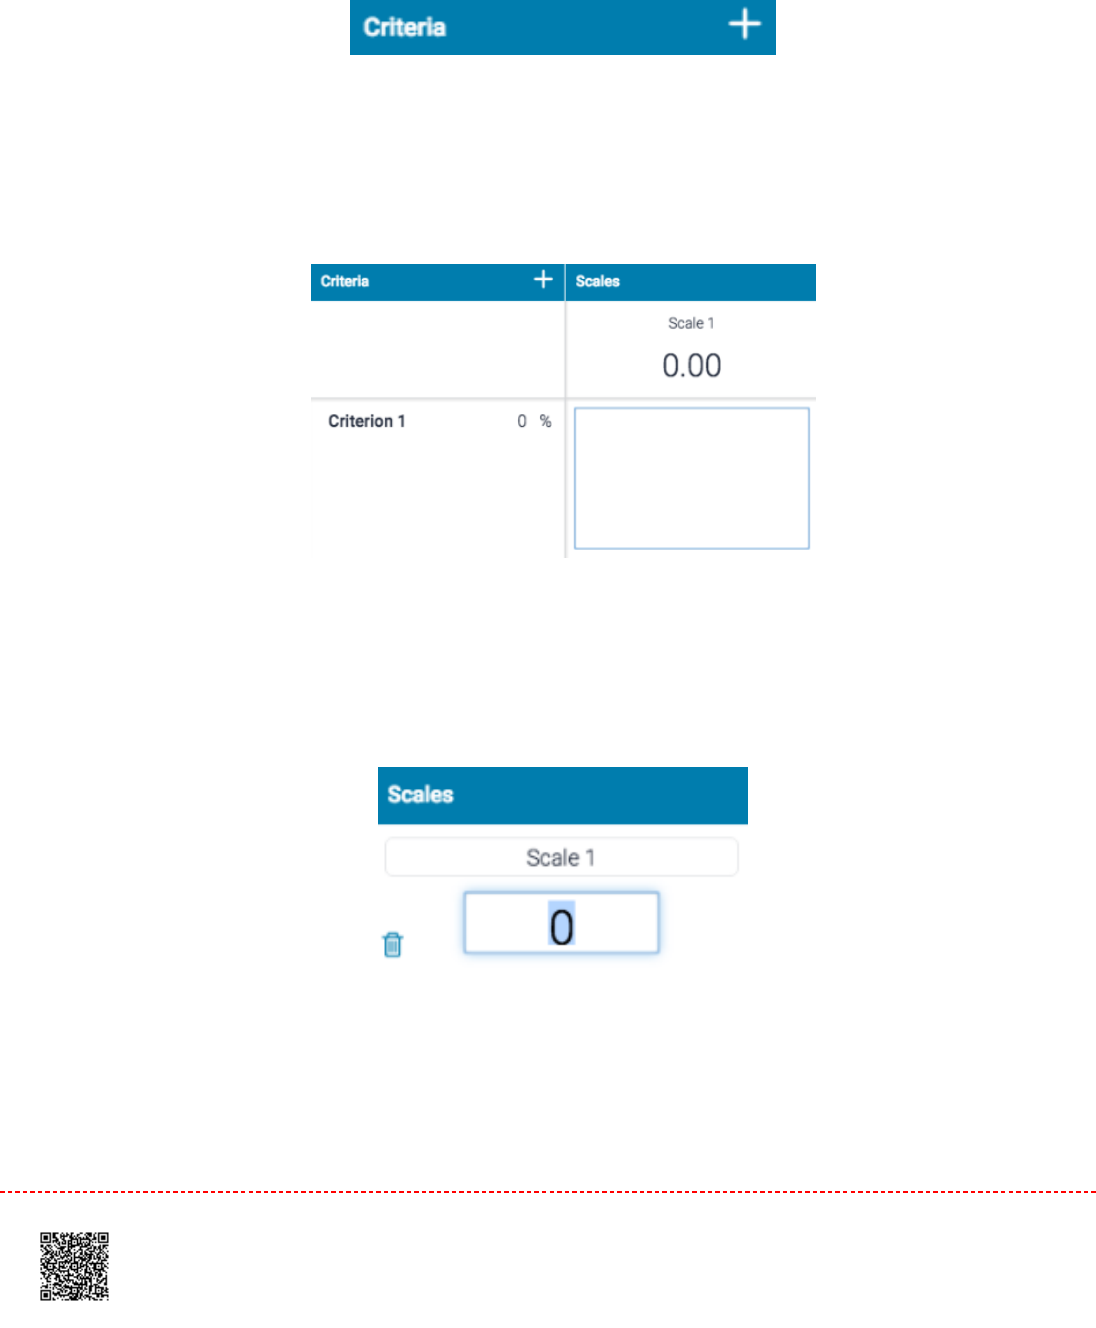
88. To add extra rows of criteria, click on the
+
icon to the right of the Criteria header.
99. To enter the description for each cell, click on the cell, enter the description, and then click outside of the cell’s
text field to finish editing the description.
1010. To enter the scale title or value, click on the scale title or scale value and begin typing. Click anywhere outside
of the text field to finish editing. You can also click the
trash can
icon in the bottom left to remove a scale.
1111. To add extra scale columns click on the + icon to the right of the Scale header.
172
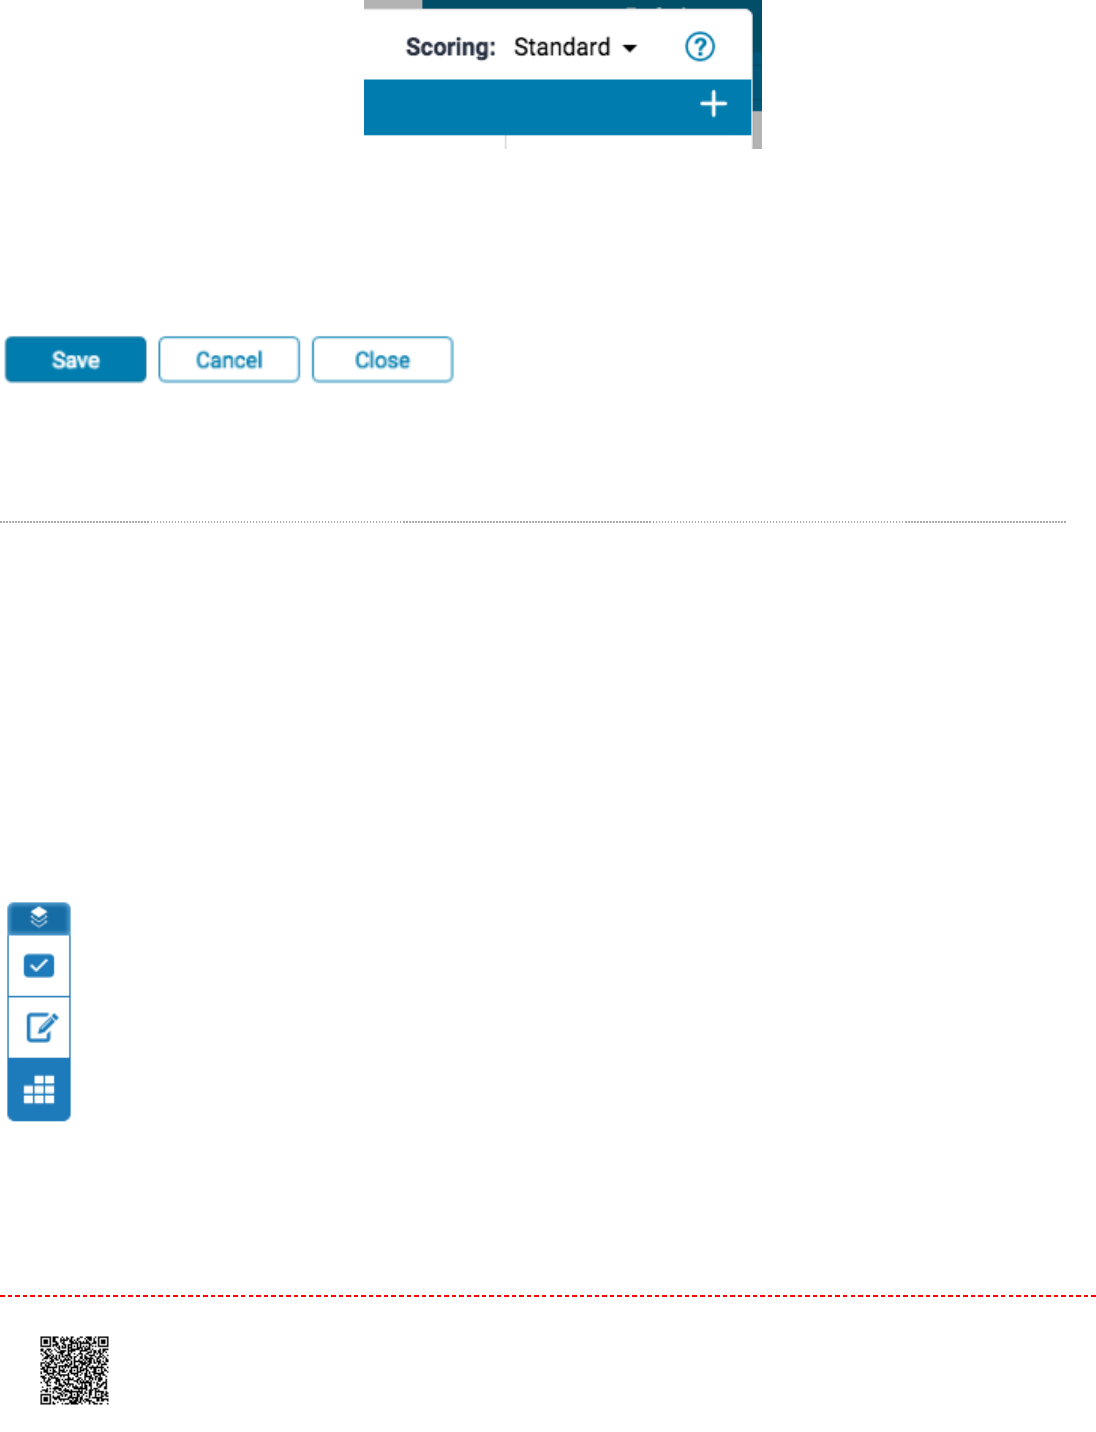
1212. Once the rubric is complete, click
Save
at the bottom right of the Rubric and Form manager.
13.13. Click
Close
to exit the Rubric and Form manager
Modifying a Rubric Scorecard
Rubric scorecards can be modified after creation. However, if the rubric scorecard has been used to score student
papers, modification of the rubric scorecard is not permitted.
11. From the online grading toolbar, select the rubric icon to open the
Rubric
side panel.
22. Click the title of the currently assigned rubric from the
Rubric
side panel. If no rubric is assigned, click
No
Rubric.
This will reveal the
Rubrics and Forms
dropdown list. Click the
Rubric and Form Manager
button.
173
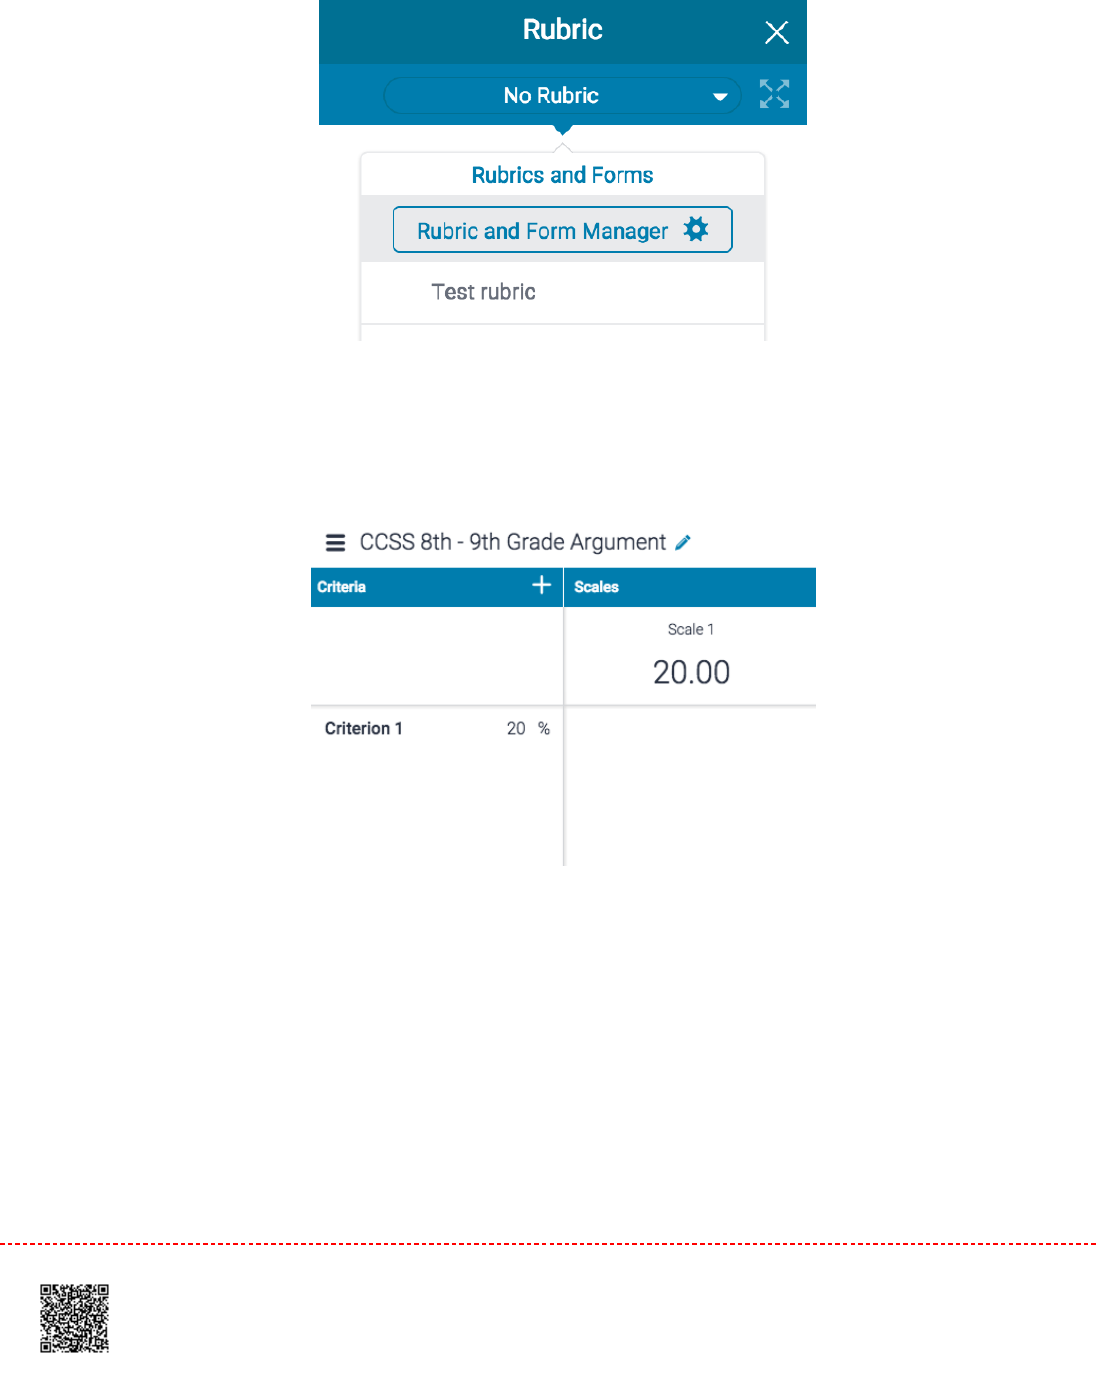
33. Click on the
menu
icon in the top left of the Rubric and Form Manager.
44. Select the rubric that you would like to edit from the list of rubrics.
174
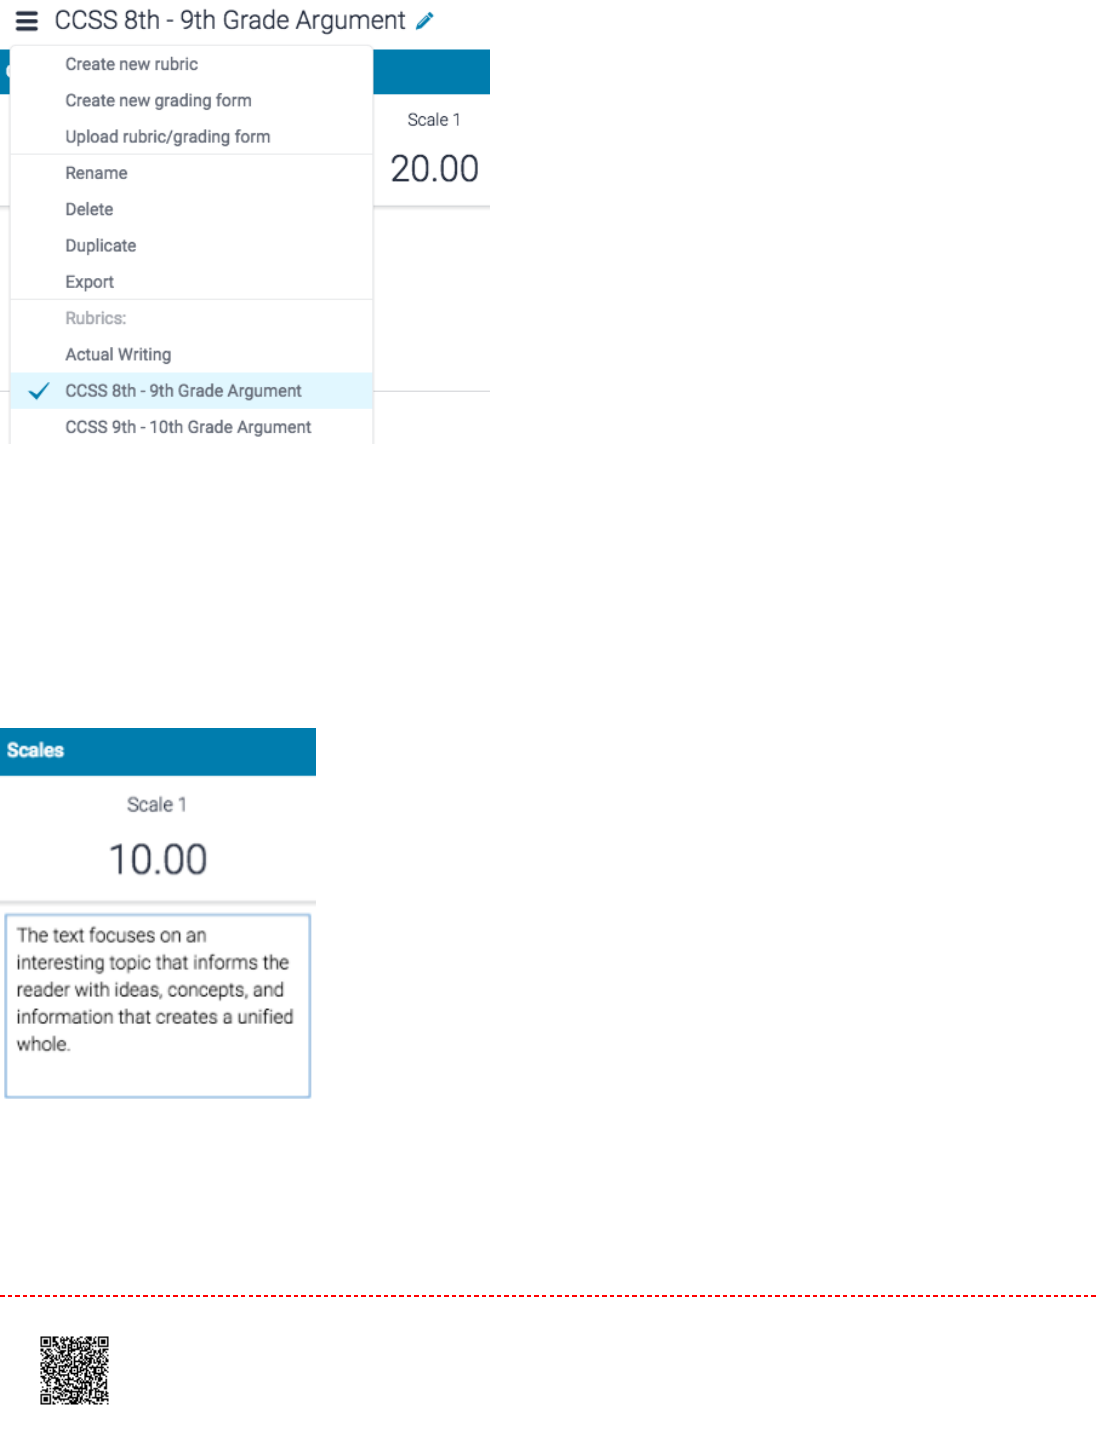
NoteNote: Rubrics that have been shared with you cannot be edited.
55. Change the rubric as needed by clicking into any field you'd like to change.
66. Click
Save
to save the changes.
175

Duplicating a Rubric Scorecard
Rubrics that have been attached to an assignment cannot be edited. Duplicating a rubric helps instructors reuse a rubric
that they would like to modify.
11. From the online grading toolbar, select the rubric icon to open the
Rubric
side panel.
22. Click the title of the currently assigned rubric from the
Rubric
side panel. If no rubric is assigned, click
No
Rubric.
This will reveal the
Rubrics and Forms
dropdown list. Click the
Rubric and Form Manager
button.
176

33. Click on the
menu
icon in the top left of the Rubric and Form Manager.
44. Select the rubric you would like to duplicate from the list of rubrics.
55. Click on the
menu
icon and then select
Duplicate
from the drop down menu.
177
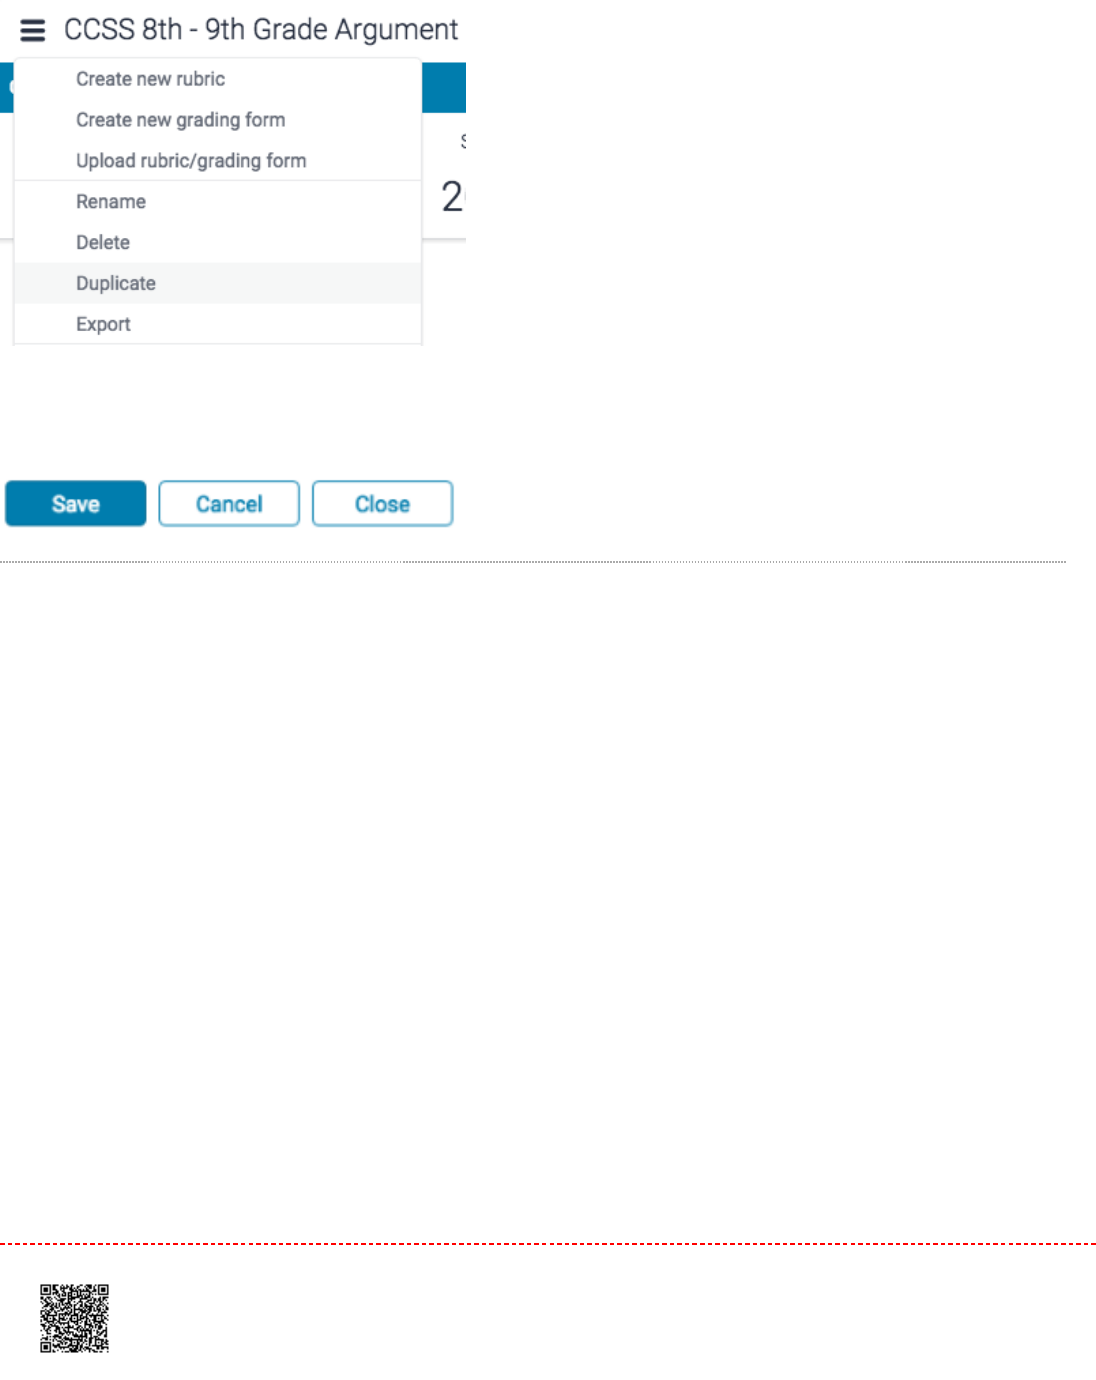
66. Click
Save
to save the changes
Exporting and Uploading Rubrics
Within the Rubric Manager, instructors can export rubrics to share with other instructors, or import rubrics to use when
grading papers within the online grading section of the Turnitin Feedback Studio. Unlike sharing, once a rubric set has
been imported into an account, it is then owned by that instructor who may then make any desired changes to the rubric.
Exporting a Rubric ScorecardExporting a Rubric Scorecard
11. From the online grading toolbar, select the rubric icon to open the
Rubric
side panel.
178
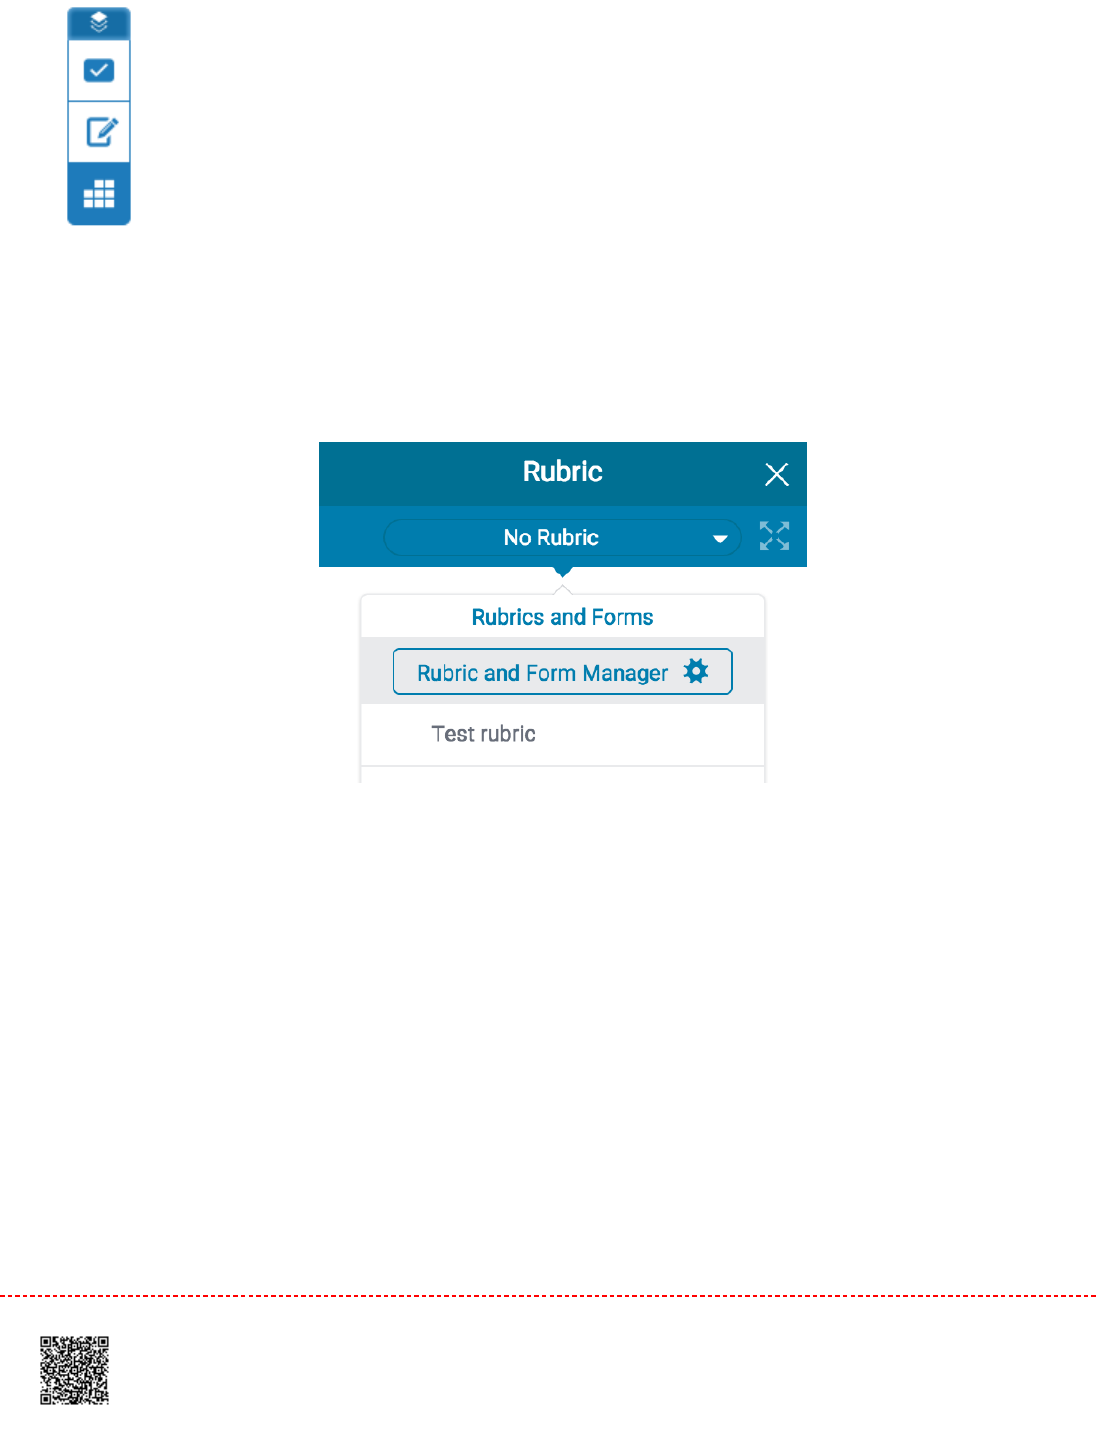
22. Click the title of the currently assigned rubric from the
Rubric
side panel. If no rubric is assigned, click
No
Rubric.
This will reveal the
Rubrics and Forms
dropdown list. Click the
Rubric and Form Manager
button.
33. Click on the
menu
icon in the top left of the Rubric and Form Manager.
179
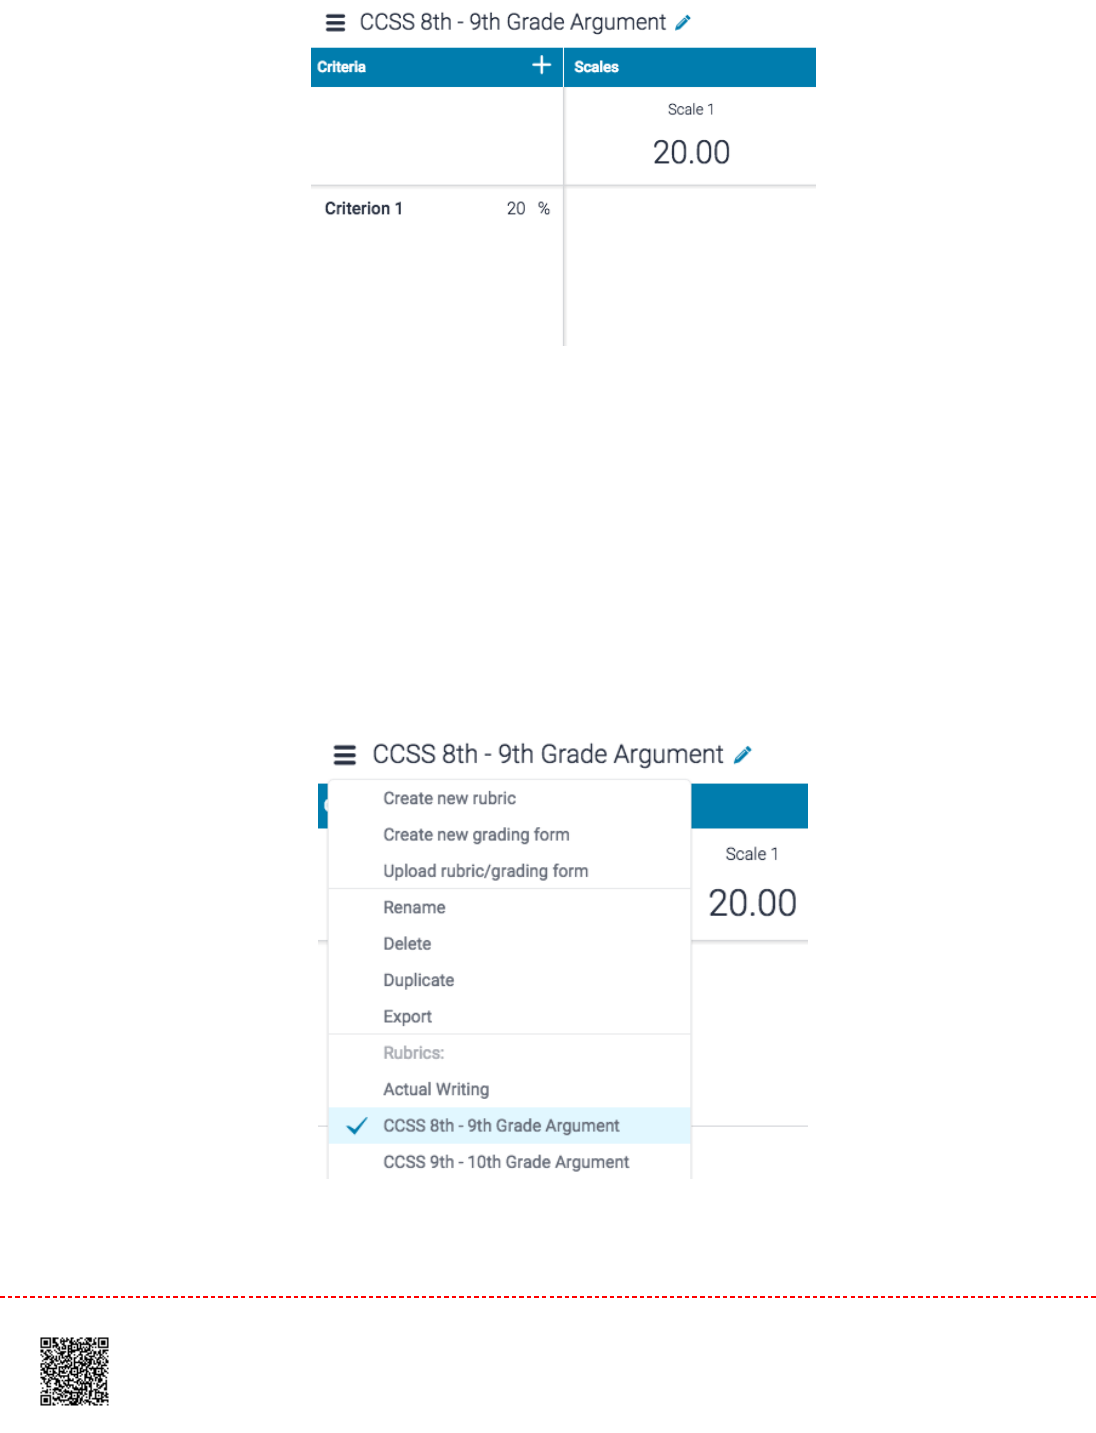
33.
3a.3a. If the rubric you wish to export is selected, move to step 44..
3b.3b. Alternatively, select the rubric you wish to export from the dropdown menu
44. Click the
Export
button from the dropdown menu
180
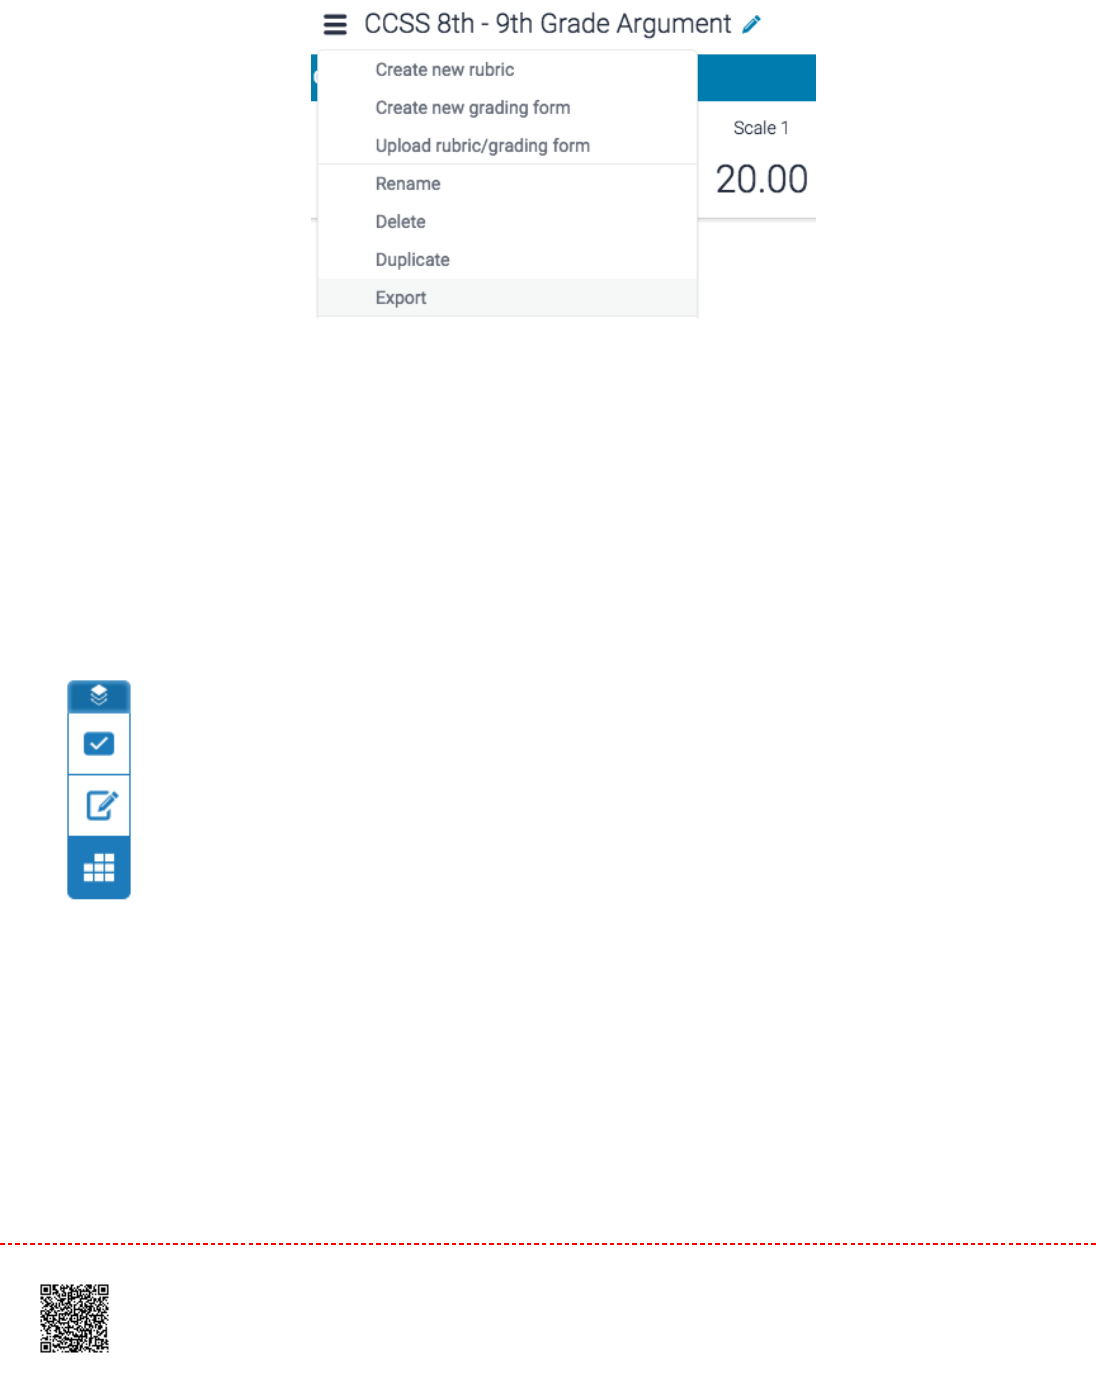
5.5. Your rubric will download to your device.
Uploading a Rubric ScorecardUploading a Rubric Scorecard
11. From the online grading toolbar, select the rubric icon to open the
Rubric
side panel.
22. Click the title of the currently assigned rubric from the
Rubric
side panel. If no rubric is assigned, click
No
Rubric.
This will reveal the
Rubrics and Forms
dropdown list. Click the
Rubric and Form Manager
button.
181
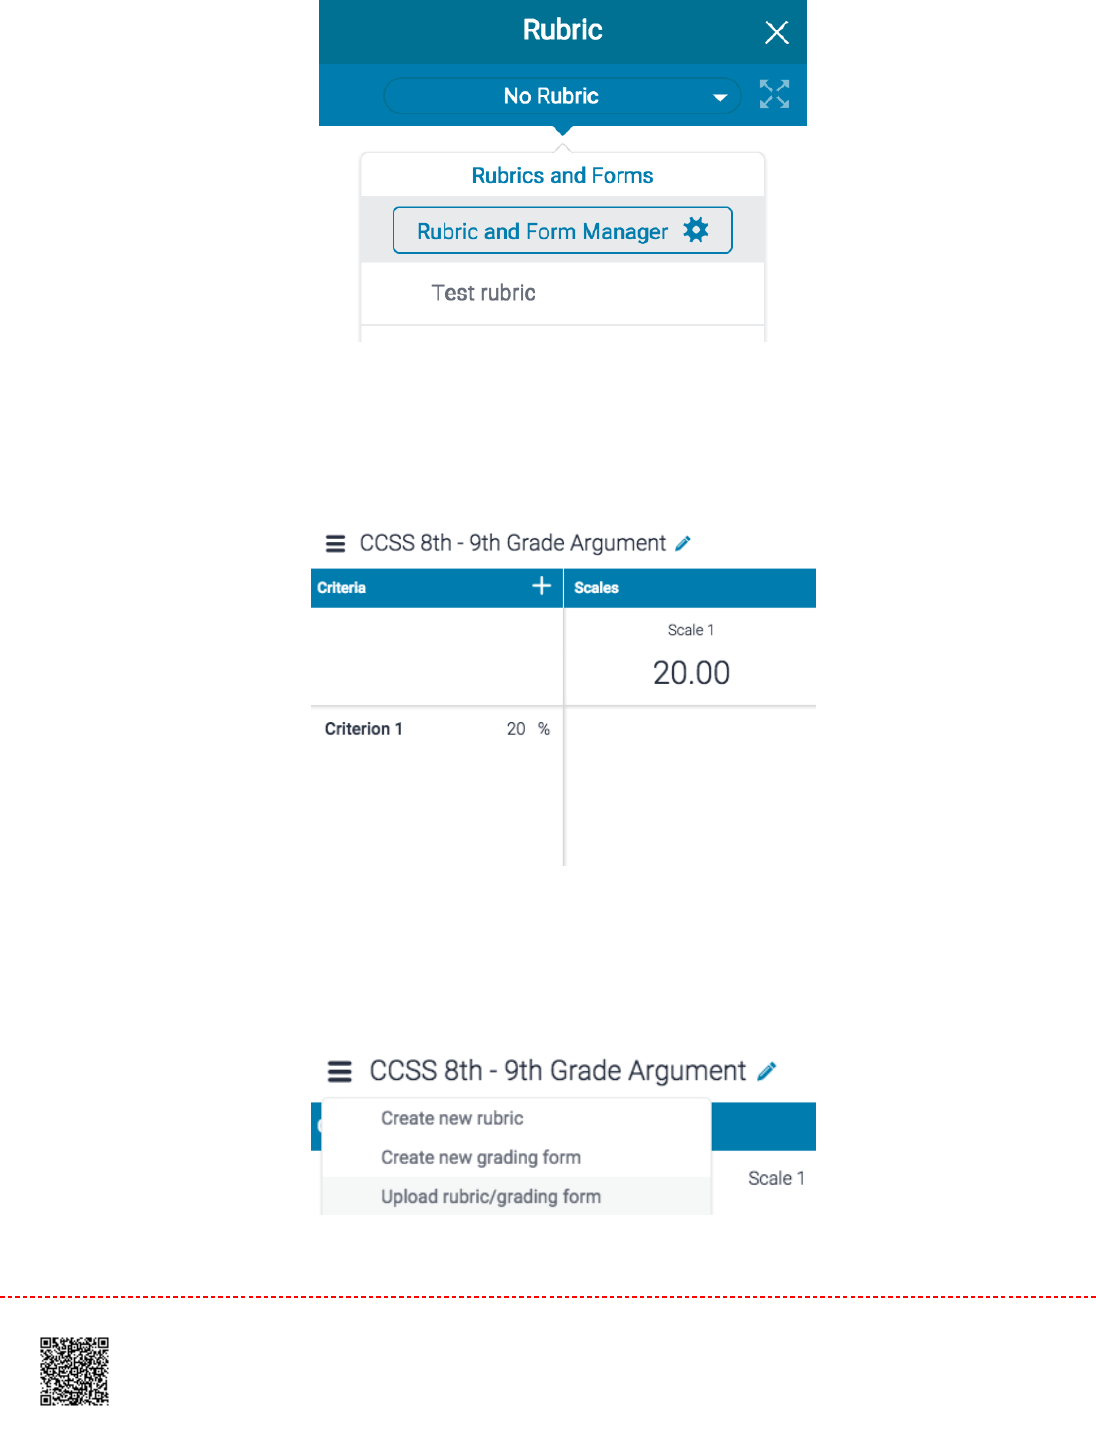
33. Click the
menu
icon in the top left of the Rubric and Form Manager.
44. Click the
Upload rubric/grading form
button from the dropdown menu.
182
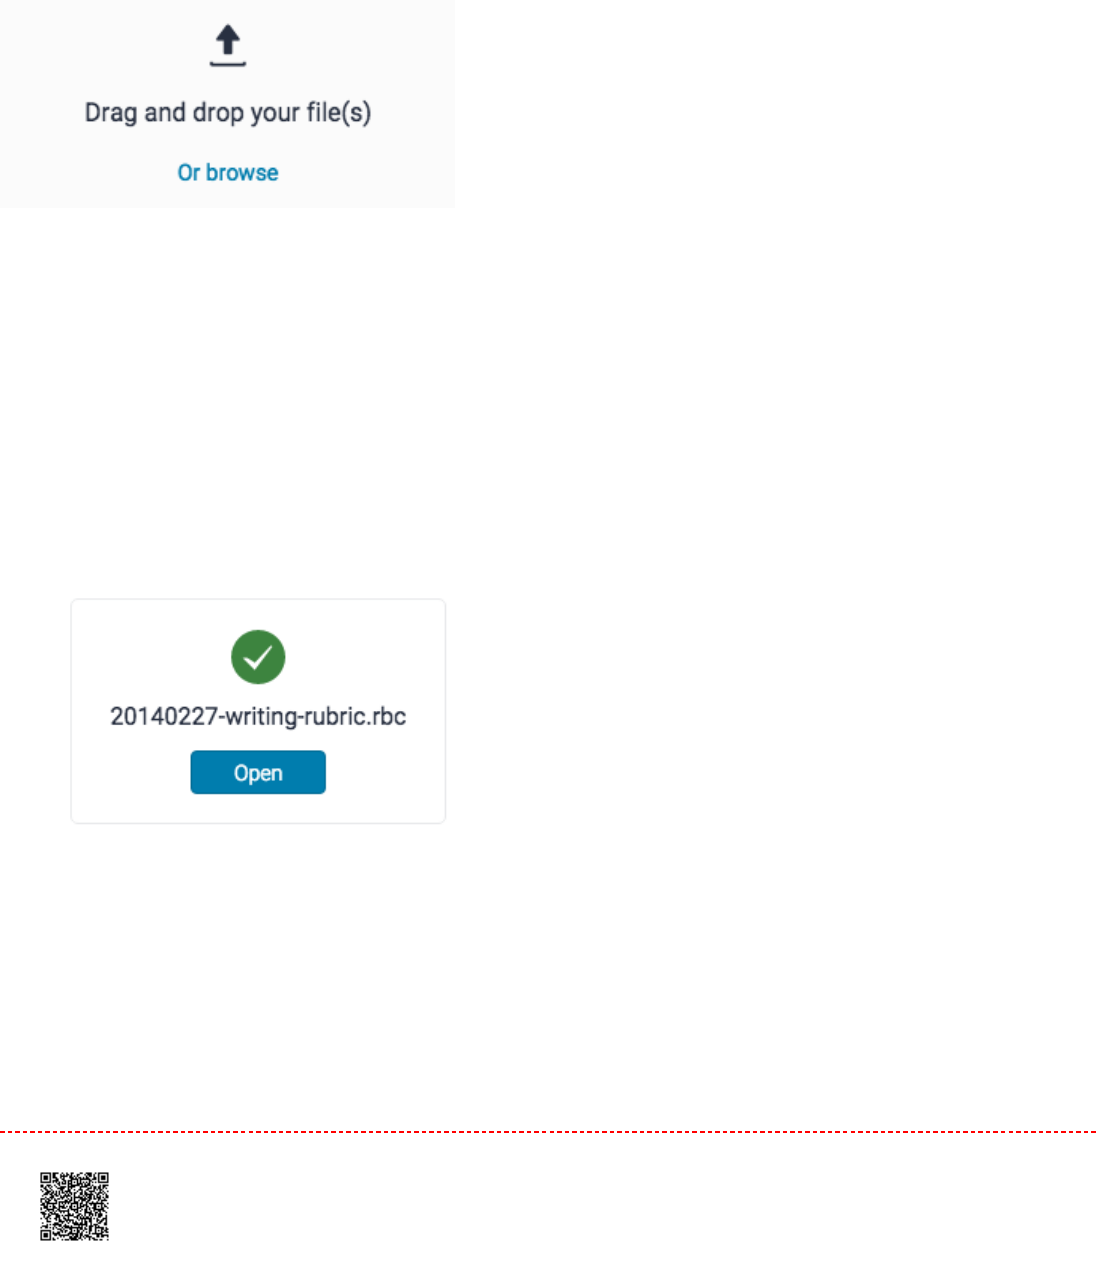
5.5. To upload your rubric or grading form(s), you can either drag and drop your file(s) into the Rubric and Form
Manager or you can browse your computer to select the file. Should you require assistance in creating your
rubric, you can download a .xls example to work from.
File requirements:File requirements: Turnitin accepts .rbc, .xls, .xlsc files. Excel file requirements are as follows: Criteria titles
must be 13 characters or less, there is a limit of 20 scale columns and 50 criteria rows, and scoring can
only be included once the rubric is uploaded.
6.6. Once your file has uploaded successfully, click the
Open
button to open the rubric in the Rubric and Form
Manager.
7.7. Your rubric will now be fully editable in the Rubric and Form Manager.
183
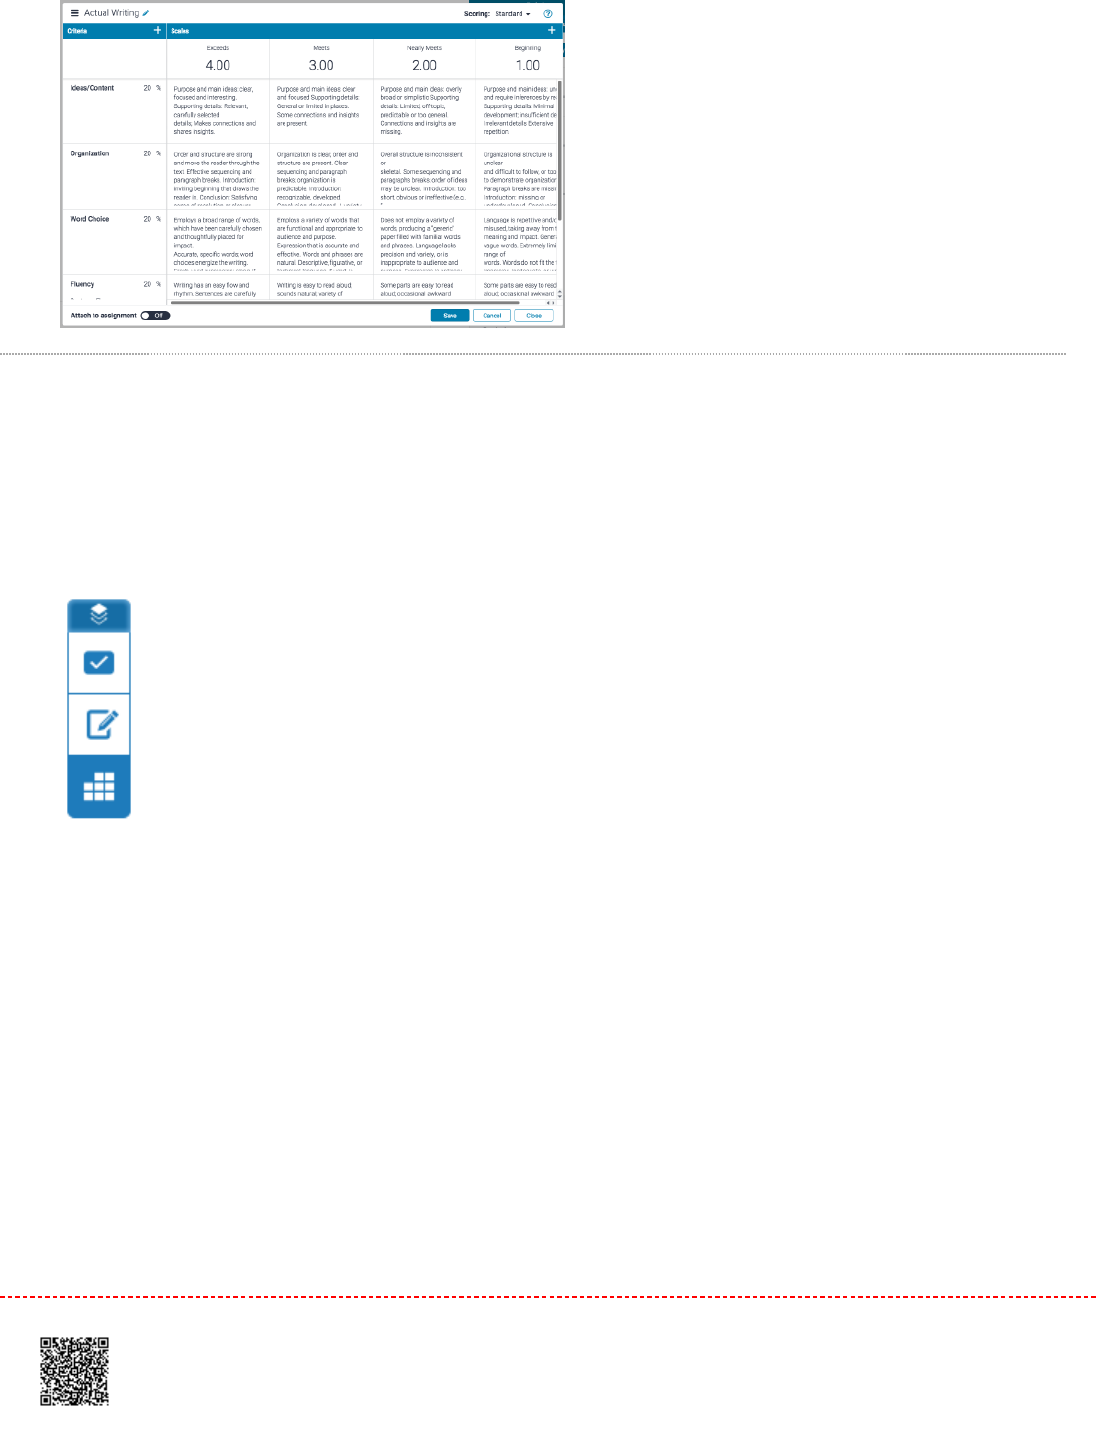
Attaching a Rubric Scorecard
11. From the online grading toolbar, select the rubric icon to open the
Rubric
side panel.
22. Click the title of the currently assigned rubric from the
Rubric
side panel. If no rubric is assigned, click
No
Rubric.
This will reveal the
Rubrics and Forms
dropdown list. Click the
Rubric and Form Manager
button.
184
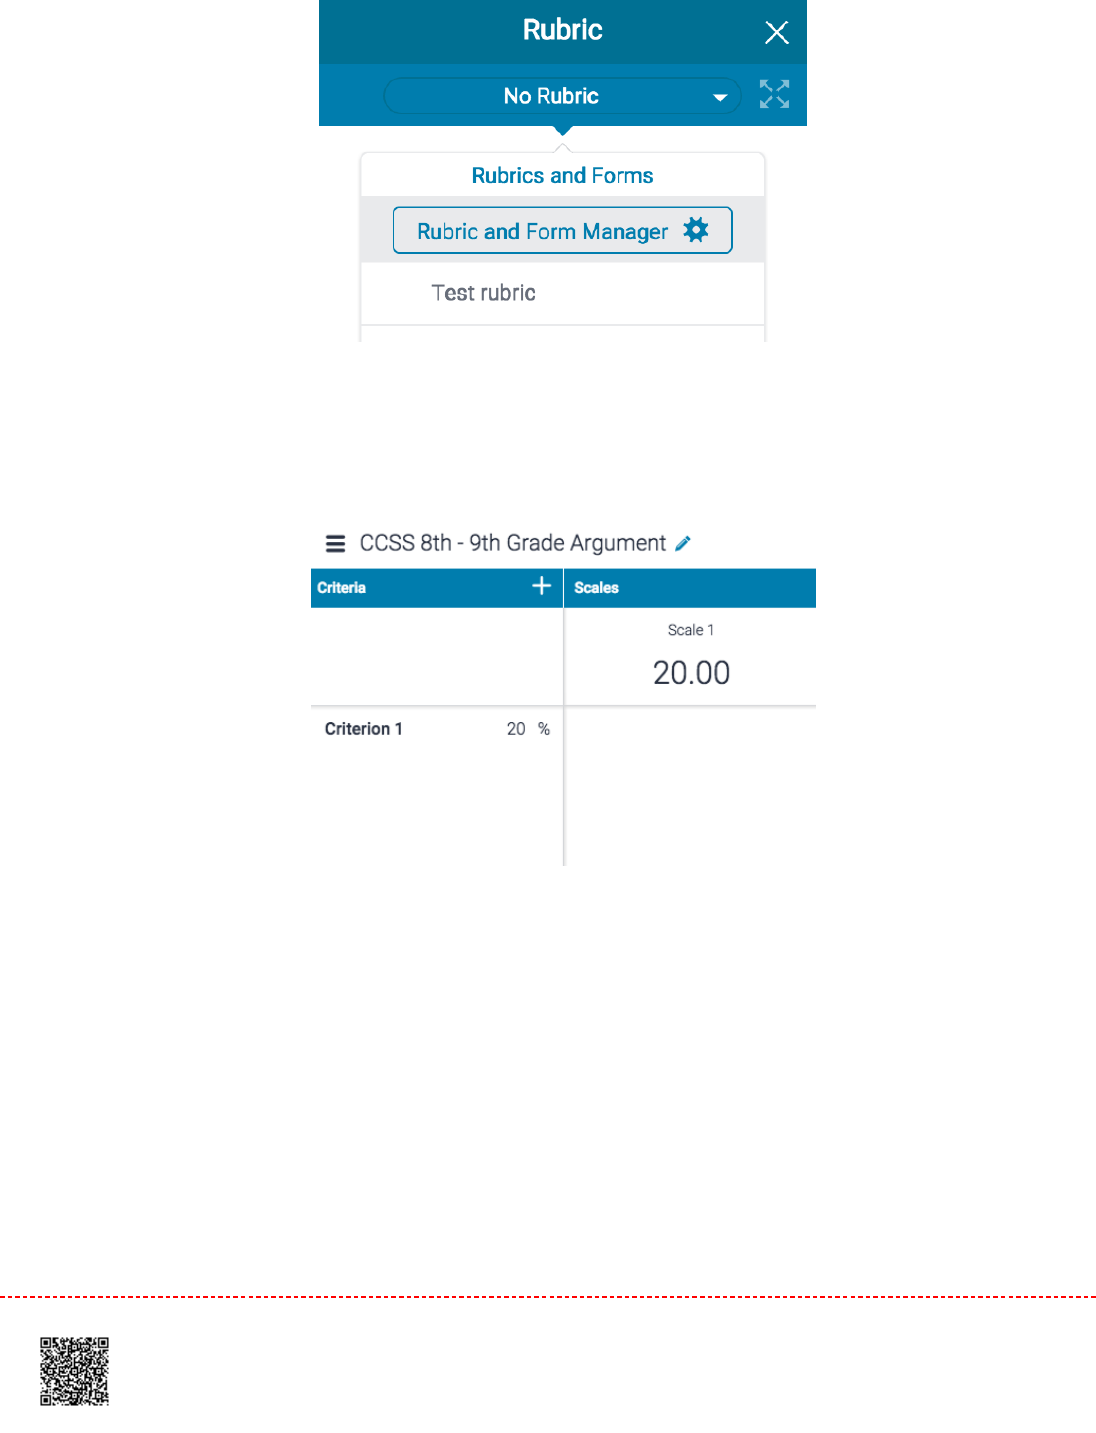
33. Click the
menu
icon in the top left of the Rubric and Form Manager.
44.
4a.4a. If the rubric you wish to attach is selected, move to stepstep 55..
4b.4b. Alternatively, select the rubric you wish to attach to the assignment from the dropdown menu.
185
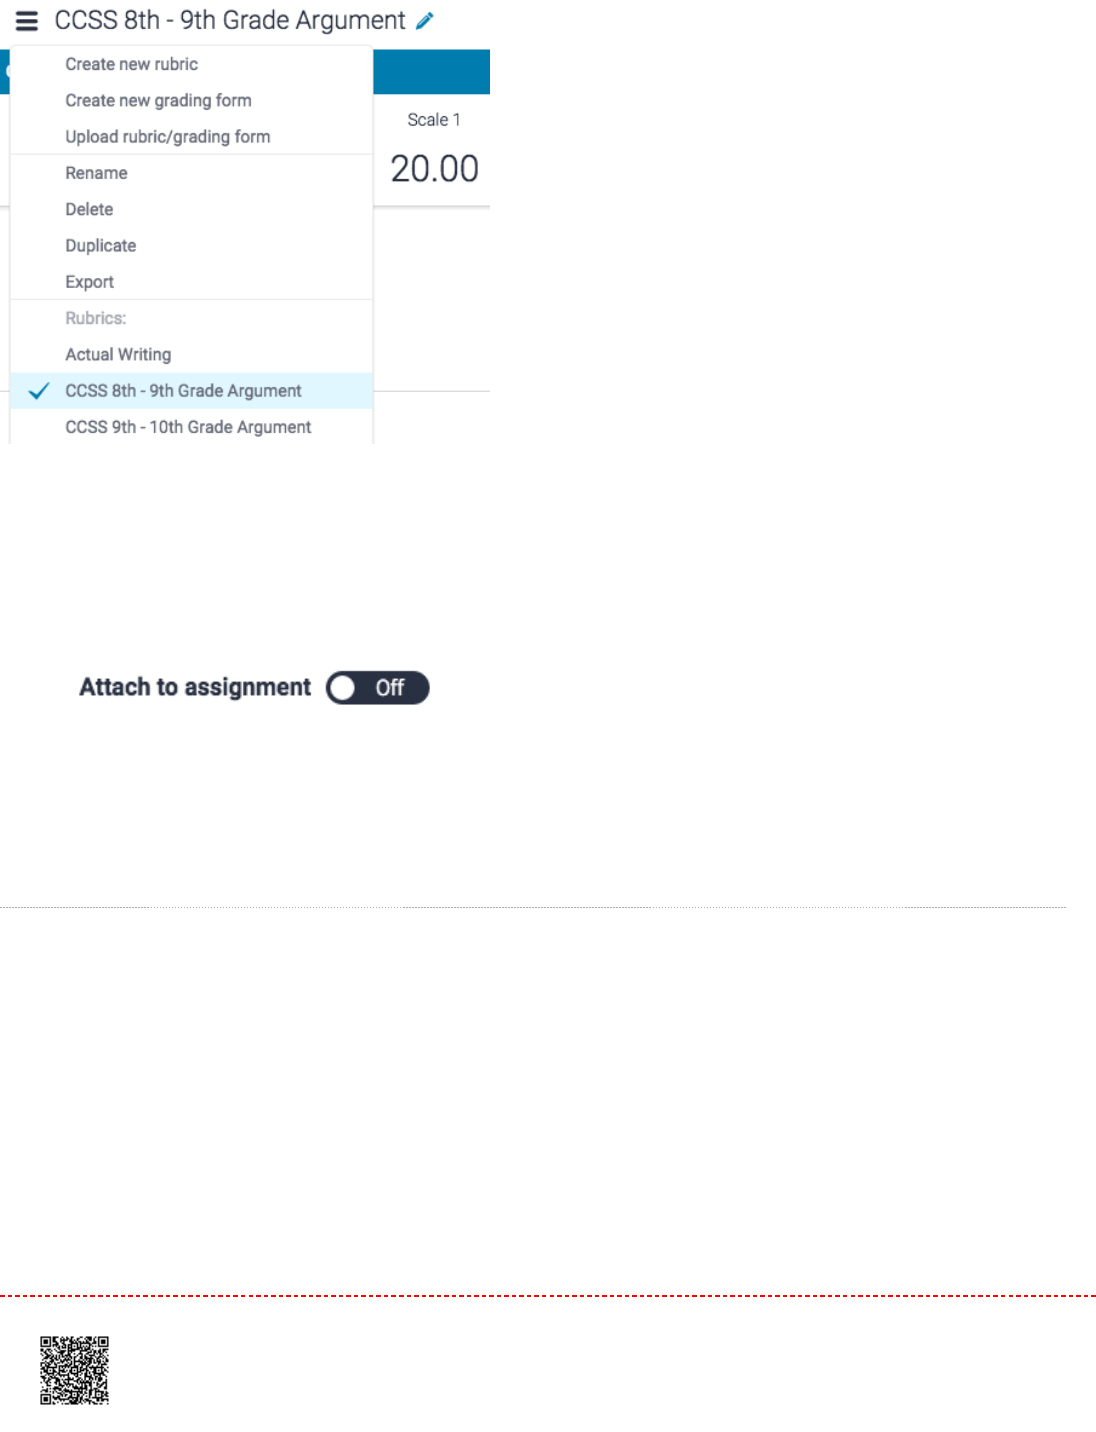
5.5. The rubric will now be displayed within the Manager. In the bottom left-hand corner of the Manager, toggle
Attach to assignment
as
On.
The same can be done to detach a rubric from an assignment.
Note:Note: Changing or detaching a rubric will remove all existing rubric scoring from papers in this assignment,
including scorecards which have previously been marked. Overall grades for previously graded papers will
remain.
Grading with Sliders
A score can be assigned to a rubric using rubric sliders. Moving the sliders will change your assigned grade for
each criterion. Clicking the
Apply score to grade
button will change the grade of the assignment to a value of the
assignment point total. For example, if an assignment receives 4 out of 5 in every criterion in the rubric, and the
assignment is worth 100 points, then the final grade will be 80.
11. From the online grading toolbar, select the rubric icon to open the
Rubric
side panel.
186
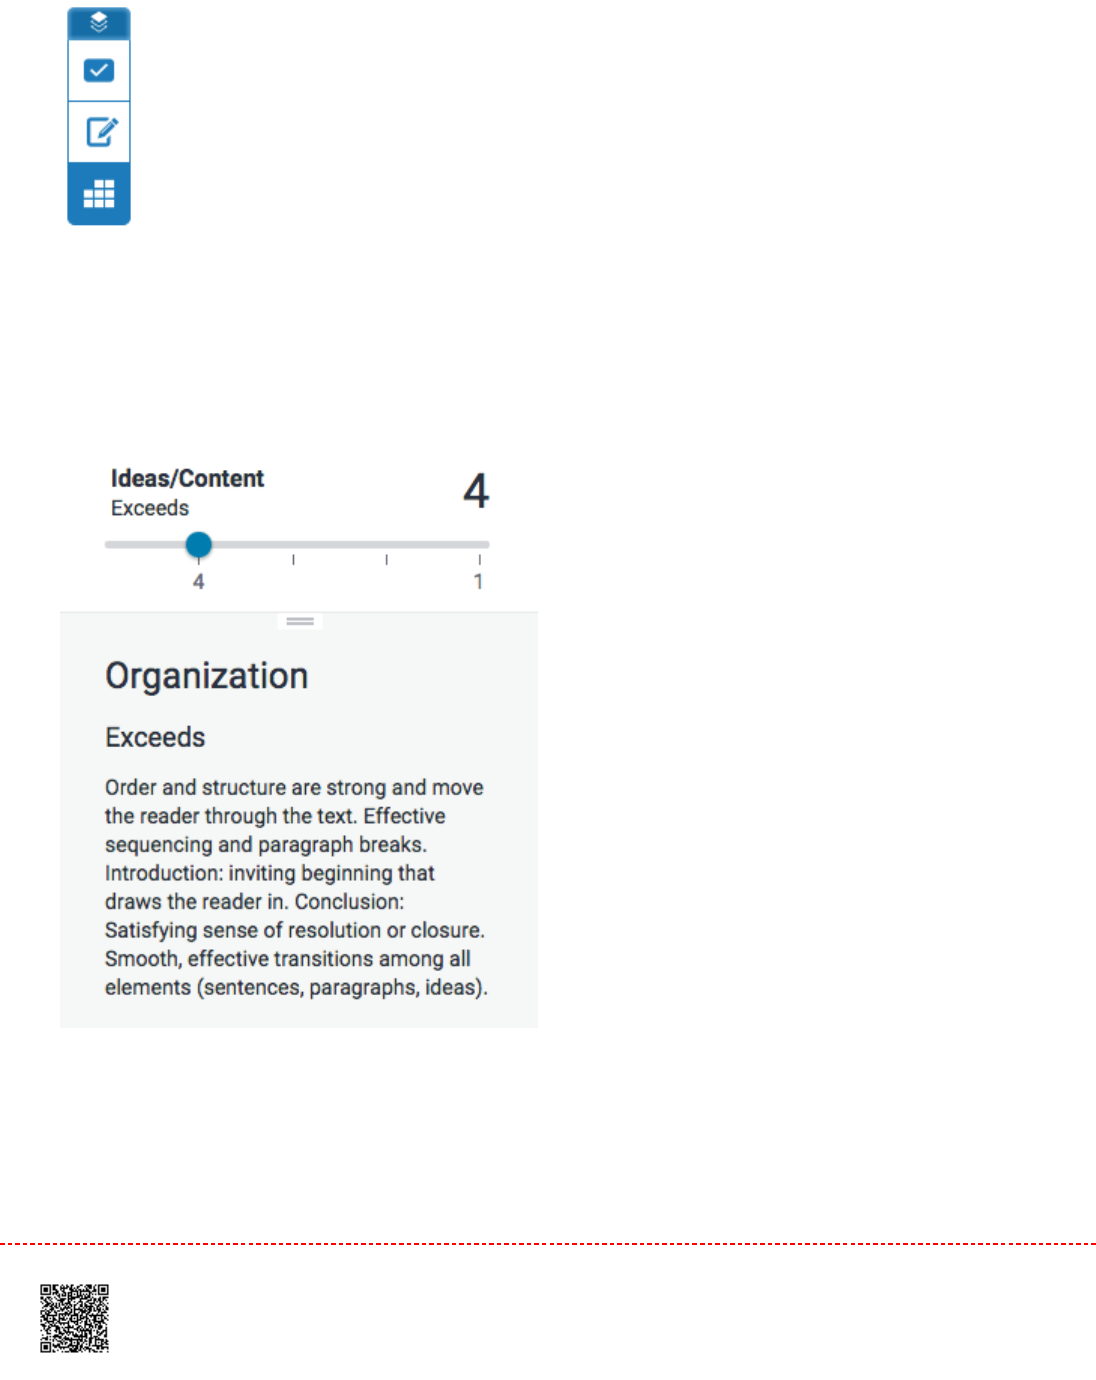
22. Set your score using the rubric sliders. Click the blue circle and drag it to the correct score. Alternatively, simply
click on the score you'd like to give which will move the slider to this position on the scale.
33. Once you have set all scores, click
Apply to grade
at the bottom of the rubric score panel
187
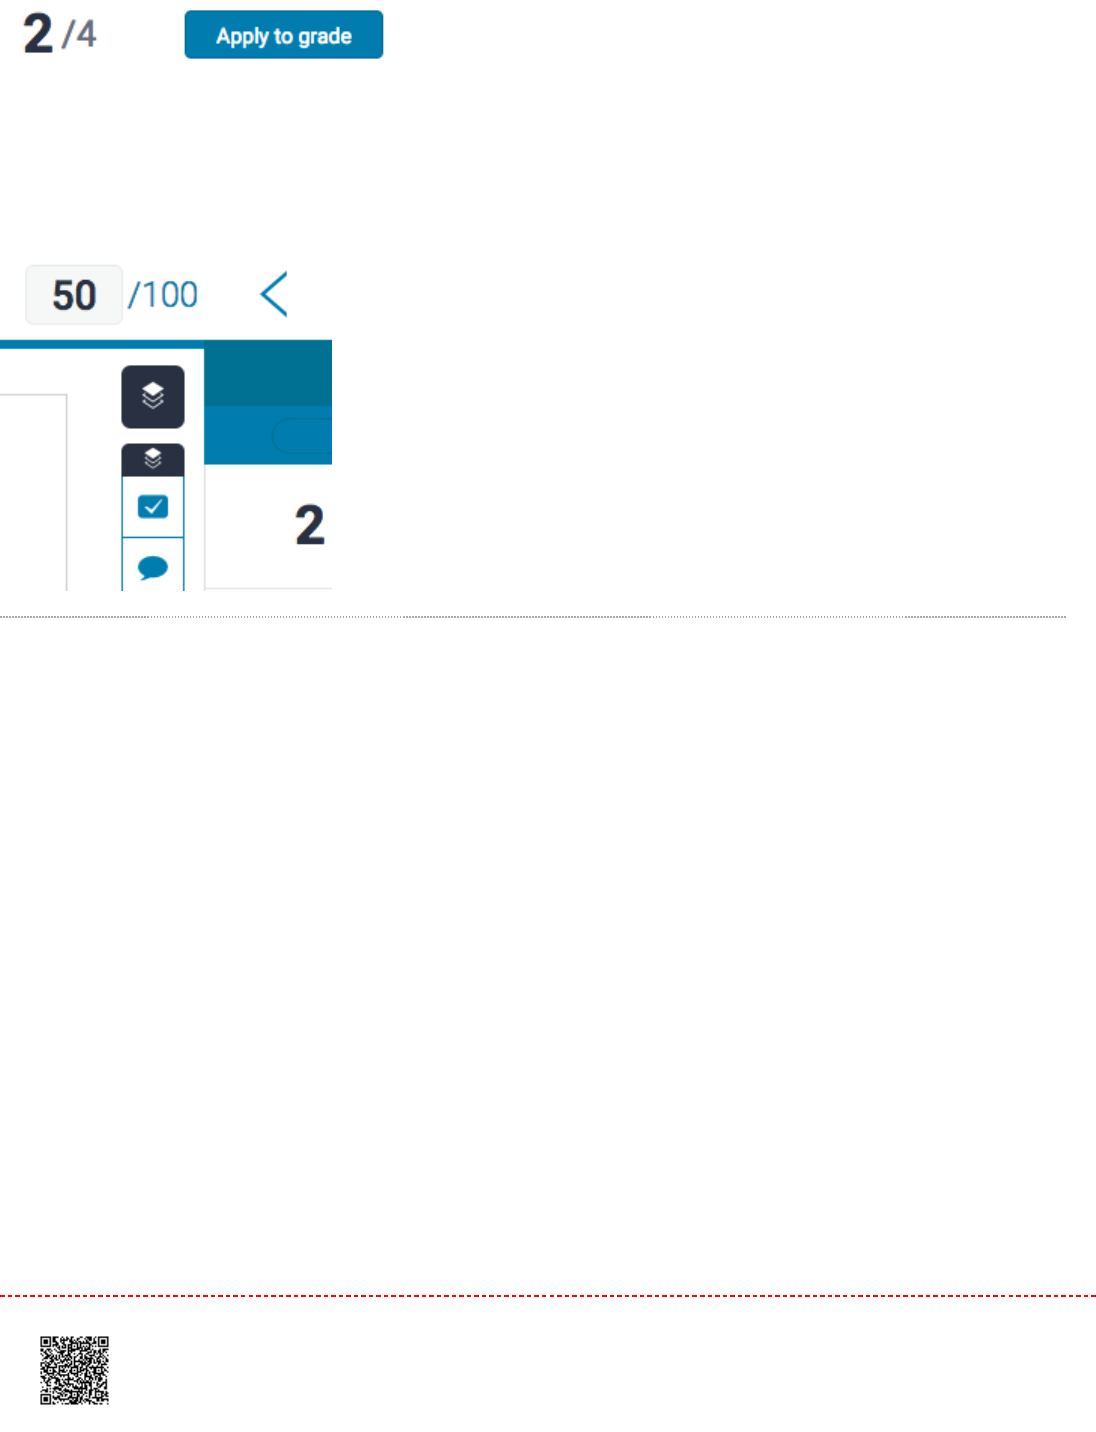
44. The score will change depending on the values you have given to each criterion.
Grading in the Expanded Rubric Manager
You can use the Expanded Rubric in a separate window to grade papers more efficiently. The Expanded Rubric opens
in a new window and will show you the rubric you have attached to the course. The student you are currently
grading can be seen in the top right-hand corner of the Expanded Rubric. You can navigate to other students using the
standard navigation options and continue to use the Expanded Rubric to grade each student that has submitted to the
assignment.
11. From the online grading toolbar, select the rubric icon to open the
Rubric
side panel.
188
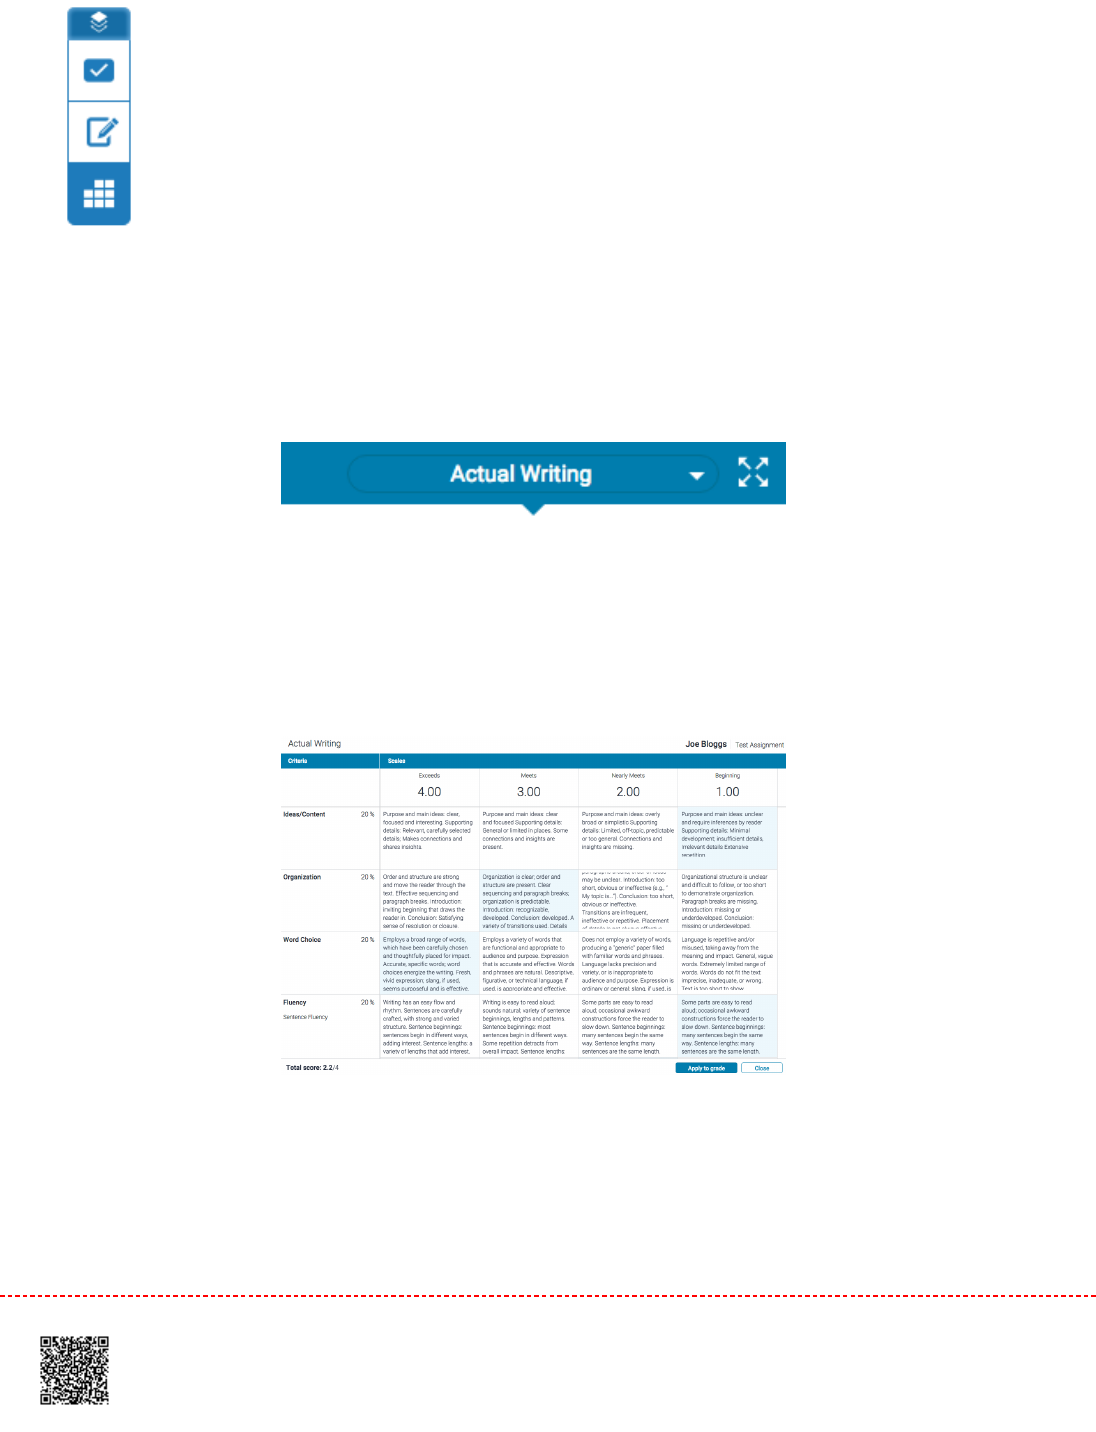
2.2. To view the expanded rubric within another window, click on the expand rubric icon to the right of the currently
selected rubric title.
3.3. The expanded rubric displays each cell description, in order to allow instructors to easily select the criteria
scales for the paper. Click a criterion description to give your student a score for that criterion.
4.4. Click the
Apply to Grade
button at the bottom of the expanded rubric window to apply the score to your
student's grade. This will add it as a percentage of the maximum total of points for the assignment. For example,
if a student received 4 for all criterion in an assignment, with 100 possible points, their final grade will be 80.
189
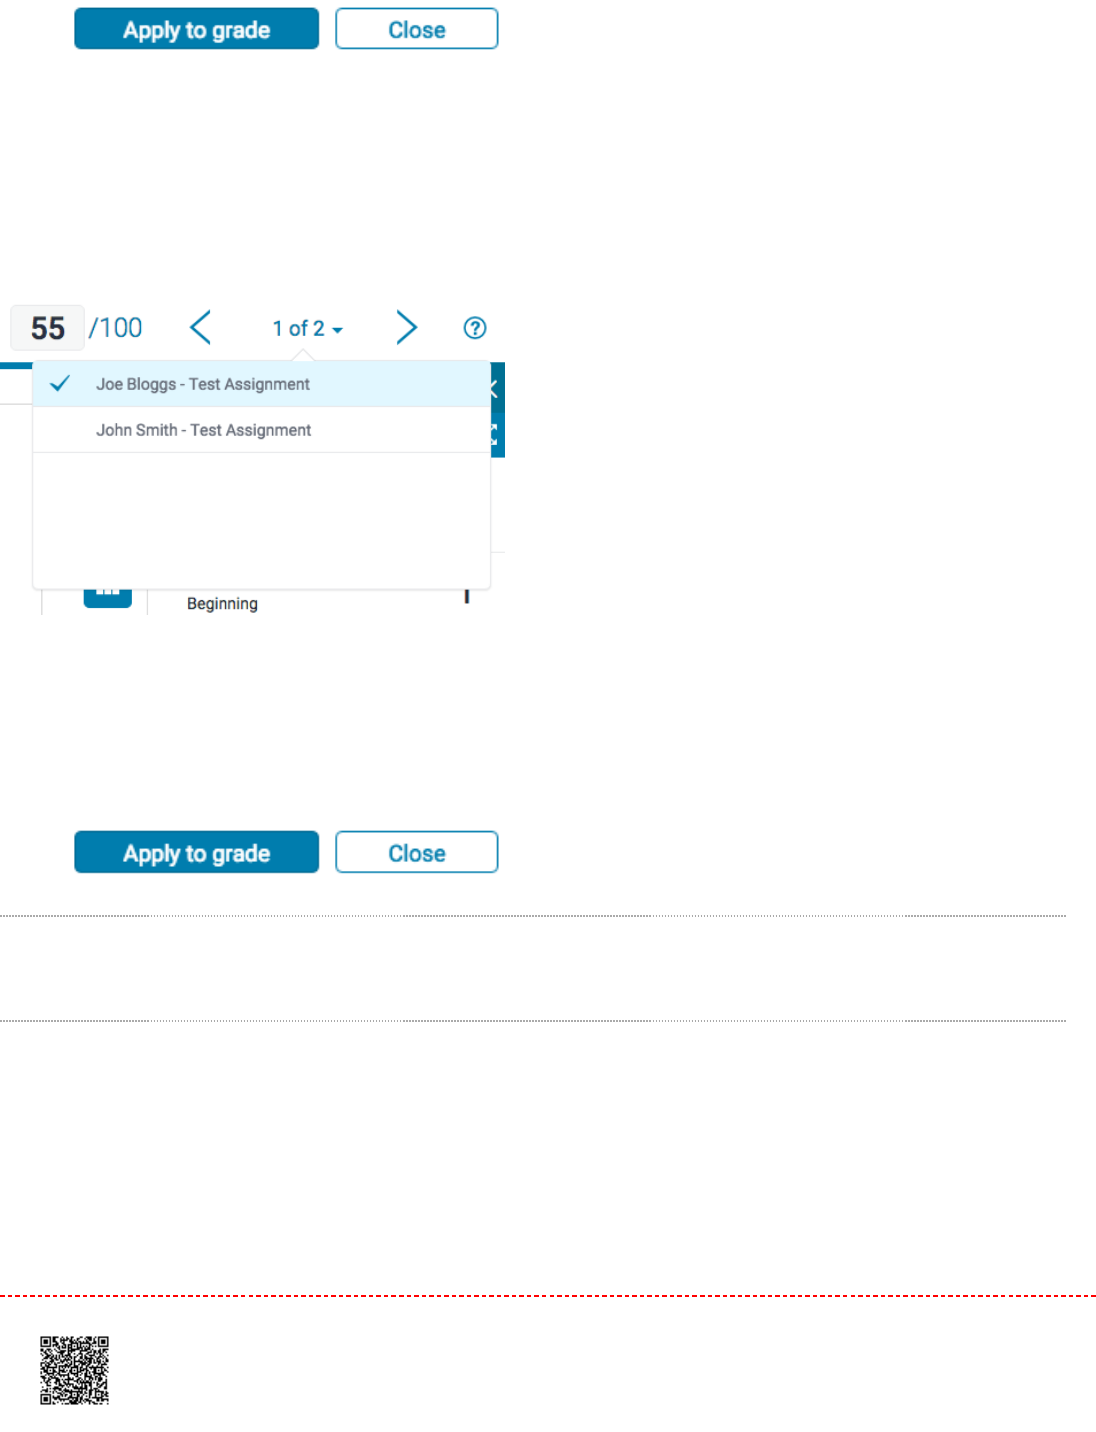
5.5. To continue grading other student papers in the expanded rubric, use the navigation arrows in the Feedback
Studio, or use the navigation drop down to select a specific paper. This will automatically change the paper you
are scoring in the Expanded Rubric.
6.6. Click
Close
to exit the expanded rubric.
Grading Forms
Creating a Grading Form
11. From the online grading toolbar, select the rubric icon to open the
Rubric
side panel.
190

22. Click the title of the currently assigned rubric from the
Rubric
side panel. If no rubric is assigned, click
No
Rubric.
This will reveal the
Rubrics and Forms
dropdown list. Click the
Rubric and Form Manager
button.
33. Click the
menu
icon in the top left of the Rubric and Form Manager.
191
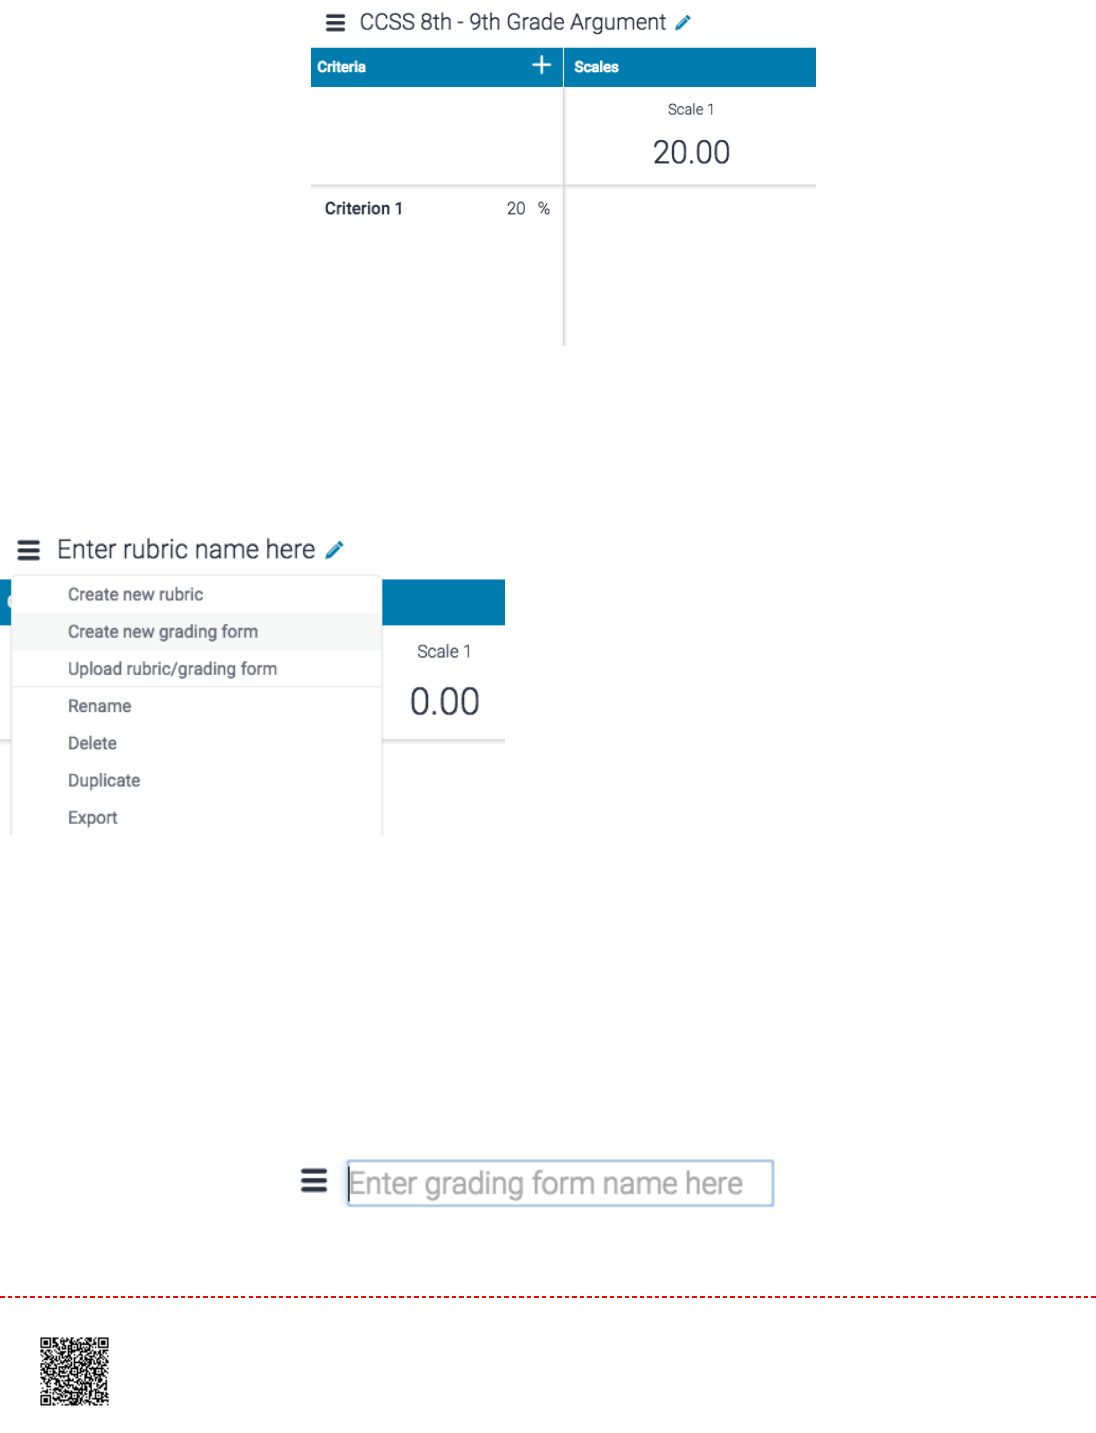
44. Click
Create new grading form
from the menu
55. Enter a name for your grading form by clicking on
Enter grading form name here
in the top left of the Rubric
and Form Manager. To save your title, click anywhere outside of the text field.
192
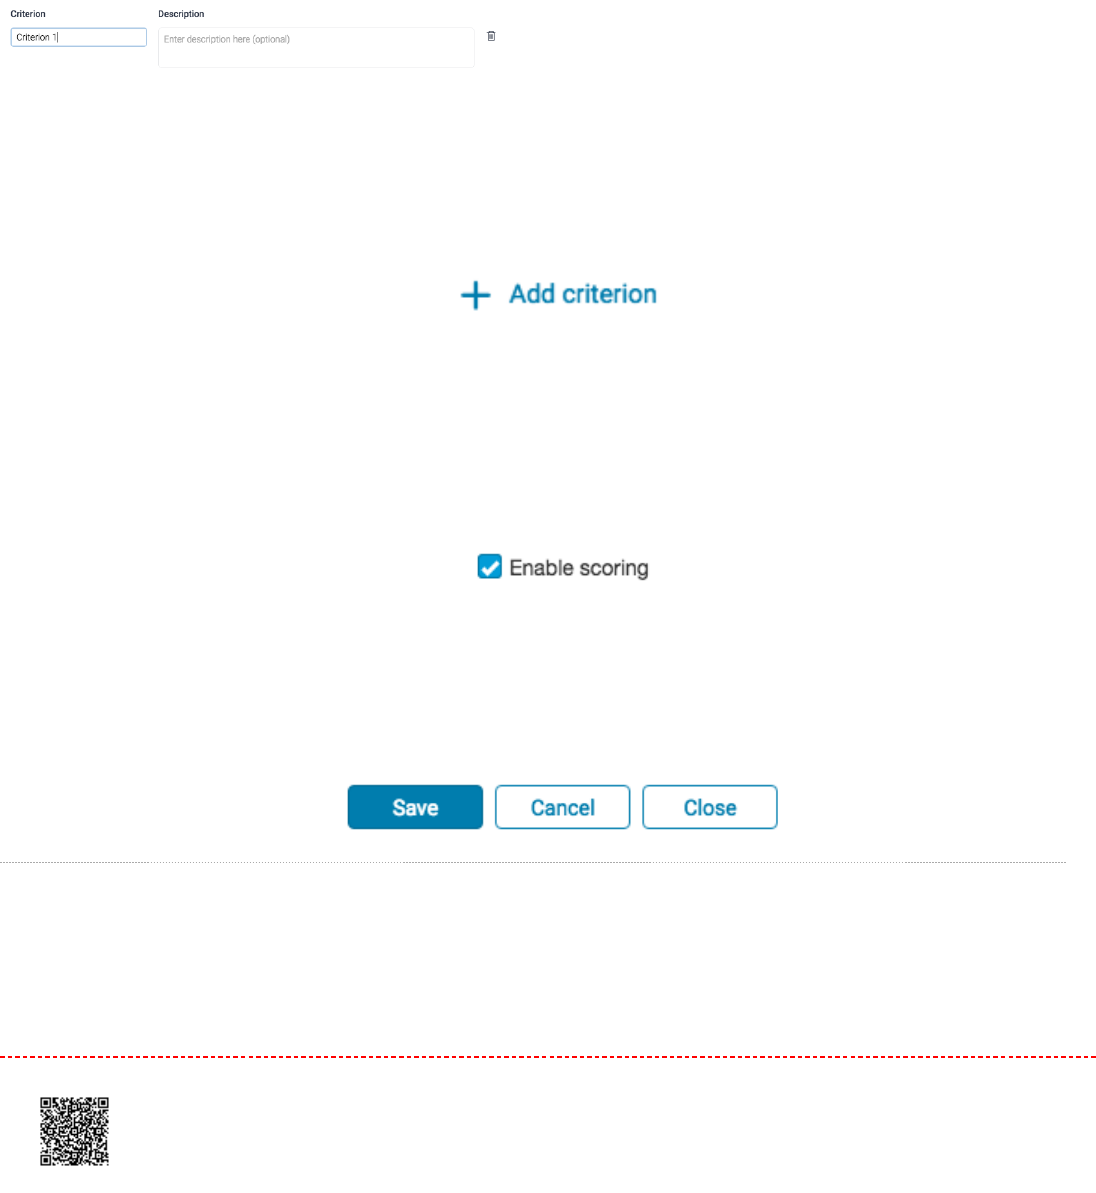
66.
6a.6a. Edit the criterion titles and descriptions by clicking into the text fields. Click anywhere outside of the text
fields to save.
6b6b. Add additional criteria by clicking the '
+'
icon
77. If you would like to use a grading form simply for adding comments to the assignment criteria, you can disable
scoring. Select whether to enable scoring at the top right of the screen.
88. When all criterion titles and descriptions have been edited, click on
Save
to save the rubric
Modifying a Grading Form
Grading forms can be modified after creation. However, if the grading form has been used to score student papers,
modification of the rubric scorecard will not be allowed.
193
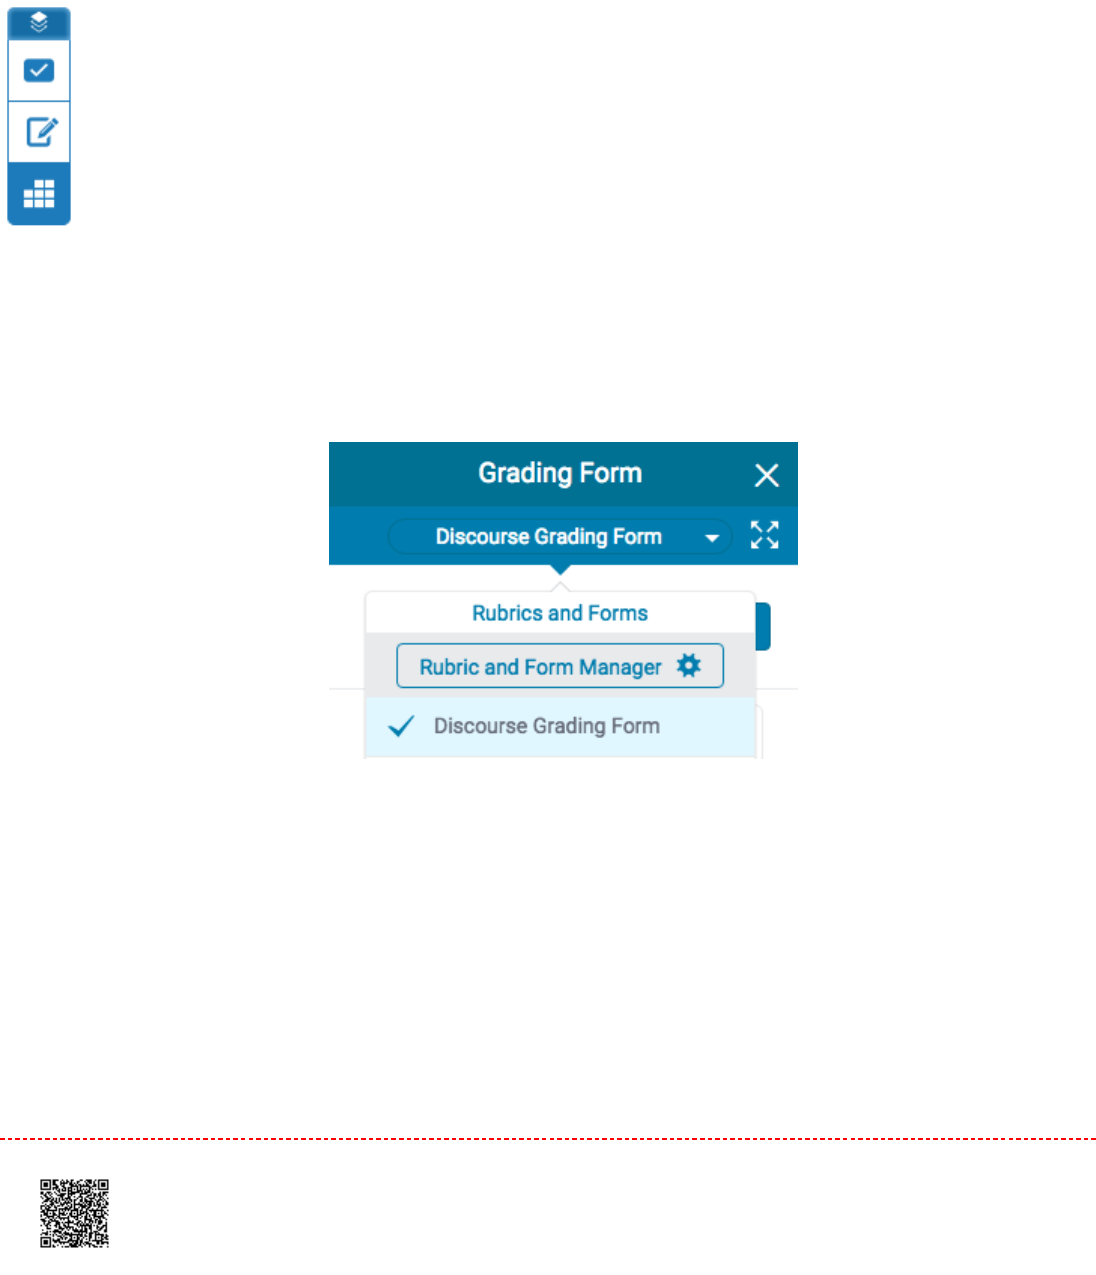
11. From the online grading toolbar, select the rubric icon to open the
Grading Form
side panel.
22. Click the title of the currently assigned grading form from the
Rubric
side panel. If no rubric is assigned, click
No Rubric.
This will reveal the
Rubrics and Forms
dropdown list. Click the
Rubric and Form Manager
button.
33. Click on the
menu
icon in the top left of the Rubric and Form Manager.
194
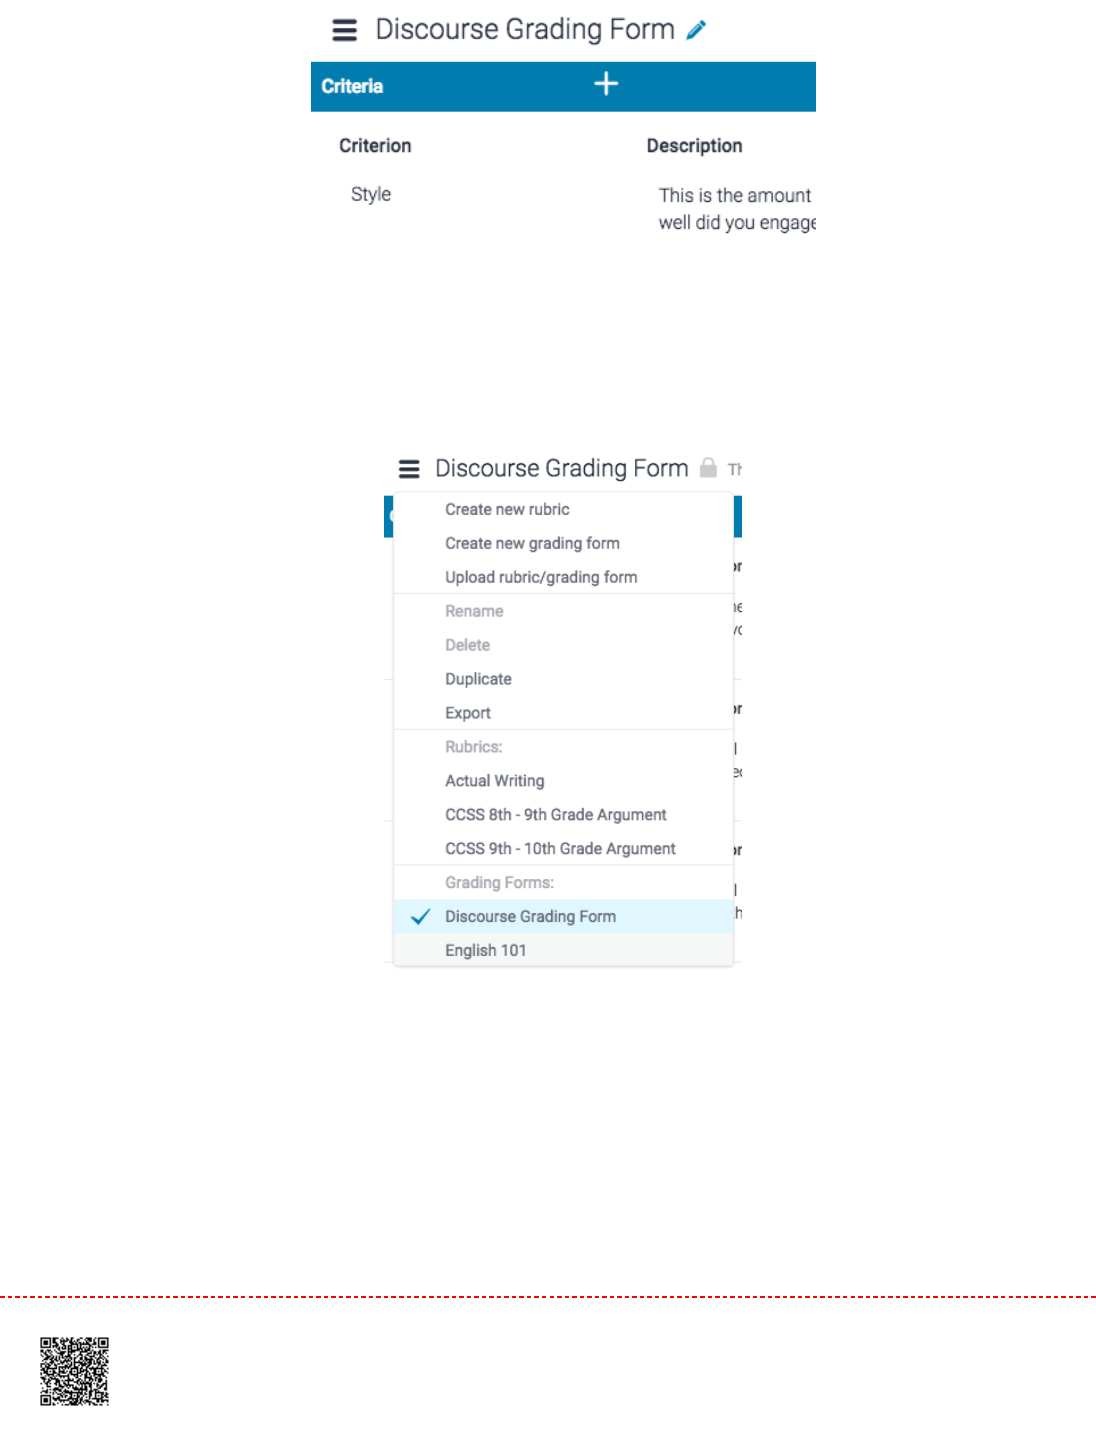
44. Select the grading form that you would like to edit from the dropdown list.
NoteNote: Rubrics that have been shared with you cannot be edited.
55. Change the grading form as needed by clicking into any field and begin typing. Click anywhere outside of the
field to finish.
195
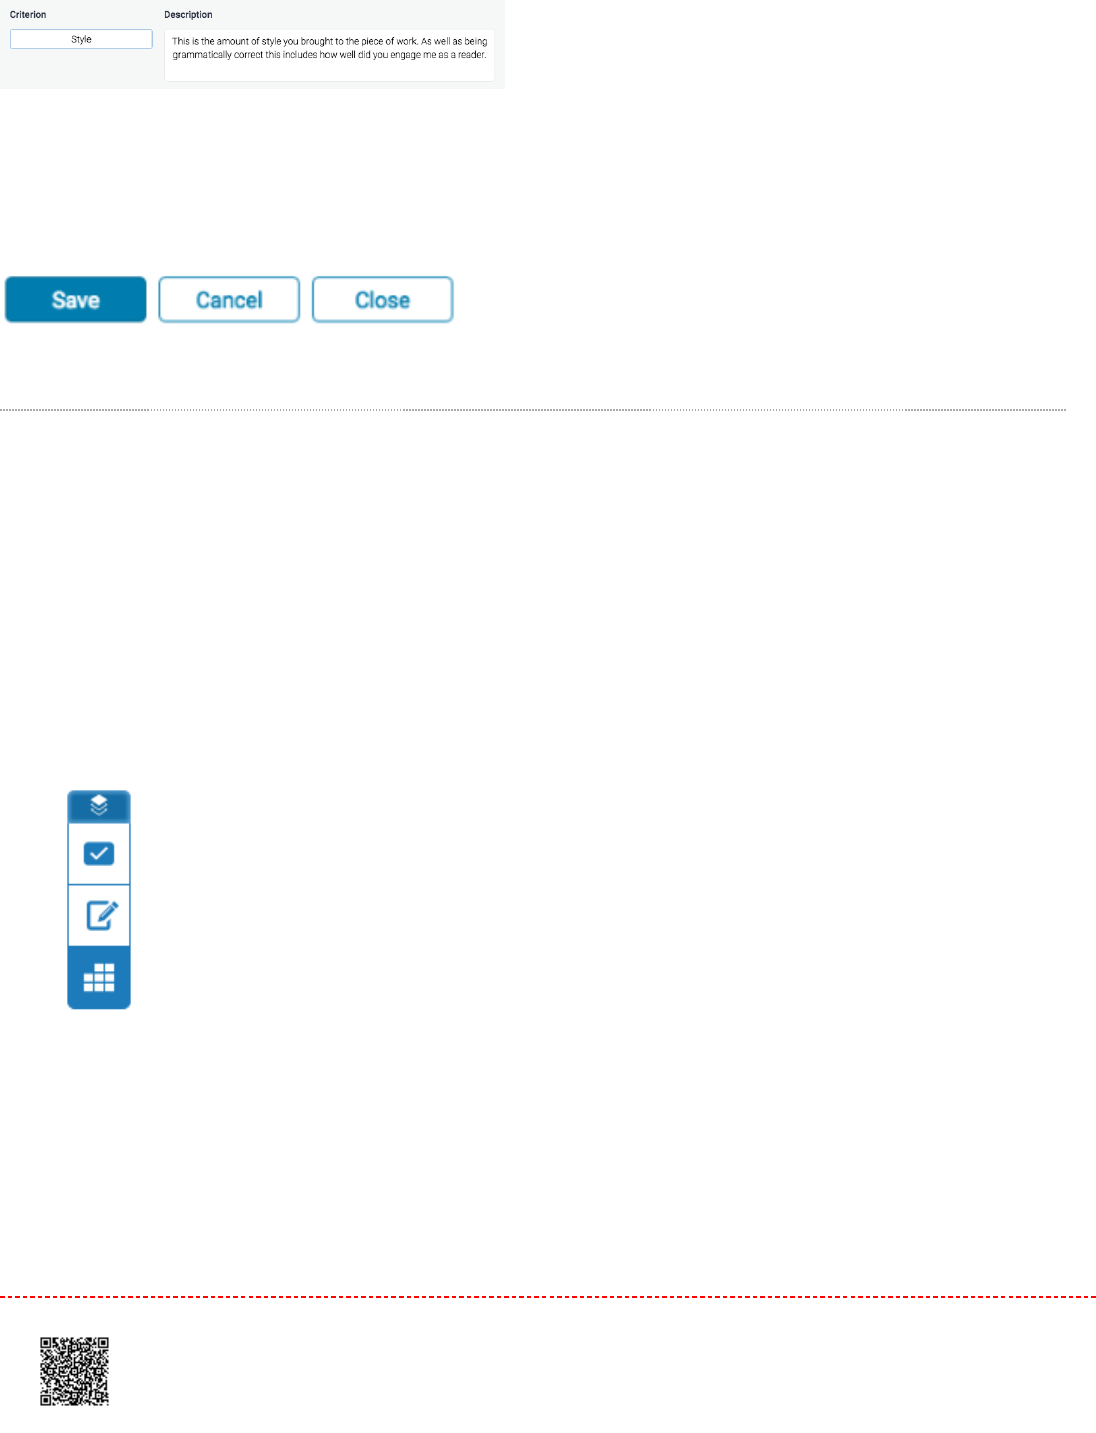
66. Click
Save
to save your changes.
Duplicating a Grading Form
Grading forms that have been attached to an assignment cannot be edited. Duplicating a grading form helps instructors
reuse a grading form that they would like to modify.
11. From the online grading toolbar, select the rubric icon to open the
Grading Form
side panel.
22. Click the title of the currently assigned rubric from the
Grading Form
side panel. This will reveal the
Rubrics
and Forms
dropdown list. Click the
Rubric and Form Manager
button.
196
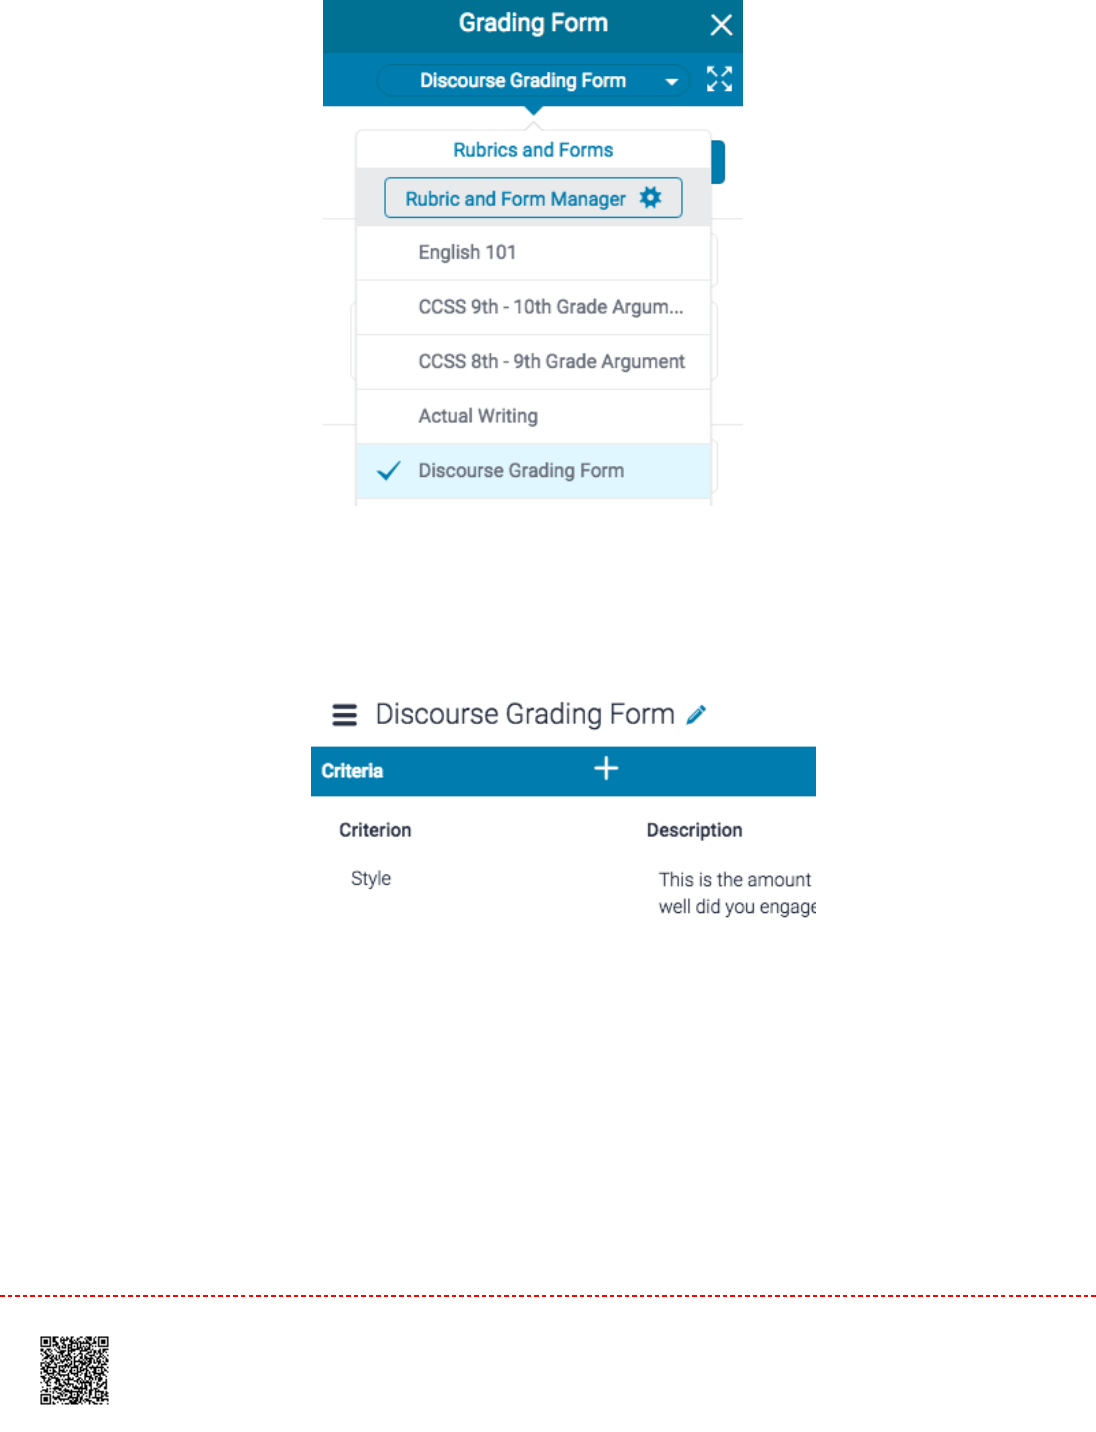
33. Click on the
menu
icon in the top left of the Rubric and Form Manager.
44. Select the grading form you would like to duplicate from the dropdown list.
197
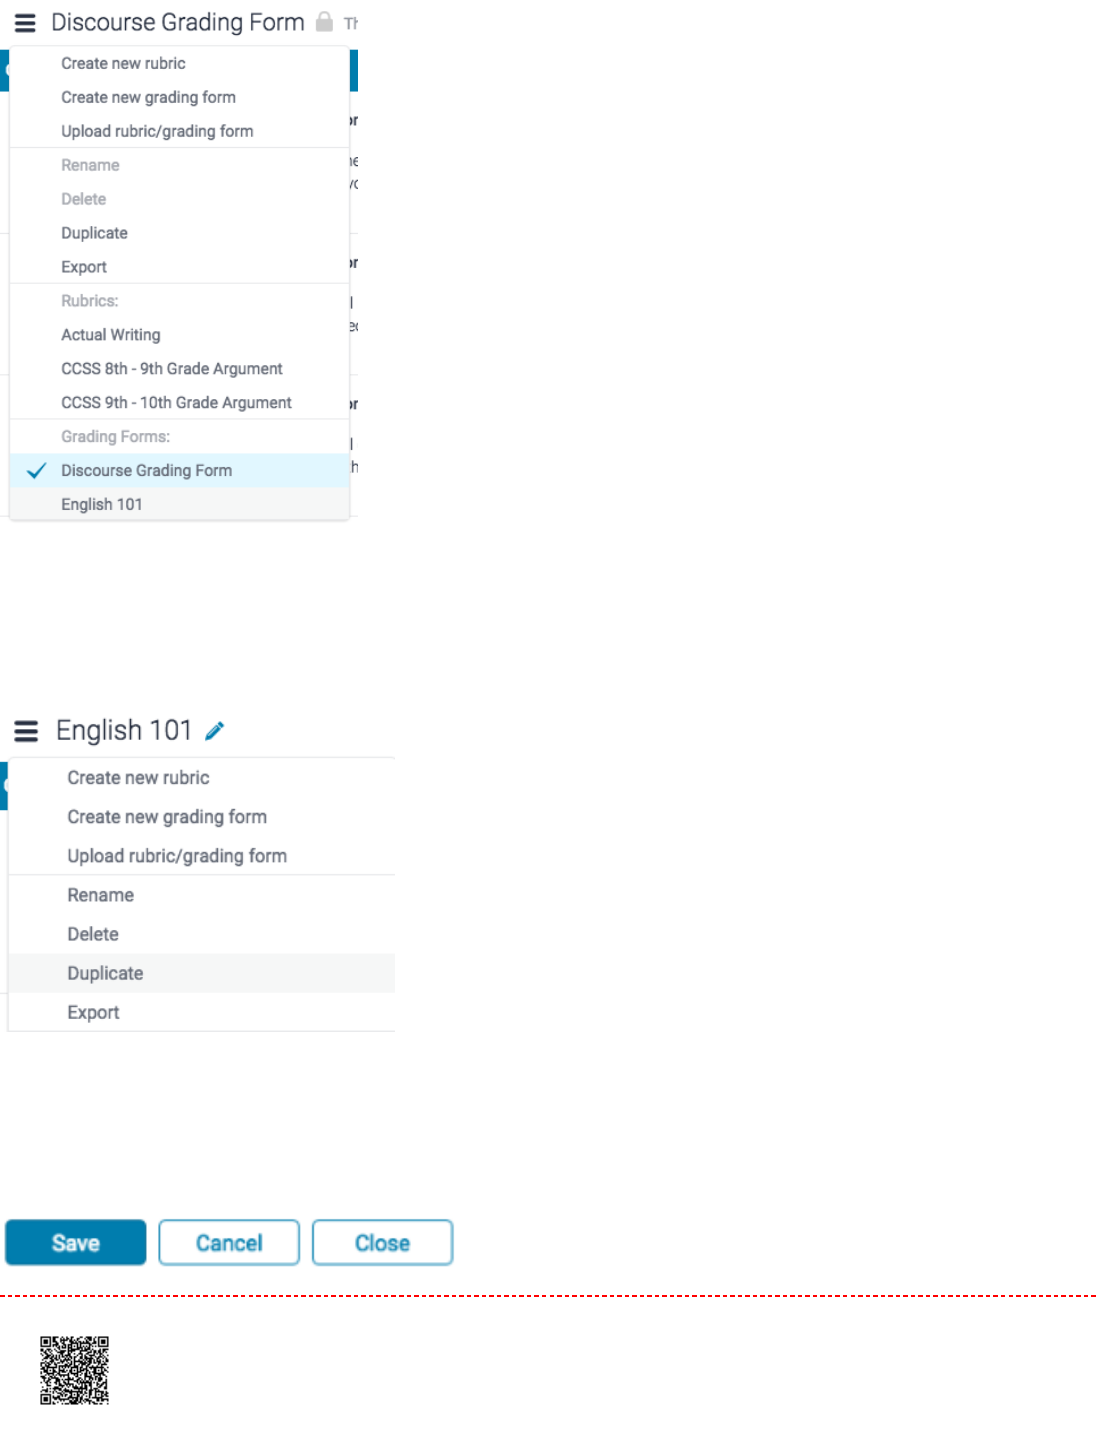
55. Click on the menu icon, then select
Duplicate
from the drop down menu.
66. Click
Save
to save the changes.
198
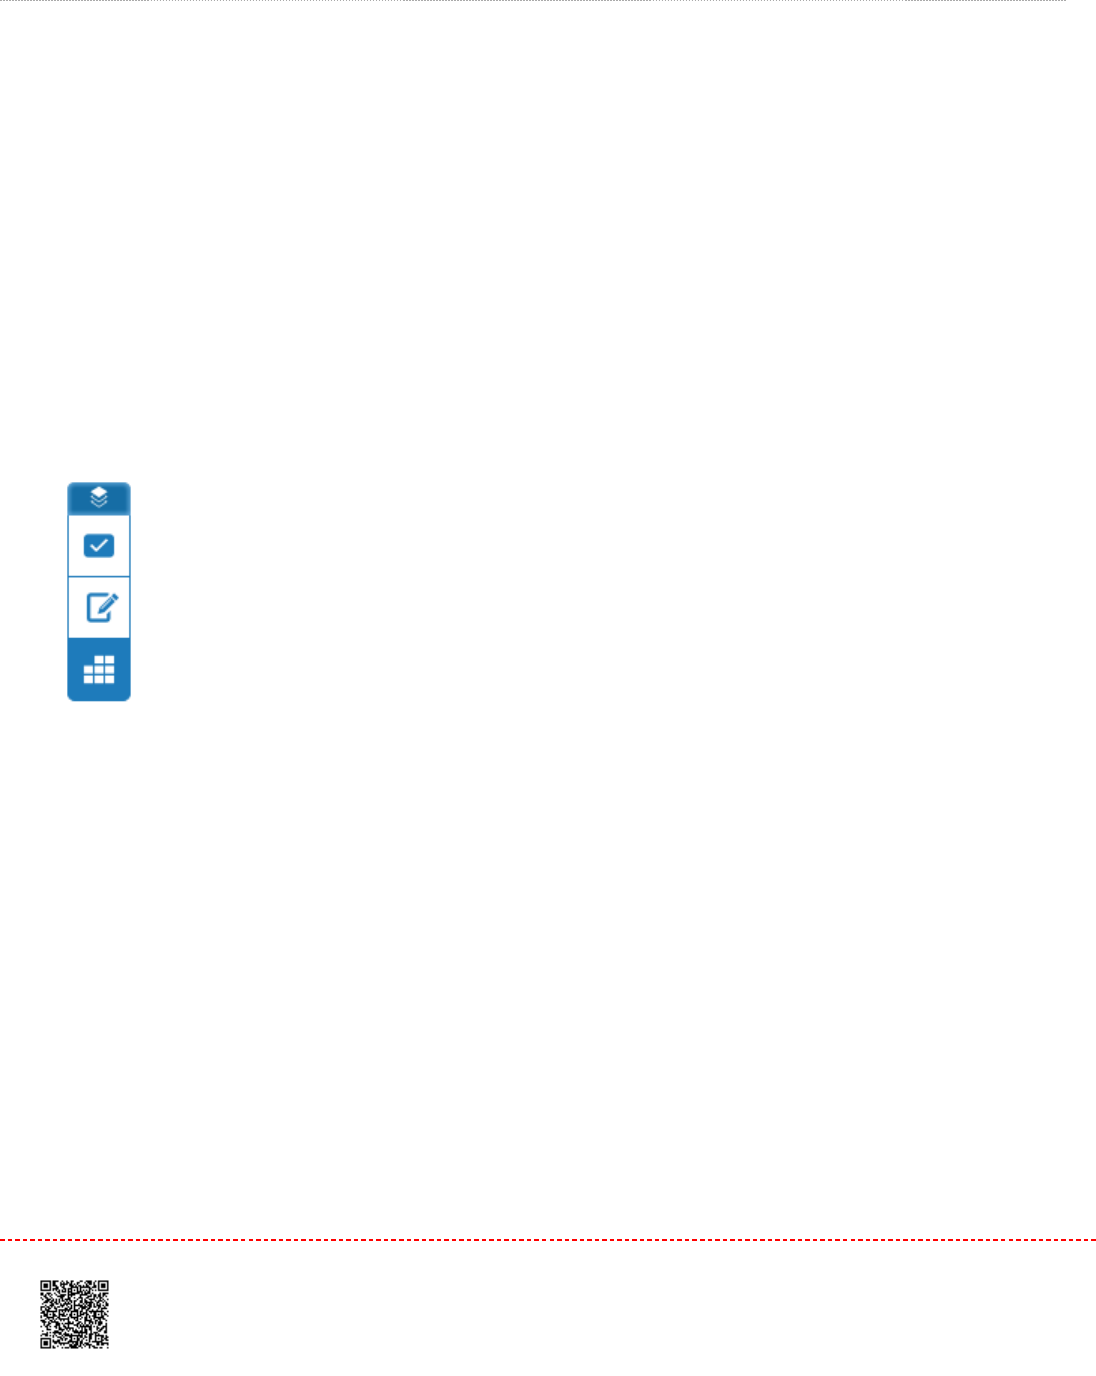
Exporting and Uploading Grading Forms
Within the Rubric and Form Manager, instructors can export grading forms to share with other instructors, or import
grading forms to use when grading papers. Unlike sharing, once a grading form has been imported into an account, it is
then owned by that instructor who may then make any desired changes to the grading form.
Exporting a Grading FormExporting a Grading Form
11. From the online grading toolbar, select the rubric icon to open the
Grading Form
side panel.
22. Click the title of the currently assigned rubric or grading form from the
Rubric
side panel. If nothing is assigned,
click
No Rubric.
This will reveal the
Rubrics and Forms
dropdown list. Click the
Rubric and Form Manager
button.
199

33. Click on the
menu
icon in the top left of the Rubric and Form Manager.
44.
4a.4a. If the grading form you wish to export is selected, move to step 5step 5..
4b.4b. Alternatively, select the grading form you wish to export from the drop-down menu.
200
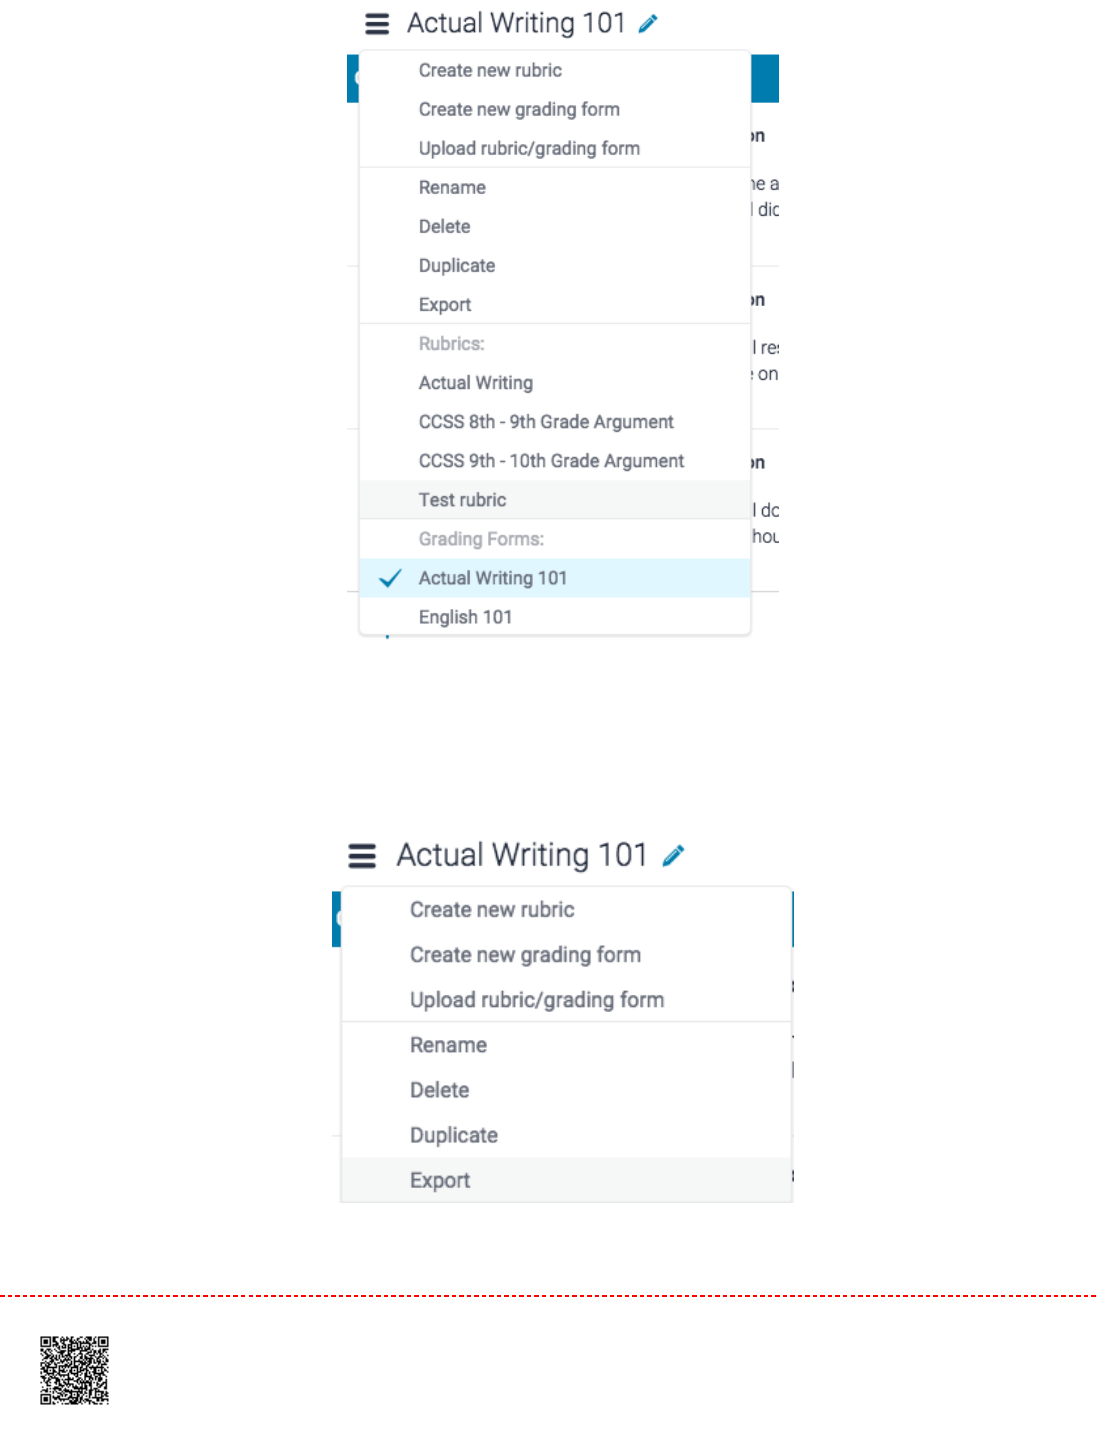
55. Click the
Export
button from the dropdown menu
201
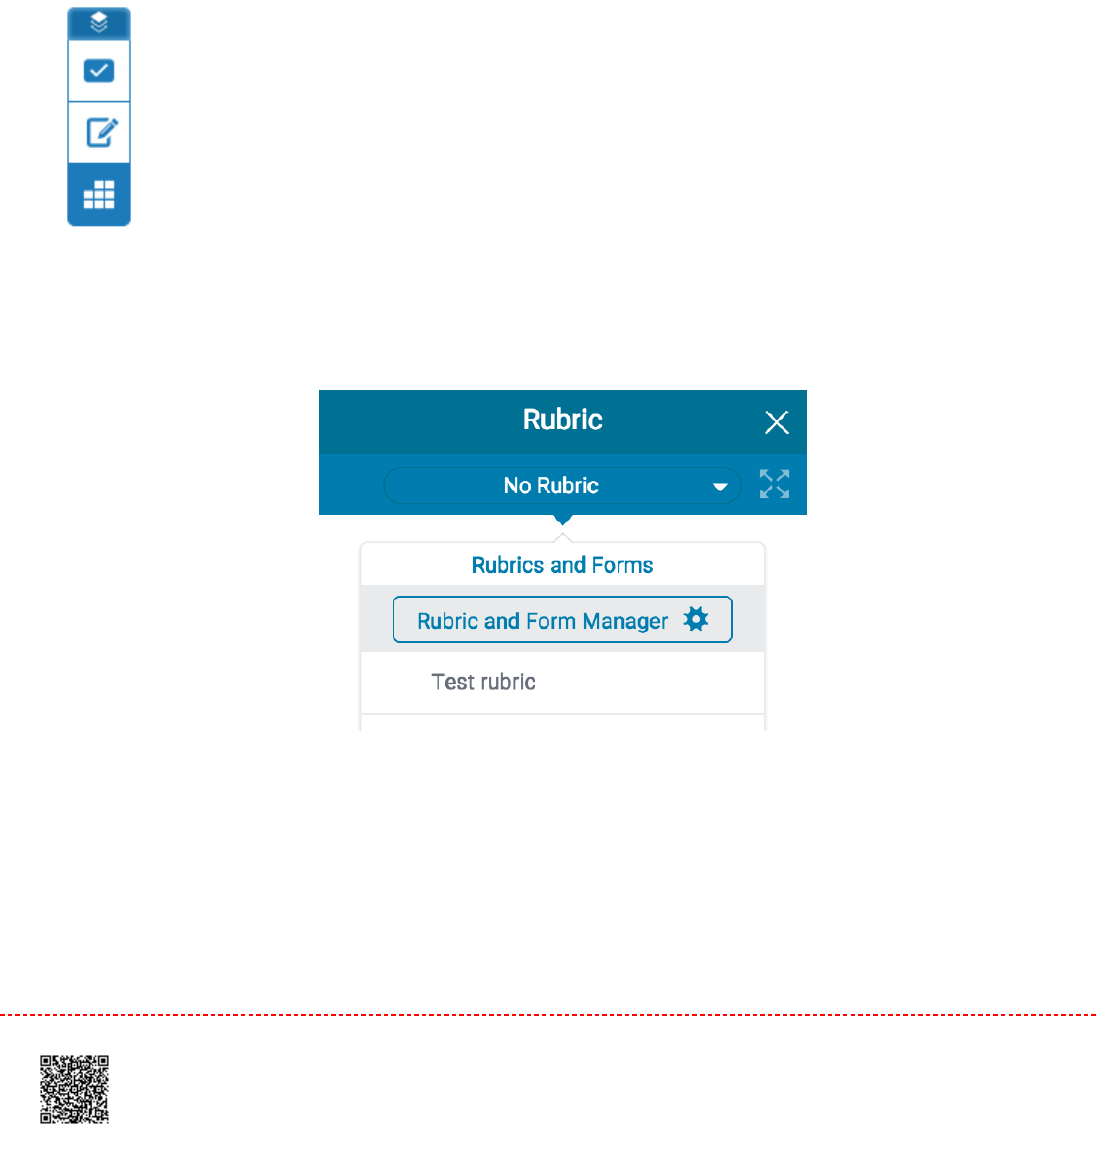
6.6. Your grading form will download to your device.
Uploading a Grading FormUploading a Grading Form
11. From the online grading toolbar, select the rubric icon to open the
Grading Form
side panel.
22. Click the title of the currently assigned rubric or grading form from the
Rubric
side panel. If nothing is assigned,
click
No Rubric.
This will reveal the
Rubrics and Forms
dropdown list. Click the
Rubric and Form Manager
button.
33. Click the
menu
icon in the top left of the Rubric and Form Manager.
202
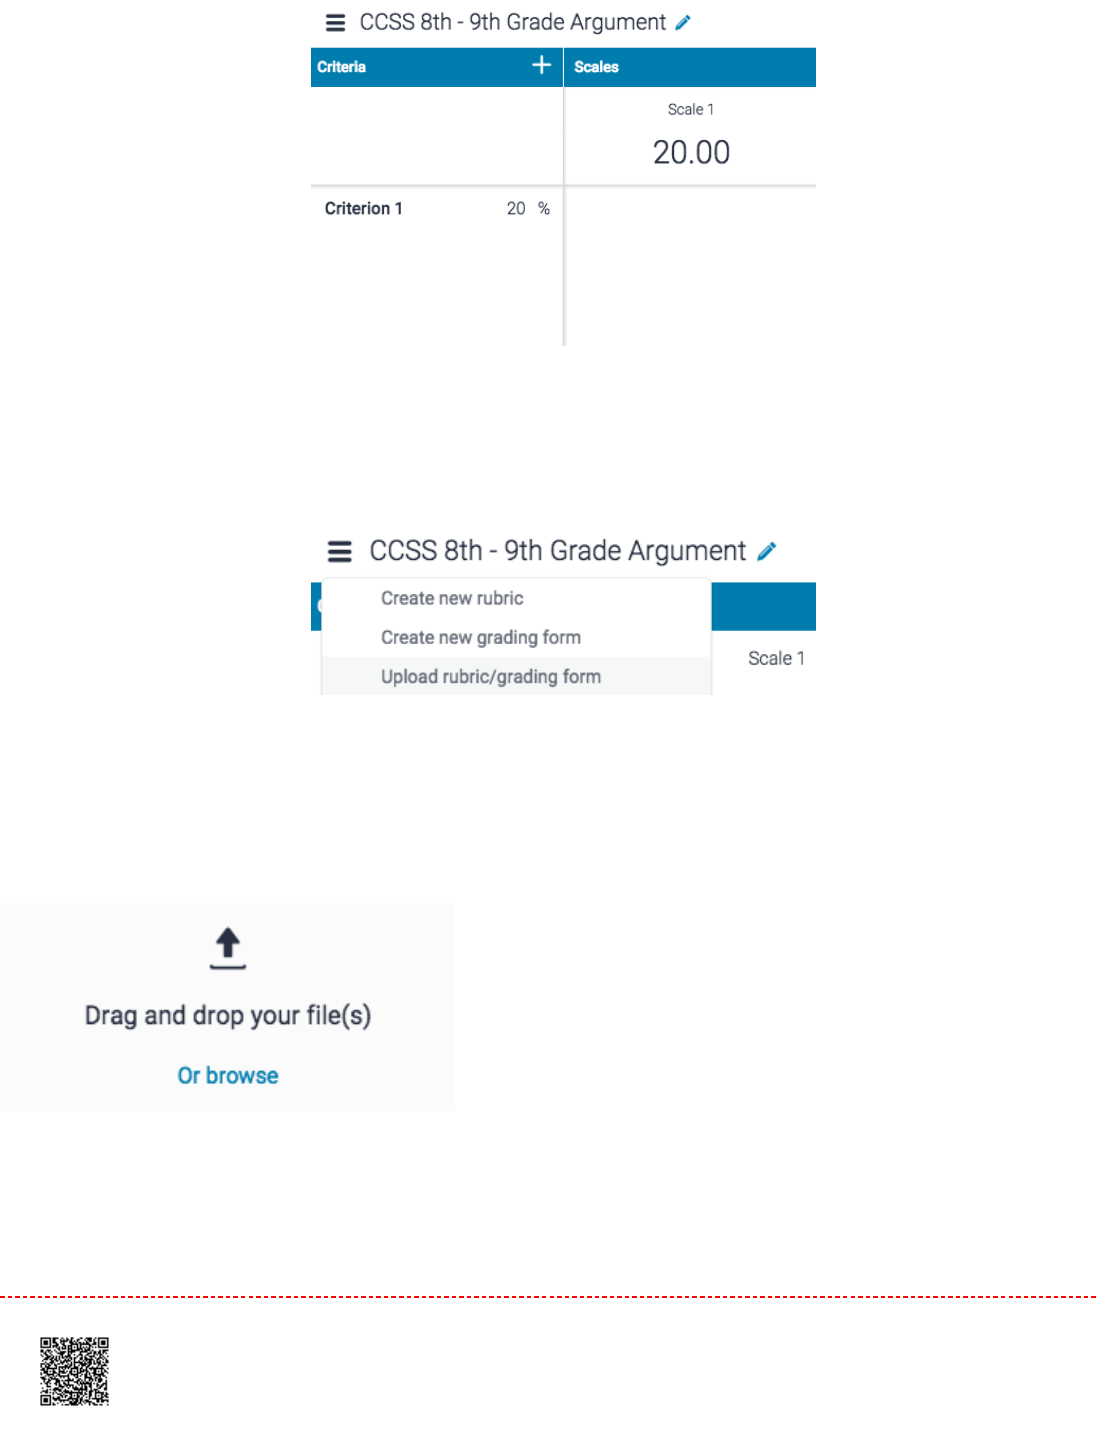
44. Click
Upload rubric/grading form
from the dropdown menu.
5.5. To upload your grading form(s), you can either drag and drop your file(s) into the Rubric and Form Manager, or
browse your computer to select the file.
File requirements:File requirements: Grading forms only support .rbc files. Scoring can only be included once the grading
form is uploaded.
203
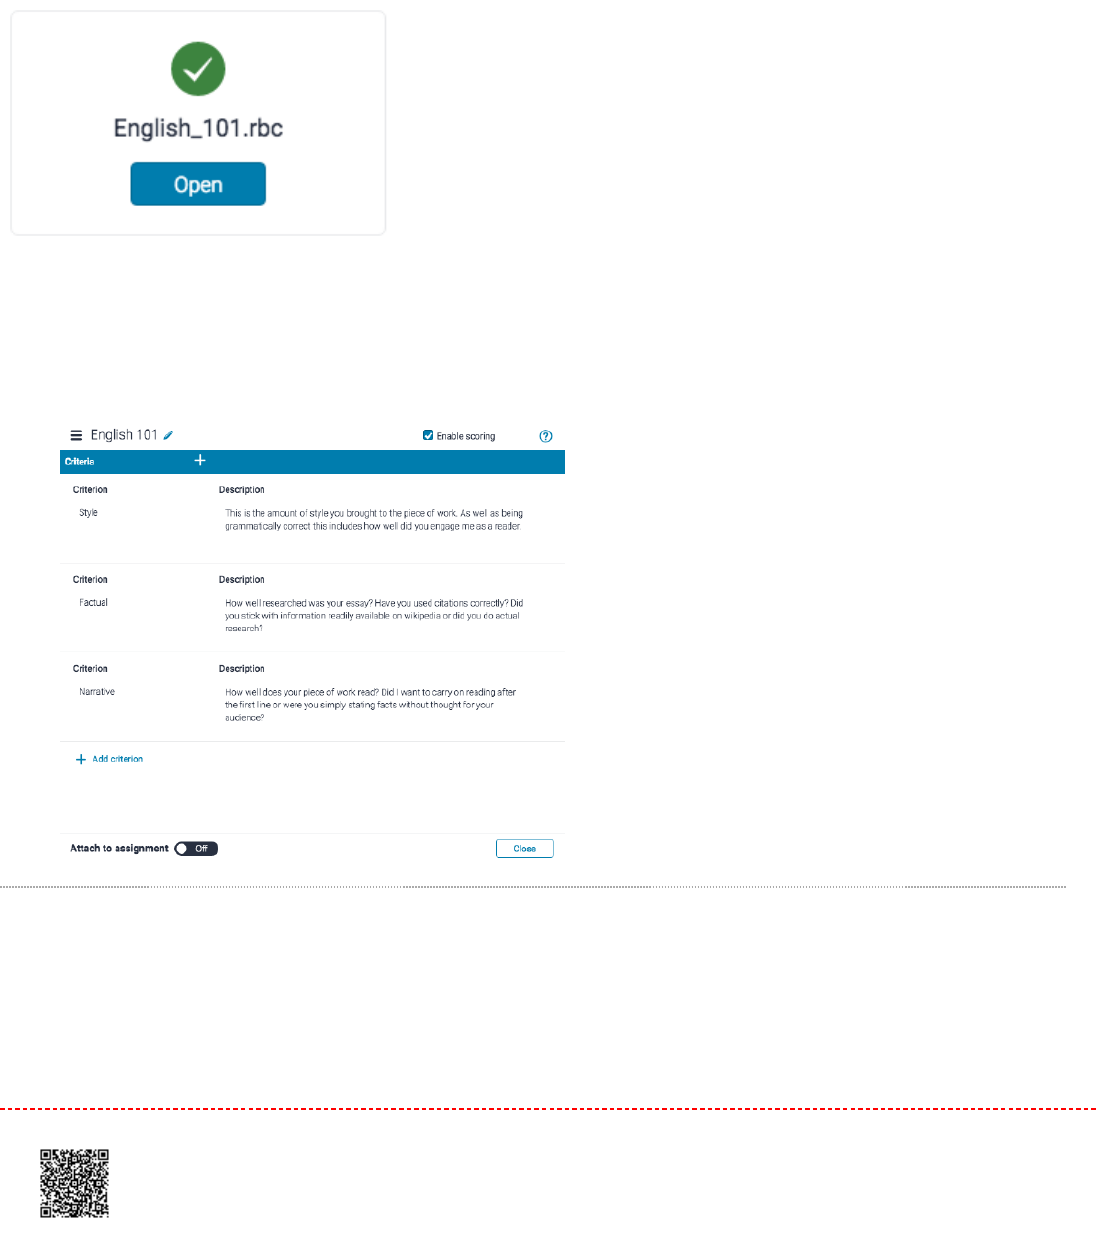
6.6. Once your file has uploaded successfully, click the
Open
button to open the grading form in the Rubric and
Form Manager
7.7. Your grading form will now be fully editable in the Rubric and Form Manager
Attaching a Grading Form
11. Click the rubric icon from the online grading toolbar to navigate to the
Grading Form
side panel.
204
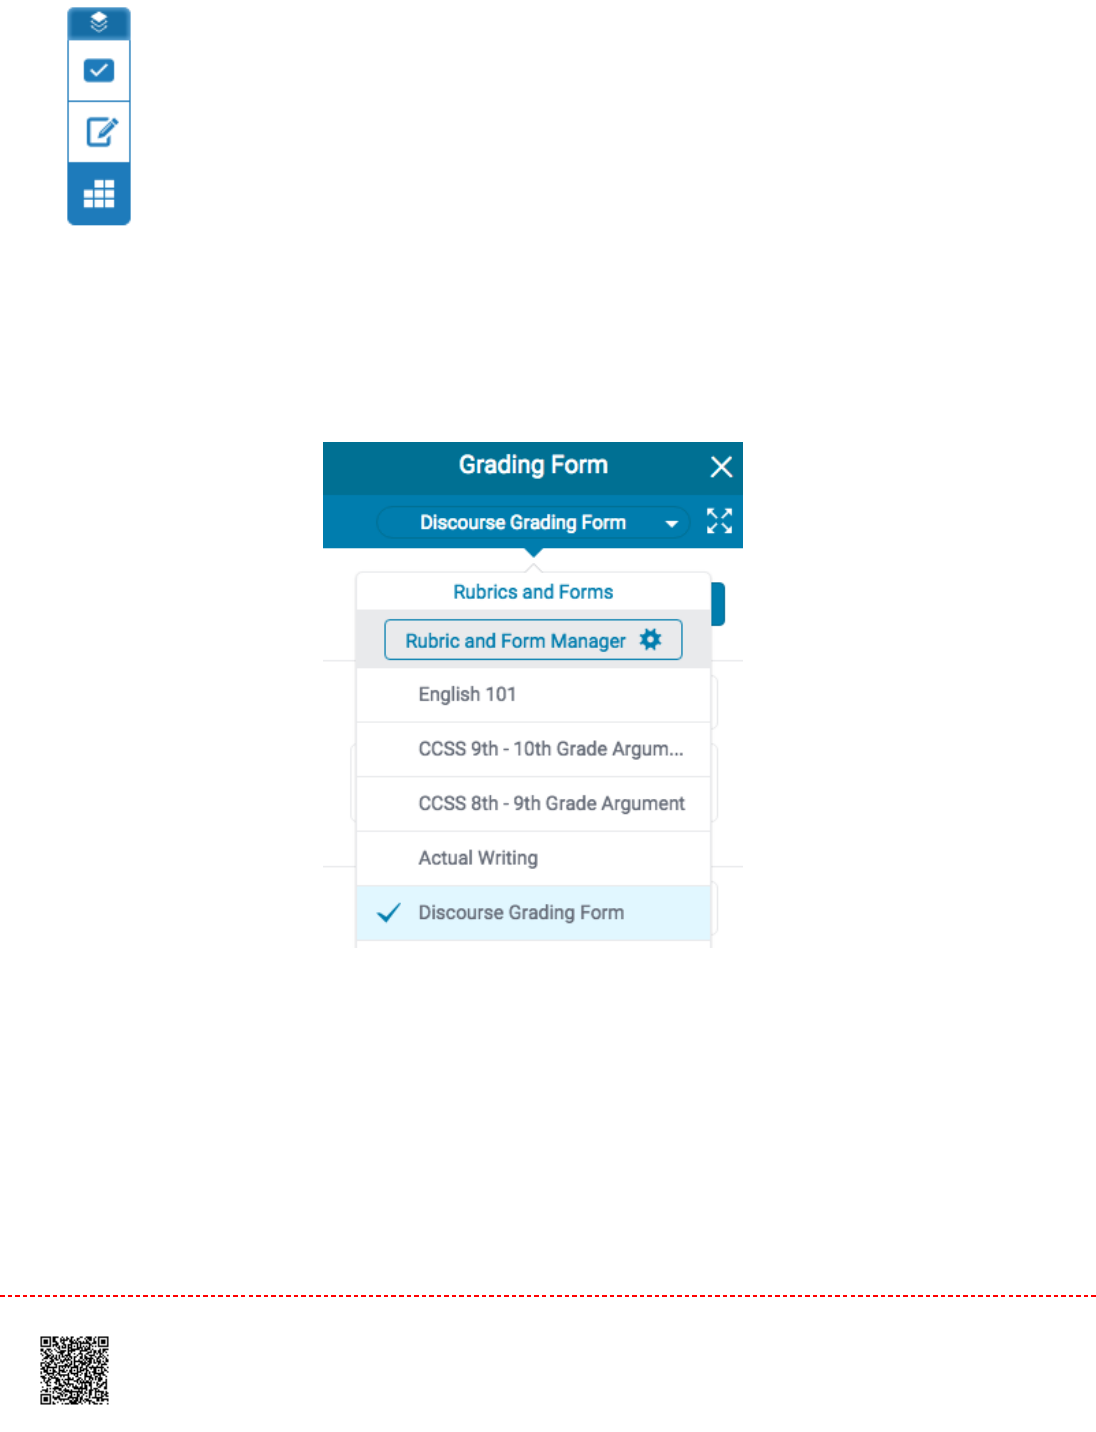
22. Click the title of the currently assigned grading form from the
Rubric
side panel. If no grading form is assigned,
click
No Rubric.
This will reveal the
Rubrics and Forms
dropdown list. Click the
Rubric and Form Manager
button.
33. Click the
menu
icon in the top left of the Rubric and Form Manager.
205
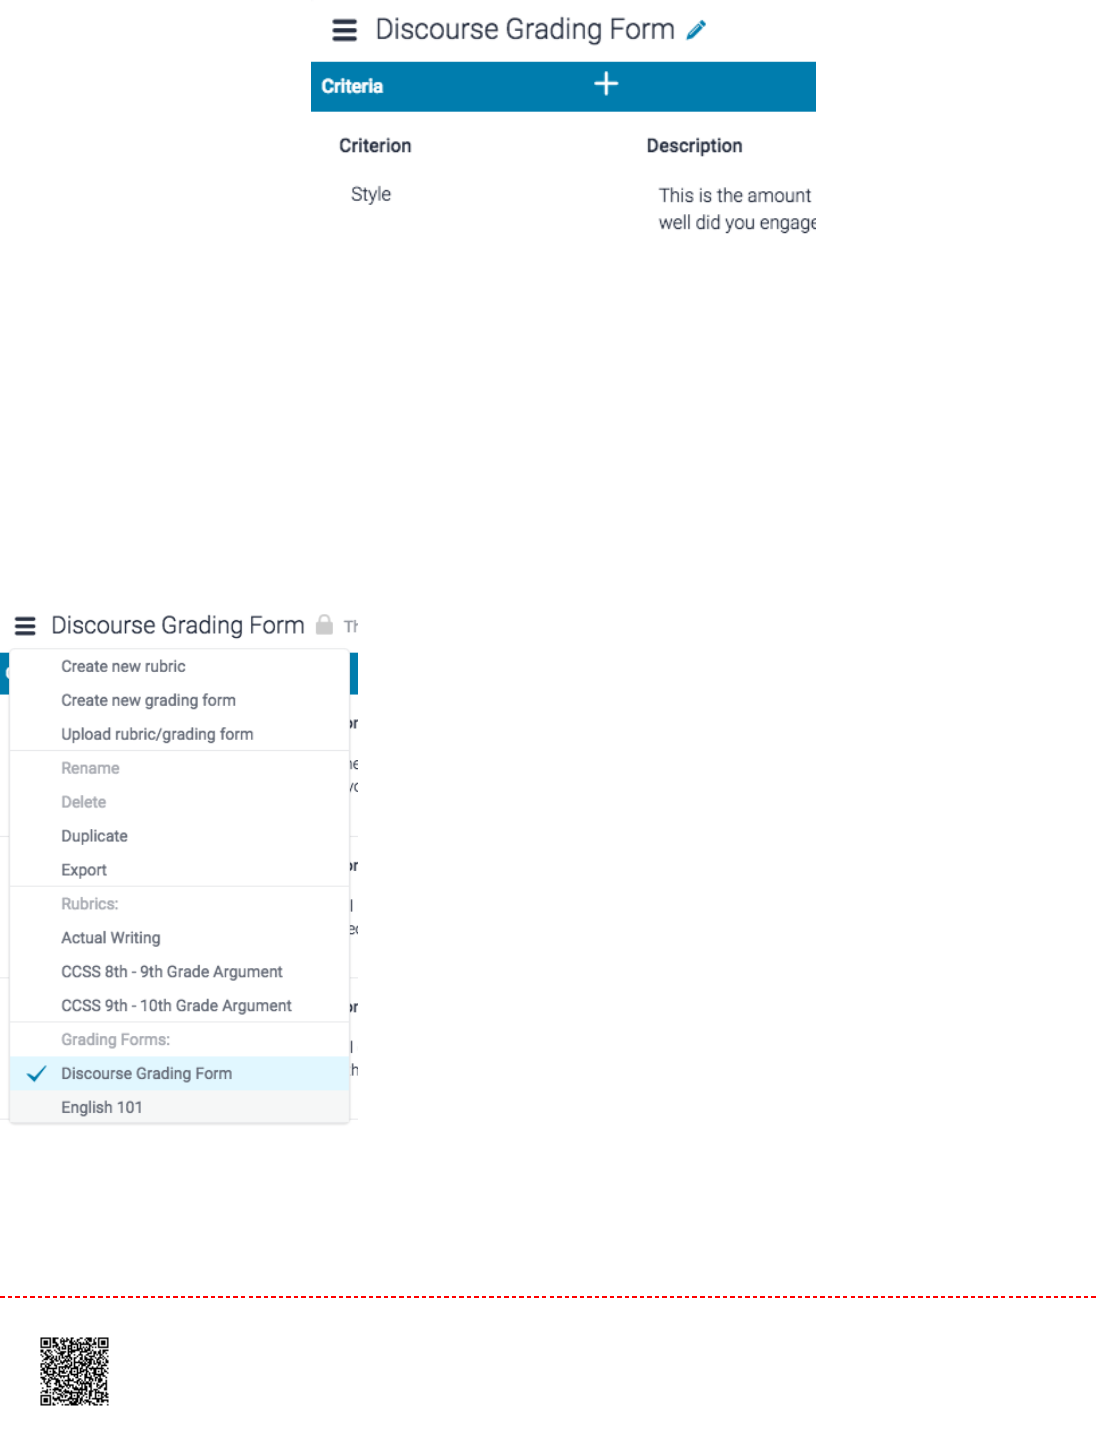
44.
4a.4a. If the grading form you wish to attach is selected, move to step 5step 5..
4b.4b. Alternatively, select the grading form you wish to attach to the assignment from the dropdown menu.
5.5. The grading form will now be displayed within the Manager. In the bottom left-hand corner of the Manager,
toggle
Attach to assignment
as
On.
The same can be done to detach a grading form from an assignment.
206
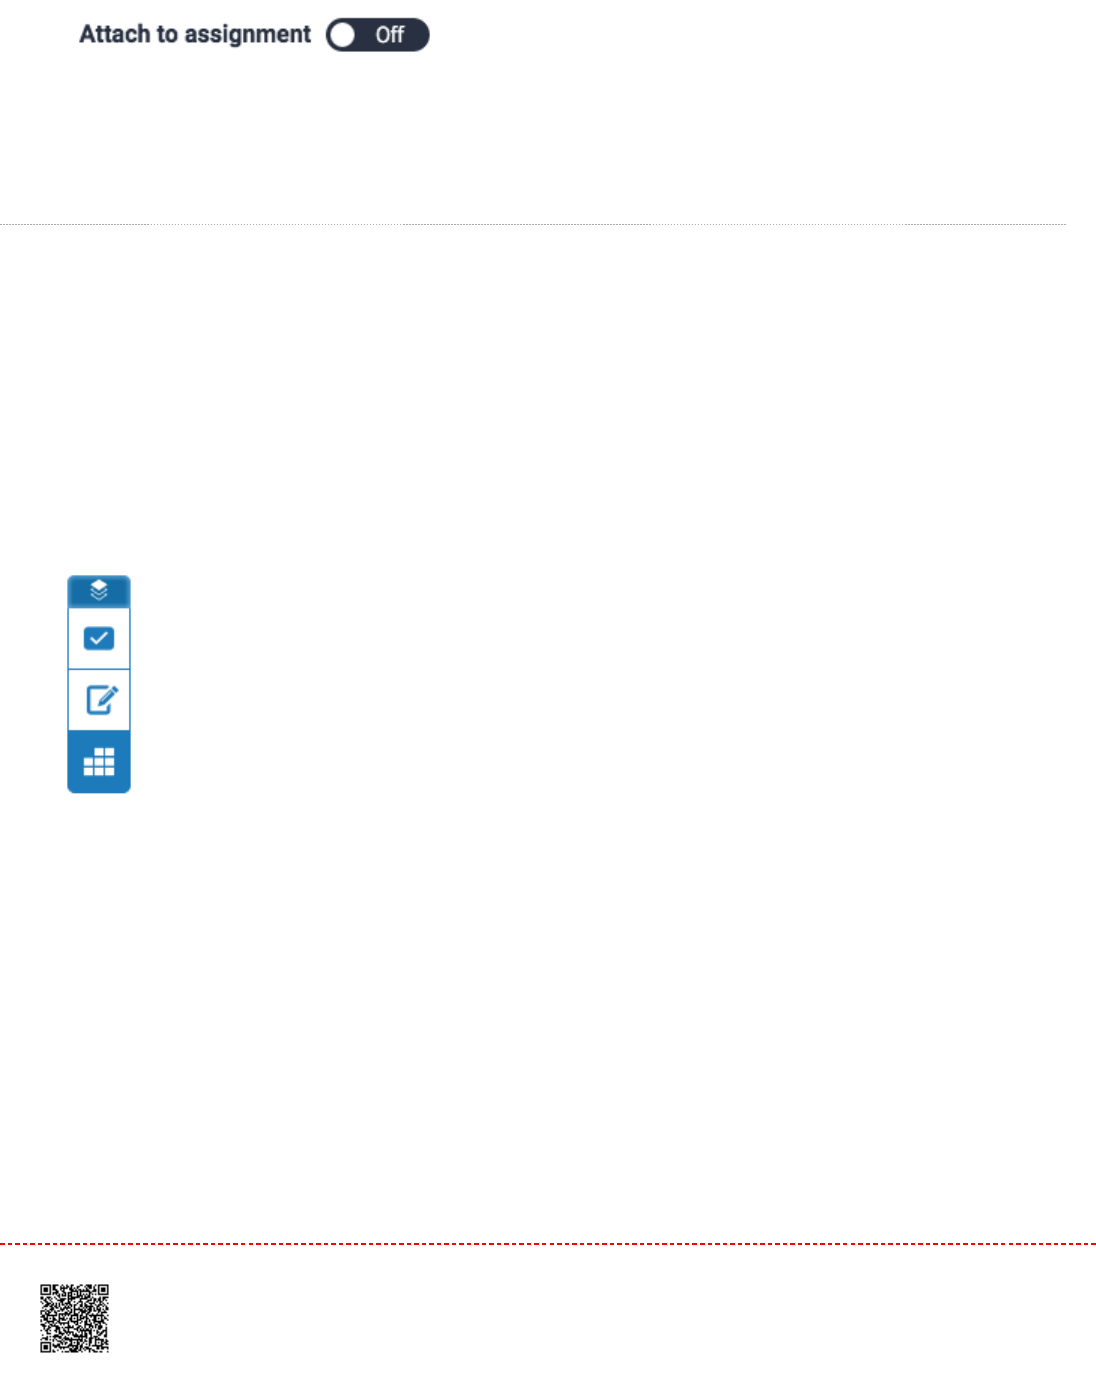
Note:Note: Changing or detaching a grading form will remove all existing scoring from papers in this
assignment. Overall grades for previous graded papers will remain.
Grading in the Grading Form
Grading forms give you the ability to provide free-form feedback and scores to your students for a set of criteria.
11. Click the rubric icon from the online grading toolbar to navigate to the
Rubric
side panel
22.
2a.2a. To grade with the grading form, ensure the form is attached to the assignment.
207
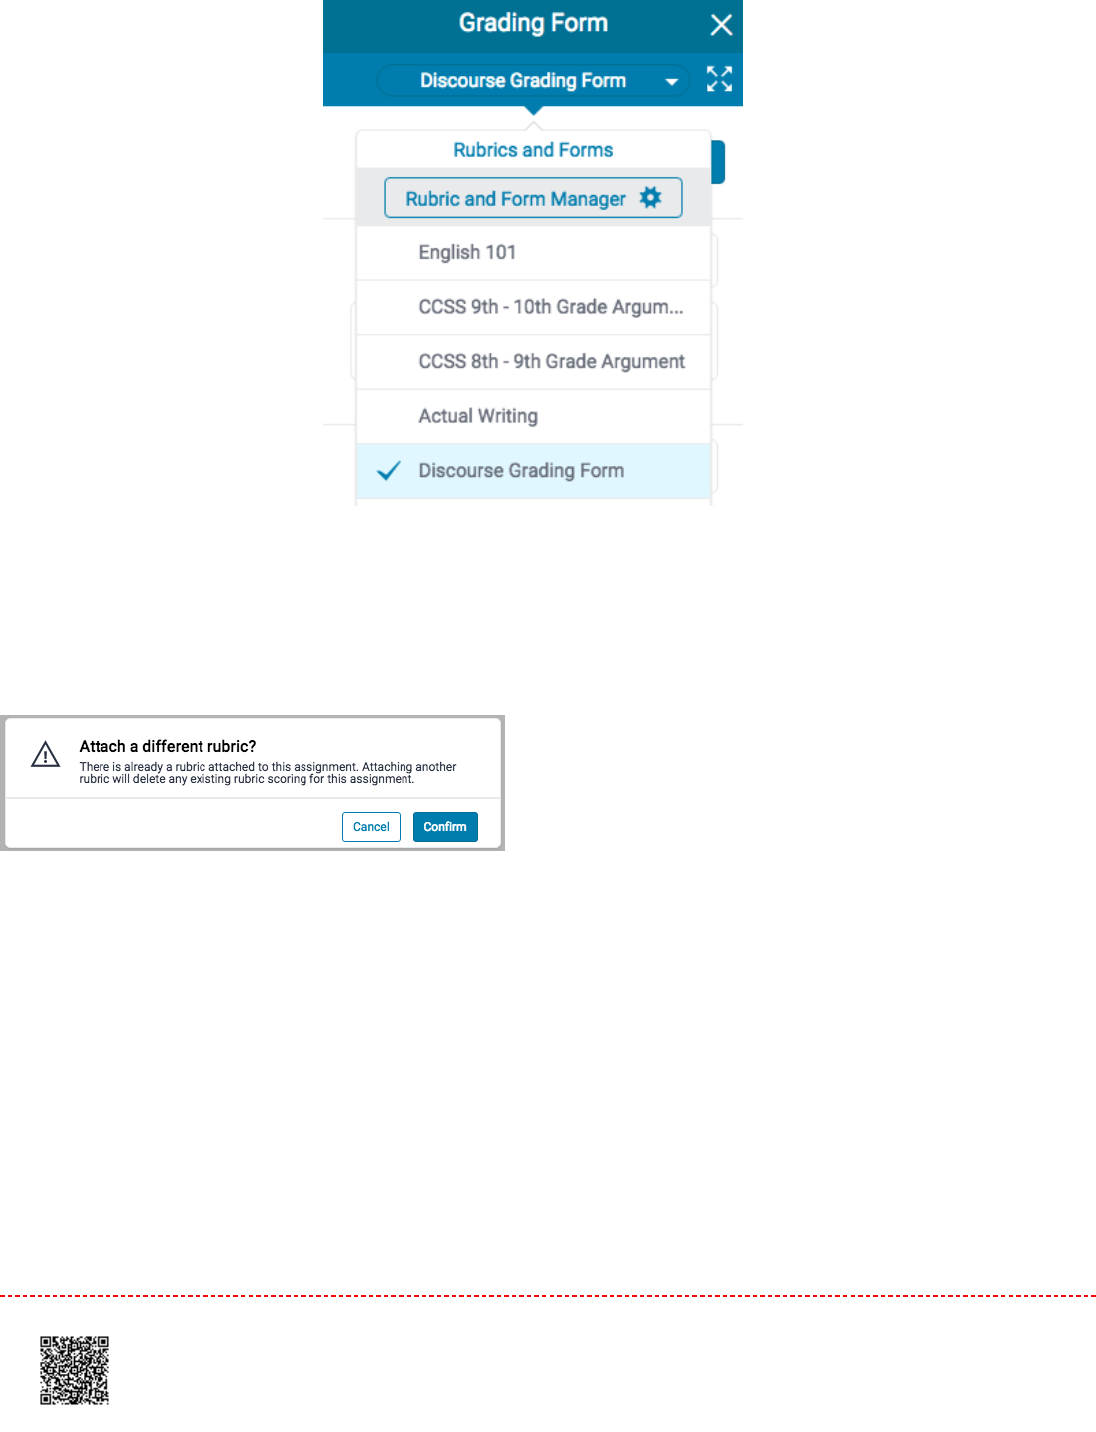
2b.2b. If the grading form is not attached to the assignment, select the grading form title. A pop-up box will
appear asking you to confirm the new attachment. Click
Confirm
to proceed.
3.3.
3a.3a. To grade with the grading form, click on the text box for each criterion and begin typing.
3b.3b. If the grading form has scoring enabled, enter the grade the student should achieve for each
criterion. Click on the
Apply to grade
button at the top of the grading form side panel to apply this value to
the assignment's total point value. Once a grade is applied, it will appear in the document viewer.
208
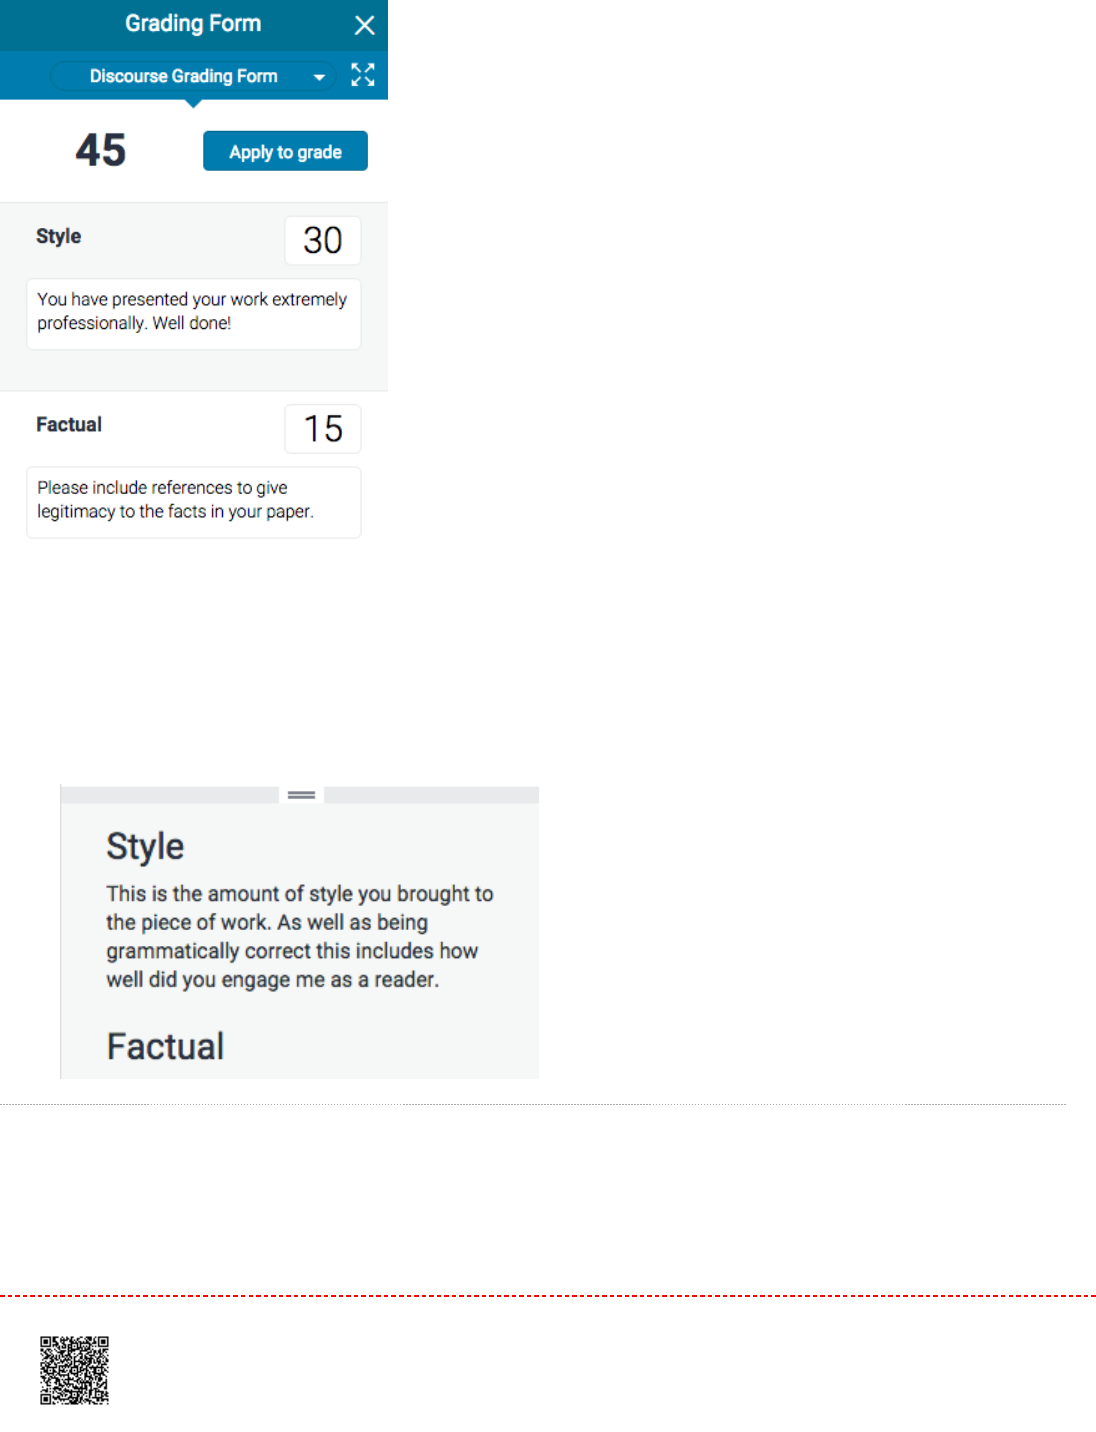
4.4. For more information concerning grading form criteria, slide this information up from the bottom of the grading
form side panel. This will help you apply your grades and comments.
Grading in the Expanded Grading Form Manager
209
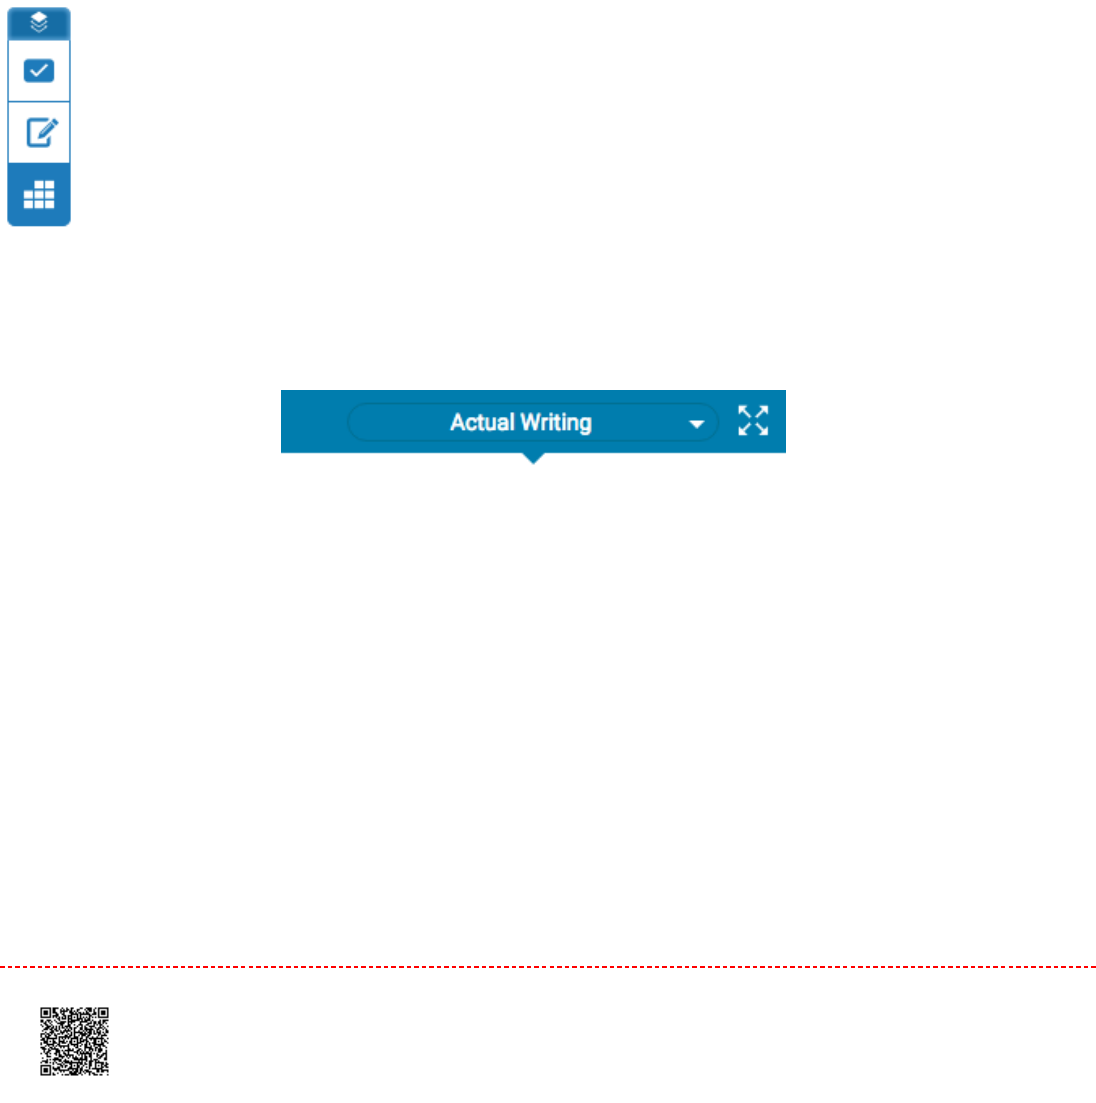
You can use the expanding grading form in a separate window to grade papers more efficiently. This opens in a new
window and will show you the grading form currently attached to the assignment. The student's name can be seen in the
top right hand corner of the expanded grading form. You can navigate to other students using the standard navigation
options and continue to use the expanded grading form to grade each student that has submitted a paper to the
assignment.
11. Click the rubric icon from the online grading toolbar to navigate to the
Rubric
side panel
2.2. To view the expanded grading form within another window, click on the expand grading form icon to the right of
the title of the currently selected grading form.
3.3. The expanded grading form displays the criteria in order to allow instructors to easily make comments and
score the paper.
210
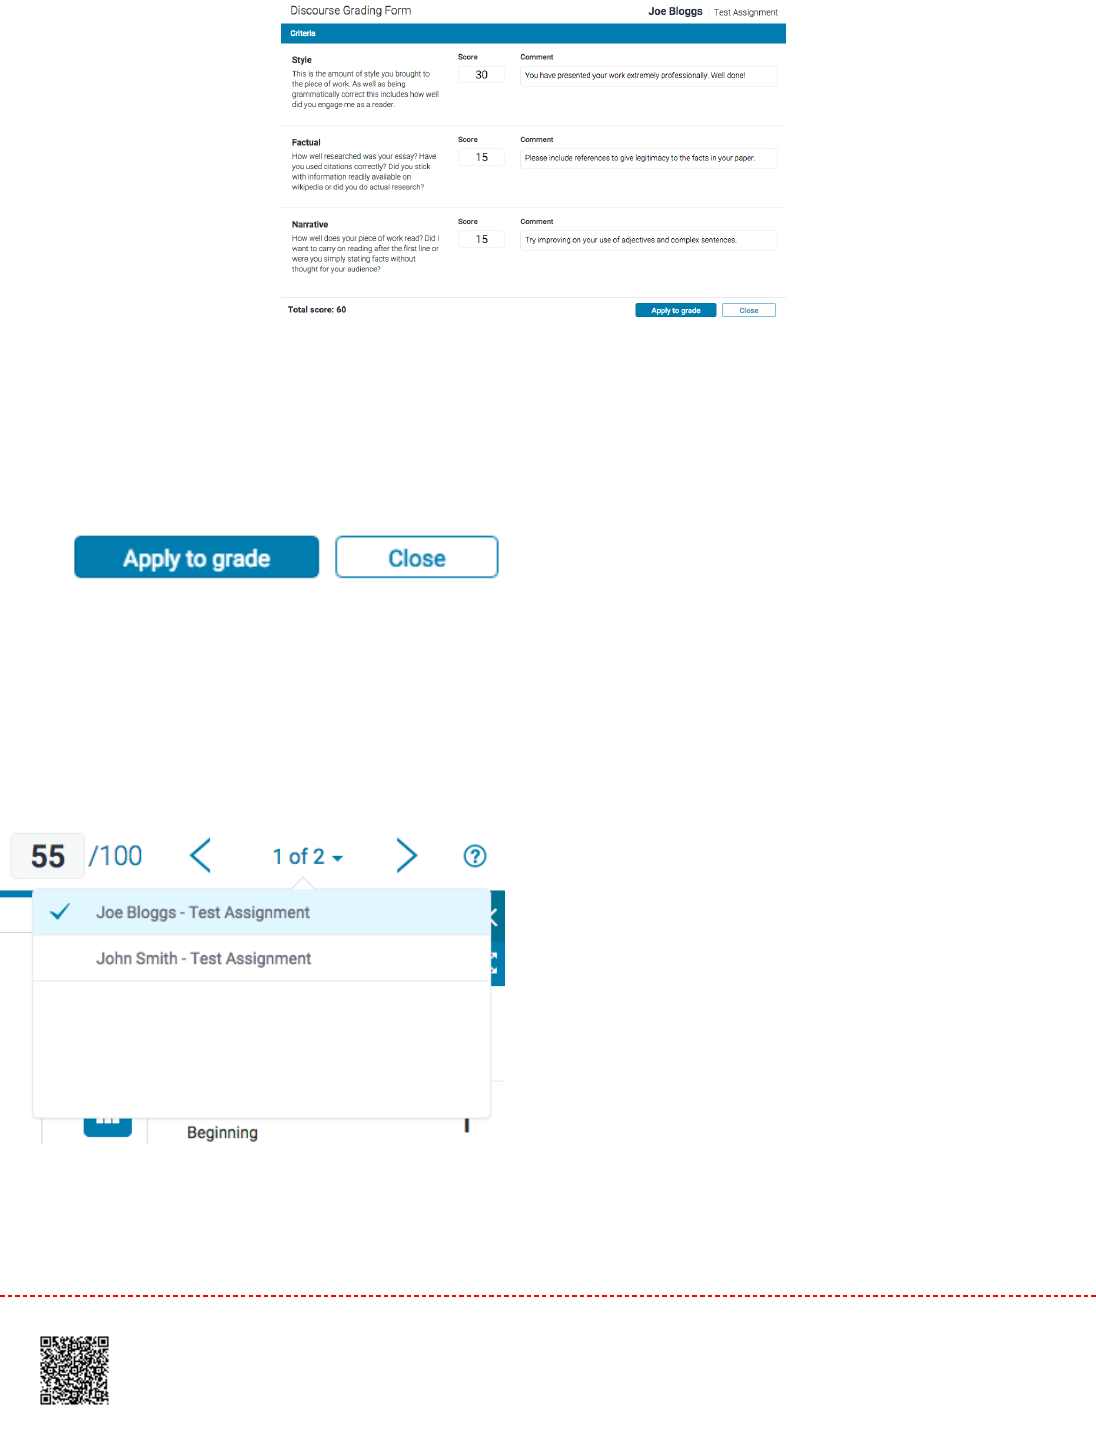
4.4. Click the
Apply to Grade
button at the bottom of the expanded grading form window to apply the score to your
student's grade. This will add it as a percentage of the maximum total of points for the assignment.
5.5. To continue grading other student papers in the expanded grading form, use the navigation arrows in the
Feedback Studio, or use the navigation drop down to select a specific paper. This will automatically change the
paper you are scoring in the expanded grading form.
6.6. Click
Close
to exit the expanded rubric.
211

212


Viewing the Similarity Report
Introduction
The Match Overview gives you a breakdown of all the matches that have been found on a paper.
At the top of the page is a student's similarity score. Turnitin compares papers against an ever expanding database of
internet pages, archived pages that might not be available anymore, a subscription repository of periodicals, journals,
publications, and a repository of previously submitted papers. This comparison can be completed against any or all of
these repositories from assignment settings.
The similarity score is a percentage of a paper's content that matches to Turnitin's databases; it is not an assessment of
whether the paper includes plagiarized material. The similarity report allows instructors to easily find matches or similar
text within submitted work.
Media, iframe, embed and object tags are not supported inside of
a PDF.
215
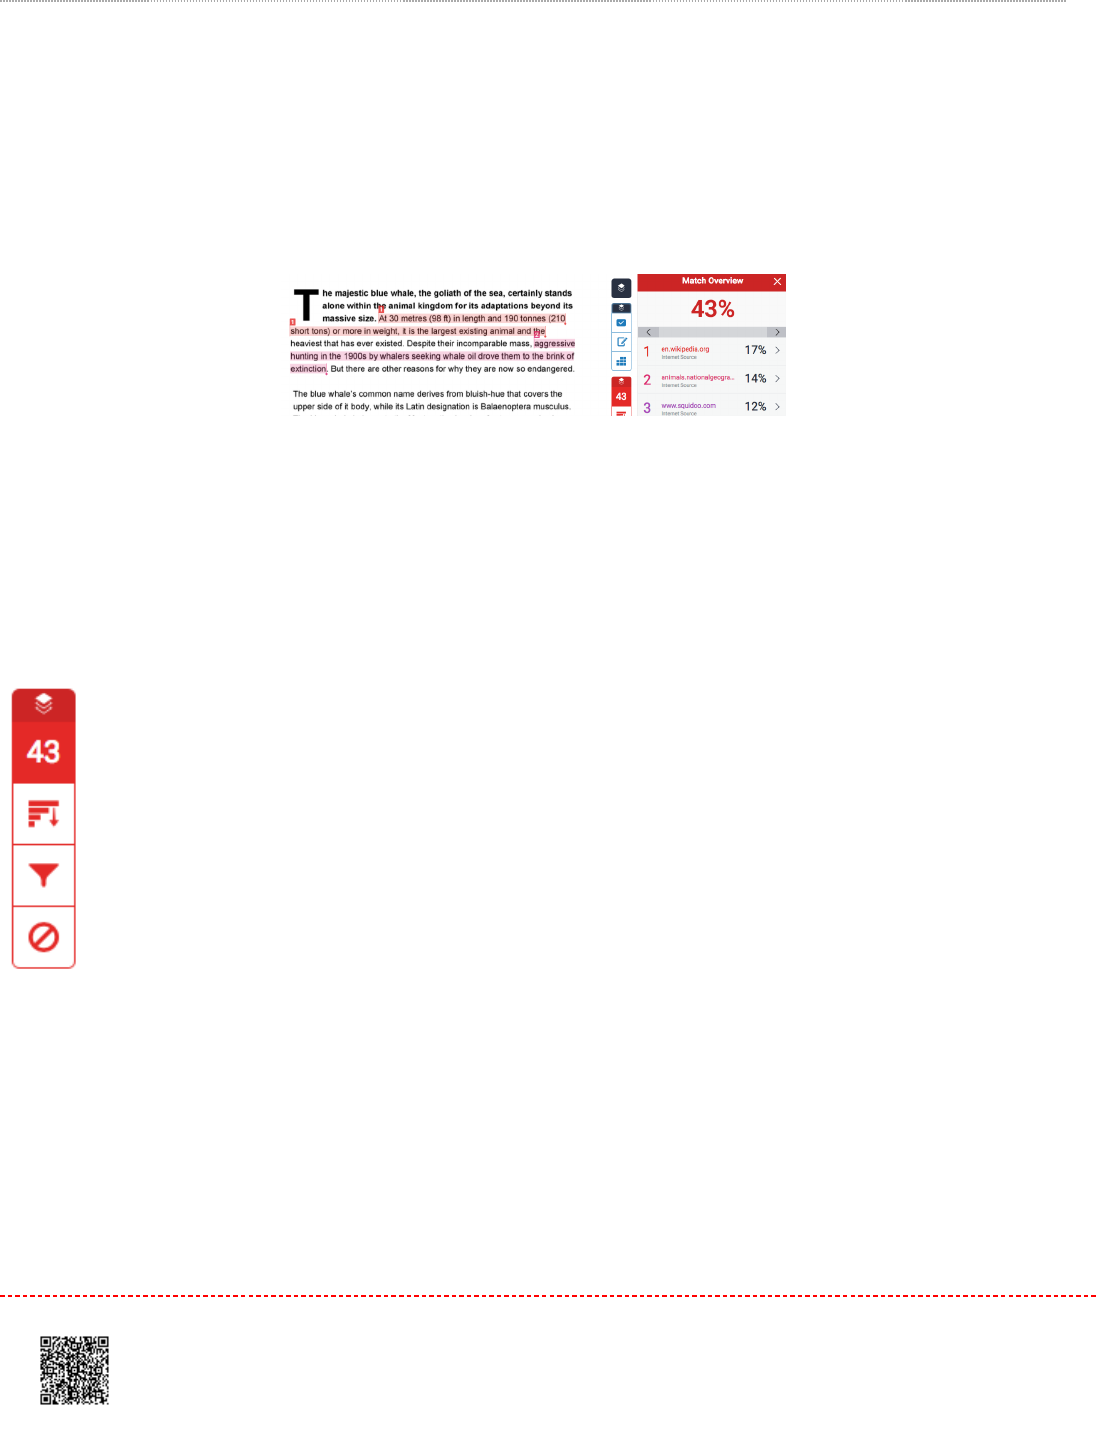
Viewing Similarity Matches
Matches can be found in the Match Overview side panel, ordered by highest similarity match to lowest. Each match is
numbered in the Match Overview side panel, helping you to identify this match on the paper.
1.1. To view the Match Overview, click the red numerical similarity score from the similarity toolbar. If the similarity
layer was inactive, it will now be activated, highlighting all matches on the paper.
2.2. All matches are displayed within the
Match Overview
side panel. A list of matches will be displayed in
descending order.
216
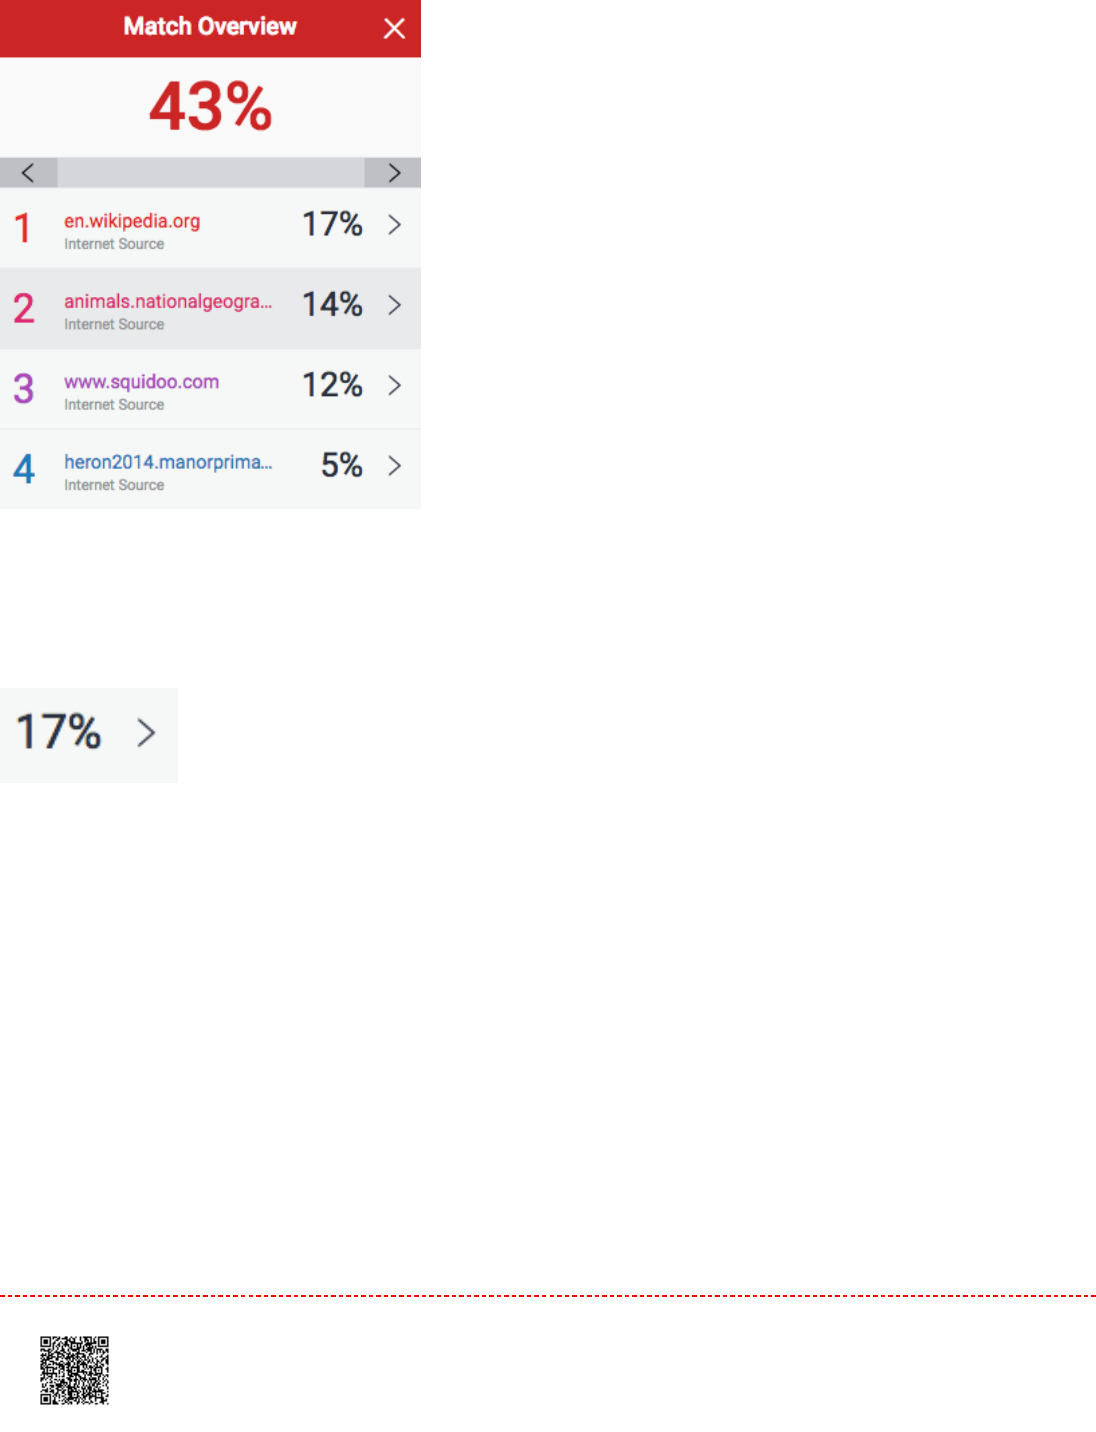
3.3. To access each match in more detail, click the arrow to the right of each similarity percentage
4.4. The Match Breakdown will display all sources identified for each match. To view the sources on-paper, simply
click on any source in the Match Breakdown.
217
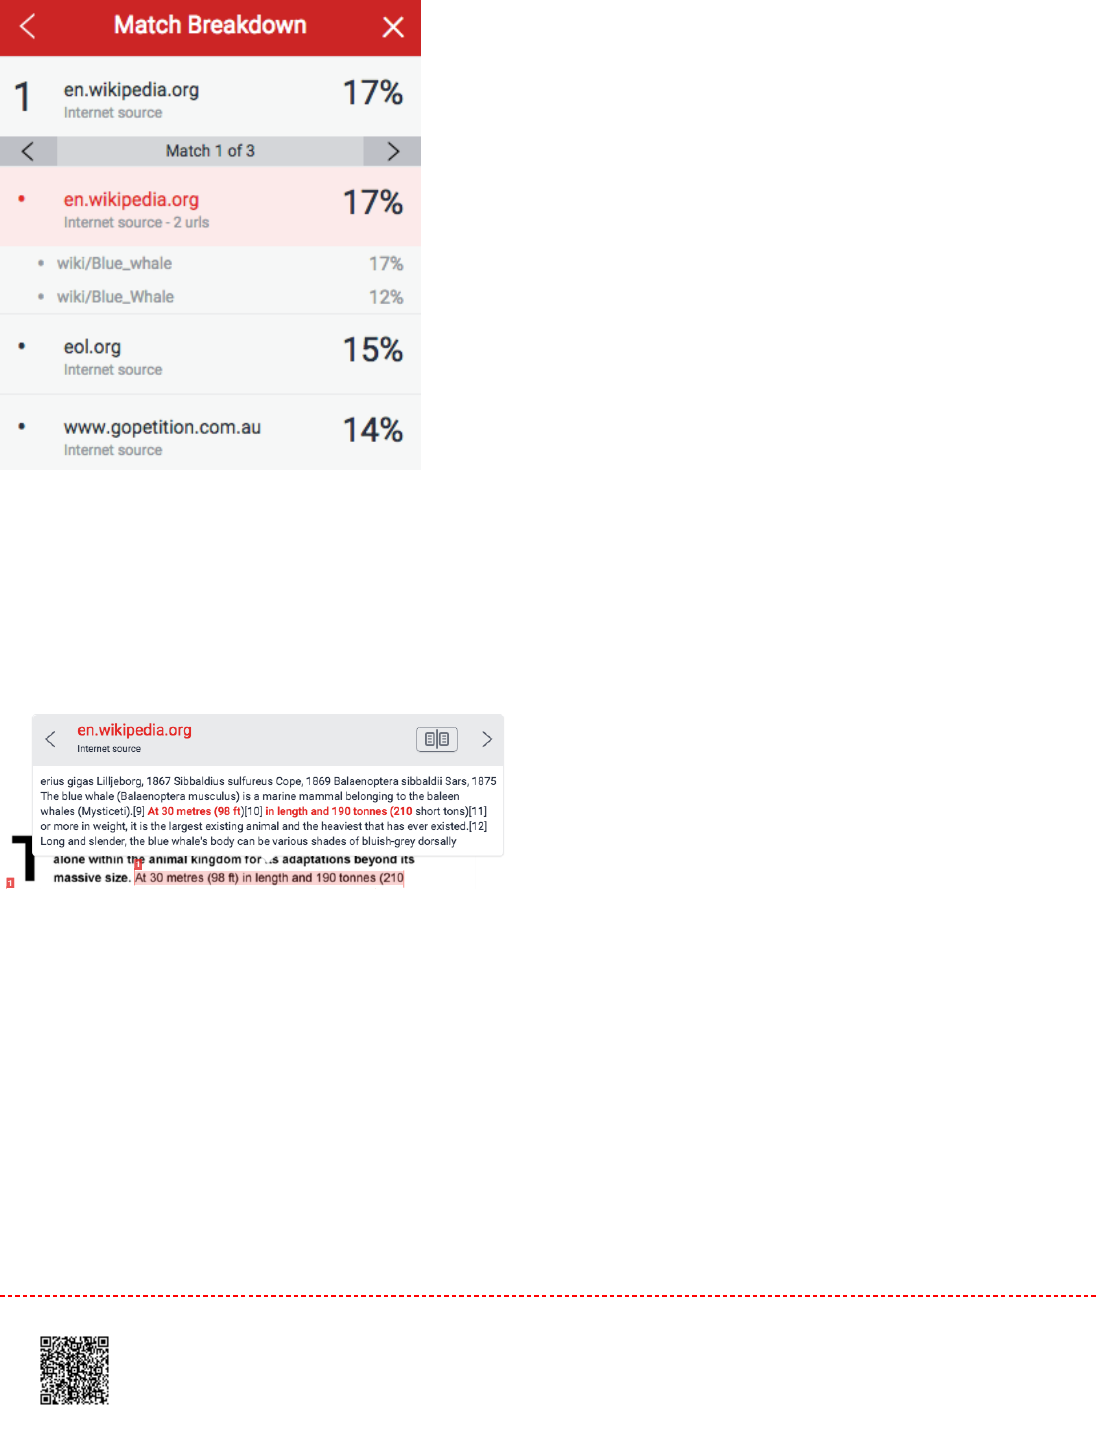
5.5. A source box will appear on the paper, revealing where in the source the text has been identified. If you would
like to read the full source, click the book icon in the top right-hand corner of the box. You can also access this
source box by clicking the red match flag to the left of the highlighted text.
Note:Note: Click the left or right arrow in the source box to move between sources.
6.6. The full source text can now be viewed in the
Full Source Text
side panel, with all matching text shown in red.
218
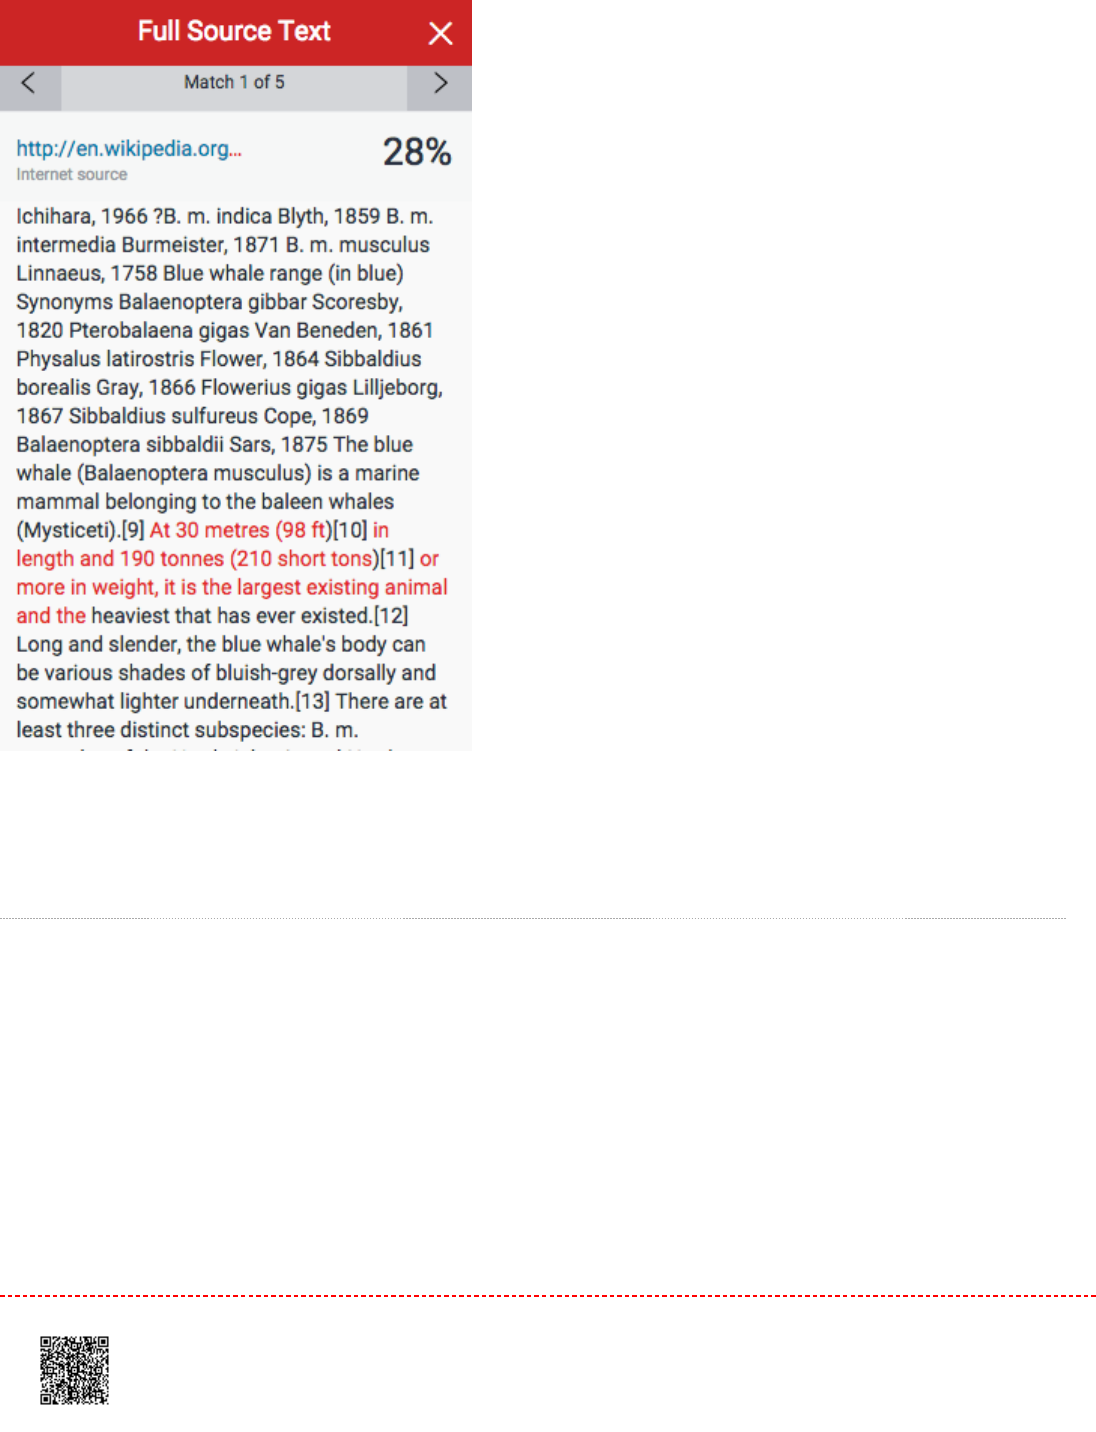
Note:Note: Click the source hyperlink in either the source box or side panel to access the website from which
the match was identified.
Viewing Sources
In the
All Sources
side panel, all of the sources that have been found are displayed and sorted by highest percentage
match. Clicking on any source will change the navigation bar at the top of the page, revealing the number of times a
particular source has matched in the paper.
1.1. To view all sources, click the red
All sources
icon from the similarity toolbar. If the similarity layer was inactive,
it will now be activated, highlighting all on-paper matches.
219
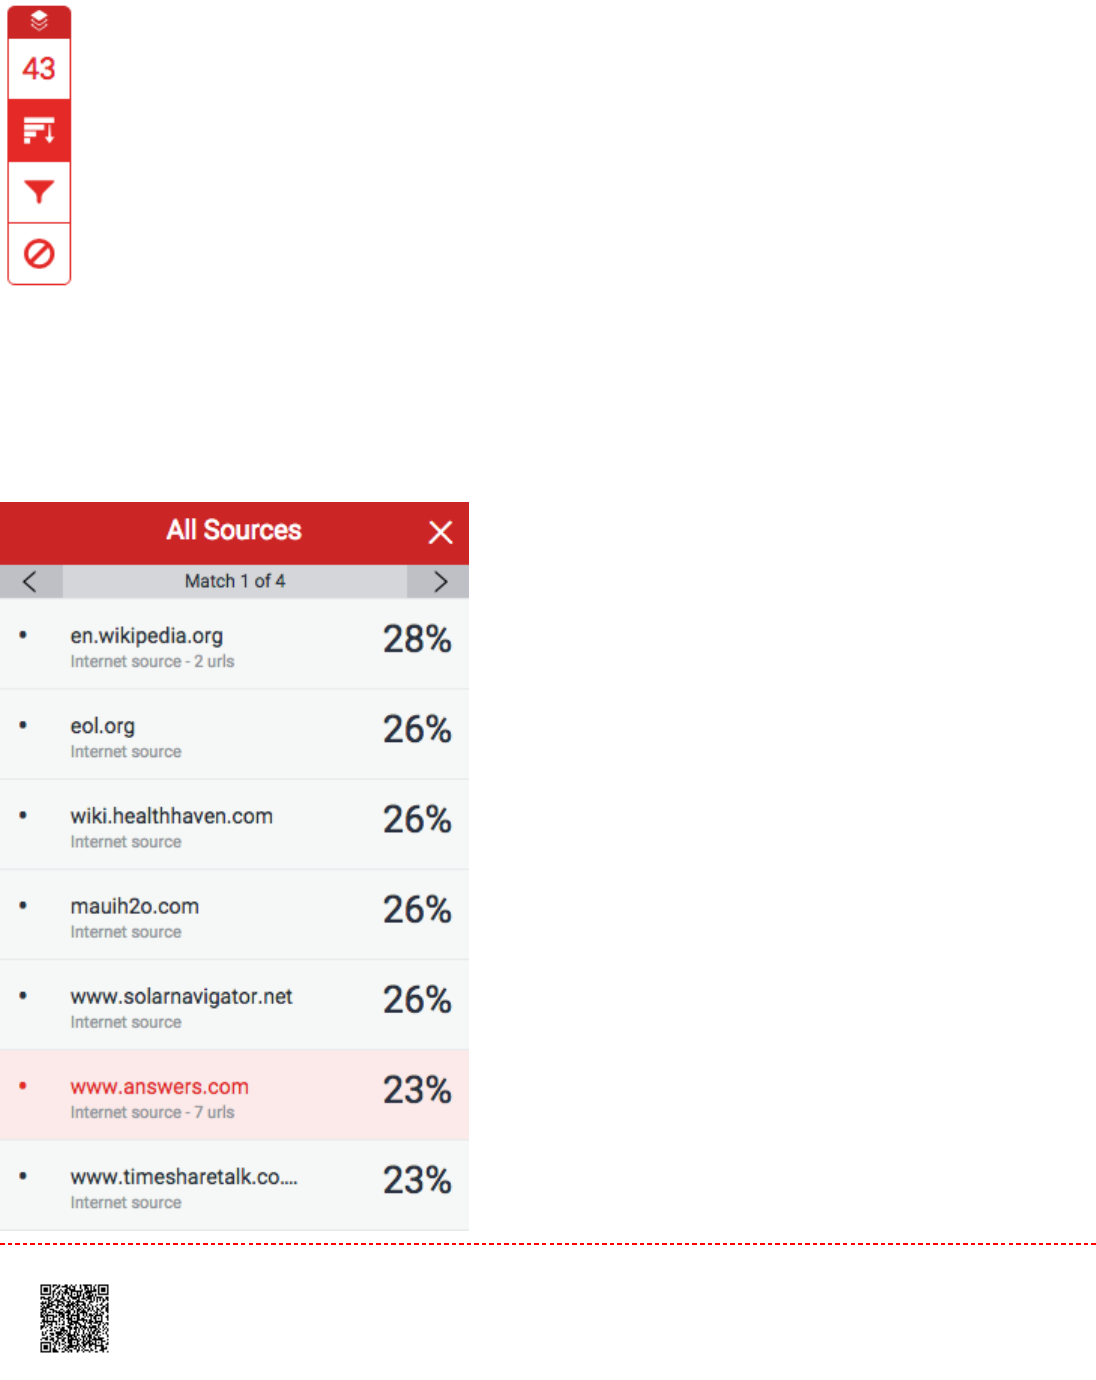
2.2. All sources are displayed within the
All Sources
side panel. A list of sources will be displayed in descending
order.
220
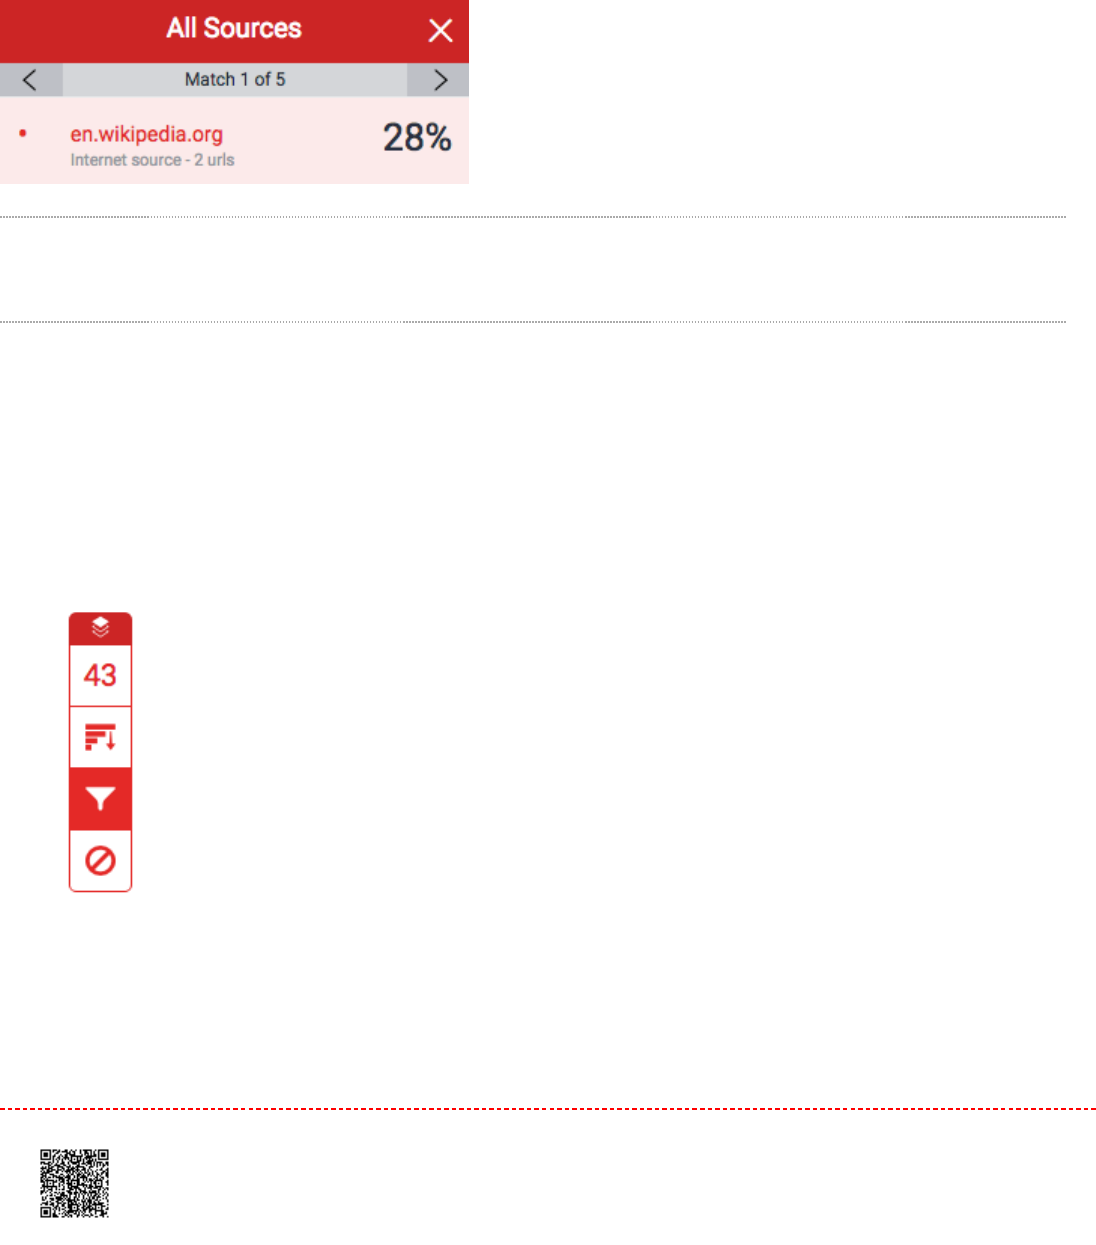
5.5. To view each match within the selected source, simply use the navigation arrows at the top of the
All Sources
side panel. As you navigate through, a new on-paper source box will appear.
Filtering the Similarity Report
Exclusion by Type
11. To exclude different types of text from the similarity report, click the red
Filter
icon from the similarity toolbar. If
the similarity layer was inactive, it will now be activated, highlighting all on-paper matches.
22. From the
Filters and Settings
side panel, use the check boxes to make bibliography and quote exclusions from
the similarity report.
221
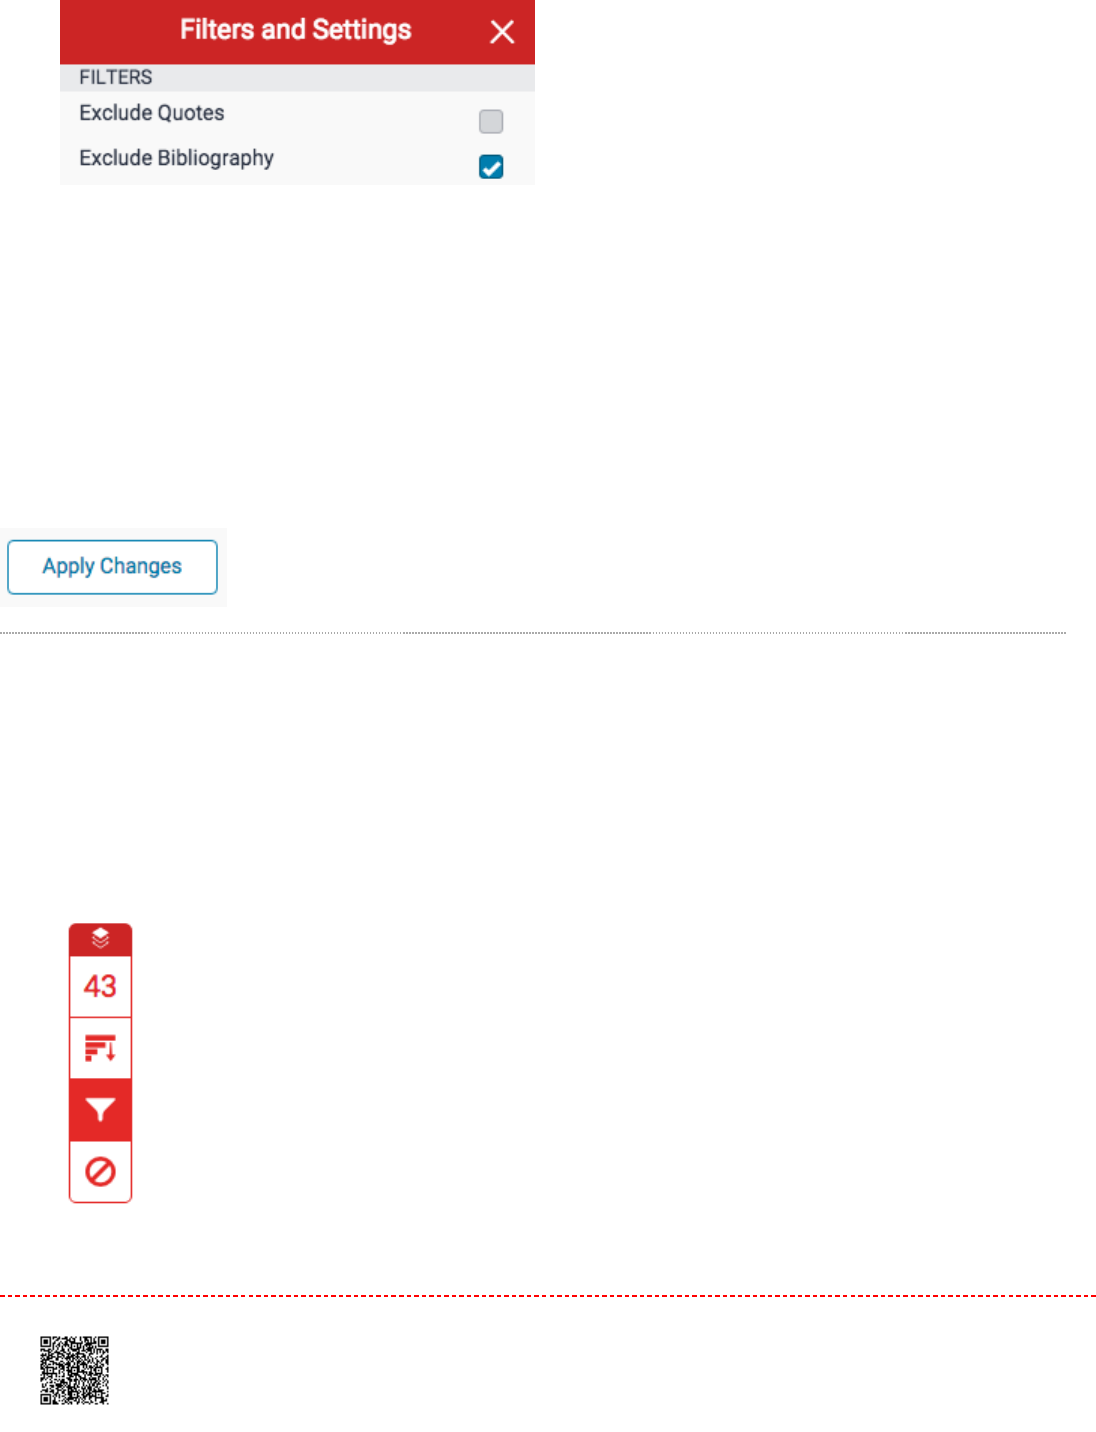
Note:Note: A recent update to similarity scoring may affect your assignments if you've opted to exclude the
bibliography. View this update here.
33. Click
Apply Changes
to confirm this change. This will repaint the similarity report with your change now
reflected in the assignment.
Exclusion by Size
11. To exclude text from the similarity report according to its size, click the red
filter
icon from the similarity toolbar.
If the similarity layer was inactive, it will now be activated, highlighting all on-paper matches.
222
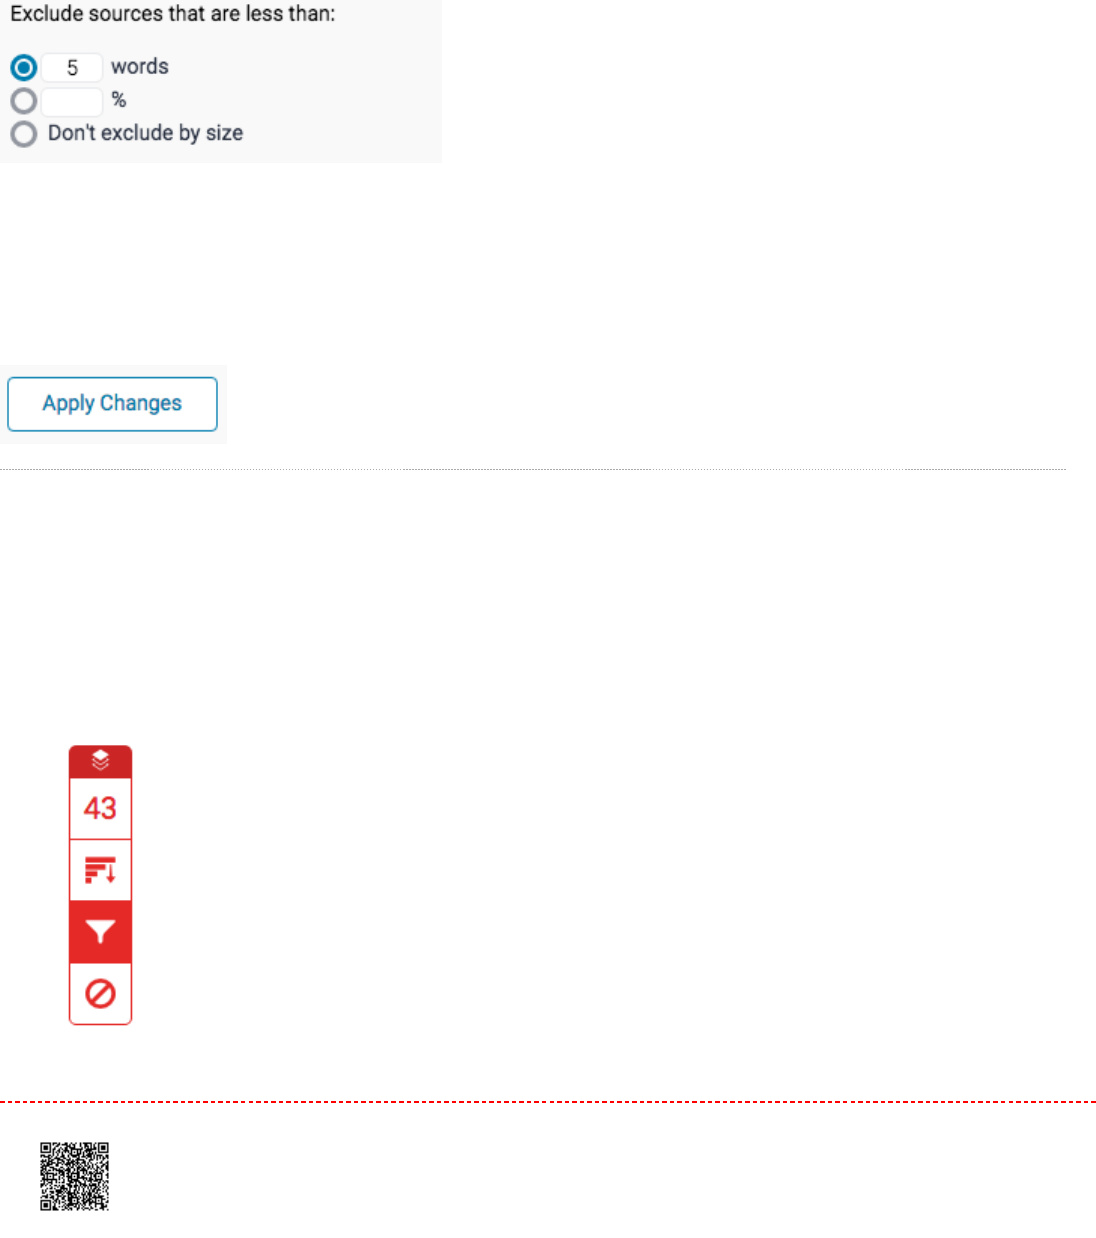
22. From the
Filters and Settings
side panel, use the radio and text boxes to determine which exclusions should
apply to the paper's similarity report. You can exclude sources that are less than a certain number of words, or a
certain percentage of words. For example, filtering by 10 words will exclude all sources that have a cumulative
number of matching words that are less than 10 words in length.
33. Click
Apply Changes
to confirm this change. This will repaint the similarity report with your change now
reflected in the assignment.
Similarity Report Multi-Color Highlighting
11. To apply multi-color highlighting to the similarity report, click the red
filter
icon from the similarity toolbar. If the
similarity layer was inactive, it will now be activated, highlighting all on-paper matches.
223
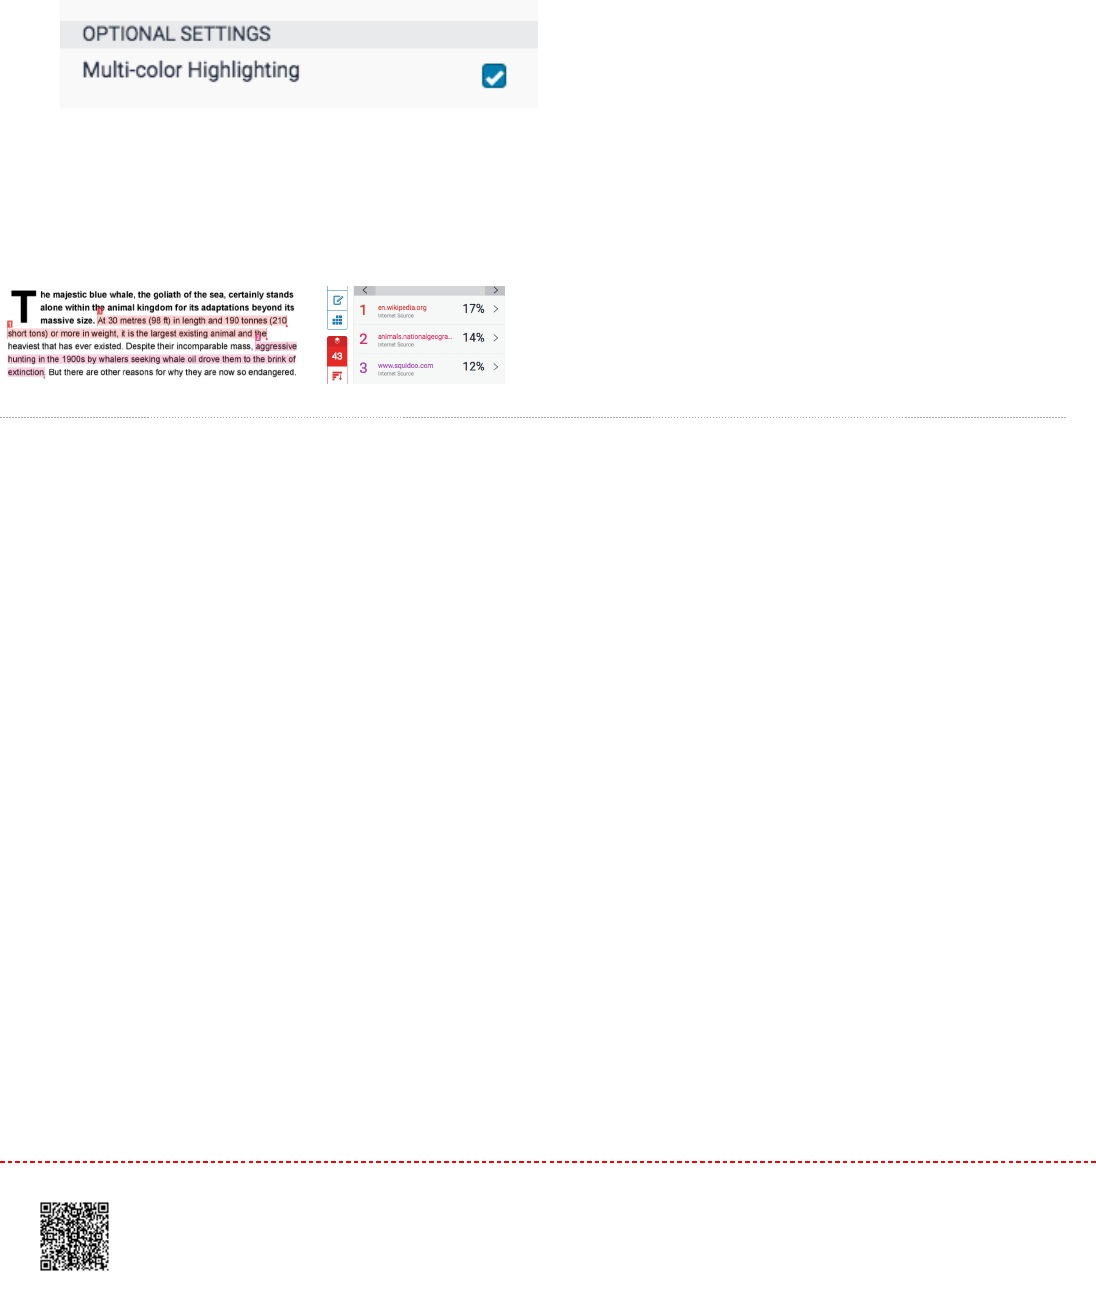
2.2. From the
Filters and Settings
side panel, use the
Multi-Color Highlighting
checkbox to toggle highlighting on
and off in the similarity report.
3.3. The paper's similarity matches can now be identified on-paper by color, as well as number.
Generating a New Similarity Report
If you believe something may have been added to our database since a paper's last similarity report was generated (a
website, journal article, or even another student’s paper), you can generate a new similarity report from the
Filters and
Settings
panel.
11. To generate a new similarity report, click the red
filter
icon from the similarity toolbar. If the similarity layer was
inactive, it will now be activated, highlighting all on-paper matches.
224
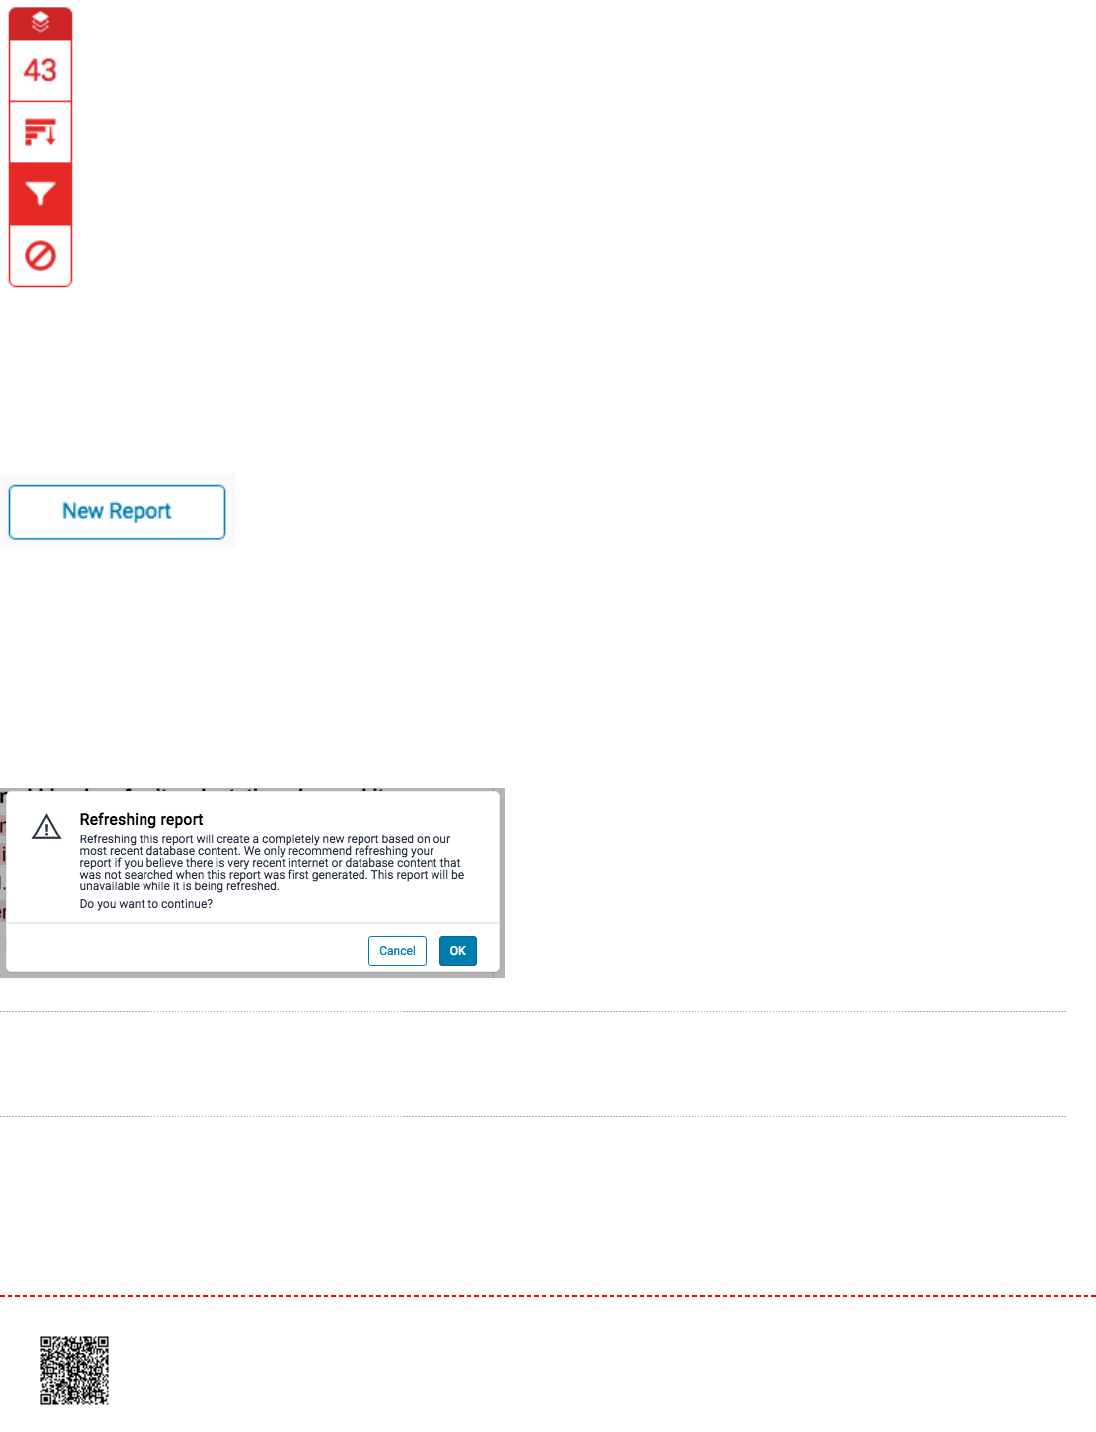
2.2. From the
Filters and Settings
side panel, click the
New Report
button to generate a new report.
3.3. We encourage you to only generate a new report if you have reason to believe that something new has been
added to the database, as your previous similarity report will be overwritten. Click
OK
to generate a new report,
or
Cancel
to abort.
Excluding Sources
Excluding Sources via Match Overview
225
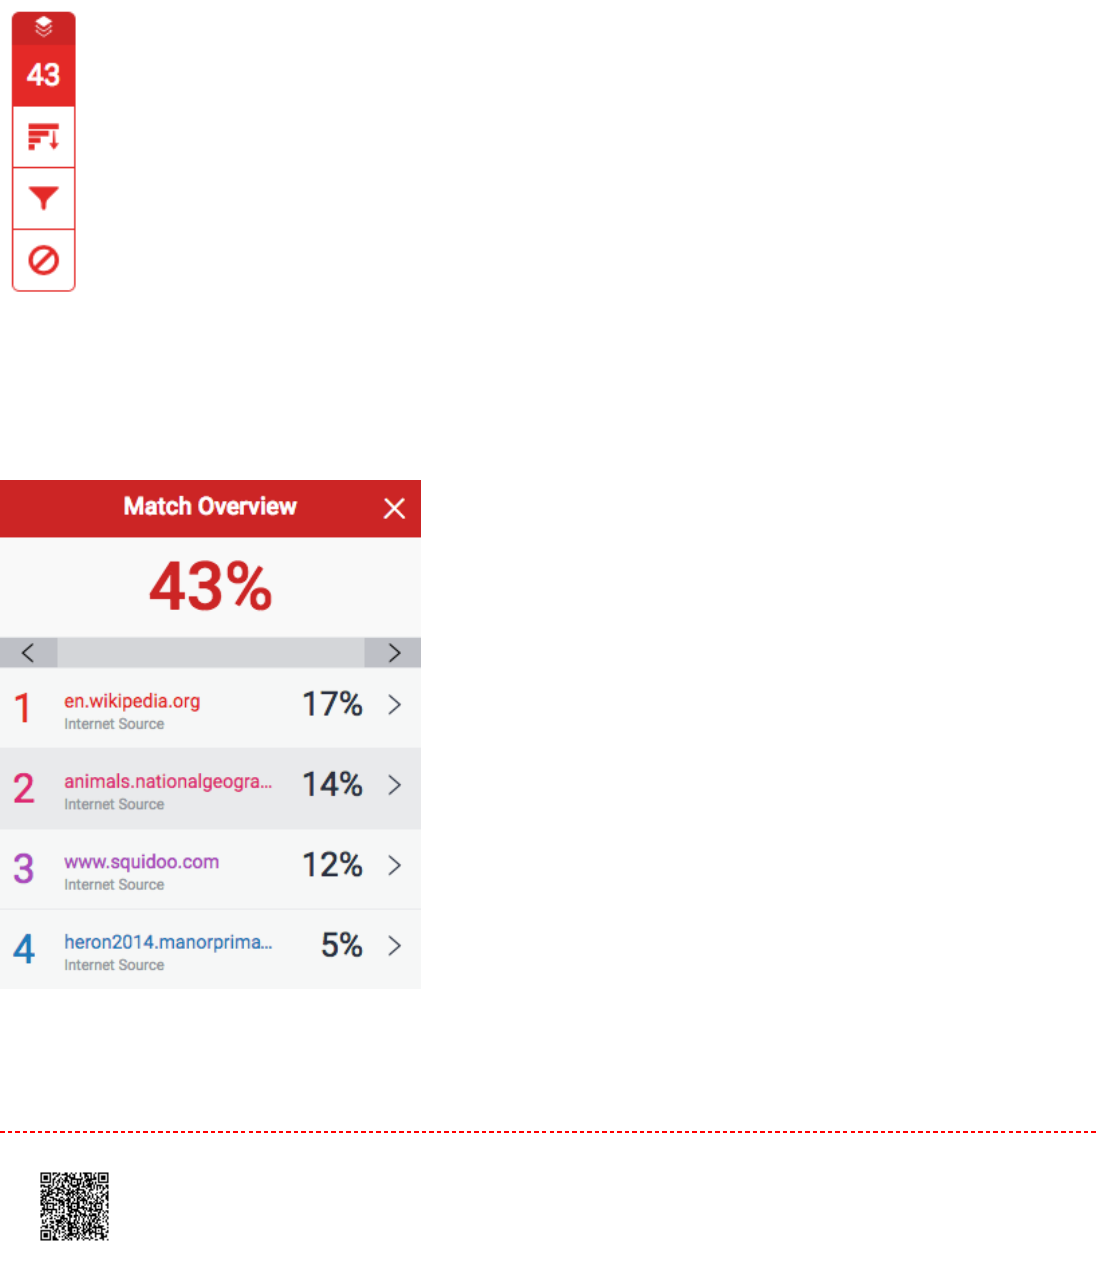
1.1. To exclude sources from the similarity report using the Match Overview side panel, click the red numerical
similarity score from the similarity toolbar. If the similarity layer was inactive, it will now be activated, highlighting
all on-paper matches.
2.2. All matches will be displayed within the
Match Overview
side panel.
3.3. To access each match in more detail and exclude sources, click the arrow to the right of the relevant similarity
percentage.
226

4.4. At the bottom of the
Match Breakdown
side panel, click the
Exclude Sources
button.
5.5. Using the checkboxes, select the source(s) you would like to exclude from the paper's similarity report, and
click the red
Exclude
button.
Note:Note: By clicking the
Exclude (x)
button, this will recalculate the similarity score.
Excluding Sources via All Sources
1.1. To exclude sources from the similarity report using the All Sources side panel, click the graph icon from the
similarity toolbar. If the similarity layer was inactive, it will now be activated, highlighting all on-paper matches.
227
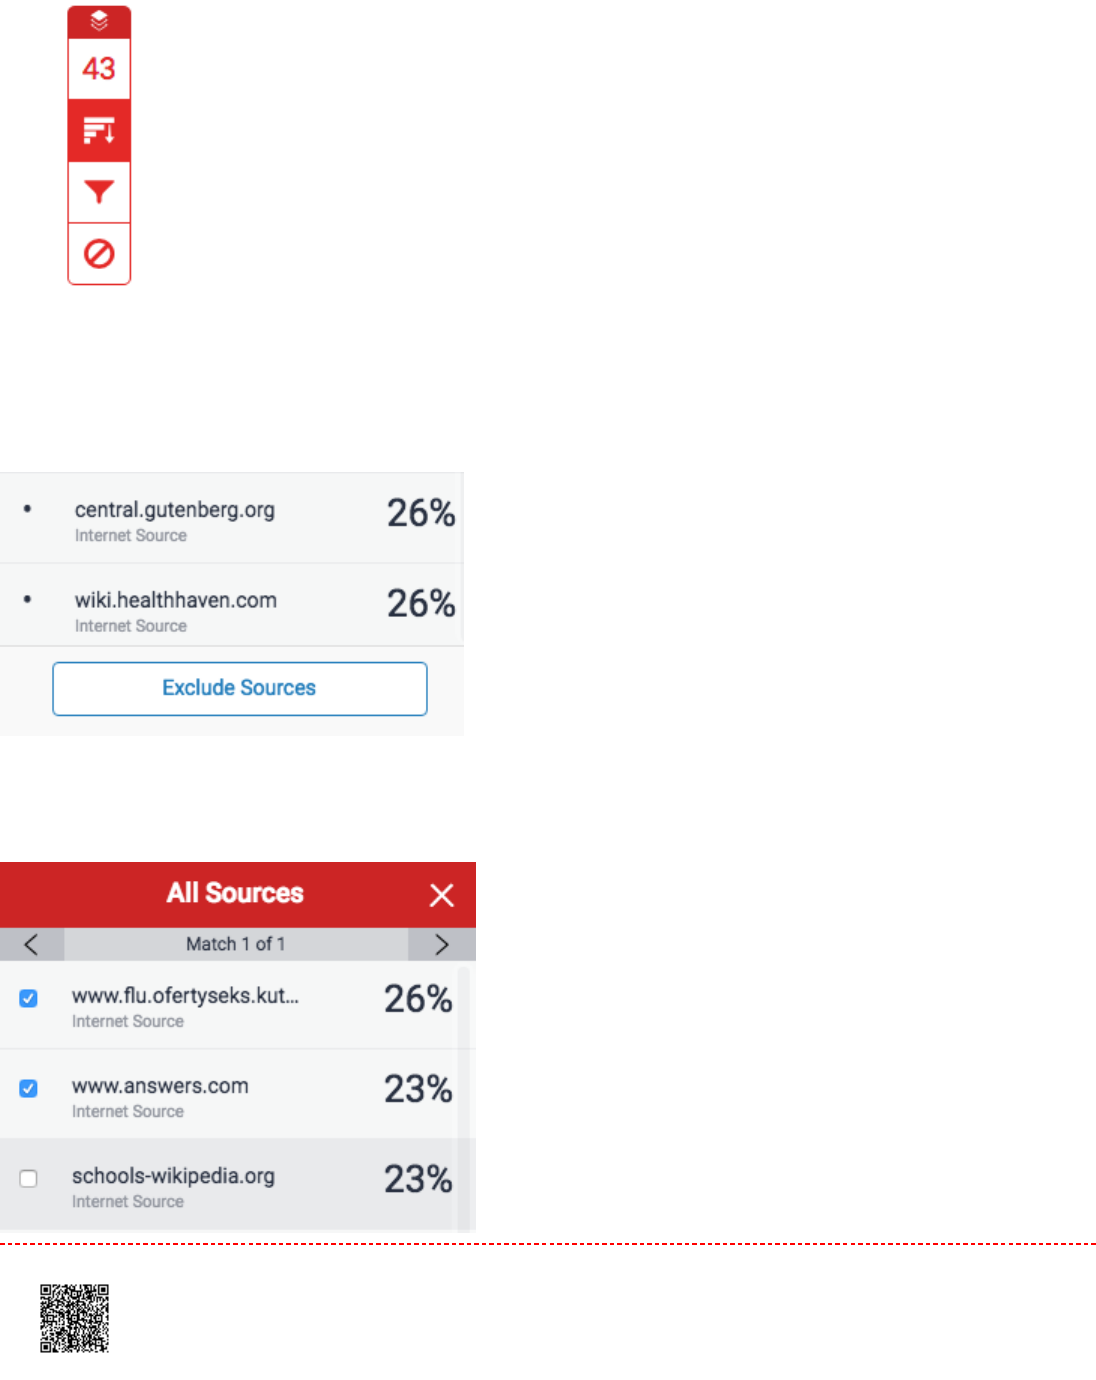
2.2. Click the
Exclude Sources
button at the bottom of the All Sources side panel.
3.3. Use the checkboxes to select the sources that you'd like to exclude from the similarity report.
228

4.4. Click the red
Exclude (x)
button at the bottom of the All Sources side panel. The button will provide a count of
the number of sources you have chosen to exclude. Alternatively, click the
Cancel
button to clear your selection.
Note:Note: By clicking the
Exclude (x)
button, this will recalculate the similarity score.
Viewing Excluded Sources
1.1. To view sources that have been excluded from the similarity report, click the red
exclude
icon from the
similarity toolbar. If the similarity layer was inactive, it will now be activated, highlighting all on-paper matches.
2.2.
2a.2a. If you have not excluded any sources from the similarity report, you will simply receive a notification
advising
No sources have been excluded for this report.
229

2b.2b. If you have excluded any sources from the paper's similarity report, you can find a list of excluded
sources in the
Excluded Sources
side panel.
3.3.
3a.3a. To restore only some of the excluded sources, use the checkboxes to select the relevant sources.
Click the
Restore
button to continue.
3b.3b. To restore all of the excluded sources in the list, click the
Restore All
button.
230

Note:Note: You do not need to refresh the similarity report to see these sources reflected in the similarity score.
231
Global Anonymous Marking
With anonymous marking, your student's name and any other identifiable information is masked from you, their
instructor.
If at any point during marking you identify a problem with a submission, you have the ability to reveal the student's name
from the Assignment Inbox. When you reveal a student's name an audit trail will be created. You will be required to enter
a reason for unveiling a student's name in order for any issues to be properly investigated.
NoteNote: This setting is permanent. If you turn off anonymous marking for a student you will be unable to turn it back
on for that student during that assignment.
Enabling Anonymous Marking for an Assignment
Anonymous marking is set at the assignment level. Please note that for you to enable anonymous marking as an
instructor, your administrator must have enabled this option too on your institution's account. If there is no option
available, please contact your administrator to request that this is activated.
1.1. To enable anonymous marking for an assignment, click the
All Classes
tab from any page
2.2. Select the class name that includes the assignment for which you wish to enable anonymous marking
232
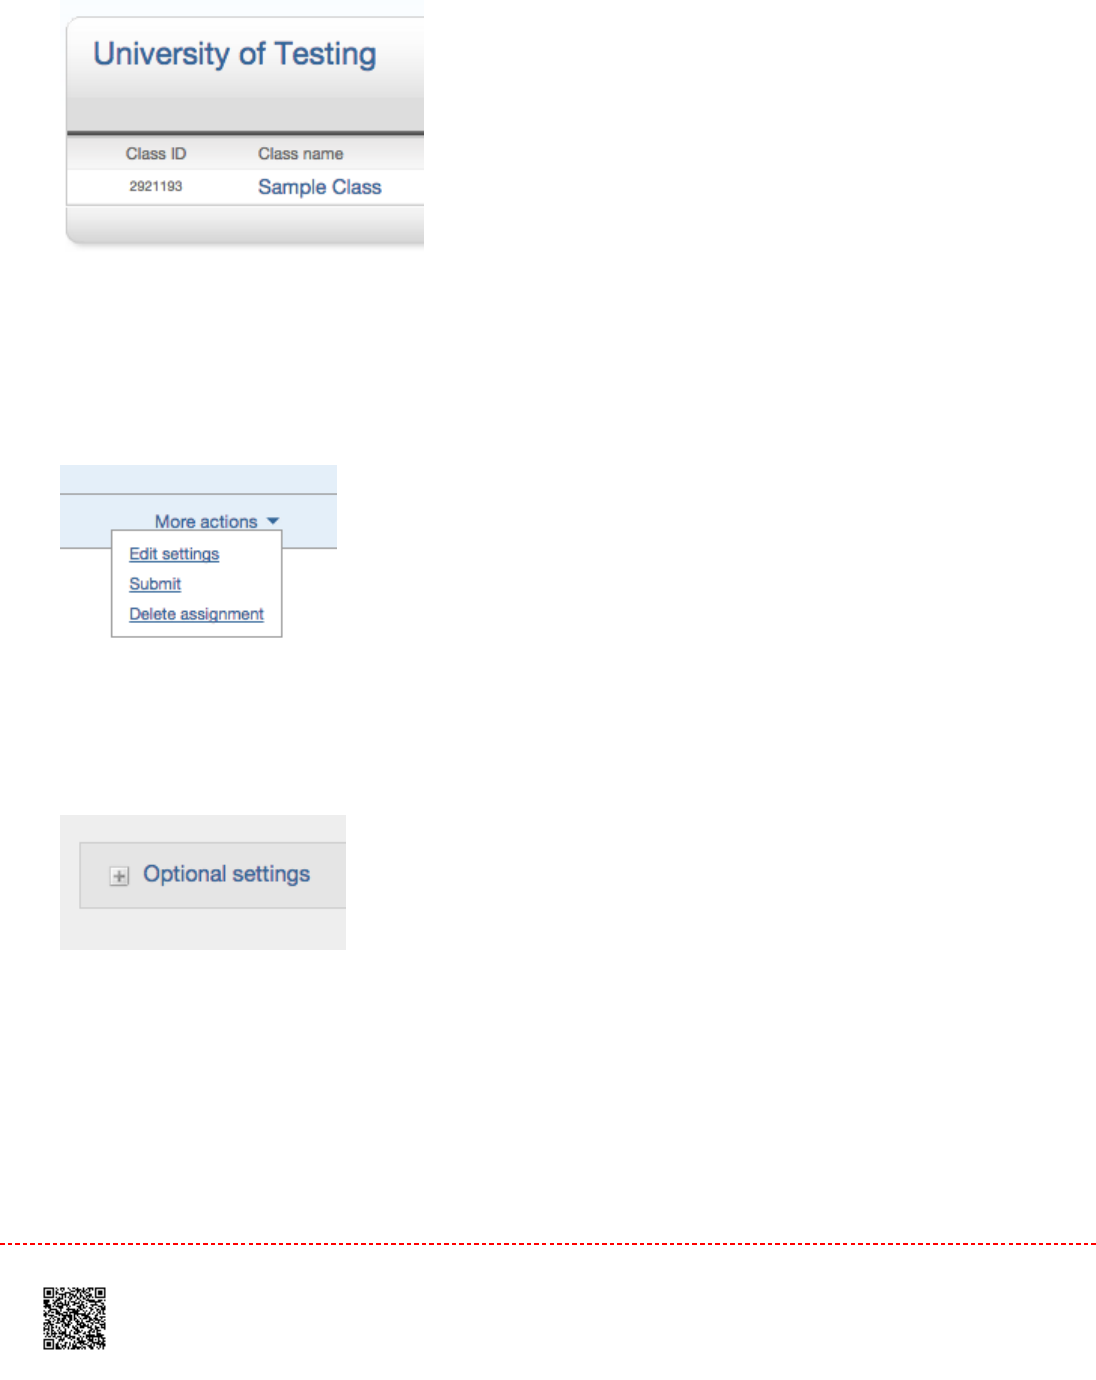
3.3. Click the Action dropdown list next to the assignment that you wish to enable anonymous marking and
select
Edit settings
4.4. You will be directed to the update assignment page. From here, click the
+ Optional Settings
link
5.5. Scroll through the optional settings list until you reach the option to 'Enable Anonymous Marking'. Select
the
yes
radio button
233
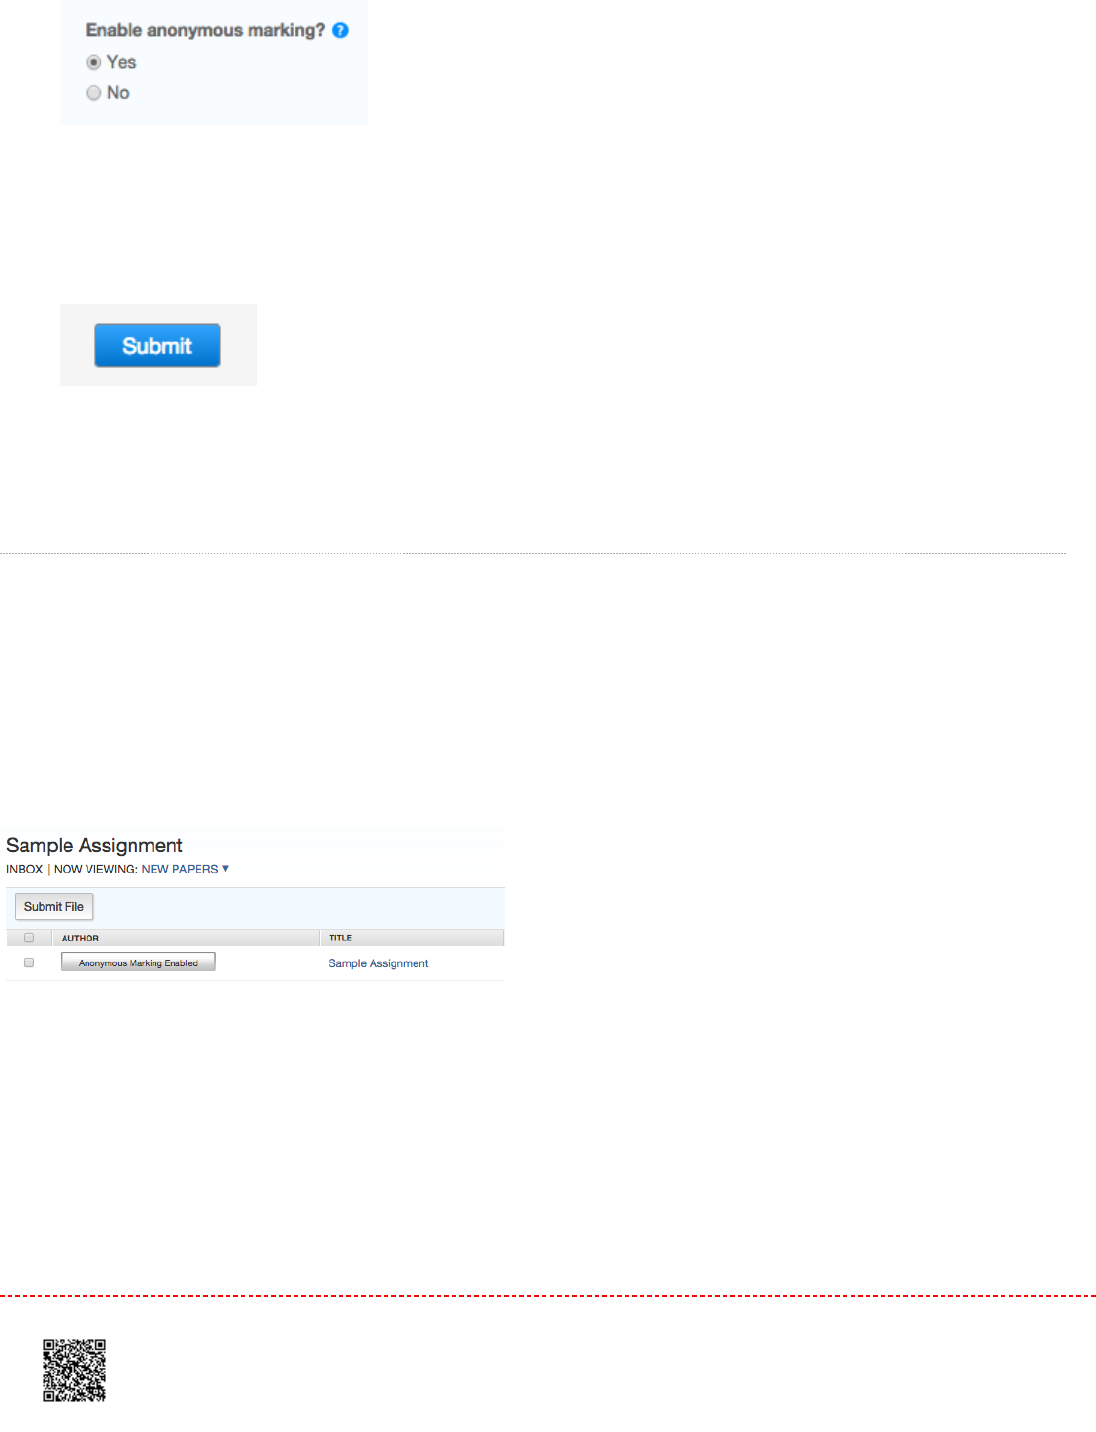
6.6. Scroll to the bottom of the page and click the
Save
button to save your changes
Note:Note: Repeat steps 1-4 should you wish to deactivate anonymous marking. Simply select the
No
radio button to disable
anonymous marking, then click
Save.
Revealing a Student's Name
1.1. From the assignment's submission inbox, a student's name will be hidden within the Author column. If for any
reason you must reveal a student's name, click
Anonymous Marking Enabled.
2.2. By clicking the
Anonymous Marking Enabled
button, this will open a pop-up box to turn off anonymous
marking. State the reason for turning off Anonymous marking for the submission by typing in the text box, and
click
Submit.
234
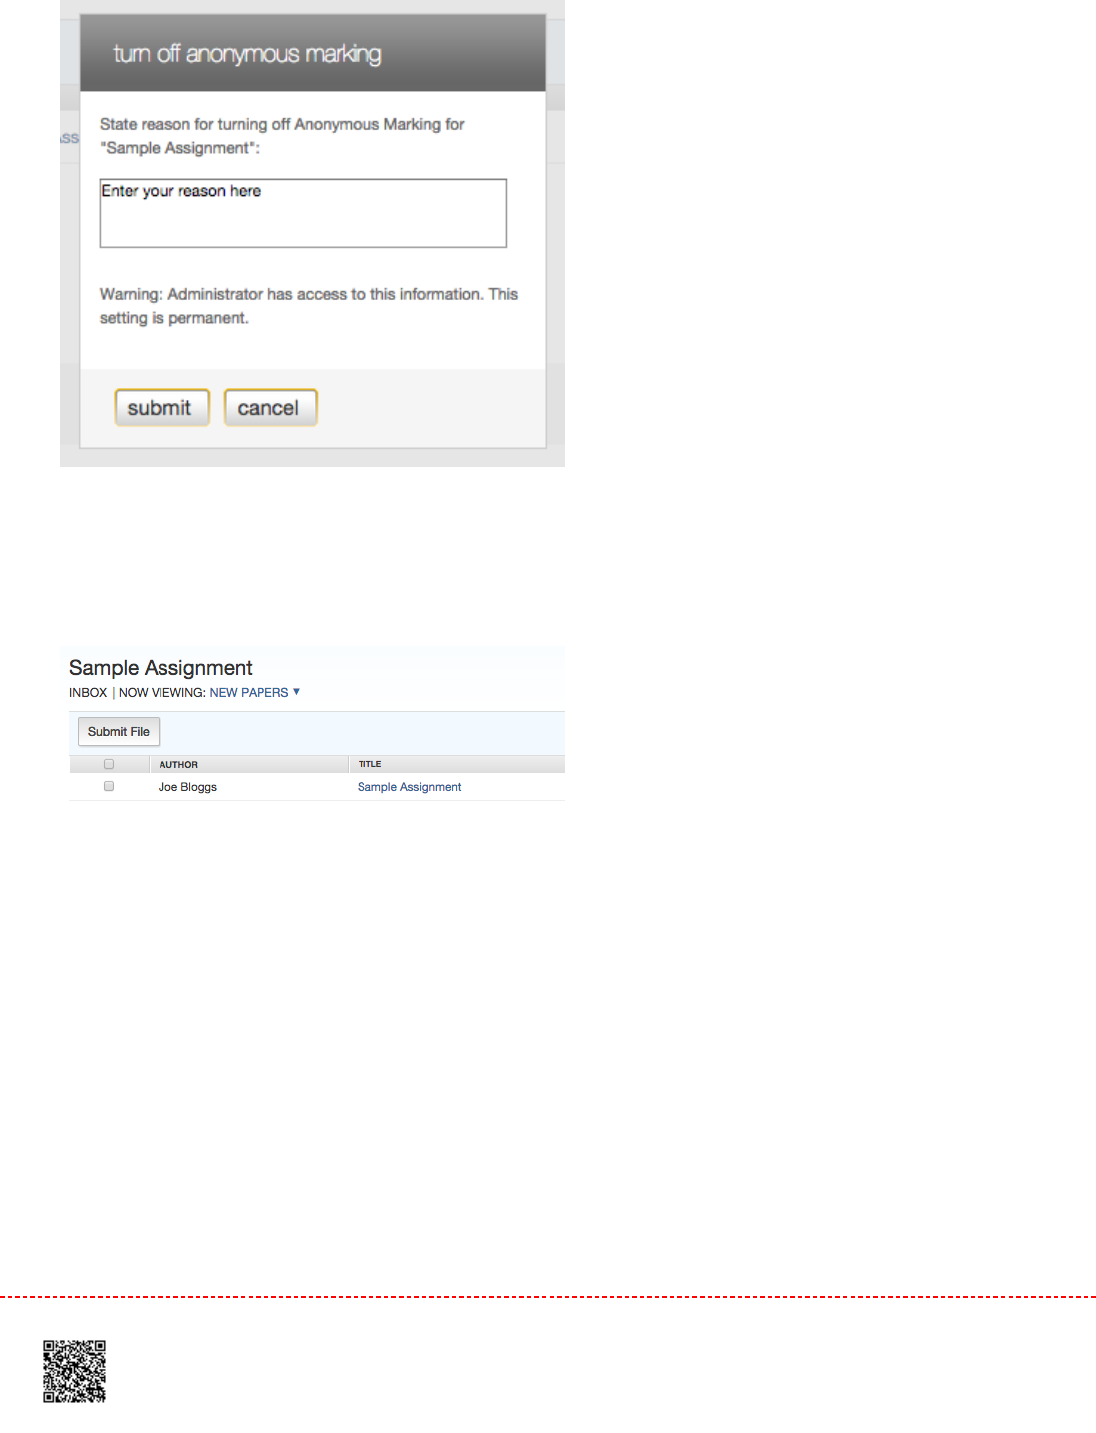
3.3. The student's name will now be revealed within the Author column
235
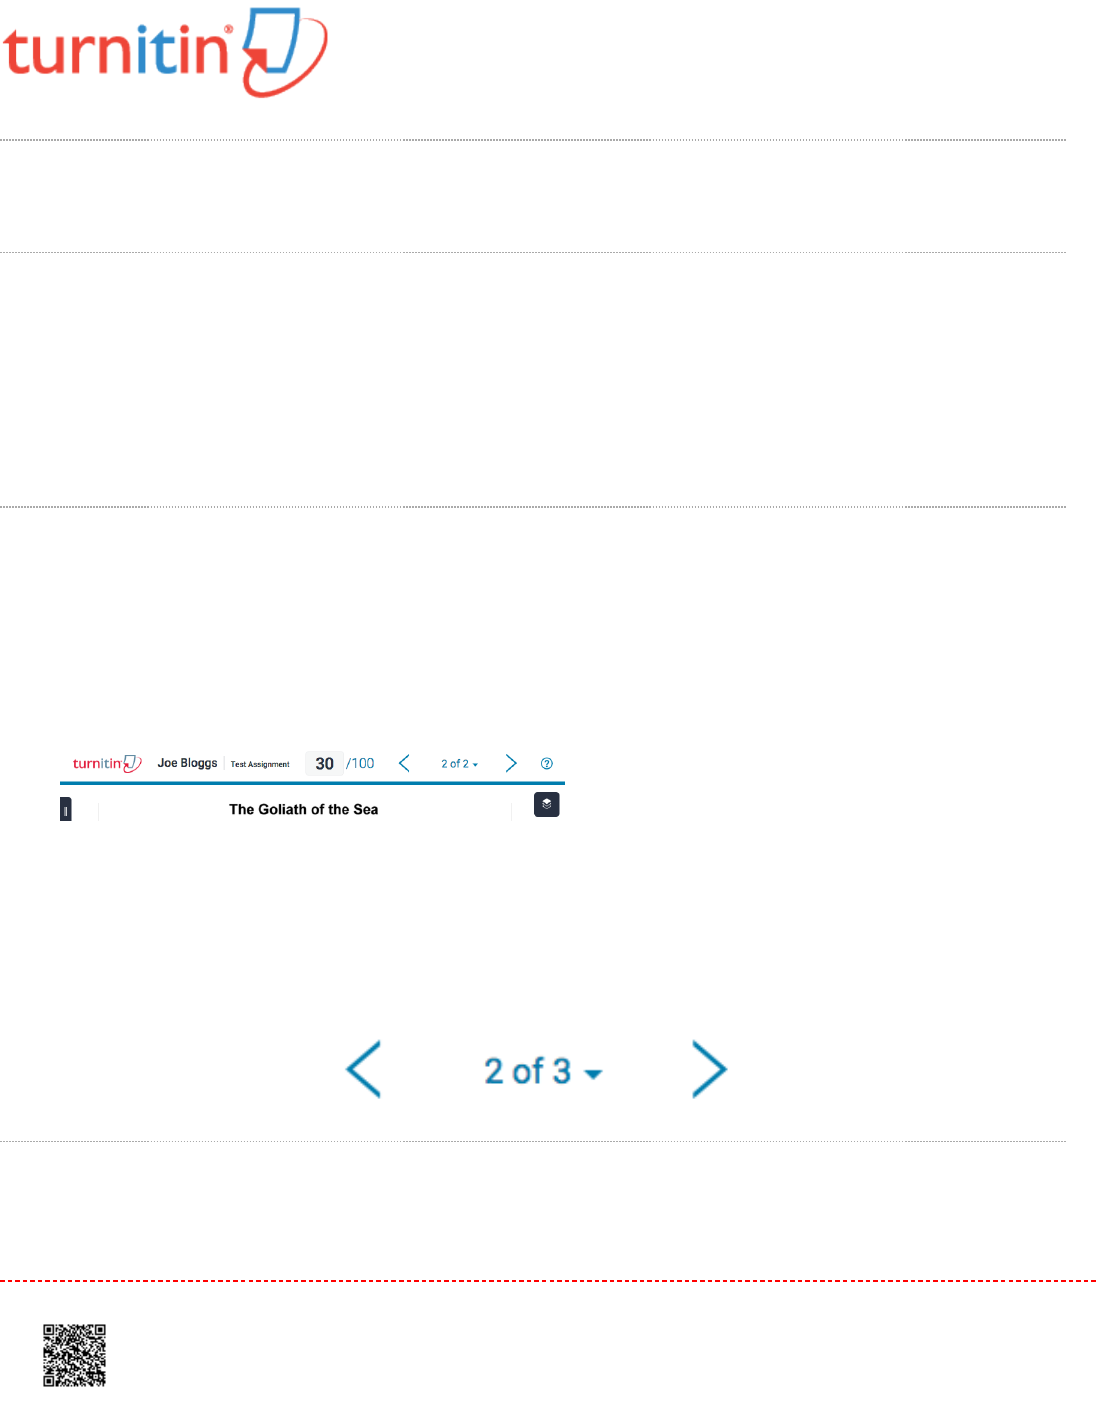
Navigating the Document Viewer
Moving Between Papers
You can navigate through papers submitted to an assignment by looking in the top right-hand corner of the navigation
frame. Here, you will find arrows to move between papers and a dropdown list that allows you to chose from all
papers that have been submitted so far.
Using the Navigation Arrows
1.1. Find the navigation arrows in the top right-hand corner of the document viewer.
22. The left arrow will take you back to the previous paper and the right arrow will move you to the next
paper. Papers are ordered by the date they were submitted.
Using the Drop Down
236
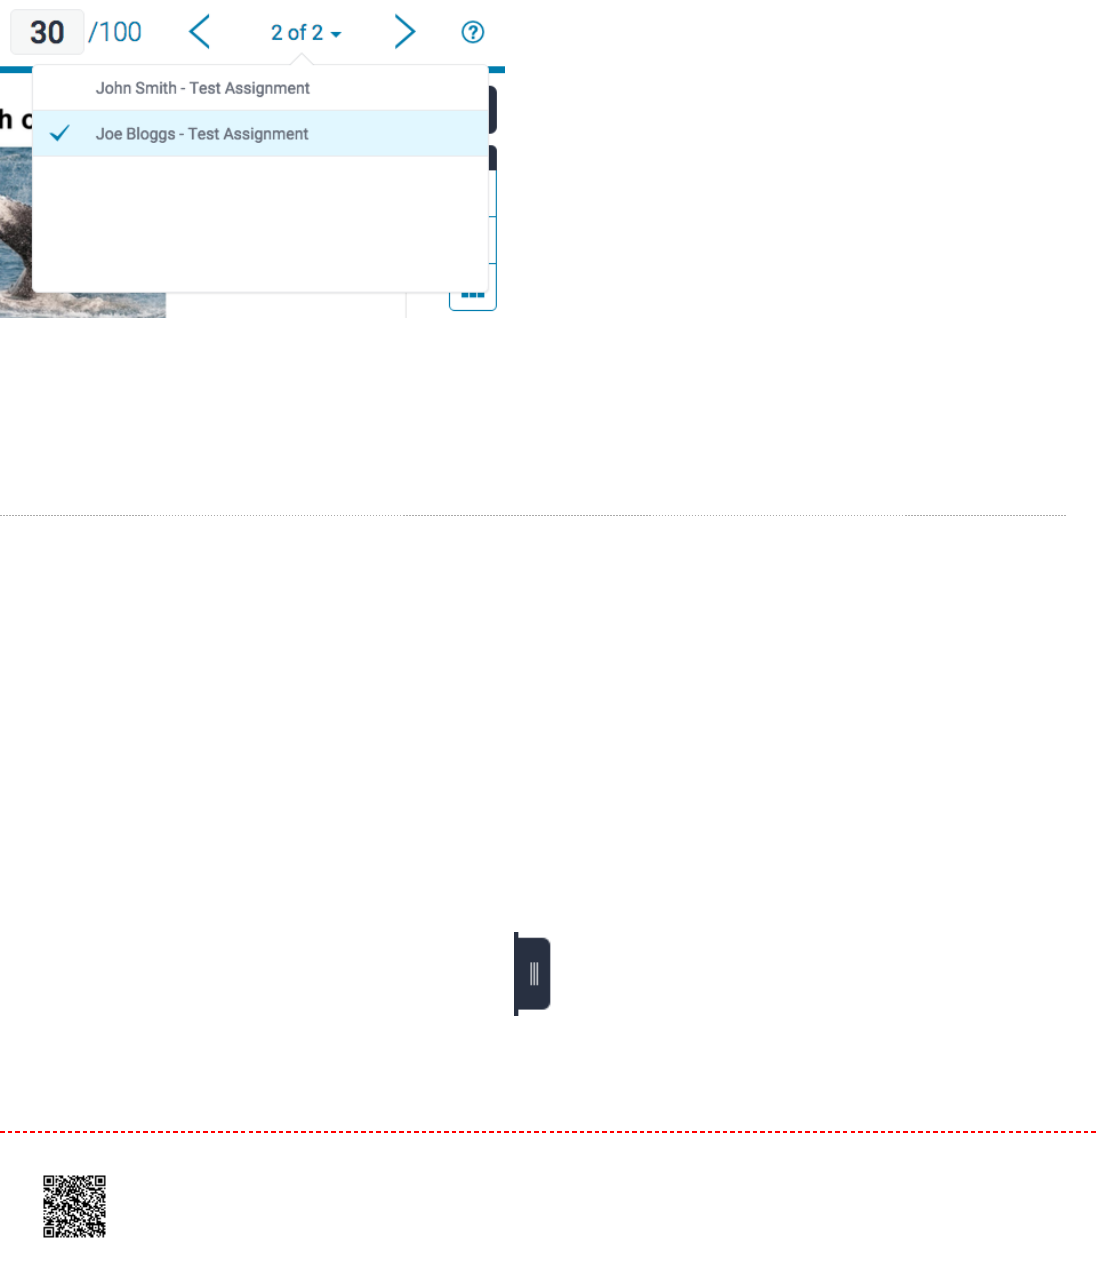
11. Find the paper count in the top right-hand corner of the page. This shows the paper that you
are currently grading. Click on the arrow to view all the papers that have been submitted to your assignment,
along with your students' names.
22. This drop-down list informs you of all of the papers that have been submitted to an assignment so far. It shows
the student's name on the left and the paper title on the right. Clicking on any of the submissions will change the
Turnitin Feedback Studio to that paper.
The Thumbnail Bar
The thumbnail bar gives you a quick overview of the paper you are currently grading.
1.1. The thumbnail bar can be accessed by clicking on the black tab in the left-hand corner of the Turnitin Feedback
Studio.
2.2. By clicking on one of the thumbnails, this will jump to the relevant page within the paper.
237
3.3. You can ‘lock’ or 'unlock' the thumbnail bar using the padlock icon in the top left-hand corner of the thumbnail
bar; this will resize the paper to fit your current view.
238
Note:Note: Locking the thumbnail bar will prevent you from being able to close it.
4.4. To close the thumbnail bar, unlock it by clicking on the locked padlock icon, then click the black tab that was
originally used to open it.
Using Layers
Media, iframe, embed and object tags are not supported inside of a PDF.
239

Layers allow you to view more than one service at the same time. With layers, you can view the similarity report and add
bubble comments at the same time. Layers can be toggled on and off using either the toolbar or the
Active Layers
side
panel.
Using the Toolbar
The service toolbar makes it easier for you to toggle between different layers, and you can do so from the layers icon at
the top of each service section.
11. Find the layer switch for the service you would like to toggle. If the layer switch is blue, red, or purple, this
means the service layer is activeactive.
Online gradingOnline grading SimilaritySimilarity e-rater®e-rater®
Screen
Shot
2015-11-18
at
10.42.03
AM.png
Screen
Shot
2015-11-18
at
10.42.22
AM.png
Screen
Shot
2015-11-18
at
10.49.51
AM.png
2.2. If the layer is black, the overlay is inactiveinactive. By clicking the black layer icon above each service, this will activate
it.
Screen
Shot
2015-11-18
at
10.53.50
AM.png
3.3. In the example below, the similarity section is active, but online grading and e-rater® are inactive.
240

Using the Active Layers Side Panel
1.1. Alternatively, you can click the
layer
icon at the very top of the toolbar, which will open the
Active Layers
side
panel.
Screen
Shot
2015-12-01
at
3.42.42
PM.png
2.2. In the
Active Layers
side panel, the services available to you will be displayed alongside a check box. Click the
relevant check boxes to activate or deactivate your chosen services. This will change the color status of the layer
icon for each service.
In the example below, the online grading and similarity layers are active, but e-rater is inactive.
241

Below, you'll find a view of a paper, where all layers are active.
242

Preferences & Notifications
There are two preference types available to Turnitin instructors - user preferences and class preferences. User
preferences apply to the instructor’s user profile, including default login views.
Class preferences are specific to each class, and apply only within the class to the assignments and student users in the
class.
User Preferences
An instructor can view the current user preferences by clicking on the User Info tab.
The user preferences available are:
default user typedefault user type - select from
student, instructor
, or
administrator
; this will be the user home page seen when the
user logs in
default submission typedefault submission type - select a default submission type, which determines which type of submission page is
shown automatically for an instructor clicking on the
submit
icon in Turnitin
activate quick submitactivate quick submit - select
yes
to turn quick submit on; refer to Chapter 10 for information on quick submit
items per pageitems per page - select the number of items from a list of students, submissions, or assignments to display per page
on Turnitin
file download formatfile download format - select the default format for files downloaded from Turnitin; the options available are
original
format, PDF format,
or
let me choose each time
243
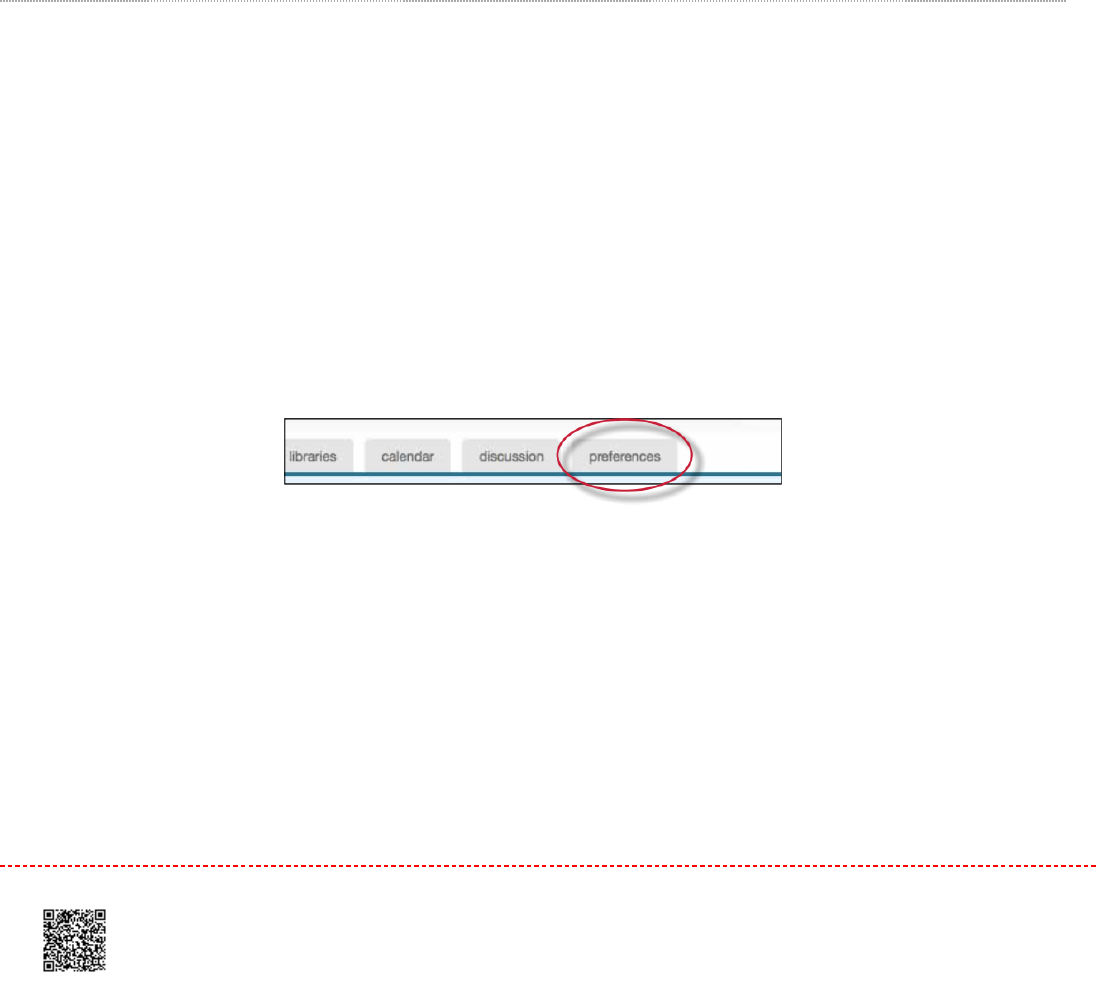
show page infoshow page info - choose
yes
to display page information at the top of each page, which contains helpful information
for each user
send me e-mail updatessend me e-mail updates - choose
yes
to receive e-mail updates from Turnitin
use homepage linkuse homepage link - choose yes to create a homepage link; to set up a link, enter a link name and URL in the fields
below this option; this provides a link to a homepage for the user
NoteNote: If any changes were made to the user profile, the instructor must click on the
Submit
button at the bottom of the
page to save the changes.
Class Preferences
The class preference page allows an instructor to control the products and features available for the class. This allows
an instructor to determine whether students can post proposed discussion topics, or whether or not GradeMark or other
products are available in a class. An instructor can also set a class homepage link which is visible to both students and
the instructor on the class homepage and other class pages.
To open the preferences page for a class, click the
preferences
tab on the class bar.
Each class has two preference types available to the instructors. There are general preferences and products that have
been enabled. Only services purchased by the instructor’s institution are available under the enable these products:
preference menu. Products that are not available will be greyed out and cannot be checked or un-checked.
To enable or disable a preference, click the check box to the left of the selected preference or product. Un-checked
products or preferences are disabled in the specified class. For more information on the products, please see the
appropriate chapter of this manual for the product or feature.
244

General Preferences
let students submit discussion topics?let students submit discussion topics? - determines if student users are able to post proposed discussion topics.
Discussion topics must be approved by the instructor before the topic becomes active
show students link to my e-mail?show students link to my e-mail? - determines whether or not the e-mail address used by the instructor to log into
Turnitin is available as a link for the students to click on to use their default e-mail program to contact the instructor
Lock assignment dates in sections?Lock assignment dates in sections? - locks assignment dates set by the master class instructor for assignments
pushed to sections
Lock assignment info in sections?Lock assignment info in sections? - locks assignment info set by the master class instructor for assignments pushed
to sections
Enable These Products:
GradeMark
PeerMark
Grade book
Discussion boards
Class LinkClass Link - A class link can be created for the instructor and students on the preferences page. Enter a name for
the link and the full URL for the link. The URL must be in the full HTTP:// format.
If any changes are made to the class preferences, the instructor must click on the
submit
button at the bottom of the
preferences page to save the changes that have been made.
245
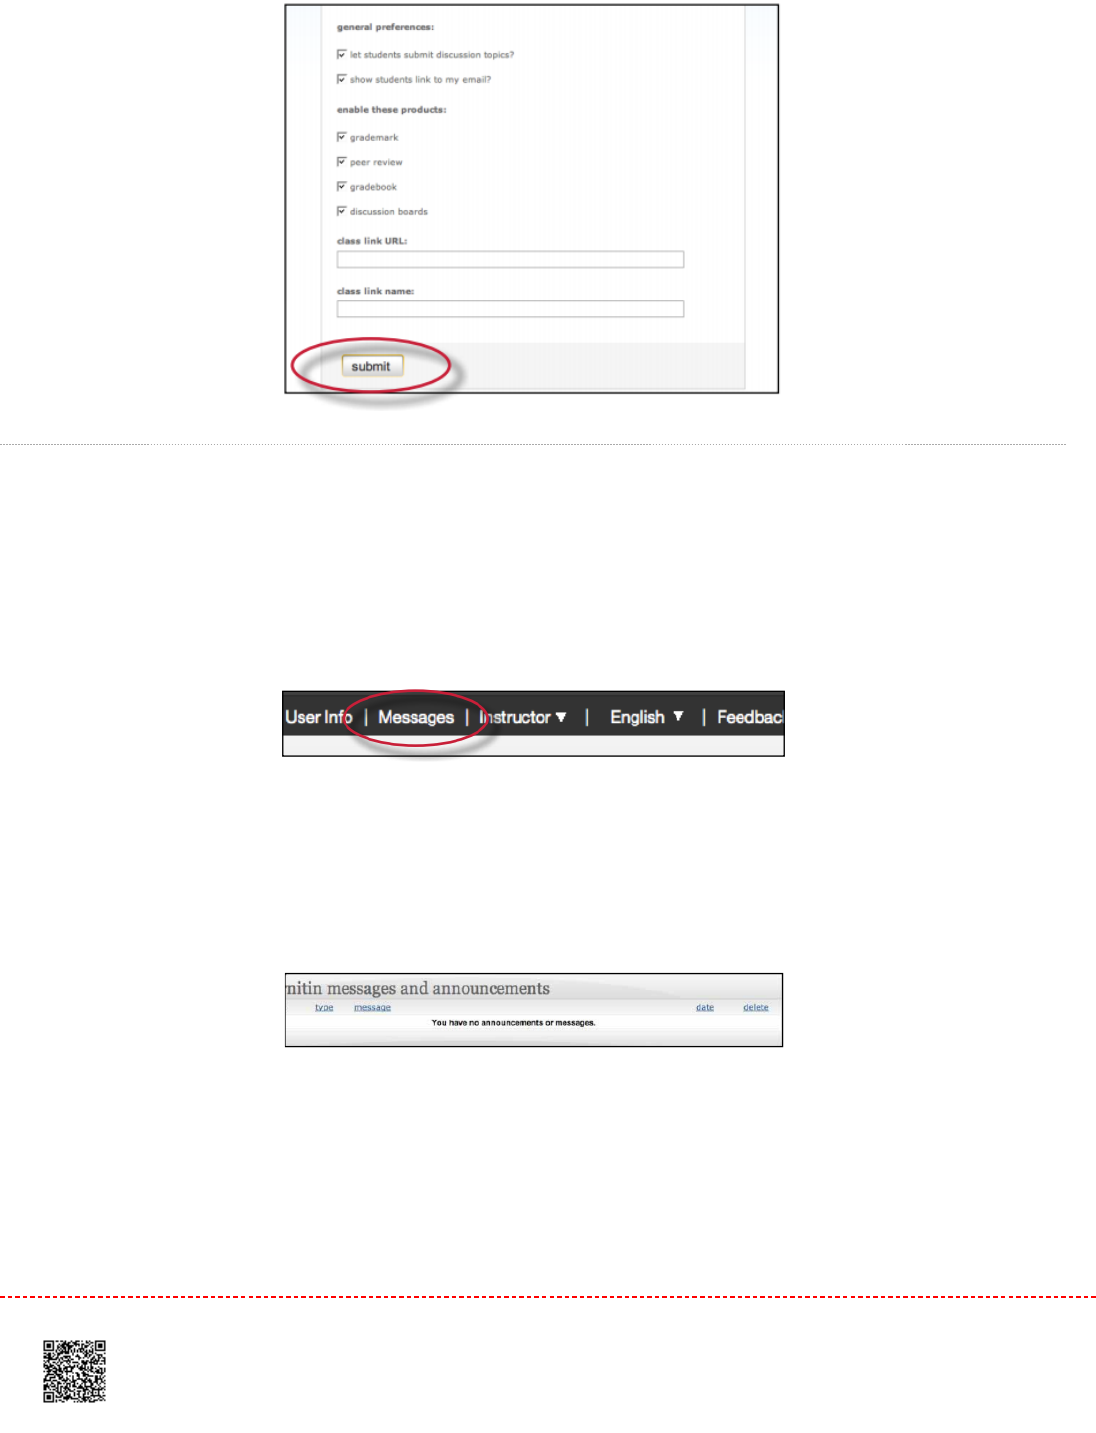
Messages and Announcements
Important announcements and messages can be viewed by clicking on the
messages
tab on the system bar.
NoteNote: Urgent notifications including announcements of scheduled downtimes for improvements to Turnitin will appear
both on the messages page and on the user homepages for all users, including instructors.
246

