3Ts for Reducing Lead in Drinking Water
in Schools and Child Care Facilities
A Training, Testing, and Taking Action Approach
Revised Manual

2 | Page
3Ts for Reducing Lead in Drinking Water
This 2018 version of 3Ts for Reducing Lead in Drinking Water in Schools and Child Care Facilities is a
revision of the October 2006 version. The U.S. Environmental Protection Agency (EPA) is in the process
of revising the Lead and Copper Rule (LCR). The requirements discussed in this document are based on
the current LCR.
Please visit https://epa.gov/safewater/3Ts for additional information.
Disclaimer
This manual contains recommendations on how to address lead drinking water in schools and child care
facilities; these recommendations are suggestions only and are not requirements. This manual does,
however, also contain an overview of federal regulatory requirements concerning lead in drinking water
that apply to public water systems. Some schools and child care facilities are regulated as “public water
systems” but many schools and child care facilities receive water from a public water system and are not
regulated under the Safe Drinking Water Act. The statutory provisions and regulations described in this
document contain binding requirements that may apply to the school or child care facility if they are a
public water system. In addition, this document describes federal statutory requirements that apply to
all repairs and new installations of pipes, fittings, and fixtures in facilities providing water for human
consumption. The general description here does not substitute for those laws or regulations; nor is this
document a regulation itself. Also, many states (or tribes) and localities have different, more stringent
requirements than EPA’s, some of which may apply to schools and child care facilities even if they are
not a public water system. Therefore, schools and child care facilities should not rely solely on this
guidance for compliance information.
Office of Water (4606M)
EPA 815-B-18-007
October 2018

3 | Page
3Ts for Reducing Lead in Drinking Water
Contents
Introduction ……………………………………………………………………………………………………………………. 4
Establishing a Lead Testing Program – 3Ts Checklist ………………………………………………………. 6
Module 1: Communicating the 3Ts ……………….………………………………………………………………... 7
Developing a Communication Plan …………………………………………………………………….… 7
Module 2: Learning About Lead in Drinking Water …………………………………………………………. 13
Health Effects of Lead ………………………………………………………………………………………….. 13
Sources of Lead ……………………………………………………………………………………………………. 14
How Lead Gets in Drinking Water ………………………………………………………………………… 15
Your Facility and the Public Water System Relationship ……….……………………………… 16
How Lead in Drinking Water is Related …..……………………………………………………………. 17
Module 3: Planning your 3Ts Program ……………………………………………………….…………………… 19
Review Your Records ……………………………………………………………………………………………. 19
Establish Partnerships ………………………………………………………………………………………….. 20
Assigning Roles …………………………………………………………………………………………………….. 25
Module 4: Developing a Sampling Plan …………………………………………………………………………… 29
Conduct a Walkthrough ……………………………………………………………………………………….. 29
Determine Sampling Locations …………………………………………………………………………….. 31
Selecting a Laboratory for Sample Analysis ………………………………………………………….. 32
Determine Your Sampling Frequency …………………………………………………………………… 33
Understanding the Sampling Procedures ……………………………………………………………… 34
Module 5: Conducting Sampling and Interpreting Results …………………………...................... 37
2-Step Sampling at the Tap ………………………………………………………………………………….. 37
Sampling Dos and Don’ts ……………………………………………………………………………………… 41
Module 6: Remediation and Establishing Routine Practices …………………………………………… 42
Immediate Response ……………………………………………………………………………………………. 42
Short-Term Control Measures ……………………………………………………………………………… 43
Permanent Control Measures ………………………………………………………………………………. 45
Follow-Up Sampling ……………………………………………………………………………………………… 46
Considerations for Replacement Activities …………………………………………………………… 47
Establishing Routine Practices ……………………………………………………………………………… 48
Module 7: Recordkeeping …………………………………………………………………………………............... 51
Keep Records ……………………………………………………………………………………………………….. 51
Appendix A: Glossary of Terms ……………………………………………………………………………………….. 52
Appendix B: Lead Water Coolers Banned in 1988 …………………………………………………………… 55
Appendix C: Develop a Code System for Samples …………………………………………………………… 58
Appendix D: Detailed Fixture Evaluation ………………………………………………………………………… 59
Appendix E: Preservation of Samples ……………………………………………………………………………… 70
Appendix F: Example Sampling Field Form ……………………………………………………………………… 72
Appendix G: Plumbing Profile …………………………………………………………………………………………. 73

4 | Page
3Ts for Reducing Lead in Drinking Water
Introduction
This document is intended to serve as a resource to help
schools and child care facilities implement a voluntary
program for reducing lead in drinking water. The approach
is focused on three key steps:
• TRAINING school and child care officials to raise
awareness of the 3Ts program and summarize the
potential causes and health effects of lead in drinking
water.
• TESTING drinking water in schools and child care
facilities to identify potential lead problems.
• TAKING ACTION to reduce lead in drinking water.
Children are most susceptible to the effects of lead
because their bodies are still undergoing development and
they tend to absorb more lead from the environment. The
adverse health effects of lead exposure include reduced IQ
and attention span, learning disabilities, poor classroom
performance, hyperactivity, behavioral problems, impaired
growth, and hearing loss. The only way to know if there is
lead in drinking water is to test.
There is no federal law requiring testing of drinking water
in schools and child care facilities, except for schools and
child care facilities that own and/or operate their own
public water supply and are thus regulated under the Safe
Drinking Water Act (SDWA). Some states, tribes, and local
jurisdictions have established their own laws, regulations,
or guidance for testing drinking water lead levels in schools and/or child care facilities. School
and child care facilities should reach out to their state to find out what laws or regulations may
apply to them. EPA suggests that school and child care facilities implement programs for
reducing lead in drinking water as part of their overall plans for maintaining healthy learning
environments. Safe and healthy environments foster healthy children and may improve student
performance.
WHAT IS YOUR WATER
SOURCE?
It is important to be familiar with
the source of your drinking
water. Some schools and child
care facilities are served by
nearby public or private water
systems, while others operate
their own water systems and are
regulated under the Safe Drinking
Water Act.
Facilities that operate their own
drinking water systems are
required to comply with of
regulations under the Safe
Drinking Water Act, including
regulations pertaining to lead in
drinking water.
Whether or not your facility is
classified as a public water
system, it is important to
establish a program that includes
routine testing and evaluations to
limit lead contamination, as well
as routine practices to ensure the
you are providing safe drinking
water to students and staff.
Even when water entering a facility meets all federal and state public health standards for lead,
older plumbing materials in schools and child care facilities may contribute to elevated levels
lead in their drinking water. The potential for lead to leach into water increases the longer the
water remains in contact with leaded plumbing materials. As a result, facilities with intermittent
water use patterns, such as schools, are more likely to have elevated lead concentrations in
5 | Page
3Ts for Reducing Lead in Drinking Water
drinking water. Implementing the 3Ts will help schools and child care facilities to identify
potential problems with plumbing systems and materials so that targeted remediation efforts
can be taken. This document will also assist you in communicating with parents, teachers, and
the public. Transparency and communication are key to developing a successful program for
reducing lead in drinking water.
In addition to this document, there are a number of supplemental resources included as
appendices, which contain information and tools to support 3Ts programs.
Access the full toolkit here: https://epa.gov/safewater/3Ts
• Appendix A: Glossary of Terms
• Appendix B: Lead Water Coolers Banned in 1988
• Appendix C: Develop a Code System for Samples
• Appendix D: Detailed Fixture Evaluation
• Appendix E: Preservation of Samples
• Appendix F: Example Sampling Field Form
• Appendix G: Plumbing Profile
3Ts Toolkit
https://epa.gov/safewater/3Ts
Build a team and make a plan! Protecting
school and child care facility drinking water is a
group effort and you will need to have a plan
for who you will work with, how you will test,
and how you will address elevated lead that
may be found. Make sure you are transparent
in your communications with your community.
The 3Ts toolkit includes modules and helpful
resources you can use to implement a
successful program!
Module 1
Communicating the 3Ts
Module 2
Learning About Lead in Drinking Water
Module 3
Planning Your 3Ts Program
Module 4
Developing a Sampling Plan
Module 5
Conducting Sampling & Interpreting Results
Module 6
Remedi
ation & Establishing Routine Pract
ices
Module 7
Recordkeeping
Establishing a Lead Testing Program – 3Ts Checklist
The 3Ts toolkit assists you with the steps needed to create a program to reduce children’s exposure to
lead in drinking water. Utilizing the 3Ts toolkit along with clear communication will help ensure a
successful 3Ts Program.
Before sampling, facilities should establish a plan on how they will respond to their sample results to
protect the school or child care facility population from lead in drinking water. You should consider
potential partners, funding options, and how frequent testing will occur.
Communication Plan: Telling parents and staff
about your lead monitoring program will
demonstrate your commitment to protecting
children and staff health.
Communicating early and often about your testing plans, results, and
next steps will build confidence in your facility’s ability to provide a safe
environment for students and staff.
The steps
in the checklist are intended to help you learn about lead in drinking water, develop a
program, test for lead, communicate the results, and take remediation actions where needed. The
checklist includes things to consider in the TRAINING, TESTING, and TAKING ACTION sections of the 3Ts,
as well as important COMMUNICATION and RECORDKEEPING items. This checklist is designed to provide
easy-to-follow steps. You may not have to complete all the steps or follow the steps in the exact order
presented to have an effective program. Your 3Ts program should be tailored for your school or child
care facility.
Find the 3Ts Checklist here:
https://epa.gov/safewater/3Ts
7 | Page
3Ts for Reducing Lead in Drinking Water
Module 1
Module 2
Module 3
Module 4
Module 5
Module 6
Module 7
Module 1: Communicating the 3Ts
COMMUNICATE
Developing a Communication Plan
At the heart of an effective communication plan is preparation and coordination to
deliver information swiftly, professionally and consistently. Telling parents and staff
about your 3Ts Program will demonstrate your commitment to protecting children and
staff health. Communicating early and often about your testing plans, results, and next
steps will build confidence in your ability to provide a safe environment.
When developing your communication plan:
• Take the initiative to communicate
with your community
• Make sure your information is
honest, accurate, and
comprehensive
• Speak with one consistent voice
• Anticipate questions and concerns
and address them proactively
• Be positive and forthcoming
• Keep your audiences up-to-date as
new information becomes available
Follow these recommended steps and utilize the templates in 3Ts Toolkit to develop a
successful and proactive communication plan.
STEP 1: Get Your Team Together
Assemble a team with technical and communications expertise. Draw from internal
resources as well as professionals and leaders in your community. Designate a
spokesperson to make announcements, respond to questions, and conduct interviews
in order to ensure the accuracy and consistency of public information.
You can learn more about other roles in your lead testing program in the Assigning
Roles Section.
Helpful Tip…
To support engagement with the
community and build trust, it is
important to begin communication
before testing starts and be open and
transparent throughout the process.

8 | Page
3Ts for Reducing Lead in Drinking Water
Module 1
Module 2
Module 3
Module 4
Module 5
Module 6
Module 7
COMMUNICATE
Fill out the chart below to get started building your team. Note, some people
may have more than one role.
Description Lead Back-Up
3Ts Program Communication Contact: This
person will act as the point of contact for your
3Ts Program and help coordinate the
communication efforts.
Partner Liaison Contact: This person will
communicate with partners as the 3Ts Program
progresses to ensure everyone is kept in the loop.
Website and Social Media Contact: This person
will make sure websites and social media stay up
to date with the latest information.
Public Hotline: Will you have a website or hotline
for people to use to get more information? This
person can monitor this to ensure questions and
concerns are being responded to.
Communication of Lead Health Risks: You should
work with your health department to
communicate lead health risks and information
about blood lead testing for children.
STEP 2: Create a Contact List
Having names, phone numbers, and email addresses at your fingertips is vital,
especially when a quick response is necessary. Create a contact list and update it
regularly. It should include task force members as well as fact-finding and
communications contacts, including:
• School Superintendent
• School Board Members
• Civic Leaders
• Local Public Health
Officials
• Head of Building
Maintenance/Custodial
Services
• State Department of Education
• State Department of Health
• State Drinking Water Program
• EPA Regional Office
• Utility/Water Supplier
• Media (Newspaper, TV, Radio,
Web, and Newswire Outlets)

9 | Page
3Ts for Reducing Lead in Drinking Water
Module 1
Module 2
Module 3
Module 4
Module 5
Module 6
Module 7
COMMUNICATE
STEP 3: Identify Your Target Audiences
Generally, there are six primary audiences or interested parties involved in the control
of lead in drinking water.
1. School or Child Care Facility Community: Employees, students, and parents
should be informed and involved from the beginning of the process.
2. Building Community: The building community includes people other than
those included in the school or child care facility community who may use the
building for other functions (e.g., local community groups, school board
members). Members of the building community probably do not utilize the
building as frequently as the members of the school or child care facilities
community, but they should still be kept informed and up-to-date regarding
lead in the drinking water.
3. Larger Community: The larger community may consist of local residents and
businesses in the school or child care facility’s district or town. The local and
regional media can serve as a conduit for information for the larger local
community. It is important that you be prepared to generate accurate news
releases. The spokesperson or task force should be prepared to respond to
interview requests with accurate and consistent information.
4. Local Community Organizations: Local health officials, such as health officers,
environmental health specialists, doctors, and nurses, can help you and your
community understand health risks associated with elevated lead levels in
drinking water. Local environmental community organizations may have an
interest and potential assistance or resources for schools and child care
facilities. The same may apply for the Lead Poisoning Prevention Program.
5. State Drinking Water Programs: State drinking water programs are responsible
for ensuring that public water systems comply with the state and federal
regulations regarding lead in drinking water. States may be able to provide
guidance on or technical assistance with communication plan, health risks, and
identifying other lead sources.
6. Drinking Water Community: Public water systems comprise the regulated
drinking water community, and they are responsible for complying with all
national and state drinking water standards. The public water system that
serves your facility can provide technical information to support your program
and can provide information to the community about what the system is doing
to minimize lead in drinking water.
10 | Page
3Ts for Reducing Lead in Drinking Water
Module 1
Module 2
Module 3
Module 4
Module 5
Module 6
Module 7
COMMUNICATE
STEP 4: Know Your Methods of Communication
The public notification methods described below can be applied independently or in
combination to communicate about drinking water issues and the meaning of
sampling program results.
Important note: You should also plan how you will provide information in other
languages, as appropriate, or provide a contact name for non-English speakers to get
more information.
Methods of Communication
Press Release: A press release in the local newspaper or on local TV and radio
stations can potentially reach a broad range of people. It is important that the
release inform readers of how to obtain the sampling results and other lead
information (as it pertains to drinking water) and include the phone number of the
point(s) of contact.
Letters/Fliers: Letters or fliers represent a direct and effective method of
communicating 3Ts Program activities to parents/guardians and other members of a
school, child care facility, or building community.
Mailbox or Paycheck Stuffers: Mailbox and paycheck stuffers represent a direct and
effective method of communicating 3Ts Program activities to your employees.
Stuffers would contain information similar to that contained in a press release or
letter/flier.
Staff Newsletter: A notice contained in a staff newsletter is another option for
directly and effectively communicating information about the 3Ts Program to
employees.
Presentations: Providing presentations at facility-related meetings can also serve as
an effective means of communication. Relevant events include meetings of PTAs,
faculty, and the school board.
Email and Websites: Electronic communications are convenient for many parents.
Websites can be updated frequently to quickly convey new information. Consider
creating a separate email address for the 3Ts Program and providing it on the
website and outreach materials. Email provides a quick, easy method for parents to
ask questions, but responses must be timely to be effective.
Social Media: Updates on the status of the 3Ts Program and information on regular
activities can be provided to the public with ease via official social media accounts
(e.g., Facebook, Twitter).
11 | Page
3Ts for Reducing Lead in Drinking Water
Module 1
Module 2
Module 3
Module 4
Module 5
Module 6
Module 7
COMMUNICATE
STEP 5: Identify Times for Communicating
Timely dissemination of communication materials is of the utmost importance. Public
communication efforts are less complicated and generate less conflict if those
potentially affected are notified in advance of important issues and events.
At a minimum, EPA recommends that schools and child care facilities provide
information to members of the local community, building community, and the larger
community (if appropriate) at the following times:
• Before the lead in drinking water sampling program begins
• After obtaining the results of testing:
o As soon as the results are available
o When/if corrective measures are decided upon
o If no corrective measures are appropriate because the lead levels are
low
• In response to periodic interest in the program
STEP 6: Start Communicating!
Remember to communicate throughout your 3Ts Program, and work with partners
and your communication team to be proactive and transparent. Recommended steps
to help make your program a success:
• Launch an ongoing campaign of education and awareness, capitalizing on a
variety of communication vehicles
• Prepare a fact sheet so that your spokesperson has accurate, up-to-date
information about the status of your plumbing system and program.
• Post information on your website in a central location
• Make sure your communication materials include:
o Details about the nature of the 3Ts Program
o The results of the sampling program and plans for correcting any
identified problems
o Information on the public health effects and risks posed by lead in
drinking water and the significance of lead other sources of lead such as
food, air, dust, and soil
o How and where individuals may seek blood-lead level testing if they are
concerned
o How families can increase their awareness of potential lead exposure in
their homes and elsewhere
12 | Page
3Ts for Reducing Lead in Drinking Water
Module 1
Module 2
Module 3
Module 4
Module 5
Module 6
Module 7
COMMUNICATE
o Information about state-certified laboratories that can test home water
for lead and other contaminants
Don’t forget to maintain a record!
It is important to keep an ongoing record of public outreach and communication
activities. By documenting outreach and the public’s response, you can learn how
to improve upon your public communication plan. For example, it might be
helpful to keep a running log of questions received from the community that
could be addressed in future communications.
Keep copies of past communication materials and dates they
were sent out. Strong recordkeeping can prove to be helpful in
illustrating what steps you have taken to notify the public
of testing efforts and results.
Additional Resources
View the 3Ts toolkit page for more resource to help you:
• Get your team together
• Create a contact list
• Identify your target area
• Know your methods of communication
• Identify timing for communication
• Start communicating!
All materials can be found here: https://www.epa.gov/safewater/3Ts
13 | Page
3Ts for Reducing Lead in Drinking Water
Module 1
Module 2
Module 3
Module 4
Module 5
Module 6
Module 7
Module 2: Learning About Lead in Drinking Water
TRAINING
Health Effects of Lead
Lead is a toxic metal that is harmful to human health. There is no safe blood lead level
for children. In the human body, toxic lead can substitute for healthy calcium, which is
a mineral that strengthens the bones. Lead is carried in the bloodstream and can harm
the nervous system and brain. What is not excreted is absorbed into the bones, where
it can collect for a lifetime.
The only way to determine a child’s lead level is to have the child’s blood
tested. Contact a health provider to learn more about blood lead testing.
Young children are especially susceptible to lead exposure, because of their frequent
hand-to-mouth activity, and their metabolism—their bodies absorb metals at a higher
rate than the average adult does. Children’s nervous systems are still undergoing
development and thus are more vulnerable to the effects of toxic agents.
Pregnant and nursing staff should also be aware of the harmful risks of lead exposure
to nursing infants and the developing fetuses of pregnant women. Mothers who have
had exposure to lead in the past may store lead in their bones. Lead may be released
from bones during pregnancy and lactation. Lead in drinking water can be a significant
contributor to overall exposure to lead, particularly for infants whose diet consists of
liquids made with water, such as baby food, juice, or formula.
Lead can affect almost every organ and system in the body. The central nervous
system is particularly sensitive to lead, especially in children. Lead also damages the
kidneys and the reproductive system. Even low blood levels of lead (those below 5
micrograms per deciliter (µg/dL)) have been associated with reduced IQ and attention
span, learning disabilities, poor classroom performance, hyperactivity, behavioral
problems, impaired growth, and hearing loss. Because childhood lead exposure often
occurs with no immediate symptoms, it frequently goes unrecognized. The degree of
harm from lead exposure depends on a number of factors including the frequency,
duration and level of the exposure(s) and individual susceptibility factors (e.g., age,
previous exposure history, nutrition, and health). In addition, the degree of harm
depends on one’s total exposure to lead from all sources in the environment—air, soil,
dust, food, paint, consumer products, and water.
14 | Page
3Ts for Reducing Lead in Drinking Water
Module 1
Module 2
Module 3
Module 4
Module 5
Module 6
Module 7
TRAINING
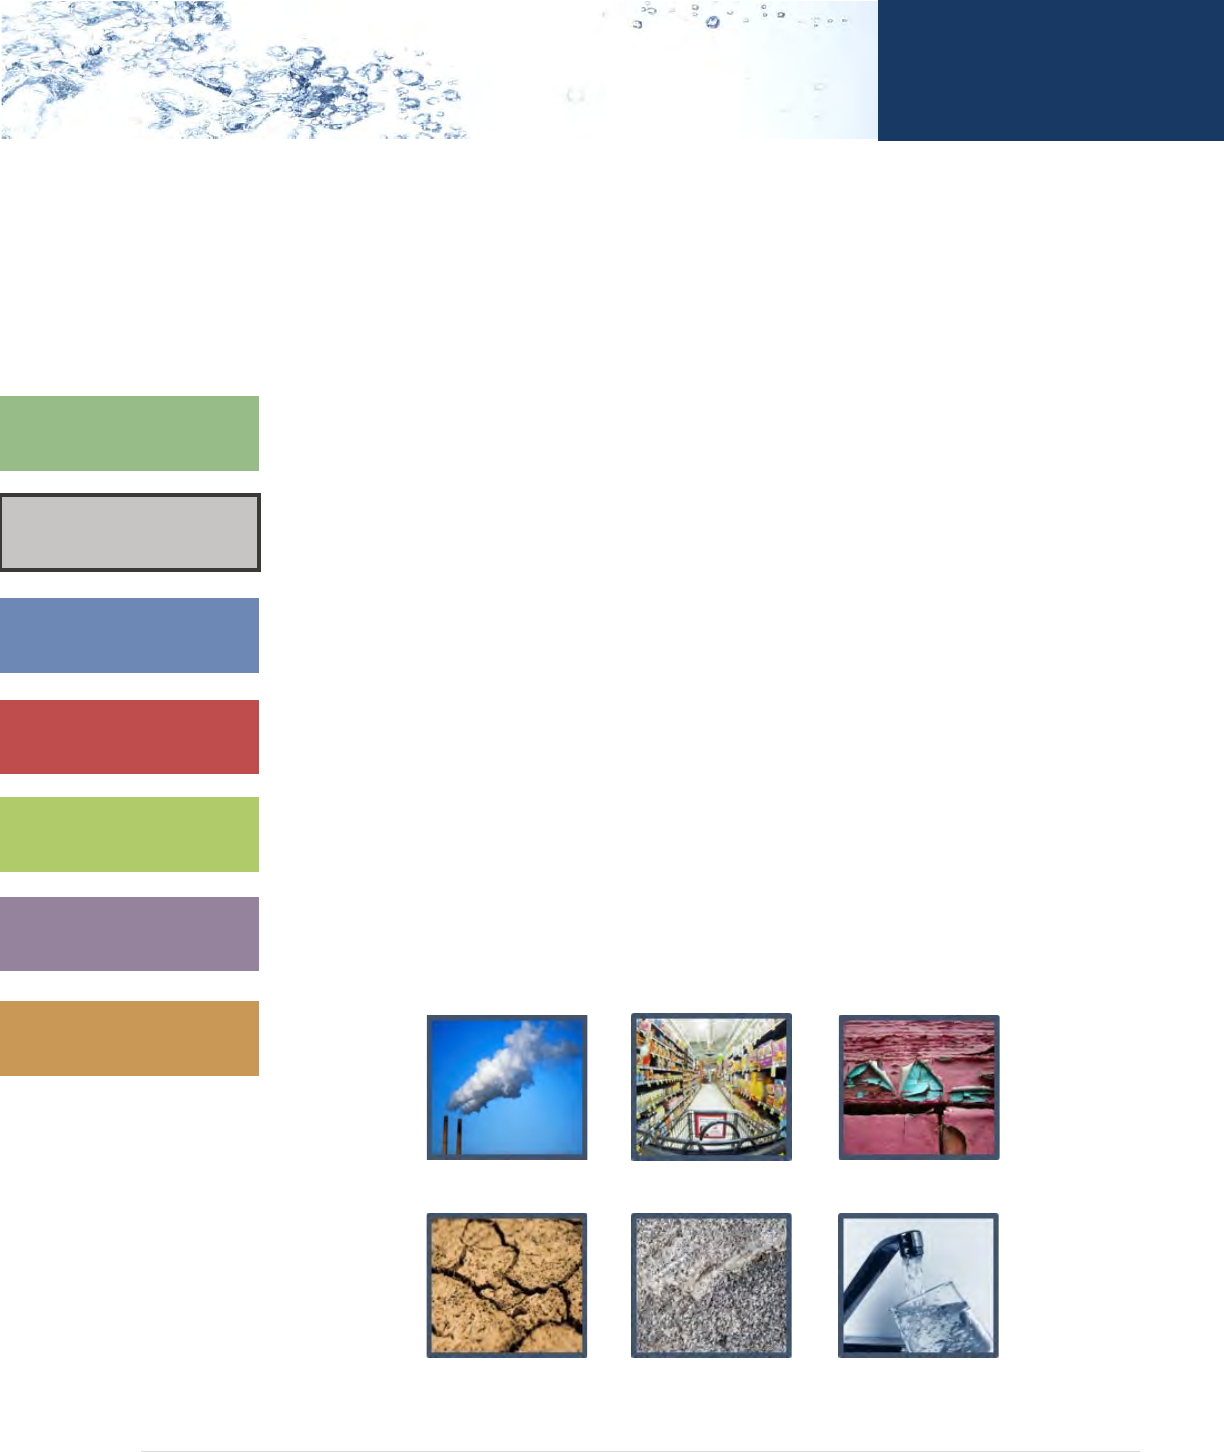
Sources of Lead
Lead is distributed in the environment through both natural and man-made means.
Sources of lead exposure include the following:
• Lead-based paint. The most common sources of lead exposure for children are
chips and particles of deteriorated lead paint. Although children may be
exposed to lead from paint directly by swallowing paint chips, they are more
often exposed to lead in house dust or soil contaminated by leaded paint. Lead
paint chips can be ground into tiny pieces that become part of the dust and soil
in and around homes. This usually occurs when leaded paint deteriorates or is
subject to friction or abrasion (as on doors, windowsills, and window wells). In
addition, lead can be dispersed when paint is disturbed during demolition,
remodeling, paint removal or preparation of painted surfaces for repainting.
• Lead in water. Typically, lead in water occurs through corrosion of plumbing
products containing lead.
• Lead in the air typically comes from industrial activities.
• Lead in soil. In most cases, lead deposits in soils around roadways and streets
and homes come from past emissions from automobiles using leaded gas,
together with lead paint chips and dust.
• Lead from industrial activities. Industrial workers can bring lead home on their
clothes and shoes.
• Lead in consumer products and food. Lead may be found in some imported
candies, medicines, dishes, toys, jewelry, and plastics.
Soil
Air
Consumer Products
Industry
Drinking Water
Paint
15 | Page
3Ts for Reducing Lead in Drinking Water
Module 1
Module 2
Module 3
Module 4
Module 5
Module 6
Module 7
TRAINING
The U.S. government has taken important steps over the past several decades to
dramatically reduce new sources of lead in the environment:
• Banning the manufacture and sale of leaded paint.
• Phasing out lead additives in gasoline.
• Encouraging the phase-out of lead seams in food cans.
• Banning the sale of plumbing for drinking water that are not “lead-free.”
• Limiting lead content in children's products.
• Banning lead-lined water coolers.
• Regulating lead in the nation’s drinking water systems
How Lead Gets in Drinking Water
Source Water
Lead is rarely present in the source water for the nation’s drinking water supplies (i.e.,
untreated water from streams, rivers, lakes, or underground aquifers that is used to
supply private wells and public drinking water). While lead can enter source water
from contaminated runoff or water pollution, treatment plant technologies can
remove lead from these sources.
Through Corrosion
Corrosion can release lead from pipes, solder, fixtures, and other plumbing materials
that the water comes in contact with on its way from the water treatment system to
the tap. The extent to which corrosion of plumbing materials occurs can affect the
amount of lead that is present in the drinking water. Most lead in school and child care
facility drinking water results from corrosion of older plumbing materials containing
lead. Interior lead solder (commonly used until 1988) and lead pipe and lead solder,
leaded brass fittings, valves, and various drinking water outlets (e.g., water fountains
and faucets) that contain lead materials are the primary contributors. It is also
important to note that brass plumbing components can contain lead.
The occurrence and rate of corrosion depend on the nature of the source water, the
corrosion control practices at the water system, and the age of the plumbing materials
in the building. For information on how chemical and physical conditions can be
controlled to reduce lead in drinking water, contact the state drinking water program,
which is typically housed in the state department of health or the department of
environmental protection.
16 | Page
3Ts for Reducing Lead in Drinking Water
Module 1
Module 2
Module 3
Module 4
Module 5
Module 6
Module 7
TRAINING
Particulate Lead
Particles of lead in drinking water, may result from physical corrosion of lead
distribution system and interior plumbing components. Physical disturbances
(e.g., construction), pipe replacement, and connection of new fixtures can
cause the release of lead particles from system and plumbing components.
This release can result in temporary, but significant, increases of lead levels
in the water. Lead particles may also collect in the low-lying sections of pipe
or behind faucet and fixture screens, increasing risk of exposure. Not all
analysis methods account for particulate lead. For example, some field
analyzer methods are not designed to account for particulate lead. See
Selecting a Laboratory for Sample Analysis for more information on
laboratory analysis of lead in water.
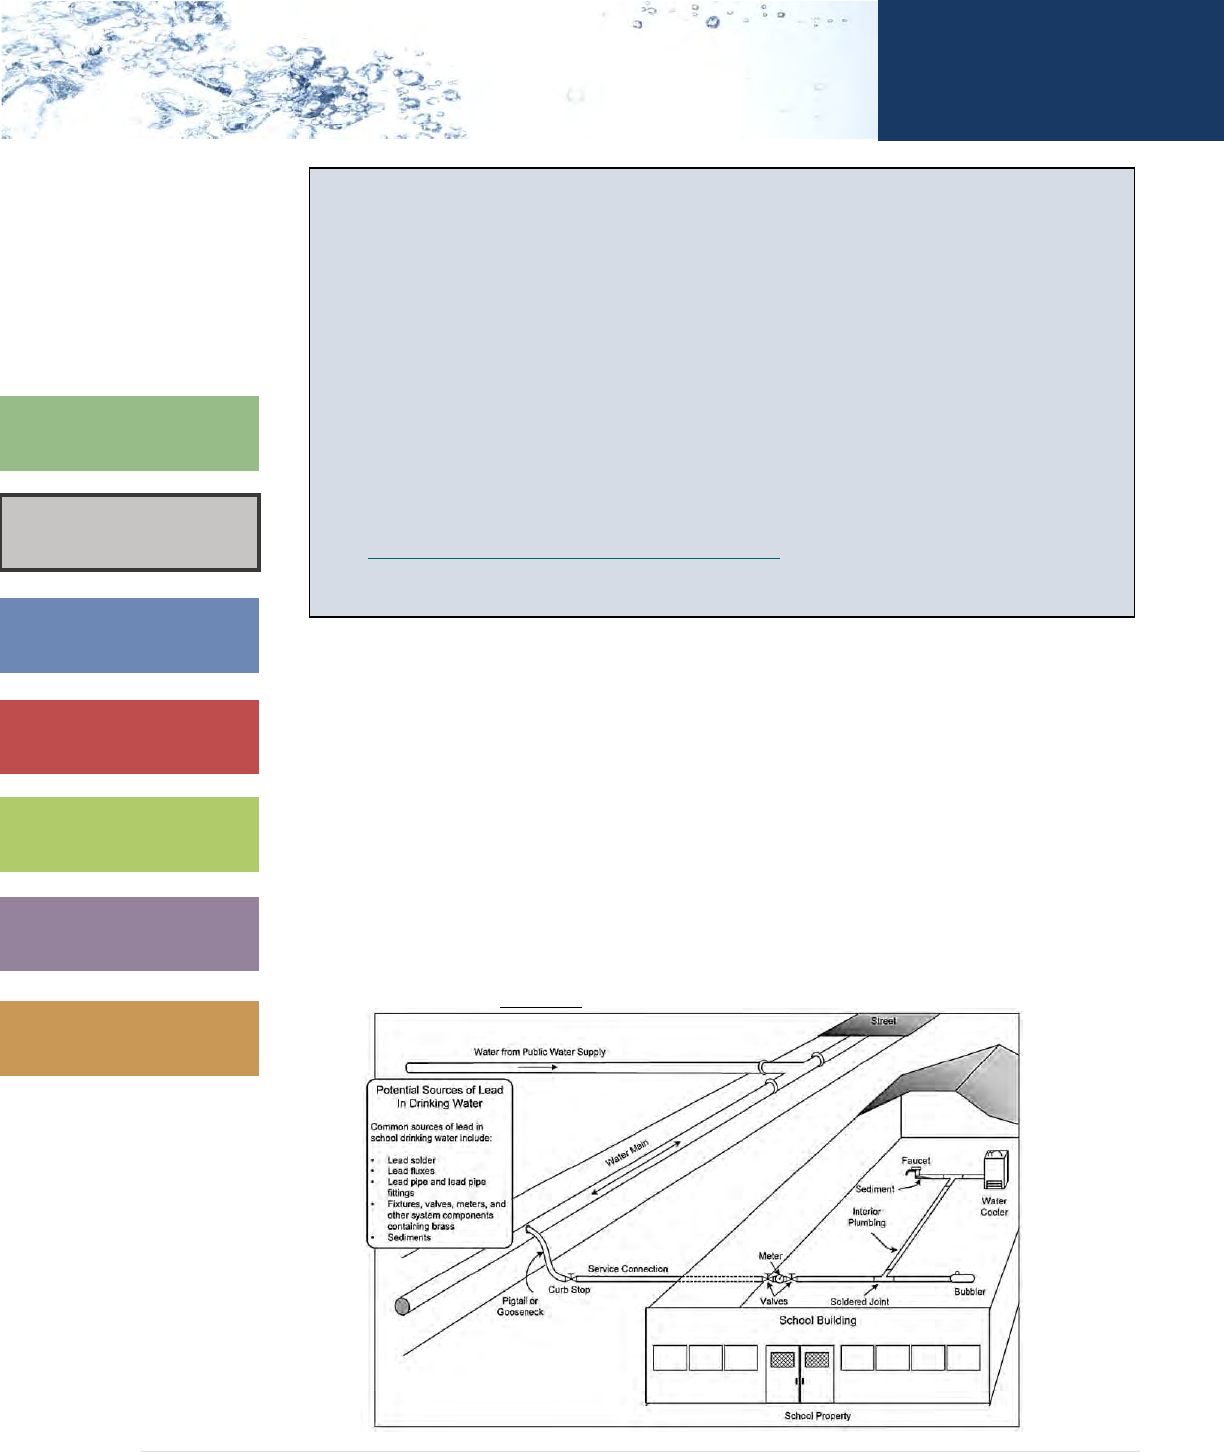
Your Facility and the Public Water System Relationship
As illustrated in Exhibit 1 below, once the water enters the distribution system – the
network of pipes that carry water to homes, businesses, schools, and child care
facilities in the community – the water may come into contact with lead. Some
communities have lead components in their distribution systems, such as lead joints in
cast iron mains, service connections (or service lines), and goosenecks or pigtails,
which connect the water main to service lines. These components may be owned by
the water supplier, or they may be owned by the school or child care facility. In
addition, the drinking water may come into contact with plumbing materials that
contain lead once the water enters the building.
Exhibit 1. Potential Sources of Lead in Schools

17 | Page
3Ts for Reducing Lead in Drinking Water
Module 1
Module 2
Module 3
Module 4
Module 5
Module 6
Module 7
TRAINING
If the public water system finds unacceptable levels of lead during sampling under the
Lead and Copper Rule (LCR), the public water system may have to provide centralized
treatment or take other actions to minimize the corrosion of lead into the water (see
How Lead in Drinking Water is Regulated below). However, centralized treatment by a
public water system does not guarantee that corrosion of lead from plumbing will not
occur within buildings served by the public water system, such as schools. It is
important to note that the lead testing protocol used by public water systems is aimed
at identifying system-wide problems rather than problems at outlets in individual
buildings.
How Lead in Drinking Water is Regulated
Picture of a Scratch on
a Lead Service Line
Lead is regulated in public drinking water systems under a federal regulation known as
the Lead and Copper Rule. This regulation was initially issued in 1991 and, in part,
requires water systems to test for lead and copper and to take actions that reduce
corrosivity and protect public health.
Nearly all states have a drinking water office
that implements the Safe Drinking Water Act
(SDWA). Questions regarding the regulation of
drinking water may be directed to the
appropriate state drinking water program
office or state licensing agency.
Requirements addressing lead in water include specific provisions in:
• THE SDWA LEAD BAN (1986): A requirement that only “lead-free” materials be
used in new plumbing and in plumbing repairs. In the 1986 ban, “lead-free”
meant that solders and flux may not contain more than 0.2 percent lead, and
pipes and pipe fittings may not contain more than 8.0 percent lead. It is likely
that lead pipes and high-lead solder and fluxes continued to be used until 1988
in several states and territories, and until 1989 or 1990 in a few states, but
other state or local governments may have imposed related lead-ban standards
prior to 1988.
• THE LEAD CONTAMINATION CONTROL ACT (LCCA) (1988): The LCCA is aimed
at the identification and reduction of lead in drinking water at schools and child
care facilities, including the recall of drinking water coolers with lead lined
tanks and the publication of a list of drinking water coolers that were not “lead
18 | Page
3Ts for Reducing Lead in Drinking Water
Module 1
Module 2
Module 3
Module 4
Module 5
Module 6
Module 7
TRAINING
free” as defined by the LCCA (no more than 8% lead for components that come
into contact with water and no more than 0.2% percent lead for solder, flux, or
storage tank interior that comes into contact with water).
• THE LEAD AND COPPER RULE (1991): A regulation by EPA to control the
amount of lead and copper in water supplied by public water systems through
corrosion control treatment, and other measures. Modifications were made to
the Lead and Copper Rule in 2000 and 2007 to include revised requirements on
demonstrating optimal corrosion control, monitoring, and reporting, treatment
processes, public education, customer awareness, and lead service line
replacement.
• THE REDUCTION OF LEAD IN DRINKING WATER ACT (2011): This act further
reduced lead in pipes, pipe fittings, plumbing fittings, and fixtures to a
weighted average of 0.25 percent. The act also redefined “lead-free” under the
SDWA as not containing more than 0.2 percent lead when used with respect to
solder and flux and not more than a weighted average of 0.25 percent lead
when used with respect to the wetted surfaces of pipes, pipe fittings, plumbing
fittings, and fixtures.
19 | Page
3Ts for Reducing Lead in Drinking Water
Module 1
Module 2
Module 3
Module 4
Module 5
Module 6
Module 7
Module 3: Planning Your 3Ts Program
TRAINING
When planning your 3Ts Program, it is important to reach out to the public water
system, state and local offices, parents, teaching staff, and other impacted
stakeholders to establish partnerships. These partnerships will:
• Provide a better understanding of current lead control resources in the area.
• Offer partners who may be able to provide guidance to a new program.
• Create a platform for communicating any program updates to local and state
offices and the community.
After you have a better understanding of how the program will operate in relation to
current state and local efforts and what resources are available from internal and
external stakeholders, it will be easier to identify individuals who can fill particular
roles and make the program a success.
Use the 3Ts Checklist to understand the recommended steps to implement a testing
program for lead in school or child care drinking water.
Review Your Records
Identify and review records to determine if monitoring has previously been conducted
at the school or child care facility. Some schools and child care facilities conducted
voluntary monitoring in cooperation with state or local officials in response to the
1988 LCCA. Other schools and child care facilities may have sampled for lead in
response to state requirements or local concerns. This information will be useful in
filling out the plumbing profile questionnaire (provided in Appendix G), a tool that may
be used to help determine whether lead is likely to be a problem in a school or child
care facility. Records should also be reviewed to determine whether remediation
actions have already been taken. For example, have water fountains with lead-lined
coolers been replaced? See Appendix B for a listing of banned water coolers. While
these records may not make additional testing or remediation unnecessary, they will
help to prioritize efforts and make them more efficient.
If testing or remediation was conducted in response to the 1988 LCCA, it may have
taken place 30 years ago or more. If current staff are not familiar with what activities
may have taken place at the school or child care facility and records are incomplete or
absent, consider contacting individuals who may have been involved in the past.
Personnel that were involved may remember activities that were not well
documented. They may also remember whether other agencies or the local public
water system were involved, which may mean that additional records are available.
20 | Page
3Ts for Reducing Lead in Drinking Water
Module 1
Module 2
Module 3
Module 4
Module 5
Module 6
Module 7
TRAINING
Throughout this manual, recommendations are provided on when and how to set up a
robust recordkeeping process for current and future efforts.
Communication Plan: Include your partners in
your communication with the parents, staff, and
the school or child care community. Also
remember to communicate to partners as new
information becomes available.
Establishing Partnerships
Entities like the public water system, local health offices, state drinking water
programs, certified laboratories, and local community organizations may be able to
provide assistance in testing the drinking water for lead. The information below can be
used to:
• Initiate communications with potential partners
• Identify ways these organizations could help the program
• Develop the right questions to ask each type of partner
In addition to contacting the public water system, schools and child care facilities may
consider exploring partnership opportunities with private foundations, private
businesses, and corporations, who may be able to provide funding, and local
construction professionals, who may be able to provide technical expertise.
Assistance from Local Health Offices
Many local governments have established programs that are responsible for a wide
variety of public health protection activities, such as Lead Poisoning Prevention
Programs. Consider contacting the local health office to discuss particular needs or
questions. Although resources may be limited, the health office may be able to provide
assistance in a variety of ways. For example, a representative may be able to attend
parent and teacher association (PTA) meetings to discuss potential health effects, as
well as to act as a liaison with state programs to obtain information and assistance.
21 | Page
3Ts for Reducing Lead in Drinking Water
Module 1
Module 2
Module 3
Module 4
Module 5
Module 6
Module 7
TRAINING
Assistance from the State Drinking Water, Health and Education Programs
Contact state program managers to determine whether training and/or technical
assistance is available and whether any other requirements may apply. The state
drinking water program may be housed in the department of health or the department
of the environment. When discussing issues with the state program, consider
requesting assistance and referring to the Lead Contamination Control Act (LCCA) or
this 3Ts toolkit to help to clarify the request. A representative may even be able to
assist in working through the plumbing profile, conducting sampling, or taking follow-
up action.
Many states have programs related to reducing lead in drinking water in schools
and/or child care facilities. These programs may be in the state’s environment,
education and/or health departments. The state health and education departments
may also be able to provide expertise and other information to support you in
developing and maintaining their programs.
The Association of State Drinking Water Administrators website contains links to many
state drinking water programs: https://www.asdwa.org/about-asdwa/.
Why Contact State Drinking Water Programs?
• For more information about lead in drinking water and
drinking water regulations pertaining to lead.
• To inquire about training or available technical assistance
on lead sampling.
• For advice in identifying a qualified consultant to assist
with developing the 3Ts Program.
• For a list of certified laboratories in the area where
samples can be analyzed for lead.
Assistance from Certified Laboratories
The state drinking water office should be able to provide a list of certified laboratories
that you can use when testing for lead in drinking water. You should only use a
laboratory that is certified by the state or EPA for testing lead in drinking water for
public water systems.
22 | Page
3Ts for Reducing Lead in Drinking Water
Module 1
Module 2
Module 3
Module 4
Module 5
Module 6
Module 7
TRAINING
Some laboratories will provide assistance in addressing the activities described in this
manual. For example, some laboratories will collect samples for clients to ensure
proper sampling technique and sample preservation. However, costs for services will
vary and you may wish to contact several certified labs.
Assistance from Local Community Organizations
There are a variety of local organizations within communities that can help; for
example, community volunteer groups, senior citizens’ groups, the PTAs, and local
environmental groups. Another useful resource is the region’s pediatric environmental
health specialty unit (PEHSU). The region’s PEHSU may be able to provide risk
communication support to districts; for more information, please visit
http://www.pehsu.net/.
Contacting these groups is another way for you to foster support. These groups might
be willing to volunteer time to collect samples and train others to collect samples.
Local nonprofit and community-based organizations may also have monetary or in-
kind resources available to support testing and/or remediation.
Working with Your Water System
A critical partner in any program to reduce lead in drinking water is the local water
system. Before contacting community-based organizations and certified laboratories,
EPA recommends contacting public water
systems or local government offices for
assistance. Water systems can help:
• Provide information that may be
helpful
• Assist with determining if lead is
present
• Support the you in developing your
sampling plan
• Collect and analyze samples
• Help interpret results and determine
potential lead sources
• Communicate with the school and
child care facility, and the public
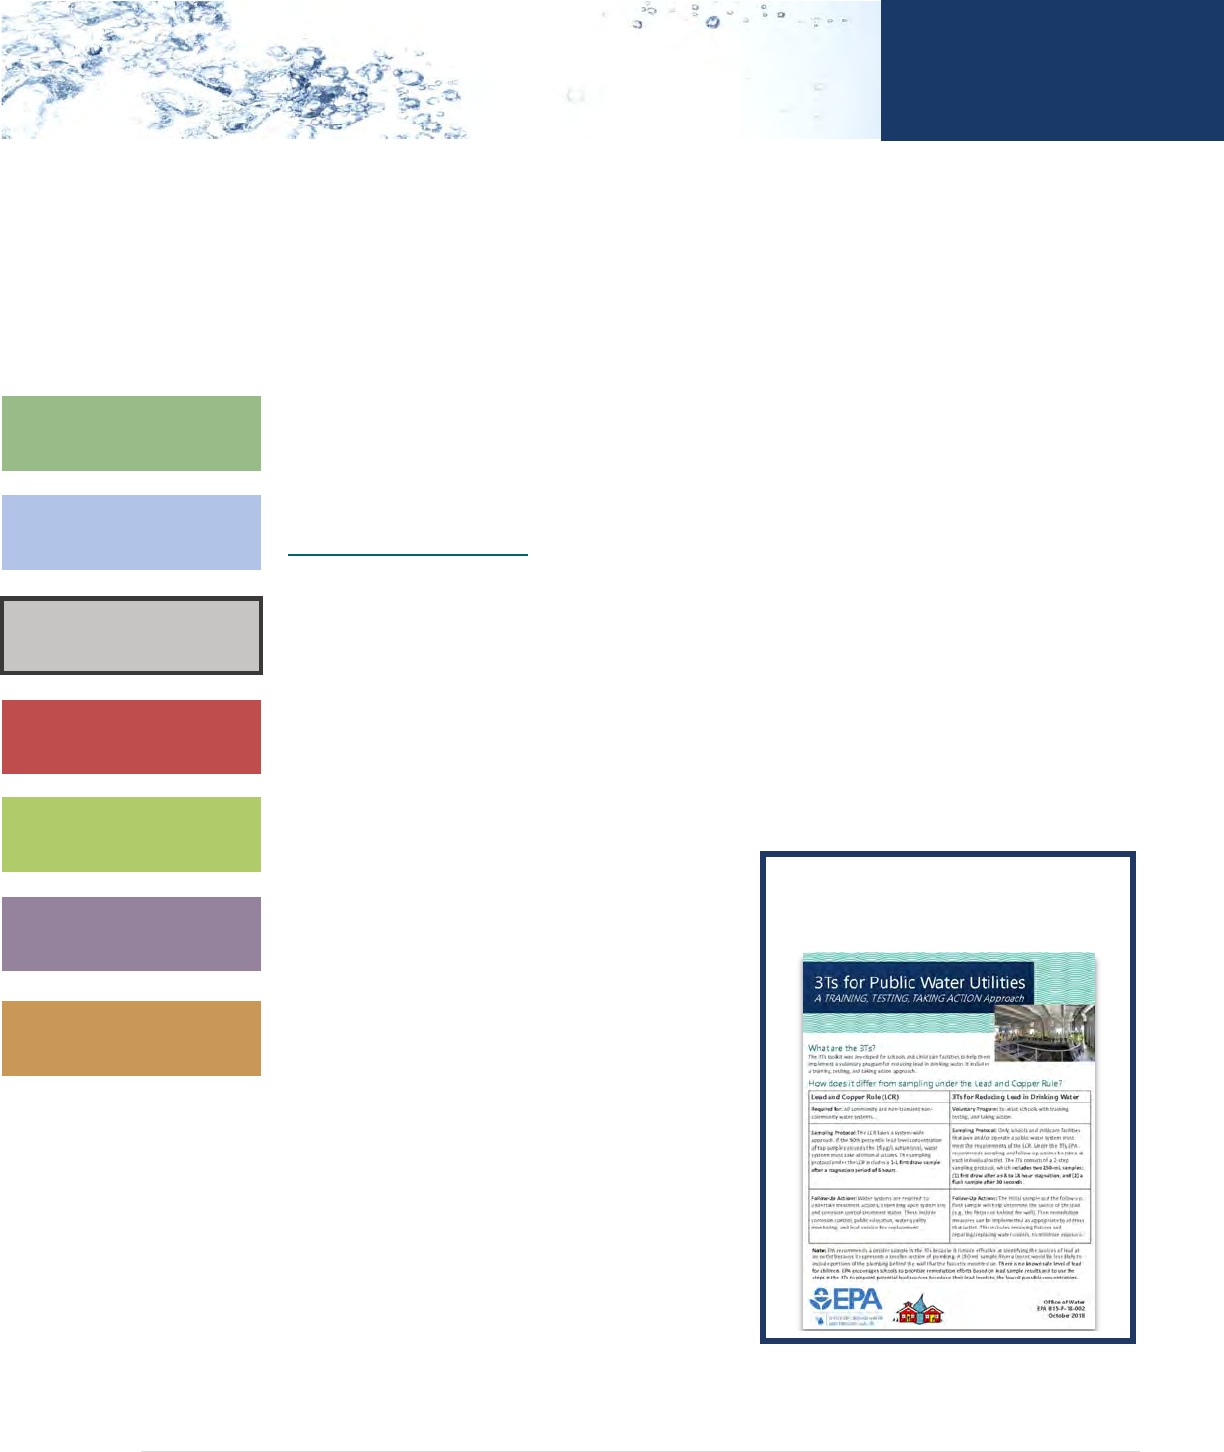
View the 3Ts for Public Water
Systems to see how they can help.
23 | Page
3Ts for Reducing Lead in Drinking Water
Module 1
Module 2
Module 3
Module 4
Module 5
Module 6
Module 7
TRAINING
Contact the public water system to determine whether assistance or information on
previous efforts is available. Some public water systems have devoted resources to
helping you conduct testing for lead. Although utilities may not be under a legal
obligation to do so, assistance may be available through technical guidance, sampling
or sharing in sampling or laboratory costs. Some utilities may be willing to help develop
sampling plans and plumbing profiles (see Testing Section).
You can obtain the results of the water supplier’s required monitoring under the Lead
and Copper Rule to determine whether the supplier is in compliance with the
requirements of the Rule. Public water systems should be able to tell you whether lead
monitoring is current, whether the monitoring results are below the lead action level,
and whether corrosion control treatment is provided. Your water supplier should also
be able to tell you whether the supplier has conducted lead monitoring at the school
or child care facility and may be able to provide some indication of whether lead could
be a problem within your building(s).
In addition, EPA maintains a data warehouse of drinking water information. Also, many
states make comprehensive drinking water system data available in online databases.
Data can be searched by state (i.e., primacy agency), city, and/or county to find public
water system information. Some public water systems are required to produce and
distribute an annual report about the public water system including system-wide
monitoring results. These reports are often called consumer confidence reports or
annual water quality reports. Contact your public water system to obtain a copy of the
latest consumer confidence reports or water quality report or visit EPA’s Where You
Live: Your Drinking Water Quality Reports Online website to check if it is available
online.

24 | Page
3Ts for Reducing Lead in Drinking Water
Module 1
Module 2
Module 3
Module 4
Module 5
Module 6
Module 7
TRAINING
Questions to Ask Drinking Water Systems
It is important to know who supplies your drinking water, and how the water is
treated. The following are some questions to consider asking the public water
system providing your drinking water:
• What information can the water system provide regarding its compliance
with federal and state standards for lead monitoring and treatment?
• What steps have been taken to maintain compliance with the Lead and
Copper Rule and reduce lead levels?
• Has the water system had a lead action level exceedance in its most recent
compliance period?
• Does the water system have sample results for the school or child care
facility?
• Does (or could) the water system take any LCR samples at schools or child
care centers?
• Is the water corrosive? If so, what is the system doing to minimize
corrosion?
• Does the water system add a corrosion control chemical to the water?
• Is there construction or water main maintenance planned in the area?
• Does the water distribution system have any lead piping (for example, lead
service lines or lead gooseneck at service connections), and does the
system plan to remove these sources of lead?
Don’t forget to maintain a record!
Ensure that communications with partners are documented
and kept in a centrally accessible repository, either online or at
the facility. Documenting who you are working with and how
partners are supporting the program will provide staff with
additional points of contact if additional information is needed.

25 | Page
3Ts for Reducing Lead in Drinking Water
Module 1
Module 2
Module 3
Module 4
Module 5
Module 6
Module 7
TRAINING
Assigning Roles
You should assign responsibility to a key individual(s) to ensure that testing and follow-
up actions are completed. Identify individuals who will likely implement and document
the 3Ts Program and who will build a new program at the school or child care facility.
A person should also be appointed to serve as the contact person for communication
with interested parties (civic groups, the media, etc.). One person or more may be
involved in these activities, but it is important to clearly define responsibilities and to
support those people in their roles. An effective 3Ts Program will require a team
effort. Identifying specific roles and responsibilities before initiating a program will
give the program accountability.
Furthermore, by developing team dynamics that include internal communications, you
can ensure that the program is successful and that staff turnover will not leave the
program without direction or documentation. Whenever possible, get the school and
child care administration involved. The superintendent, principal or school or child
care facility director can give the 3Ts Program validity and support the individuals
involved, improving the likelihood that their role in the 3Ts Program is integrated with
their other job functions.
If you decide to use consultants or certified lab personnel, their roles should be
defined and documented with respect to the responsible person(s) at your facility.
Contact the state drinking water program or local
health department if additional advice is needed on
how to identify a qualified consultant.

26 | Page
3Ts for Reducing Lead in Drinking Water
Module 1
Module 2
Module 3
Module 4
Module 5
Module 6
Module 7
TRAINING
Identify Key Individuals
The most important people to involve in the planning process for the school’s 3Ts
Program are those who will be required to approve, support or fund aspects of the
program and those who have current job roles and responsibilities that align with
protecting the health of the school or child care facility population. Key stakeholders
both within and outside of the school and child care facility system include:
• Principal/Director. Include the superintendent if this is a multifacility initiative.
• Custodial and facilities staff. These individuals will have in-depth knowledge
about plumbing and history and assist in implementing the program (e.g., take
water samples).
• School board. Those responsible for developing budgets and recommending
district-wide initiatives.
• School nurse. This individual will have knowledge of overall student health, as
well as an awareness of the dangers of lead poisoning and the importance of
safe drinking water. This individual may already work with the local health
department, be able to identify local laboratories for testing samples and can
also advise parents on how to get their children’s blood lead levels tested.
• Cafeteria staff. These individuals are aware of water use in food preparation.
They can identify the faucets that are regularly used in food or drink
preparation, as well as any unused faucets.
• Athletics staff. These individuals will know the sources of water used to fill
water jugs or those used when teams are practicing or playing games.
• Students. Should feel informed and educated on drinking water and know who
to go to if they notice an issue.
• Teachers. Those affected by lead in drinking water and able to assist with the
program. Teachers also might be sources of information on water use (e.g.,
knowing which fountains are most used). Math and science faculty will have
knowledge of volume equations and water quality and could provide assistance
during the testing process.
• Parents. Advocates for the children in schools and child care facilities.

27 | Page
3Ts for Reducing Lead in Drinking Water
Module 1
Module 2
Module 3
Module 4
Module 5
Module 6
Module 7
TRAINING
• School district wellness committees. Congressional legislation mandated that
schools participating in the National School Lunch Program or other child
nutrition programs create school wellness policies (USDA Team Nutrition).
• Parent Teacher Associations (PTAs). Student advocacy groups made up of
parents and teachers.
• Local plumbing and construction contractors/suppliers. Those working on
facilities; they should use “lead free” materials and plumbing products certified
to be lead free.
Programmatic Questions
Who should create the sampling plan?
It is important to designate a person(s) to serve as a project lead of the sampling
program and follow-up activities, even if someone else is hired to conduct testing. You
may want to involve consultants, laboratories, or other knowledgeable partners to
help develop the plan. You can contact the state, local health department or drinking
water program, or water system, to get advice on how to identify a qualified
consultant.
Who should collect the samples?
Deciding who will collect samples may be based, in part, on whether the certified
laboratory chosen to analyze samples also provides specialists to assist with sample
collection. Choosing an individual who is adequately trained (e.g., a consultant or
someone from the laboratory) to collect samples may help avoid sampling errors. Ask
for references to confirm that individuals are qualified to test for lead in drinking water
in schools and child care facilities. Some state drinking water programs or public water
systems may provide both services, although there is no federal requirement that they
do so.
Will the laboratory take samples or will it provide training and sample
containers for collectors designated by the school or child care facility?
If certified laboratory representatives or consultants are used to conduct testing,
ensure that they have experience in conducting lead testing for drinking water at
schools and child care facilities. You may wish to ask the laboratory or consultant for
references for work they have completed at other schools and child care facilities.
Regardless of who is collecting samples, you should ensure the sampler is familiar with
the procedures outlined in the Testing Section. You should send the sampler a copy of
this document, and any specific testing procedure documents, before sampling is
28 | Page
3Ts for Reducing Lead in Drinking Water
Module 1
Module 2
Module 3
Module 4
Module 5
Module 6
Module 7
TRAINING
conducted. Testing activities can be misrepresentative if sample collectors do not
follow proper sampling procedures. Also, make sure that laboratories or consultants
do not confuse the sampling protocol with the lead testing protocol used by public
water systems. The two protocols are different.
Who should ensure proper remediation?
If testing results show elevated levels of lead in drinking water, then you should
implement remediation measures. Some State programs have additional
requirements, such as notification and remediation, if testing results show lead in
drinking water above specified levels. If remediation is needed, you should assign a
project manager to lead the development of a remediation plan by a qualified
professional and to ensure that remediation is properly completed. The Taking Action
Section, has more information on solutions that you can implement.
Who is in charge of recordkeeping?
Selecting a team member to ensure methods and results are documented is key to
building a sustainable program that is not impacted by staff resignation, retirement, or
transfer. The person responsible for recordkeeping should work with all other team
members to gather information and store it in a centrally accessible place.
Don’t forget to maintain a record!
Document your 3Ts Program contacts and the steps your team
will take to accomplish the goals set out in your 3Ts Program.
Use the 3Ts Toolkit to identify and record contact information for
partners from various organizations and groups described in this section.
29 | Page
3Ts for Reducing Lead in Drinking Water
Module 1
Module 2
Module 3
Module 4
Module 5
Module 6
Module 7
TESTING
Module 4: Developing a Sampling Plan
This section includes recommended steps for developing and implementing a plan for
testing drinking water in schools and child care facilities
1
1
For schools that are public water systems, there are regulatory requirements for sampling that must be followed to
comply with the Lead and Copper Rule (LCR). The recommendations in this module could still be useful for those schools
in addition to the monitoring required by the LCR.
. Each section includes
recommendations and explanations to help you understand your plumbing materials
and sampling plan, evaluate your service connection (service lines), take samples, and
interpret the results. The Taking Action Section provides short-term and longer-term
control measures, examples of remedies for plumbing fixtures, and appropriate follow-
up procedures that you should perform. Throughout the testing process, remember
to document the methodology, any implemented procedures or protocols, and
testing results.
Conduct a Walkthrough
Conduct a walkthrough of the facility and create
an inventory. Take note of all sinks and fountains
used for human consumption. If a floor plan is
available, mark each tap and water filler on the floor plan and assign a unique
identification. It may be helpful to take pictures when conducting this walkthrough. A
plumbing profile can be created by answering a series of questions about the
building’s plumbing. The plumbing profile questionnaire in Appendix G can be used as
a worksheet and recordkeeping tool. It may also be helpful to interview custodial staff
and the teachers about water use.
Take note of the visible plumbing for these outlets. Staff creating the inventory may
need to look under sinks or behind cabinets. Document whether faucets have aerators
or filters in place to understand all possible sources of lead and any current
remediation efforts at each fixture. Aerators should not be removed while conducting
sampling for lead. If your facility has additions, wings or multiple buildings built during
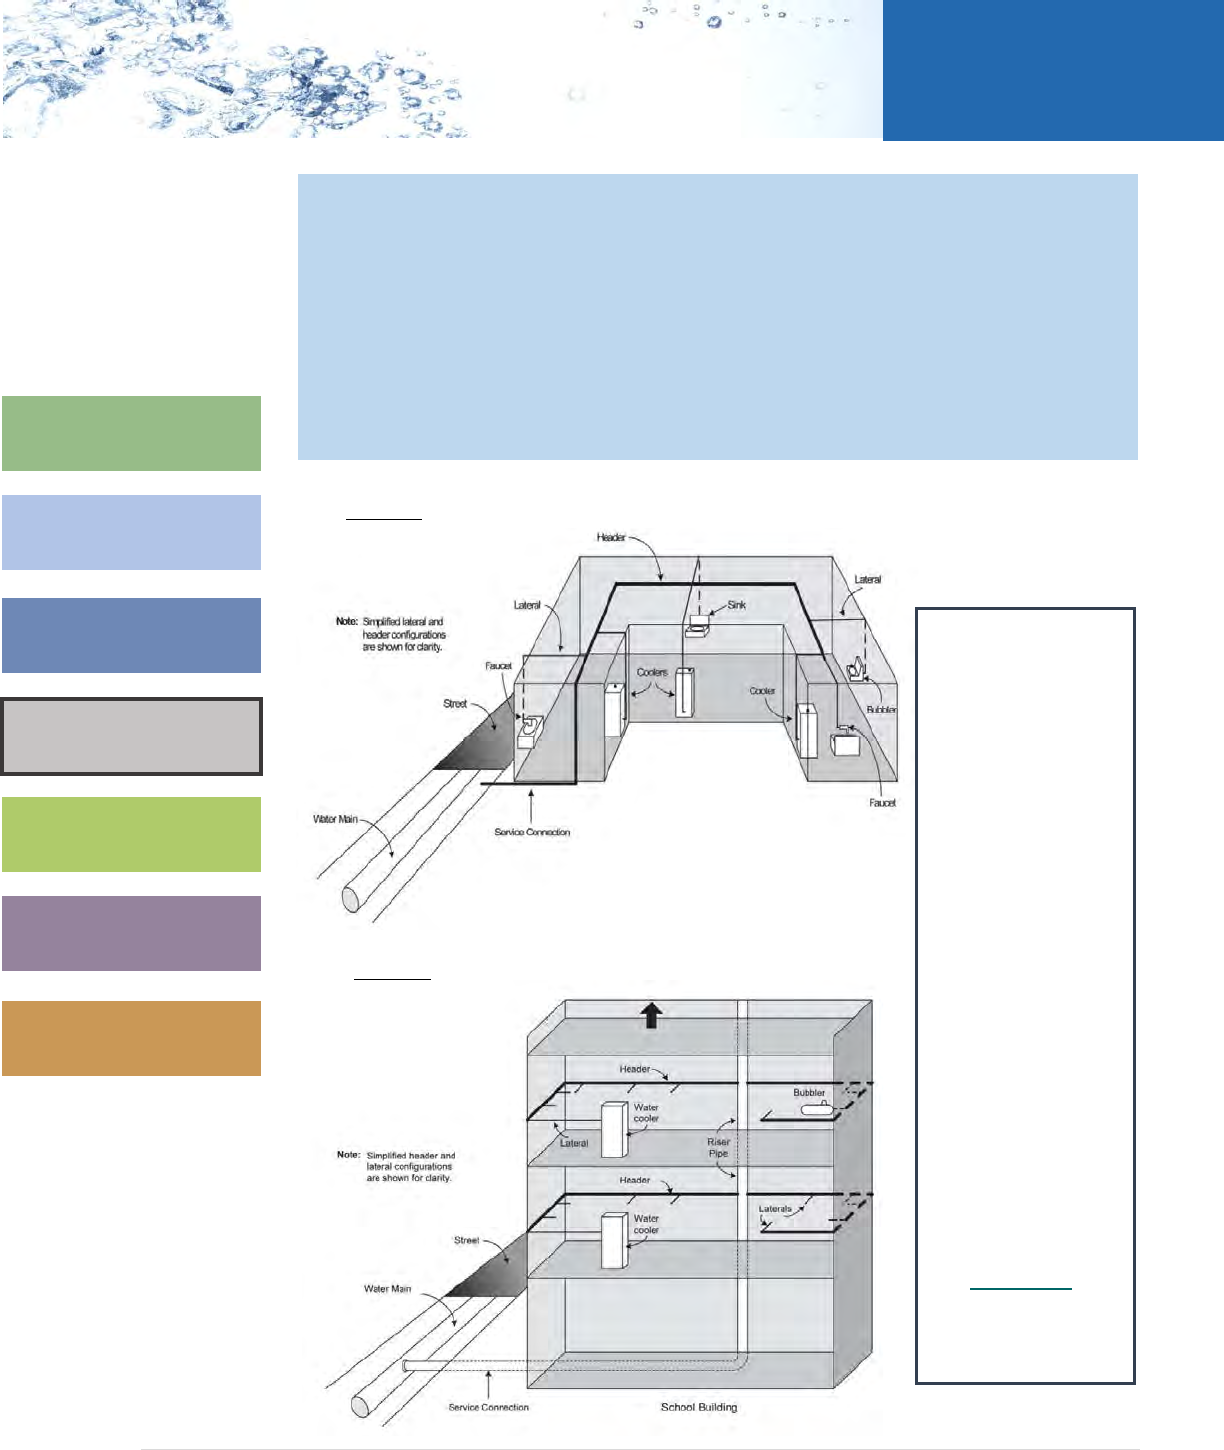
different years, a separate plumbing profile is recommended for each. Examples of
plumbing configurations for a single-level building and a multilevel building are
illustrated in Exhibit 2 and Exhibit 3, respectively.
Make sure to note any lead-lined storage tanks or lead parts such as those noted in
Appendix B. Water coolers identified by EPA as having lead-lined storage tanks or lead
parts should be removed.
30 | Page
3Ts for Reducing Lead in Drinking Water
Module 1
Module 2
Module 3
Module 4
Module 5
Module 6
Module 7
TESTING
Conducting this survey of the building’s plumbing will enable
you to:
Understand how water enters and flows through building(s).
Identify and prioritize samples.
Identify additional sites staff or students may be using for drinking water,
such as bathroom faucets, locker room showerheads, and non-traditional
drinking water outlets that might be used to fill water jugs.
Exhibit 2. Plumbing Configuration for a Single-Level Building
Exhibit 3. Plumbing Configuration for a Multilevel Building
Header: The main
pipe in the internal
plumbing system of
a building. The
header supplies
water to lateral
pipes.
Lateral: A plumbing
branch between a
header or riser pipe
and a fixture or
group of fixtures. A
lateral may or may
not be looped.
Where more than
one fixture is served
by a lateral,
connecting pipes are
provided between
the fixtures and the
lateral.
See Appendix A
for
additional
definitions.
31 | Page
3Ts for Reducing Lead in Drinking Water
Module 1
Module 2
Module 3
Module 4
Module 5
Module 6
Module 7
TESTING
As shown in Exhibit 2, in single-story buildings, the water comes from the service
connection via main plumbing branches, often called headers. These, in turn, supply
water to laterals. Smaller plumbing connections from the laterals and loops supply
water to the faucets, drinking water fountains and other outlets. In multilevel buildings
(Exhibit 3), water is carried to the different floors by one or more riser pipes. In
addition, in some buildings, water may be stored in a tank prior to being distributed to
the drinking water outlets and fixtures. Remember, for sampling purposes, that water
within a plumbing system moves from the water main in the street through the service
connection and through the building. Sample collection should typically start on the
bottom floor then continue up. However, the water main can enter the building from
the first floor and splits to the riser running up to the second, third floors, etc., and the
riser can lead to the basement. This configuration may also be different if the water
tank is on the roof. Try to learn more about how water flows in your facility to better
inform your sampling plan.
Determine Sampling Locations
Decide where to take samples and how to prioritize the sample sites based on
responses to the plumbing profile questionnaire and knowledge of the building(s). This
should include drinking fountains, kitchen sinks, kitchen kettle filler outlets, classroom
combination sinks and drinking fountains,
home economics room sinks, teachers’
lounge sinks, nurse’s office sinks, and any
other sink known to be or visibly used for
consumption (e.g., coffeemaker or cups
are nearby). Faucets that are not used for
human consumption, such as sinks in
janitor’s closets or outdoor hoses, should
not be sampled. If there is potential that
these may be used (e.g., janitor closet is
close to kitchen and is used for cleaning
appliances or the outdoor hoses are used
to fill water jugs for sports activities), use
clear signage to notify people that the
faucet should not be used for drinking or cooking, or include the fixture in your
sampling plan.
Important: schools and child care facilities should not use sample results from one
outlet to characterize potential lead exposure from all other outlets in their facility.
This approach could miss localized lead problems that would not be identified.
Helpful Tip…
Don’t forget to include kitchen
kettles in your sampling plan. Kitchen
kettles are large containers of water
that are then heated to steam or
cook things like vegetables, sauces,
pastas, rice, etc. They are used in
larger kitchens, like some school
kitchens, and sample results taken
from these have found to contain
elevated lead.
32 | Page
3Ts for Reducing Lead in Drinking Water
Module 1
Module 2
Module 3
Module 4
Module 5
Module 6
Module 7
TESTING
Make sure to prioritize outlets that are used by children under the age of 6 years or
pregnant women (e.g., drinking fountains, nurses’ office sinks, classrooms used for
early childhood education, kitchen sinks, teachers’ lounges).
During the process of determining sample locations, it will be helpful to code each
outlet using a system that will allow each unique outlet to be identified by location,
type and other relevant characteristics. Appendix C provides examples.
Do You Have a Lead Service Line?
Lead pipes were used for service connections, or service lines, in some locations. Other
materials used for service lines include copper, galvanized steel, plastic, and iron. In
larger schools, the service line is probably not lead because lead is impractical for the
larger service lines typically used in these facilities; however,
many child care facilities reside in small buildings and are at a
higher likelihood of being served by lead lines.
Regardless of building size, make sure to check the service line.
The water system may be able to provide information about
whether there is a lead service line or can help identify the
service line for your facility.
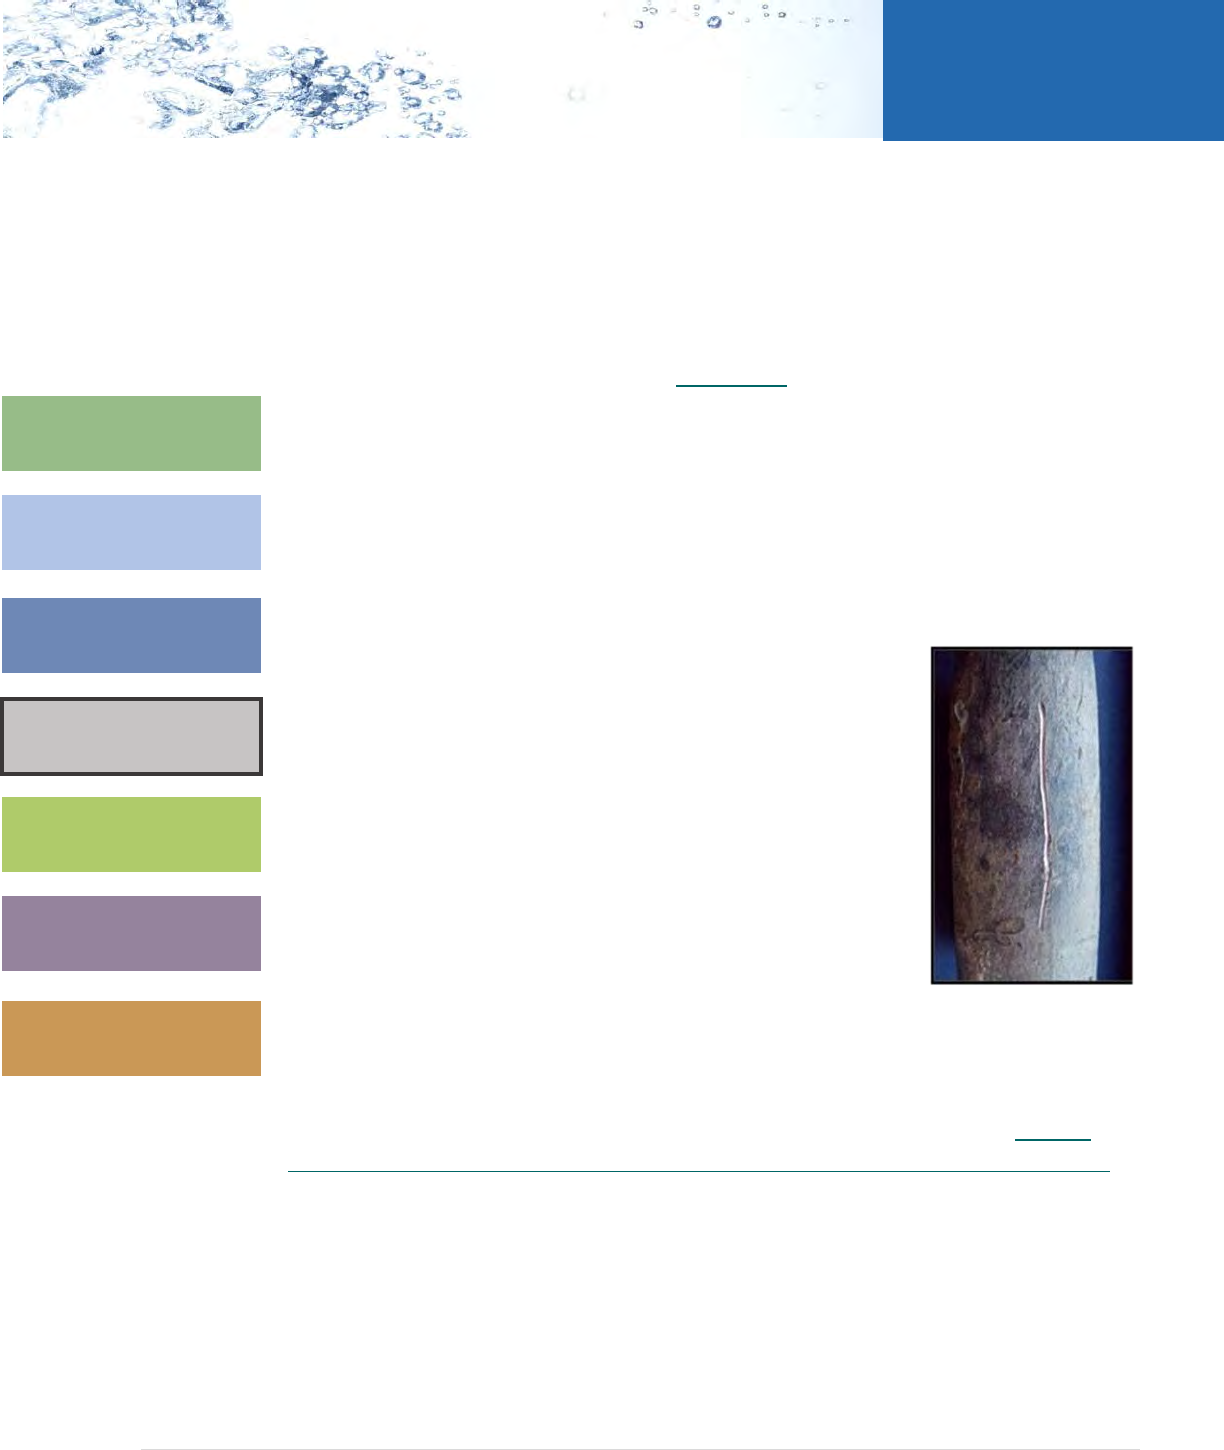
Lead service lines may be visible and are generally a dull gray
color and very soft. They can be identified easily by carefully
scratching with a key. If the pipe is made of lead, the scratched
area will turn a bright silver color. Do not use a knife or other
sharp instruments and take care not to puncture the pipe.
Picture of a Scratch on
a Lead Service Line
Selecting a Laboratory for Sample Analysis
Regardless of who collects the samples, you should employ a certified laboratory
approved by the state or EPA for testing lead in drinking water. Contact the state
drinking water program or the public water system, or visit EPA’s website: Contact
Information for Certification Programs and Certified Laboratories for Drinking Water
for a list of certified laboratories in the area. Consider the following issues prior to
making a selection:
33 | Page
3Ts for Reducing Lead in Drinking Water
Module 1
Module 2
Module 3
Module 4
Module 5
Module 6
Module 7
TESTING
Considerations When Choosing a Laboratory
• Will the laboratory conduct sampling as well as analyses? Be sure to let the
laboratory know that samples will most likely be taken between 5:30 a.m. and
7:30 a.m. Sampling outside of business hours may influence the cost.
• What is the cost of the laboratory’s services, and what is included in that cost?
Costs will vary, depending upon the extent of the services to be provided (e.g.,
if only analyses are conducted or if other services such as sample collection are
provided), and some laboratories may have bulk analysis rates for a large
number of samples.
• You may want to contact several laboratories to compare prices and services,
and they may wish to combine sampling with another school or child care
facility to reduce the cost per sample.
• What other testing could the laboratory conduct for your facility? See Appendix
D for more information.
• What is the laboratory’s time frame for providing sample results?
• Establish a written agreement or contract with the laboratory for all of the
services to be provided.
Determine Your Sampling Frequency
How frequently your facility can and should test for lead in drinking water is
dependent on a variety of factors (e.g., plumbing, water quality, lead results, budget,
and competing priorities). Regardless of the frequency set by your facility, EPA
recommends that the sampling frequency be documented so that it does not go
overlooked for extended periods of time.
EPA suggests schools and child care facilities make testing drinking water a part of
their regular building operations. Annual monitoring provides information on changes
in the lead levels and the effectiveness of remediation or treatment efforts as well
timely notice of lead levels that need to be addressed.
Communication Plan: Before you begin
sampling, it is important to engage with the
community and develop a plan for how to
communicate throughout the sampling process.
34 | Page
3Ts for Reducing Lead in Drinking Water
Module 1
Module 2
Module 3
Module 4
Module 5
Module 6
Module 7
TESTING
Understanding the Sampling Procedures
Who should collect 3Ts Samples?
It is important that water samples be collected properly. Certified laboratories chosen
to analyze samples may provide specialists to assist with sample collection. If the
laboratory is not supplying someone to sample, be sure to identify an individual who is
adequately trained to collect lead samples to help avoid sampling errors. It is useful to
ask for references to confirm that individuals are qualified to test for lead in schools
and child care facilities. Some state drinking water programs or public water systems
may provide both services, although there is no federal requirement that they do so.
What is the recommended sample volume?
EPA recommends the use of small samples (e.g., 250-mL) because a smaller sample
represents a smaller section of plumbing, which can help you to identify the sources of
lead at an outlet (e.g., fixture, interior plumbing, or water entering the school). A
smaller sample is also more representative of the amount of water consumed per
serving.
35 | Page
3Ts for Reducing Lead in Drinking Water
Module 1
Module 2
Module 3
Module 4
Module 5
Module 6
Module 7
TESTING
What are the recommended types of samples?
First-draw samples
First-draw samples are typically collected in the morning at outlets that are used for
drinking or cooking, after the water has been sitting still the night before. Begin
collecting the sample immediately after turning on the faucet or valve, not allowing
any water to spill. EPA strongly recommends that schools collect first-draw samples
from all fixtures used for consumption and prioritize sampling from high-risk fixtures.
Flush samples
Flush samples are taken after water has been running from the fixture for a pre-
determined length of time. These types of samples are used in Step 2 (described in the
2-Step Sampling Section of the 3Ts). Flush samples can be used to determine if lead is
coming from the fixture itself or from interior plumbing.
Sequential samples
Sequential samples involve collecting a series of water samples at a single fixture,
without flushing beforehand or running the water between samples. This sampling
procedure is another method used in a Detailed Fixture Evaluation described in
Appendix D, to sample multiple sections of plumbing.
When should samples be collected?
Collect all water samples before the facility opens and before any water is used.
Ideally, the water should sit in the pipes unused for at least 8 hours but not more than
18 hours before a sample is taken. However, water may be more than 18 hours old at
some outlets that are infrequently used. If this is typical of normal use patterns, then
these outlets should still be sampled. Make sure that no water is withdrawn from the
outlets prior to their sampling. Remember not to use the facilities’ restrooms or sinks
that morning prior to sampling.
Unless specifically directed to do so, do not collect samples in the morning after
vacations, weekends or holidays because the water will have remained stagnant for
too long and will not represent the water used for drinking during most of the days of
the week. See Establishing Routine Practices to learn ways to improve water quality
throughout the year and after long breaks.
36 | Page
3Ts for Reducing Lead in Drinking Water
Module 1
Module 2
Module 3
Module 4
Module 5
Module 6
Module 7
TESTING
When should I take action?
There is no safe level of lead for children. EPA encourages schools to prioritize
remediation efforts based on lead sample results and to use the steps in the toolkit to
pinpoint potential lead sources to reduce their lead levels to the lowest possible
concentrations.
Before sampling, facilities should establish a plan on how they will respond to their
sample results to protect the school and child care facility population from lead in
drinking water. This may be dependent on a variety of factors (e.g., age of plumbing,
population, water corrosivity, available resources, and other school and child care
program priorities). EPA recommends that you prioritize remediation of drinking water
outlets with the highest lead levels.
Make sure to also check with your state and local health department. They may have
guidance or even requirements that include a lead remediation trigger.
Note: EPA’s Lead and Copper Rule (LCR) establishes a lead action level of 15 parts
per billion (ppb) for water systems and facilities that have and/or operate their
water source (e.g., own their own well). If the 90th percentile lead level
concentration of tap samples exceeds the 15 ppb action level, water systems must
take additional actions, such as optimizing corrosion control, public education, and
lead service line replacement. The action level for lead is not a health-based
standard and is based upon EPA’s evaluation of available data on the ability of
corrosion control to reduce lead levels at the tap. The action level is a screening
tool for determining when certain treatment technique actions are needed.
37 | Page
3Ts for Reducing Lead in Drinking Water
Module 1
Module 2
Module 3
Module 4
Module 5
Module 6
Module 7
TESTING
Module 5: Conducting Sam
pling and Interpreting Results
Communication Plan: Don’t forget to
communicate your plans to test your facility, and to
prepare for communicating results. Results should
be shared regardless of the lead level detected.
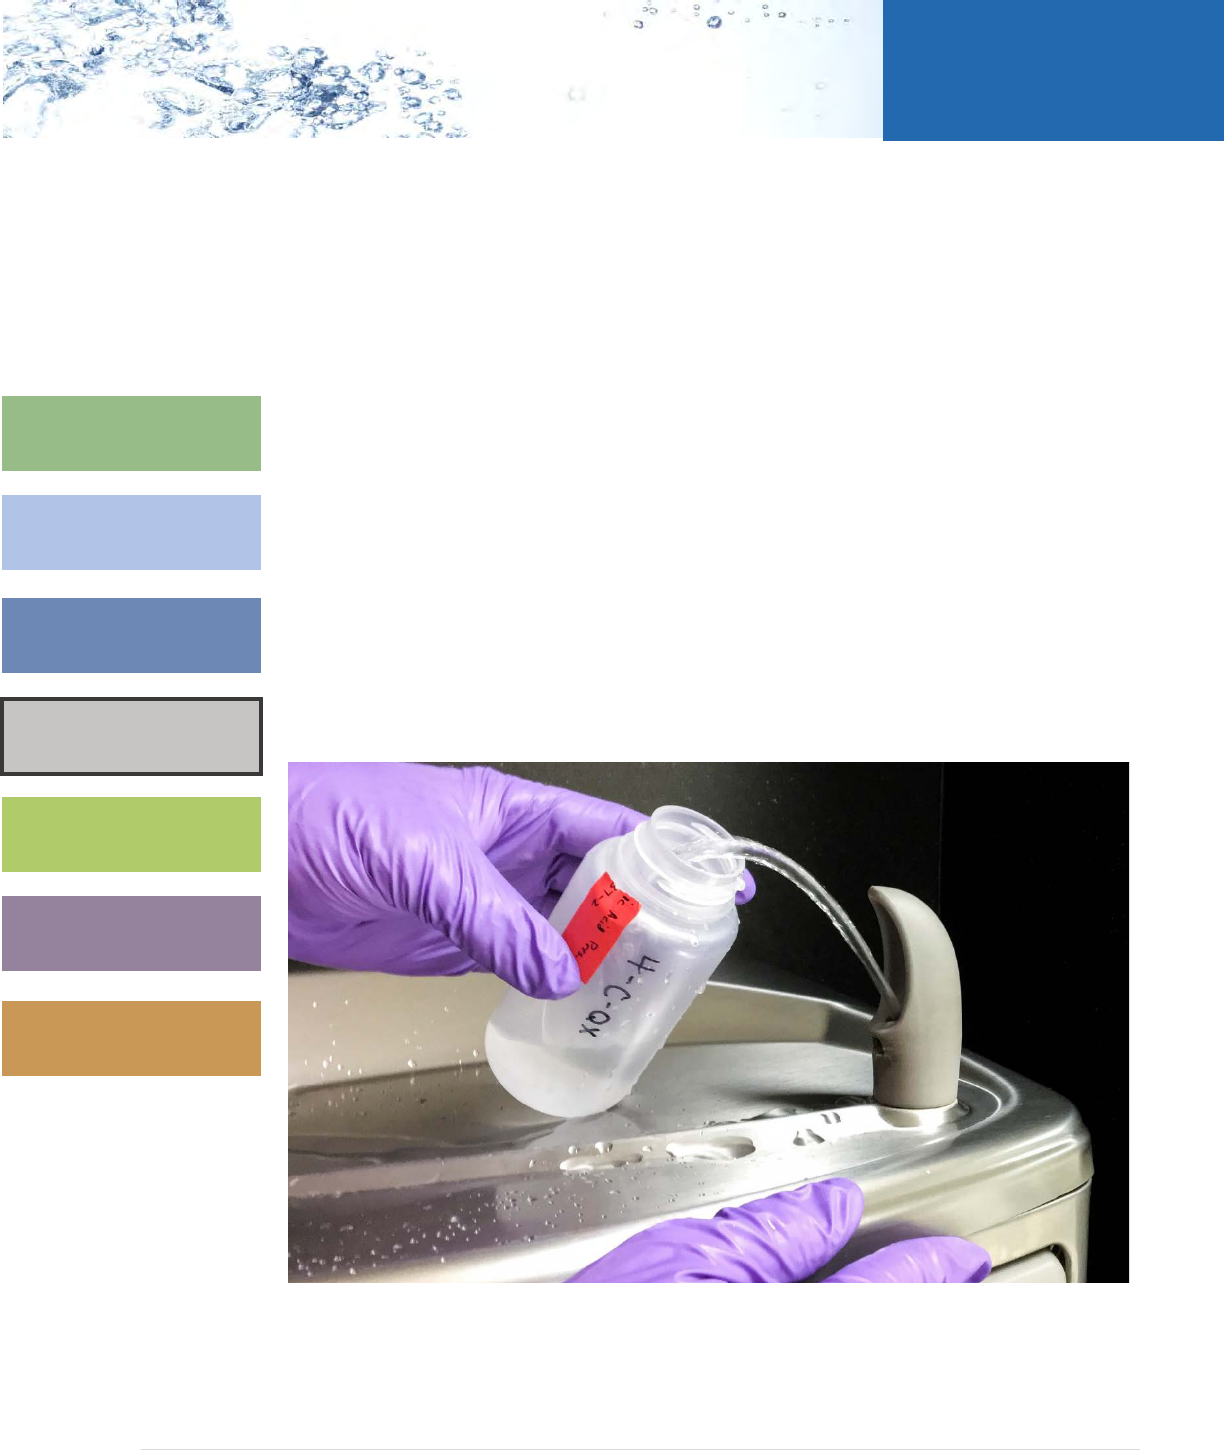
2-Step Sampling at the Tap
EPA recommends that schools and child care facilities conduct a 2-step sampling
procedure to identify if there is lead in the outlet (e.g., faucet, fixture, or water
fountain) or behind the wall (e.g., in the interior plumbing). These samples should be
taken after an 8 to 18-hour stagnation period.
Please note that this section contains recommendations that are generalized for
typical plumbing configurations. Appendix D contains details on types of fixtures and
targeted sampling.
STEP 1
250-mL First-Draw Sample
Take a 250-mL first-draw
sample at all taps used for
consumption to identify
potential lead in the fixture.
STEP 2
250-mL Flush Sample
If the result of Step 1 is high,
take a 30-second flush sample
to identify lead in the
plumbing behind the fixture.
These samples can be taken in
the same sampling event, which
can reduce cost, and provide
you with more information on
lead levels. If not taking these
samples at the same time, and
elevated lead levels have been
found in Step 1, the water
should not be consumed while
preparing to take the follow-
up flush sample. More
information on immediate steps is in the Taking Action Section.
Helpful Tip…
For further potential cost savings, you or lab can
collect, preserve, and hold (but not analyze) the
second sample at the same time the first sample
is collected, then analyze only selected Step 2
samples based on review of the Step 1 results.
Most commercial labs will “Hold” samples until
the client advises to dispose (at nominal cost) or
analyze those samples.
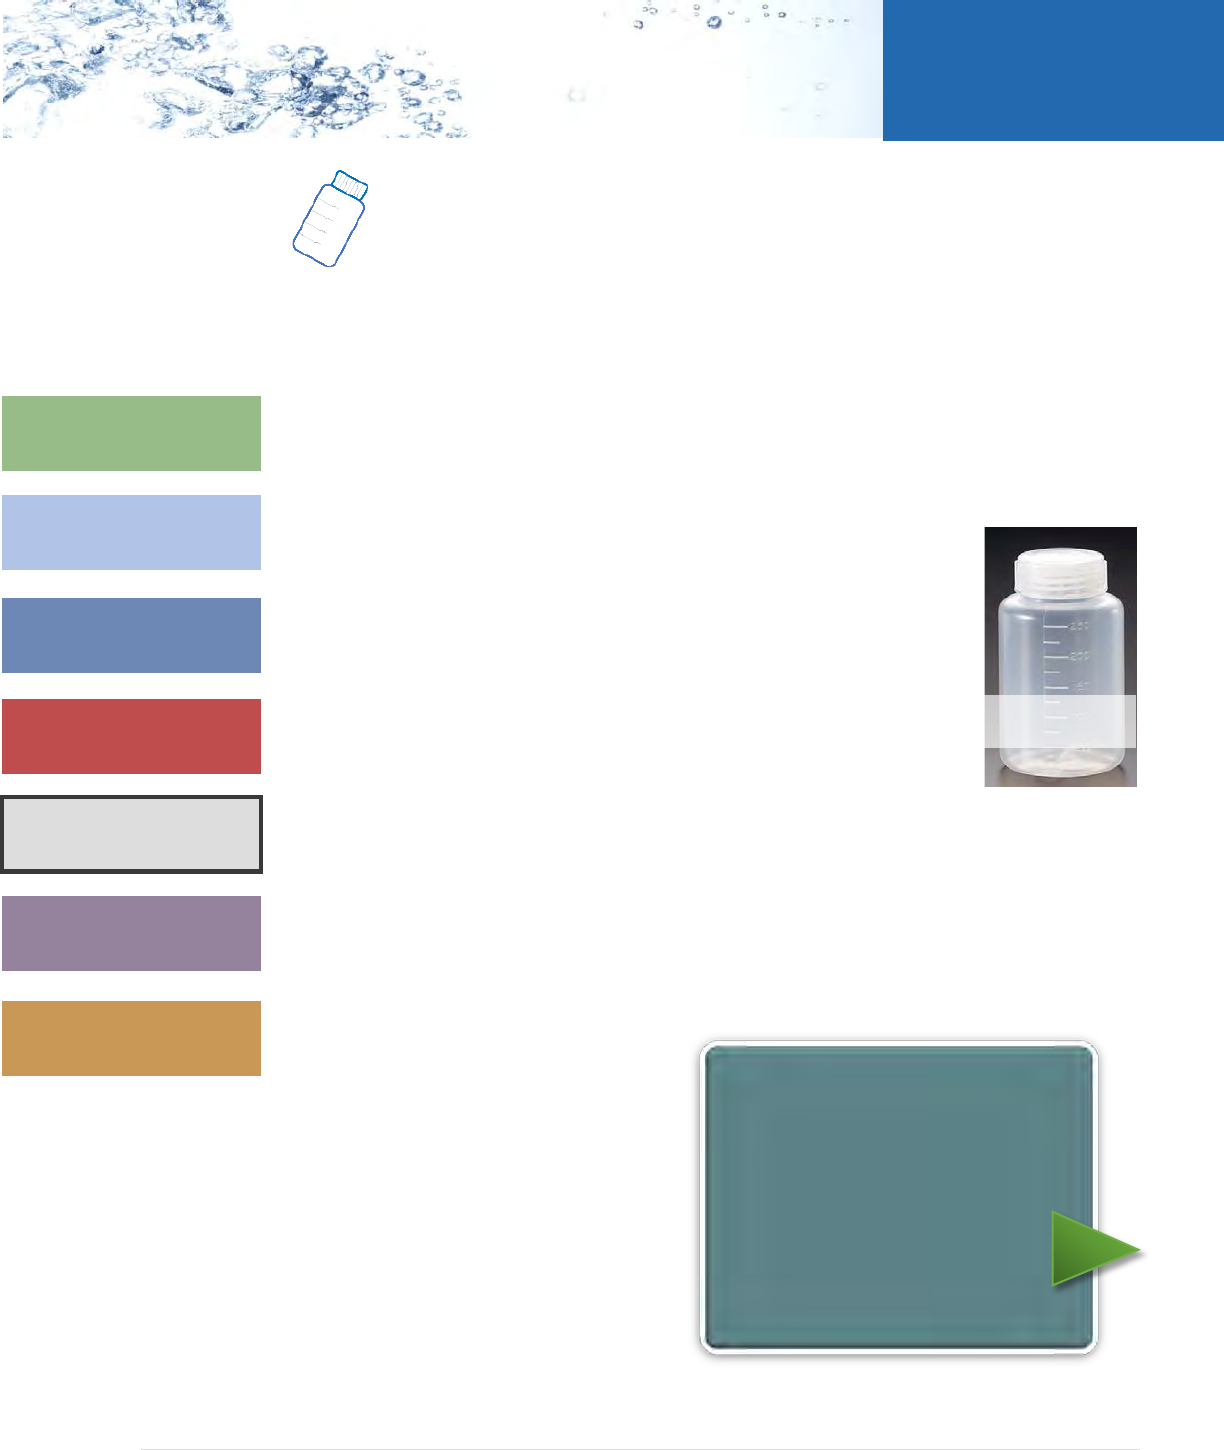
38 | Page
3Ts for Reducing Lead in Drinking Water
Module 1
Module 2
Module 3
Module 4
Module 5
Module 6
Module 7
TESTING
Step 1: Initial First-Draw Samples
Take first-draw samples from fixtures throughout the building that are used
for human consumption. EPA strongly recommends that you collect these samples
from all outlets used for drinking or cooking, prioritizing the high-risk outlets (i.e.,
fixtures that are known to or potentially contain lead and fixtures that are used most
frequently). The plumbing profile will help pinpoint those high-risk fixtures and to
prioritize sample collection.
Important: schools and child care facilities should not use sample results from one
outlet to characterize potential lead exposure from all other outlets in their facility.
This approach could miss localized lead problems that would not be
identified.
The first-draw sample identified in Step 1 is representative of the
water that may be consumed at the beginning of the day or after
infrequent use. This protocol maximizes the likelihood that the
highest concentrations of lead will be found because the first 250-mL
sample is collected after overnight stagnation (the water sat in the
pipes for at least 8 hours).
Procedures for initial outlet samples are shown below:
• All samples should be
• Compare all sample results to
prioritize follow-up sampling
and remediation. Outlets with
elevated lead levels should not
be made available for
consumption.
collected before the facility opens and before the fixtures
have been used (EPA recommends an 8-18 hour stagnation period).
• One 250-mL sample should be taken at each fixture. Note this is a first-draw
sample. Therefore, collect the sample immediately after opening the faucet or
valve.
STEP 1
250-mL First-Draw Sample
Take a 250-mL first-draw
sample at all taps used for
consumption to identify
potential lead in the fixture.
250-mL
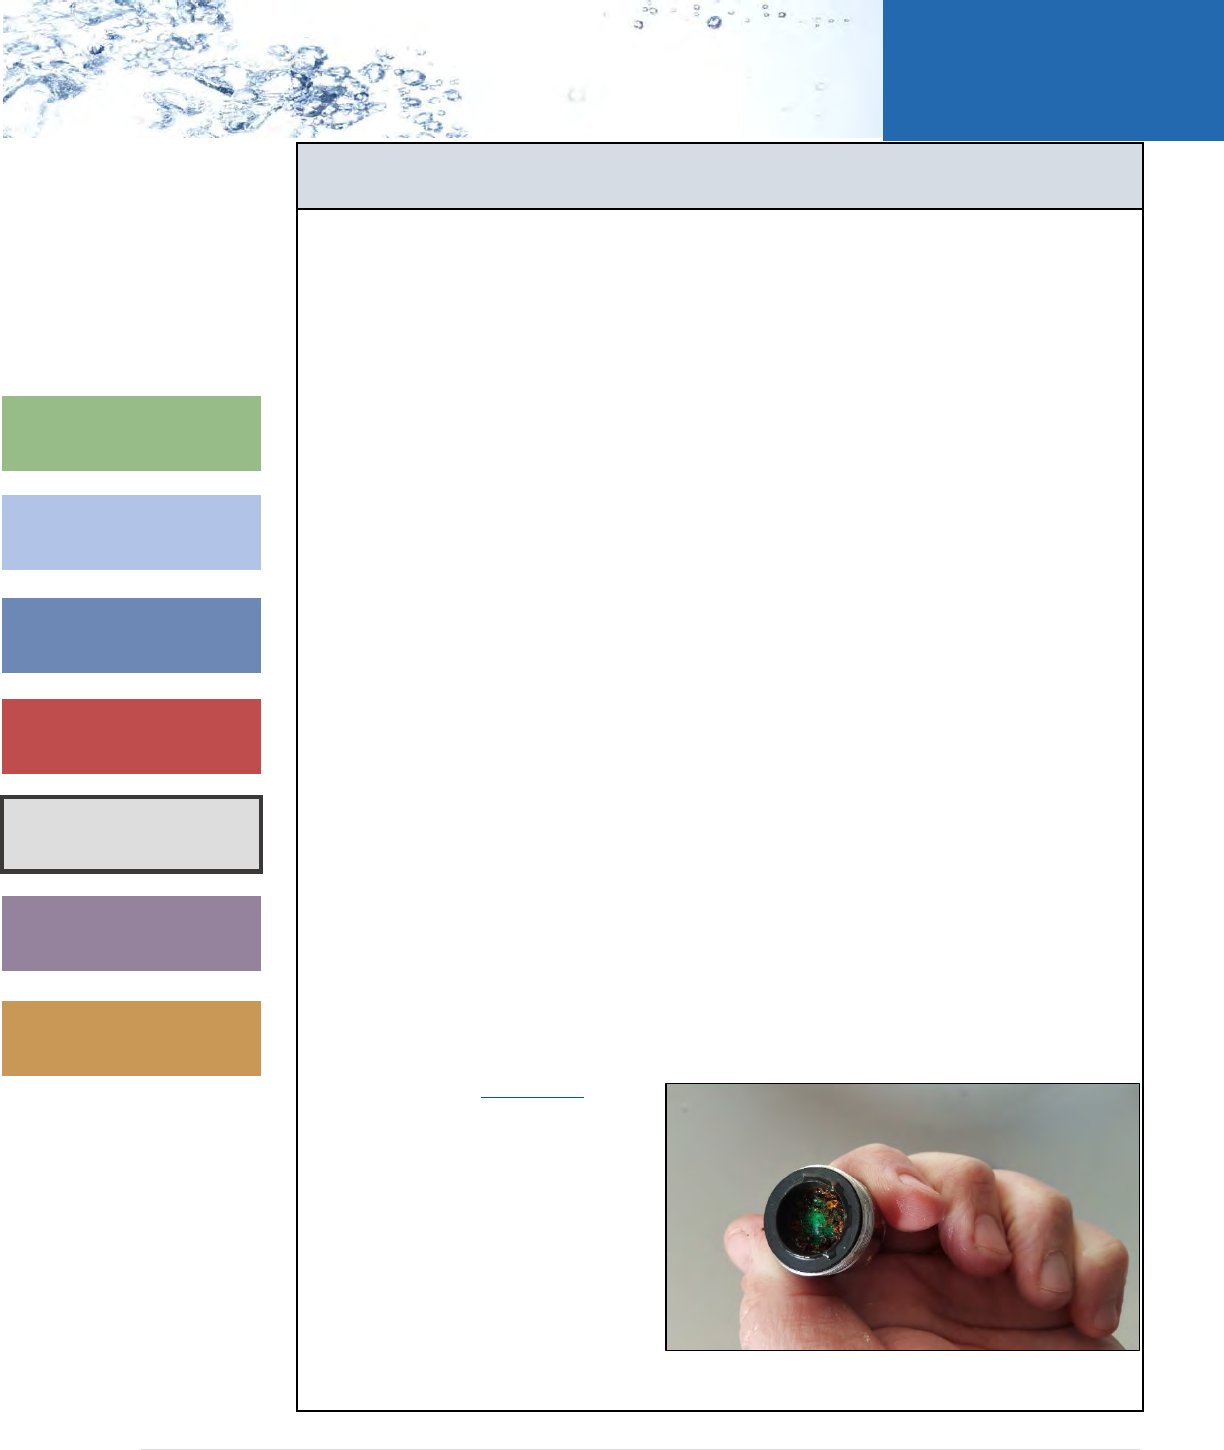
39 | Page
3Ts for Reducing Lead in Drinking Water
Module 1
Module 2
Module 3
Module 4
Module 5
Module 6
Module 7
TESTING
High Results Due to Particulate Lead
If initial first-draw sampling results reveal high lead levels in the 250-mL sample for
a given outlet, a contributing source of the elevated lead levels could be the debris
in the aerator or screen of the outlet. By cleaning the aerator or screen and
retesting the water following the initial first-draw sampling procedures, you can
identify whether or not the debris is contributing to elevated lead levels.
Determining aerator/screen debris contribution:
Scenario 1: The initial sample result is 19 ppb; you decide to see if the aerator is
contributing to lead in the water. After cleaning out the aerator, you take another
first-draw sample. The results come back less than or close to the detection level (e.g.,
1ppb). This result indicates that the debris in the aerator was likely contributing to
elevated levels in the fixture. Continue to clean the aerator on a regular basis;
continued use of the outlet should be acceptable. However, please note that without
regular maintenance, this outlet may serve water with elevated lead levels.
Scenario 2: The initial sample result is 22 ppb; you decide to see if the aerator is
contributing to lead in the water. After cleaning out the aerator, you take another
first-draw sample. The second sample result is very close or equivalent to the 22 ppb
sample. Since the initial sample and post-cleaning first-
draw sample results are similar,
the problem is likely not the aerator.
Scenario 3: The initial first-draw sample result is 60 ppb; you decide to see if the
aerator is contributing to lead in the water. After cleaning the aerator, you take
another first-draw sample. The post-cleaning sample result is 25 ppb. Although the
results are lower, they are still high; this indicates that the aerator is likely a
contributing source and that the outlet itself and/or the plumbing upstream of the
aerator are contributing as well. If this situation occurs, the school should take this
fixture offline, and continue with 2-step sampling, or consider the Detailed Fixture
Evaluation in Appendix D
to
target the additional
contributing sources.
* When taking a second first-draw
sample, please remember to follow
the same sampling procedure as the
initial first-draw sample. Ensure that
fixtures and outlets have been out
of use for 8-18 hours, sampling
before students arrive at the facility.
Picture of an aerator with particulate
40 | Page
3Ts for Reducing Lead in Drinking Water
Module 1
Module 2
Module 3
Module 4
Module 5
Module 6
Module 7
TESTING
Step 2: Follow-Up Flush Samples
If initial test results reveal elevated lead, follow-up flush testing described in
Step 2 is recommended to determine if the lead contamination results are from the
fixture or from interior plumbing components. Follow-up flush samples generally
involve the collection of water from an outlet where the water has run for 30 seconds.
The purpose of Step 2 is to pinpoint where lead is getting into drinking water (i.e.,
fixtures versus interior plumbing) so that appropriate corrective measures can be
taken.
Procedures for initial outlet samples are shown below:
• As with initial first-draw samples, follow-up flush samples are to be taken
before a facility opens and before any water is used. For best results, flush
samples from different outlets that are in close proximity should be collected
on different days. For drinking fountains or other fixtures that are manifolded
closely together, a single flush sample may be representative of the shared
interior plumbing.
• The sampler should be careful to maintain a consistent rate of flow when
collecting flush samples.
• Open up the tap and let the water run for 30 seconds. Then, take a 250mL
sample. Make sure to label this sample bottle as the flush sample.
STEP 2
250-mL Flush Sample
If the result of Step 1 is high,
take a 30-second flush sample
to identify lead in the
plumbing behind the fixture.
41 | Page
3Ts for Reducing Lead in Drinking Water
Module 1
Module 2
Module 3
Module 4
Module 5
Module 6
Module 7
TESTING
Sampling Dos and Don’ts
Do:
• Follow the instructions provided by the laboratory for handling sample
containers to ensure accurate results.
• Assign a unique sample identification number to each sample
collected. Use a coding scheme to help differentiate samples, and
don’t forget to label each sample bottle.
• Collect all water samples before the facility opens and before any
water is used. The water should sit in the pipes unused for at least 8
hours but not more than 18 hours before a sample is taken.
• Learn how water flows in your facility. If there are multiple floors, it is
typically recommended to sample from the bottom floor and continue
up. Start sampling closest to the main and work away.
Don’t:
• Remove aerators prior to sampling. Potential sources of lead may be
missed if aerators are removed, since debris could be contributing to
the lead in drinking water if particles containing lead are trapped
behind aerator screens.
• Flush water prior to sampling, unless instructed to do so. Flushing can
be a tool to improve water quality, especially after long holidays or
weekends. However, flushing prior to sampling may cause results
showing lower-than representative lead levels in the water. See
Flushing Best Practices Factsheet for more information.
• Close the shut-off valves to prevent their use prior to sample
collection. Minute amounts of scrapings from the valves can produce
results showing higher-than-representative lead levels in the water.
Don’t forget to maintain a record!
Recording sample information is critical to tracking and managing
water quality year-over-year. Record sampling procedures,
locations, and results.
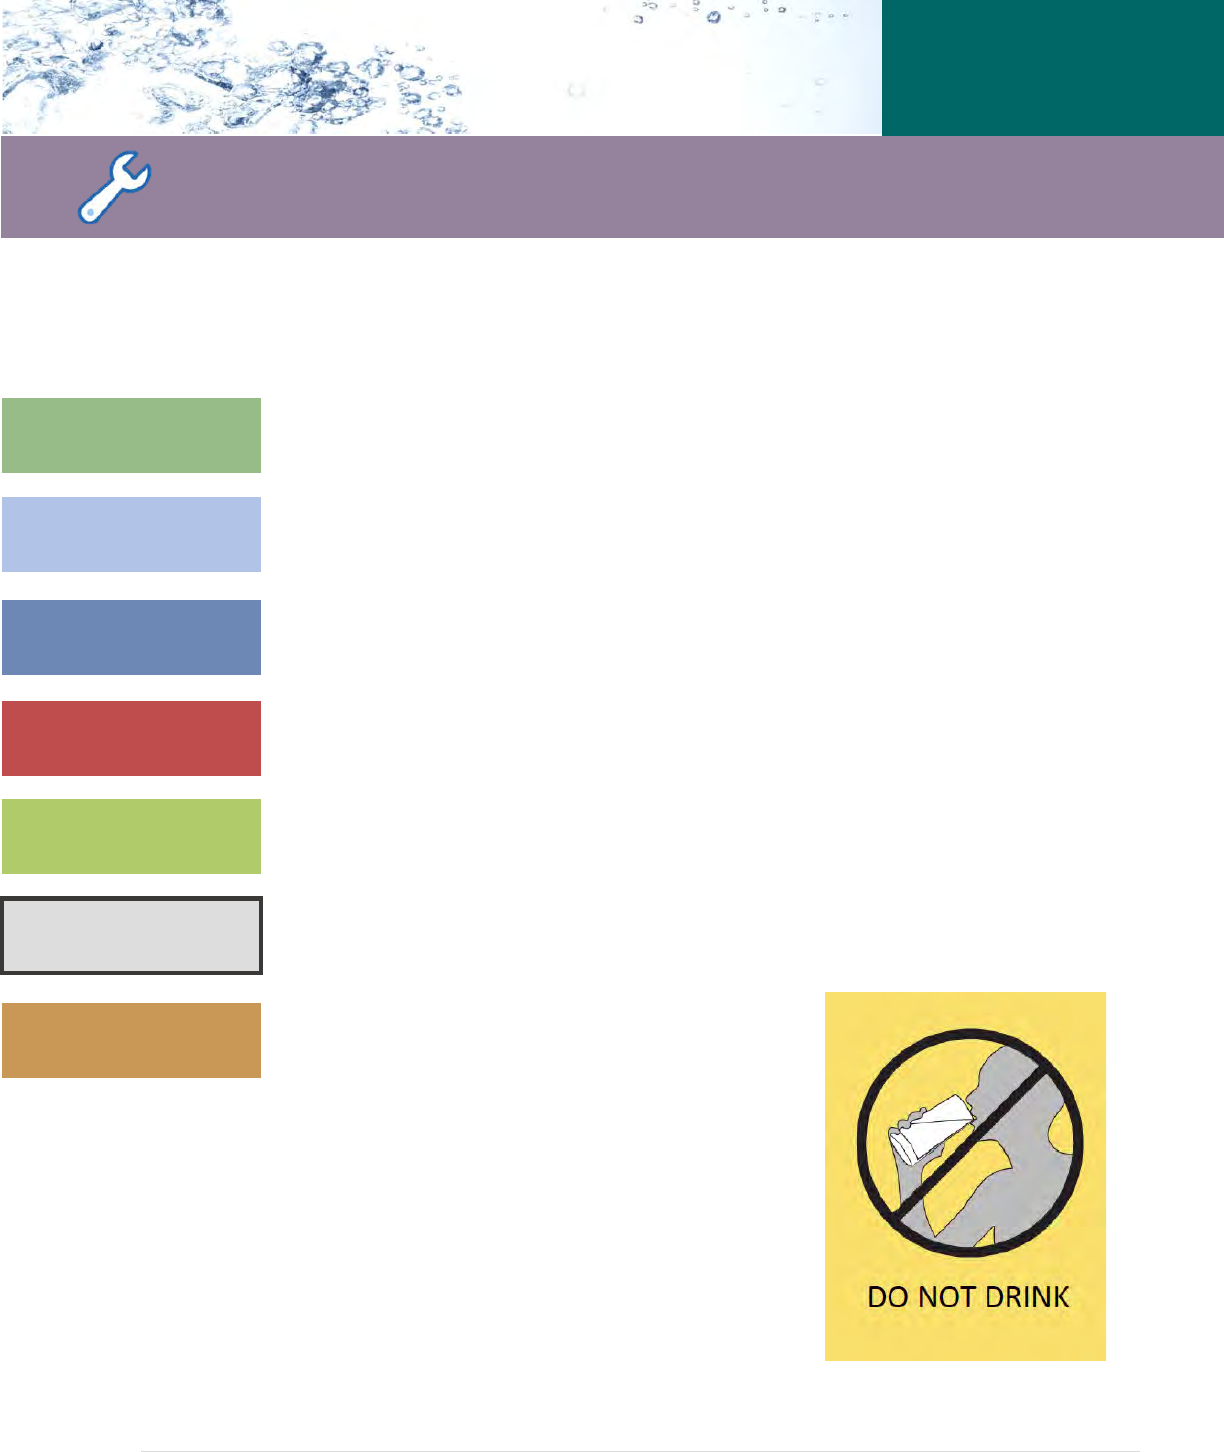
42 | Page
3Ts for Reducing Lead in Drinking Water
Module 1
Module 2
Module 3
Module 4
Module 5
Module 6
Module 7
Module 6: Remediation and Establishing Routine Practices
TAKING
ACTION
Solutions to lead problems typically should be addressed on both a short-term and a
long-term basis. Measures can be taken while you wait for your test results or until a
permanent solution has been put in place. It is helpful to become familiar with
potential remediation options before sampling has occurred. You should work closely
with maintenance staff and plumbers who may make repairs to ensure that the chosen
remediation options will remove lead from the water and to understand the benefits
and considerations associated with each option. It is also important to ensure that
your school and/or child care facility population are familiar with the use of new
fixtures or technology that may be installed.
When selecting a remediation provider, engage the local health department, public
water system, and other available resources to ensure the organization performing
remediation is qualified and reputable. Ask vendors for information on the schedule,
health precautions that must be taken during and following remediation and request
regular status updates on their progress prior to agreeing to work with any particular
organization. The internal team should identify an individual that is responsible for
working with the remediation contractors. This person should regularly communicate
the schedule, activities, and hazards to the 3Ts Program team.
Immediate Response
Below are some immediate actions to consider following the receipt of results
indicating elevated lead in drinking water.
Shut Off Problem Outlets
If initial sample results from an outlet exceed the
remediation level, the outlet can be shut off or
disconnected until the problem is resolved. Shutting
off problem outlets can also provide a permanent
solution. If the outlet is not used regularly, this may
be a viable option; however, if the outlet is
frequently used, this is probably not a practical long-
term solution.
43 | Page
3Ts for Reducing Lead in Drinking Water
Module 1
Module 2
Module 3
Module 4
Module 5
Module 6
Module 7
TAKING
ACTION
Share Test Results
Post test results in your facility (i.e., in the administrative offices), and on a public
website. Notify staff, parents, and students of test results and actions you are taking.
Also, reach out to the public water system to share results and discuss potential
remediation measures.
Post “Not for Drinking/Cooking” at Problem Outlets
If initial sample results from an outlet exceed the remediation trigger level, but the
problem outlet is routinely used for purposes other than human ingestion (e.g., hand-
washing), clear signage can be posted to notify people that the outlet is not to be used
for drinking or cooking until the problem is resolved.
Increase Awareness and Public Education
Take the initiative in providing information to your community. Be a good
and reliable source of information on your program for reducing lead in
drinking water. Be positive, proactive, and forthcoming when working
with the media, members of the community, parents, students, and
staff.
Short-Term Control Measures
Below are short-term measures facilities can take as they consider long-term or
permanent control measures. You should consider the pros and cons of each before
choosing what steps are most appropriate. As you implement short-term measures,
you should also consider the benefit of remediation that removes the risk of lead
contamination (noted in the Permanent Control Measures Section).
Provide Filters at Problem Taps
Point-of-use (POU) units are commercially available and can be effective in removing
lead. There are a number of POU cartridge filter units on the market that effectively
remove lead They can be relatively inexpensive ($65 to $250) or more expensive ($250
to $500), their effectiveness varies, and they may be vulnerable to vandalism. Filters
need routine maintenance (e.g., cartridge filter units need to be replaced periodically)
to remain effective.
44 | Page
3Ts for Reducing Lead in Drinking Water
Module 1
Module 2
Module 3
Module 4
Module 5
Module 6
Module 7
TAKING
ACTION
To select a lead-reducing POU filter, check with the manufacturer or a third-party
website (such as nsf.org or wqa.org) to verify the product was tested and certified
against NSF/ANSI Standard 53 (for lead removal). For additional protection for
particulate lead, look for a POU filter that is also certified against NSF/ANSI Standard
42 (for class I particulate reduction, 0.5 µm to <1 µm).
POE vs POU: Point-of-entry (POE) and POU devices are different types of treatment
options. A POU is installed at each outlet, while a POE is installed where the water
enters the building. If you are considering installing a device to treat water entering
their buildings, you should first consult with your state drinking water office.
Installation of a POE device could lead to your facility being identified as a public water
system under SDWA, and your facility could be required to meet the federal and state
regulations for drinking water, including additional water quality monitoring. In
addition, POE devices are not effective in remove lead that comes from plumbing
materials within the school or child care facility.
Flush Taps Prior to Use
Flushing individual problem water outlets or all outlets within the school or child care
facility may also represent a short-term solution. However, unless you can ensure lead
levels remain low throughout the day, flushing just once a day or once a week is not
recommended. If follow-up flush samples indicated no or low lead levels, facilities
could use signage that notifies staff and students to flush for 30 seconds prior to each
use. It is important to create schedules and ensure implementation of these practices
until permanent control measures have been completed. See the Flushing Best
Practices factsheet for additional information on outlet flushing instructions.
Provide Bottled Water
This can be an expensive alternative but might be warranted if you are aware of
widespread contamination and other remediation is not a near-term option. If you use
bottled water, be aware that it is not regulated by EPA but rather by the Food and
Drug Administration (FDA). States may also regulate bottled water, and in some
instances, these standards may be more stringent than the federal requirements. EPA
recommends that you request a written statement from the bottled water distributor
guaranteeing that the bottled water meets FDA and state standards. A copy of this
letter should be recorded.

45 | Page
3Ts for Reducing Lead in Drinking Water
Module 1
Module 2
Module 3
Module 4
Module 5
Module 6
Module 7
TAKING
ACTION
Permanent Control Measures
You can take a number of actions to permanently reduce or eliminate the sources of
lead that originate in building plumbing. After obtaining an understanding of the water
supply and the lead conditions in their facilities through testing, you should examine
the permanent remediation options and select those most appropriate to their
situation. The decision will be based on such factors as cost, likelihood of success,
availability of water, and staffing requirements.
Replacement of Problem Outlets
After identifying the sources of lead contamination, replacing these identified outlets
and any identified upstream plumbing components (e.g., valves, leaded solder)
permanently address the problem, compared with other solutions that have long-term
costs and risks. If the sources of lead contamination are localized and limited to a few
outlets, replacement may also be the most cost-effective option in the short-term.
EPA's revised March 2015 guidance, How to Identify Lead-Free Certification Marks for
Drinking Water System & Plumbing Products, can be a useful resource selecting lead-
free plumbing. Follow-up testing is also recommended, as with the other remedies, to
ensure that the efforts result in reduced lead levels at the fixture outlets.
Helpful Tip…
If multiple replacements of one type of component (for example, fountain valves)
are needed, you may wish to purchase only one or two initially. Take follow-up
water samples after installing the new component(s) to verify that lead levels are
reduced to acceptable levels. If follow-up testing is satisfactory, you can be
reasonably certain that the product would perform well at other locations in your
facilities.
Pipe Replacement
Lead pipes within your property and portions of a lead service lines under your and/or
public water system’s jurisdiction can be replaced. Contact the public water system
regarding jurisdiction. you may be responsible for replacing the portion of a lead
service line that is on school or childcare property, rather than under the jurisdiction of
the public water system.
46 | Page
3Ts for Reducing Lead in Drinking Water
Module 1
Module 2
Module 3
Module 4
Module 5
Module 6
Module 7
TAKING
ACTION
Provide Filters at Problem Taps
Some facilities may also choose to use certified lead-reducing filters, also called Point
of use (POU) units as a long-term or permanent control measure. When doing this,
facilities should be sure to create maintenance schedules and identify a point of
contact to be in charge of making sure they are properly maintained.
Reconfigure Plumbing
Ongoing renovation of school or childcare buildings may provide an opportunity to
modify the plumbing system to redirect water supplied for drinking or cooking to
bypass sources of lead contamination. Before
undertaking such an alternative, be certain that you
have properly identified all of the sources of lead
contamination in drinking water. Follow-up testing is
also necessary, to ensure that the efforts result in
reduced lead levels at the drinking water outlets.
Helpful Tip…
Flushing can be a tool after
remediation. In addition to
replacing or removing lead
containing plumbing or
fixtures flushing can help clear
out debris or lead particulates
that may be released when
remediation occurs.
Follow-Up Sampling
Once a remediation option has been selected
and implemented, there are additional follow-
up procedures that should be taken. Work with
plumbers and maintenance staff to ensure that additional samples are taken from any
outlets that were impacted by replacement of fixtures, reconfiguration of plumbing, or
other remediation actions.
Ensure that additional samples are taken before a facility opens and before any water
is used. Additional samples should follow the same testing process as the initial
samples. Sample any replaced or reconfigured components using the recommended
procedures for first-draw and/or flush samples. Be sure to document (e.g., in sample
labeling) the conditions that follow-up samples were collected, such as after fixture
replacement or after POU installation.
A comparison of original and additional samples will help to assess whether the
remediation has been successful in reducing lead in drinking water. Additional samples
may be required to further pinpoint sources of lead contamination, if lead levels are
still elevated.
Follow-up sampling when flushing is being used
If flushing is selected as a remedy, follow-up testing procedures should include
sampling to verify the effectiveness of flushing procedures at each problem outlet. If
the 30-second flush sample (in Step 2) is low, flushing for 30 seconds may be sufficient.
47 | Page
3Ts for Reducing Lead in Drinking Water
Module 1
Module 2
Module 3
Module 4
Module 5
Module 6
Module 7
TAKING
ACTION
In other cases, a longer flushing duration may need to be determined. See the Flushing
Best Practices factsheet for additional information on outlet flushing instructions.
After determining the required flushing duration, repeat sampling should be collected
after flushing, followed by a period of normal water use at the fixture, to determine
whether flushing daily, twice daily, or at a different frequency is needed to ensure lead
levels remain low throughout each day. For determining if once-daily flushing is
sufficient, flush the outlet at the routine time and duration (e.g., 30 seconds) and then
collect one 250-mL sample near the end of the day (e.g., after 10 hours of
representative water usage following morning flushing). If the sample collected at the
end of the day contains high levels of lead, more frequent flushing (e.g., every 4 hours
or every time the outlet is used) or a different remedy should be evaluated.
Considerations for Replacement Activities
When making any repairs, ensure that “lead-free” materials are used. Make sure that
any plumber who does repair or replacement work on the facility’s plumbing system
uses only “lead-free” solders and other materials. The 1986 Safe Drinking Water Act
Amendments and the 2011 Reduction of Lead in Drinking Water Act require that only
“lead-free” materials be used in new plumbing and plumbing repairs. Make sure all
plumbers and other workers adhere to these requirements. These actions will prevent
or minimize new lead from being introduced into the facility’s plumbing system.
Report any violations of the “lead-free” requirements to the local plumbing inspector,
the state drinking water program or EPA.
Electrical current may accelerate the corrosion of lead in piping materials, so also
consider checking grounding wires. Existing wires already grounded to the water pipes
can in some cases be removed by a qualified electrician and replaced by an alternative
grounding system. If local or state building codes allow, consider finding an alternative
grounding system and having a qualified electrician make the change. Be aware that
the removal of grounding from water pipes may create a shock hazard unless an
acceptable, alternative ground is provided.
Communication Plan: Share your plans to
remediate if elevated lead is found. This may
include short-term or permanent measures.
Don’t forget to maintain a record!
Record remediation efforts, schedules for upkeep and maintenance,
and partners and contacts that assisted in your efforts.

48 | Page
3Ts for Reducing Lead in Drinking Water
Module 1
Module 2
Module 3
Module 4
Module 5
Module 6
Module 7
TAKING
ACTION
Establishing Routine Practices
Schools and child care facilities should establish routine practices to reduce exposure
to elevated lead levels and other environmental hazards (e.g., bacteria). These
activities should not be conducted immediately prior to collecting a water sample
but should be planned as part of the school’s or child care facility’s overall water
management program to improve drinking water quality. Below are examples of
routine activities that should be conducted to prevent exposure to drinking water
contaminants:
Cleaning
• Clean drinking water fountains regularly. Consider posting a cleaning time card
by the water fountains to allow the cleaning times to be recorded.
• Create an aerator (faucet screen) and water fountain strainer cleaning
maintenance schedule and clean debris from all accessible aerators and
strainers frequently. Establish a recordkeeping procedure to record when the
aerators and strainers are cleaned.
• Consider setting a reminder on the calendar to notify the maintenance staff
when it is time to clean the aerators and water fountain strainers.
Temperature Control
• Use only cold water for food and beverage preparation. Hot water will dissolve
lead more quickly than cold water and may contain increased lead levels.
• If hot water is needed, it should be taken from the cold water faucet and
heated on a stove or in a microwave oven. Consider creating notices that can
be posted in the food and beverage preparation areas to remind students and
staff to use cold water.
Point-of-Use Filter Maintenance
• If POU devices have been installed, make sure they are maintained. An example
of a POU device is a filter on a faucet or within a drinking water fountain or
water bottle filler.
• Ensure that the selected POU device is certified to remove lead (or any other
contaminants of concern). To select a lead-reducing POU filter, check with the
manufacturer or a third-party website (such as nsf.org or wqa.org) to verify the
product was tested and certified against NSF/ANSI Standard 53 (for lead
removal). For additional protection for particulate lead, look for a POU filter
49 | Page
3Ts for Reducing Lead in Drinking Water
Module 1
Module 2
Module 3
Module 4
Module 5
Module 6
Module 7
TAKING
ACTION
that is also certified against NSF/ANSI Standard 42 (for class I particulate
reduction, 0.5 µm to <1 µm).
• Consider setting a reminder on the calendar when it is time to change the filter.
Cross-Connections Control
• Evaluate the facility for the presence of cross-connections (e.g., connections of
nonpotable water to potable sources) and address any issues.
Communication
• Create and post placards near bathroom sinks with notices that water should
not be consumed. As an example, indicate that a sink is a hand-washing only
sink to prevent students and staff from misunderstanding and utilizing sinks for
brushing teeth, washing food or other activities that ultimately result in water
being consumed.
• Use pictures if there are small children
using bathrooms.
• Consider organizing an event for the
community to explain how everyone can
help.
Routine Flushing Practices
See the Flushing Best Practices
Factsheet for more information.
• Regularly flush all water outlets used for
drinking or food preparation, particularly
after weekends and long vacations when
water may have been stagnant for a long
period of time.
• Flushing involves opening valves and
faucets and letting the water run to
remove water that has been standing in
the interior pipes and/or the outlets. The
flushing time varies by the type of outlet being cleared.
• Be careful not to flush too many outlets at once. This could dislodge sediments
that might create further lead problems, or it could reduce pressure in the
system below safe levels. If the flow from outlets is reduced noticeably during
flushing, too many outlets have likely been turned on at once.

50 | Page
3Ts for Reducing Lead in Drinking Water
Module 1
Module 2
Module 3
Module 4
Module 5
Module 6
Module 7
TAKING
ACTION
Flushing Directions by Outlet Type
Remember that each drinking water outlet should be flushed individually;
flushing a toilet will not flush the water fountains. All flushing should be
recorded in a log submitted to the individual in charge of this program.
Locate the faucet furthest away from the service line on each wing and floor
of the building, open the faucets wide, and let the water run for 10 minutes.
For best results, calculate the volume of the plumbing and the flow rate at
the tap and adjust the flushing time accordingly. This 10-minute time-frame
is considered adequate for most buildings.
Open valves at all drinking water fountains without refrigeration units and
let the water run for roughly 30 seconds to one minute, or until cold.
Let the water run on all refrigerated water fountains for 15 minutes.
Because of the long time period required, routinely flushing refrigerated
fountains may not be feasible. It may therefore be necessary, and more
economical, to replace these outlets with “lead-free” NSF-approved devices.
Open all kitchen faucets (and other faucets where water will be used for
drinking and/or cooking) and let the water run for 30 seconds to one minute,
or until cold.
Flushing is not recommended as a practical remedy for water coolers.
Communication Plan: Your continual effort to
improve water quality in your facility will be of
interest to parents, staff, and the community.
Consider sending updates in newsletters.
Don’t forget to maintain a record!
Record schedules for upkeep and maintenance and set calendar
reminders to help you keep on schedule.
51 | Page
3Ts for Reducing Lead in Drinking Water
Module 1
Module 2
Module 3
Module 4
Module 5
Module 6
Module 7
Module 7: Recordkeeping
TAKING
ACTION
Keep Records
Finally, it is important to keep an ongoing record of partners, team contacts, testing
efforts, remediation efforts, public outreach, and communication activities. Keep copies
of past communication materials and dates they were sent out. It is imperative to be
able to prove steps were taken to inform the public on lead issues. Strong recordkeeping
can also prove to be helpful in illustrating what steps you have taken to notify the public
of testing efforts and results.
Furthermore, recordkeeping is important for the “Taking Action” portion of the
program—by documenting their outreach and the public’s response, you can learn how
to improve upon their public communication plan. For example, it might be helpful to
keep a running log of questions received from the
community that could be addressed in future
communications. As mentioned previously, you could create
a separate email address for the lead program so that
questions are sent to a single point of contact.
See the 3Ts Toolkit for recordkeeping templates and
customizable forms.

52 | Page
3Ts for Reducing Lead in Drinking Water
APPENDIX
Appendix A: Glossary of Terms
Aerator: Also called a “screen” is typically located on the fixture valve (e.g., where the water
comes out) to improve water flow out of a tap or drinking water fountain. These aerators can
collect sediment and lead particulate and should be cleaned regularly. See the Establishing
Routine Practices Section for more detail.
Chiller: A central refrigeration unit providing cold water to some types of drinking water
fountains.
Corrosion: A dissolving and wearing away of metal caused by a chemical reaction (e.g., between
water and the piping that the water contacts).
Cross-connection: A cross-connection is a point in a plumbing system where it is possible for a
nonpotable substance to come into contact with the potable drinking water supply.
Detailed Fixture Evaluation: A sampling process designed to pinpoint where (i.e., fixtures or
interior plumbing) lead is getting into drinking water so that appropriate corrective measures can
be taken.
Drinking Water Fountain: A fixture connected to the water supply that provides water as needed.
There are different types of drinking water fountains: fountains without central chillers, fountains
with central chillers, water coolers, bottled water fillers, etc.
Faucet: A valved outlet device attached to a pipe that normally serves a sink or tub fixture. A
faucet discharges hot and/or cold water for a variety of consumptive uses, including drinking,
cooking, and washing. The term “faucet” is used interchangeably with the term “tap.”
First-Draw Samples: These are the samples taken immediately after turning on the faucet or
valve, without spilling, if possible. These samples represent the lead content of water sitting in
water outlets that are used for drinking or cooking within the building(s).
Fittings: These are generally static parts that are used to join sections of pipe, or to join pipe to
outlet fixtures.
Flush Samples: These samples are taken after water has been running from the fixture for some
pre-determined length of time. They can be used to determine if lead is coming from the fixture
itself or from interior plumbing.
Flux: A substance applied during soldering to facilitate the flow of solder. Flux often contains lead
and can itself be a source of lead contamination in water. The “lead-free” requirements of the
1986 Safe Drinking Water Act Amendments require that solders and flux not contain more than
0.2 percent lead.

53 | Page
3Ts for Reducing Lead in Drinking Water
APPENDIX
Fountain Valve: The valve and discharge device that mounts on top of the bubbler fixture and
discharges water for consumption. This document does not distinguish bubbler drinking water
fountains from other types of fountains. Therefore, the term “fountain valve” is used
interchangeably with bubbler valve.
Header: The main pipe in the internal plumbing system of a building (see Interior Plumbing
definition below for context within this document). The header supplies water to lateral pipes.
Inlet: A location where the water enters a plumbing component, such as where the water from
the pipes enters a central chiller (defined above).
Interior Plumbing: For the sake of this document, interior plumbing is the plumbing within the
wall and upstream of the fixture.
Lateral: A plumbing branch between a header or riser pipe and a fixture or group of fixtures. A
lateral may or may not be looped. Where more than one fixture is served by a lateral, connecting
pipes are provided between the fixtures and the lateral.
Lead-free: Per the Reduction in Lead Drinking Water Act of 2011: not containing more than 0.2
percent lead when used with respect to solder and flux; and not more than a weighted average
of 0.25 percent lead when used with respect to the wetted surfaces of pipes, pipe fittings,
plumbing fittings, and fixtures.
Outlet: A location where water may be accessed for consumption, such as a drinking fountain,
water faucet or tap.
Potable Water Pipe: The pipe in a distribution system and in a building which carries water
intended for human consumption.
Public Water System: Any system for the provision of water for human consumption through
pipes or other constructed conveyances if the system has 15 or more service connections, or
regularly serves an average of at least 25 persons daily at least 60 days per year.
Riser: The vertical pipe that carries water from one floor to another.
Sediment: Matter from piping or other water conveyance device that settles to the bottom of
the water in the apparatus. If lead components are used in plumbing materials, lead sediments
may form and result in elevated water lead levels.
Sequential Samples: Water samples collected at the fixture, one after another, without flushing
beforehand or wasting water in between samples.
Service Line: Also called a connection line. The pipe that carries tap water from the public water
main to a building. Service lines were often composed of lead materials, particularly those
installed prior to 1986.

54 | Page
3Ts for Reducing Lead in Drinking Water
APPENDIX
Source Water: Untreated water from streams, rivers, lakes or underground aquifers that is used
to supply private wells and public drinking water.
Solder: A metallic compound used to seal the joints between pipes. Until 1986, solder containing
up to 50 percent lead was legally used in potable water plumbing and the law prohibiting that
may not have been enforced in your state until 1990. “Lead-free” solders, which can contain up
to 0.2 percent lead, often contain one or more of the following metals: antimony, tin, copper or
silver. Several alloys are available that melt and flow in a manner similar to lead solder.
Strainers: Are typically located within the fixture itself (e.g., at the inlet to a water fountain or
cooler) and collect debris and/or sediment. These strainers should be checked and regularly
cleaned since they can be a contributing source of elevated lead levels.
Valve: A mechanical device by which the flow of water may be started, stopped or regulated by
a movable part that opens, shuts or partially obstructs one or more ports of passageway.
Water Cooler: A mechanical device affixed to drinking water supply plumbing that actively cools
water for human consumption. The reservoir can consist of a small tank or a pipe coil.

55 | Page
3Ts for Reducing Lead in Drinking Water
APPENDIX
Appendix B: Lead Water Coolers Banned in 1988
Lead Water Coolers Banned in 1988
The Lead Contamination Control Act (LCCA), which amended the Safe Drinking Water Act
(SDWA), was signed into law on October 31, 1988 (P.L. 100-572). The potential of water coolers
to contribute lead to drinking water in schools and child care centers was a principal focus of
this legislation. Specifically, the LCCA mandated that the Consumer Product Safety Commission
(CPSC) order the repair, replacement, or recall and refund of drinking water coolers with lead-
lined water tanks. In addition, the LCCA called for a ban on the manufacture or sale in interstate
commerce of drinking water coolers that are not “lead-free.” Civil and criminal penalties were
established under the law for violations of this ban. With respect to a water cooler that may
come in contact with drinking water, the LCCA (Section 1461 of SDWA) defines the term “lead-
free” to mean:
not more than 8 percent lead, except that no drinking water cooler which contains any solder, flux, or
storage tank interior surface which may come in contact with drinking water shall be considered “lead-
free” if the solder, flux, or storage tank interior surface contains more than 0.2 percent lead.
Another component of the LCCA was the requirement that EPA publish and make available to
the states a list of drinking water coolers, by brand and model, that are not “lead-free.” In
addition, EPA was to publish and make available to the states a separate list of the brand and
model of water coolers with a lead-lined tank. EPA is required to revise and republish these lists
as new information or analyses become available.
Based on responses to a Congressional survey in the winter of 1988, three major manufacturers (the
Halsey Taylor Company, EBCO Manufacturing Corporation, and Sunroc Corporation) indicated that lead
solder had been used in at least some models of their drinking water coolers. On April 10, 1988, EPA
proposed in the Federal Register (54 FR 14320) lists of drinking water coolers with lead-lined tanks and
coolers that are not “lead-free.” Public comments were received on the notice, and the list was revised
and published on January 18, 1990 (Part III, 55 FR 1772). See the following page for a list of water
coolers and lead components included on that list.
Important Note:
The 1990 list is based on a definition of “lead free” in SDWA applicable to drinking
water coolers only (SDWA Section 1461). At the time it was enacted, the 8% standard of the
definition was the same as the definition of lead free in another section of SDWA applicable to pipes,
pipe fittings, plumbing fittings and fixtures, solder, and flux (SDWA Section 1417). Since then,
however, the definition of “lead free” for pipes, fittings, and fixtures in Section 1417 was changed as
a result of the 2011, THE REDUCTION OF LEAD IN DRINKING WATER ACT to a weighted average of
0.25 percent of the wetted surface. It is still important to test fixtures that are not on this list;
especially if they were installed prior to 2014, the year THE REDUCTION OF LEAD IN DRINKING
WATER ACT became effective.

56 | Page
3Ts for Reducing Lead in Drinking Water
APPENDIX
List of Water Coolers and Lead Components
EBCO Manufacturing
All pressure bubbler water coolers with shipping dated from 1962 through 1977 have a bubbler valve
containing lead. The units contain a single 50-50 tin-lead solder joint on the bubbler valve. Model
numbers for coolers in this category are not available.
The following models of pressure bubbler coolers produced from 1978 through 1981 contain one 50-50
tin lead solder joint each.
CP3 DP15W DPM8 7P 13P DPM8H DP15M DP3R DP8A
DP16M DP5S C10E PX-10 DP7S DP13SM DP7M DP7MH DP7WMD
WTC10 DP13M-
60
DP14M CP10-50 CP5 CP5M DP15MW DP3R DP14S
DP20-50 DP7SM DP10X DP13A DP13A-
50
EP10F DP5M DP10F CP3H
CP3-50 DP13M DP3RH DP5F CP3M EP5F 13PL DP8AH DP13S
CP10 DP20 DP12N DP7WM DP14A-
50/60
Halsey Taylor
Lead solder was used in these models of water coolers manufactured between 1978 and the last week
of 1987:
WMA-1 SCWT/SCWT-a SWA-1 DC/DHC-1
S3/5/10D BFC-4F/7F/4FS/7FS S300/500/100D
The following coolers manufactured for Haws Drinking Faucet Company (Haws) by Halsey Taylor from
November 1984 through December 18, 1987, are not lead-free because they contain 2 tin-lead solder
joints. The model designation for these unites are as follows:
HC8WT HC14F HC6W HWC7D HC8WTH HC14FH HC8W HC2F HC14WT
HC14FL HC14W HC2FH HC14WTH HC8FL HC4F HC5F HC14WL HCBF7F
HC4FH HC10F HC16WT HCBF7HO HC8F HC8FH HC4W HWCZ

57 | Page
3Ts for Reducing Lead in Drinking Water
APPENDIX
Lead Lined Tanks
Prior to publication of the January 1990 list, EPA determined that Halsey Taylor was the only
manufacturer of water coolers with lead-lined tanks Below provides a listing of model numbers of the
Halsey Taylor drinking water coolers with lead-lined tanks that had been identified by EPA as of January
18, 1990.
Based upon an analysis of 22 water coolers at a U.S. Navy facility and subsequent data obtained by
EPA, EPA believes the most serious cooler contamination problems are associated with water coolers
that have lead-lined tanks.
Since the LCCA required the CPSC to order manufacturers of coolers with lead-lined tanks to repair,
replace, or recall and provide a refund of such coolers, the CPSC negotiated such an agreement with
Halsey Taylor through a consent order published on June 1, 1990 (at 55 FR 22387). The consent
agreement calls on Halsey Taylor to provide a replacement or refund program that addresses all the
water coolers listed below as well as “all tank-type models of drinking water coolers manufactured by
Halsey Taylor, whether or not those models are included on the present or on a future EPA list.” Under
the consent order, Halsey Taylor agreed to notify the public of the replacement and refund program for
all tank type models.
Currently, a company formerly associated with Halsey Taylor, Scotsman Ice Systems, has assumed
responsibility for replacement of lead-lined coolers previously marketed by Halsey Taylor. If a school or
child care facility has one of the Halsey Taylor water coolers noted below, contact Scotsman Ice Systems
to learn more about the requirements surrounding its replacement and rebate program.
Scotsman Ice Systems
775 Corporate Woods Parkway Vernon Hills, IL 60061
PH: (800) SCOTSMAN or 800-726-8762
PH: (847) 215-4500
Halsey Taylor Water Coolers with Lead-Lined Tanks
The following six model numbers have one or more units in the model series with lead-lined tanks:
WM8A WT8A GC10ACR GC10A GC5A RWM13A
The following models and serial numbers contain lead-lined tanks:
WM14A Serial No. 843034 WM14A Serial No. 843006 WT11A Serial No. 222650
WT21A Serial No. 64309550 WT21A Serial No. 64309642 LL14A Serial No. 64346908

58 | Page
3Ts for Reducing Lead in Drinking Water
APPENDIX
Appendix C: Develop a Code System for Samples
Develop a Code System for Samples
Code each outlet using a system that will allow each unique outlet to be identified by location,
type and other relevant characteristics. The text below provides examples for coding by fixture
type and sample type. The following is an example template that can be used to designate
unique samples in single-building schools and child care facilities.
Floor-Room Number-Outlet Type-Sample Number
The following is an example that uses the structure above and the example codes to the right.
An initial sample (P) was taken at a drinking water fountain (DW) on the 3rd floor (003) outside
of room 312 (312) and is the 15th outlet counted (015). This sample would be coded as:
003-312-DW-P-015
If multiple buildings are being sampled, include the building number as well.
Building Number-Floor-Room Number-Outlet Type-Sample Number
Thus, if that same drinking water fountain was located in building 1 (01), it would be coded as:
01-003-312-DW-P-015
Important Note: when taking sequential samples, be sure to
add a number to the sample to indicate the order the samples
were taken in.
• 1SS = First sequential sample
• 2SS = Second sequential sample
For example, the first 125-mL sequential sample taken at
that same drinking water fountain, would be coded as:
003-312-DW-1SS-015
Coding examples can include:
DW = drinking water fountain
WC = water cooler (chiller unit)
CF = classroom faucet
KF = kitchen faucet
BF = bathroom faucet
NS = nurse's office sink
SC = service connector
As well as the type of sample taken:
P = primary or initial sample
F = flush
SS = sequential sample
The coding should be identified on a site map, accompanied by a narrative that describes the
observable conditions of each sampling location. It is also important to document any special
conditions for the sampling, such as whether it was conducted after a remedy was
implemented (e.g., after fixture/plumbing replacement, after POU filter installation), during a
flushing evaluation (e.g., XX hours after morning flushing), or after aerator or inlet strainer
cleaning so that results can be interpreted in the future.

59 | Page
3Ts for Reducing Lead in Drinking Water
APPENDIX
Appendix D: Detailed Fixture Evaluation
The purpose of the detailed fixture evaluation is to pinpoint where (i.e., fixtures, cooler, interior
plumbing) lead is getting into drinking water so that appropriate corrective measures can be
taken.
Because the composition and dimensions of these fixtures vary, there are different sample
collection procedures for each fixture. Using the partnerships established with the 3Ts Program,
you may choose to request assistance with sampling from entities like public water systems,
state drinking water programs or certified laboratories.
The following pages break down the sampling for five types of fixtures and explain how to
interpret results:
• Drinking Water Fountains
• Cold Water Faucet
• Drinking Water Fountains with Coolers
• Ice-Making Machine
• Central Chiller Unit
Note: The graphics in this factsheet are meant to provide a general depiction of the plumbing
being sampled. Each outlet is a little bit different; there may be instances where more or less of
the plumbing is covered in the sample than is shown in the graphics.
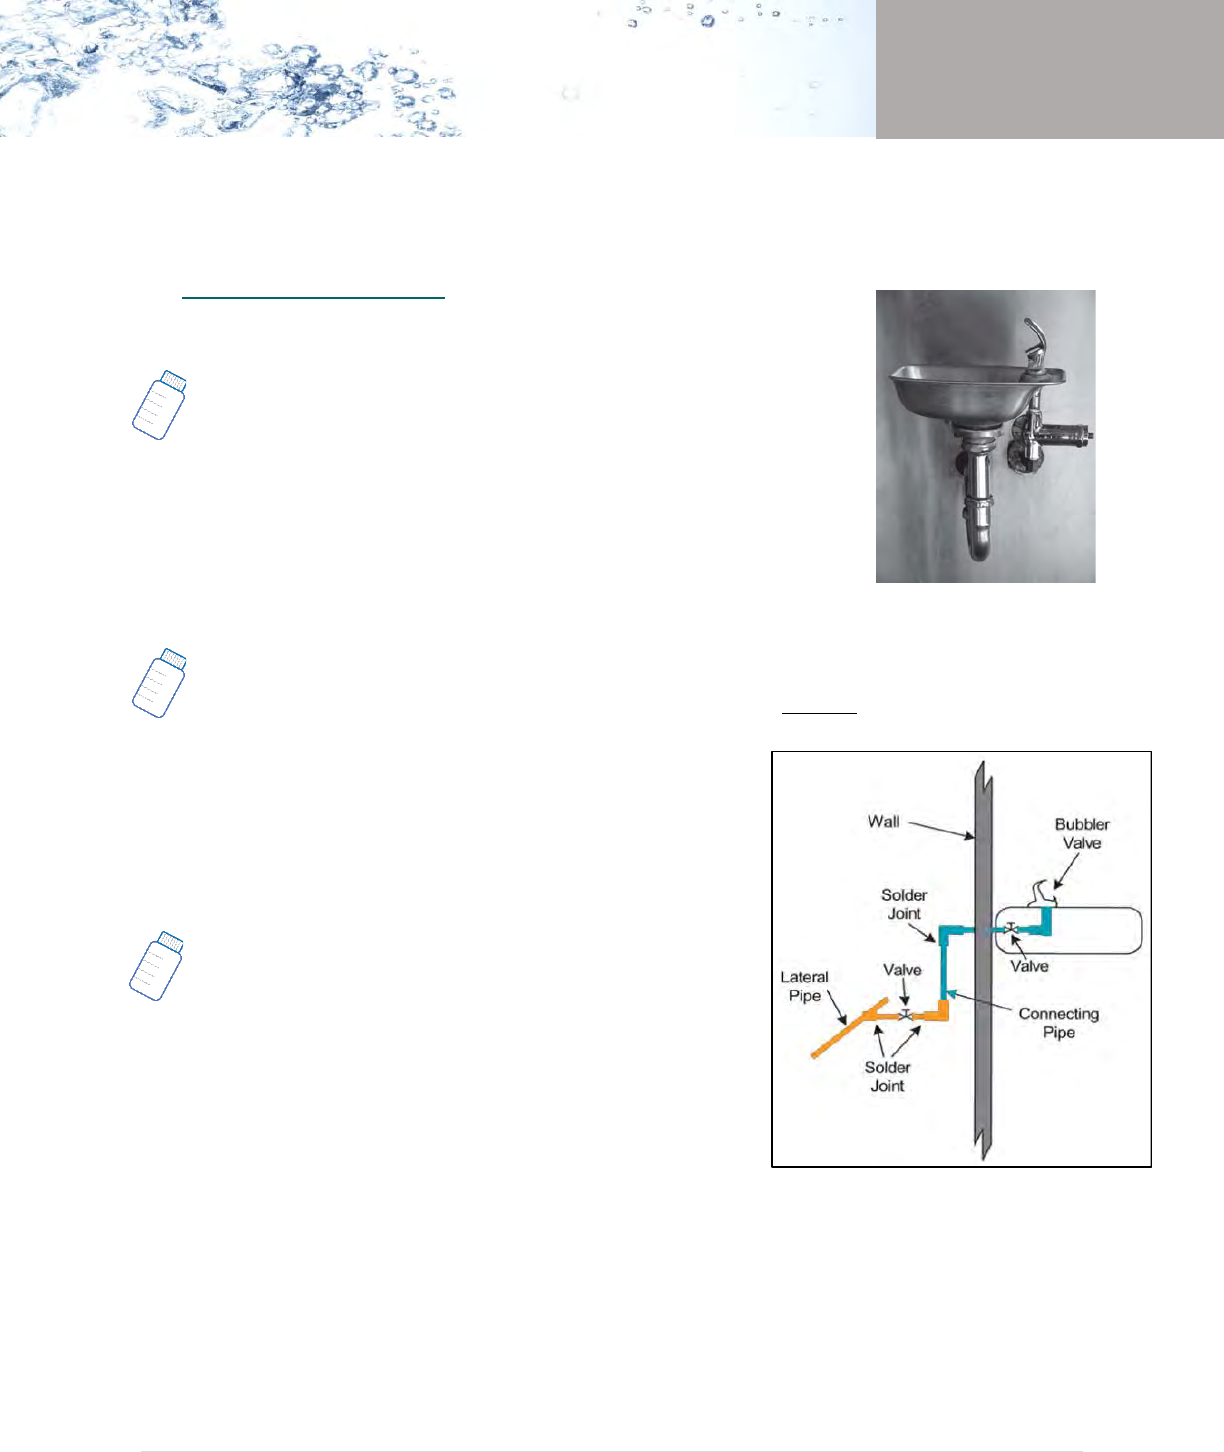
60 | Page
3Ts for Reducing Lead in Drinking Water
APPENDIX
Drinking Water Fountains
You will want to collect water so that the sample water has been in contact with the fixture and
has been in contact with the connecting pipes (Exhibit 4). If the fountain has a chiller unit, see
the Central Chiller Unit Section for additional sampling.
Helpful hint: Read the full instructions before sampling.
Sample 1A: Sampling the Outlet
Take this sample before the facility opens and before any water is
used. Try to predict the arc of the water and take a 125-mL sample. Note
this is a sequential sample. This sample is representative of the water
that may be consumed at the beginning of the day or after infrequent
use. It consists of water that has been in contact with the fountain or
bubbler valve, shut-off valve and connecting pipe.
Sample 2A: Sampling the Connecting Pipe
Without shutting off the water, take another 125-mL
sample, trying not to spill. Be sure to record which sample
was the first and which was the second sample. This is also a
sequential sample.
This sample consists of water that has been in contact with
the plumbing upstream of the outlet and the lateral pipe.
Sample 3A: Sampling the Interior Plumbing
Again, without shutting off the water, take a final 250-mL
sample trying not to spill any water in between samples. This
is also a sequential sample. This sample is representative of
the water that is in the plumbing upstream from the fountain.
Interpreting Results: Drinking Water Fountains
To determine the source of lead in the water, compare the test results of samples 1A, 2A and
3A.
Exhibit 4. Targeted Locations of Water in
Plumbing for Drinking Water Faucets
• IF the lead level in the first 125-mL sample (1A) is higher than that of the second-125 mL
sample (2A), THEN the fixture may be contributing lead and might need to be replaced.
• IF the lead level in the second 125-mL sample (2A) is higher than that of the first sample
(1A), THEN the lateral pipe or shut-off valve may be contributing lead.
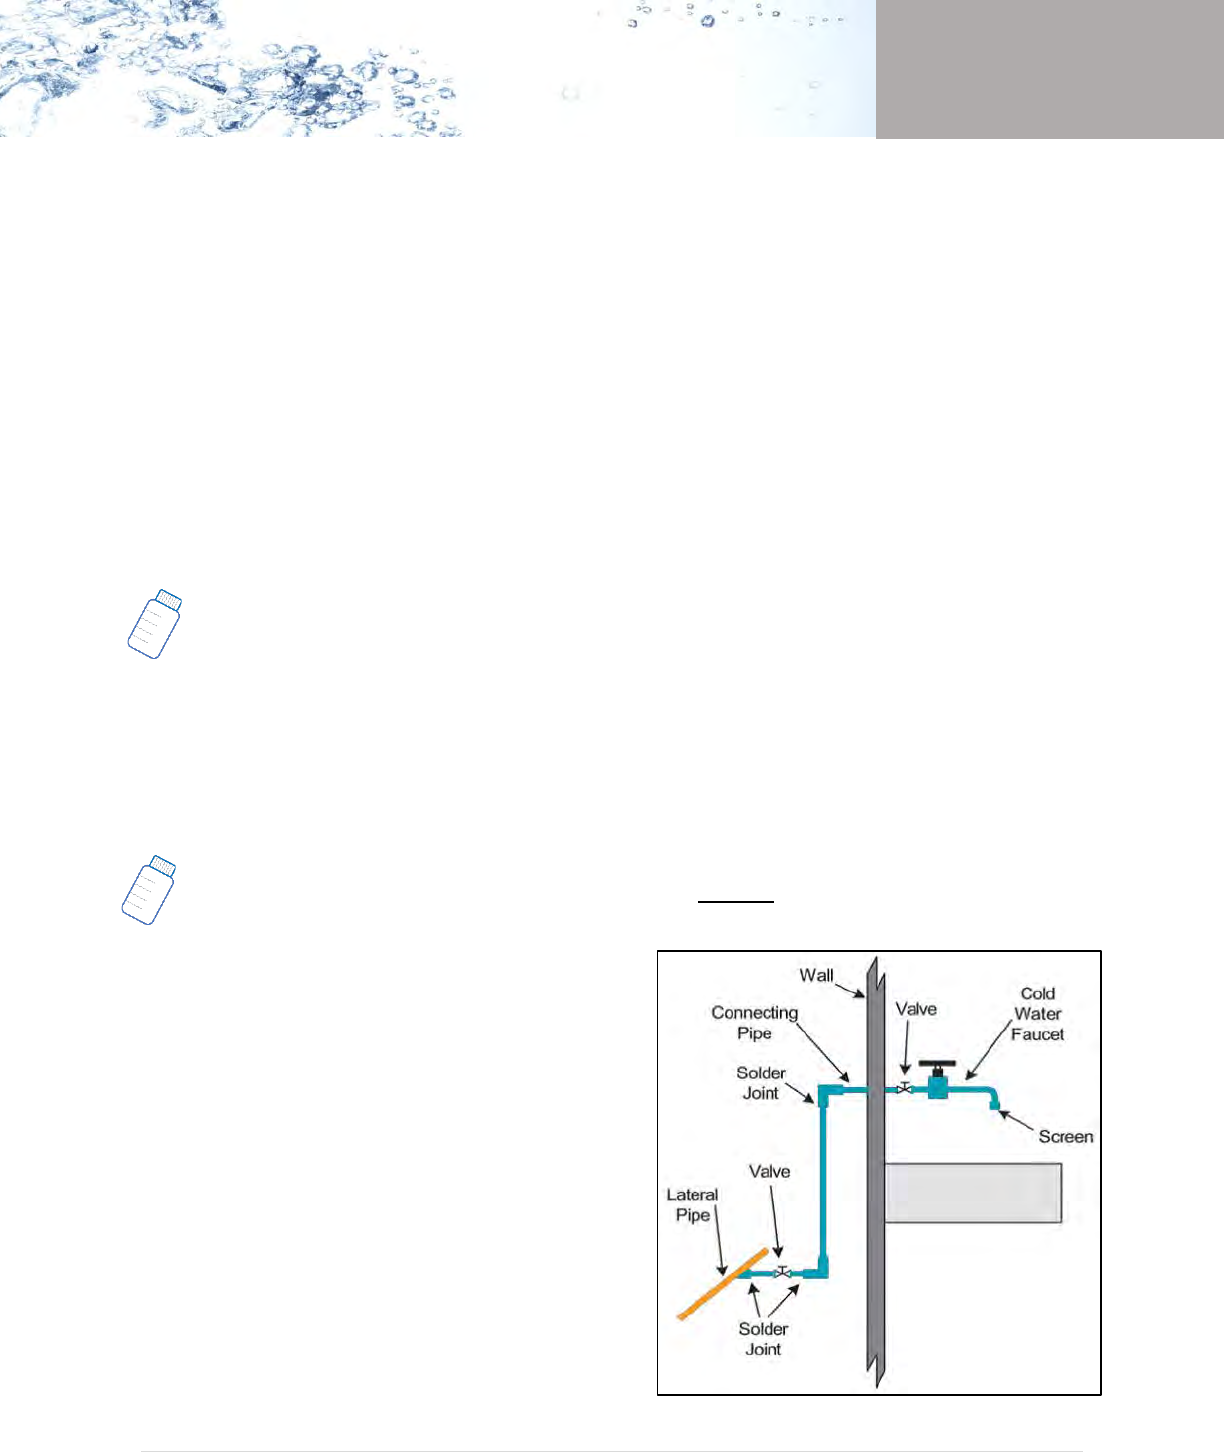
61 | Page
3Ts for Reducing Lead in Drinking Water
APPENDIX
• IF the lead level in the 250-mL sample (3A) is lower (below 5 ppb), THEN very little lead
is being picked up from the plumbing upstream from the outlet. The majority or all of
the lead in the water is likely contributed from the drinking water fountain.
• IF the lead level in the 250-mL sample (3A) significantly exceeds 5 ppb (for example, 10
ppb), THEN lead in the drinking water could also be contributed by the plumbing
upstream of the drinking water fountain. Compare all sample results to prioritize follow-
up sampling and remediation. Outlets with elevated lead levels should not be made
available for consumption.
Cold Water Faucet (i.e., Water Faucet, Water Tap, Kitchen Sink)
Water in this sample should consist of water that has been in contact with the faucet fixture
and the lateral pipe (Exhibit 5).
Sample 1B: Sampling the Faucet
Take a 250-mL sample before the facility opens and before any water is used. Note this is a
sequential sample.
Sample 1B is representative of the water that may be consumed at the beginning of the day or
after infrequent use. It consists of water that has been in contact with the fixture and the
plumbing connecting the faucet to the lateral pipes. See Exhibit 5.
Sample 2B: Sampling the Interior
Plumbing
Without shutting off the water, take a second
250-mL sample, trying not to spill. Note this is also
a sequential sample.
This sample is representative of the water that is
in the plumbing upstream from the faucet.
Interpreting Results: Cold Water
Faucets
To determine the source of lead in the water,
compare the results of samples 1B and 2B.
Exhibit 5. Targeted Locations of Water in
Plumbing for Cold Water Faucets
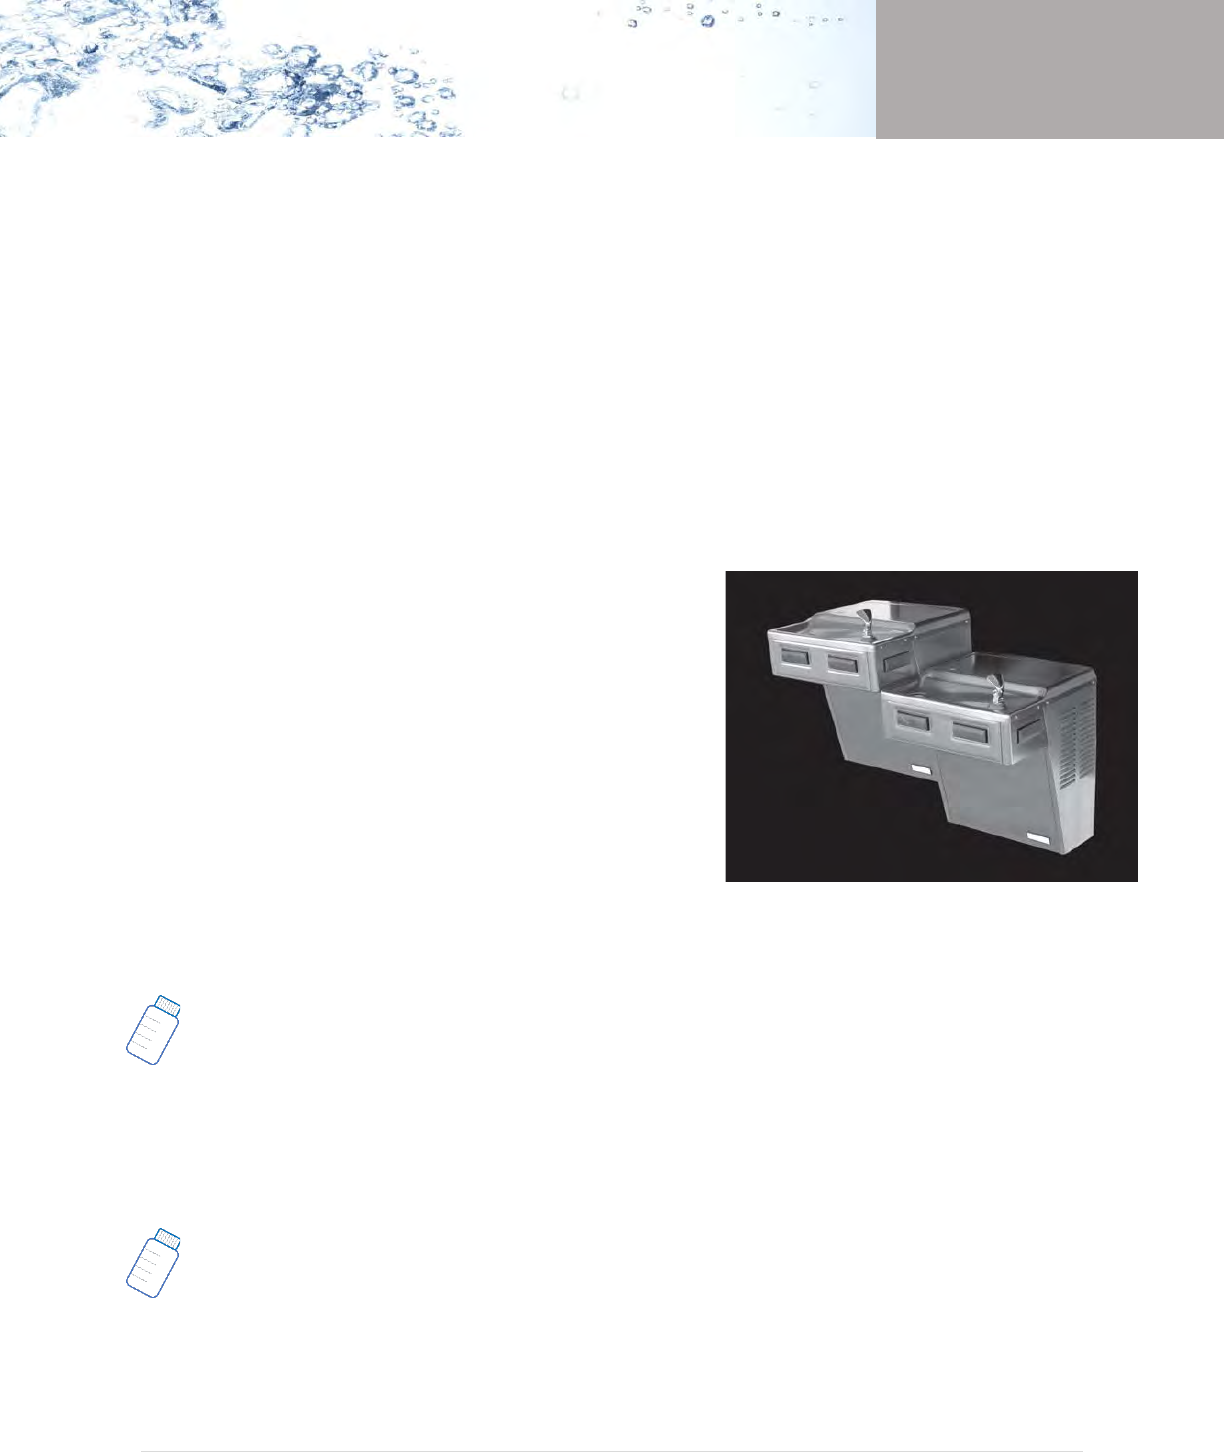
62 | Page
3Ts for Reducing Lead in Drinking Water
APPENDIX
• IF the lead level in sample 1B is higher than that in sample 2B, THEN the source of lead
could be the water faucet and/or the plumbing upstream from the faucet.
• IF the lead level in sample 2B is lower, close to 5 ppb, THEN very little lead is coming
from the plumbing upstream from the faucet. The majority or all of the lead in the water
is likely from the faucet and/or the plumbing connecting the faucet to the lateral.
• IF the lead level in sample 2B significantly exceeds 5 ppb (for example, the level is 10
ppb), THEN lead may be coming from the plumbing upstream from the faucet.
Drinking Water Fountains with Coolers
Two types of water coolers are used in drinking water fountains: the wall-mounted and the
free-standing types. Water in these coolers is stored in a pipe coil or in a reservoir. Refrigerant
coils in contact with either of these storage units cool the
water. Sources of lead in the water may be the internal
components of the cooler, including a lead-lined storage
unit; the section of the pipe connecting the cooler to the
lateral pipe; and/or the interior plumbing of the building
(Exhibit 6).
Flushing the Afternoon Before
In order to sample this outlet, you need to flush the
outlet the afternoon before sampling. Flushing times will
be dependent on the cooler tank size, but a 15-minute
flush should get to the piping upstream of the cooler and ensure that no stagnant water is left
in the storage unit.
Sample 1C: Sampling the Outlet
Take a 125-mL sample before the facility opens and before any water is used. Collect the
water immediately after opening the fountain or bubbler valve without allowing water to run.
Note this is a sequential sample.
The sample consists of water that has been in contact with the fountain or bubbler valve and
the plumbing inside the outlet.
Sample 2C: Sampling the Water Cooler
Without shutting off the valve, take a 250-mL sample immediately after sample 1C, trying
not to spill any water. This is also a sequential sample.
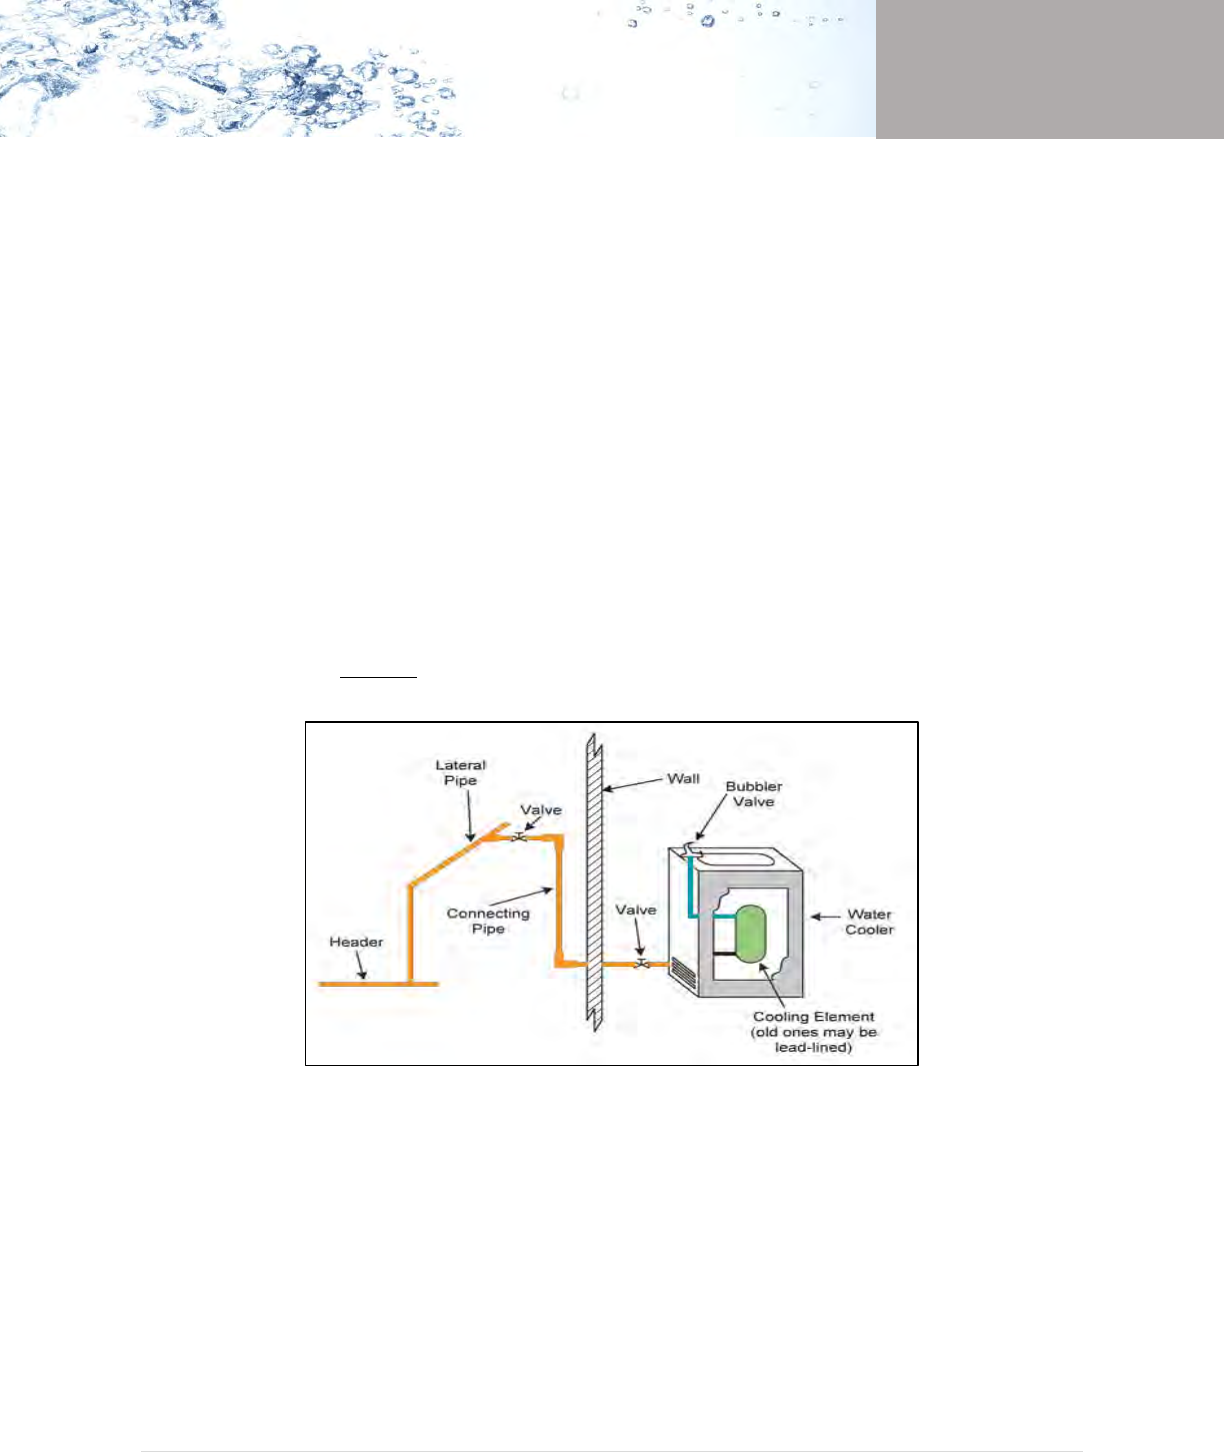
63 | Page
3Ts for Reducing Lead in Drinking Water
APPENDIX
Because the water in the cooler was flushed the previous afternoon, this sample is
representative of the water that was in contact with the cooler overnight, not in extended
contact with the plumbing upstream.
Interpreting Results: Drinking Water Fountain Coolers
To determine the source of lead in the water, compare the test results of samples 1C, 2C, and
3C.
• IF the lead level concentration in the first 250-mL sample (2C) is high AND is greater
than or equal to the lead level concentration of sample 1C, THEN the source of the lead
may be sediments contained in the cooler storage tank, screens or the plumbing
upstream from the cooler.
• IF the lead level concentration in the first 125-mL sample (1C) is greater than the sample
2C concentration, THEN bubbler valve may be contributing lead.
Exhibit 6. Targeted Locations of Water in Plumbing for Water
Fountains with Coolers

64 | Page
3Ts for Reducing Lead in Drinking Water
APPENDIX
Eliminating Particulate Lead as a Source
If the detailed fixture results reveal there are high lead levels of lead in the cooler sample,
a contributing source of the elevated levels could be the debris in the aerator or screen of
the fixture. By cleaning the aerator or screen and retesting, you can determine whether
the debris is a contributing source to elevated lead levels in their facilities.
Determining aerator/screen debris contribution:
Turn off the valve leading to the cooler. Disconnect the cooler from the plumbing and look
for a screen at the inlet. Remove the screen. Some coolers also have a screen installed at
their bubbler or fountain valve. Carefully remove the valve by unscrewing it. Some coolers
are equipped with a drain valve at the bottom of the water reservoir that may also catch
debris. Clean it all. Then take a 250-mL sample (3C).
Interpreting Results: Cooler
• IF the concentration of sample 3C is less than 5 ppb THEN the lead could be coming
from debris in the cooler or the screen.
• IF the concentration of sample 3C is much greater than 5 ppb THEN the lead is likely
coming from debris in the cooler or on the screen.
• IF the concentration of sample 3C is much greater than 5 ppb AND less than sample
1C THEN the source of lead may be sediments contained in the cooler, screens, and/
or the upstream plumbing. Routine flushing practices should be implemented to
reduce exposure from lead particulates.
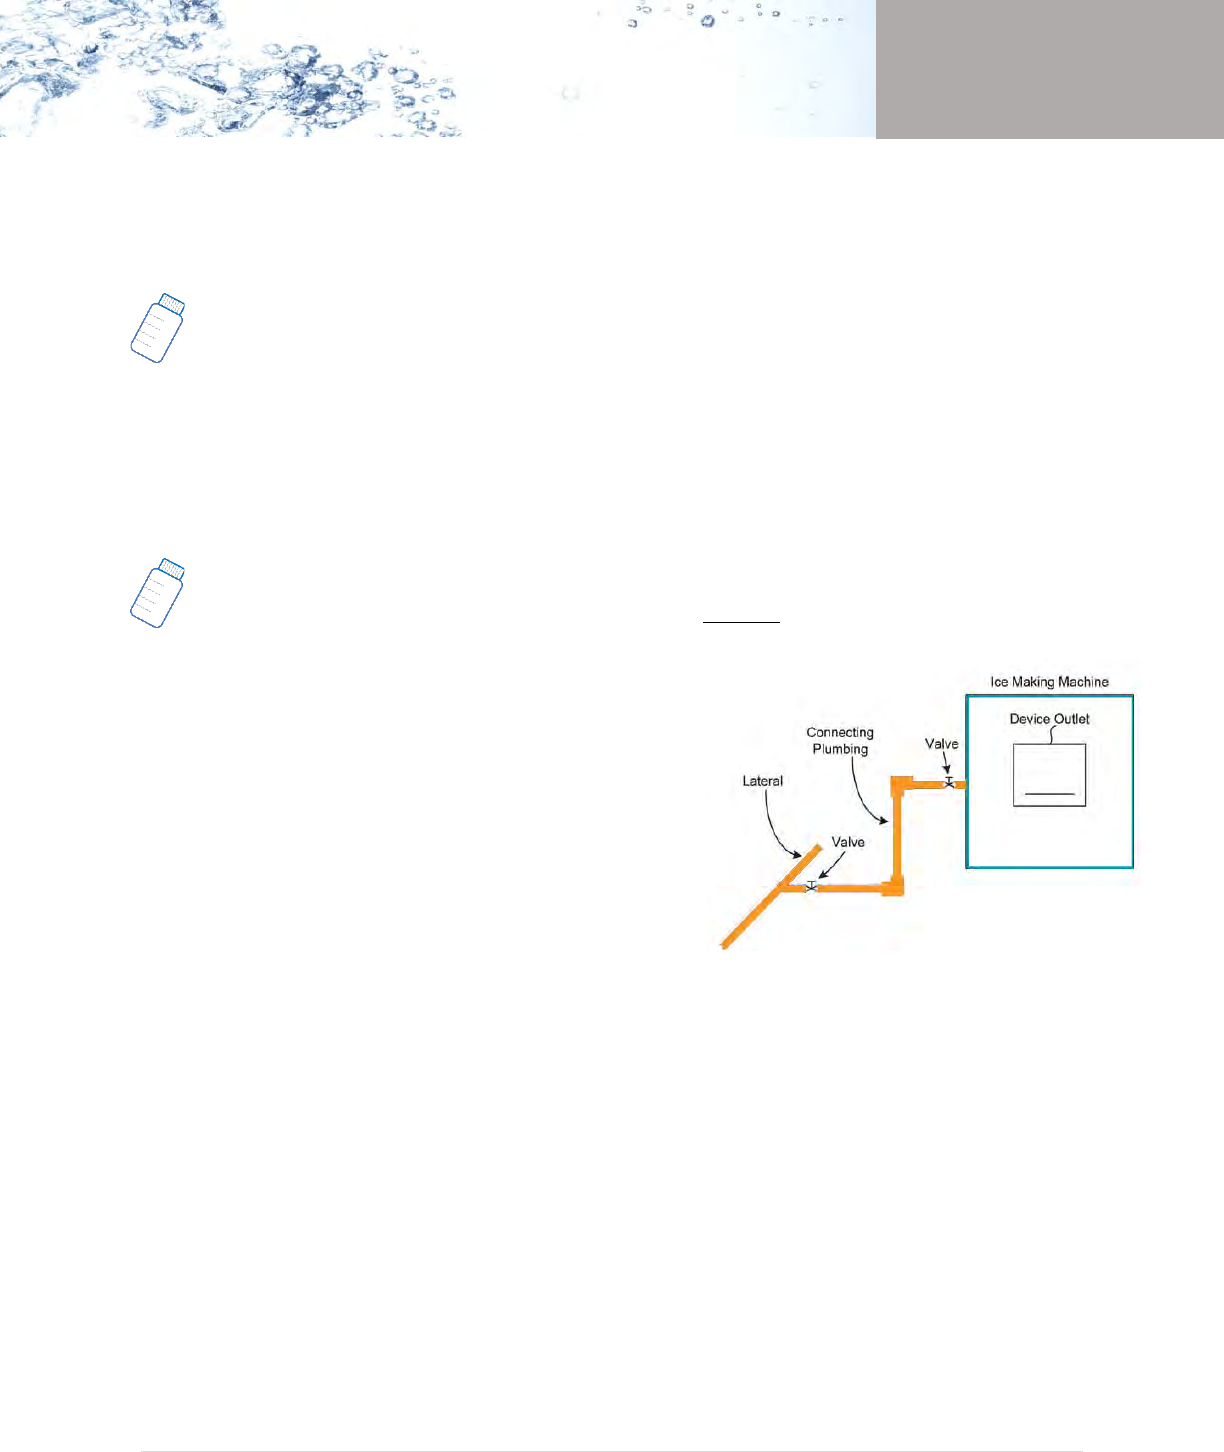
65 | Page
3Ts for Reducing Lead in Drinking Water
APPENDIX
Ice-Making Machine
You will want to collect water so that the sample water has been in contact with the ice making
machine an
d with the plumbing upstream (Exhibit 7).
Sample 1D: Sampling the Ice
Fill a suitable container (250-mL or larger, wide-mouthed bottle or other container)
provided by the laboratory at least three-quarters full with ice. Do not touch the ice with bare
hands. Use the non-metal scoop or disposable plastic gloves provided by the laboratory to place
the ice in the container. The results of 1D can be used to determine if sample 2D is needed.
Note: If there are high lead levels in the initial sample (1D), then collect sample 2D to
determine if the source of the lead is the plumbing or the ice making machine itself.
Sample 2D: Sampling the Plumbing
Disconnect the ice maker from the plumbing and
look for a screen at the inlet. Remove the screen.
Clean out the debris, if debris is present. Clean the
screen routinely to avoid accumulations of debris.
Collect the sample from the disconnected plumbing as
close to the ice maker as possible. Fill the sample
container with 250-mL of water immediately after
opening the faucet or valve. If no faucet is available,
contact the ice machine manufacturer for
recommendations that will minimize disruption of
existing plumbing.
Interpreting Results: Ice-Making Machine
• IF the lead level in sample 2D is lower (below 5 ppb), THEN the source of the lead may
be in the ice maker.
• IF the lead level in sample 2D significantly exceeds 5 ppb (for example, the level is 10
ppb), THEN lead could also be contributed from the plumbing upstream from the ice
maker.
• Follow-up samples from the supplying system may also need to be taken to identify the
source of lead.
Exhibit 7. Targeted Locations of Water in Plumbing
for Ice Making Machines

66 | Page
3Ts for Reducing Lead in Drinking Water
APPENDIX
Central Chill Unit
Sample 1E: Sampling the Plumbing Supplying the Chiller
Take a 250-mL sample from a faucet or valve as close to the inlet of the chiller as
possible. If no outlet is available, contact the chiller manufacturer for recommendations that
will minimize disruption of existing plumbing. If a sample faucet or valve is available, collect
the sample immediately after opening the outlet, without allowing any water to go to waste.
This sample is representative of water that has been in contact with the plumbing supplying
water to the chiller.
Sample 2E: Sampling the Connecting Pipe
Take a 250-mL sample from a faucet or valve as close to the outlet of the chiller as possible.
If no outlet is available, contact the chiller manufacturer for recommendations that will
minimize disruption of existing plumbing.
This water sample consists of water that has been in contact with the chiller unit and the
plumbing upstream, which supplies water to the chiller. Often, water supplied to the fountains
is recirculated to the chiller unit. In this instance, sample 2E consists of a mixture of water from
the water supply and any water that may be recirculated from the plumbing supplying water to
the fountains.
Interpreting Results: Central Chiller Unit
Note: You will need the results from samples collected at the drinking water fountain (Exhibit 4)
covered earlier in this section.
• IF the lead level in sample 3A (the drinking water fountain sample) is higher than that in
sample 2E (the second 250-mL central chiller sample), THEN lead could be contributed
by the plumbing supplying the water from the chiller to the fountain.
• IF the lead level in sample 2E is higher than in sample 1E, THEN a portion of the lead
may be coming from the chiller.
o Note: Sludge and sediments containing high levels of lead may accumulate in
chiller tanks. If the test results indicate that lead is coming from the chiller unit,
check for the presence of debris and sludge. Remove any of these materials
from the chiller, flush the chiller unit, and resample the water.
• IF the lead level in sample 1E is lower (close to 5 ppb), THEN very little lead is being
picked up from the plumbing upstream from the chiller. The majority of the lead in the
water may be attributed to the chiller and the plumbing downstream from the chiller.
• IF the lead level in sample 1E is very high (above 20 ppb), THEN there could be lead
sources upstream from the chiller and you may need to contact a plumber to further
diagnose.
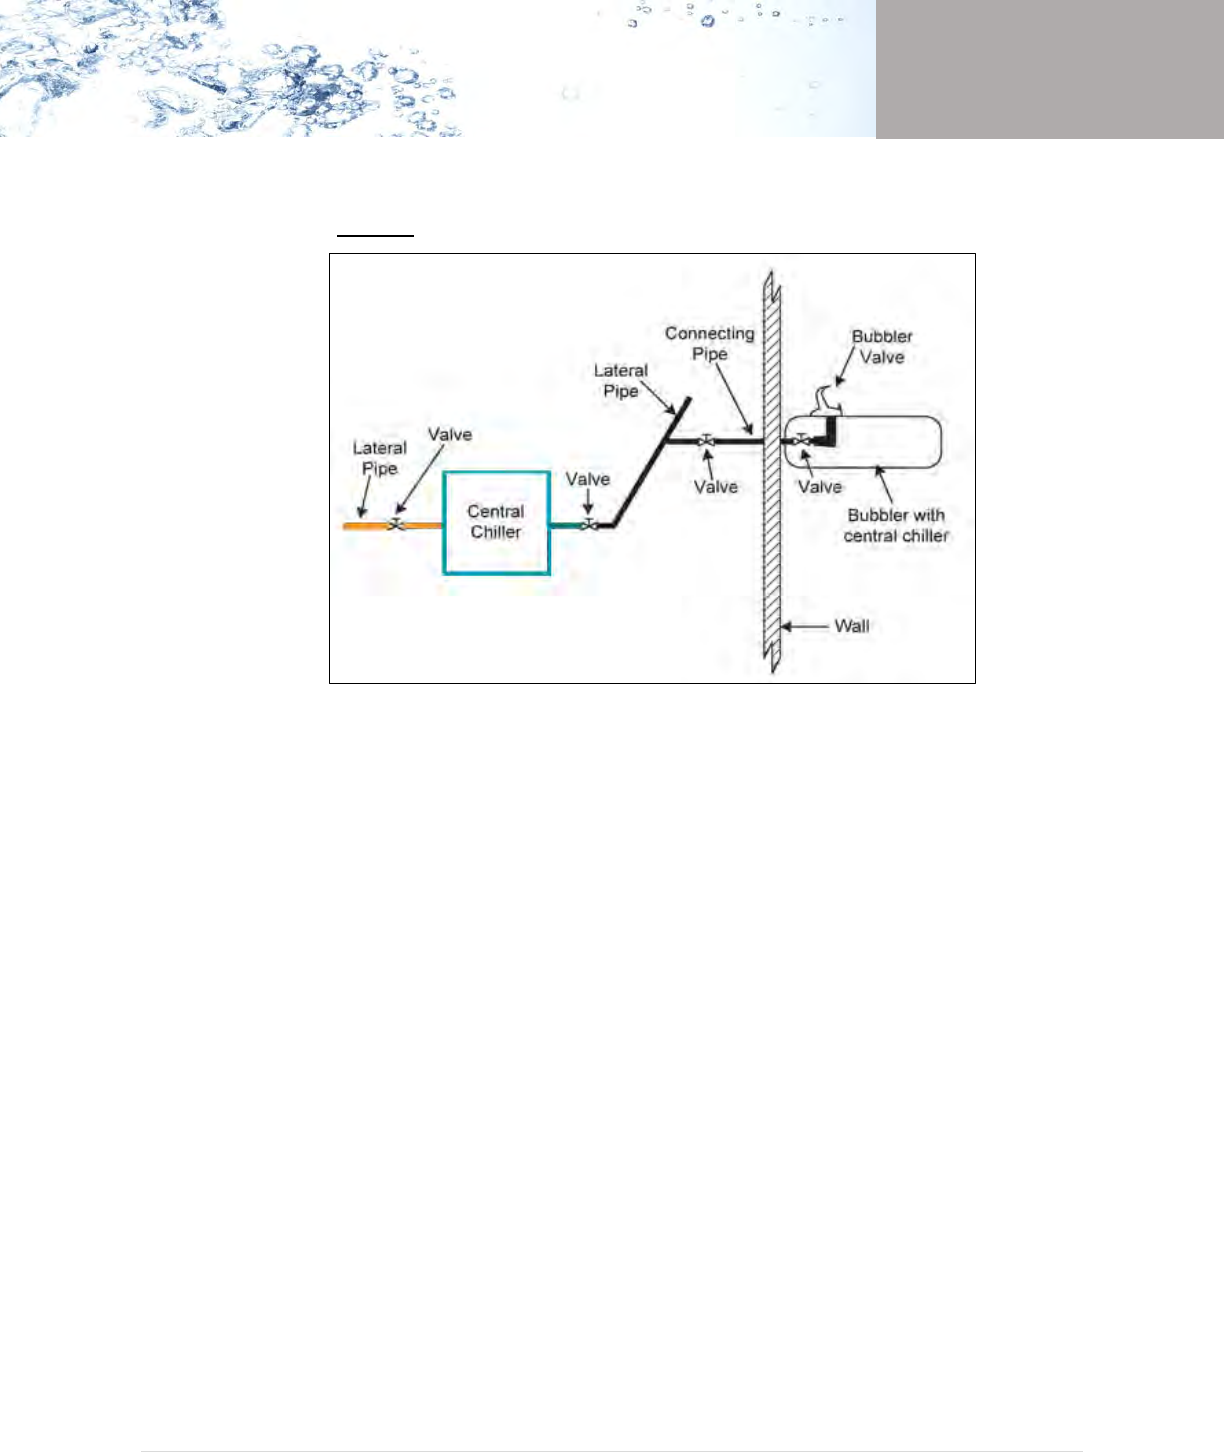
67 | Page
3Ts for Reducing Lead in Drinking Water
APPENDIX
Exhibit 8: Targeted Locations for Water in Plumbing for Central Chillers

68 | Page
3Ts for Reducing Lead in Drinking Water
APPENDIX
Additional Sampling Information
Sample Documentation
Record the unique sample identification number on each sample bottle and on the
recordkeeping form. An example form is provided in Appendix F. The information recorded will
include:
Type of sample taken (e.g., initial first-draw)
Date and time of collection
Name of the sample collector
Location of the sample site
Name of the outlet manufacturer, and the outlet’s model number, if known
Model number of faucets, valves, and other visible fixtures; include digital photos in
sampling records, if possible
Water treatment already in place in the building (i.e., point-of-entry (POE) devices) or
filters (point-of-use (POU) devices).
•
•
•
•
•
•
•
Additional Interior Plumbing Samples
In general, if lead levels remain high in samples taken from drinking water outlets, and the
source cannot be determined, additional samples from upstream sample sites in the interior
plumbing should be collected. The Detailed Fixture Evaluation can further help in determining
potential lead sources.
The configuration of interior plumbing will vary depending on the layout of a given building and
type of outlet. Construction materials may also vary, especially in larger buildings where
additions and repairs have been made to the original structure.
At this point, if not done already, you may also want to contact a professional to assist in
collecting interior plumbing samples. you should also consider the installation of filters.

69 | Page
3Ts for Reducing Lead in Drinking Water
APPENDIX
Sampling for Other Parameters
In addition to monitoring for lead, you may wish to monitor for other parameters that
may provide an indication of problems in your plumbing. However, note that analysis
costs will increase as the number of parameters increases. Some other parameters include
bacteria, cadmium, color, copper, iron, turbidity, and zinc. See Table below.
Contaminant
Limit
Concern
Bacteria
Absent
Bacteria are present throughout our environment. They have adapted to
live and reproduce in a variety of environments, including inside animals
and humans, and in water, soil, and food. If bacteria are present in
drinking water sources, most are removed during the disinfection
process. However, some may survive and enter the distribution system
(the building’s pipes and plumbing). Bacteria can also grow within the
plumbing system, water fountains, and faucets.
Cadmium
5 ppb
A regulated toxic metal found in low levels in galvanized pipe. The
maximum allowable level at the water treatment plant is 5 ppb.
However, the presence of cadmium at any level indicates that corrosive
conditions may exist in the plumbing.
Color
15 color
units
An aesthetic parameter that may indicate the presence of iron oxides.
Iron oxides are often present in iron or steel pipe as a result of corrosive
conditions.
Copper
1300 ppb
A regulated metal used to make copper piping. The presence of copper in
water samples taken from copper piping is not unusual, but higher levels
indicate that corrosive conditions may be a concern.
Iron
300 ppb
An aesthetic parameter that is indicative of corrosive conditions at higher
levels. See also color and turbidity. (Galvanized pipe is made of iron.)
Turbidity
1 turbidity
unit
A measurement of the clarity of water. Higher turbidity values may
indicate the presence of iron oxides. Iron oxides are often present in iron
or steel pipe as a result of corrosive conditions.
Zinc
5000 ppb
An aesthetic parameter that is indicative of corrosive conditions at higher
levels. Zinc is used in making galvanized piping products. The presence of
zinc in water samples taken from galvanized piping is not unusual, but
higher levels indicate that corrosive conditions may be a concern.
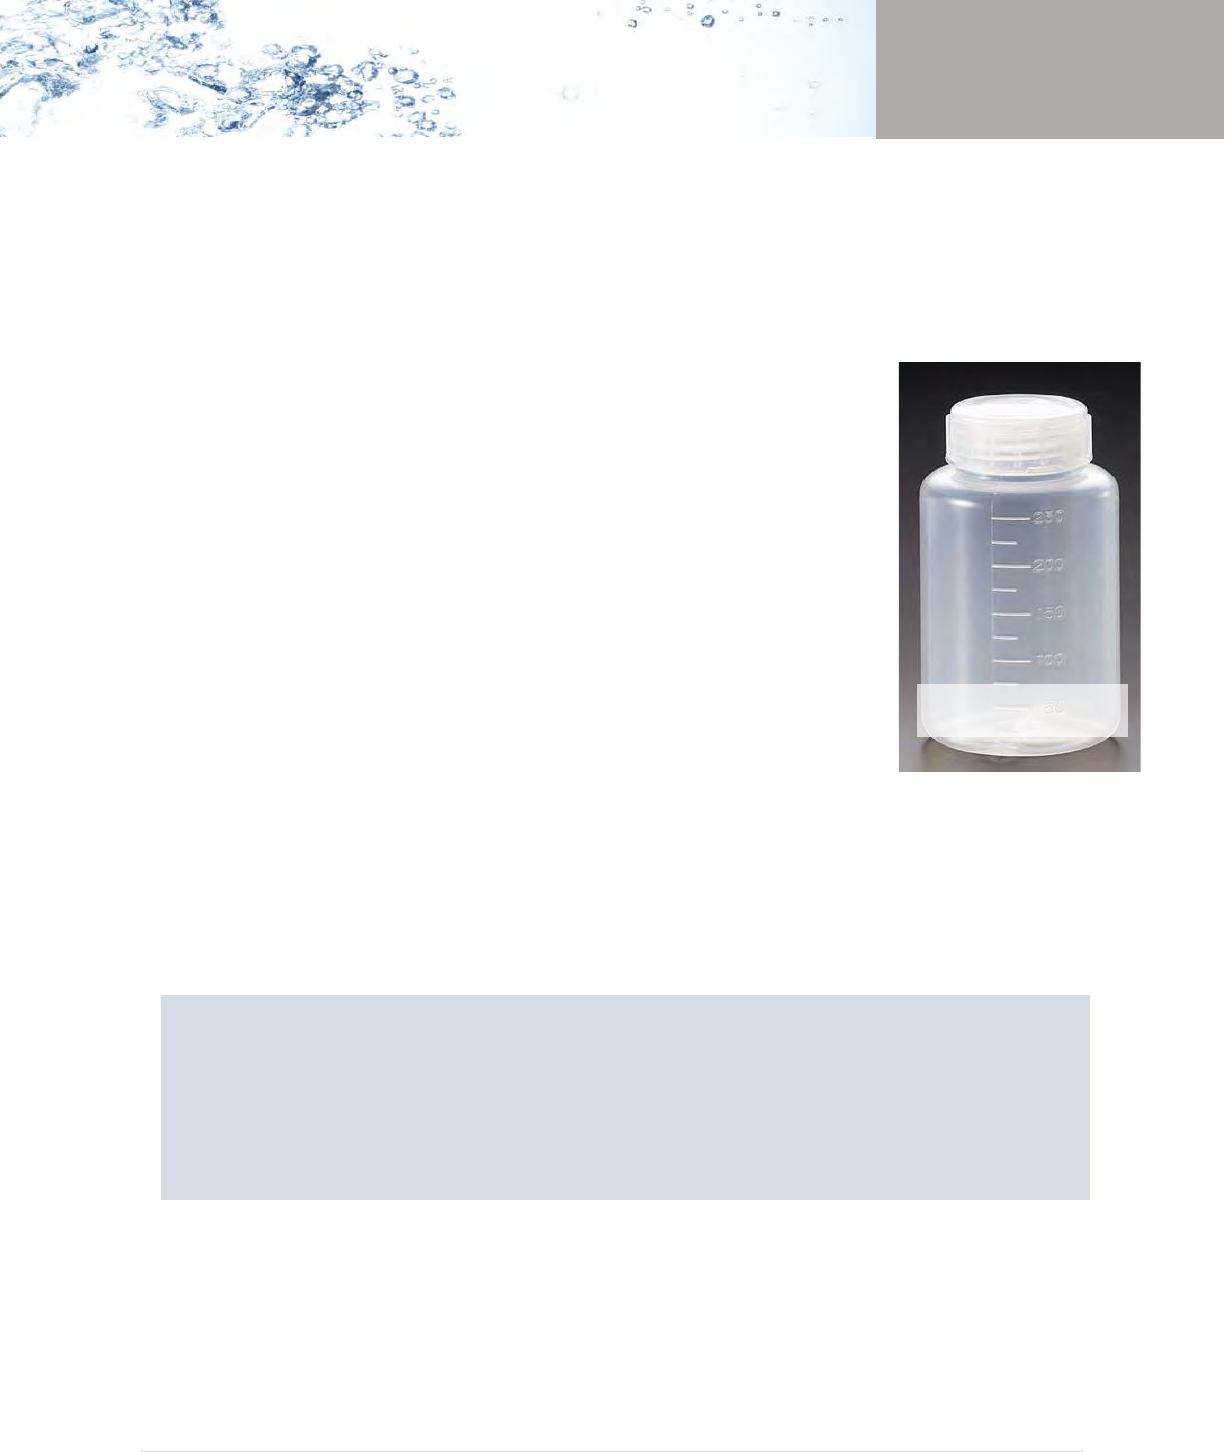
70 | Page
3Ts for Reducing Lead in Drinking Water
APPENDIX
Appendix E: Preservation of Samples
In order to avoid analytical errors, pay particular attention to proper collection and handling of
the sample before analysis. Sample containers (250-mL) should be obtained from a certified
laboratory. The containers should have wide openings for easier sample collection and to allow
samples to be collected with the water flowing at normal flow rates (i.e., A container with a
narrow opening would make it difficult to collect water from a faucet that
is turned on at the normal flow rate. Water collected from a faucet that is
turned on “low” may not be representative of normal usage.) Other
containers such as used jars or water bottles should not be used.
Make sure the containers are kept sealed between the time of their
preparation by the lab and the collection of the sample. This will assure
that no contaminants from the outside are introduced. If also taking
bacteria samples, preserve the samples by icing, and promptly ship or
deliver it to the laboratory. Most laboratories will provide the necessary
shipping containers and cold packs. Upon receipt, the laboratory will
acidify the sample. The sample can be held up to 14 days prior to
acidification without loss of lead through absorption, but EPA recommends
that you ship your samples as soon as possible.
It is best to have water samples analyzed for “total lead” rather than “dissolved lead.” Many
laboratories may recommend the dissolved lead test because it is cheaper, but this test does
not analyze for particulate lead, which can only be measured using the “total lead” test.
However, both tests can also be conducted in order to determine if particulate lead is a
problem. The difference in value of lead between the two results can be used to calculate
particulate lead.
250-mL
A certified drinking water laboratory should be aware of these requirements. In addition,
the laboratory may provide qualified individuals to collect samples or sample containers and
instructions. The sample containers may have been prepared prior to reaching the school or
child care facility. The laboratory will also specify how to handle the sample containers and
when to submit them after taking the samples.
71 | Page
3Ts for Reducing Lead in Drinking Water
APPENDIX
When the laboratory returns the test results, the concentrations of lead in the drinking water
samples will be reported in metric form such as milligrams per liter (mg/L) or micrograms per
liter (µg/L), or they will be reported as a concentration such as parts per million (ppm) or parts
per billion (ppb), respectively.
Milligrams per liter (mg/L) is the same as parts per million (ppm).
Micrograms per liter (µg/L) is the same as parts per billion (ppb).
Examples:
1 mg/L = 1000 µg/L = 1 ppm = 1000 ppb
0.020 mg/L = 20 µg/L = 0.02 ppm = 20 ppb
For more detailed information, refer to the following documents:
Methods for the Determination of Metals in Environmental Samples. U.S. EPA/600/4-94/111.
May 1994 (available from the National Technical Information Service, Pub. No. PB95-125472
(703) 487-4650).
Manual for the Certification of Laboratories Analyzing Drinking Water. U.S. EPA 815-R-05-004.
January 2005 (available from the National Technical Information Service (703) 487-4650).
Standard Methods for the Examination of Water and Wastewater, 22nd Edition. Co-published
by the American Public Health Association, the Water Environment Federation and the
American Water Works Association. 2012 (available from the American Water Works
Association, ISBN # 0-87553-013-3, Catalog #10085).
72 | Page
3Ts for Reducing Lead in Drinking Water
APPENDIX
Appendix F: Example Sampling Field Form
Building Name:
Sample Date (MM/DD/YYYY):
Sampler’s Email:
Building Number:
Sampler’s Name:
Sampler’s Phone:
Sample Id = Building Number-Floor-Room Number-Outlet Type-Sample Number (e.g., 01-03-312-DW-P-015)
Outlet Type Codes
DW = drinking water fountain KF = kitchen faucet WC = water cooler (chiller unit) BF = bathroom faucet
CF = classroom faucet NS = nurse's office sink
Sample ID
Model #
Time
Color
(describe)
Filter
Filter Date
(MM/DD/YYYY)
Location Notes
Lab Sample ID
(Lab use only)
01-03-312-DW-P-015
SF – 7080
5:30am
Yes No
10/14/2016
DW in next to room 312
Chain of Custody:
1. Released By: Received By: Date/Time: #of Samples:
2. Released By: Received By: Date/Time: #of Samples:
3. Released By: Received By: Date/Time: #of Samples:
General Notes:

73 | Page
3Ts for Reducing Lead in Drinking Water
Appendix G: Plumbing Profile
This questionnaire is designed to assist with determining whether lead is likely to be a problem in a facility. A separate plumbing
profile may be needed for each building, addition or wing of the facility, especially if the construction of each took place at different
times. The questions in the left column will help to determine whether lead is likely to be a problem in a facility and will enable
sampling effort prioritization. The middle column is where questions should be answered. Use the right column as a guide to
interpret the answers and gain a better understanding of the significance of possible answers. Some of the questions in this
questionnaire may not apply to a facility for various reasons. Skip those questions that do not apply.
Plumbing Profile Question
What Answers to the Plumbing Profile Questions Mean
1. When was the original
building constructed?
Were any buildings or additions
added to the original facility? If
so, complete a separate plumbing
profile for each building, addition
or wing.
Older Buildings – Through the early 1900s, lead pipes were commonly used for
interior plumbing in certain parts of the country. Plumbing installed before 1930 is
more likely to contain lead than newer pipes. After 1930, copper generally replaced
lead as the most commonly used for water pipes. Up until the mid- to late-1980s
(until the “lead-free” requirements of the 1986 Safe Drinking Water Act
Amendments took effect), lead solder was typically used to join these copper pipes.
The efforts of a public water system over the years to minimize the corrosiveness of
the water may have resulted in a protective coating of mineral deposits forming on
the inside of the water pipes (passivation). This coating insulates the water from the
plumbing and generally results in decreased lead levels in water. If the coating does
not exist or is disturbed, the water is in direct contact with any lead in the plumbing
system.
Newer Buildings – New buildings are not likely to have lead pipes in their plumbing
systems, but they are very likely to have copper pipes with solder joints. Buildings
constructed prior to the late 1980s, before the “lead-free” requirements of the 1986
Safe Drinking Water Act Amendments, may have joints made of lead solder.
Buildings constructed after this period should have joints made of “lead-free”

74 | Page
3Ts for Reducing Lead in Drinking Water
Plumbing Profile Question
What Answers to the Plumbing Profile Questions Mean
solders. In addition, “lead-free” brass fixtures or plumbing components purchased
or installed prior to 2014, the Reduction of Lead in Drinking Water Act effective
date, were allowed to contain higher levels of lead. Even if “lead-free” materials
were used in new construction and/or plumbing repairs, lead leaching may occur.
See the Training Section for more information on the “lead-free” requirements.
2. If built or repaired since 1986,
were “lead-free” plumbing and
solder used in accordance with the
“lead-free” requirements of the
1986 Safe Drinking Water Act
Amendments? What type of solder
has been used?
The 1986 Safe Drinking Water Act Amendments banned plumbing components that
contained elevated levels of lead. The Reduction of Lead in Drinking Water Act further
reduces lead in pipes, pipe fittings, plumbing fittings, and fixtures to a weighted
average of 0.25 percent. The Act also redefines “lead-free” under the SDWA to mean:
not containing more than 0.2 percent lead when used with respect to solder and flux
and not more than a weighted average of 0.25 percent lead when used with respect
to the wetted surfaces of pipes, pipe fittings, plumbing fittings, and fixtures. These
provisions went into effect in January 2014.
In some areas of the country, it is possible that high-lead materials were used until
1988 or perhaps even later. The local plumbing code authority or building inspector
may be able to provide guidance regarding when high-lead materials were last used
on a regular basis in the area.
If “lead-free” materials were not used in new construction and/or plumbing repairs,
elevated lead levels can be produced. If the film resulting from passivation does not
exist or has not yet adequately formed, any lead that is present is in direct contact
with the water.

75 | Page
3Ts for Reducing Lead in Drinking Water
Plumbing Profile Question
What Answers to the Plumbing Profile Questions Mean
3. When were the most recent
plumbing repairs made? Note the
locations.
If the building (or an addition, new plumbing, or repair) is less than 5 years old and
lead solder or other leaded materials were used (e.g., brass fixtures containing lead
alloys, especially those purchased or installed prior to 2014 when the Reduction of
Lead in Drinking Water Act took effect), elevated lead levels may occur. If water
supplied to the building is corrosive, lead can remain a problem regardless of the
plumbing’s age.
4. Of what materials is the service
connection (the pipe that carries
water to the school or child care
facility from the public water
system’s main in the street) made?
Note the locations where the
service line enters the building and
connects to the interior plumbing.
Lead piping was often used for the service connections that join buildings to public
water systems. In larger schools, the service line is probably not lead because lead is
impractical for the larger service lines typically used in these facilities; however, many
child care facilities reside in small buildings and are at a higher likelihood of being
served by lead lines.
Some localities required the use of lead service connections up until the “lead-free”
requirements of the 1986 Safe Drinking Water Act Amendments took effect. Although
a protective layering of minerals may have formed on these pipes, vibrations can
cause flaking of any protective build-up and, thus, allow lead contamination to occur.
5. What are the potable water
pipes made of in the facility?
Examples include: Lead, plastic,
galvanized metal,
cast iron, copper, other.
Note the location of the different
types of pipe, if applicable, and the
direction of water flow through the
building.
Survey the building for exposed pipes, preferably accompanied by an experienced
plumber who should be able to readily identify the composition of pipes on site. Most
buildings have a combination of different plumbing materials.
Lead pipes are dull gray in color and may be easily scratched by an object such as a
knife or key. Also, a magnet will not stick to lead.
Galvanized metal pipes are gray or silver-gray in color and are usually fitted together
with threaded joints. A magnet will stick to galvanized iron pipe. In some instances,
compounds containing lead have been used to seal the threads joining the pipes.
Debris from this material, which has fallen inside the pipes, may be a source of
contamination.

76 | Page
3Ts for Reducing Lead in Drinking Water
Plumbing Profile Question
What Answers to the Plumbing Profile Questions Mean
Note the areas of the building that
receive water first, and which areas
receive water last.
Copper pipes are red-brown in color. Corroded portions may show green deposits.
Copper pipe joints were typically joined together with lead solders until the “lead-
free” requirements of the 1986 Safe Drinking Water Act Amendments took effect.
Plastic pipes, especially those manufactured abroad, may contain lead. If plastic pipes
are used, be sure they meet NSF International standards,
http://info.nsf.org/Certified/pwscomponents/.
6. Are there tanks in the plumbing
system (e.g., pressure tanks or
gravity storage tanks)?
Note the locations of any tanks,
and any available information
about the tank (e.g., manufacturer
or date of installation).
Some older tanks may contain coatings that are high in lead content.
Tanks may accumulate sediment that could be flushed back into the plumbing system
under certain circumstances. You may wish to contact the supplier or manufacturer to
obtain information about coatings. They may also wish to hire a plumber or tank
service contractor to inspect the tanks, especially gravity storage tanks that are
located outside of the building.
Although EPA encourages routine maintenance of hot water heaters, this guidance
does not include sampling hot water outlets or hot water heaters, because hot water
is not recommended for consumption (drinking/cooking). See Temperature Control
Establishing Routine Practices in the Taking Action Section.
7. Was lead solder used in the
plumbing system?
Note the locations with lead solder.
The 1986 Safe Drinking Water Act Amendments banned plumbing components that
contained high levels of lead. It is likely that high-lead solder and fluxes continued to
be used until 1988 and even later in some areas of the country. The local plumbing
code authority or building inspector may be able to provide guidance regarding when
high-lead solder was last used on a regular basis in the area. It is important to note
that the Reduction of Lead in Drinking Water Act did not revise the “lead-free”
definition for solder and flux.

77 | Page
3Ts for Reducing Lead in Drinking Water
Plumbing Profile Question
What Answers to the Plumbing Profile Questions Mean
8. Are brass fittings, faucets or
valves used in the drinking water
system? (Note: Most faucets are
brass on the inside.)
You may want to note the locations
on a map or diagram of their
facilities and make extensive notes
that would facilitate future analysis
of lead sample results.
Brass fittings, faucets, and valves are golden yellow in color, similar to copper in
appearance, or are plated with chrome. After 1996, brass fittings installed in drinking
water outlets such as faucets and water coolers were required to meet NSF/ANSI
standards for lead content (NSF/ANSI 61, NSF/ANSI 372). While this percentage was
considered “lead-free” under the 1986 Safe Drinking Water Act Amendments, some
contamination problems still may occur. Older brass faucets and components may
contain higher percentages of lead and lead solder in their interior construction and
pose contamination problems. Note that state or local governments may have
imposed this standard prior to 1988.
The degree to which lead will leach from brass products containing alloys with less
than 8 percent lead is dependent upon the corrosiveness of the water and the
manufacturing process used to develop the product. You should request NSF/ANSI 61
certification on all drinking water system products purchased. Include a copy of the
NSF/ANSI 61 certificate as a requirement on the purchase orders. The distributor or
manufacturer can provide a list of certified products. NSF 372 covering pipes, pipe
fittings, plumbing fittings, and fixtures was adopted in 2010, and dictates that a
product has been certified as meeting a weighted average lead content of less than or
equal to 0.25 percent when used with respect to wetted surfaces. See EPA’s 2013
guidance, How to Identify Lead-Free Certification Marks for Drinking Water System
& Plumbing Materials for additional guidance.
The Reduction of Lead in Drinking Water Act further reduces lead in pipes, pipe
fittings, plumbing fittings, and fixtures to a weighted average of 0.25 percent. These
provisions went into effect in January 2014.

78 | Page
3Ts for Reducing Lead in Drinking Water
Plumbing Profile Question
What Answers to the Plumbing Profile Questions Mean
9. How many of the following
outlets provide water for
consumption?
Water coolers, water fountains
with central chillers, cold water
taps, ice makers, kitchen taps, or
drinking fountains. Note the
locations.
In addition to lead components in the plumbing system, lead solders or lead in the
brass fittings and valves used in some faucets, fountains, and refrigerated water
coolers may be sources of lead. It is important to identify the locations of all such
drinking water outlets. Faucets in bathrooms should not be used to obtain water for
drinking. Although they may be adequate for washing hands, they may not be
appropriate for drinking purposes. However, if bathroom faucets, locker room
showerheads, and non-traditional drinking water outlets are known to be used for
drinking or cooking (e.g., fill water jugs), sampling should be conducted. You may
consider posting “Do Not Drink or Cook” signs.
10. Have you checked the brands
and models of water coolers and
compared them to the listing of
banned water coolers in Appendix
B of this document?
Note the locations of any banned
coolers.
Older water coolers (purchased or installed prior to 1988) may be a major source of
lead contamination. See Appendix B of this manual for a summary of EPA’s list of
water coolers found to contain lead. Use the list to help prioritize sampling. If a water
cooler is listed as having a lead-lined tank, its water should not be used for drinking,
and the cooler should be removed immediately, as these coolers pose the highest risk
of contamination.
11. Do outlets that provide drinking
water have accessible screens or
aerators? (Standard faucets usually
have aerator or screens. Many
coolers and fountains also have
inlet strainer screens.) If so, have
the screens been cleaned?
Note the locations.
Lead-containing sediments that are trapped on screens can be a significant source of
lead contamination. Facilities should create a routine maintenance program to clean
the screens regularly. See Cleaning in Establishing Routine Practices of the Taking
Action Section. If sediment has been a recurring problem, regular cleaning of the
screens and additional investigation of the reasons for the debris accumulation is
appropriate. However, the manufacturer or water service provider should be
contacted to obtain instructions for cleaning screens.

79 | Page
3Ts for Reducing Lead in Drinking Water
Plumbing Profile Question
What Answers to the Plumbing Profile Questions Mean
12. Are there signs of corrosion,
such as frequent leaks, rust-colored
water, or stained dishes or
laundry?
Note the locations.
Frequent leaks, rust-colored water, and stains on fixtures, dishes, and laundry are
signs of corrosive water. Blue-green deposits on pipes and sinks indicate copper
corrosion; brown stains result from the corrosion of iron. Where such symptoms
occur, high levels of lead, copper, and iron may be present in the water.
13. Is any electrical equipment
grounded to water pipes?
Note the locations.
If electrical equipment has been installed using water pipes as a ground, the electric
current traveling through the ground wire will accelerate the corrosion of any interior
plumbing containing lead. This practice should be avoided, if possible. However, if
existing wires are already grounded to water pipes, the wires should not be removed
from the pipes unless a qualified electrician installs an alternative grounding system.
Check with the local building inspector on this matter. State or local building codes
may require grounding of the wires to the water pipes. Improper grounding of
electrical equipment may cause severe shock.
14. Have there been any
complaints about bad (metallic)
taste?
Note the locations.
Although lead dissolved in water cannot be seen, tasted or smelled, the presence of a
metallic taste or rusty appearance may indicate corrosion and possible lead
contamination.

80 | Page
3Ts for Reducing Lead in Drinking Water
Plumbing Profile Question
What Answers to the Plumbing Profile Questions Mean
15. Check building files and ask the
public water system to determine
whether any water samples have
been taken from the building for
any contaminants.
Name of contaminant(s)?
What concentrations of the
contaminant(s) were found?
What was the pH?
Is testing done regularly at the
facility?
As discussed in the Training Section, lead testing may have previously been done
voluntarily under the Lead Contamination Control Act. Results of analyses of general
water quality, such as measures of pH, calcium hardness, and carbonate alkalinity, can
provide important clues about the corrosiveness of the water. If there is no data from
the school or child care facility, the public water system should at least be able to
provide information about the general water quality.
16. Other plumbing questions:
Are blueprints of the building
available?
Are there known plumbing “dead-
ends,” low use areas, existing leaks
or other “problem areas?”
Are renovations being planned for
part or all of the plumbing system?
You should incorporate this information into decisions regarding sample locations and
sampling protocol. They may wish to note the direction of water flow and the location
of fixtures, valves, tanks, areas of sediment accumulation, areas of corrosion, etc., on
a sketch or blueprint of the plumbing.
