
BellevueCollege|Chemistry162LabManual
Chem& 162 ~ Reaction Kinetics: An Iodine Clock Reaction
1
Reaction Kinetics: The Iodine Clock Reaction
Introduction
The “clock reaction” is a reaction famous for its dramatic colorless-to-blue color change, and is often used
in chemistry courses to explore the rate at which reactions take place. The color change occurs when I
2
reacts with starch to form a dark blue iodine/starch complex. The ability to record the time at which the
blue complex appears allows the rate of reaction to be determined accurately with a stopwatch.
In this experiment, the rate law for a reaction is determined using the method of initial rates. The effect of
concentration on the rate of this reaction is determined by measuring the initial reaction rate at several
reactant concentrations. You will also examine the effect of a metal ion catalyst on the reaction rate.
Lastly, you will investigate the effect of temperature on the rate of this reaction, which will allow you to
determine the activation energy.
The Clock Reaction
The primary reaction to be studied is the oxidation of I
-
by S
2
O
8
2-
(persulfate) in aqueous solution:
2I
-
(aq) + S
2
O
8
2-
(aq) I
2
(aq) + 2SO
4
2-
(aq) (slow, rate determining) Equation 1
This reaction will be run in the presence of a known amount of S
2
O
3
2-
(thiosulfate), which reacts very
rapidly with I
2
. As long as S
2
O
3
2-
is present, I
2
is consumed by S
2
O
3
2-
as fast as it is formed. This
competing reaction prevents the I
2
produced from our reaction of interest from reacting with starch, so no
color change is observed until the thiosulfate is completely used up. The "clock" reaction is the reaction of
a very small amount of S
2
O
3
2-
(thiosulfate) with the I
2
produced in the primary reaction:
I
2
(aq) + 2S
2
O
3
2-
(aq) 2I
-
(aq) + S
4
O
6
2-
(aq) (fast) Equation 2
The “clock” reaction will signal when the primary reaction forms a specific amount of I
2
. The amount of I
2
formed before the color change can be calculated from the known amount of S
2
O
3
2-
added using the molar
ratio in Equation 2. To find the rate of Equation 1, the change in the concentration of I
2
is monitored over
time. Below, [I
2
] is the change in the concentration of I
2
, and t represents the change in time:
Rate =
t
][I
2
Equation 3
Recall: Rate = 1/2
=
= - 1/2
As soon as all of the S
2
O
3
2-
ions have reacted, the I
2
still being formed (Equation 1) starts to accumulate and
reacts with starch. Starch serves as an indicator to help us “see” the I
2
, since the interaction between starch
and I
2
forms a blue starch-iodine complex. Thus, "∆t" is simply the time elapsed between mixing the
reagents and the appearance of the blue color. Because the S
2
O
3
2-
ion concentration in the reaction mixture
is known, you can calculate "∆[I
2
]" using the stoichiometry of the “clock” reaction. Since the same amount
t
][I

BellevueCollege|Chemistry162LabManual
Chem& 162 ~ Reaction Kinetics: An Iodine Clock Reaction
2
of S
2
O
3
2-
is added to each run, ∆[I
2
] is also the same for each run. However, the amount of time for the
appearance of the blue color varies with initial reactant concentrations, with temperature, and in the
presence of catalyst, so t is not constant.
Notes Regarding the Initial Concentrations, the Dilution Formula, and Ion Molarities:
The initial concentrations of reactants are calculated for the moment at which they are mixed. At that time,
the solutions have mutually diluted each other (raised the volume of total solution, with or without adding
moles of the solute), but have not yet started disappearing from solution (via reaction). For each ion in
solution, a new molarity must be calculated that takes into consideration the new total volume of the
solution, and the other ions that were added. The concentrations and volumes of the reactants are given in
Table 1.
To determine the concentration of an ion in solution, consider the stoichiometric relationship between the
ionic compound and the number of ions formed in solution. For example, a 0.20 M solution of KI releases
0.20 M I
-
and 0.20 M K
+
ions. The situation would be different if the source of I
-
was CaI
2
, since 2 moles of
I
-
ions would be released for each mole of CaI
2
that dissociates.
Calculate the concentration of each reactant after combining the solutions, but before the chemical reaction
begins. Note that the total volume of each solution is 20 mL. Thus, in the dilution formula, M
1
V
1
= M
2
V
2
,
V
2
is always 20 mL, and V
1
is the volume of the individual solution added to the mixture.
Preliminary Calculations Involving the "Clock” Reaction
Using the dilution formula, the concentration of S
2
O
3
2-
in the mixture is 1.2
x10
-3
M. According to the
stoichiometry of the clock reaction in Equation 2, the number of moles of I
2
is one-half the the number of
moles of S
2
O
3
2-
. The blue color will appear when 6.0 x10
-4
M of I
2
(with two significant figures) has been
formed by the primary reaction. This number remains constant in all Runs, and so provides ∆[I
2
] in all of
rate calculations.
All Runs: ∆[I
2
] = 6.0 x 10
-4
M I
2
Reaction Rate
The rate law for Equation 1 will be determined by measuring the initial rate of reaction with varying initial
reactant concentrations. The concentration of S
2
O
3
2-
in the reaction mixture is very small compared to the
other reactants present, such that the measured rate is the initial rate of the reaction. The rate law for
Equation 1 is given below:
Rate = k[I
-
]
x
[S
2
O
8
2-
]
y
Equation 4
In Equation 4, k is the rate constant, and x and y represent the order of I
-
and S
2
O
8
2-
, respectively. These
values will be determined experimentally from your data.
Note: When the solution turns blue, only a very small percentage of the reactants have been used up.
Thus, the initial concentrations of reactants can be used in the rate law with very little error. Typically,
the error is less than 5%.

BellevueCollege|Chemistry162LabManual
Chem& 162 ~ Reaction Kinetics: An Iodine Clock Reaction
3
Effect of Concentration on the Reaction Rate: Finding the Rate Law
For Runs 1-3, the initial I
-
concentration is varied while the initial S
2
O
8
2-
concentration remains constant.
The order with respect to I
-
is determined using the method of initial rates. The following example will
illustrate how to find a reaction order using the method of initial rates.
Example: The following data was obtained for the reaction: A + B C
Experiment [A], M [B], M Rate (M/s)
1 0.020 0.10 1.20
2 0.030 0.10 1.80
3 0.030 0.25 11.25
The general rate law for this example is
Rate = k[A]
x
[B]
y
Since [A] changes between Experiment 1 and 2, while [B] remains constant, the order for A is obtained by
taking the ratio of the rates from these two experiments:
yx
yx
.10][k[0.020]
.10][k[0.030]
M/s1
M/s
0
0
20
801
.
.
Since k is constant at a given temperature and [B]
y
is constant for Experiments 1 and 2, the equation
simplifies to:
x
.
.
[0.020]
[0.030]
M/s1
M/s
20
801
or 1.50 = 1.5
x
Thus, x = 1 for this example.
Unfortunately, experimental results are not usually that "clean", and a more sophisticated method is needed
to find x. Mathematically, solving for exponents requires the use of logarithms. Taking the log of both sides
of the equation above yeilds:
1.5logx1.50log
Rearranging this equation to solve for x yields
x =
1.5log
1.50log
= 1.0 ≈ 1
Experiments 2 and 3 may then be used to find the order for B, as shown below
yx
yx
.10][k[0.030]
.25][k[0.030]
M/s
M/s
0
0
801
2511
.
.
By cancelling out the common terms and dividing the rate and concentration values, we obtain
6.25 = 2.5
y
Taking the log of both sides and rearranging to solve for y gives
y =
2.5log
6.25log
= 2.0 ≈ 2
For Runs 2, 4, and 5, the initial S
2
O
8
2-
concentration
will vary
while the initial I
-
concentration remains
constant. Use the initial rates method shown above to find the order for S
2
O
8
2-
.

BellevueCollege|Chemistry162LabManual
Chem& 162 ~ Reaction Kinetics: An Iodine Clock Reaction
4
Once the values for x and y are known, these can be substituted back into Equation 4, and the rate constant
(k) calculated for each set of initial concentrations. The average value of k is reported for the five runs
conducted at room temperature, along with the average rate. Use average values for Run 3 in Parts II and
III.
Effect of a Catalyst on the Reaction Rate
A comparison of the reaction rate with and without a catalyst will demonstrate catalytic action. The Cu
2+
ion, added in the form of a dilute Cu(NO
3
)
2
solution, makes a suitable catalyst.
Effect of Temperature on the Reaction Rate: Determination of E
a
The Arrhenius equation describes the relationship between k, T, E
a
and A, the frequency factor:
ln k = -
E
a
R
1
T
+ ln A Equation 5
y = m x + b
The reaction is run at four different temperatures, and for each, the rate constant is calculated. From these
data, construct an Arrhenius plot of ln k vs (1/T) by mapping the four data points onto the equation of a line,
as shown under Equation 5. Use the slope of the Arrhenius plot to determine the value of the activation
energy, E
a
.
*Waste handling: Keep a 600 mL beaker at your station to collect the clock reaction waste. When you
have completed all trials, pour the contents of the waste beaker into the waste container in the fume
hood.
Safety Precautions
CAUTION: Ammonium persulfate is moderately toxic by ingestion, and corrosive to body tissues. Avoid
body tissue contact. Potassium iodide is irritating to body tissues, avoid all body tissue contact.
Disposal
Dispose of all chemicals and solutions in the appropriately marked waste container in the fume hood.
BellevueCollege|Chemistry162LabManual
Chem& 162 ~ Reaction Kinetics: An Iodine Clock Reaction
5
Procedure
Part I: The Effect of Concentration
Work in groups of 2. Make sure that the necessary glassware is clean and dry. Each group will carry out
Run 2, plus another Run as determined by the instructor, and will obtain data for the remaining Runs from
other groups. Three trials of each Run will be used to give a good average time. To keep the ionic
strength of all runs relatively constant, the non-reactive compounds KNO
3
and (NH
4
)
2
SO
4
are added to
replace the reactants KI and (NH
4
)
2
S
2
O
8
when less than 10 mL of the former and 8 mL of latter are used.
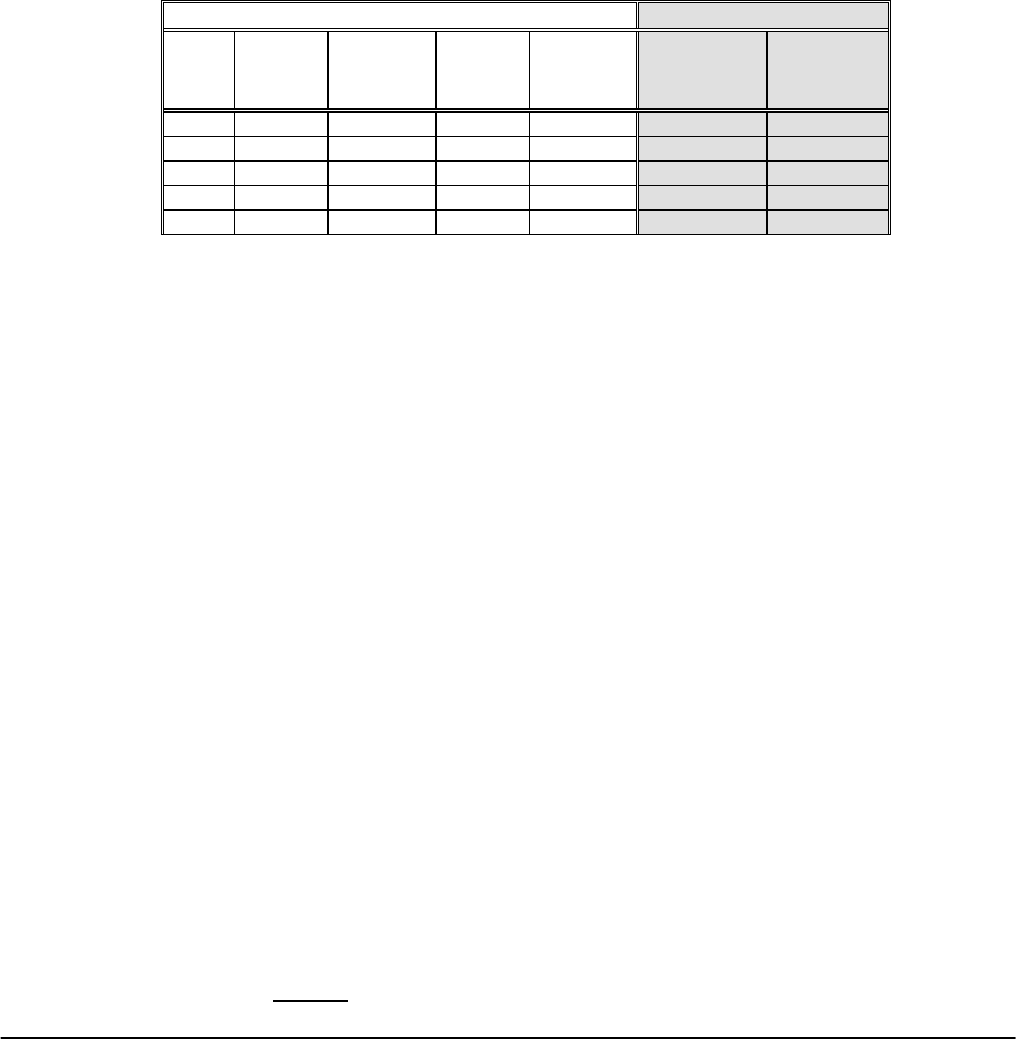
Table I gives the composition in milliliters of the reaction mixtures that will be used to determine the order
of reaction with respect to iodide and persulfate.
Table I. Compostion of the Reaction Mixtures
Test Tube A
Test Tube B
Run
No.
0.2%
Starch,
drops
0.012 M
Na
2
S
2
O
3
,
mL
0.20 M
KI, mL
0.20 M
KNO
3
, mL
0.20 M
(NH
4
)
2
S
2
O
8
,
mL
0.20 M
(NH
4
)
2
SO
4
,
mL
1 5 drops 2 8 2 4 4
2 5 drops 2 4 6 4 4
3 5 drops 2 2 8 4 4
4 5 drops 2 4 6 8 0
5 5 drops 2 4 6 2 6
1. Heat a 400 mL beaker of water on a hot plate to prepare for Part III. Place the hot plate out of the way,
and watch that cords do not get in the way. There may be room to set up your hotplate on the counter
along the wall.
2. Label three clean, dry test tubes A and three clean dry test tubes B (for Run 2). Use a test tube rack to
hold these grouped appropriately, and avoid contamination between Set A and Set B.
3. Use the self-zeroing burets containing Na
2
S
2
O
3
and KI to deliver the appropriate amounts of these
reactants (see Table 1) to Test Tube A, according to Table 1. Use a graduated cylinder or graduated
pipet to measure the appropriate volume of KNO
3
for Run 2 into Test Tube A. Repeat this process with
two more test tubes to prepare the other two trials for Run 2. Add 5 drops of starch to each test tube.
Note: Make sure you use solutions from the same set of burets. Label your test tubes. Use the
precision of the measuring device to get the correct number of significant figures for the total volume.
Write down all concentrations shown on the burets in your data tables.
4. Obtain a thermometer to record the temperature of the mixture in one of these test tubes. Note that this
will be room temperature and this temperature will remain relatively constant for Runs 1-5, so only one
measurement is needed.
5. Use the self-zeroing burets containing (NH
4
)
2
S
2
O
8
and (NH
4
)
2
SO
4
to combine the appropriate volumes
for Run 2 in Test Tube B. Prepare two more test tubes to use for the other two trials for Run 2.
6. Obtain a stir plate from one of the benchs. Transfer the contents of Test Tube A to a clean, dry 50 mL
beaker. Add a magnetic stir bar to the 50 mL beaker, place the beaker on the magnetic stirplate, and
adjust the speed of the stirrer to obtain a slow but steady speed.
7. Have one partner hold the stopwatch, and practice using it to make sure it can be set to zero and then
started quickly when the reaction begins.
8. When ready, one student starts the timer as the other student completely empties the contents of Test
Tube B into the 50 mL beaker as rapidly as possible. Watch the solution continuously, and stop the
timer when the solution initially turns blue-black. Record the time in your data table.

BellevueCollege|Chemistry162LabManual
Chem& 162 ~ Reaction Kinetics: An Iodine Clock Reaction
6
CAUTION: I
2
is toxic and corrosive! It can damage eyes and skin on contact. It is readily
absorbed through skin and harmful if inhaled in high concentrations.
9. Use forceps to remove the stir bar from the beaker. Rinse the stir bar and test tubes with tap water, then
DI water, and then acetone between trials. Place the test tubes upside down to dry.
10. Repeat this process for the other two trials of Run 2, so you will have three reaction times for Run 2.
11. Repeat the procedure for Run 1, 3, 4, or 5 as assigned by your instructor.
12. Write your raw data on the board, or post on the class forum if your class uses one. Copy posted
data into your data table for use in the calculations.
Note: The same test tube B can be used for all trials of Runs 1-3 because the same amounts of
(NH
4
)
2
S
2
O
8
and (NH
4
)
2
SO
4
are used in all three Runs. However, use a different test tube B for each
subsequent Run, Runs 4 and 5, because the composition of the (NH
4
)
2
S
2
O
8
and (NH
4
)
2
SO
4
mixture is
different for these runs.
Part II: Effect of a Catalyst
Repeat Run 2 (at room temperature) one more time, adding one drop of 0.020 M Cu(NO
3
)
2
to the mixture
in the Test Tube B. Since there are no calculations using this result, one trial should be sufficient. Record
your time, and calculate the rate with the catalyst.
Part III: Effect of Temperature and the Activation Energy
Run 2 provides the reaction time at room temperature, and the temperature study requires reaction times for
Run 2 at another temperature . Perform a single run at one of the following temperatures, as assigned by
your instructor: one at least 15°C colder than room temperature, one about 15°C warmer than room
temperature, and another about 25°C warmer than room temperature.
Make sure to do the cold temperature run first and only perform one trial at each temperature.
1. If preparing a cold water bath: Use a small beaker that is large enough to prop up two test tubes. Use
tap water to mostly-fill the beaker, and add small pieces of ice. The test tubes should sit in an ice-water
slurry, but don’t add too much ice. Rather, maintain a cool temperature by adding pieces of ice
periodically as they melt.
2. If preparing a warm water bath: Use a small beaker by mixing the warm water on the hot plate with
an appropriate amount of tap water. Verify that the temperature of the water baths are within the
appropriate ranges.
3. Prepare three each of Test Tubes A and Test Tubes B, as described in Part I for Run 2. Place both
Test Tubes A & B in a water bath containing either an ice-water slurry or warm water, depending on the
desired temperature. Allow the solutions to remain in the water bath (separately, not yet mixed!) until
their temperatures have equilibrated (about 10 minutes), and measure the temperature of Tube A. Make
sure to record into your data table the temperatures of the solutions just before you combine them. Then
combine the mixtures, and time the reaction as before. For the reactions at temperatures above room
temperature, the reaction will occur very quickly.
4. Repeat this for each temperature of water bath.

BellevueCollege Name______________________________
Chemistry162LabManual Section_______
Chem& 162 ~ Reaction Kinetics: An Iodine Clock Reaction
1
Report Sheets
Reaction Kinetics: The Iodine Clock Reaction
Write the concise scientific purpose of this experiment. Be sure to include each part of the experiment, and
indicate what quantities (results) will be reported.
Purpose
Data
Fill in the concentrations of reagents used (include units):
Na
2
S
2
O
3
KI (NH
4
)
2
S
2
O
8
(NH
4
)
2
SO
4

BellevueCollege Name______________________________
Chemistry162LabManual Section_______
Chem& 162 ~ Reaction Kinetics: An Iodine Clock Reaction
2
Report Sheets
Reaction Kinetics: The Iodine Clock Reaction
Parts I & II: The Effect of Concentration and a Catalyst on Reaction Rate
Record the time of each Trial of each reaction in the table below. Fill in calculated values after the raw data
(time and temperatures) have been recorded. Record the units.
Temperature of reactions (room temperature): _____________________ ( )
Table1:MeasuredReactionsTimesandCalculatedRatesforConcentrationStudyand
EffectofaCatalyst*
Run
No.
Initial[I‐]
()
Initial
[S2O8
2‐
]
()
time
()
rate
()
AverageRate
()
AverageRate
Constant(k)
()
Run1a
Run1b
Run1c
Run2a
Run2b
Run2c
Run3a
Run3b
Run3c
Run4a
Run4b
Run4c
Run5a
Run5b
Run5c
Run2*
BellevueCollege Name______________________________
Chemistry162LabManual Section_______
Chem& 162 ~ Reaction Kinetics: An Iodine Clock Reaction
3
Report Sheets
Reaction Kinetics: The Iodine Clock Reaction
Parts III: The Effect of Temperature on Reaction Rate; Finding the Activation Energy
Transfer the reaction time for Run 2 above (at room temperature) to the data table below.
Table2:TemperatureStudy:MeasuredReactionsTimesand
CalculatedRatesforRun2
Temperature
()
Time
()
rate
()
rateconstant(k)
()
Calculations
Perform the following calculations in your lab notebook, if your class is using them, and show a neat sample
calculation for each below.
Parts I: The Effect of Concentration
1. Convert the time for each trial to seconds. Calculate the rate of reaction (∆[I
2
]/∆t) for each trial in Runs
1-5, and record these values in Table 1. Recall, ∆[I
2
] = 6.0 x 10
-4
M I
2
for every run. Show a sample
calculation below for Run 1. Respect significant figures based on the metric equipment used and show
the units.
2. Use the dilution formula to calculate the concentration of I
-
and S
2
O
8
2-
for each of the five Runs, and
record these values in Table 1. Show a sample calculation below for Run 1. Respect significant figures
based on the metric equipment used and during calculations. Show the units.

BellevueCollege Name______________________________
Chemistry162LabManual Section_______
Chem& 162 ~ Reaction Kinetics: An Iodine Clock Reaction
4
Report Sheets
Reaction Kinetics: The Iodine Clock Reaction
3. Use Runs 1, 2 and 3 to determine x, the order of I
-
. Pick two of these Runs and use the initial rates
method (shown in the example on page 3) to find the value for x. Pick a different combination among
Runs 1, 2 and 3 to verify the value obtained for x. Show calculated value with significant figures and
then state the order for I
-
, rounding the value for x to the nearest whole number.
4. Use Runs 2, 4 and 5 to determine y, the order of S
2
O
8
2-
.
Pick two of these Runs and use the initial rates
method (shown in the example on page 3) to find the value for y. Pick a different combination among
Runs 2, 4 and 5 to verify the value obtained for y. Show calculated value with significant figures and
then state the order for S
2
O
8
2-
, rounding the value for y to the nearest whole number.
5. Substitute x, y, the rate of reaction, and your calculated ion concentrations back into the rate law
(Equation 4) to calculate the rate constant, k, for each Run. Respect significant figures based on the
metric equipment used and show units.
6. Write out the rate law substituting in the values for the 3 constants: x, y, and k. Respect significant
figures and make sure to include units for your average room temperature rate constant.

BellevueCollege Name______________________________
Chemistry162LabManual Section_______
Chem& 162 ~ Reaction Kinetics: An Iodine Clock Reaction
5
Report Sheets
Reaction Kinetics: The Iodine Clock Reaction
Parts III: The Effect of Temperature on Reaction Rate; Finding the Activation Energy
7. Calculate the rate for the cold and hot temperature trials. Using the rate law from Question 6, calculate
the rate constant, k, at each temperature, using [I
-
] and [S
2
O
8
2-
] from Run 2. Record these values in
Table 2. Respect significant figures based on the metric equipment used and show units.
8. Use Excel to prepare an Arrhenius plot with ln k on the y-axis and (1/T) on the x-axis. (Note that "T"
needs to be expressed in Kelvin rather than °C.) This plot should have four points, the original room
temperature data for Run 2, and the runs you carried out at the three additional temperatures. Print a full
page graph with the straight line equation showing the slope and intercept. (Refer to the Excel Tutorial
from earlier in the class if necessary.) The graph must have properly labeled axes and a descriptive title.
Attach the graph to this report.
9. Use the Arrhenius plot to calculate the activation energy, E
a
, for this reaction, and show the calculation
below. Respect significant figures based on the linear regression analysis and show units. Note that the
slope of this Arrhenius plot is equal to E
a
/R, where the gas constant, R, is 8.314
J
mol
K
.
Results and Discussion
1. The rate law for Equation (1) was found to be _______________________________________ .
2. Which of the following mechanisms is compatible with the rate law obtained in this experiment? Give
an explanation for your choice.
a) 2I
-
(aq) + S
2
O
8
2-
(aq) I
2
(aq) + 2SO
4
2-
(aq) one-step reaction
b) I
-
(aq)
+ S
2
O
8
2-
(aq)
I
+
(aq)
+ 2SO
4
2-
(aq) slow step
I
-
(aq)
+ I
+
(aq)
I
2
(aq)
fast step

BellevueCollege Name______________________________
Chemistry162LabManual Section_______
Chem& 162 ~ Reaction Kinetics: An Iodine Clock Reaction
6
Report Sheets
Reaction Kinetics: The Iodine Clock Reaction
3. Compare the average reaction time for Run 2 without a catalyst to the reaction time with a catalyst
(include the values). How did the addition of Cu(NO
3
)
2
affect the rate of reaction? Based on your
choice in question 1, explain how the rate is affected in terms of collision theory and the properties of
the copper(II) ion. Write in full sentences, using proper grammar.
4. Compare your average reaction time for Run 2 at room temperature to your reaction times at the colder
and hotter temperatures. What effect does changing the temperature have on the rate of reaction?
Explain this effect in terms of collision theory.
5. Based on your choice in question 1, how do you expect the rate to change for Run 1 if 4 mL of
deionized water is used in place of the 4 mL of aqueous (NH
4
)
2
SO
4
? Explain.

BellevueCollege Name______________________________
Chemistry162LabManual Section_______
Chem& 162 ~ Reaction Kinetics: An Iodine Clock Reaction
7
Pre-Laboratory Exercise
Reaction Kinetics: The Iodine Clock Reaction
1. Write a concise scientific purpose for this experiment in the space available in the Report Sheet. Be sure
to include each part of the experiment, and indicate what results will be reported.
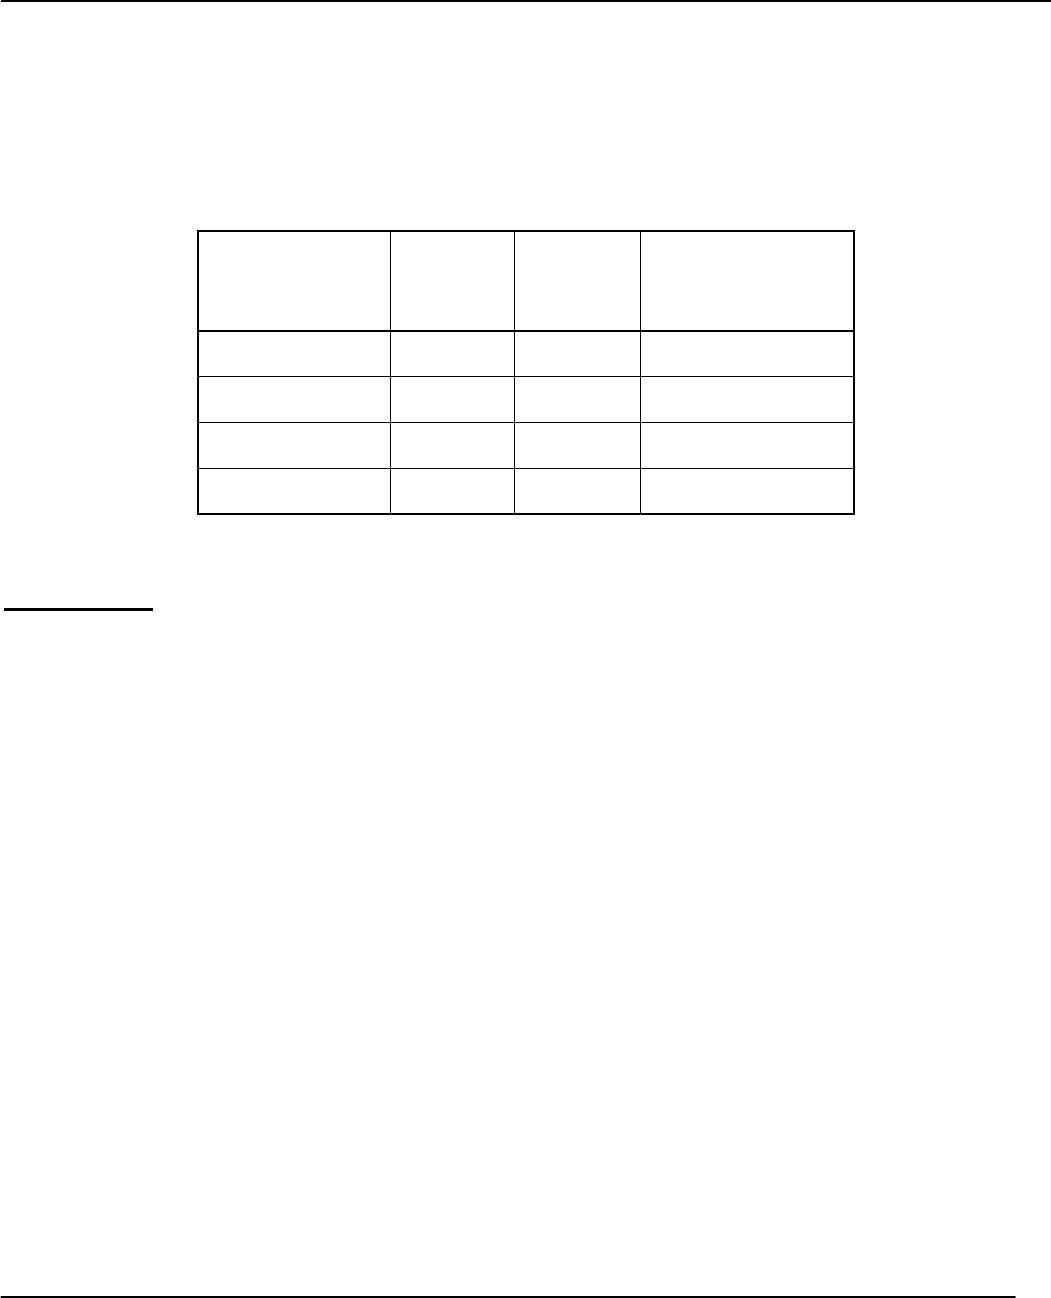
2. Calculate the initial concentration of [I
-
] and [S
2
O
8
2-
] for each reaction (Runs 1 – 5) using the volumes
and concentrations given in Table 1. Show a sample calculation for Run 1.
Run
No.
Initial [I
-
]
(M)
Initial [S
2
O
8
2-
]
(M)
1
2
3
4
5
3. In the reaction A + B C, it is found experimentally that doubling the concentration of A,
while holding other variables constant, doubles the rate. Doubling the concentration of B while holding
other variables conctant increases the rate by a factor of four. Write the rate law for this reaction.
