
University of Aberdeen :: IT Services Reviewed: 15/07/2020
The University of Aberdeen is a charity registered in Scotland, No SC013683
Create a Talking Head Video
This user guide explains how to plan, record and produce a video in which the presenter is the focus –
commonly known as a talking head video.
A talking head shot is usually a medium close-up or a portrait close-up. The presenter can either speak
directly to the camera, or can be looking slightly off camera in what is called a ¾ profile. It’s one of the most
common shots in video production and used frequently for online presenting.
The University supported software for recording video is Panopto, which is integrated with MyAberdeen
and can be used to host and record content for your students. We will therefore focus on how to edit your
video using Panopto, although other video editors are available. Detailed guidance about operating
Panopto can be found in our Panopto resource.
Most sections of this guide have a short companion video which you’ll find in the video carousel – look for
Video References to direct you to the correct video. You can work through this guide step-by-step, from
start to finish, or if you’re struggling with one particular aspect, you can skip to the relevant section.
Contents
Pre-production .............................................................................................................................................. 2
Storyboarding ............................................................................................................................................ 2
Scripting ..................................................................................................................................................... 3
Film Environment ...................................................................................................................................... 4
Lighting ...................................................................................................................................................... 4
Camera....................................................................................................................................................... 5
Microphone ............................................................................................................................................... 5
Environment and clothing ......................................................................................................................... 6
Delivery ...................................................................................................................................................... 6
Post-Production in Panopto (editing) ............................................................................................................ 7
Trimming and Timeline .............................................................................................................................. 7
Removing Errors ........................................................................................................................................ 7
University Branding ................................................................................................................................... 7
Adding ASR (automatic speech recognition) Captions .............................................................................. 8
Accessibility ................................................................................................................................................... 8
Captions and Subtitles ............................................................................................................................... 8
Transcript ................................................................................................................................................... 8
Colour contrast .......................................................................................................................................... 9
Font choices ............................................................................................................................................... 9
Signposting and Support ............................................................................................................................. 10
Panopto ................................................................................................................................................... 10
eLearning ................................................................................................................................................. 10
Accessibility ............................................................................................................................................. 10
2
Pre-production
Storyboarding
To create a high-quality video, it is essential to plan out what content you want to cover so that you
can source any images, clips or presentations before you begin. This stage of the process is called
‘storyboarding’.
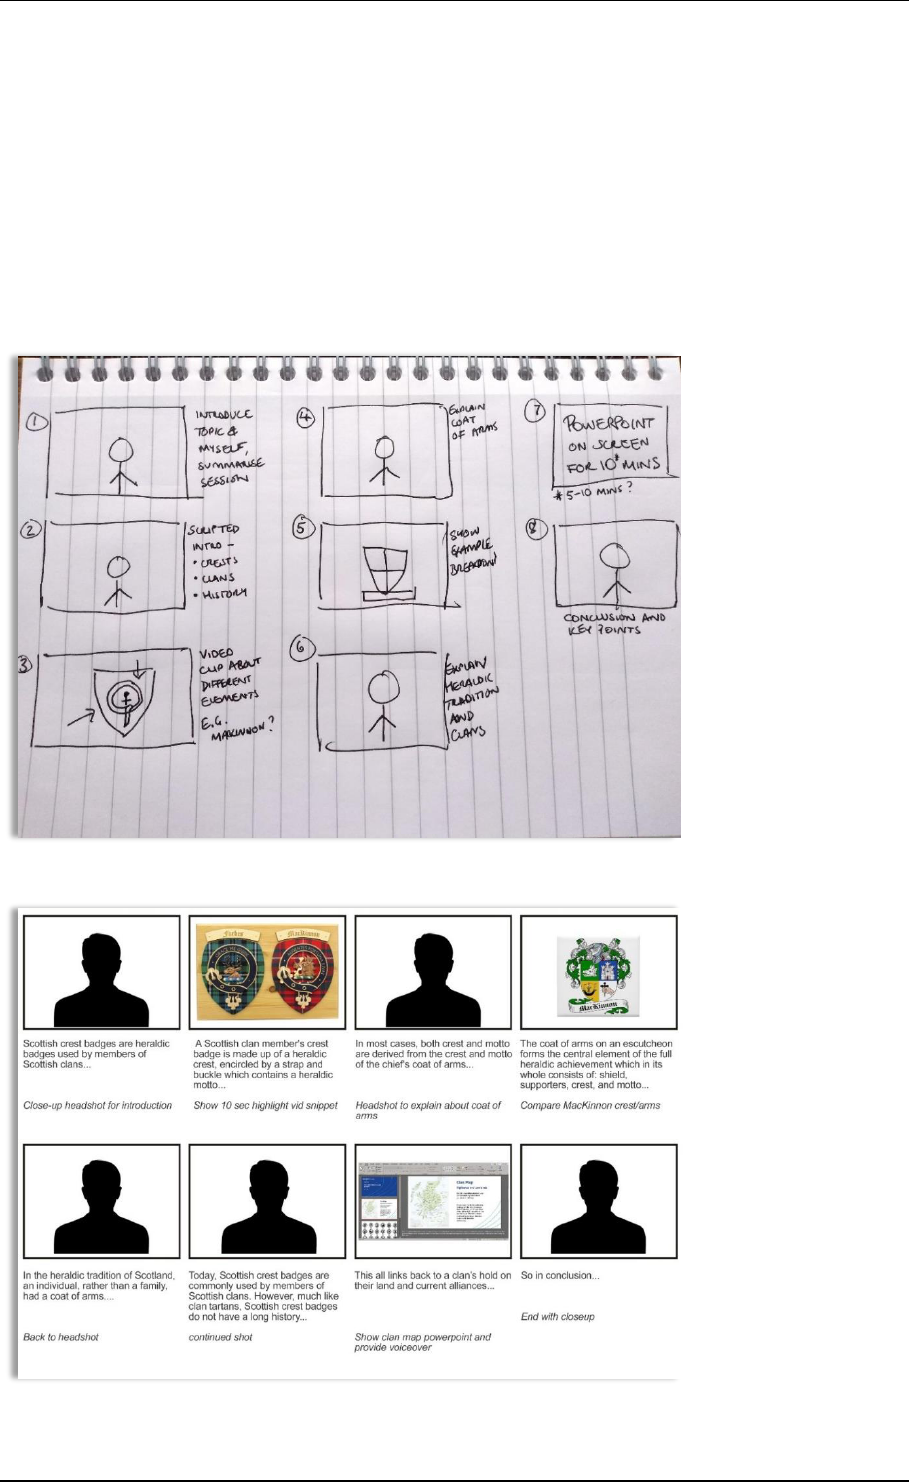
You don’t need to be good at art to create a storyboard – you simply need to indicate whom or what
will be on-screen at given points. Here are a couple of approaches, both of which do the job
perfectly.
Figure 1: Simple, hand-drawn storyboard
Figure 2: Storyboard created in layout software, e.g. PowerPoint
3
Panopto can capture slides, camera, microphone and computer screen so you might want to think at
this point about which of these functions you want to use, and at what points during your recording.
We recommend keeping videos to around ten minutes long so that the viewer remains engaged and
the information is easy to digest. It is also a good idea to think about breaking up your content into
smaller sections. Not only is this more likely to keep the viewer engaged, it also brings new energy to
the start of each section.
Scripting
The script can be written before, during or after you create your storyboard and you can use it to
structure your video and make it more accessible.
The average person speaks at somewhere between 125 and 150 words per minute, so if you’re
speaking for around ten minutes, your total word count will be between 1250 and 1500 words.
You might choose to read your script verbatim. We wouldn’t normally recommend this as it can
come across as reading rather than presenting, however there are some circumstances where it
might be necessary. In such cases, consider using a teleprompter to display the script so that you
don’t have to look down. You can use a simple solution to display the script – for example, a second
monitor, or even handwritten notes taped to the wall. There are also more expensive solutions such
as teleprompter apps and projectors.
As an alternative to a wholly scripted presentation, we recommend using flashcards or bullet points
as a quick reference guide for your recording. This has several advantages:
• You won’t have to try to remember the entire script
• You won’t be distracted by attempting to read the information word-for-word
• You can present in a more natural way, allowing you to add your own insights and
personality
• You can focus on the most important part of presenting – your energy and enthusiasm
Your delivery is equally as important as the content. You’re much more likely to hold the viewers’
attention if your presentation is engaging and delivered with confidence. You’ll find further guidance
in our section on Error! Reference source not found. below.
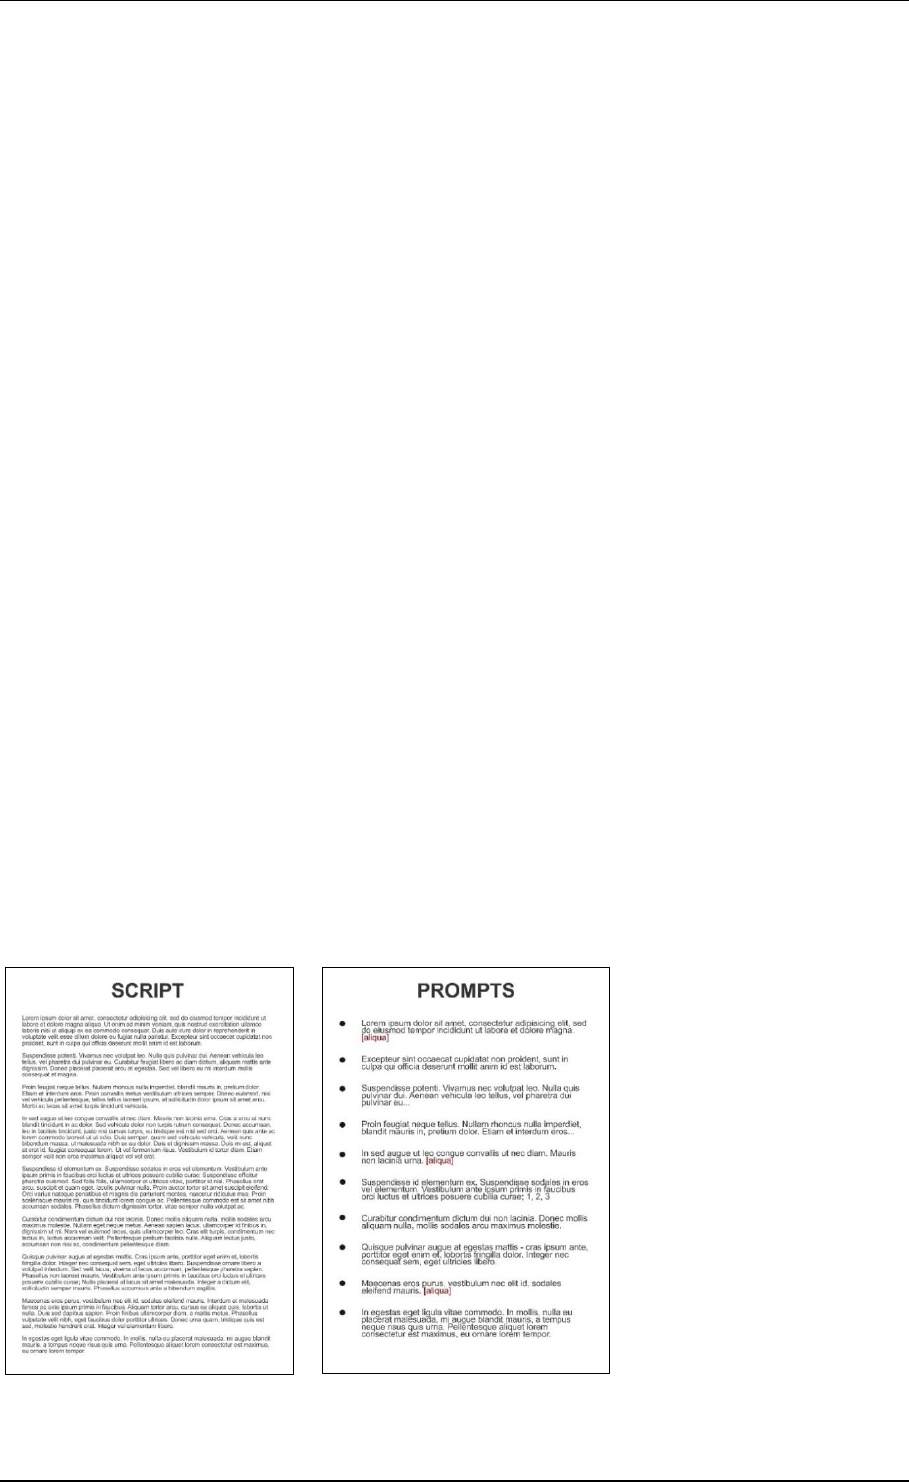
If you do decide to use bullet points or flashcards to prompt you, these can easily be displayed on a
second monitor, handwritten poster, or even a whiteboard.
Figure 3: Example of Script and Prompt card

4
Film Environment
Regardless of the type of camera you use, make sure that it is close to you and that your head and
shoulders are in-shot. Your eyes should be in the top one third of the frame, and your head in the
centre. If you are using a Windows computer, the default ‘Camera’ app provides a framing grid
within the settings cog that you can use to align yourself.
Figure 4: Framing yourself on screen
Filling the space on screen will project confidence; you are the main focus for the viewer, so make
sure you can be seen clearly and are an appropriate distance from the camera. Also, consider your
posture. Different postures convey different moods, so remember to match your physical behaviour
to the subject matter. You may even prefer to stand up during your presentation to avoid slouching
over time.
Ideally, your background should not be too distracting. We recommend using a solid colour such as a
plain wall, or something that adds to the theme of the presentation without looking too cluttered.
Video Reference: For a walkthrough of this process, please see video #1.
Lighting
Good lighting is extremely important, but you don’t need expensive equipment to achieve this.
Often the best place in your home or office for filming is the spot with the most convenient lighting –
for example, the window is a good natural light source.
Use as much light as possible. If you look overexposed, or the shadows seem too harsh, try placing a
white sheet over the window or opening/closing/angling blinds and curtains to control the light
entering the room. Or if your image appears dim, add an additional desk lamp to your set. Note that
lamps with positional necks create a softer light when focussed upwards at the wall rather than
directly on the presenter.
Avoid positioning yourself in front of a light source, such as a window or lamp. You may appear in
silhouette and this can make it more difficult for viewers to see your facial expressions, which are so
essential to effective communication. Additionally, viewers who are deaf or hard of hearing rely on
lip reading (in addition to closed captions), and viewers with sensitivity to light may experience
discomfort from the harsh lighting.
For best results, make sure the light source is coming from the same direction as the camera or
slightly off to the side.
Video Reference: For examples and tips about lighting, please see video #2.
5
Camera
You can use any video camera to film a talking head, including a tablet or smartphone. However,
these will need to be stabilised during filming, so you might consider using a tripod or stand. Make
sure your device is in landscape mode so that the recording is the right aspect ratio for editing or
watching.
Make sure your camera is positioned at face/eye-level and avoid awkward angles that focuses on
your nose or forehead.
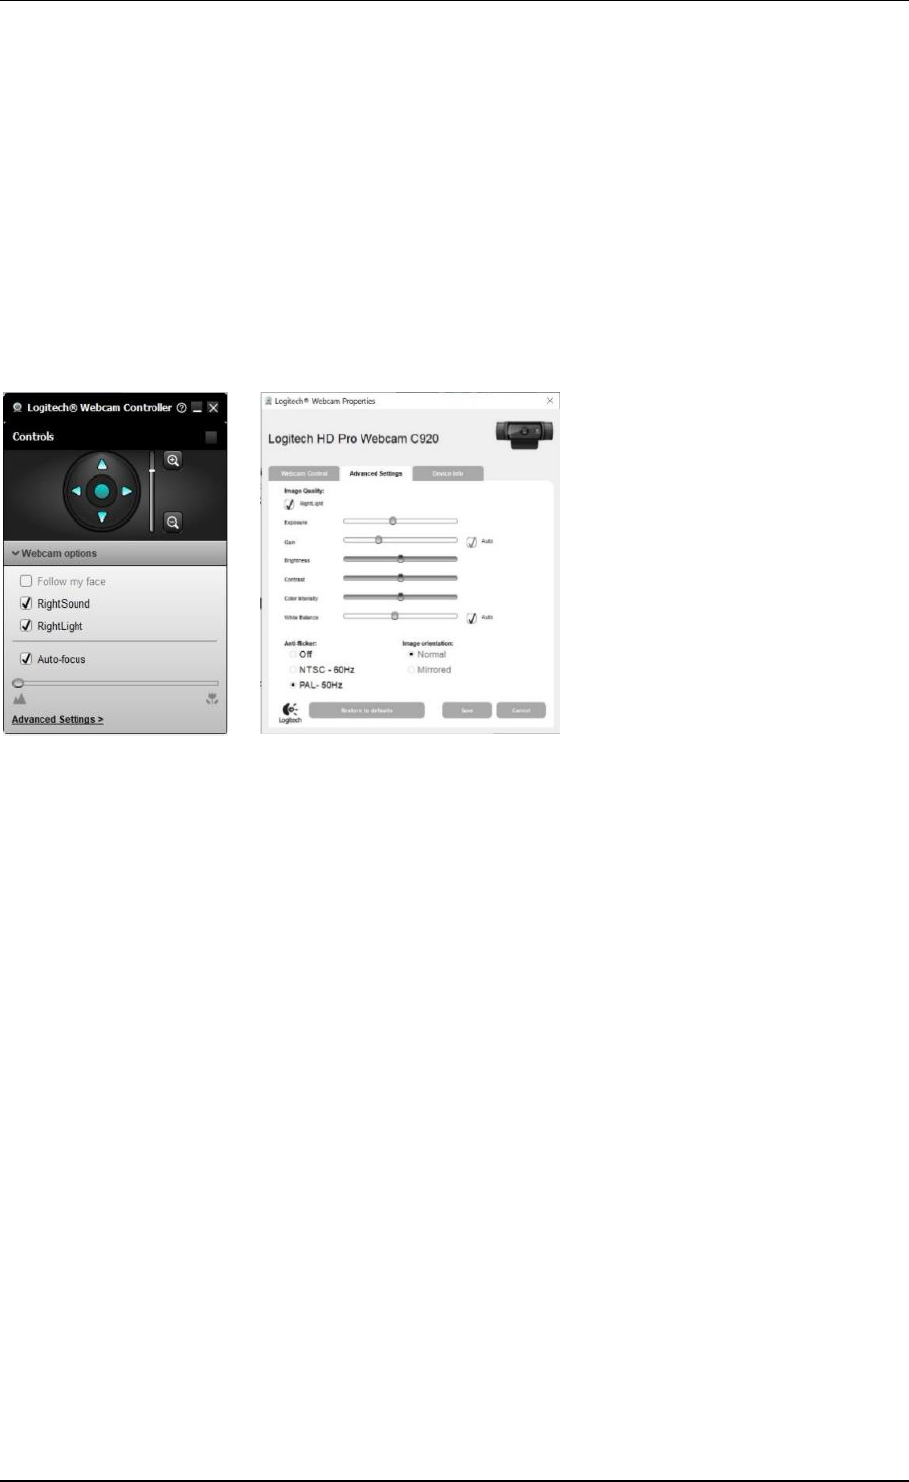
In many cases you may be using the built-in webcam on your laptop, which is ideal for use with
programs such as Panopto. Some standalone webcams have additional options such as zoom,
brightness, focus, follow motion, etc., so it’s worth checking if you can improve the image quality
before you begin.
Figure 5: Webcam settings
Video Reference: For more information about cameras, please see video #3.
Microphone
If you have an external microphone you can use for recording, this will always give the highest
quality audio and should be your first choice. However, a headset or clip-on mic can also record
good quality audio.
The microphone should be close enough to capture crisp audio. If you are wearing a headset, make
sure it is positioned slightly below or to the side of your mouth so that it doesn’t pick up loud breath
sounds. Speak clearly and articulate well for the best possible recording.
Panopto does not have extensive audio production features, so you will not be able to improve the
quality much beyond the original recording. Because of this, our best advice is to ensure you are in
the quietest environment possible, that windows are closed, and that all computer and phone
notifications are silenced. If possible, avoid filming in a room with too many hard surfaces such as a
large lounge with hardwood floors as this can create or increase echoes. Smaller rooms with soft
furnishings (at least directly in front of the presenter) soak up audio and prevent reverb. And if at
any point during the recording you become aware of unwanted sounds such as a doorbell, dog bark,
or errant child, simply stop for a moment and continue once the noise has abated.
Video Reference: For a walkthrough of this process, please see video #4.

6
Environment and clothing
Now that your camera, microphone and lights are set up, the final checks should be your filming
environment and clothing. The area on-screen around you should be clean, clear and appropriate for
filming. Clothing choice is also important as many designs such as stripes, checks and complex
patterns appear to ‘dance’ or strobe on video.
Have a practice run. Record a few paragraphs of your video and use it as a test recording. Check for
any lighting issues, sound problems and how you appear on-screen – you can fix any issues now
before you record the full version.
Delivery
Practicing your delivery will also help to put you more at ease as the process will become more
familiar.
Business Film Booth recommend a technique called ‘Panto Mode’ for engaging delivery:
“To come across as human, genuine and utterly spontaneous in your talking head video then
you need to try Panto Mode. This a device which will banish the fear from your eyes and
make you look like you’ve been presenting for years.
To pull off Panto Mode, you need to project at 120% of the level you usually would. More
expression, more exaggerated body language, longer pauses, basically like you would if you
were the lead in a pantomime.
To start with it’s going to feel very forced and unnatural. The key to getting this right is to
film yourself presenting the same line, multiple times with different levels of energy. When
you watch the line back, you’ll notice just how hard it is to look ridiculous on video. The
camera sucks so much life out of us that we’ve got to put a lot back in.”
1
Our experienced Media Services team recommend smiling while recording voiceover or video; it
warms the voice, improves inflection, and helps to project your voice.
Filming a talking head video can be time consuming and labour intensive. Don’t worry if it’s not right
on the first take – most talking head videos rely on multiple takes, or clever editing. If you make a
mistake while speaking, simply start that particular sentence again; there is no need to stop
recording and start over from the beginning as you can use a video editor to remove your mistake. A
good tip is to create a visual indicator that you have made an error, so that it’s easy to find and
remove when you are editing later. This could be a wave, clap, or a hand over the camera.
Video Reference: For an overview of this process, please see video #5.
1
https://businessfilmbooth.com/how-to-make-the-best-talking-head-videos/ Accessed 10.05.20
7
Post-Production in Panopto (editing)
You can use any video editor – such as Adobe Premiere Pro, Premiere Elements, Windows Video
Editor or Apple iMovie – to edit your video; but if you have recorded with Panopto, you can use tools
within the program for easy editing.
You can think about trimming your video, deciding where it begins and where it should end. You can
edit sections to remove mistakes or gaps in content. You also have the option to zoom in or make
small adjustments to the brightness and colour.
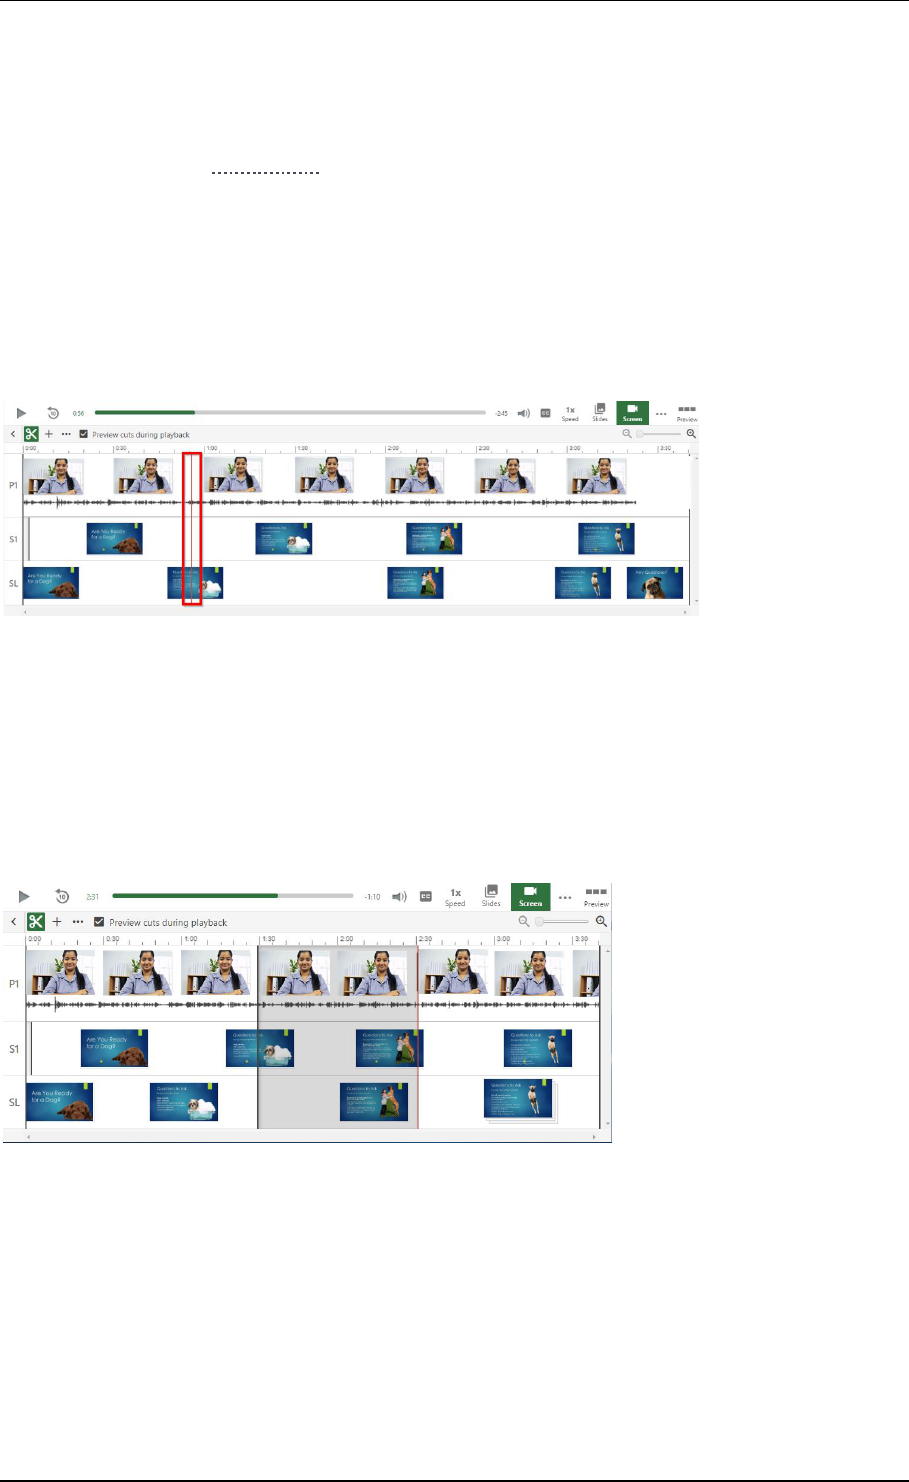
Trimming and Timeline
Play your video from the beginning and pause it right before you’d like it to start. Select the cut tool
and click and drag the grey line to trim out the section of the video.
Figure 6: Trimming the timeline in Panopto
Video Reference: This process is completed in video #6 on the carousel.
Removing Errors
To cut a section from the middle of the video, position the cursor over the point you would like to
start the edit, click and drag to the right and then let go at the point you want the cut to end. This
will remove the highlighted area from the video and add a new handle at each edit point to allow
you to fine tune your cut.
Figure 7: Video cutting in Panopto
Video Reference: To see this process in detail, please see video #7 on the carousel.
University Branding
Video content should be branded with the University’s ‘standard’ video end ident. This is included in
the zip file MediaPack.zip which you can find in the Guides area of this resource.
Video Reference: To see how to insert this using Panopto, please see video #8.

8
Adding ASR (automatic speech recognition) Captions
You can add automatically generated captions to your video.
Note:
• These captions are machine generated so are likely to need edited once created to ensure
accuracy.
• After you have made and uploaded a recording, there is a time delay before the option to
add captions appears. The delay is dependent on the length of the recording – for example,
target completion time for videos of one hour or shorter is 8 hours.
Find the recording you want to add captions to in the Panopto Editor and click Edit.
Select Captions from the left side of the editor, and then click the Import captions drop-down.
Click Import automatic captions to generate captions.
Once the captions have been processed successfully, you can then edit each individual caption by
clicking the three dots next to it and choosing Edit.
You’ll find more guidance about captioning in Panopto in our ‘Lecture Capture (Panopto)’ resource.
Video Reference: Video #9 goes through this process.
Accessibility
Regulations on the accessibility of websites and mobile applications of public sector bodies came
into effect in the UK in September 2018. This means that all new content created in Higher
Education Institutions needs to be accessible for all users.
In regard to video, there are a few things you can do to ensure your content is accessible:
Captions and Subtitles
To ensure that users with an auditory disorder or dyslexia can still utilise your content, you must add
captions or subtitles. Although these terms are used interchangeably, they refer to different things:
• Captions display all audio information, including sound effects or music. They are always
displayed in the same language as the audio and can be ‘closed’ (turned on or off by the
user) or ‘open’ (always on).
• Subtitles only display spoken content and are often in a language different than the
language of the audio. They can usually be turned on or off by the user.
These are the general definitions, however it is worth noting that some video editors, including
YouTube and Panopto, have used the term ‘caption’ to describe a ‘subtitle’ which can be confusing.
You’ll find detailed guidance about captioning, and subtitling in our ‘Accessibility for
Authors/Creators’ resource.
Transcript
A transcript adds another level of accessibility to your video, allowing a person who is blind, has
other disabilities, or who otherwise cannot watch the video to get all the information they need in
text form.
Transcripts are essentially text-based versions of your video. It includes what is spoken, but also
describes anything visually important or meaningful.
9
We recommend using your original script and/or captions as a basis for the transcript, adding
additional contextual information where appropriate. Use your judgement about whether leaving
out the sound or visual would change the message or experience of your video. You could include
descriptions such as:
• Important audio cues or sound effects
• Words written on-screen
• Descriptions of actions or visual characteristics that give context
Once written, you can upload the transcription as a Word file to wherever you host your video.
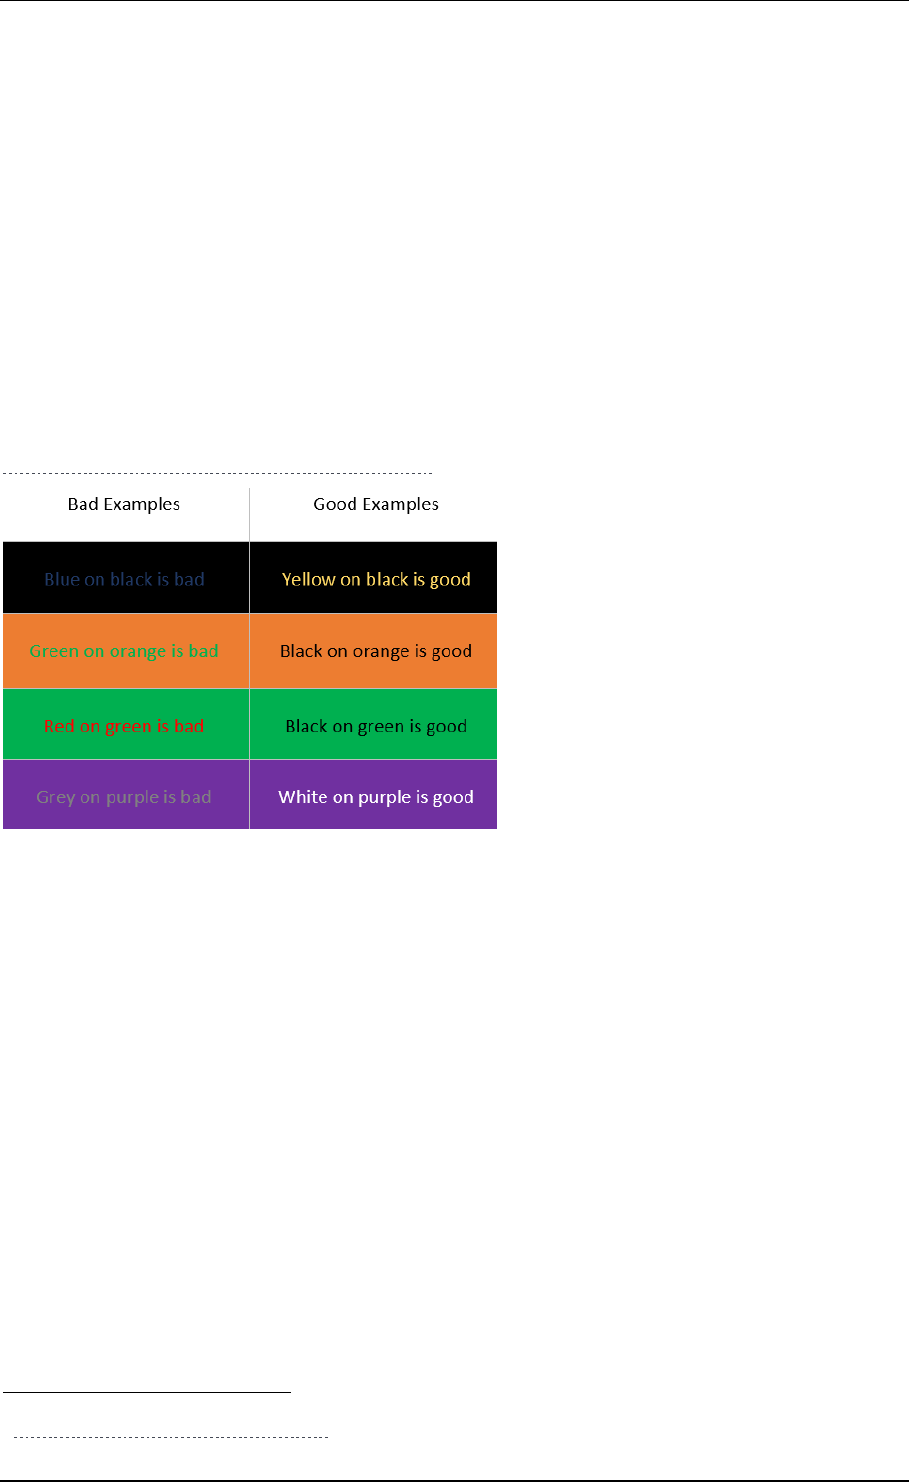
Colour contrast
If you show any text on-screen, make sure there is a high level of colour contrast between it and the
background as text is much easier to read when where this is the case. Black text on a white
background is the de facto standard for both print and web, but you may need to use other colours.
We suggest using WebAIM’s Colour Contrast Checker to make sure your contrast ratio is acceptable:
https://webaim.org/resources/contrastchecker/
Figure 8: Examples of contrast between text and background - good and bad
Font choices
Your font choice is important. It can change the tone of your presentation, but more importantly can
affect the accessibility of your video. We follow the guidance from WebAIM:
“It is generally best to use standard fonts that are available on the end user’s device. Keep in
mind that content with only one, or only a few font faces are usually easier to read. Using too
many font faces can create a confusing visual layout, which is bad for all users, but may be
especially difficult for users with reading disorders, learning disabilities, or attention deficit
disorders.”
2
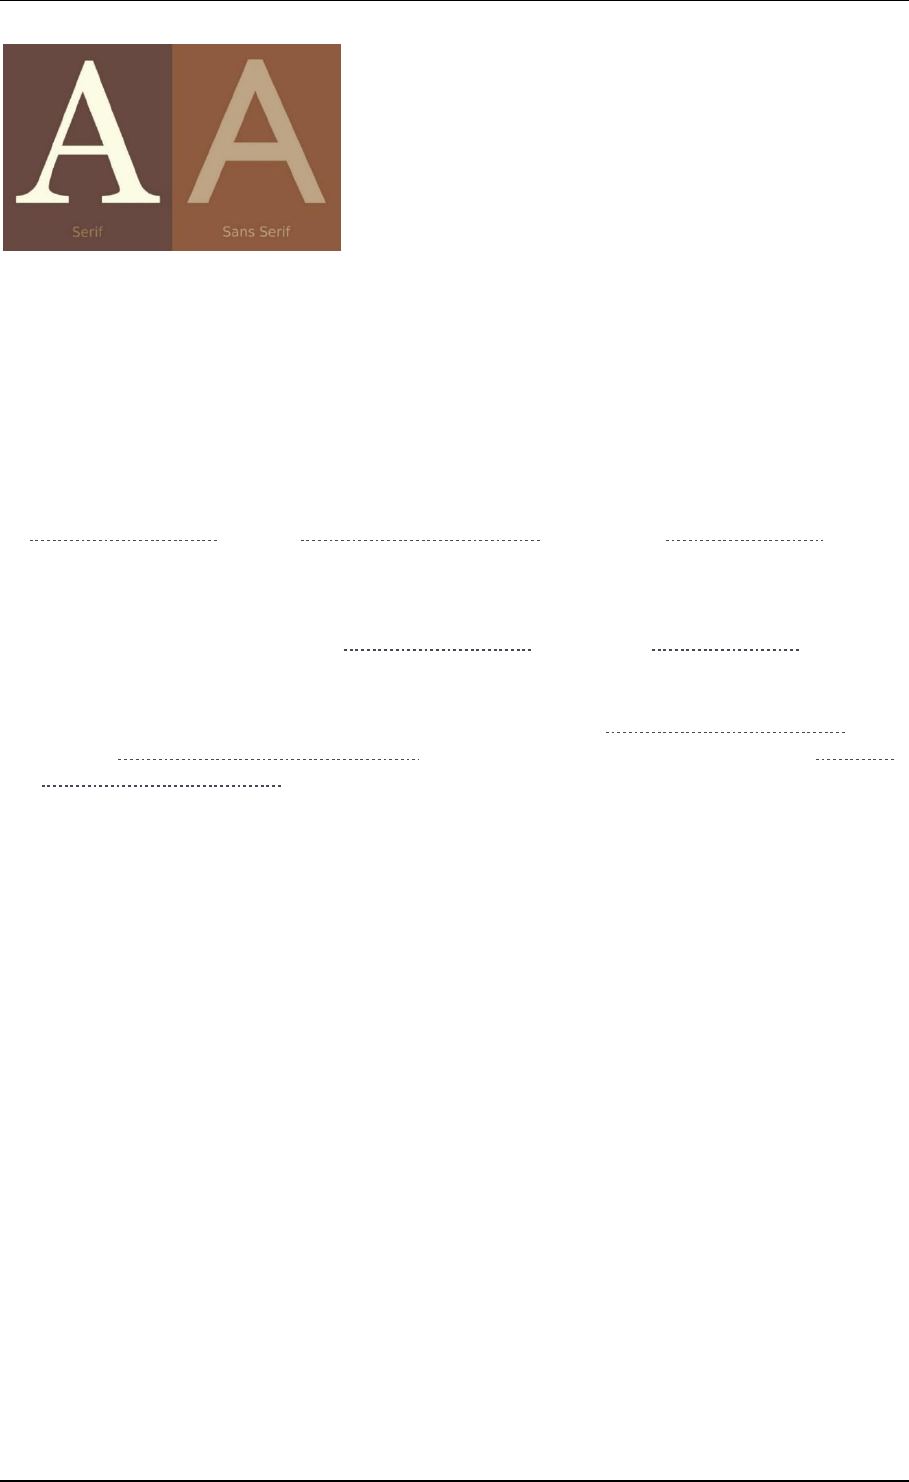
Users with dyslexia can sometimes struggle to read ‘Serif’ fonts such as Georgia and Times New
Roman due to the extra strokes and width variations. The most accessible fonts are ‘Sans Serif’,
which simply means ‘without serifs’.
2
https://webaim.org/techniques/fonts/ Accessed 01.06.20
10
Figure 9: Examples of 'Serif' and 'Sans Serif' fonts
The University’s standard font for digital materials is Source Sans Pro, and is ideal for making your
content accessible.
Signposting and Support
Panopto
For more advice and support using Panopto, you can speak to the University’s Media Services Team
by logging a support call, use the Toolkit’s Panopto resource, or check the Panopto help site.
eLearning
For information and guidance about eLearning, you can speak to specialists in the University’s
Centre for Academic Development by logging a support call, or use their online resources
Accessibility
For support with accessibility issues please contact the University’s Assistive Technology Team, use
the Toolkit’s Accessibility for Authors/Creators resource, or check online resources such as WebAIM
and UK Government guidelines.
