This is a guide to using Loom. Loom is a free screen and video recording software.
Now we will look at how to record videos and screens.
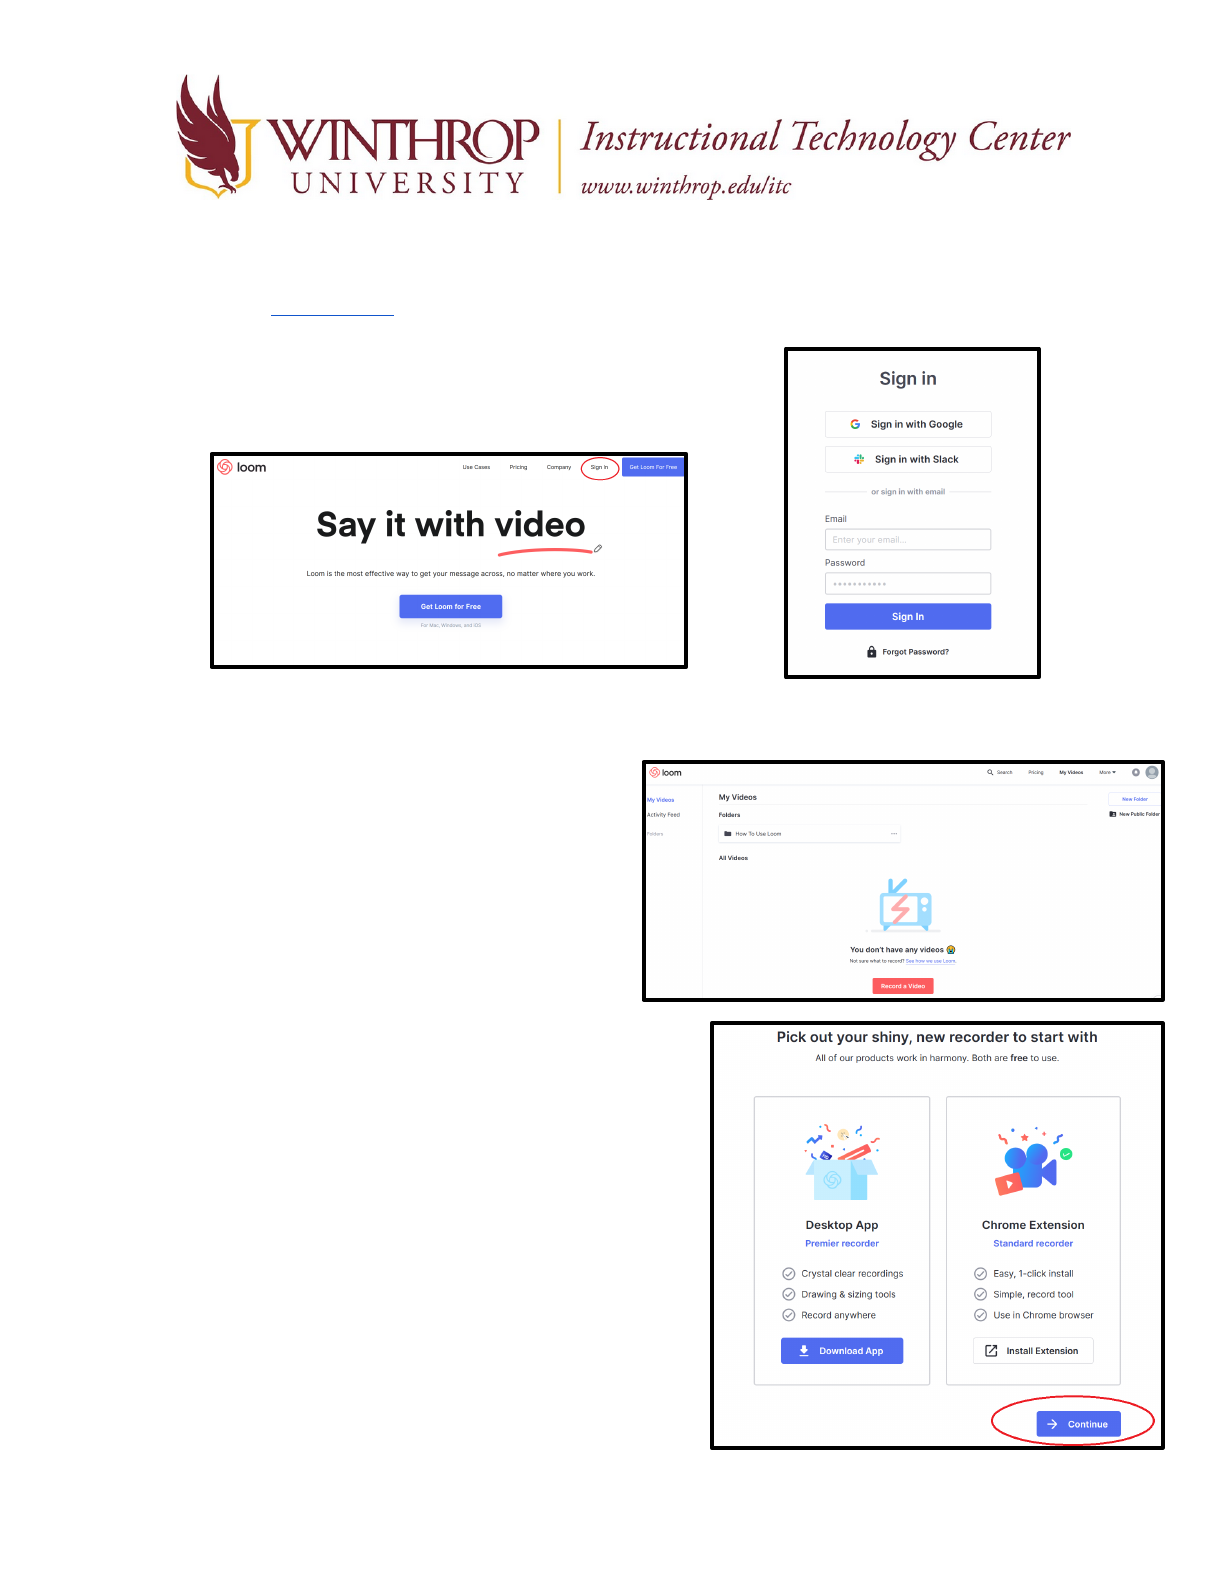
1. Go to www.loom.com and sign in by clicking “Sign In” in the upper right corner. If you need to
create an account, please see our separate instructions on how
to do this.
Sign in using your account credentials.
2.
You will be brought to your account homepage, it will look similar to this:
a. There are many tutorials on Loom,
and I highly recommend that you
check them out! They are great -
where it says “Folders” You can
choose “How to Use Loom” for
some good ideas and tutorials.
3. To start recording, click on the big button in
the bottom middle that says “Record a
Video”.
4. A pop-up will appear and you will need to choose the
Desktop App or the Chrome Extension. Both work
similarly. If you want to use the Chrome, make sure
that you are using the Chrome Browser or it will not
work. Click on “Download App” Or “Install
Extension” depending on which you want to do. The
Desktop App does offer more options as far as
abilities and editing.
Using the Desktop App
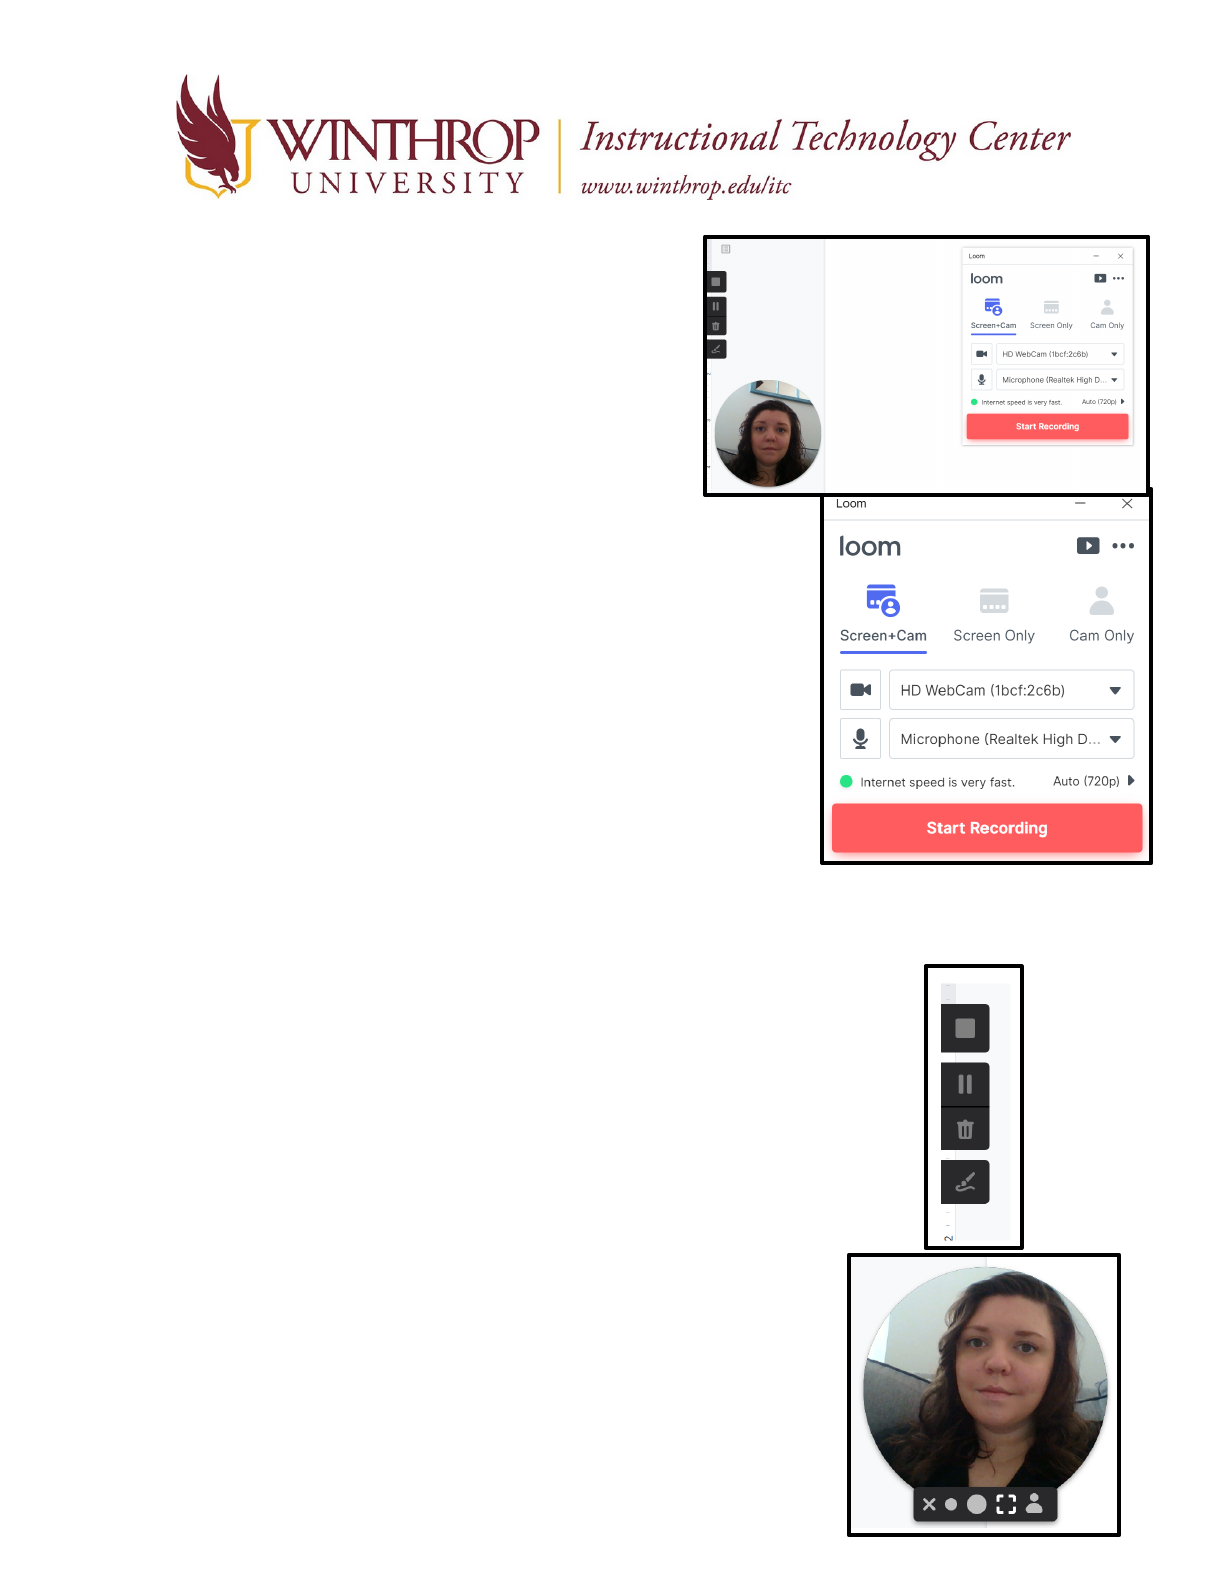
1. Once the app downloads and you’ve run the
application, you will see a few different pop ups like
these.
2. In the larger pop-up in the middle:
a. you can choose to do a screen plus
webcam, webcam only, or screen only. This
is completely up to you and what you want.
b. The webcam and microphone should default to whatever
you have automatically installed into your computer, if
you have multiple cameras and microphones you can also
select which one to use here.
c. You can start your recording by clicking “Start
Recording”
d. The ‘three dot’ menu in the upper right corner of the box
will allow you to quit Loom, sign out, or go to the
preferences menu. The Preferences menu will give you
options such as highlighting your mouse click, recording
a countdown, flipping the camera, and more.
e. Clicking the little play button (beside the ‘three dot’
menu) will bring you to your account homepage.
3. The pop up on the left side of the screen will:
a. Allow you to stop the recording (by hitting the top button/stop
symbol).
b. Allow you to pause the recording (by hitting the second button/pause
symbol).
c. Allow you to trash the recording (by hitting the third button/trash
can).
d. Allow you to edit the recording (by hitting the fourth button/pencil).
4. The small webcam that pops up in the bottom left corner can also:
a. Be moved around your screen by clicking and dragging it.
b. If you roll over the picture with your mouse you will have a
few options as well.
c. This includes an X to close the webcam and make the
recording screen only.
d. A small and large circle, which will increase or decrease the

size of the webcam on the recording.
e. A box shape which will make the recording only the full-screen camera.
f. A person shape which will allow you to choose a photo to sub in place of your webcam.
5. To get started, simply click “Start Recording”, to end your recording hit the stop button on the
left.
To use the Chrome Extension
1. If you’ve decided to use the Chrome Extension,
when you open Chrome you will see it in the top
right corner of the browser as a small pink swirl
once you download it. You will need to click on it
to open the extension.
2. A few pop ups will occur, giving you options to
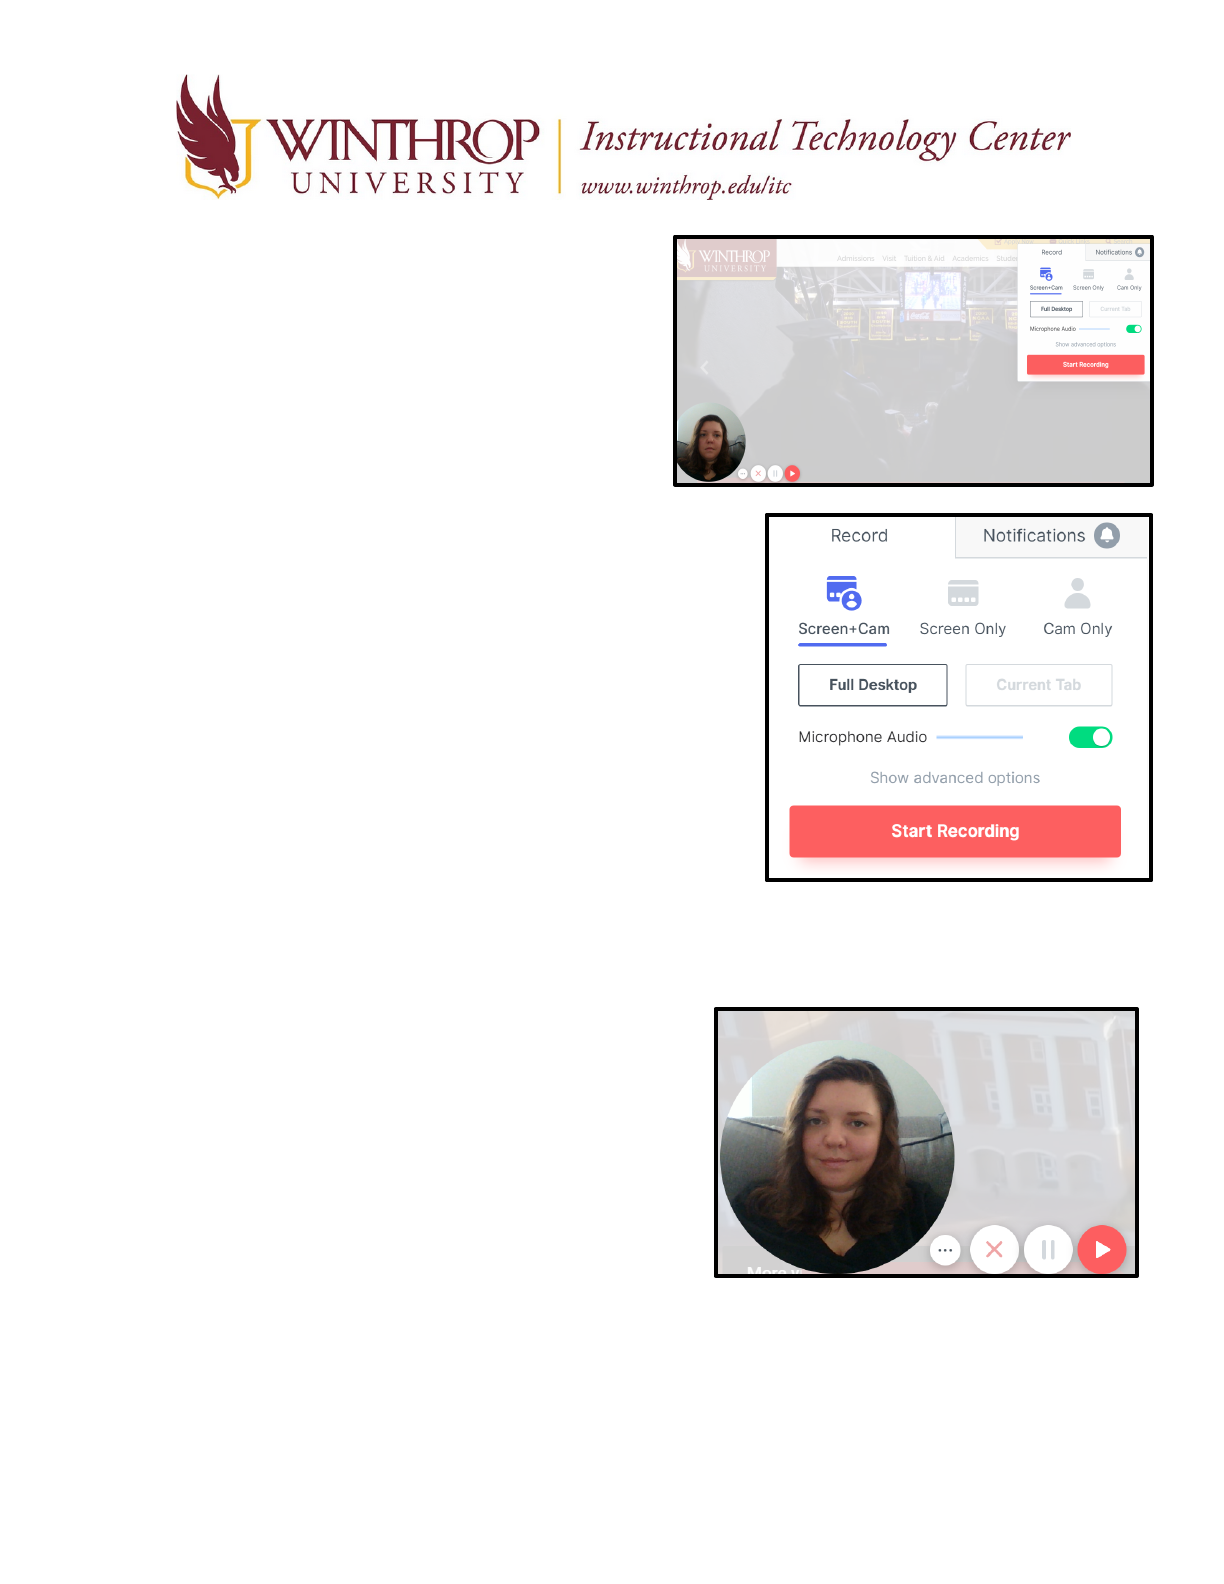
work with and your screen will look like this:
3. The pop up on the right side of the screen will
give you the following options:
a. you can choose to do a screen plus webcam,
webcam only, or screen only. This is completely
up to you and what you want.
b. By clicking on “Advanced Options” you will be
able to choose the webcam and microphone being
used. It should default to whatever you have
automatically installed into your computer, if you
have multiple cameras and microphones you can
also select which one to use here.
i. Also under advanced options, you can flip
your camera, use the photo for screen only,
see the control menu, and choose to do a
recording countdown.
c. You can start your recording by clicking “Start
Recording”
4. The pop up with the camera on the bottom left screen
will allow you to:
a. Cancel the recording (by clicking the X).
b. Pause the recording (by clicking the pause
button).
c. Start your recording (by clicking the play
button).
d. The three dot menu beside the X will let you
hide that menu.
e. You can still click and drag the camera
around the screen as well.
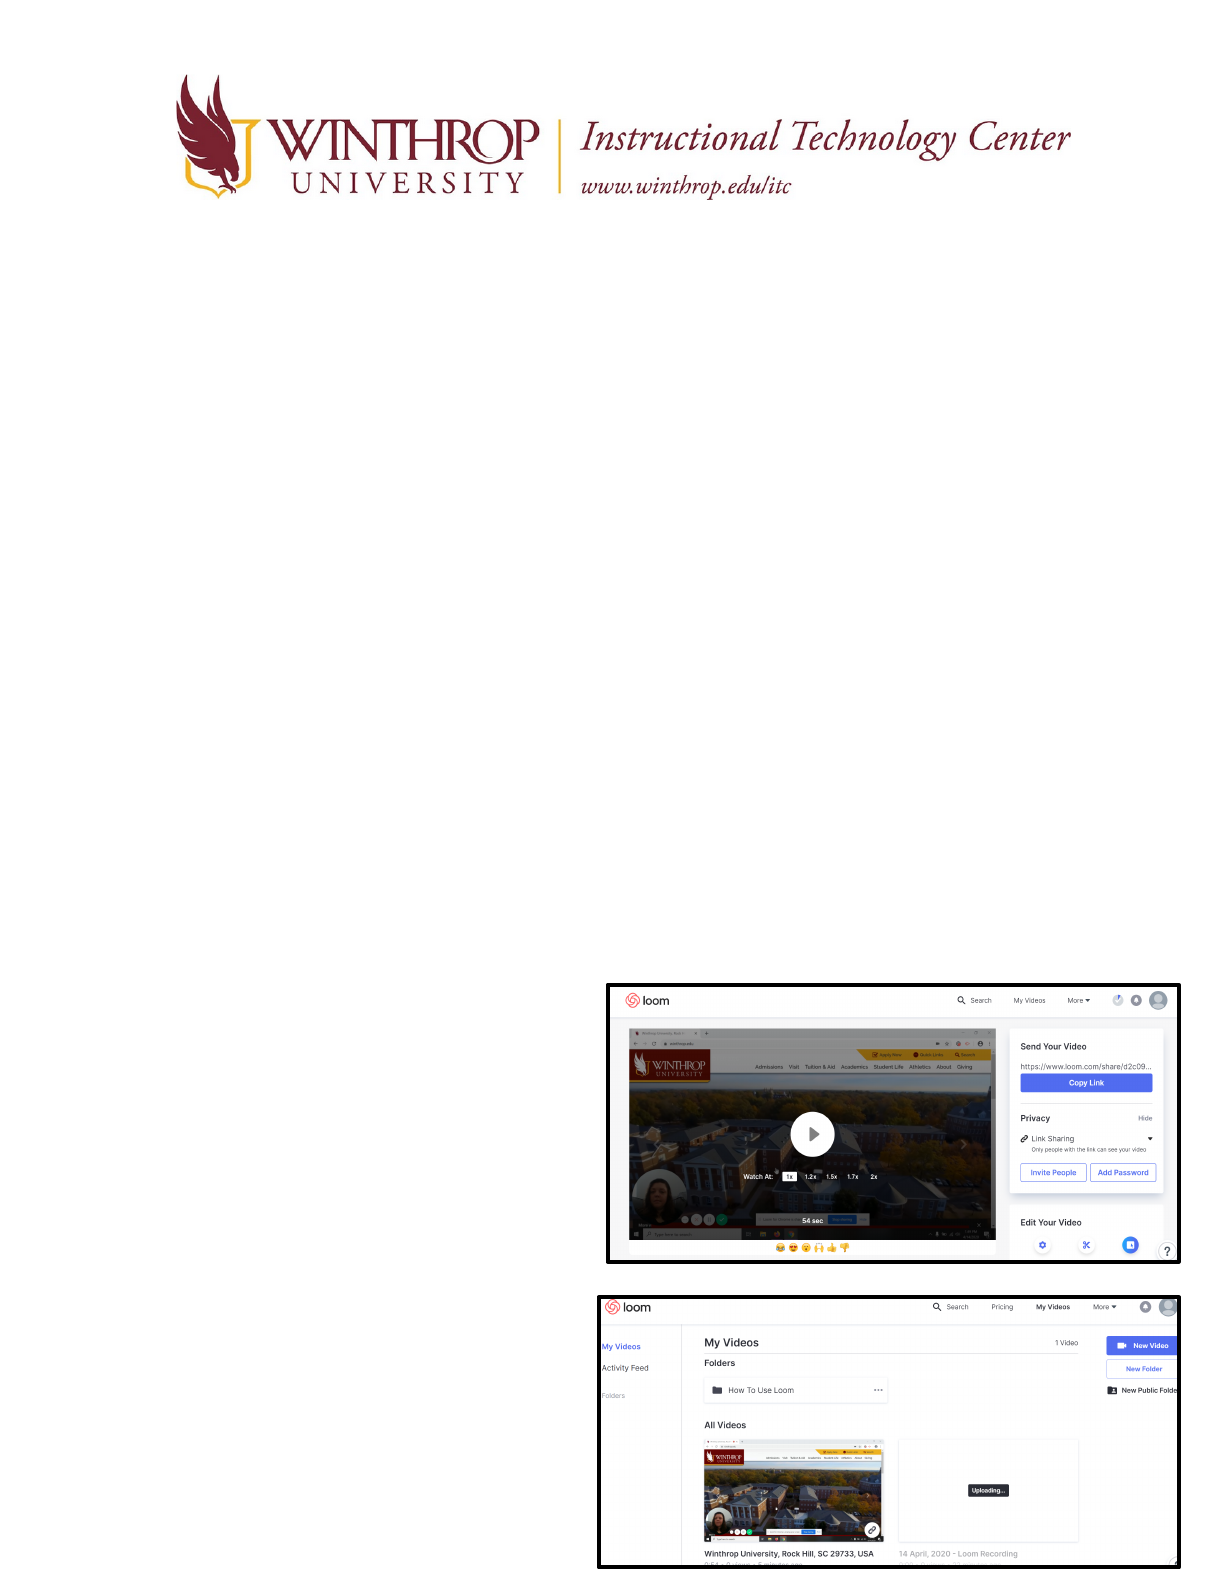
When you have finished recording…
1. You will be brought to a similar screen to this and you will be able to:
a. Watch your recording.
b. Download, Duplicate, Trash, or
Share your recording.
c. Edit your video.
d. Trim your video.
e. Create a call to action.
f. Invite others to watch your
video.
g. Copy the link to the video.
h. Password protect your video.
2. Now that you’ve created some test
videos, you can see them in your
account homepage when you log on -
Loom stores your videos for you if you
want!
