1
Creating Holiday Cards with Publisher
Instructor: Daniel Chong Email: [email protected]
Course Objective: To create custom holiday cards using Microsoft Office – Publisher, while learning the basics
of the Publisher Program.
What is Publisher?
Publisher is a graphic design application that is offered by Microsoft in its Office Suite, although it does not
come with standard edition. While we offer this application on our computers here at the Bloomingdale
Library, if you wanted to use it at home you would most likely have to add it onto your current suites.
Publisher is used for creating a myriad of different types of publications such as: brochures, newsletters,
yearbooks, photo albums and business/greeting cards. Tonight we will focus on making greeting cards,
specifically cards to send to friends and loved ones over the holiday. While there are more robust tools that
can accomplish this, such as Adobe InDesign or Quark Express, Publisher is considered to be an easy to use,
entry level application. For this reason it makes it ideal for regular Joes, like you and me, to create custom
publications. It functions similarly to Word or PowerPoint, so if you have any experience with those
applications, you will feel right at home using publisher after a brief introduction.
In this class we will be using Publisher from the Office 2016 suite, although if you have an earlier version at
home, the interface will be similar.
Getting Started
Publisher can be opened like any other program that we have on our computer, we can find it on the desktop
(Teal “P” | Similar to the Blue “W” for Word). From there it’s a simple double-click and we’re in! If for some
reason it cannot be found on your desktop, then you can simply search for it in the start menu, and then click
the application
when it comes up.
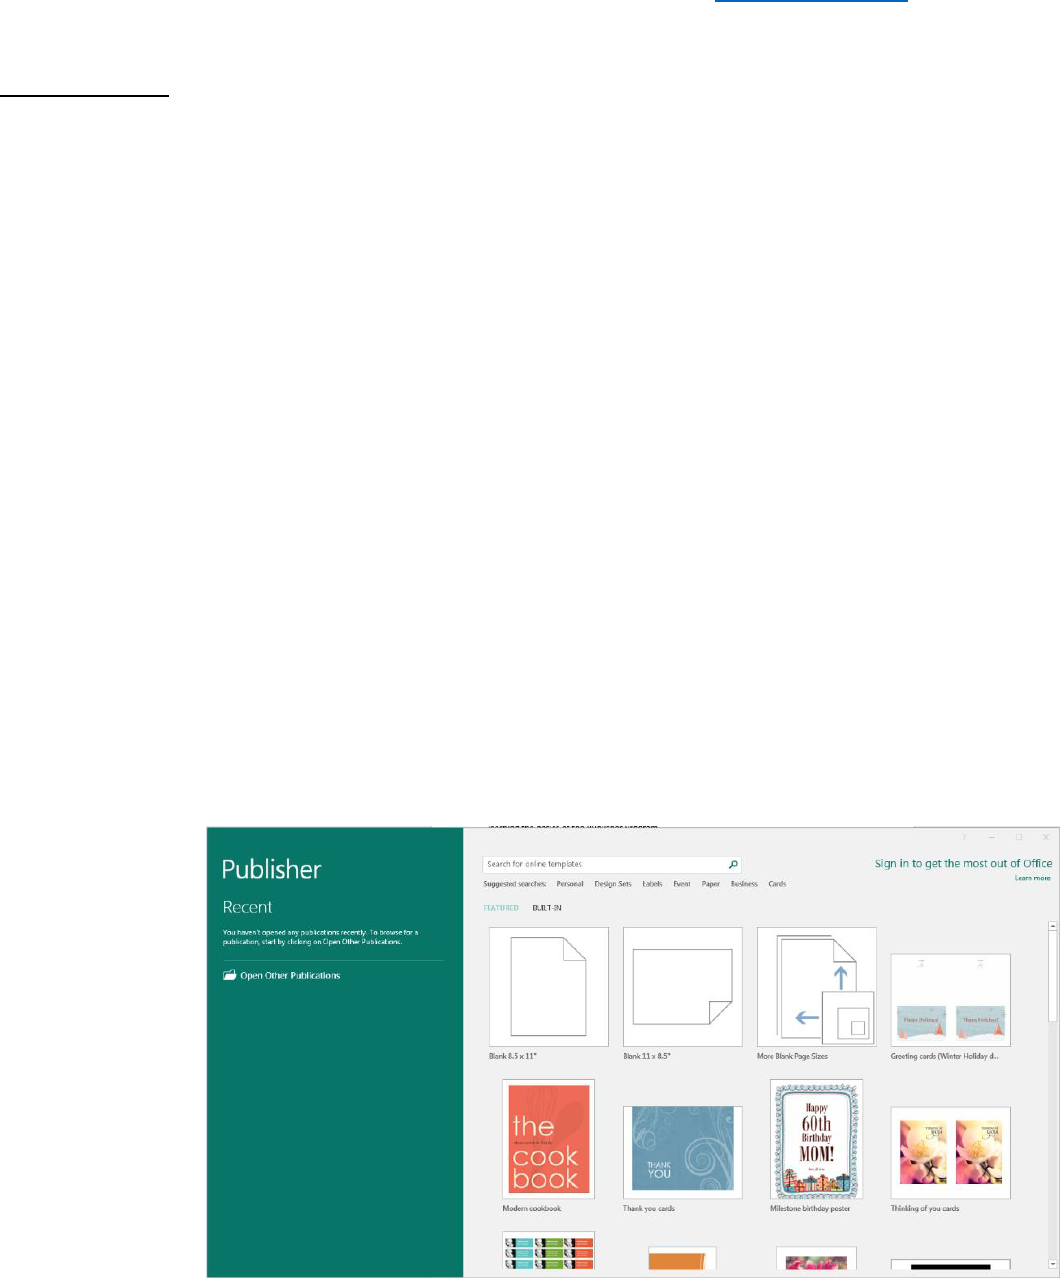
When the
application starts,
you will be greeted
with the following
screen. From here
you can choose
one of the many
templates, or you
can create a blank
document.

2
Once you decide whether or not you’re going to use a template or a blank document, then the first thing you
should do is to save the file with the name you would like. By default the name of the document will be
“Publication2,” you can either save it as that or create a name suited to you. The most important thing is being
able to find it when you want to come back to work on it!
User Interface (UI)
Before we start, I wanted to give you a little bit of information about the User Interface that is used here in
Publisher. While similar to Word and PowerPoint, there are some differences that could seem confusing at
first, also it never hurts to go over the basics.
Quick Access Tool bar
o Can be found in the upper-left corner
o By Default contains Save, Undo, and Redo but it can be customized to hold whatever you
want.
Ribbon
o Located along the top, this is where we will find all our tools that we can utilize with
Publisher.
o Just like the Quick Access Tool Bar, this can be customized.
o This is broken into tabs to better organize your workflow.
o By default our ribbon holds: File, Home, Insert, Page Design, Mailings, Review, and View.
The three things you will be using the most often will be the Home, Insert, and Page Design Tabs. This will be
where the majority of your design tools will reside. The File tab can be used to do backend things such as
saving or printing; it also holds the Business Information function, which can be used to include things like
Company Name, Logo and job titles as a preformatted template to be inserted where we like. While we will
not be covering this tonight, it is a good tool to know that could potentially save you a lot of time.
Creating a Holiday Card
While it is possible to create custom cards using publisher, for tonight we will look through several of the
premade templates and I will show you how to customize from there. To find the right Holiday Card Template,
we will, in the starting screen, search for “Holiday” in the bar. This will bring up several different templates
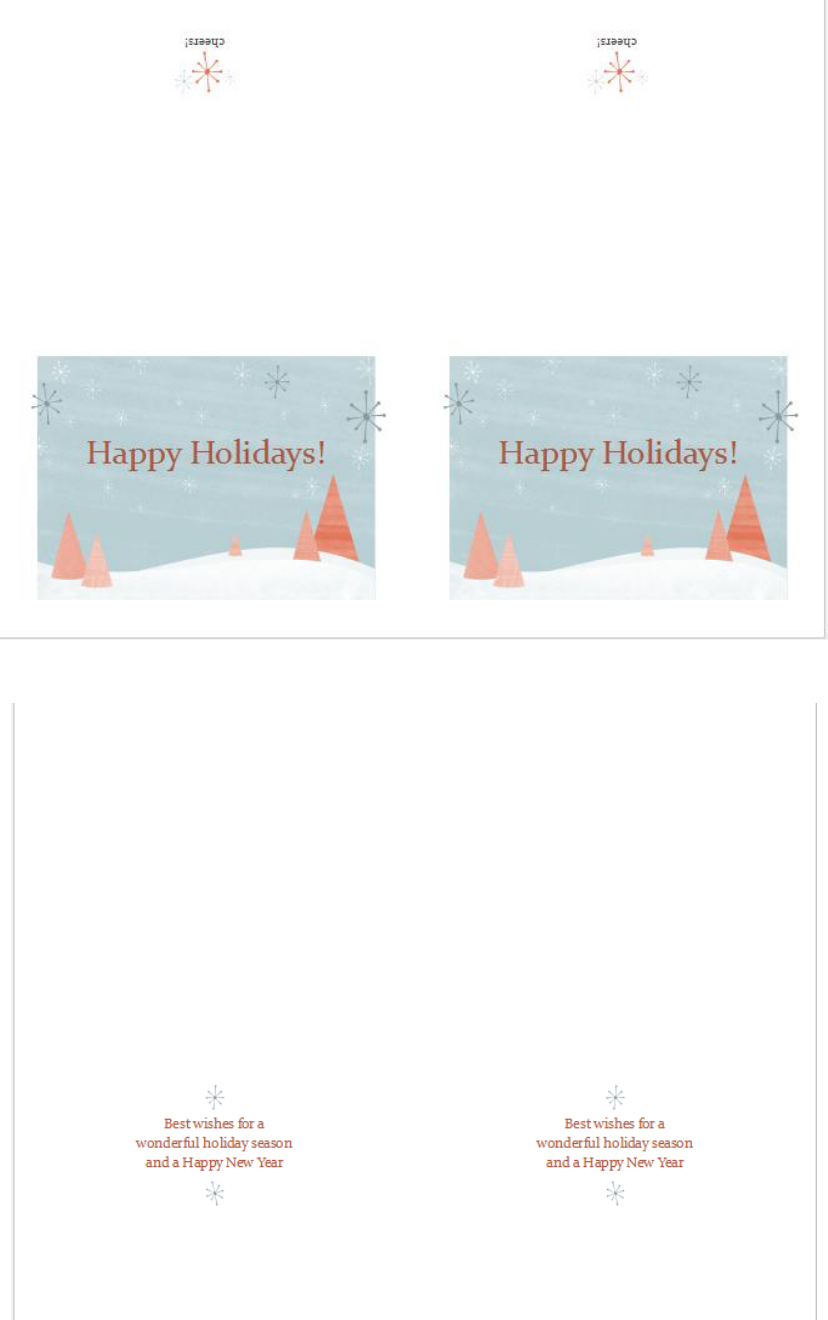
that we can choose from. The First one we will look at is called “Greeting Cards – Winter Holiday Design.” Go
ahead and open that and you will find yourself looking at a screen similar to this (See Next Page…)
3
------------------------------------------------------------------------------------------------------------------------------
4
Now this is a very basic Christmas card template. As you can see, it offers two cards per page, and since there
is an inside greeting, there is a second premade page. The way to get the two pages to print on the same piece
of paper is to simply print on both side of the paper (flipped long-side). From here we can customize the card
as we wish.
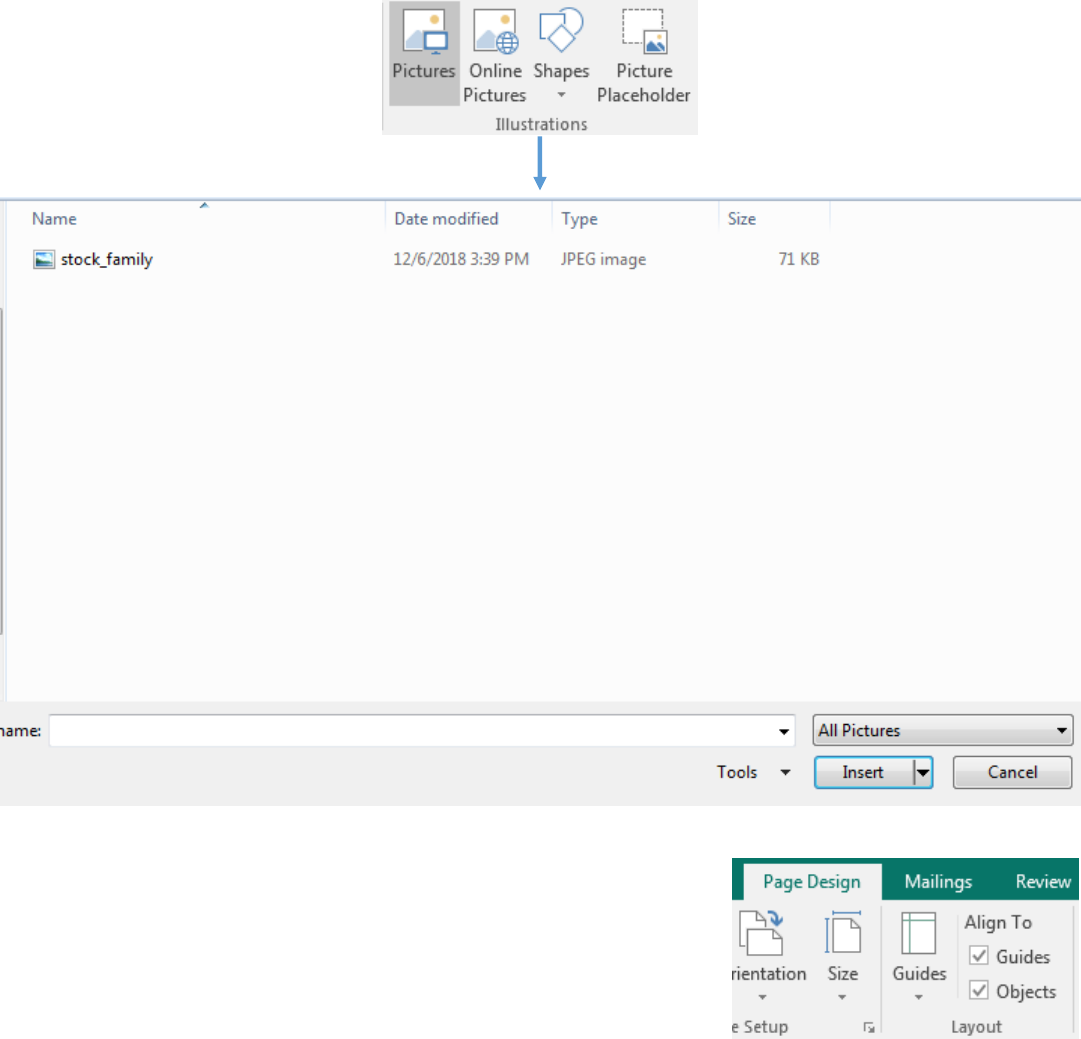
On your computer, you will find a stock family photo (it should be residing on your desktop). If you navigate to
the “Insert” tab on the top ribbon, you will find an option to insert illustrations. One of the options within that
group is called “Pictures.” This will allow us to insert pictures in a saved location that we have access too, such
as the desktop or C drive. It will open a file explorer and we can choose our picture from there. The steps can be
followed below.
After inserting the picture, you can resize and move it as you wish. To
see where you might fold the cards you can turn on the “Guides” on the
page design tab, in the layout group, as seen to the right.
Also note, that the picture should go on the second page, as that is our
inside portion of the card. On the following page you can see an example
5
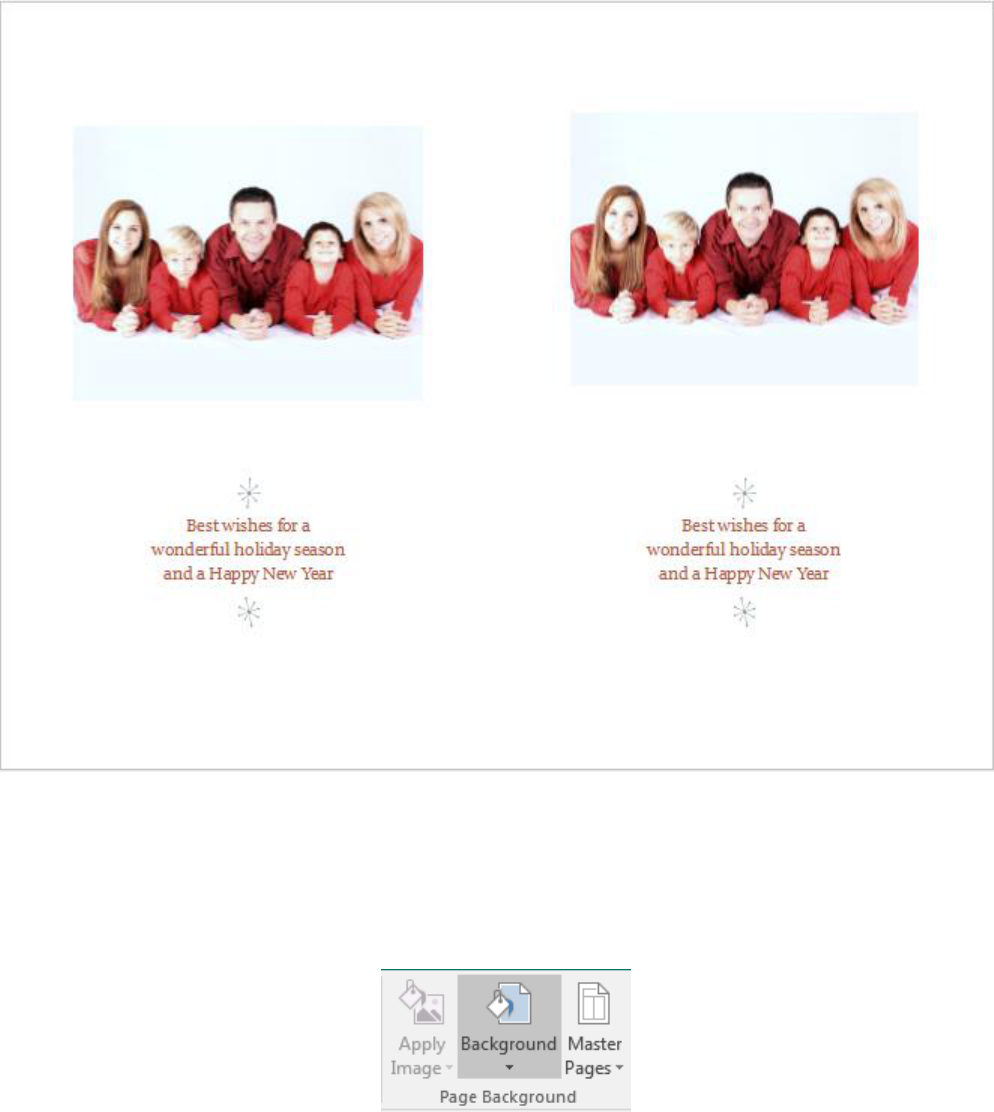
Now that we have our beautiful family photo, let’s spice the actual card up a bit. After all, we are competing
with our neighbors!
We will change the background to more of a Christmas theme, so to do that we can go to the “Page
background” group located on the Page Design tab (note: its located on the far right of the ribbon).
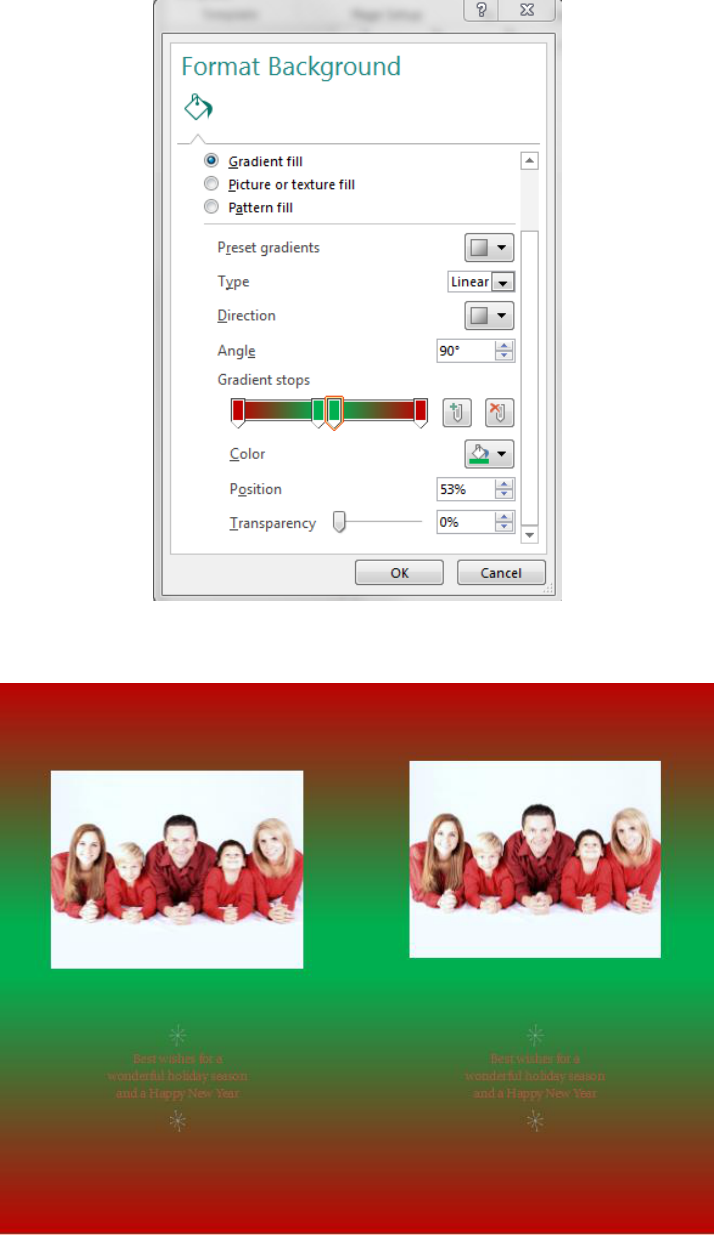
With this tool we can change the background color of the page we are currently on. We can change it to a
solid color, or a gradient scale. Since Christmas colors are Green and Red we will choose the gradient. When
you click background you will get the option for present colors and gradients, but go ahead and choose “More
Backgrounds.” This will let us choose the style of background we would like. Choose the “Gradient” check box
and you will be given a background formatting tool. This can be seen on the next page.
Note: If you are using colored paper at home (which I recommend doing to save ink) you will not need to do
this step.
6
In the section called “gradient stops” you will find little flags that you can slide, each one of these will affect
how your gradient looks. Since we want both green and red on both our cars, we will make 4 flags. The two
outer ones will be red, while the two inner ones will be green. This will give us a full spectrum of Christmas
colors on both cards.
When we are done our cards second page, should look like this. Go ahead and apply the gradient to the first
page as well, this will keep our card consistently colored.
7
Now that we have our Picture and background chosen, we can customize our greetings or format the one that
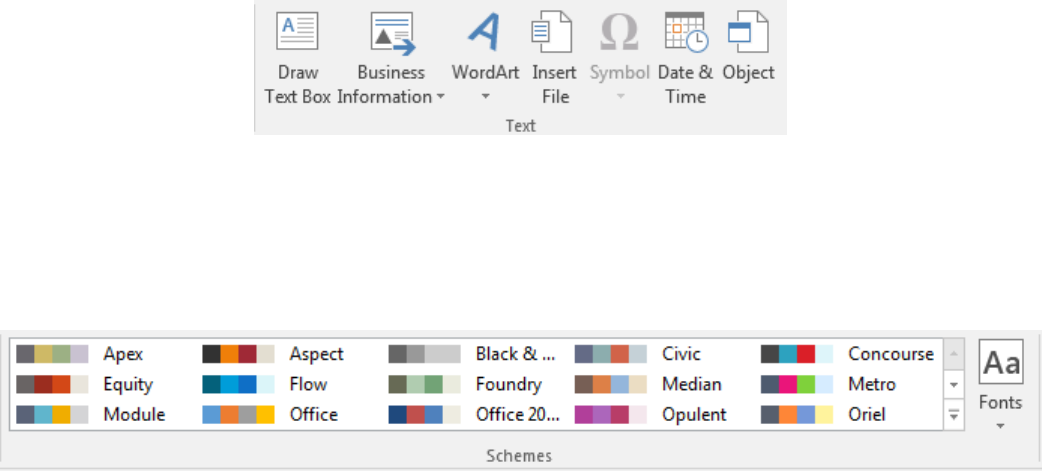
is already there. To create your own text box you would choose the “Draw Text Box” option in the text group
which is part of the Insert ribbon.
Within the text box you can format your text in the same ways that you would in a normal word processor.
Changing things like font weight or color as well as font type and size.
The last thing we will cover is called Schemes. This can be found in the “Page Design” tab and is in the middle
of the ribbon.
Think of schemes as themes for our pages, here we can choose colors that go well together, as well as change
font types that affect our whole document. Since we are making a holiday card if you hit the double arrow on
the right side of the color chooser, you will be presented with the whole suite of scheme colors. There is one
called “Mistletoe,” go ahead and choose that one. This will change our font to green, but that will clash with
our background, so to make the final touches we will change our font color to white, to be more in line with
our pictures background color. To do this just highlight each section of text, and then change the color to
white using the color selector on the homepage.
There you have it! A customized Christmas card, that you can send your friends and family. I hope you have a
wonderful holiday season, and a happy new year!
