
1
Microsoft Forms: Quick Guide
Microsoft forms allows O365 users to create custom surveys, quizzes, polls and questionnaires in minutes. It is a great
way to ask quick questions and receive feedback or conduct an in-depth survey with up to 5000 responses. Microsoft
Forms allows the content created to be sent as an invitation to other users and be filled out on any O365 compatible
device. The creator can see real time results and use inbuilt statistics or export the data for further analysis.
Accessing Forms
1. Open a web browser and go to https://staff.jcu.edu.au/
2. Log in with JCU staff email address and password.
3. Click on the Application launcher located on the top of O365.
4. Select Forms from the list of applications (or select All apps, and select Forms from the extended list).
This opens the Forms web application.
Desktop/Laptop Online
2
Microsoft Forms: Quick Guide
Creating a New Form
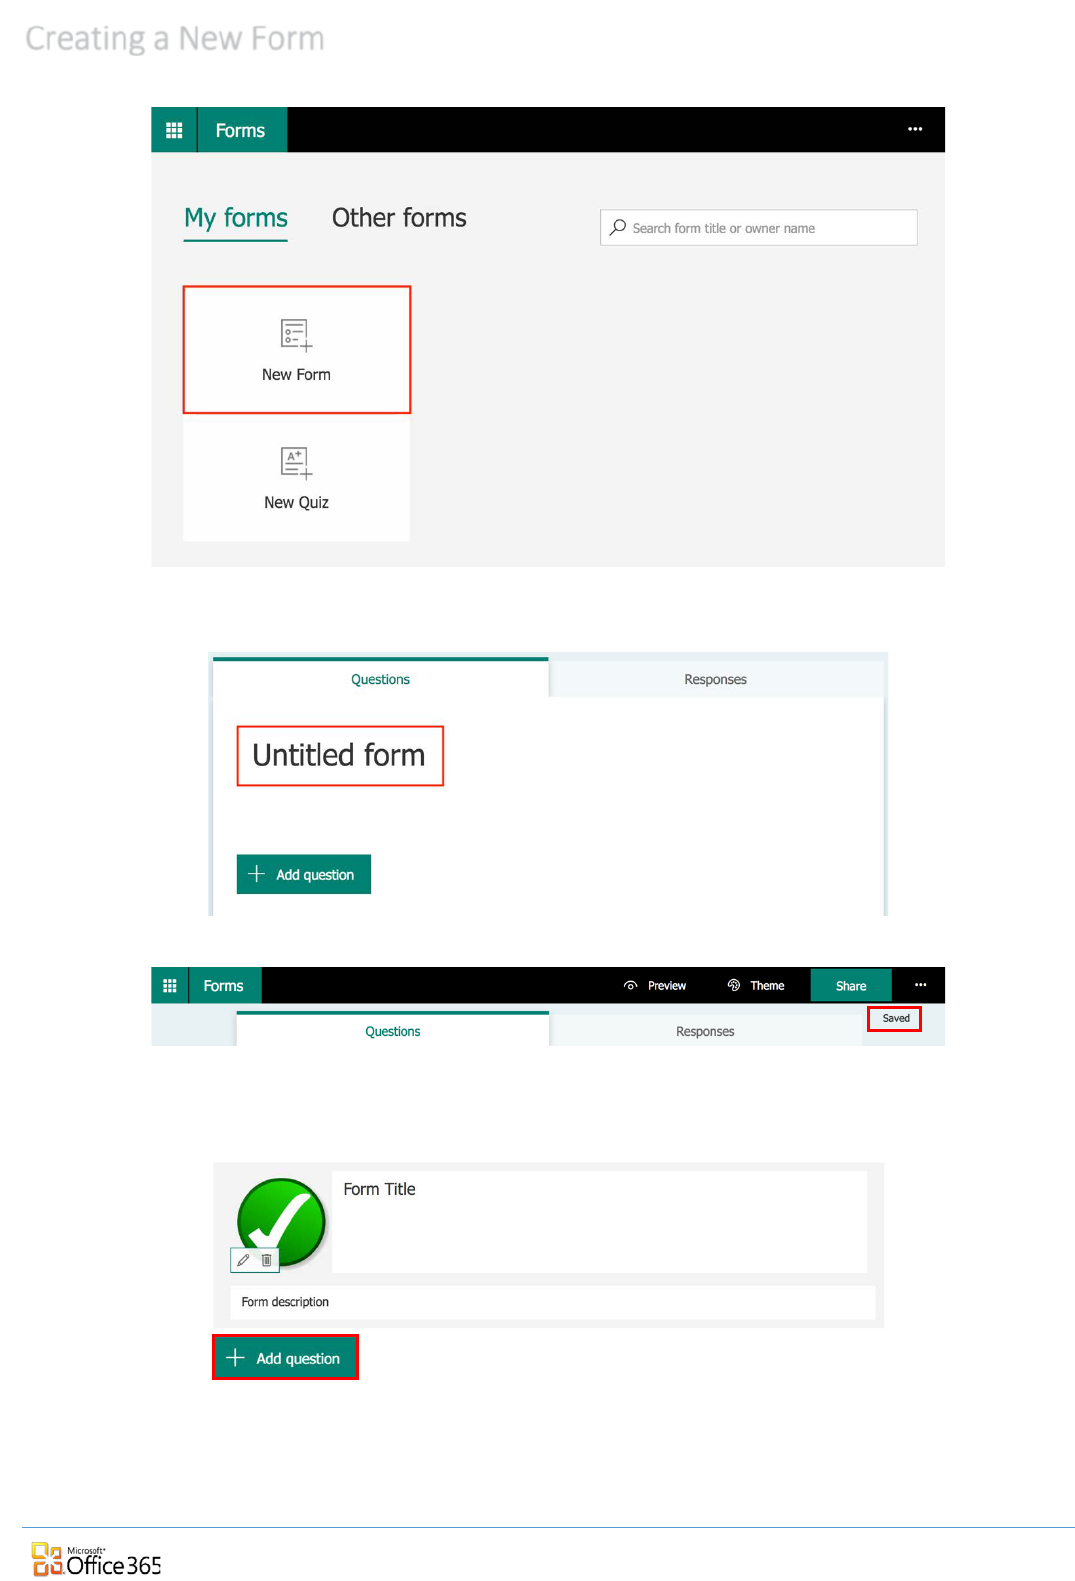
1. From the Forms home page click New Form, which opens a blank form.
2. Click Untitled form to edit the title and add a description.
3. The form auto-saves, a save indicator in the top left corner confirms when completed.
4. Click Add question to create content.
3
Microsoft Forms: Quick Guide
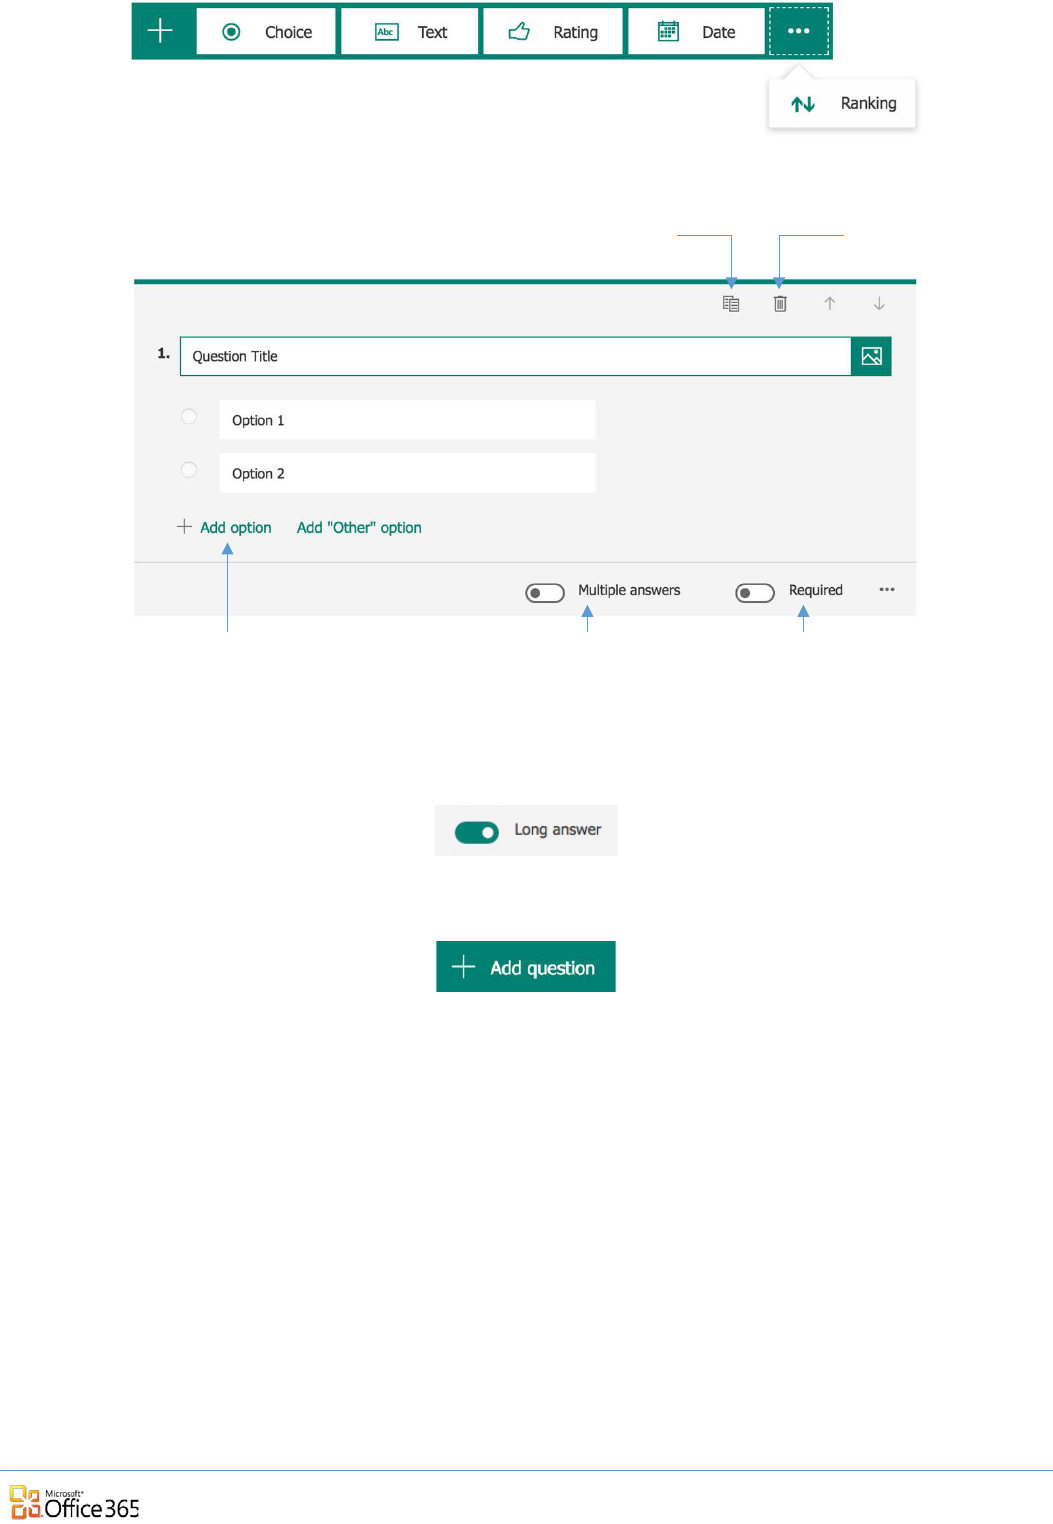
5. Choose the type of question: Multiple Choice, Text, Rating, Date or Ranking.
6. Fill in required fields for the selection – available options will change depending on question chosen.
7. For text responses, a long answer option is available. Activate long answer option by clicking the slider, green
indicates option activated.
8. Click + Add question to insert additional content.
Duplicate Question
Delete Question
Allow multiple
answers
Make Question
Compulsory
Add question
options
4
Microsoft Forms: Quick Guide
Adding Media to Forms
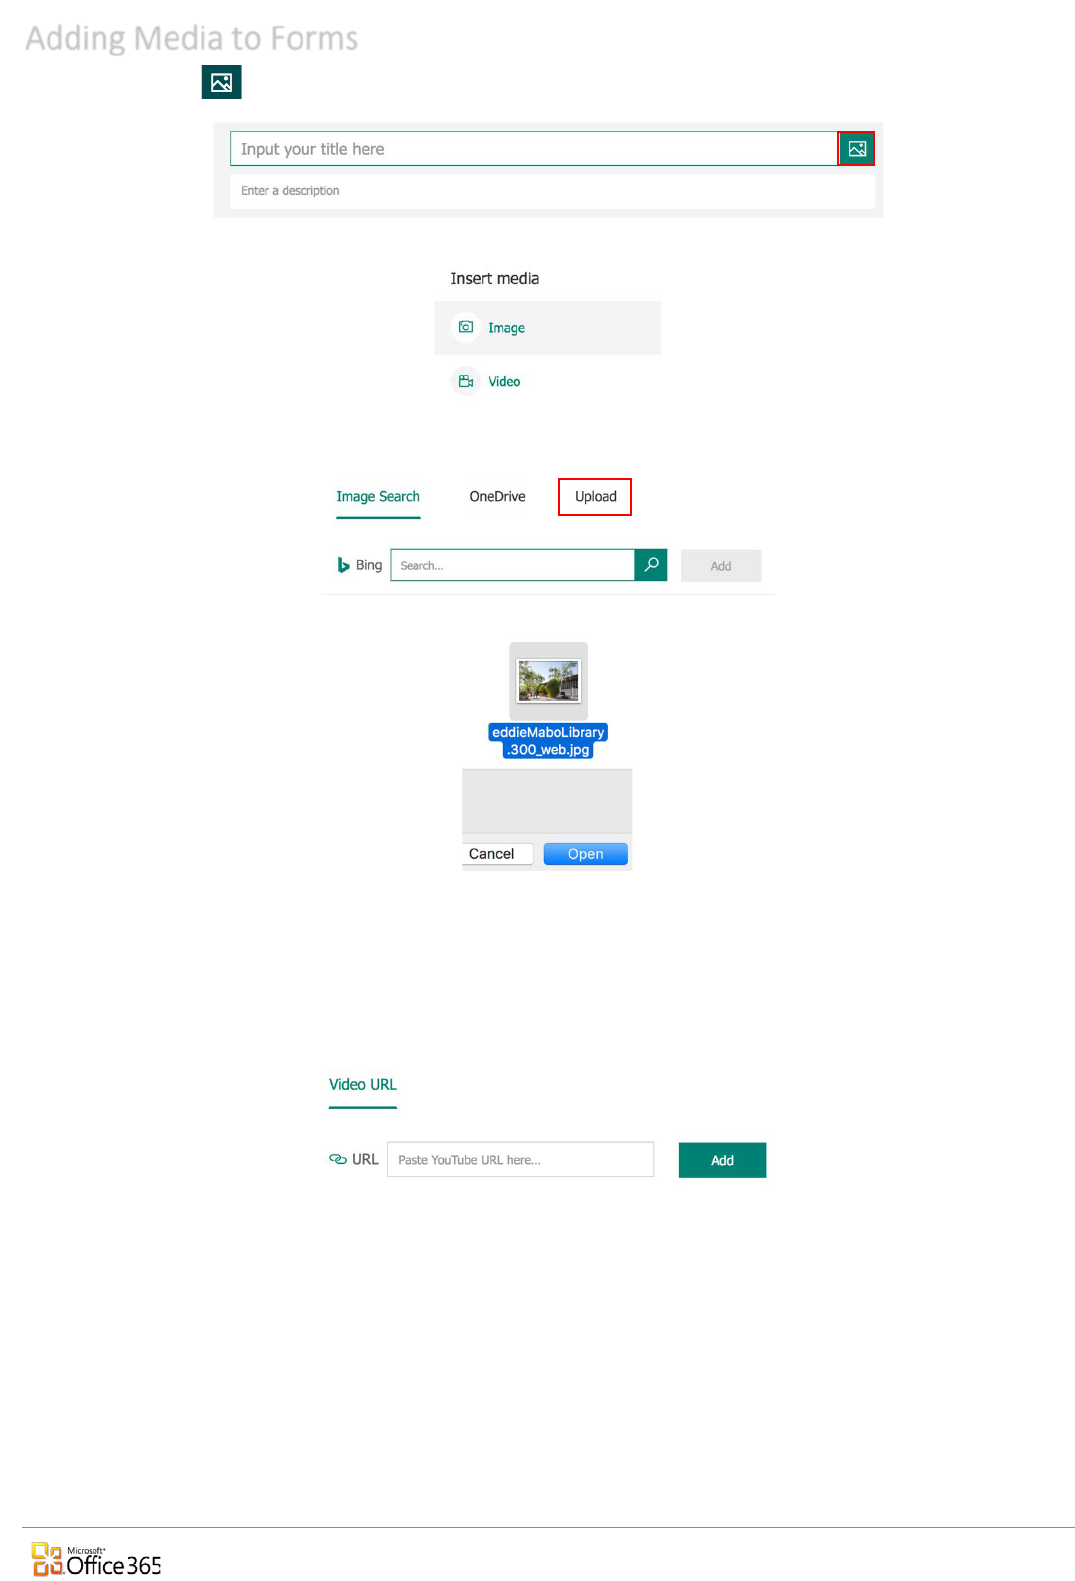
1. Click Media to add media (image or video) to a question.
2. Select Image or Video.
To add an image:
a. Select Upload.
b. Select an image and click Open.
NB: Images sourced from BING images may violate Copyright laws, do not use.
To add a video:
a. Paste the YouTube URL (web address) of the video into the URL box (this works with Private, Unlisted
and Public YouTube videos).
b. Click Add.
5
Microsoft Forms: Quick Guide
Sharing a Form
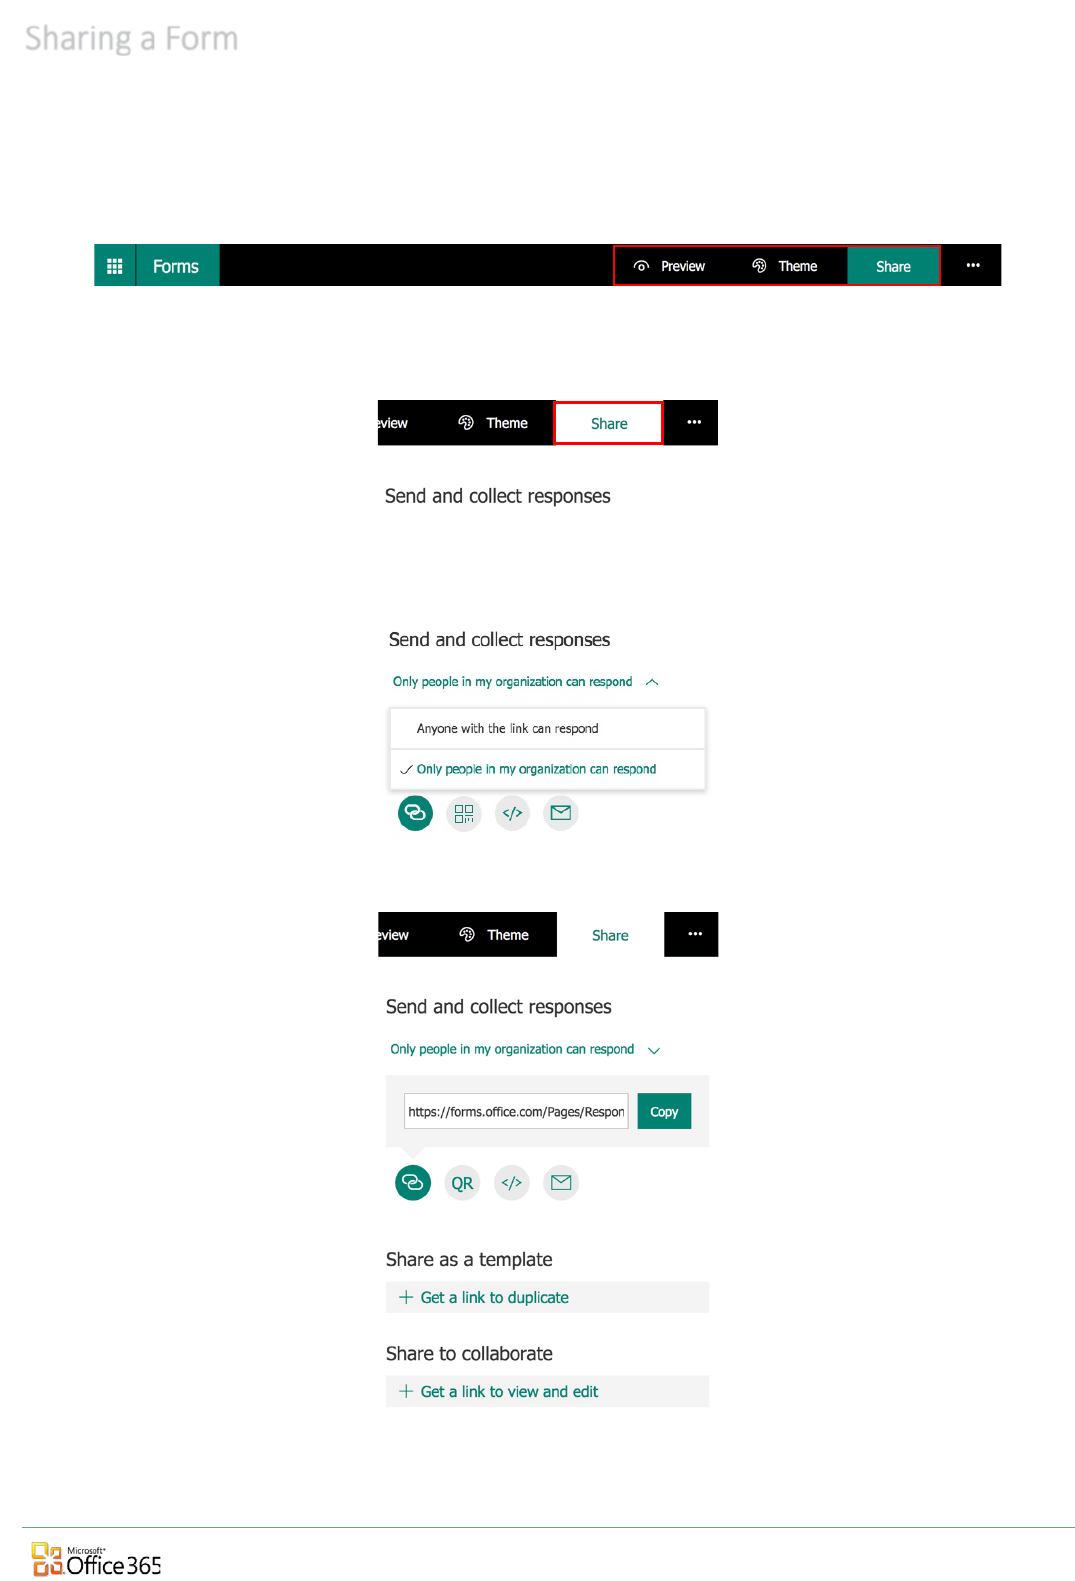
Once complete, use the toolbar options to preview, add a theme or share the form.
Preview: Preview the form to see how it looks when viewed on computer or mobile device
Theme: Select a colour or theme to apply to the form, or upload custom banner image
Share: Share the form and choose sharing settings
There are 3 options for Sharing forms: Send and Collect Responses, Share as a Template and Share to Collaborate.
1. Click Share from the Form toolbar.
2. Choose an audience from the drop down menu.
Forms sent to people within JCU can be set to record the person’s name, Forms sent to external email
addresses will only record the respondents name as anonymous.
3. To generate a link for the form, click Copy next to the link box, this link can be emailed or sent as a
message.
6
Microsoft Forms: Quick Guide
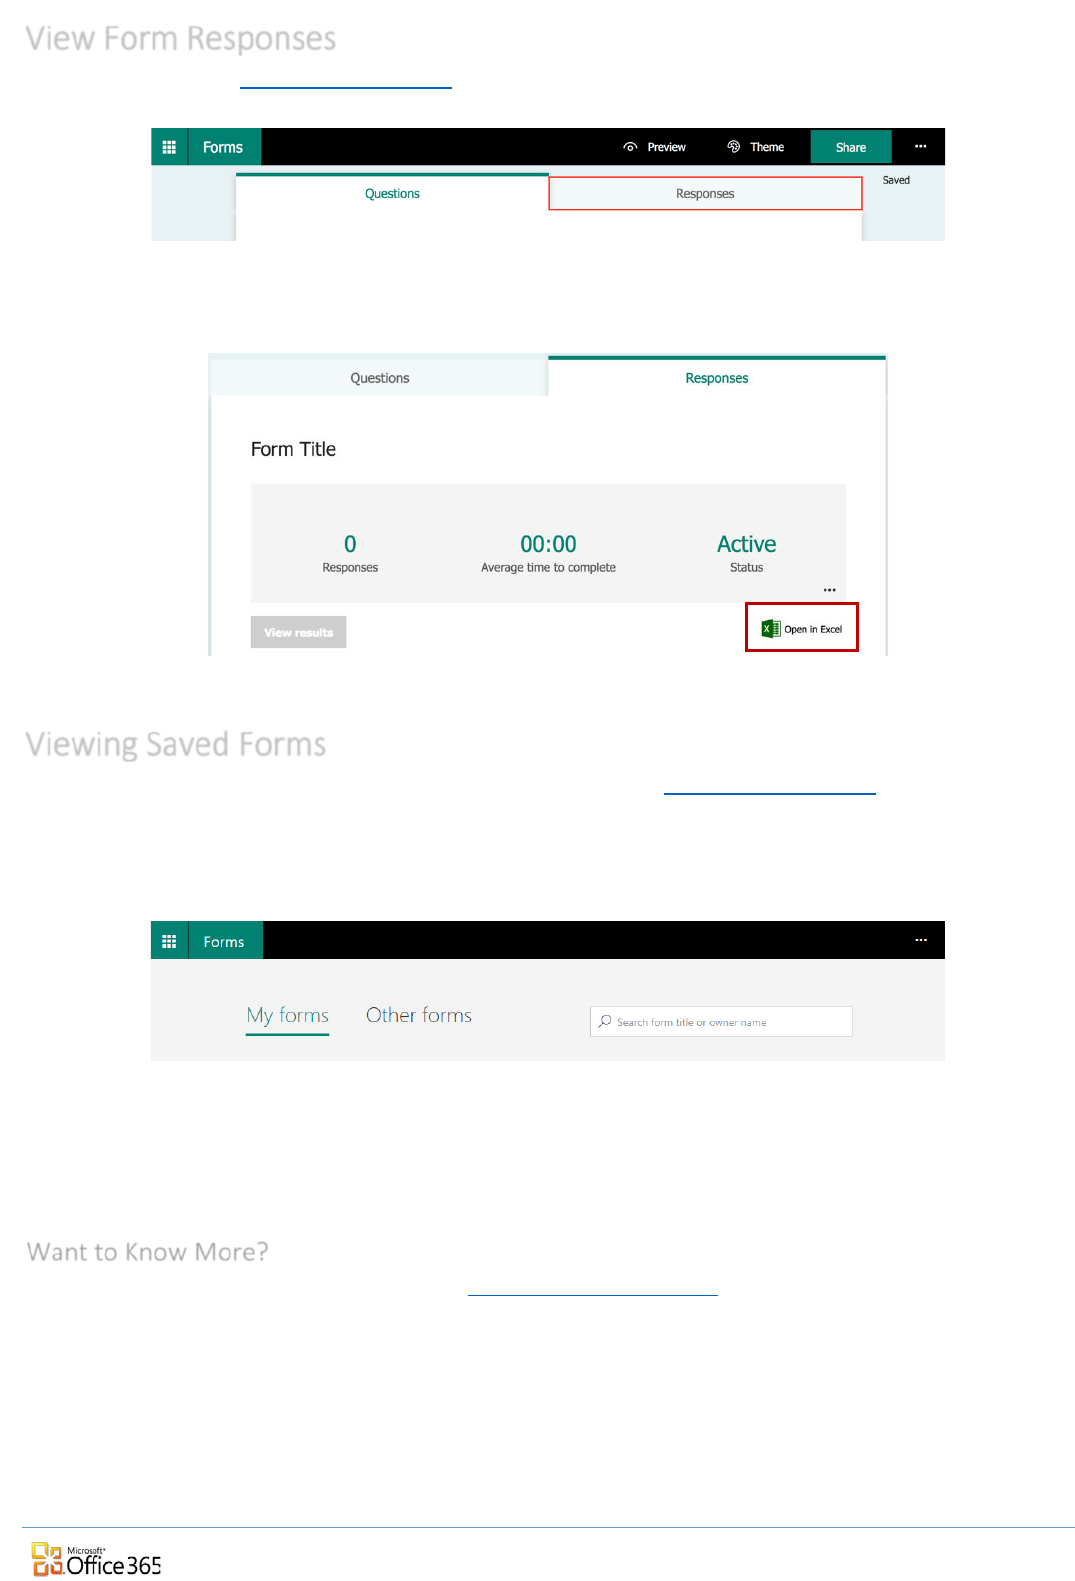
View Form Responses
To view responses, go to https://forms.office.com and open the appropriate form.
Click Responses at the top of the form. When people have completed the form, this is where the results can be viewed.
Results can be viewed in Excel by clicking Open in Excel.
Viewing Saved Forms
To view saved Forms or Forms you have been granted edit access to, go to https://forms.office.com
The Forms window has two tabs:
• My forms forms you have created
• Other forms forms that you have edit access to
Select the appropriate tab to view available saved forms.
Want to Know More?
Lynda.com has a great beginner course that takes a First Look at Microsoft Forms.
