
A Qorus + Pickit e-book
How to create
winning proposals
in Word for Oce 365
Practical tips for building beautiful, compelling
proposals using Qorus and Pickit for Oce 365
+

www.qorusdocs.com 2 www.pickit.com
Contents
Introduction
Chapter 1 The power of Oce 365
Chapter 2 Design fundamentals
Chapter 3 Practical tips for working in Word
Chapter 4 Using Qorus to build proposals quickly
Chapter 5 Using Pickit to give your proposal a visual advantage
Chapter 6 Case studies

Every day, people all over the world are pitching ideas, presenting their work or putting
together proposals. Often, countless hours go to compiling the most compelling ideas,
insights, and suggested improvements, while little attention is paid to presentation. Whether
its pressing deadlines or a lack of experience, people fail to package their work so it makes
it past the front door. In an age of images, choosing the right visual elements to complement
your content is crucial.
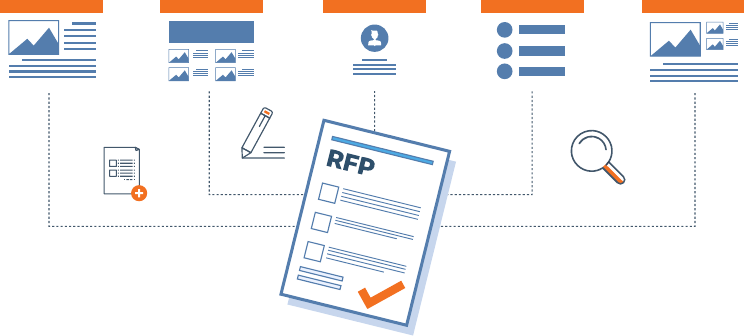
As increasing regulation and competition forces organizations to create increasing numbers
of proposals and RFPs, we need to be prepared to stand out from the crowd and get
noticed. At the same time, however, the pressure is on to increase sales and marketing
eciency. This can seem like a dicult task, but it’s one that can be solved with the help of
cutting-edge software.
We’re on a mission to change that by helping people create documents that are compelling,
error-free and visually appealing. The answer lies in digital technology, and organizations
that have already embraced Oce 365 understand the value of technology and can benefit
from a range of productivity-enhancing apps including Qorus and Pickit.
Introduction
www.qorusdocs.com 3 www.pickit.com

www.qorusdocs.com 4 www.pickit.com
If you’ve ever used Oce 365, we probably don’t need to tell you the package includes
some pretty solid software. But what many don’t know is that with an increasing number
of powerful apps and add-ins available, programs like Word can now do more than ever.
Qorus and Pickit have both harnessed the potential of the Oce add-in and created apps
that are proving popular in the Microsoft ecosystem.
Chapter 1
The power of Oce 365
Qorus – Connected content creates productive people
Qorus for Oce 365 is a suite of add-ins for Word, PowerPoint and Outlook that connect to content
in SharePoint Online and One Drive for Business. Sales, marketing and proposal teams use Qorus
to build high-quality documents in minutes. Qorus is the 2017 Microsoft Partner of the Year for Cus-
tomer Experience. For more info, go to www.qorusdocs.com/oce-365-add-ins
Pickit – Saving the world from boring docs & presentations
Pickit is a new kind of image service that brings the pictures to you in the programs you’re already
using. Award-winning apps for PowerPoint and Word make it easier to make your work stand out
with royalty-free photos, clipart images and illustrations. Pickit’s Business solution helps organiza-
tions save time and stay on brand by putting company visuals in Oce 365, G Suite and the web.
For more info, go to www.pickit.com

Having a good grasp of design elements will help you create more visually appealing work.
When it comes to proposals, the more appealing your content, the better. Here are design
fundamentals to be aware of.
Chapter 2
Design fundamentals
Color Using a color wheel is the easiest way to determine which colors work best for your
proposal template. Contrast can be achieved by using colors close to each other, giving
the viewer a sense of harmony and continuity. Colors further apart can introduce tension.
Using contrast
Designs look more appealing when two elements contrast with each other. You can
achieve contrast in a number of ways using color, size, shapes, and positioning.
www.qorusdocs.com 5 www.pickit.com
Size Introducing one element that is distinguishably larger than anything else creates con-
trast. Larger elements indicate that they are also important to the reader.
Shapes Dierent shapes are used to lead your reader’s eye or organize information.
For example, squares represent honesty, stability, uniformity, and rigidity. Because squares
represent uniformity to the eye, most text is often presented in block format. By introducing
a dierent shape, say a circle which represents peace, protection, and infinity, you achieve
contrast.
Position Contrast can be achieved by making one element appear out of alignment with
everything else on a page.
Repetition
Using repetition creates a feeling of harmony and balance, which is due to the consistency
of certain design elements. You can achieve repetition using a particular background, con-
sistent typography, or solid blocks of colors when introducing new sections of content.
Alignment
As you design your proposal, aim to align your text in a uniform fashion throughout your
document. This creates a sense of harmony with the reader.
Proximity
Proximity relates to the placement of elements in relation to each other. For example, the
closer a heading is to the paragraph below, the more it communicates to the reader that
the heading and paragraph directly relate to each other. A good use of proximity also
makes the reading experience more pleasurable.
White space
There’s always a lot of important information to add to a proposal, but remember to use a
generous amount of white space to create balance.
www.qorusdocs.com 6 www.pickit.com

Dierent versions of Word use similar settings for customizing documents, however not all
features are found in the same tabs. In the interest of simplicity, the instructions and tips that
follow all apply to Word for Oce 365.
Set up your document styles
Use the Styles to set up your document’s font size, color, character spacing, line height, and
text indentation. These updates can be applied to titles, headings, paragraphs, and lists. If
the style gallery doesn’t include a format that you like, you can create your own or modify
an existing style.
Chapter 3
Practical tips for working in Word
Pro tip: Most documents designed to be viewed online use San
Serif fonts because they are easier to read on computer screens.
The style gallery is found on the Home tab. From there you’ll be
able to modify and create the style you need.
Bullet point selection
Bullets are helpful when listing important information and also create balance by breaking
up larger chunks of text into easier to read pieces. Be sure to select your bullet design
throughout your proposal to create uniformity, and also pay attention to the indentation of
text. Misaligned bullets and text make the best proposals look unprofessional.
To set your bullets, select the bullet symbol, then right-click to choose Adjust List Indents. In
the Adjust List Indents dialog box, change the indentation. When done, click OK and then
use the Styles pane (Ctrl+Shift+Alt+S) to update the style by right-clicking on the style name
and choosing Update List Bullet to Match Selection.
Table design
Word and PowerPoint come with set table styles. Like all other style elements, it is possible
to modify them. As you customize your tables, remember to set text to vertical and horizon-
tal alignment, background colors, and border designs and colors.
www.qorusdocs.com 7 www.pickit.com

Page numbering
If your proposal has more than one page (excluding the cover page), it’s a good idea to add
page numbers as a reference guide for readers. If you have more than one page, ensure that
your page numbers start from the first page of content and not the cover page.
Page numbering also allows you to restart your page count for dierent sections of your
proposal.
How to set up page numbering from the first page of content:
1. To begin, navigate to the Insert tab, then click the Page Number
command. You’ll find dierent options designed to help you with
dierent types of documents.
2. To add page numbers to an existing header or footer, use the Current
Position command. Otherwise, choose one of the three options
presented to create page numbers from scratch.
No matter what you select, you’ll have several numbering styles to choose from. All you
have to do is click the one you want and it will be added to your document.
3. The Design tab appears any time your header or footer is open, making
it easy to customize your page numbers. To remove the page number
from your cover page, check the box next to Dierent First Page.
4. Close your header or footer, click Close Header and Footer, or press Esc
on your keyboard.
To open it again, simply double-click the margin to unlock it.
How to style your tables:
1. Go to the Table Tools tab and select the Design Tab. Once there,
you’ll be able to select or modify existing tables.
2. After you’ve designed your new table style, save it for use by
clicking on the down arrow next to Table Styles
3. Click on New Table Style, give your table a name, and change the
“Style based on” option to “New documents based on this template”
so the table style will be available in future documents.
www.qorusdocs.com 8 www.pickit.com

How to restart page numbering for a new section
Insert a section break first. Place your cursor at the beginning of the section and then go to
the Layout tab. Click the Breaks command. You’ll see a few dierent types of section breaks.
Click on Next Page.
Next, adjust your page numbering by following these steps:
1. Double-click the header or footer to unlock it.
2. Then click the Page Number command and choose Format Page Numbers
from the menu.
3. A dialog box will appear where you can change the number format, add
chapters to your page numbering, and much more. To restart your
numbering, select the field which says “Start at”.
By default, Word will set it to restart at 1, but you can enter any number here, depending
on what you need. When you’re done, click OK and you’ll see the change immediately.
www.qorusdocs.com 9 www.pickit.com
Headers and footers
Headers and footers are relatively easy to insert. Simply double-click on the header of the
page you’re working on and enter the text you’d like to appear there. You can also use the
design tab for dierent header and footer styles.
As with page numbers, it’s a good idea to not have your header appear on the cover page
of your proposal.
Here’s how:
1. Create a section break, selecting the “Next Page” section break.
2. Double-click on the first page of content. You’ll note that the Design Tab
is selected; click on “Link to Previous” to deselect the button. This
will ensure that your header only appears from the first page of content.
Do the same for footers.

Using page breaks
Page breaks are great ways to separate dierent types of information, but can make
documents look unstructured if used incorrectly. Here are a few tips on when and when not
to use them:
When to use them:
Introducing a new section
Introducing a new idea with a heading on a new page
When not to use them:
Separating two paragraphs and starting a new section with a header
directly below
Separating a sentence over two pages and introducing a new section with
a header directly below
Spreading tables over two pages
Using an image that relates to text on an earlier page and introducing a
section with a header directly below
www.qorusdocs.com 10 www.pickit.com

Bonus tip
Manage your proposal file size
Most proposals designed with high-quality images tend to increase in file size. As a rule of
thumb, try to keep your proposal file size to less than 1.5 MB. Here’s 3 recommendations:
1. Swap out high-quality images for compressed JPEGs.
2. You can also compress image files using a free online tool called Compressor.io. It’s
powerful and supports JPEG, PNG, and SVG files. Stick to JPEGs as they are typically
smaller in file size.
3. Use solid colors as background instead of images.
Designing templates in Word takes a little practice, but once you get the hang of how to
use Word’s styling features, you’ll be able to save time and turn over more proposals faster.
www.qorusdocs.com 11 www.pickit.com

Qorus for Oce 365 connects your best content to the places you work. Instantly find
winning proposal content from SharePoint Online or OneDrive for Business and insert it into
Outlook, Word and PowerPoint. The result? Better quality pitches, proposals and RFPs, and
happier, more productive employees.
Download the app
First things first, you’ll want to install the Qorus add-in for Word (The add-ins for PowerPoint,
and Outlook are also available, but we’ll stick to Word for now).
How to install the Qorus Document Builder for Word
After you’ve installed the add-in, simply follow the sign up wizard, using your Oce 365
login credentials.
Connect your content
Qorus will automatically connect to OneDrive for Business, so you can tget going right away
without having to configure or setup anything else. For those who use SharePoint Online,
you can also connect your SharePoint Online libraries to Qorus. You can find the steps on
how to do that here.
Locate your best proposal content
Now that you’re all set up, and your Oce 365 content is connected to Qorus, you can
quickly locate your best content.
Follow the links below to:
Search OneDrive for Business
Search SharePoint Online Libraries
Boost content productivity
Found what you need? Next, learn about a few of the dierent ways in which you can use
your content while you work in Word.
Insert re-usable content
Copy and paste from the preview
Clip and save content
Attach files and insert links
Refresh and sync content
And there you have it! There’s a lot more that you can do with Qorus, but this is a good way
to get started.
Chapter 4
Using Qorus to build accurate, engaging proposals
www.qorusdocs.com 12 www.pickit.com
The award-winning Pickit app for PowerPoint and Word lets you create stunning docs and
presentations in a matter of minutes. Adding visuals when presenting your work can really
help make your ideas and message more memorable, and let’s be honest; nobody needs
another dull doc or boring presentation.
Chapter 5
Using Pickit to give your work a visual advantage
First up, go to Microsoft AppSource and search for Pickit Free Images. Or just click here.
Once you’ve found the add-in, download it for PowerPoint and/or Word. Once you’ve got
the app, here’s how it works in 5 simple steps.
Using Pickit Free Images
1. Open a presentation and add some text
2. Open the Pickit Free Images app and search for a specific
image or browse our curated collections
3. Double-click the images you like to insert them in your slide(s)
4. Pick a layout suggested by PowerPoint Designer
5. Present like a pro
See more here
www.qorusdocs.com 13 www.pickit.com

Chapter 6
Case Study
Leading IP video surveillance firm creates significant eciencies with Qorus
Challenges
Genetec produces a large amount of content as part of their commercial process. This
includes technical training documents, marketing collateral, proposals and RFP responses.
The cost-eective production of this content is critical to the success of their commercial
operations.
Solution
Qorus worked with Genetec to centralize their content in SharePoint Online and OneDrive
for Business. This created a single, trusted platform for well managed content. Genetec
elected to use Oce Groups for digital team collaboration.
Genetec’s Oce 365 users can now access content stored in SharePoint Online without
leaving the documents they’re working on.
Results
Content creation and management are greatly simplified, leading to significant im-
provements in internal eciency.
Content is securely stored and fully tracked, giving Genetec powerful perspectives on
the eectiveness of their content.
Commercial teams are more productive and digital collaboration has drastically im-
proved.
“
“Qorus add-ins for Oce 365 have created significant
eciencies and productivity improvements for Genetec.”
– Eric Jacobs, Bid Manager
www.qorusdocs.com 14 www.pickit.com
[email protected] | www.qorusdocs.com
[email protected] | www.pickit.com
Qorus and Pickit are both proud
Microsoft Partners.
GET QORUS
GET PICKIT
