Building Mission Models
for FIRST LEGO League Challenge
Last Update: 9/17/2023

Getting
Organized
2
© FLLTutorials.com, 2023
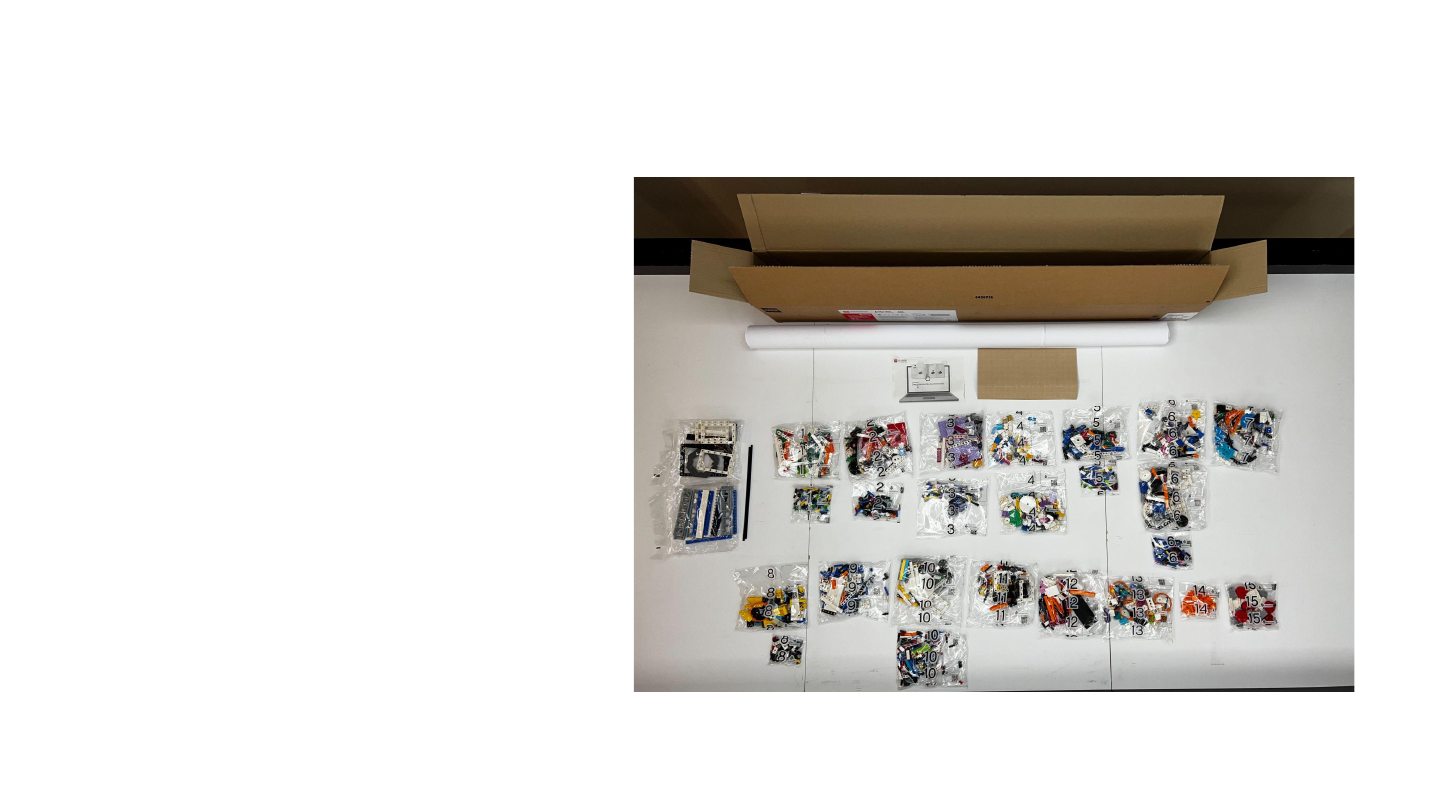
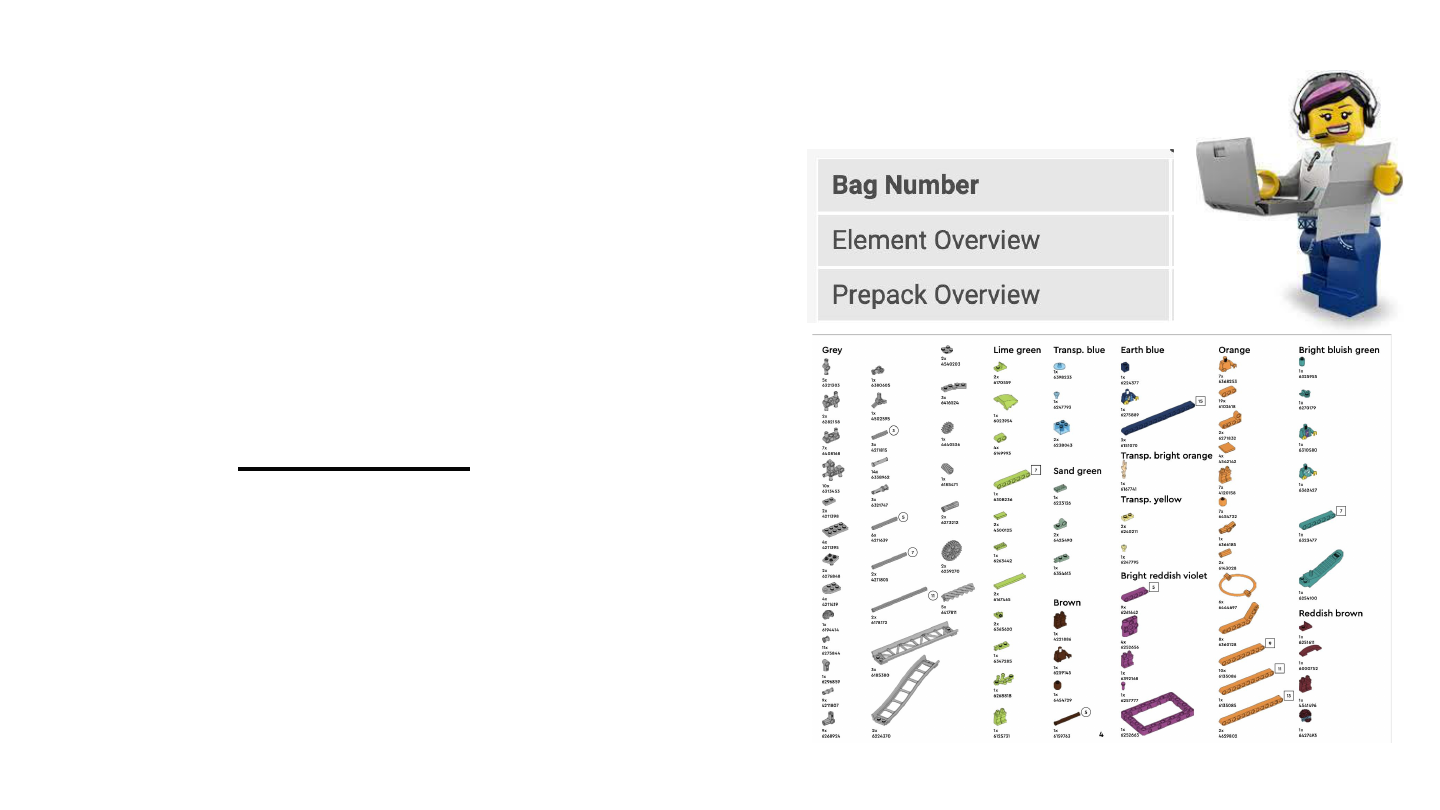
Sort Your Bags by Number
Bag #1 - 2
Bag #2 - 2
Bag #3 - 2
Bag #4 - 2
Bag #5 - 2
Bag #6 - 3
Bag #7 - 1
Bag #8 - 2
Bag #9 - 1
Bag #10 - 2
Bag #11 - 1
Bag #12 - 1
Bag #13 - 1
Bag #14 - 1
Bag #15 - 1
2 unnumbered bags
2 loose black axles
1 sheet of 3M Dual Lock
For the MASTERPIECE season,
you should find the following
items in your Challenge set box
3
1 rolled up Challenge Mat

© FLLTutorials.com, 2023
Open and Sort by Number
● Open only one set of
numbered bags at a time. E.g.
all bags numbered 1.
● There can be multiple bags
with the same number (See
previous page to check how
many there should be)
● Building instructions are by
bag number.
4
© FLLTutorials.com, 2023
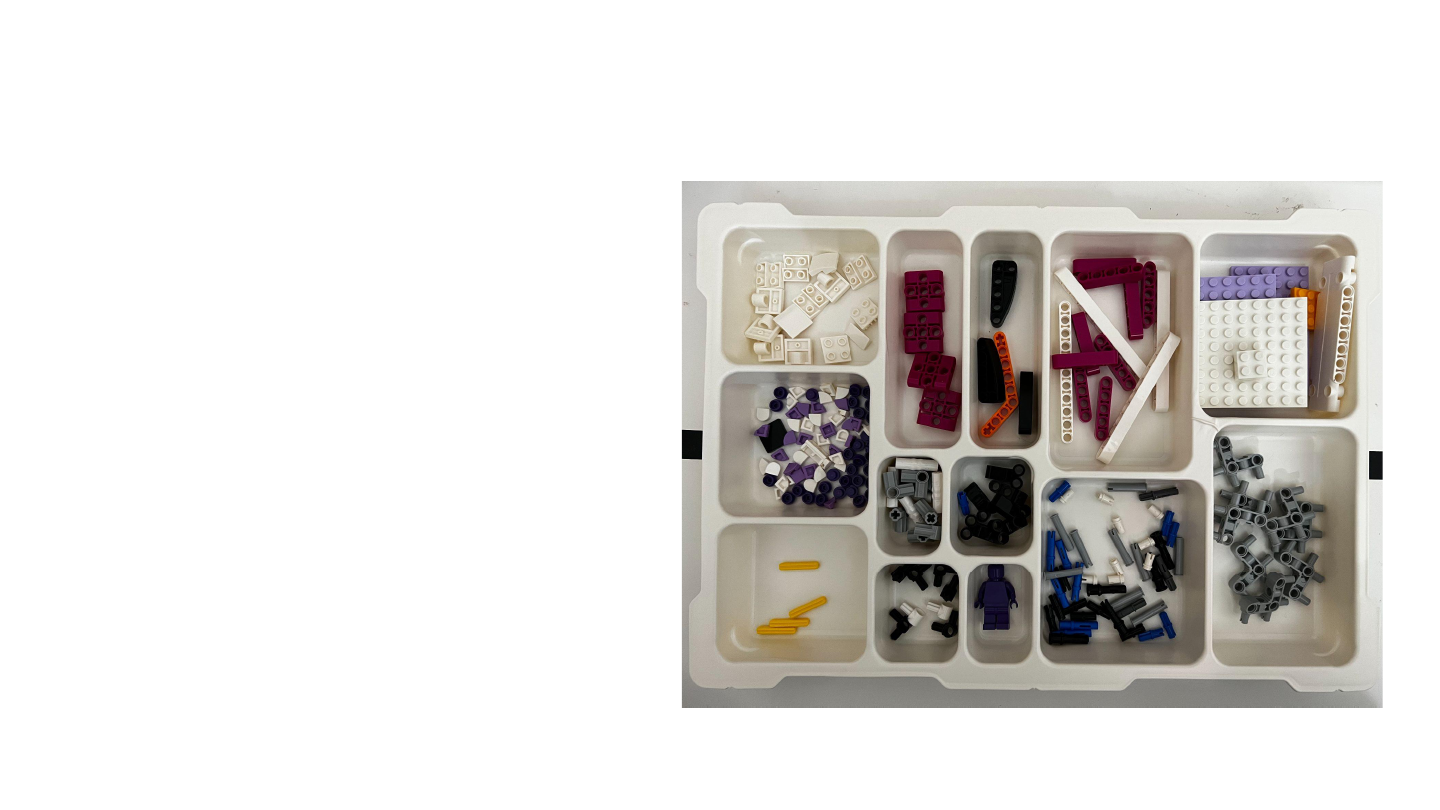
Sorting Can Save You Time
● Sort the parts in each bag into
general part types so that they
are easier to find (axles, liftarms,
frames, pins, etc.)
● You can use LEGO sorting trays,
paper plates, small bowls, box
lids, trays, etc.
● This step is will help find the
part you need as you build
5
Elements in Bag 3 sorted before building

Building
Eciently and
Reliably
6

© FLLTutorials.com, 2023
Build in Pairs
● Building in pairs or small groups
works well.
● One person finds the parts for the
step, one person puts the pieces
together, and one person checks
to make sure the step was done
correctly.
● Change roles every few steps.
7
© FLLTutorials.com, 2023
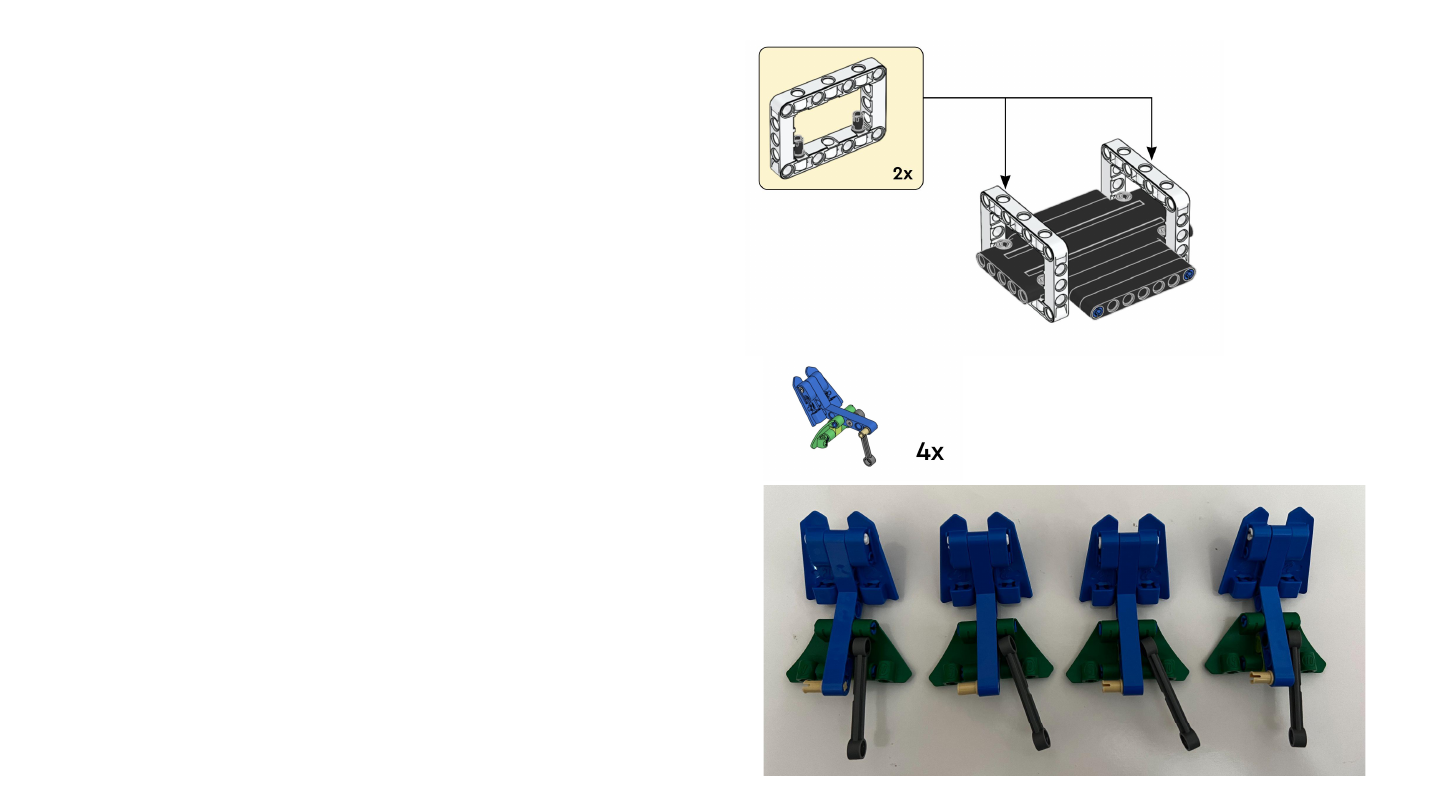
Multiplier Symbols
● Be sure to pay attention to the
multiplier symbols (e.g. 2x, 4x)
symbols at the start of a subset of
instructions.
● You can save time by constructing
them simultaneously.
● In MASTERPIECE, sometimes the
multiplier symbol only shows up
after you have built one copy.
8

© FLLTutorials.com, 2023
Follow the Instructions
● Take your time and always build
exactly what the instructions tell
you.
● Do not improvise or “improve” the
model.
● Your model must look like and
behave exactly the same way as
the ones at the competition.
9
© FLLTutorials.com, 2023
Check Your Work
● Have your coach or adult check the
build or compare with another
team’s set if needed.
● Be careful and use the right part in
the right step
● Common mistakes include:
○ Using the wrong length liftarm in a
step (e.g. 11M instead of a 13M
liftarm)
○ Using the wrong pin (friction vs.
frictionless)
10
E.g. Using a black friction pin instead of a light grey
frictionless pin in this step will change how the
model operates
TIP: LEGO Technic
is measured in
“Modules”. 5M
means it has 5
holes in it.
© FLLTutorials.com, 2023
Some Models Take Longer to Build
● When splitting up the work, note that
some models and bag numbers take a
lot longer to complete than others.
● You can check ahead and see how many
step numbers are in each build
instruction and/or refer to this table with
approximate build times for the
MASTERPIECE season.
11
Bag No. Time Bag No. Time
1 16 mins 8 15 mins
2 20 mins 9 13 mins
3 30 mins 10 21 mins
4 6 mins 11 13 mins
5 20 mins 12 10 mins
6 35 mins 13 7 mins
7 15 mins 14 1 min
TIP: A student who is artistic and enjoys creating
designs with LEGO dots will enjoy building the
model in Bag 03.
© FLLTutorials.com, 2023
Unnumbered Bags
● Larger elements such as hoses, long axles,
large frames, and 13M/15M beams are just loose
in the box or in unnumbered bags. (M = LEGO
Modules)
● Check the top of the instructions page for parts
needed before you begin.
6 Elements in Unnumbered Bags
+ 2 Loose Items (black axles)
+ Everything in Bag 10(s)
12
TIP: If you are trying to presort by mission model so
that a student can take elements home and build, be
sure you look for all the larger items in the
unnumbered bags or loose items at the bottom of the
box.
© FLLTutorials.com, 2023
Flip Symbol
● The model sometimes requires
flipping before the next element is
added. Check before you add the
pins/next element
13
© FLLTutorials.com, 2023
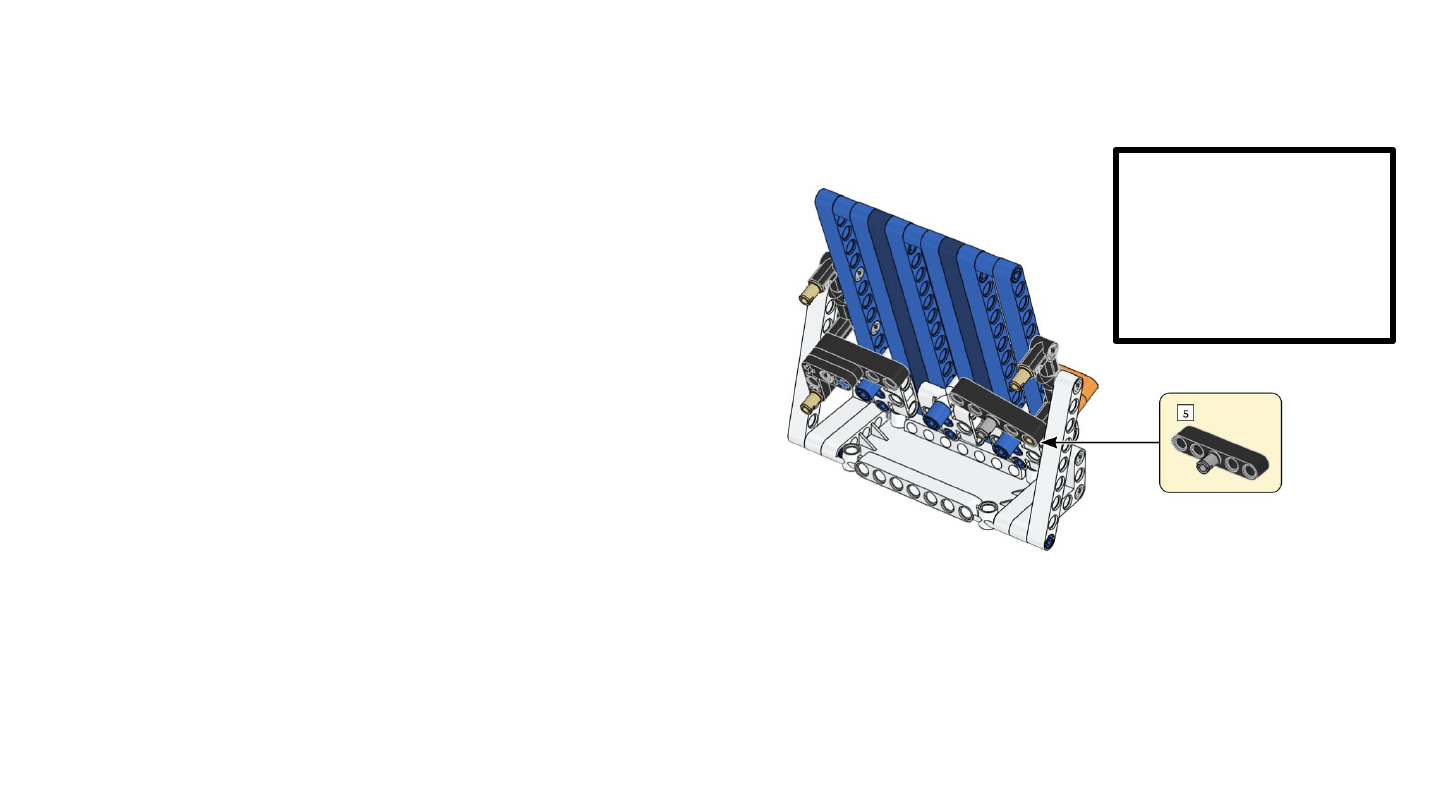
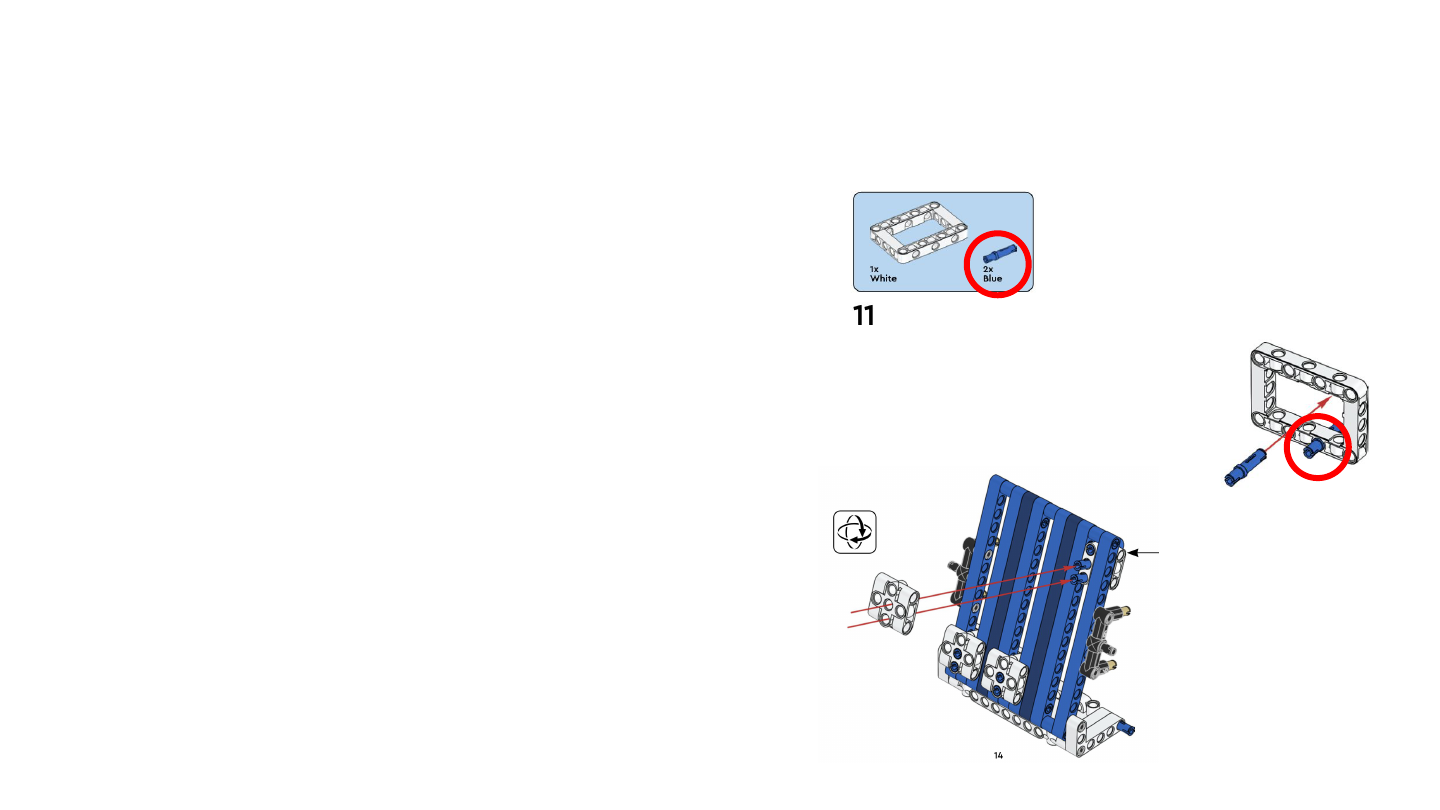
Arrows
● Sometimes instructions have arrows or
show where one element is added.
● However, pay attention to how many items
are in the blue box and look for them in the
image.
● Pay attention to which pins/holes you need
to use. It is easy to put a peg in the wrong
hole.
● Sometimes there is no arrow indicator, but
if you look closely, elements were added in
the step.
14
In Step 11 you can see
an arrow for 1 pin.
However another blue
pin has already been
inserted in this step

Setting Up
the Mat
15
© FLLTutorials.com, 2023
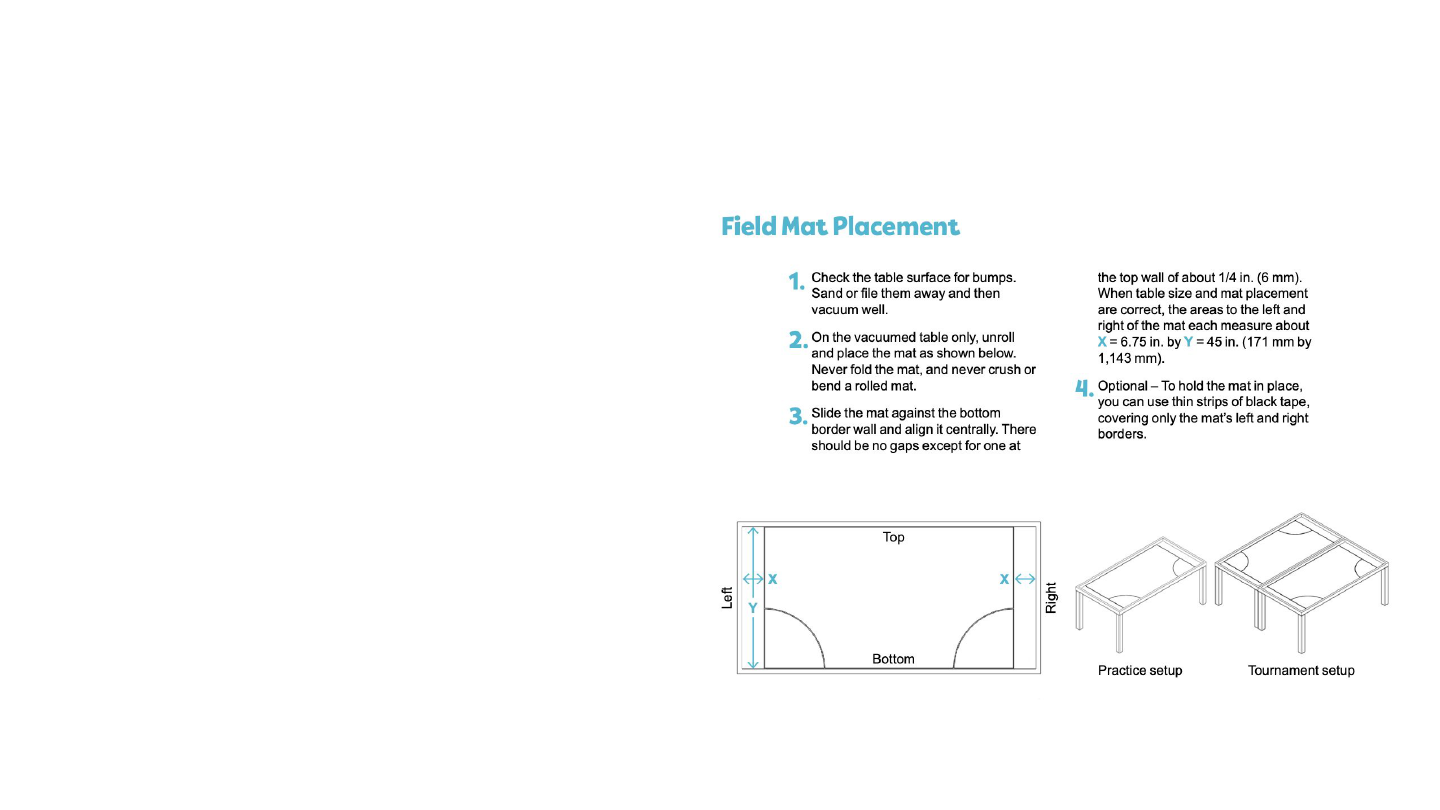
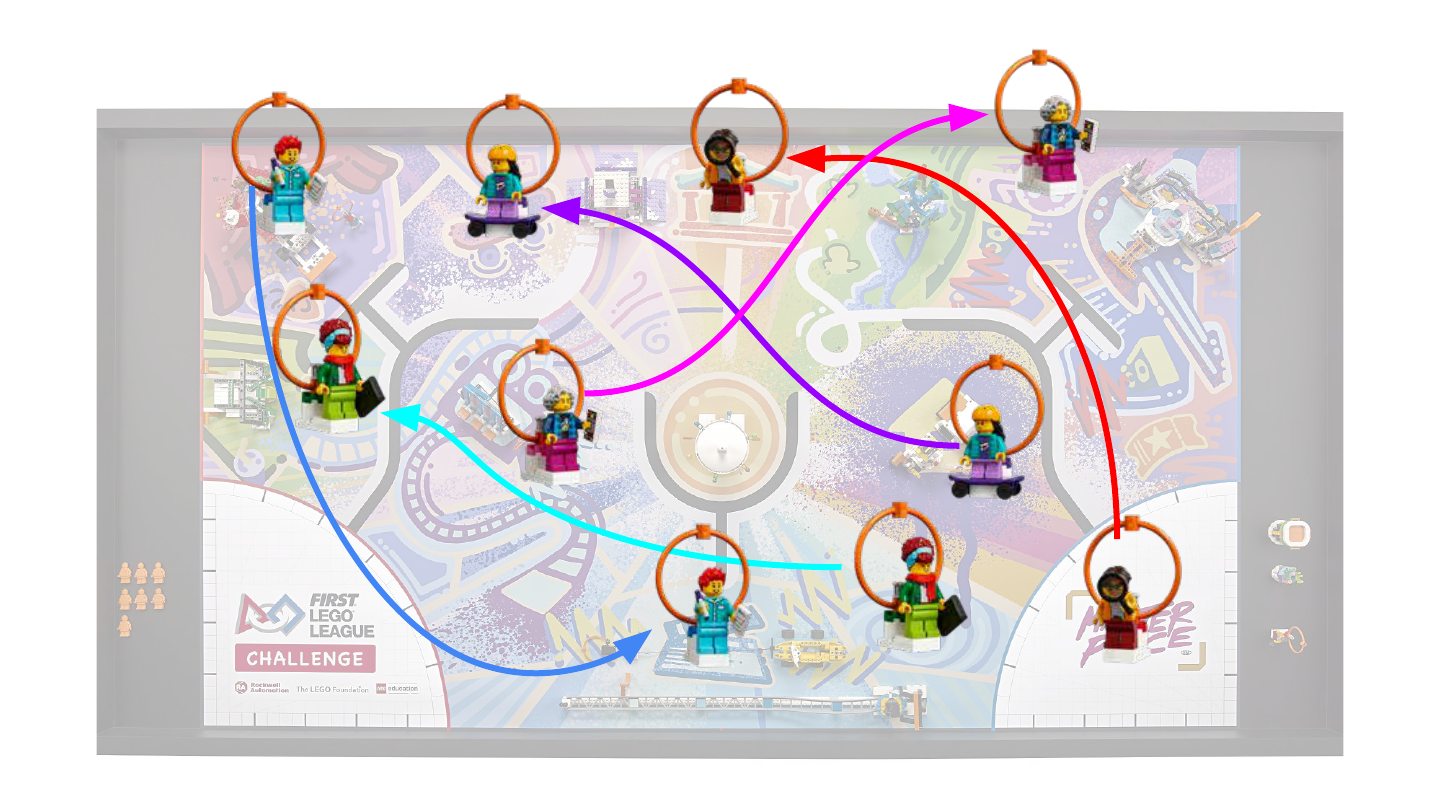
Setting up the Challenge Mat
● Placement of the challenge mat is a
very important step before placing
the models on it.
● The rules for placement can vary
every year (Check the Robot Game
Rulebook and see image on right)
● The instructions will tell you how far
East-to-West and North-to-South the
mat should be placed relative to the
table.
16
© FLLTutorials.com, 2023
Setting up the Models
● Place finished models loosely on
the challenge mat.
● Be sure to follow the text and
images in the Field Setup section of
the Robot Game Rulebook very
carefully. They will tell you which
way a model should face.
● Use the markings on the challenge
mat itself as alignment points. If it
doesn’t align, it is probably an
indication of something wrong with
the build itself.
17
Tip: Watch this YouTube video to see how to align the
models on the Challenge Mat.
© FLLTutorials.com, 2023
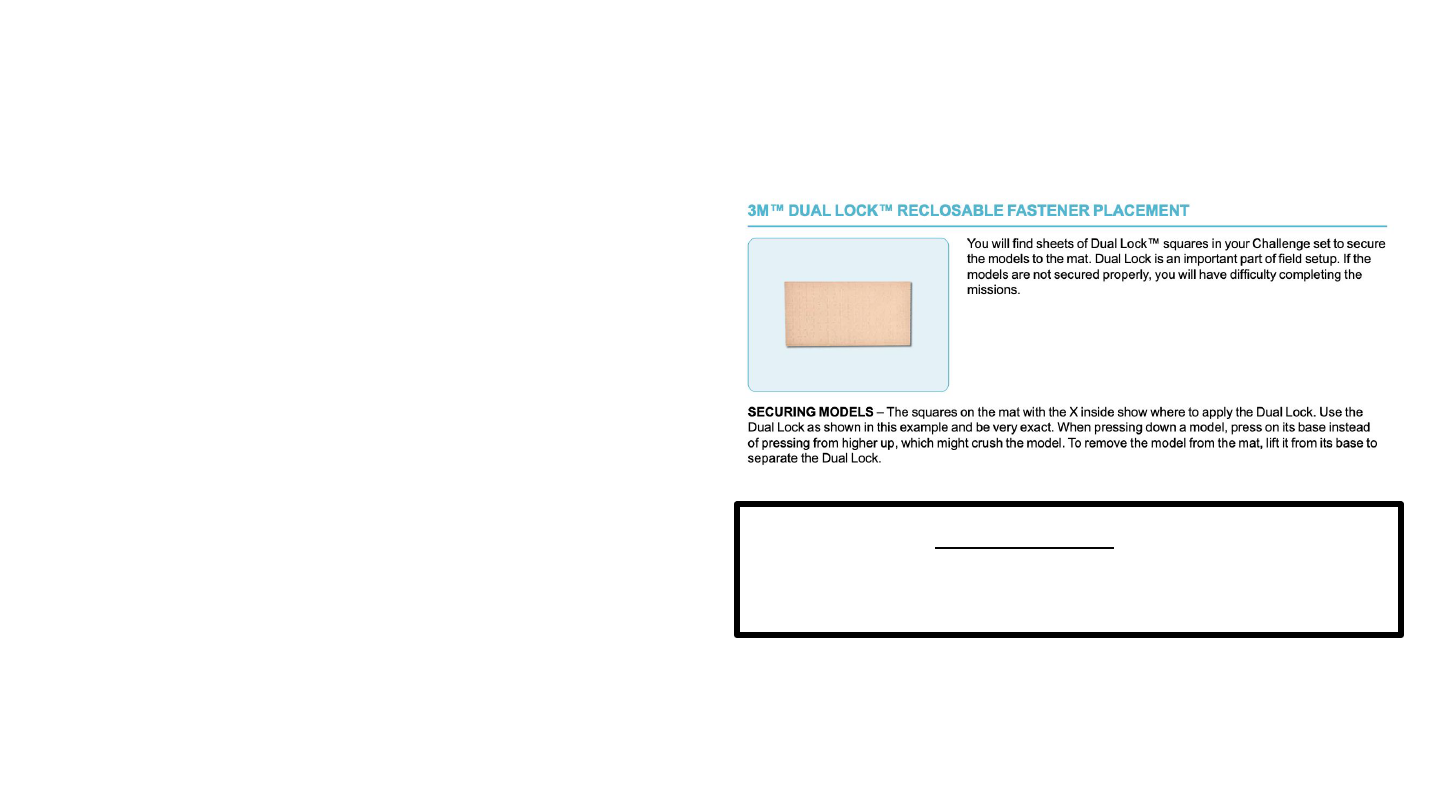
Pressing Models into Place
● Once everything looks correct, follow
the set-up instructions to place the
dual-lock (square with X) on the
Challenge mat as shown in the Robot
Game Rulebook.
● Press the models down in place holding
and pressing as close to the dual lock
as possible.
● Not all models will need to be
dual-locked. Some will stay loose on the
markings on the mat.
18
Tip: Watch this YouTube video if you need an
example of how to apply the dual lock and place
mission models.

© FLLTutorials.com, 2023
Packing Away Models
● You can pack up and put away your
challenge set if you need to. The models
are generally very durable
● Remove models from as close to the dual
lock as possible.
● One side of the dual lock should come off
with the model. The other side stays on the
mat.
● Place all smaller items such as minifigures
in ziplock bags so that you do not lose the
accessories
19
Packing instructions created
by MK Baldwin are available
on FLLTutorials

Common
Questions
and Issues
20

© FLLTutorials.com, 2023
Should I glue or lubricate the models?
● Do not glue (permanently or temporarily) any
models even if they tend to “fall apart”
● Do not lubricate any models that seem hard to
activate
● You should not make models behave differently
than the ones at your competition
● If models are not acting as intended, press
elements together and/or rebuild the model.
● Until FIRST issues an official update, do not
deviate from official build instructions.
21

© FLLTutorials.com, 2023
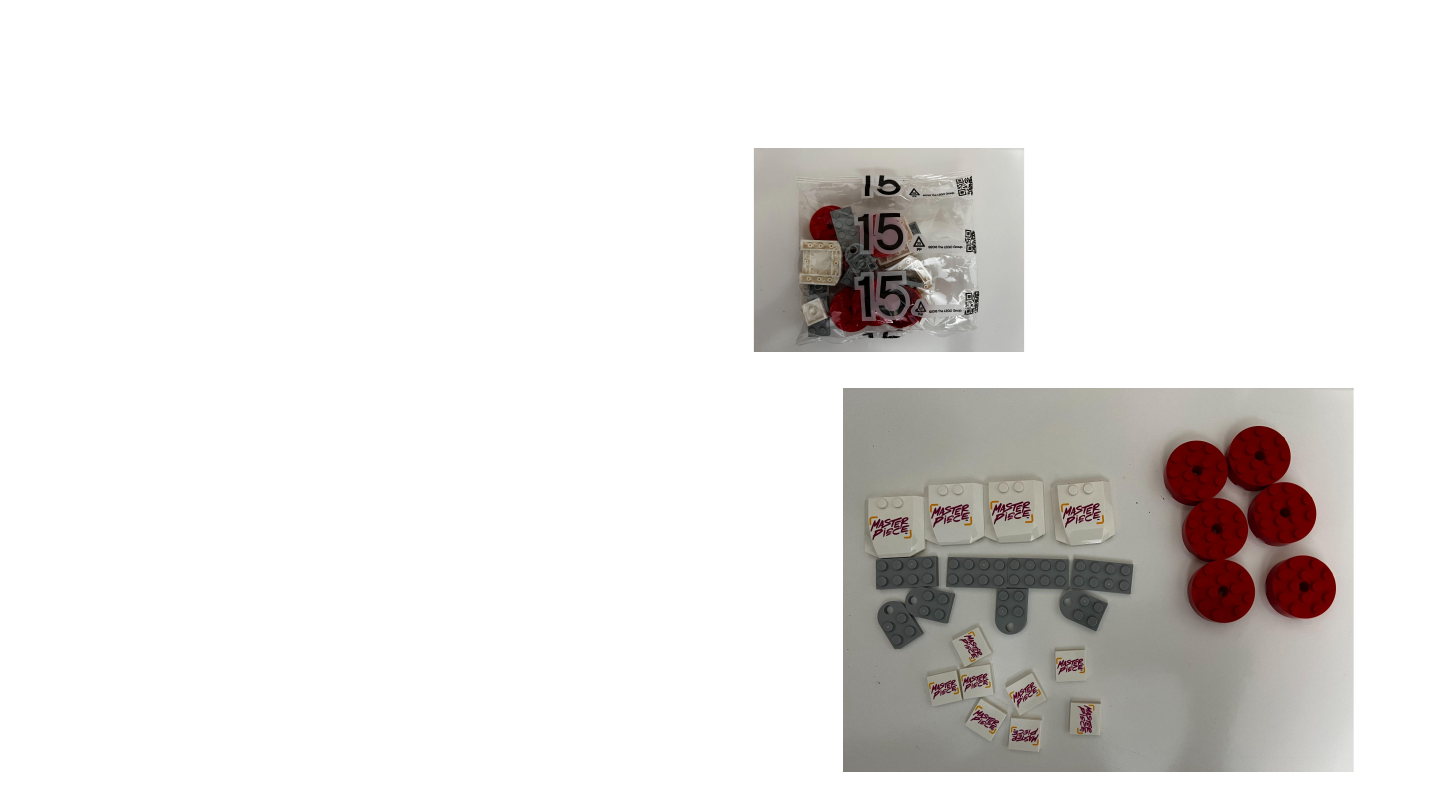
Leftovers
● There are always some small
leftover elements
● The image on the right shows all
the leftover elements from every
bag number once you have finished
building the models
● There should be no large elements
leftover
● Bag 4 of MASTERPIECE contains a lot of
extra LEGO bricks that are used in
Mission 04 (MASTERPIECE) (see the
Robot Game Rulebook for further
instructions on this mission.)
23
© FLLTutorials.com, 2023
No Build Instructions
● No build instructions for a bag
number simply means the bricks are
used in some other way
● Bag 15 contains team souvenirs
(badges, tiles) as well and 6
precision tokens which are used by
the referee (see Robot Game
Rulebook).
● See the next page for building
instructions for the badges.
24
© FLLTutorials.com, 2023
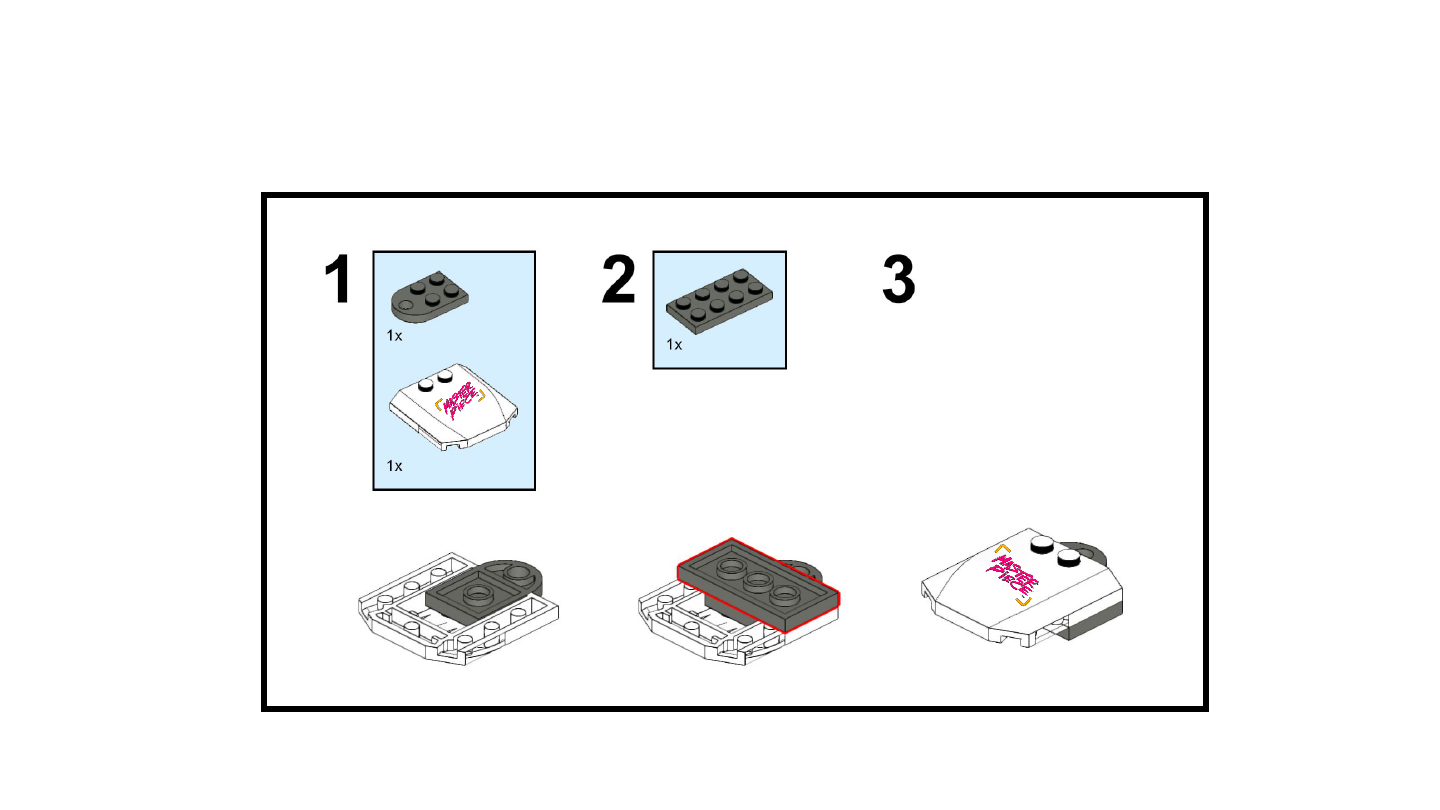
Build Instructions
25
© FLLTutorials.com, 2023
Missing Items
● It is very uncommon to be missing a LEGO element or a whole bag.
● Can’t find a small part?
○ Check the bags, check the ground, and check to see that the element
was not used earlier in another step by mistake.
● Can’t find the dual-lock?
○ Check the box again - it tends to blend in with the cardboard
● Can’t find a larger item?
○ Check the unnumbered bags or bottom of the box.
26
Tip: To prevent losing elements, make sure that you empty the bags of LEGO on to a
tray or container of some kind rather than on the floor or table.
© FLLTutorials.com, 2023
Missing Items
● If you really can’t find an item, call
LEGO for help: 1-800-422-5346
(USA/CAN) or 00800 5346 5555
(International), You can also visit the
missing parts/customer service page
of the LEGO website
● You will need to know the set number
(45823) and the part you need. The
Element Overview document in the
Building Instructions section will tell
you the part number.
27

Issues and Tips
Specific to
MASTERPIECE
28
© FLLTutorials.com, 2023
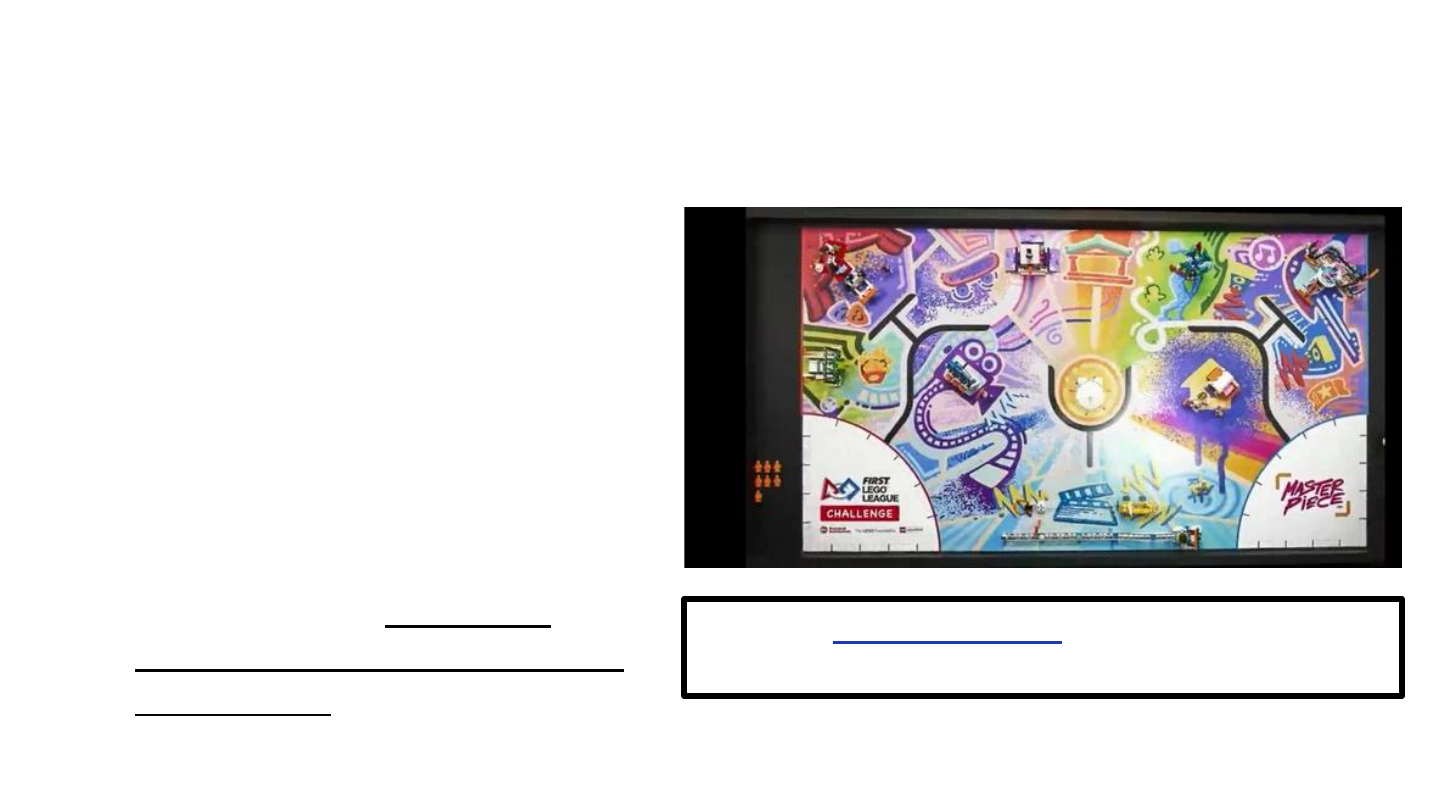
Start & End Position for Experts
29
Starts in
Either Home
Note: FIRST adapted this
image for its 9/26
Challenge Update
© FLLTutorials.com, 2023
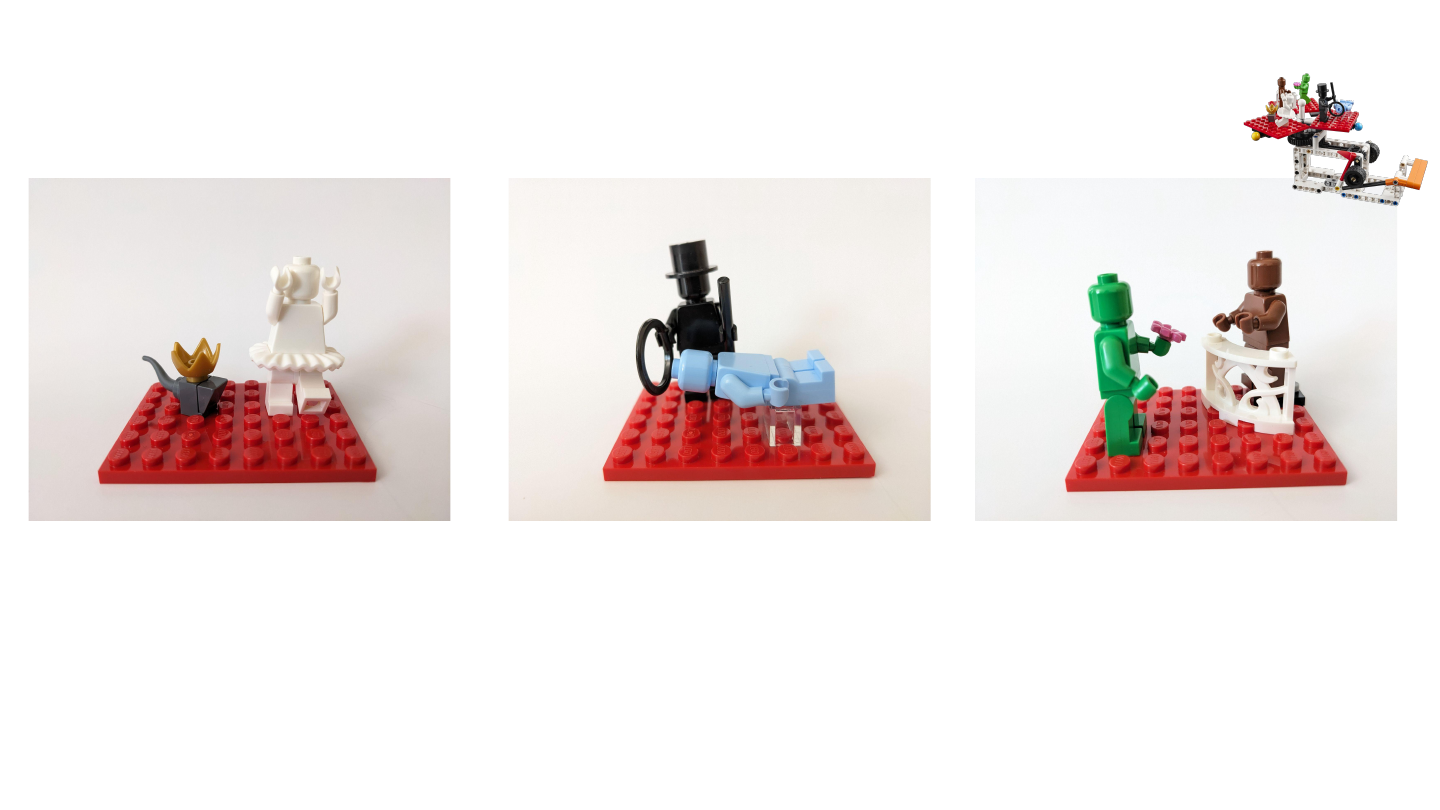
M02 Minifigure Placement (X,Y)
30
Use of Coordinates by MK Baldwin
Ballerina Right Foot (6, 4)
Mouse: (3, 4)
Transparent Brick starts: (6,2)
Light Blue Assistant: Place on
upper thigh holes
Magician Right Foot: (3,5)
Green Actor Right Foot: (2,2)
Brown Actor: 2X2 plate in
corner
White Railing Corner (7, 3)
1 2 3 4 5 6 7 8 1 2 3 4 5 6 7 8
1 2 3 4 5 6 7 8
6
5
4
3
2
1
6
5
4
3
2
1
6
5
4
3
2
1
© FLLTutorials.com, 2023
M03 and M06 Minifigure Placement (X,Y)
31
Purple Left Foot: (6, 4)
1 2 3 4 5 6 7 8
6
5
4
3
2
1
Note: Activated model
(orange lever pushed in all
the way) spins Singer
Singer Right Foot: (3, 5)
1 2 3 4 5 6

© FLLTutorials.com, 2023
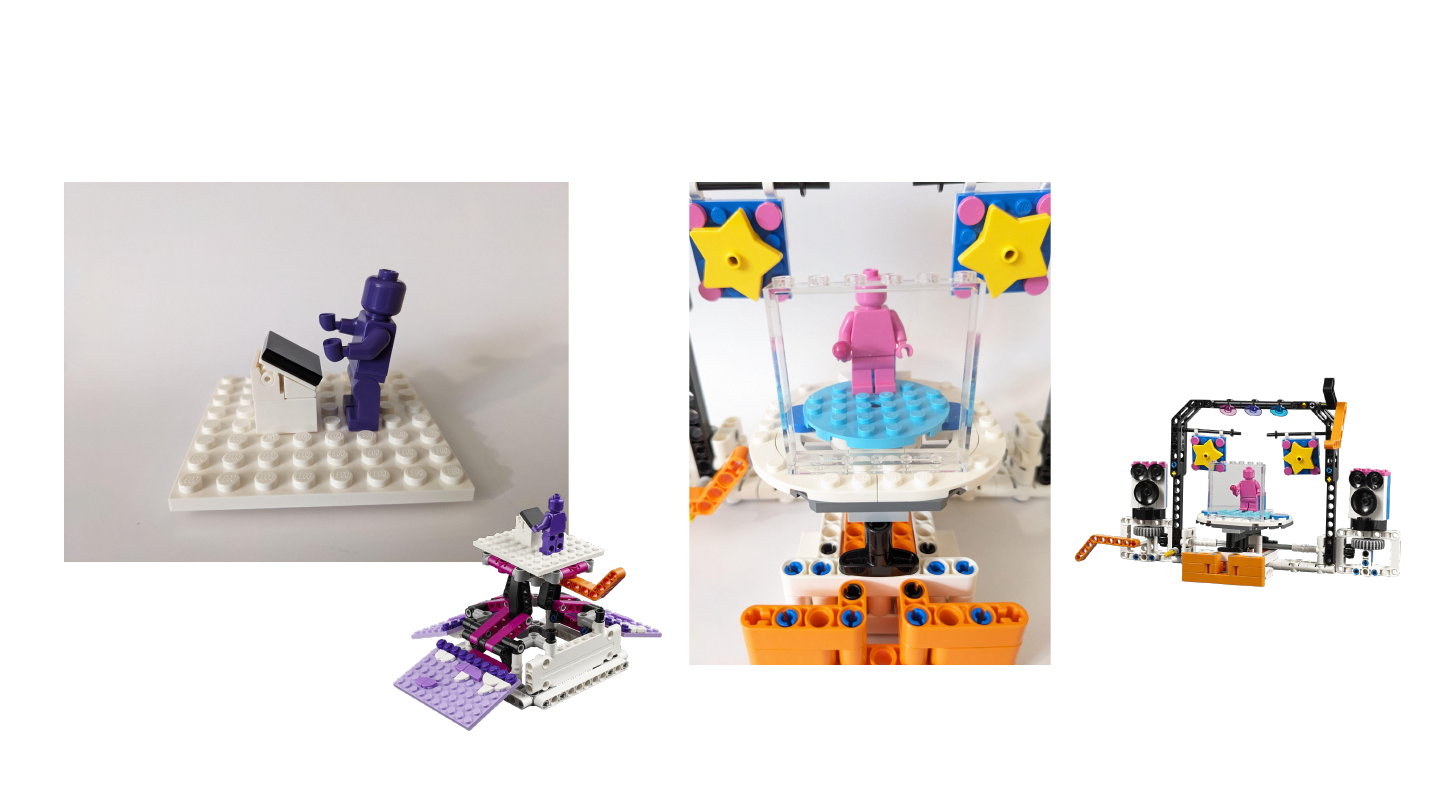
M05 Minifigure Placement
32
When model is at the start-of-match
position (flower petals are closed)
© FLLTutorials.com, 2023
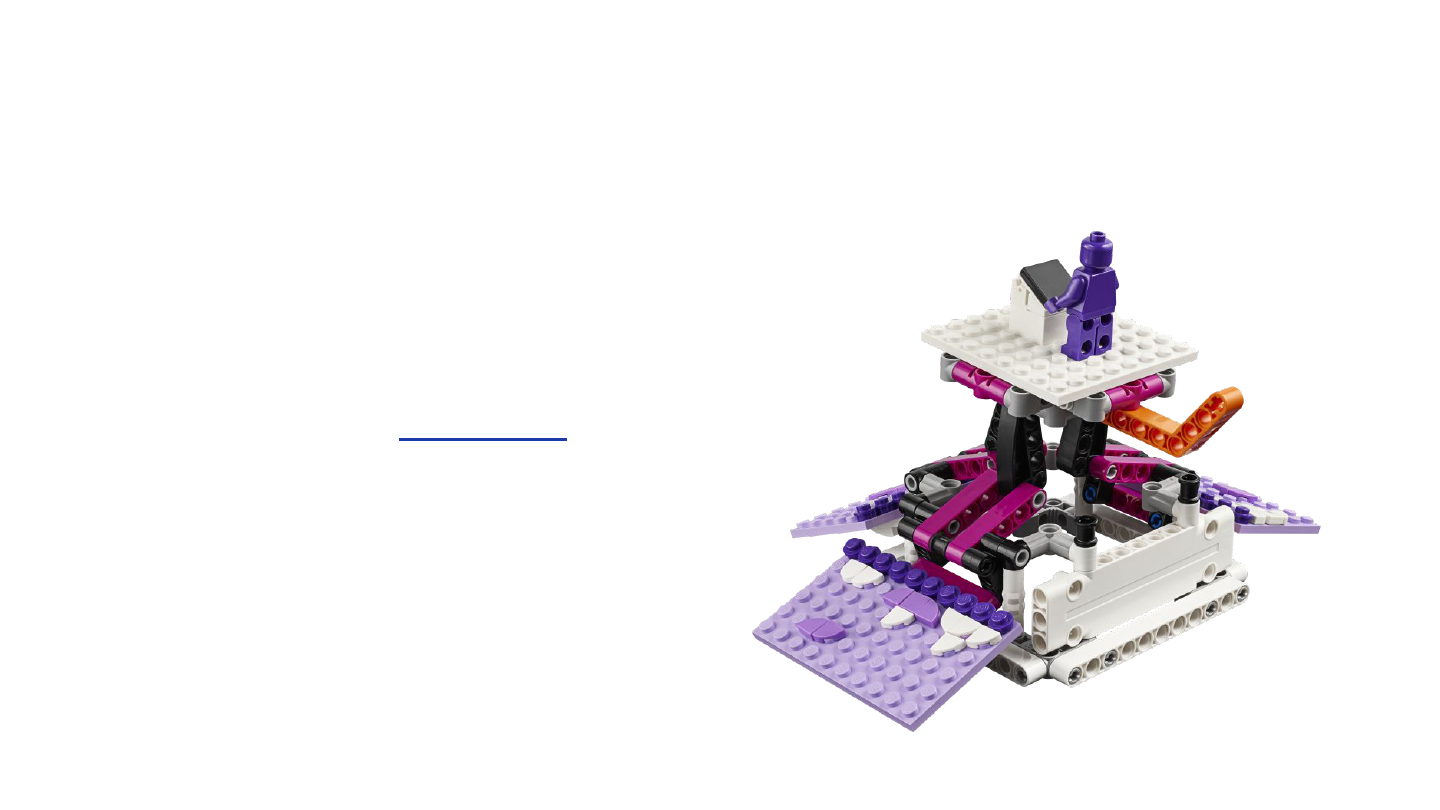
M05 Model Behavior
● This model seems to be behaving differently for
different teams.
● The Challenge Update from 10/16 states: “Teams
should prepare to rotate the orange activation lever
of the augmented reality statue mission model a full
180 degrees.”
33
TIP: Teams need to be prepared for some variation in models as long as it is within the normal expected
behavior of the model. They can graciously ask the referee to check a model prior to a robot run.
© FLLTutorials.com, 2023
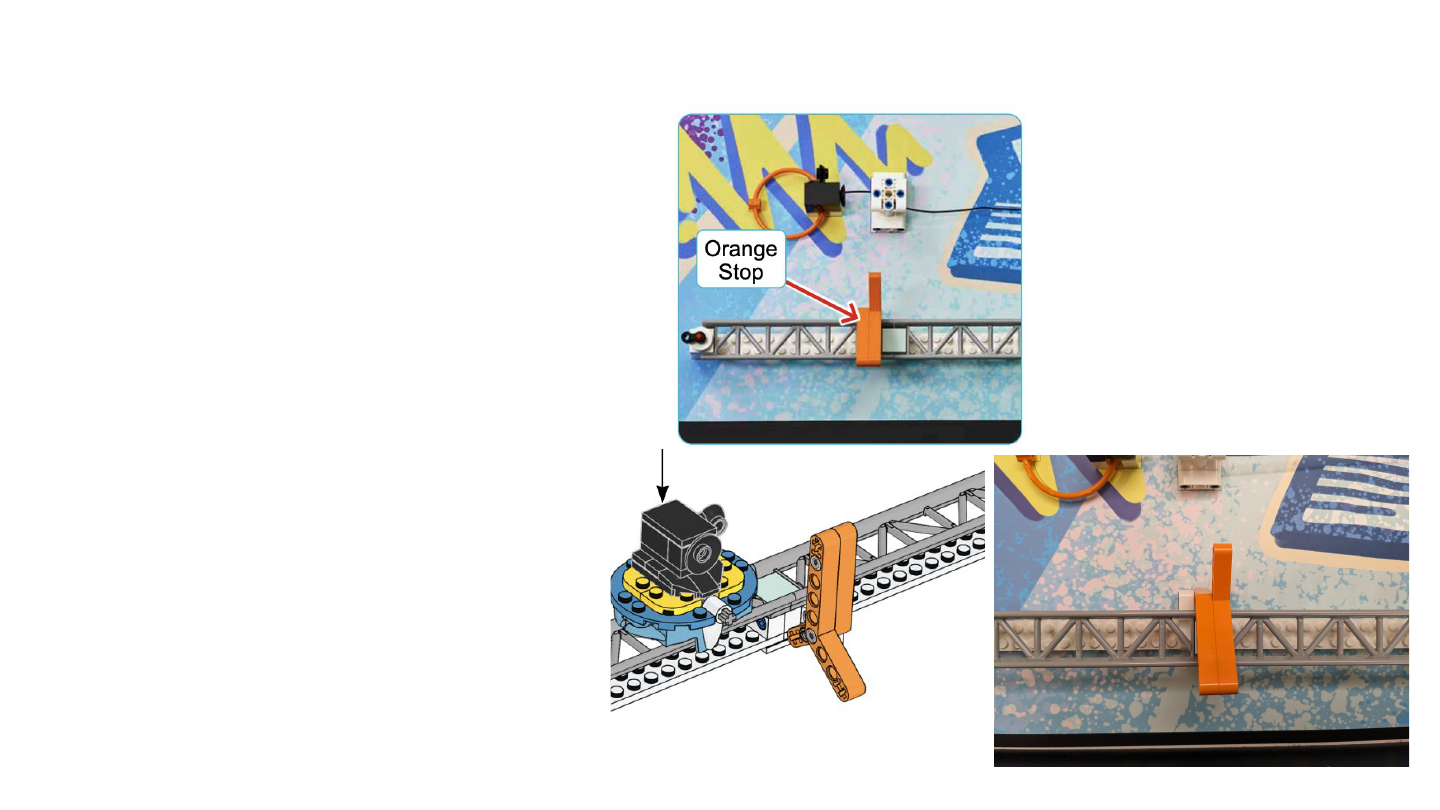
M08 Error
● In the Robot Game Rulebook,
the images for M08 seem to
indicate that the Orange Stop
lies past the light blue tile
when down.
● However, if you follow the
build instructions, the Orange
Stop lays over the light blue
tile.
● An official Challenge Update
was issued on 8/22 about this
error. Please follow the
Building Instructions.
34
Robot Game Rulebook
Build Instructions for Bag 7
© FLLTutorials.com, 2023
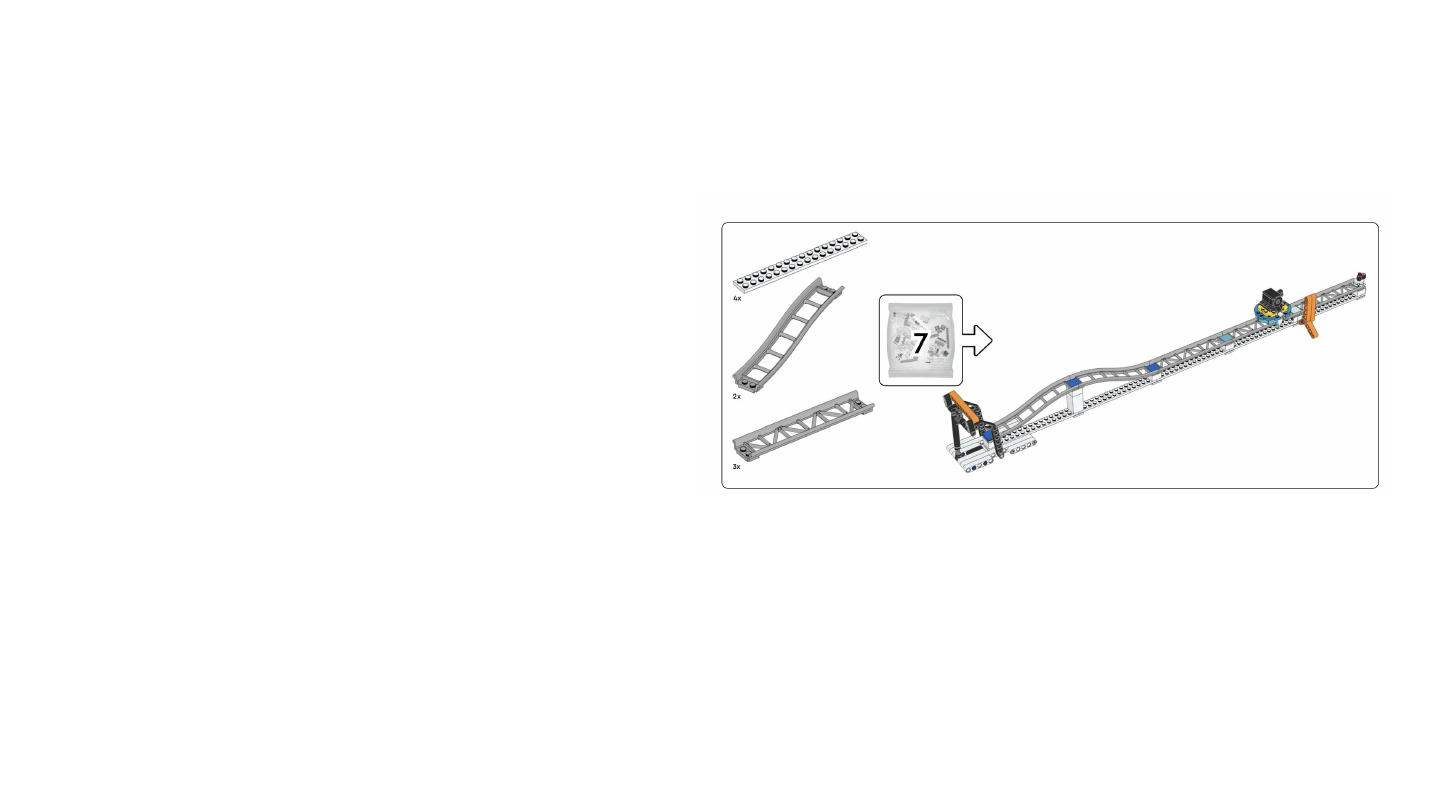
Bag 7 Error
● The first page indicates that you
need four 2X16 white plates.
However, you need five of them to
build the model.
● The opening page also does not
mention that you need two 13M lift
arms in white from the unnumbered
bags.
● The extra parts are in the
unnumbered bags.
35
© FLLTutorials.com, 2023
Bag 8 Error
● The opening page of
instructions does not
mention that you also
need two 13M light
blue liftarms from the
unnumbered bags.
36
© FLLTutorials.com, 2023
Bag 9 Error
● The opening page of the
instructions does not
indicate you need a white
13M from an unnumbered
bag.
37

© FLLTutorials.com, 2023
Credits
● This document is created and maintained by
FLLTutorials.com where you can access lessons, worksheets
and guides for the current season.
● Thank you to members of Facebook Group, FLL: Share &
Learn for sharing some of the content used in this document
such as problems with the models.
38
© FLLTutorials.com, 2023
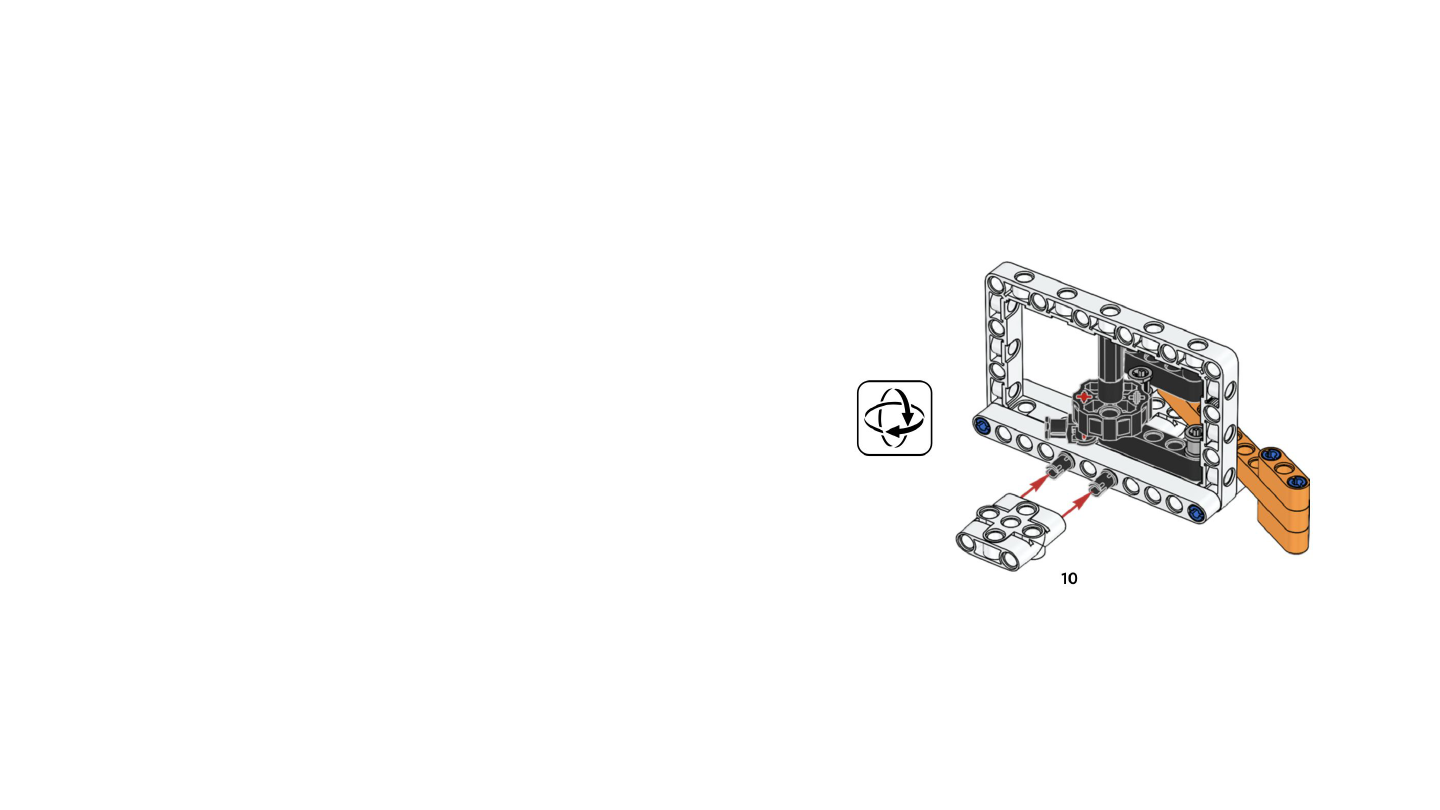
Bag 11 Error
● Step 12 points to the wrong part of the model. Be careful where you
insert the parts.
39
Insert here
