DA1026W-18
DA1026B-18
DA1026P-18
DA1026WN-18
0-72000-96501-6
0-65857-15766-6
0-72000-96502-3
0-65857-14462-8
WHITE
BLACK
PINE
WALNUT
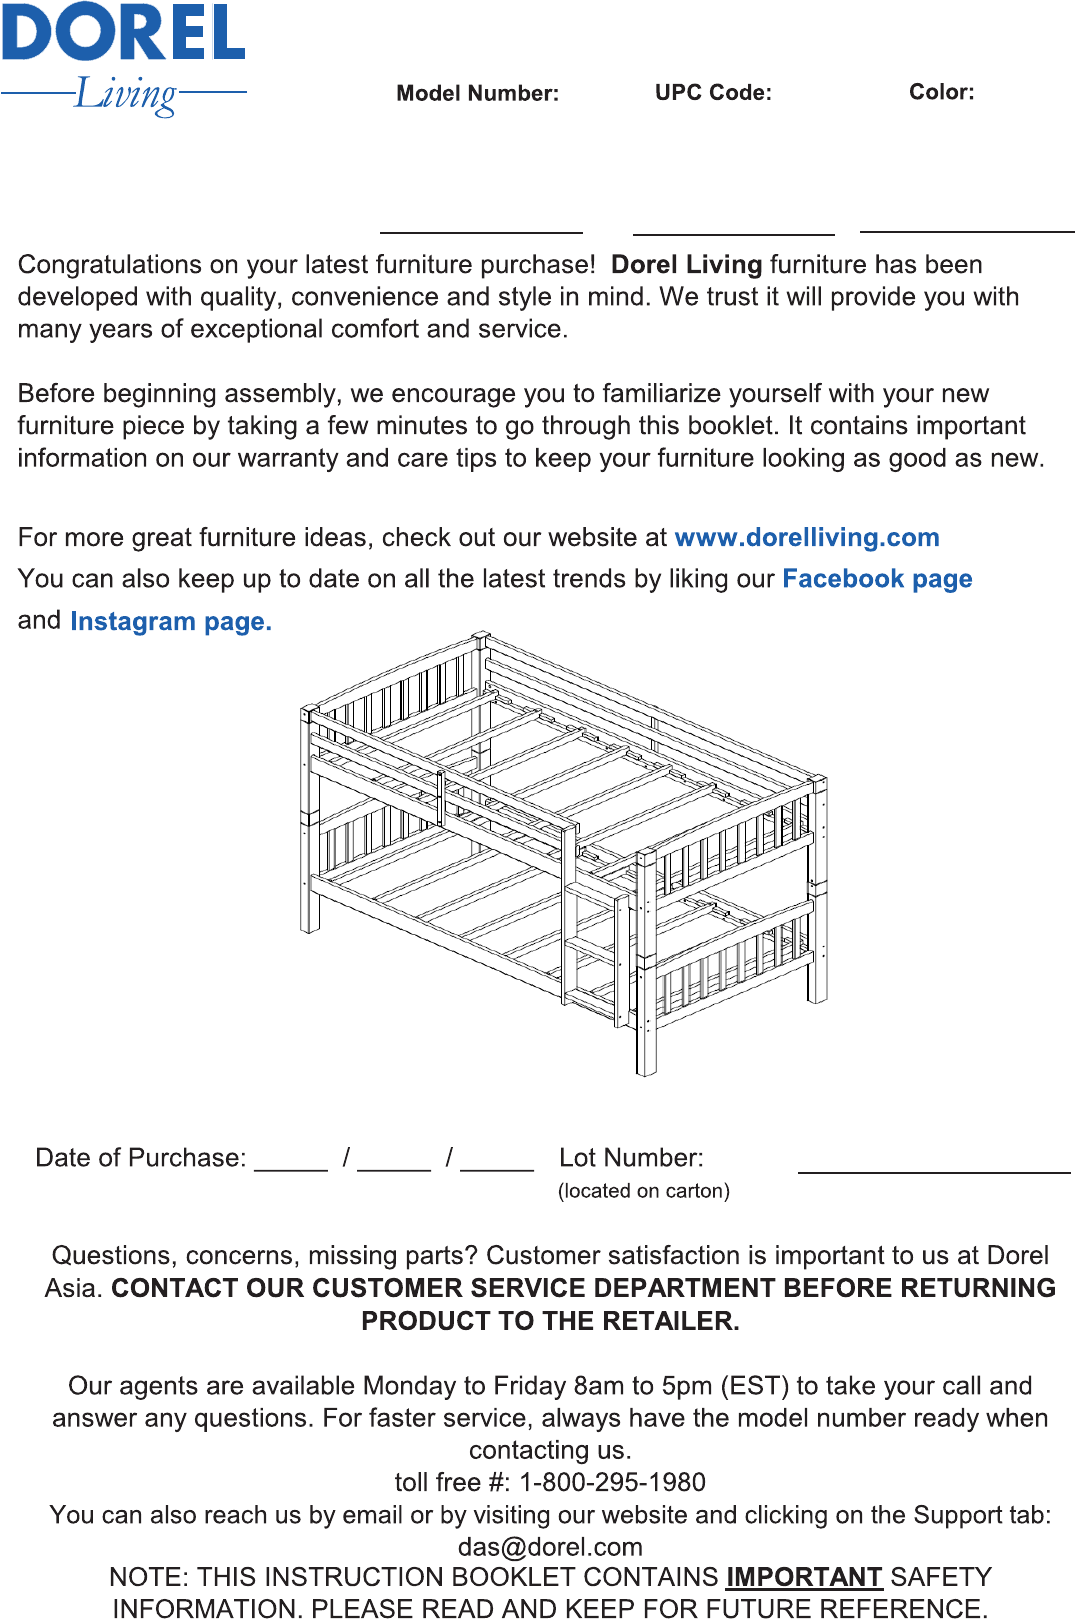
BELMONT BUNK BED

BELMONT BUNK BED
DA1026P-18 PINE / DA1026W-18 WHITE / DA1026WN-18 WALNUT / DA1026B-18 BLACK
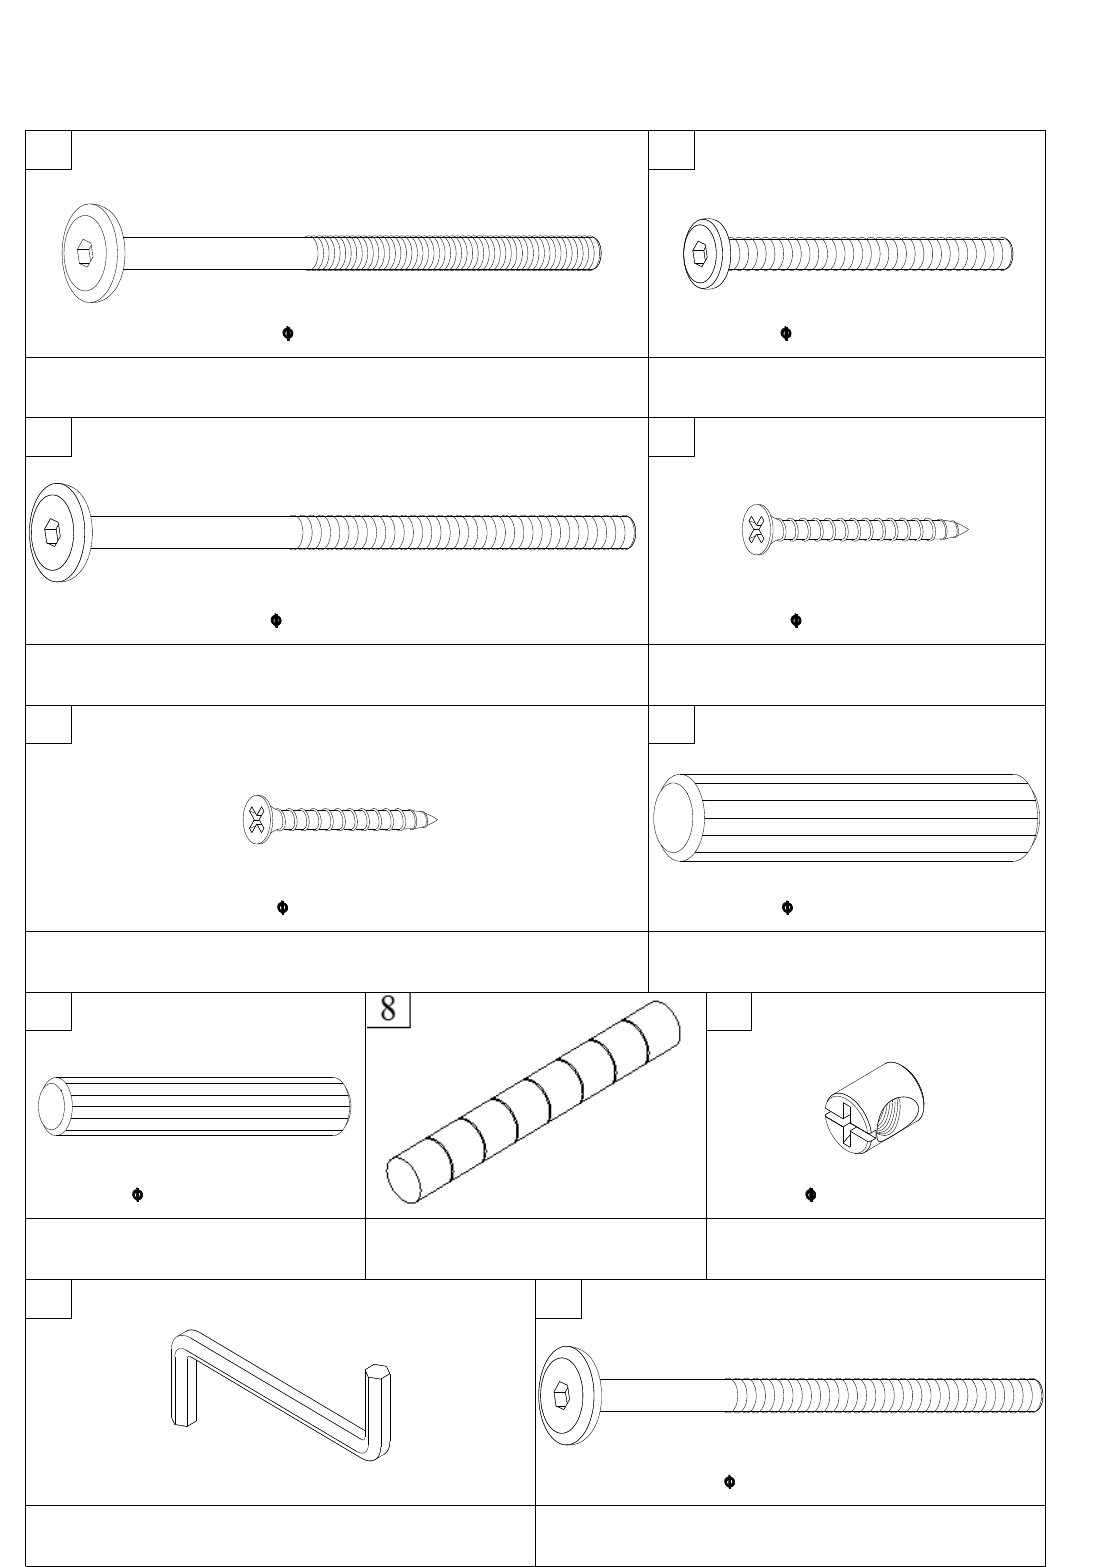
JOINT CONNECTOR (4mm HEX HEAD)
1/4" x 85mm
16 PCS
6.5mm x 48mm
WOOD JOINT CONNECTOR (4mm HEX HEAD)
6.5mm x 100mm
16 PCS
BARREL NUT
11.8mm x 15mm
16 PCS
FLAT HEAD SCREW
4mm x 35mm
32 PCS
FLAT HEAD SCREW
4mm x 30mm
6 PCS
WOOD DOWEL
10mm x 50mm
28 PCS
1
HARDWARE LIST
3
4
2
WOOD JOINT CONNECTOR (4mm HEX HEAD)
12 PCS
5
6
7
9
10 11
WOOD DOWEL
15mm x 60mm
4 PCS
WOOD JOINT CONNECTOR (4mm HEX HEAD)
6.5mm x 80mm
6 PCS
STOPPER
4 PCS
HEX KEY
1 PC
1
BELMONT BUNK BED
DA1026P-18 PINE / DA1026W-18 WHITE / DA1026WN-18 WALNUT / DA1026B-18 BLACK
A
A
B
C
D
D
E
F
F
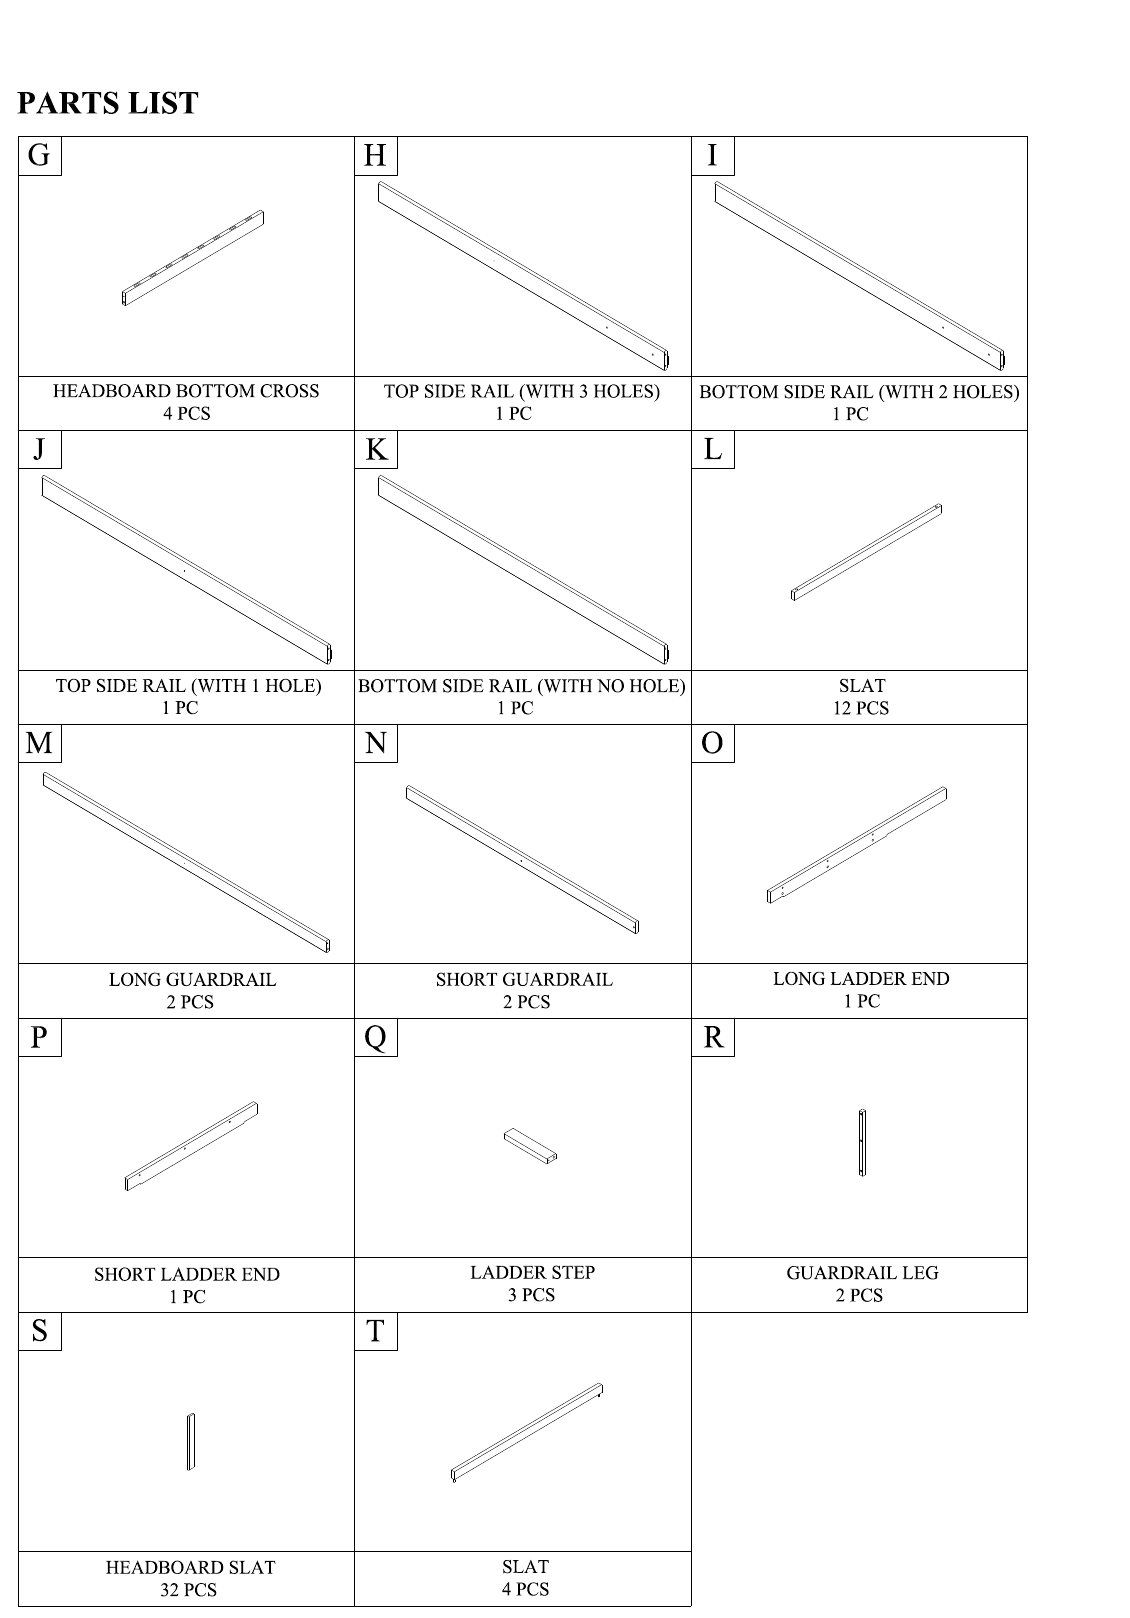
G
G
H
J
K
L
M
N
L
L
R
R
S
S
T
T
A
B
PARTS LIST
C
D
E
F
TOP POST
2 PCS
BOTTOM POST
2 PCS
HEADBOARD TOP CROSS
4 PCS
TOP POST
1 PC
TOP POST
1 PC
BOTTOM POST
2 PCS
2
BELMONT BUNK BED
DA1026P-18 PINE / DA1026W-18 WHITE / DA1026WN-18 WALNUT / DA1026B-18 BLACK
3
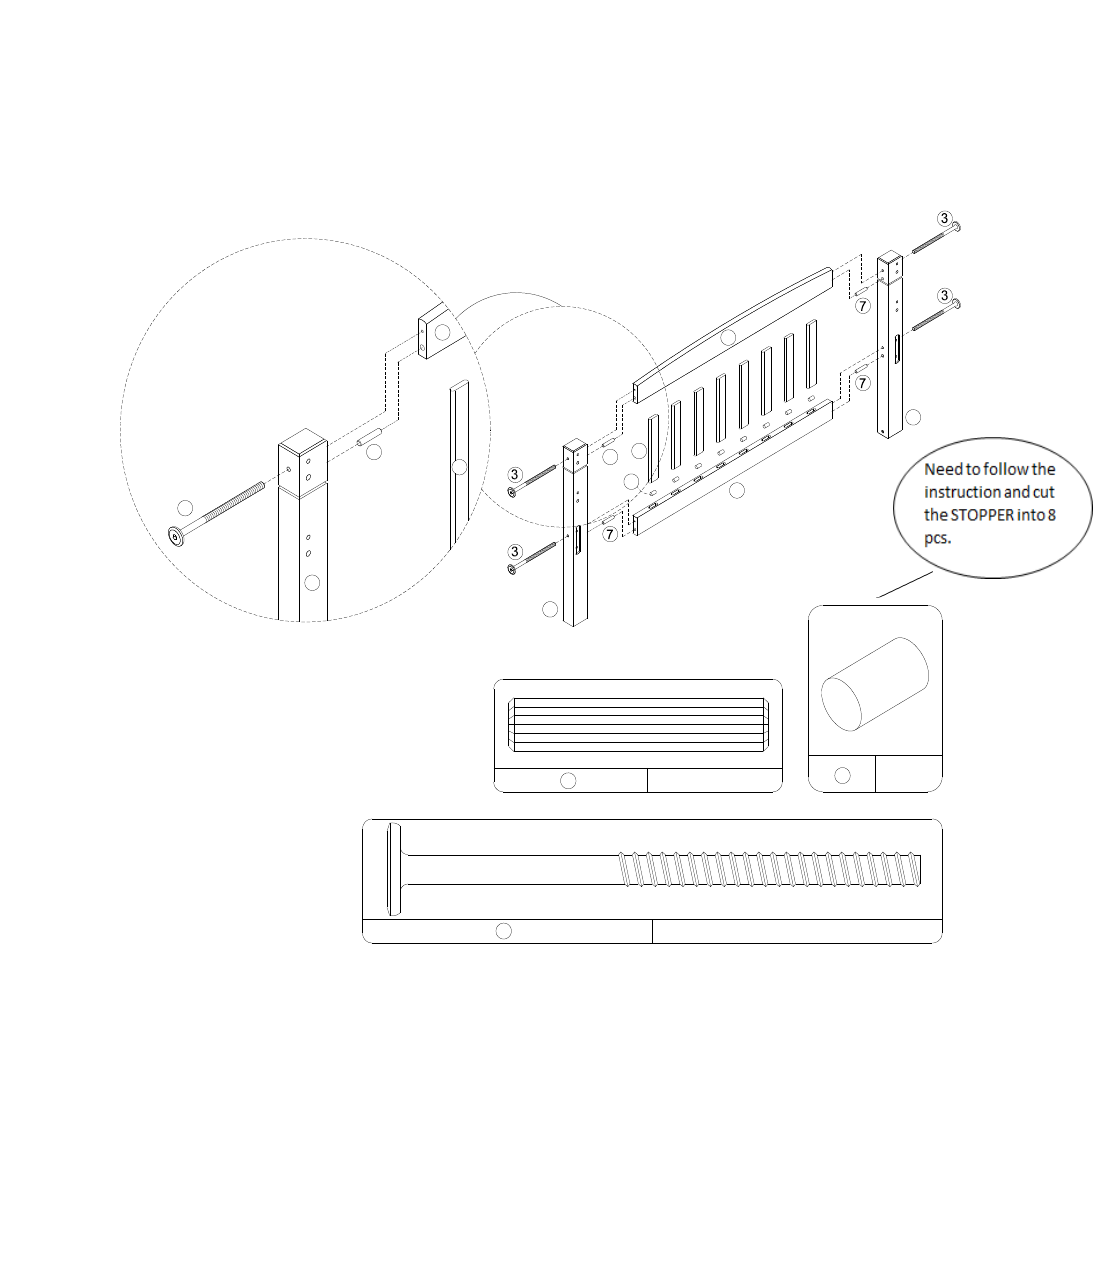
NOTES: Headboard top cross (F) and headboard bottom cross (G) may require that they be pulled
closer together or further apart in order to allow wood dowels (7) to align with holes in top posts (A
and B).
Insert stoppers (8) and headboard slats (S) into the holes of the headboard bottom cross (G) and
push down until firmly in place. Slide the headboard top cross (F) onto the headboard slats (S). Insert
wood dowels (7) into ends of top cross (F) and bottom cross (G). Attach top posts (A & B) using wood
joint connectors (3) as shown.
BELMONT BUNK BED
DA1026P-18 PINE / DA1026W-18 WHITE / DA1026WN-18 WALNUT / DA1026B-18 BLACK
One of the headboard top cross (F) has a label on it, do not use it in this step.
STEP 1
F
S
7
3
A
8
7
B
A
S
F
G
8
8 PCS
4 PCS
7
4 PCS
3
without label
4
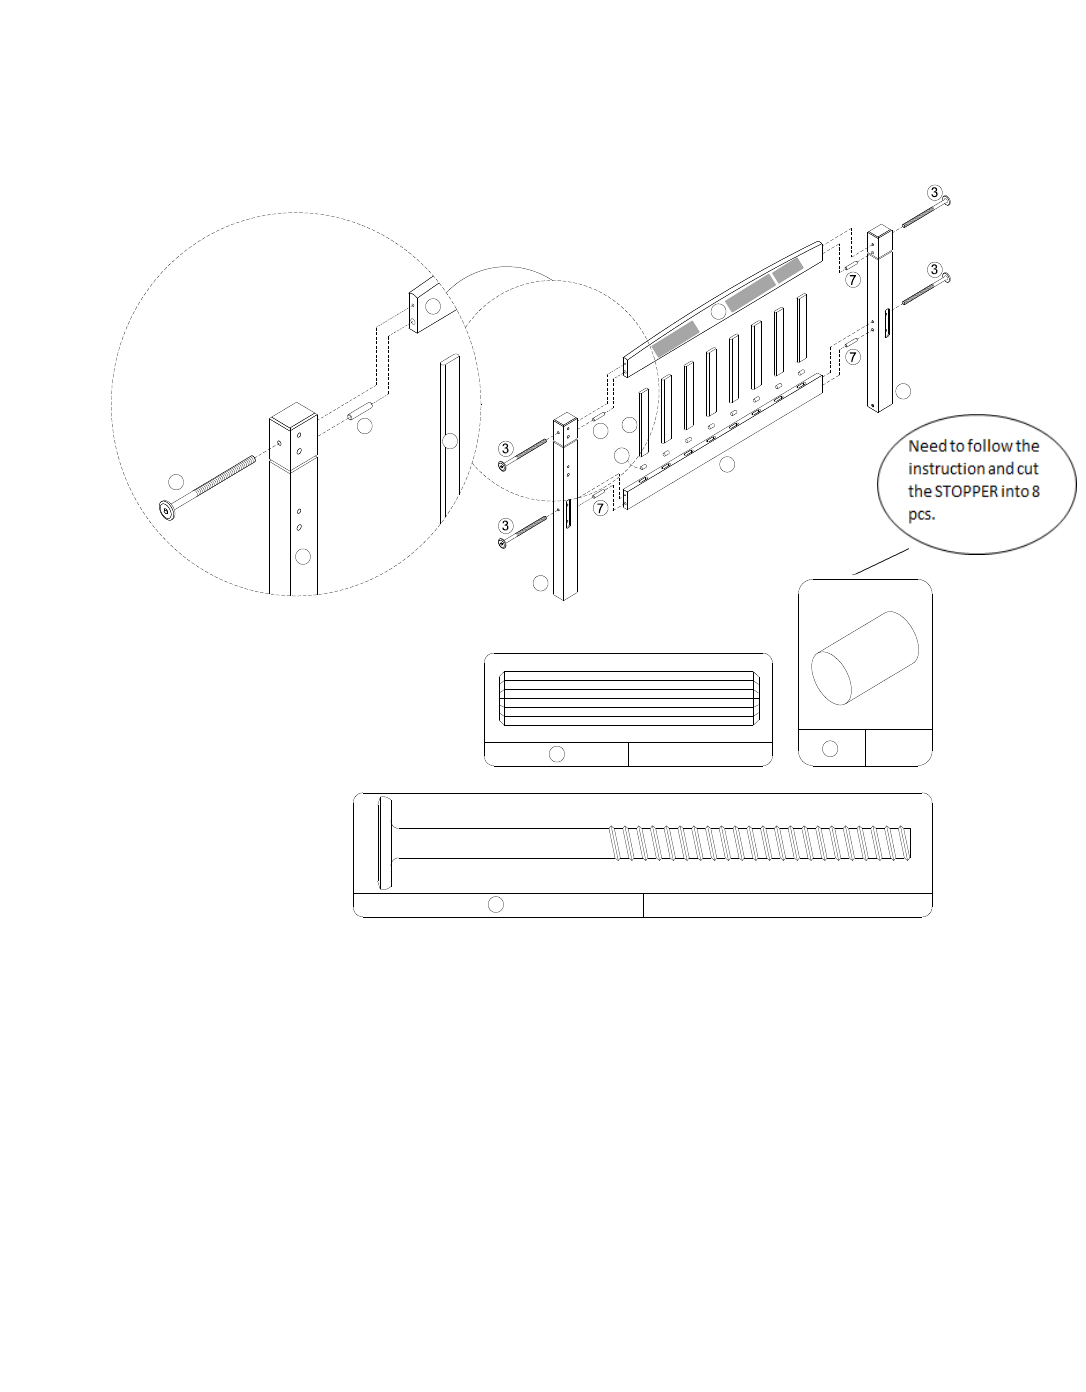
NOTE: Headboard top cross (F) and headboard bottom cross (G) may require that they are pulled
closer together or further apart in order to allow wood dowels (7) to align with holes in top posts (A
and C).
Insert stoppers (8) and headboard slats (S) into the holes of the headboard bottom cross (G) and
push down until firmly in place. Slide the headboard top cross (F) onto the headboard slats (S). Insert
wood dowels (7) into ends of top cross (F) and bottom cross (G). Attach top posts (A & C) using wood
joint connectors (3) as shown
BELMONT BUNK BED
DA1026P-18 PINE / DA1026W-18 WHITE / DA1026WN-18 WALNUT / DA1026B-18 BLACK
Use the headboard top cross with label (F) in this step.
STEP 2
F
S
7
3
A
8
7
C
A
S
F
G
8
8 PCS
4 PCS
7
4 PCS
3
with label
5
STEP 3
BELMONT BUNK BED
DA1026P-18 PINE / DA1026W-18 WHITE / DA1026WN-18 WALNUT / DA1026B-18 BLACK
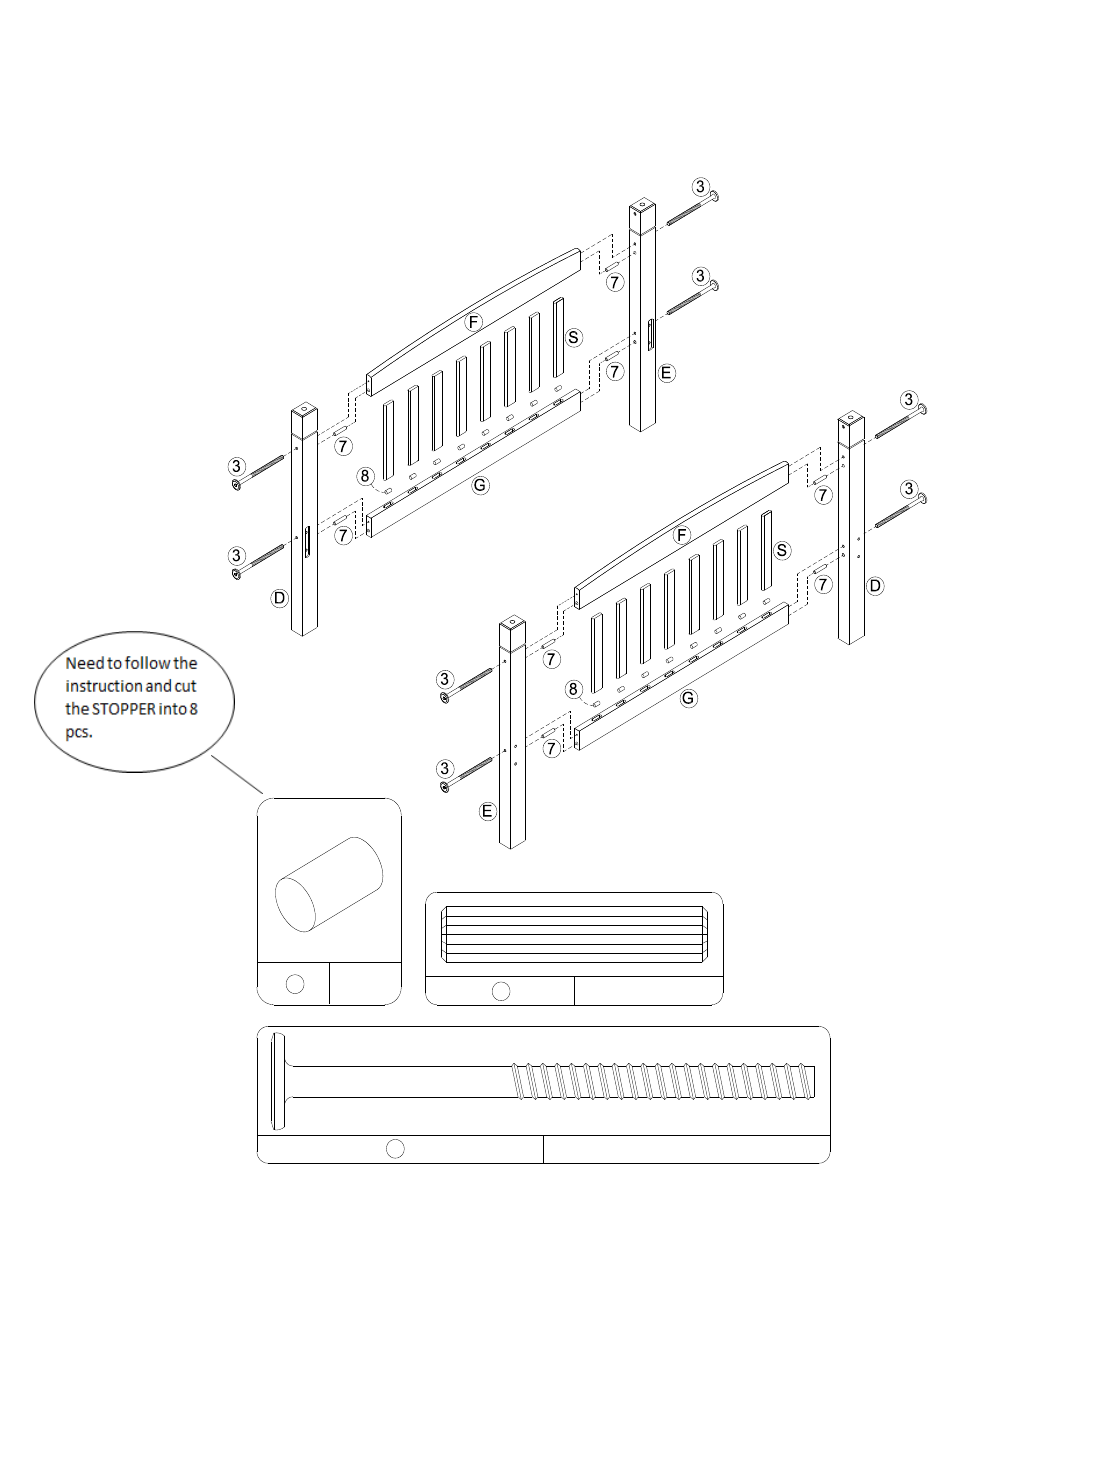
Insert stoppers (8) and headboard slats (S) into each hole in the headboard bottom cross (G) and push
them down until firmly in place. Slide headboard top cross (F) onto headboard slats (S). Insert wood dowels
(7) into ends of top cross (F) and bottom cross (G). Attach bottom posts (D and E) using wood joint
connectors (3) as shown.
Repeat the above step to assemble the remaining headboard.
8
16 PCS
7
8 PCS
8 PCS
3
6

BELMONT BUNK BED
DA1026P-18 PINE / DA1026W-18 WHITE / DA1026WN-18 WALNUT / DA1026B-18 BLACK
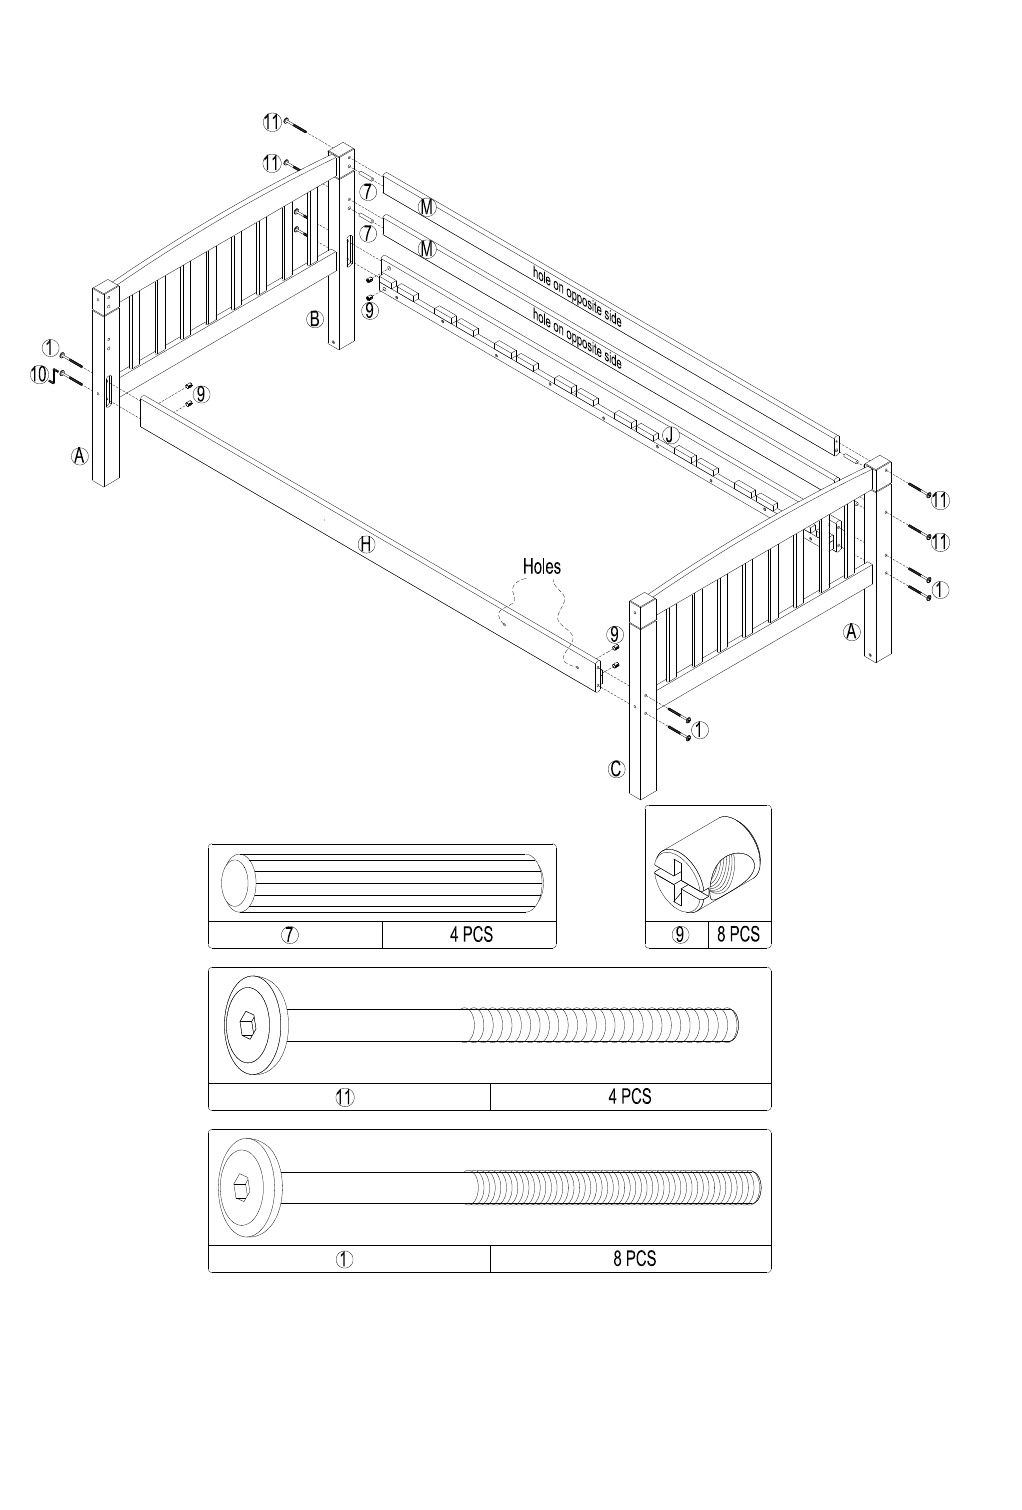
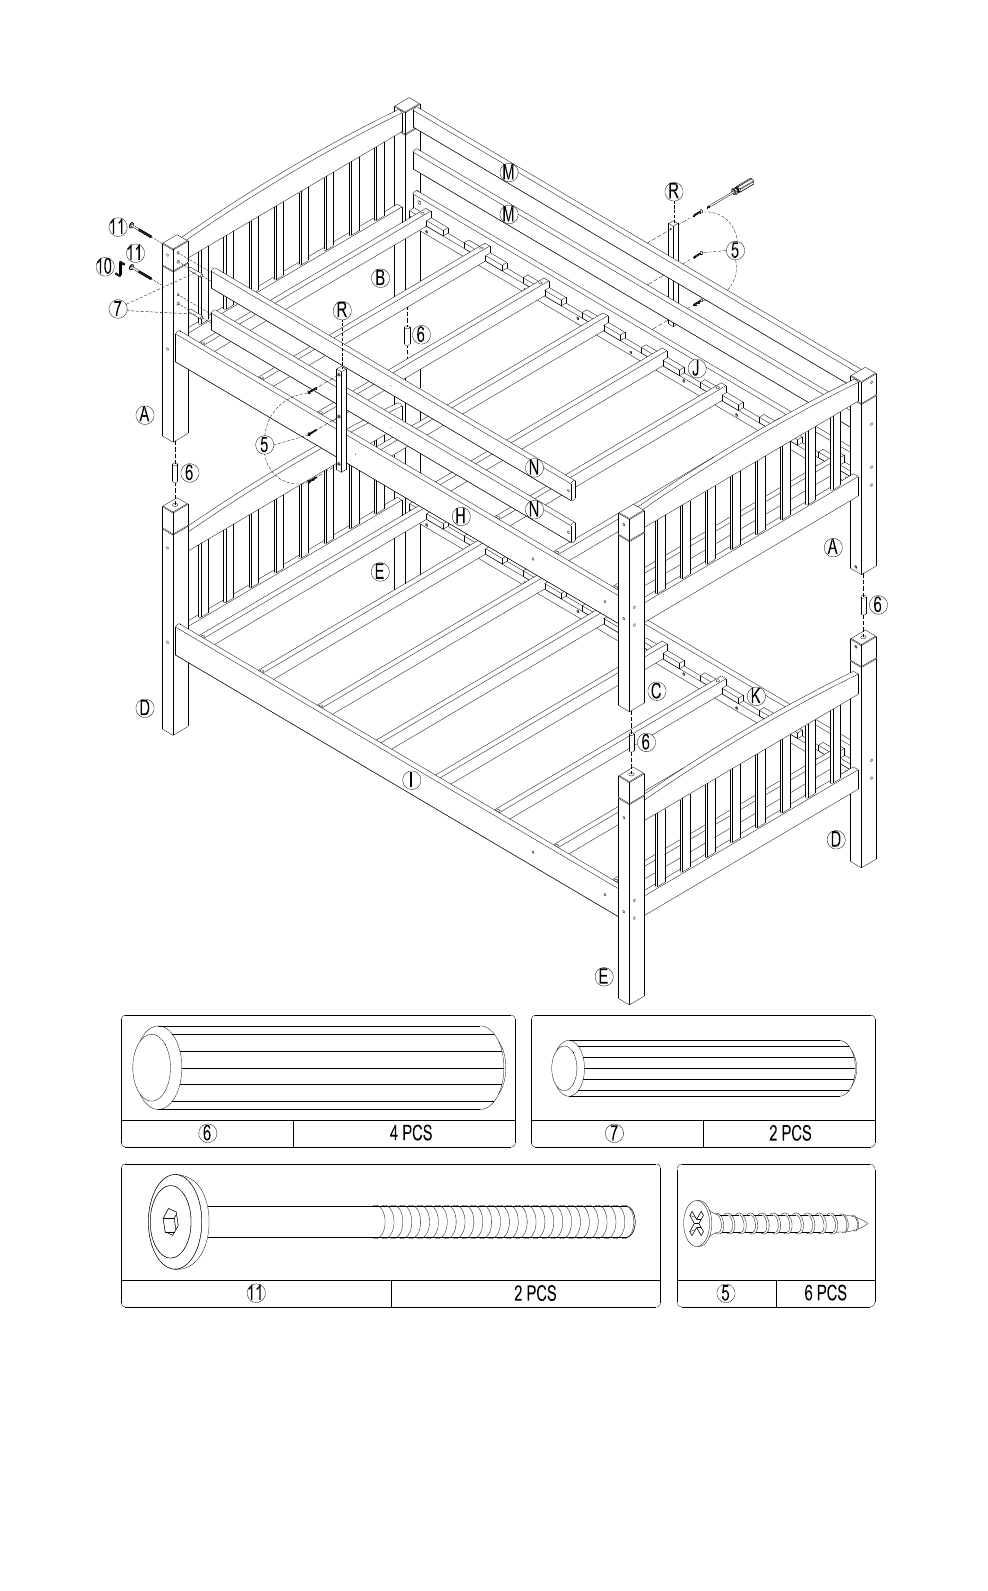
Attach the two headboards with the bottom posts (D and E) to the bottom side rails (I and K) by the
joint connectors (1) and barrel nuts (9) as shown. Use hex key (10) to tighten joint connectors.
STEP 4
This is the lower bunk.
7
STEP 5
BELMONT BUNK BED
DA1026P-18 PINE / DA1026W-18 WHITE / DA1026WN-18 WALNUT / DA1026B-18 BLACK
Insert a wood dowel (7) into each end of the long guardrails (M). Attach the two long guardrails
(M) and the two top side rails (H and J) to the top posts (A and B) and (A and C) as shown. Use
the joint connectors (1) with the barrel nuts (9) to fasten the top side rails (H and J) and use the
wood joint connectors (11) to fasten the long guardrails (M). Use hex key (10) to tighten joint
connectors.
8
STEP 6
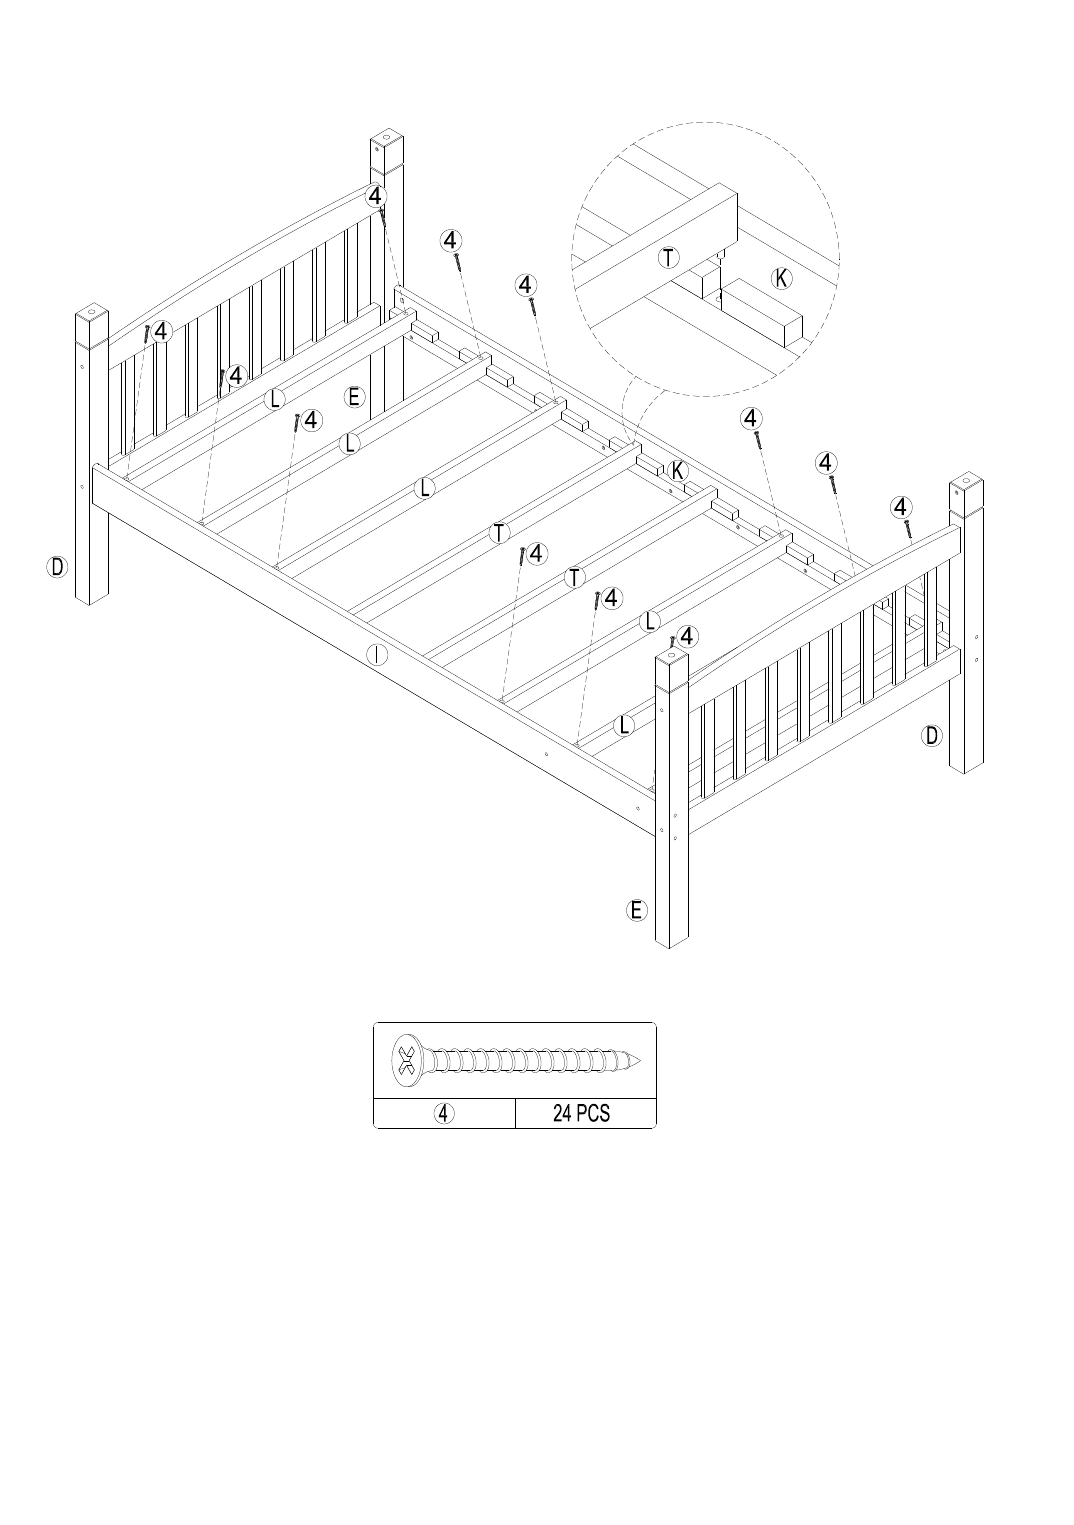
NOTE: If you notice that any of the slats (L) are not perfectly flat, be sure to assemble them so
that the slats (L) curves up in the middle and down on the ends.
Insert two slats (T) into the center slots of the bottom side rails (I and K) of the bottom bunk as
shown.
Insert slats (L) into remaining slots of the bottom side rails (I and K) of the bottom bunk. Attach
slats (L) onto the bottom side rails (I and K) with flat head screws (4). Use Phillips screwsdriver
(not included) to tighten the screws (4).
BELMONT BUNK BED
DA1026P-18 PINE / DA1026W-18 WHITE / DA1026WN-18 WALNUT / DA1026B-18 BLACK
Repeat this process for the top bunk.
9
STEP 7
BELMONT BUNK BED
DA1026P-18 PINE / DA1026W-18 WHITE / DA1026WN-18 WALNUT / DA1026B-18 BLACK
Place four wood dowels (6) into the holes in the bottom posts (D and E). With the help of another
person, stack the top bunk onto the bottom bunk.
Insert wood dowels (7) into the holes in the ends of short guardrails (N). Attach short guardrails (N)
to top post (A) with wood joint connectors (11). Use hex key (10) to tighten joint connectors.
Attach the guardrail leg (R) to the short guardrails (N) and top side rail (H) with flat head screws
(5). Attach the remaining guardrail leg (R) (on the other side of the bed) to the long guardrails (M)
and top side rail (J) with flat head screws (5).Use Phillips screwsdriver (not included) to tighten the
screws (5).
PHILLIPS
SCREWDRIVER
10

STEP 8
BELMONT BUNK BED
DA1026P-18 PINE / DA1026W-18 WHITE / DA1026WN-18 WALNUT / DA1026B-18 BLACK
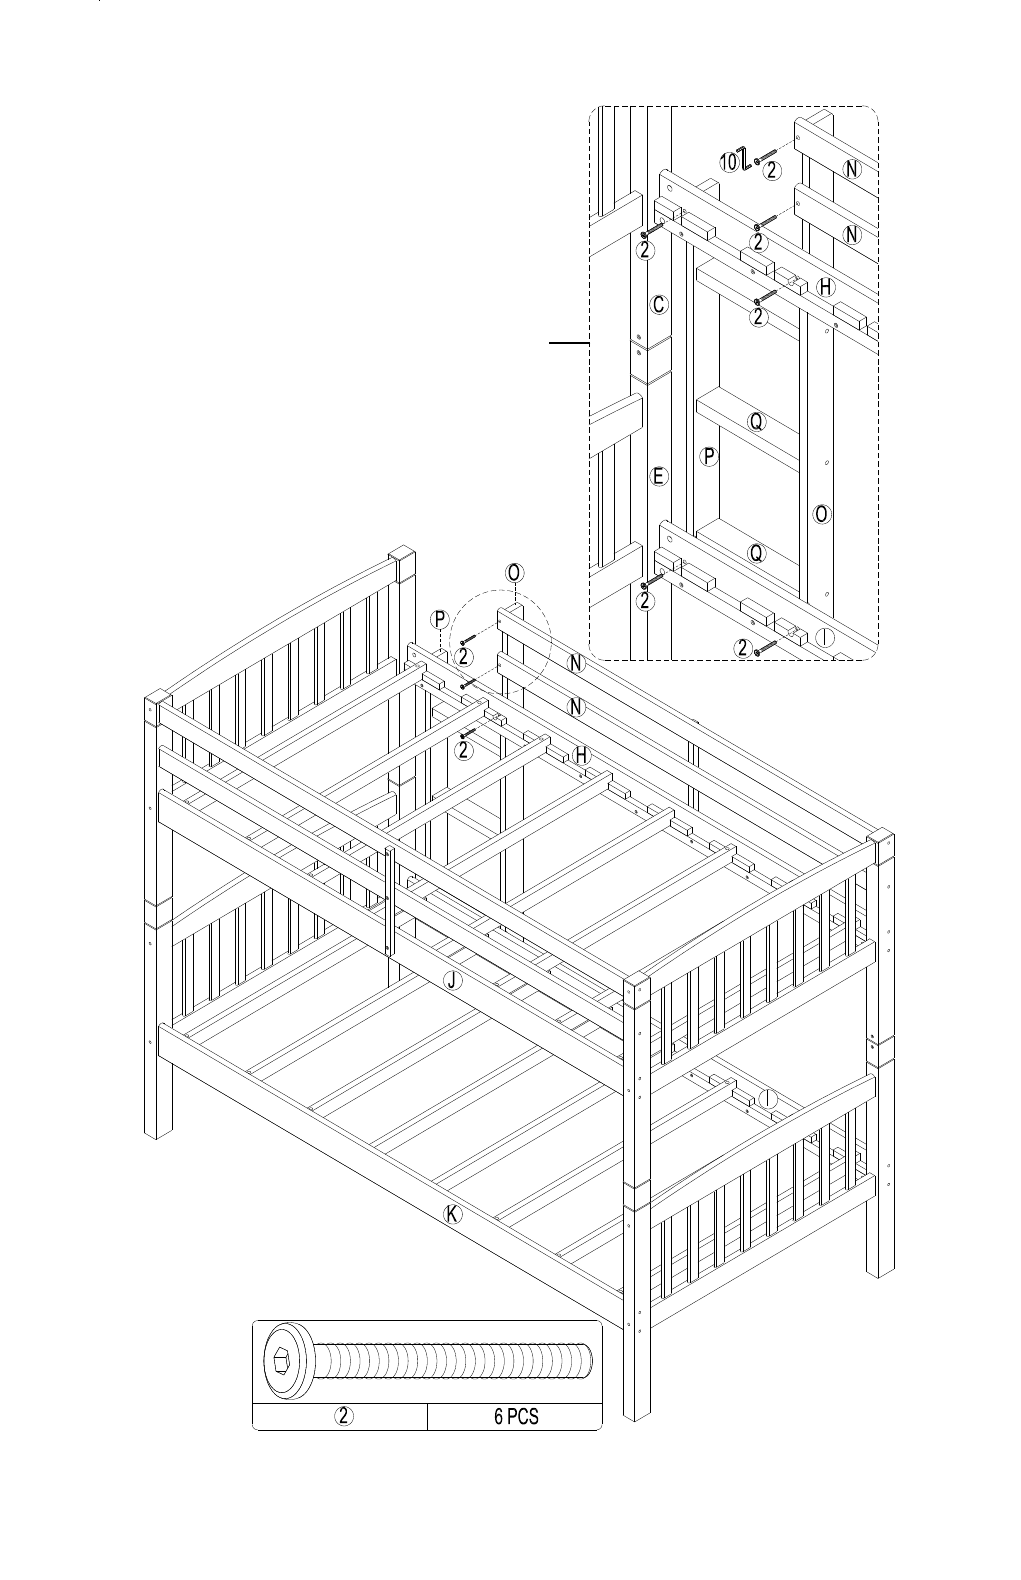
Assemble the ladder by inserting wood dowels (7) into the end of the ladder steps (Q) and screwing
long ladder end (O) and short ladder end (P) to ladder steps (Q) with wood joint connectors (2) as
shown. Use hex key (10) to tighten joint connectors.
Secure the upper bunk to the lower bunk by screwing the screws (4) into the holes in the top and
bottom posts (A, B, C, D & E) as shown.
11
STEP 9
BELMONT BUNK BED
DA1026P-18 PINE / DA1026W-18 WHITE / DA1026WN-18 WALNUT / DA1026B-18 BLACK
Attach the ladder to the short guardrails (N), the top side rail (H) and bottom side rail (I) with
the wood joint connectors (2). Use hex key (10) to tighten joint connectors as shown.
NOTE: If a slat (L) is covering the ladder mounting holes, please remove the slat (L) and
reattach after the ladder is attached.
Slats are not shown in
illustration for clarity
12
DA1026P-18 PINE / DA1026W-18 WHITE / DA1026WN-18 WALNUT / DA1026B-18 BLACK
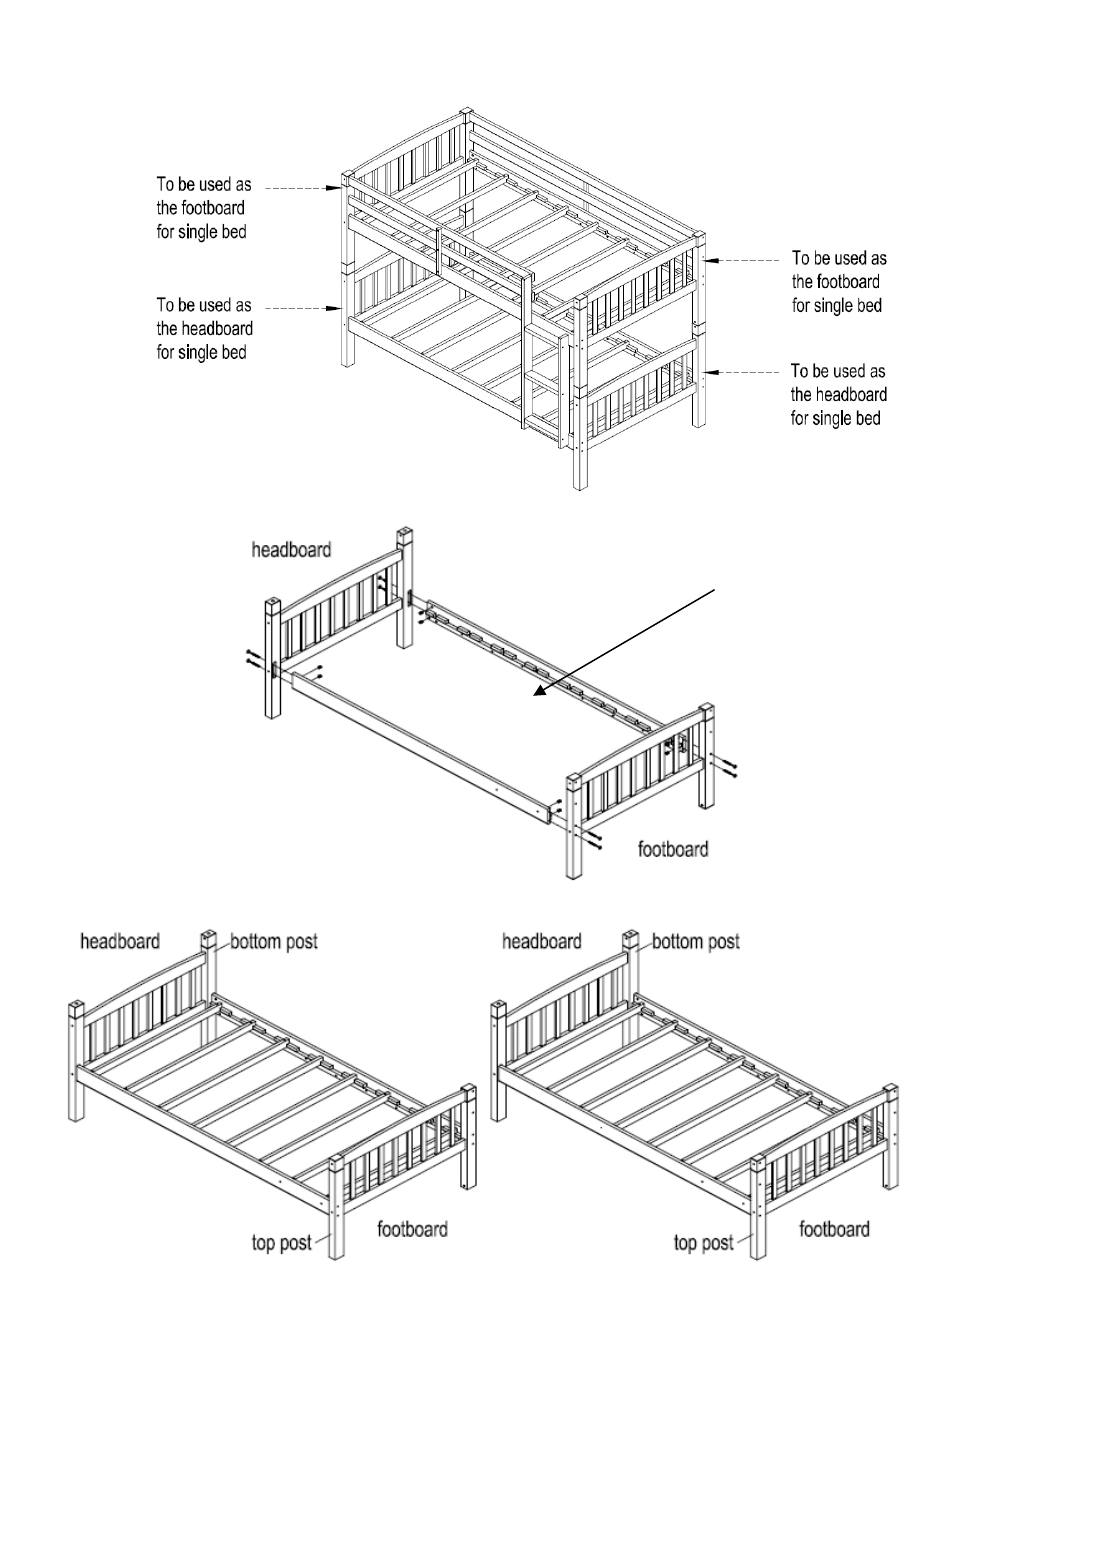
Instructions for converting the bunk bed into two single beds
BELMONT BUNK BED
Remove the ladder and all the guardrails.
With the help of another person, remove the top bunk from the lower bunk.
Disassemble the side rails from all headboards (top and lower bunks).
Re-assemble the headboards (with tall posts) and footboards (with short posts) to side rails.
Note: Switching the headboards will allow the two single beds to be identical (headboards
have taller posts and footboards have shorter posts).
The supports slats are
removed from illustration for
clarity only - they DO NOT
need to be removed to convert
the bunk bed to single beds.
However, the 2 end slats
can be removed to facilitate
assembly.
DO NOT RETURN PRODUCT TO THE RETAILER.
If a part is missing or damaged, contact
our customer service department. We
will replace the part FREE of charge.
Tel # : 1-800-295-1980
E-Mail: [email protected]
BELMONT BUNK BED
DA1026P-18 PINE / DA1026W-18 WHITE / DA1026WN-18 WALNUT / DA1026B-18 BLACK
MAXIMUM WEIGHT
CAPACITY: 165 LBS
(75 KGS) PER LEVEL
DO NOT ALLOW CHILDREN
UNDER 6 YEARS OF AGE
TO USE THE UPPER BUNK.
BED IS DESIGNED FOR
CHILDREN RANGING FROM
6 YEARS OF AGE TO
YOUNG TEENAGERS.
DO NOT ALLOW HORSEPLAY ON
OR UNDER THE BED AND
PROHIBIT JUMPING ON THE BED.
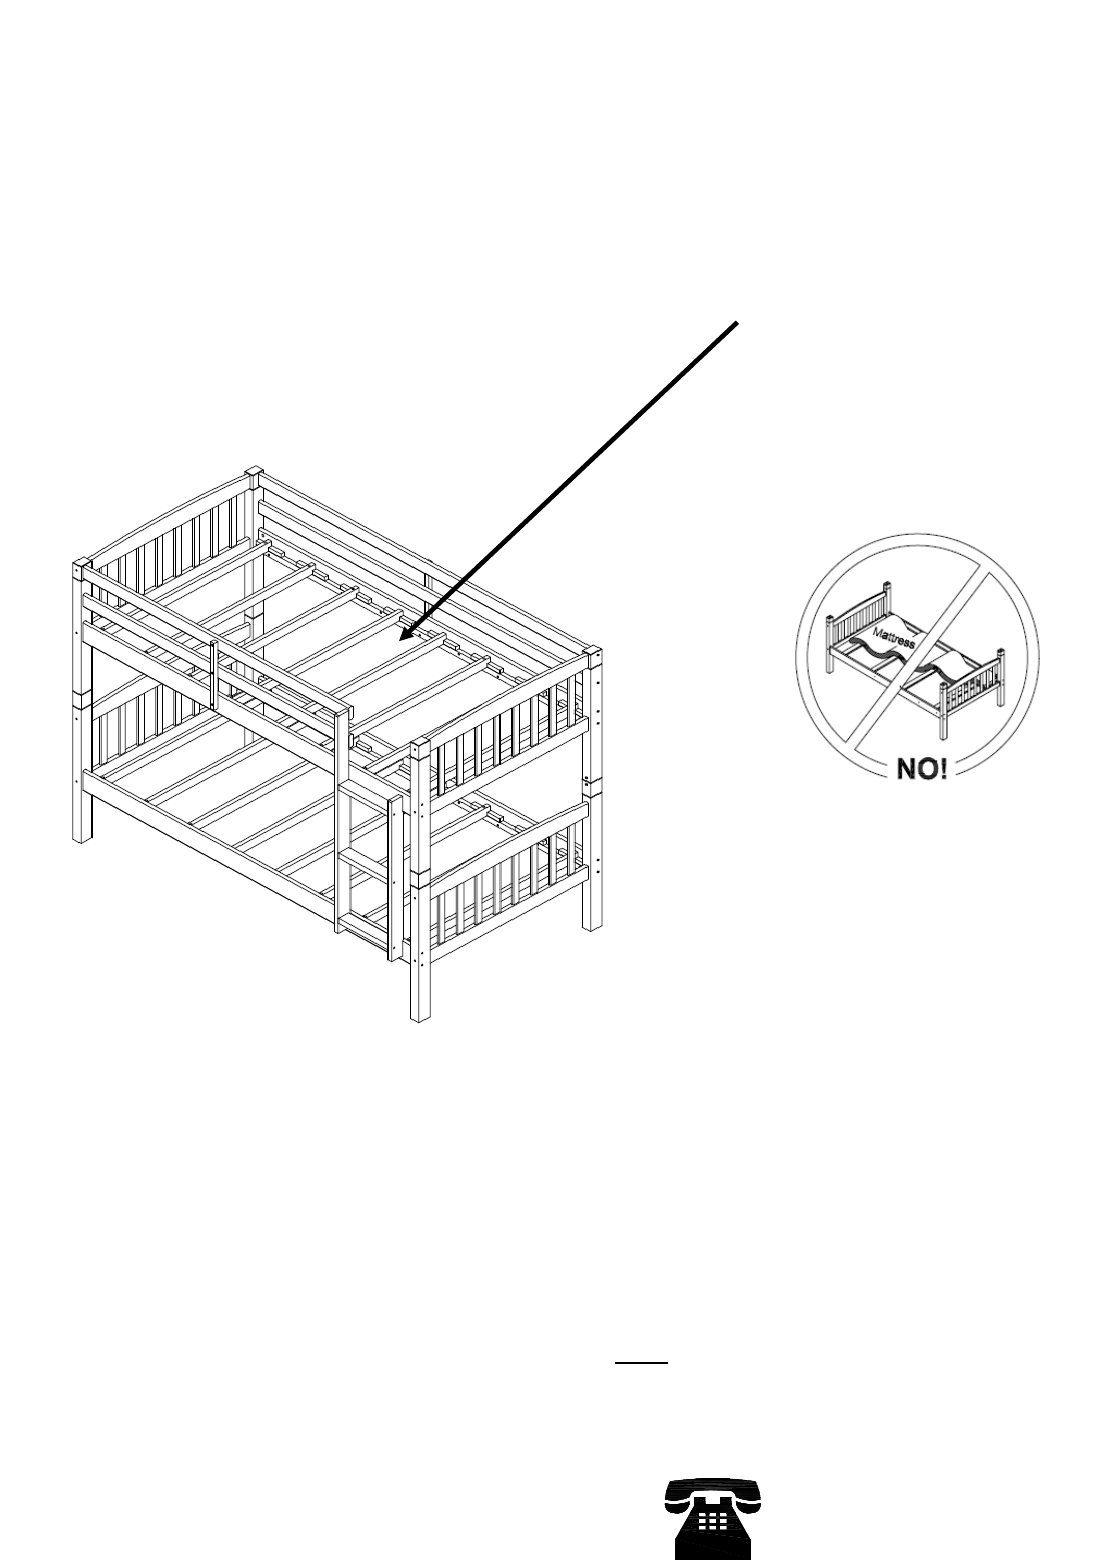
USE ONLY COIL SPRING
MATTRESSES ON BOTH THE
UPPER AND LOWER BUNKS.
FAILURE TO DO SO CAN
RESULT IN INJURY.
