© 2020 The Crafty Quilter
1
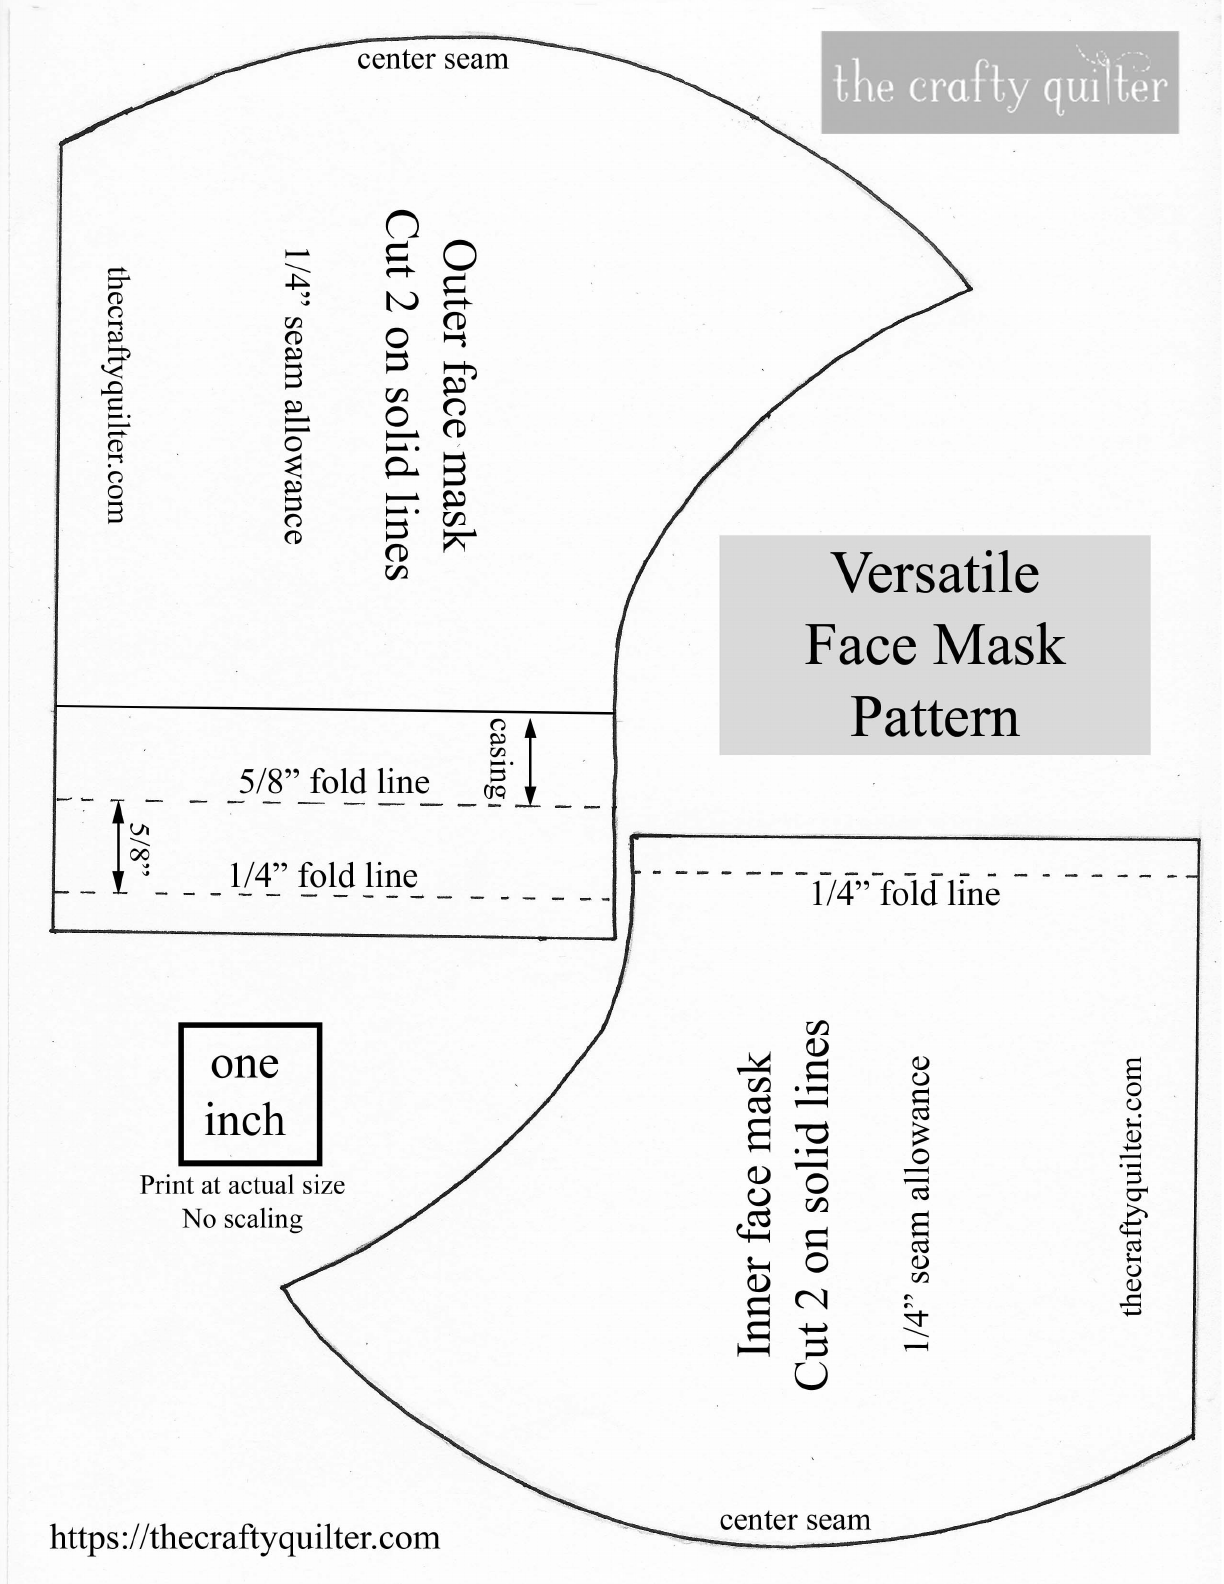
Versatile Face Mask Pattern
TheCraftyQuilter.com
Face mask size: This face mask is one size only. It will fit most adults. If you want
to make it larger, I suggest adding 1/4″- 3/8” on all sides to start. If you want to
make it smaller, subtract 1/4″ - 3/8” from all sides.
See my Versatile Face Mask Tutorial for more information such as supply details,
expanded instructions and more photos.
Materials:
• Two 8″ cotton fabric squares for outside of mask, washed and dried
• Two 8″ cotton fabric squares for inside of mask, washed and dried
• 1/4″ elastic or 1/4″-3/8″ wide grosgrain ribbon or double-fold bias tape or hair
ties
• wire or pipe cleaners or twist ties (optional)
• filter (optional)
• pencil or other fabric marking tool
• sewing machine
• scissors
• printed face mask pattern
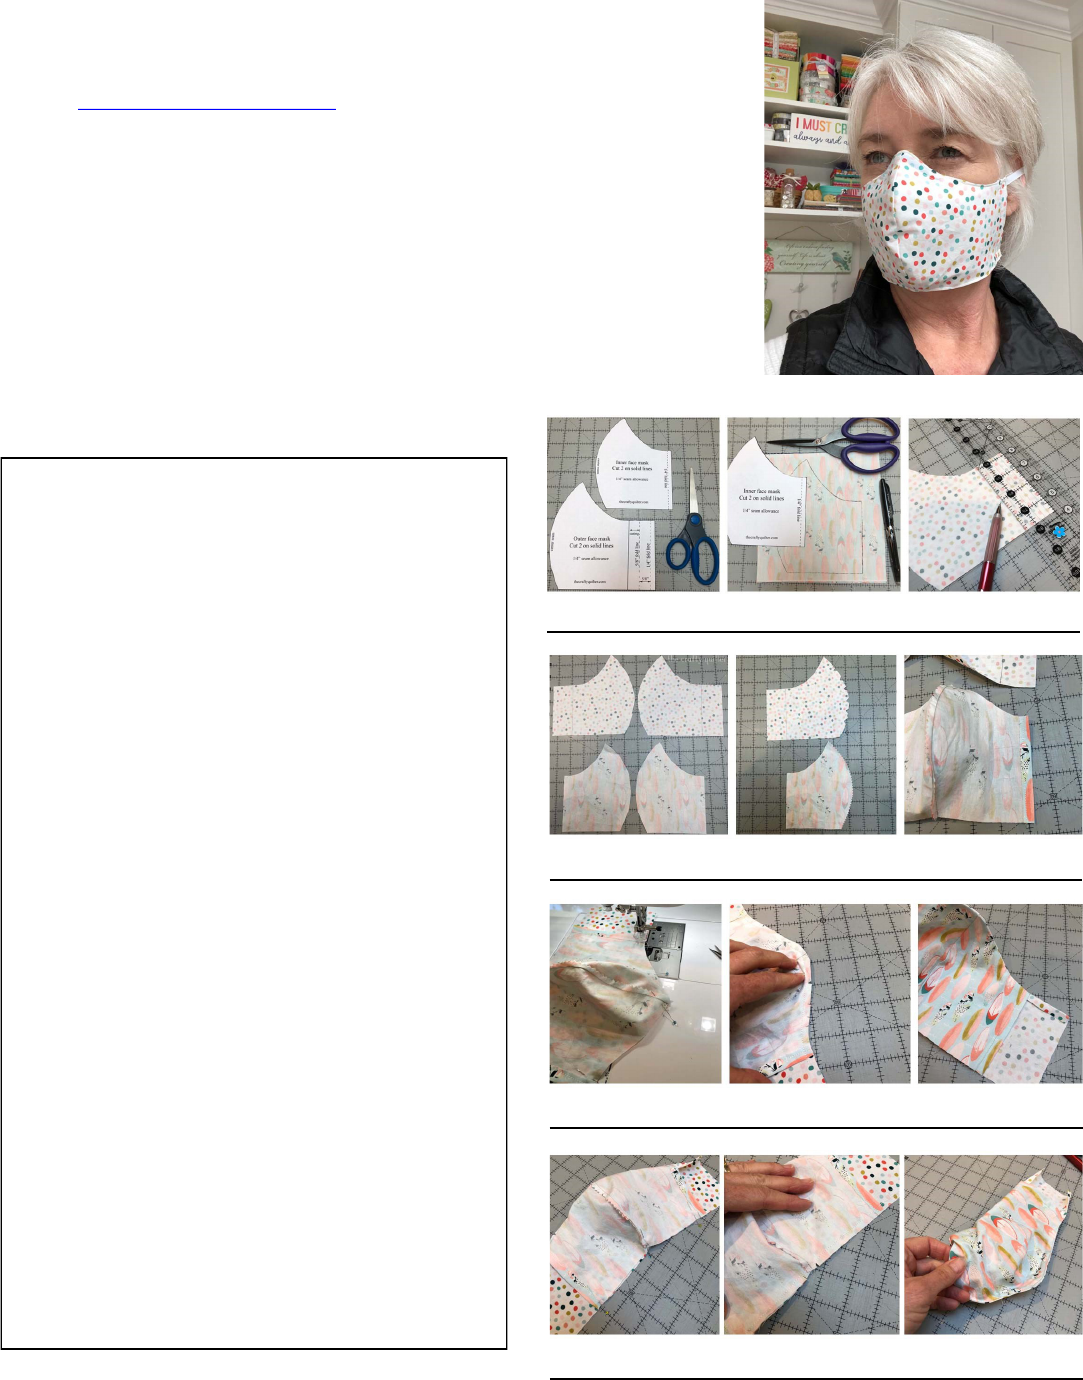
Assembly Instructions
1. Cut out inner and outer face mask pattern pieces on
the solid lines (includes 1/4” seam allowance).
2. With fabric right sides together, pin pattern pieces
to fabric or trace cutting lines onto fabric. Cut out
inner and outer face mask pieces.
3. Transfer solid casing line (1 1/2″ from raw edge)
onto the wrong side of outer face mask pieces
using pencil or other marking tool.
4. With right sides together, sew 1/4″ seam along the
inside center face mask pieces. Repeat for the
outside center face mask seam.
5. Cut notches into the curved seam allowance just
sewn or use pinking shears to trim curved seam
allowance. This will reduce bulk and help the seam
to lay flat. Gently press to one side.
6. Turn under 1/4″ along the short side edges of the
inner face mask and press. Stitch in place.
7. With right sides together, pin inner and outer face
mask pieces along upper edge, matching center
seam. Stitch using 1/4″ seam allowance
(backstitching at the beginning and end).
8. Clip seam allowance. Turn right side out and press
seam, extending 1/4″ fold along the outer face
mask edge.
9. Top stitch upper seam edge in place 1/8″ from
folded edges.
10. Repeat step 7 on the bottom edge – right sides
together and matching the center seam.
11. Clip seam allowance on both sides of center seam.
12. Turn right side out and press as before.
Steps 1-3
Steps 4-6
Steps 7-9
Steps 10-12
© 2020 The Crafty Quilter
2
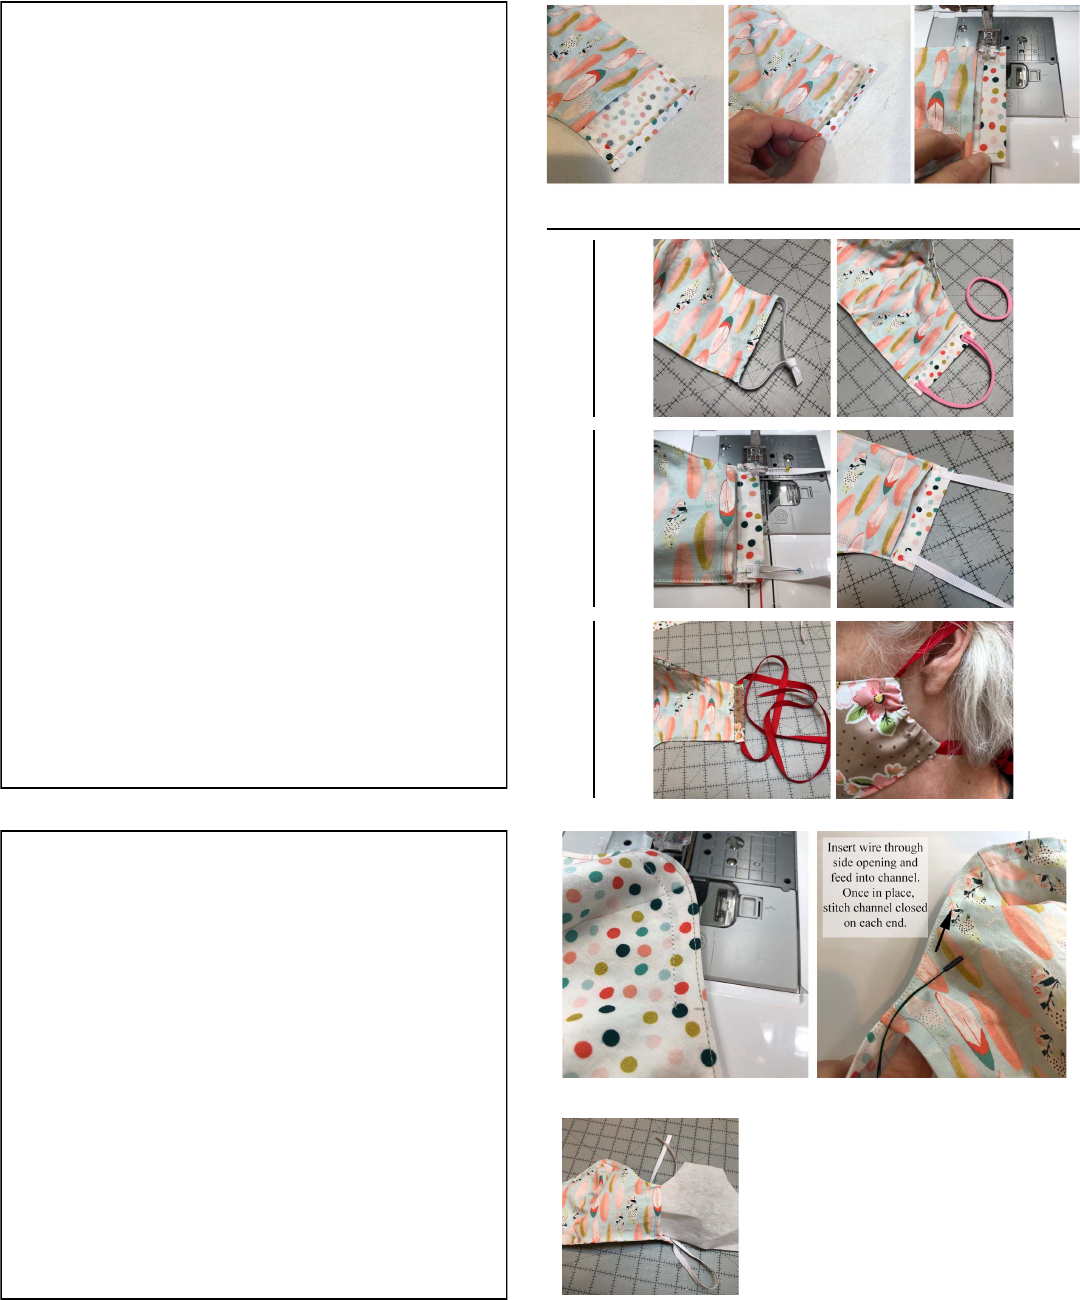
13. Turn under 1/4″ along the short sides of the outer
face mask and press.
14. Fold this edge again (5/8″) so that it meets the
pencil line and press.
15. Stitch along the inner folded edge, creating a casing
for elastic or ties.
16. Add elastic or ties to the mask. If you have elastic,
cut a 12″ length and thread through the side casing.
Tie a knot and adjust it as needed. Once it’s
comfortable, you can slide the elastic around so the
knot is inside the casing (optional).
17. If you’re using hair ties, you can cut them in half
and sew them to the outside instead of feeding
them through the casing. Otherwise, you will have
to place them into the casing before stitching the
casing seam closed.
18. For ribbon or fabric ties, you can attach them two
ways. The first way (my preference) is to sew each
one to a corner of the face mask. The length should
be about 16″ each. This takes a little longer to put
the face mask on, but it’s adjustable, the mask sits
tight against the face and it makes it easy to remove
the mask partially without having to completely
remove it.
19. The second way to attach ribbon or fabric ties is to
thread a longer tie (36″) through the casing on each
side and tie behind the head. This method is more
difficult to tie it behind the head tightly. It also
gathers the short sides of the face mask which
might give you a better fit but it also can create
gaps.
Optional nose wire: Cut a length of wire or pipe
cleaner to 3 1/2″. Turn under the ends a tiny bit and
crimp so that there are no sharp edges. I used thin
florist wire so I folded a 6 1/2″ piece in half and
covered the exposed ends with electrical tape. Sew a
channel for the wire 1/4″ away from the upper edge
stitching and about 1 1/2″ on either side of the center
seam. Insert wire through the side opening. Stitch
channel ends closed or leave one end open if you want
to remove the wire prior to washing.
Optional Filter: A filter or another layer of material
can be inserted at this point. Since I don’t have access
to any filters, I’ve used some interfacing just for
example purposes. I cut a rectangle 5″ x 7″ and then cut
a curve on both top edges by estimating it (eyeballing
it). Use the pattern as a guide. You can also fuse
interfacing to the outer face mask pieces at the
beginning of mask assembly.
Steps 13-15
Steps 16
-17
Step 18
Step 19
Nose wire
Disclaimer: This pattern has not been tested. If you find a mistake, please let me know. This face mask is not
considered personal protective equipment (PPE) and should be used only if nothing else is available.
© 2020 The Crafty Quilter
3
