EARTH SCIENCE
Lab Manual
UARM
Gaumani Gyanwali
University of Arkansas Rich Mountain
Cover by Shreetika Gyanwali

1 | E a r t h S c i e n c e L a b M a n u a l
Table of Contents
Experiment Page Number
Preface 3
1. Density of Rocks and Water 5
2. Salinity and Density 15
3. Latent Heat and Differential Heating… 25
4. Magma Viscosity and Isostasy of Mountains 33
5. Minerals and Rocks Part I 43
6. Minerals and Rocks Part II 53
7. Mineral Crystallization 61
8. Albedo Effect 69
9. Psychrometer Experiment 75
10. Coriolis Effect 85
11. Insolation Pattern 95
References 103

2 | E a r t h S c i e n c e L a b M a n u a l

3 | E a r t h S c i e n c e L a b M a n u a l
Preface
Earth Science to me is a fascinating world of information, much of which is yet to be explored. It is this
unexplored part of the world which keeps the students imagining and the instructors exploring and
researching more to help students fulfill their goals. Last two spring semesters had been very rewarding in
terms of what I was able to learn in this natural field of science. As a preparation for the laboratory
portion of this course, I came across several laboratory manual textbooks that are intended to supplement
the lecture portion of the course. However, while implementing one selected laboratory manual in the labs
among many, I found that a major portion of the manual was designed to expose students again to many
core theoretical concepts. While it is good to revise and review the theoretical concepts and to give
students more opportunity to grasp the concept better, it is not so much appreciated if it has to be done in
a laboratory setting. Laboratory works should be more visual, experimental, hands-on, and hypothesis-
building.
Both I and my previous students of this course found that the available laboratory manuals were far from
meeting the above requirements. The student surveys about the course at the end of semester strongly
suggested that the available laboratory manuals were lacking the major portion of the laboratory
experience a science student would usually expect to do. I thank you all (students) for providing me a
genuine feedback for the course output and directly telling me what you would enjoy more! The more I
researched on preparing this laboratory manual, the more I understood you all about what exactly you
meant in your valuable feedbacks and surveys.
I believe that this Earth Science Lab Manual will provide simple and easy-to-follow instructions for
experimental procedures and help students understand basic principles in Earth Science. The step-wise
description of experimental procedures and corresponding data sheet pages are meant to provide students
with clear and detailed guidance to gain hands-on experimental learning experience. While some
experiments demand more safety precautions than others students are guided to follow all standard safety
precautions while using glassware, thermometers, hot objects, and gas burners etc. Use of safety goggles
is strictly required unless it is not required by the instructor to do so.
This lab manual is customized to the laboratory needs of Earth Science, PSC 104, at University of
Arkansas Rich Mountain (UARM) but can also be used by other college instructors who teach same or
similar courses in earth science, after receiving permission from the authorized personnel from UARM.
The experiments in this laboratory manual are designed for a two-hour long session once a week for a fall
or a spring semester. Same laboratory exercises can be implemented for twice-a-week schedules for
summer courses when needed.
Gaumani Gyanwali, PhD
University of Arkansas Rich Mountain
Mena, Arkansas 71953
©UARM, January 2017

4 | E a r t h S c i e n c e L a b M a n u a l

5 | E a r t h S c i e n c e L a b M a n u a l
Experiment 1: Density of Rocks and Water
Objective: 1. To measure the density of various types of rocks in order to compare composition and
predict the formation process.
2. To measure the density of water at various temperatures.
Introduction
Density is a physical quantity which is the measure of compactness of particles or molecules. Density
explains how close or far apart the particles or components are to each other. The more tightly the
particles are arranged, the higher is the resulting density. You can take an example of cotton and a rock
for comparison. As you can observe, the cotton is very fluffy and light while a rock is very compact. As a
result, the density of the rock is very high as compared to cotton. Density is an intrinsic property, meaning
it is the property present in the objects depending on what they are made of.
Density also depends on other factors such as temperature. For example, in a warmer day the density of
air is low while in a colder day the density of air is high. Hotter temperature keeps the molecules of air
further apart and lowers the density and cooler temperature condenses the molecules closer and makes the
density lower.
Rocks are made of various minerals and particles. Depending on which material is the rock made of, its
density varies. If it is made of naturally harder materials or if it is more compactly arranged, its density is
high. If it is made of lighter materials or is less compactly organized, its density will be low. For example,
density of mainly iron-oxide rich minerals such as hematite is obviously high and density of silica-rich
minerals is low. Also, density of a metamorphic rock made from a sedimentary rock is high while density
of the parent sedimentary rock from which the metamorphic rock was made is low. Mainly, two factors
control the density of rocks – its mineral composition and its mode of formation.
We can calculate the density of a rock by using simple scientific techniques of finding its mass and its
volume first. Then the ratio of its mass to its volume gives its density. It means that the total quantity of
material (mass, in kilograms, grams, milligrams etc.) present in a unit volume (in m
3
, liter, cm
3
etc.) of a
substance gives its density. Density can be expressed in the form of formula as follows:
Density = Mass (kg)
Unit of Density = kg/m
3
Volume (m
3
)
After finding the density of the rocks we can roughly predict the possible mineral composition of the rock
by density comparison.
Like solids, liquids also have their own density. The liquid density also depends on its composition (the
type of molecules it has and their arrangement). Unlike solids whose density does not significantly change
over small range of temperature, liquids show density change even over small change in temperatures.
That is because the molecules of liquid are farther apart than solids and can be affected by temperature
changes easily.
Part A: Density of Rocks
Mass of the rock can be found by using the digital balance. You should tare the balance to zero before
you slowly put the rock on the pan.

6 | E a r t h S c i e n c e L a b M a n u a l
A rock is a solid whose dimensions are not regular. That means it does not have uniform length, width, or
height throughout. So to find its volume, we have to use an indirect method of finding the space it
occupies. If we dip a rock in water, it displaces water of equal volume to the volume the rock occupies
inside water. The volume of displaced water then gives the actual volume of the rock. This indirect
method of measuring volume of irregular solids such as a piece of rock is quite accurate indeed!
Figure 1.1: A rock has non-uniform dimensions
To find the volume of displaced water, we first measure the water in a container without putting the rock
(known as V
i
) and then measure the water level after putting the rock (known as V
f
). When we subtract
these two volumes we get the volume of the rock.
Volume of rock = V
f
- V
i
After we find the mass and the volume of the rocks we can calculate the density by dividing the mass by
the volume, using the above mentioned formula, density = mass/volume
Part B: Density of water at different temperatures
In water the molecules are closely packed and can slide past each other. This makes the mobility of
molecules easy and can easily be affected by temperature changes. The changes can be seen in terms of
density measurements at various temperatures. In this experiment we will measure the density of water at
three different temperatures: at room temperature, at 50-60
o
C, and at around the boiling temperature.
Measuring mass and the volume of water can be done at the same time using graduated cylinder. You
should first place the graduated cylinder on the balance and tare it to zero. When known volume of water
is added to the cylinder (you know it from the graduated scale on the cylinder), you can also read the
mass of the water you just added from the balance. Then use the formula of density to calculate the
density of water you used.
The formula is again, density = mass/volume
Materials Required
Different pieces of rocks, 100 mL graduated cylinder, 50 mL graduated cylinder, digital balance,
calculator, heating set-up (stand, wire gauze, ring clamp, Bunsen burner, lighter), 100 ml-beaker, beaker
tongs, heat gloves, thermometer.

7 | E a r t h S c i e n c e L a b M a n u a l
Procedure
Follow the given procedures for each part of the experiment in the numerical order given. Record all the
measurements in the data sheet and carry out proper calculations using appropriate formula.
Part A: Density of Rocks
1. Bring the provided rocks on your desk and record each rock’s physical appearance on the data
sheet.
2. Record the mass of each rock using the digital balance. First zero (tare) the balance and then
gently put the rock on the balance pan. Record the mass to three decimal places.
3. In a 100 ml graduated cylinder, place about half water and record the initial reading of water
level.
4. Place the rock into the cylinder carefully so that you do not splash any water. You can slide the
rock along the wall of the cylinder.
5. After the rock settles at the bottom, shake the cylinder so that any air bubbles attached to the rock
will escape. Record the level of water in the cylinder now.
6. The difference between these levels of water gives volume of water raised, which is same as the
volume of the rock submerged under water. Use appropriate units for each quantity measured.
7. Calculate the density of the rock using the mass and volume you just found by applying
appropriate formula. You must show the work of this calculation in the space provided in the data
sheet
Part B: Density of water at different temperatures
Room temperature water
1. Bring all requirements for a heating set up: Bunsen burner, wire gauge, ring clamp, stand, and a
lighter.
2. Bring a 100 mL beaker. Make sure it is clean and dry. Measure its mass using the digital balance,
zeroing it first, and record in the data sheet.
3. Bring a 50 mL graduated cylinder and fill it to 50 mL-mark with DI (deionized) water. Record the
actual volume of water taken as either exact 50 mL, or if it is not exact 50 mL, whichever is the
volume shown by the lines in the cylinder. It does not matter if it is slightly less than (not more
than) 50 mL but record the volume.
4. Place the water into the beaker. Measure its current temperature with a thermometer and record in
the data sheet.
5. Place all the water into the 100 mL-beaker and measure the mass of the beaker with water.
Record it.
6. Subtract the mass of the beaker from this water + beaker mass to get the mass of water only.
7. Now you can calculate the density of this water using appropriate formula.
50
o
C – 60
o
C water
1. Measure 50 mL DI water as above using a 50 mL-graduated cylinder and record the exact volume
taken. Again, it does not have to exact 50.0 mL but record whichever number you have.
2. Place this water in the 100 mL-beaker and set it up for heating on the wire gauge of the heating
set-up.
3. Light the burner outside of the set-up and bring it under the beaker. Use a medium to low flame.
Place the thermometer in the beaker. Caution: it may drop off the beaker if you leave it, so keep
holding it, being careful about not catching the fire.

8 | E a r t h S c i e n c e L a b M a n u a l
4. As the temperature reaches 55
o
C, first record the exact temperature in the data sheet and then
remove the beaker from the heating set-up using a beaker tong or a heat glove. Measure the mass
of this water and the beaker together. Record the mass.
5. Find the mass of the water only and calculate the density using appropriate formula.
Near-boiling water
1. Measure 50 mL DI water as above using a 50 mL-graduated cylinder and record the exact volume
taken. It has to be close to 50 mL but exact 50mL is not required.
2. Place this water in the 100 mL-beaker and set it up for heating on the wire gauge of the heating
set-up, as above
3. Use a high flame this time in the burner to heat the water. Low flame will take forever!
4. As the temperature reaches 95
o
C, first record the exact temperature in the data sheet and then
remove the beaker from the heating set-up using a beaker tong or a heat glove. Measure the mass
of this water and the beaker together. Record the mass.
5. Find the mass of the water only and calculate the density using appropriate formula.

9 | E a r t h S c i e n c e L a b M a n u a l
Experiment 1: Density of Rocks and Water
Pre-laboratory Questions
Complete this page before coming to the lab. Read the information given to answer the following
questions.
Q1. What is density? Write its formula.
Q2. Why the volume of rocks cannot be found using length, width, and height method?
Q3. An object A floats on water but another object B sinks in water. Which object has higher density?
Which object has density less than density of water?
Q4. Why is it important to measure the density of rocks?
Q5. If the unit of mass is gram and the unit of volume is cm
3
, what will be the unit of density?
Instructor’s approval____________________

10 | E a r t h S c i e n c e L a b M a n u a l

11 | E a r t h S c i e n c e L a b M a n u a l
Date
Name
Lab Partner
Experiment 1: Density of Rocks and Water
Data Sheet
Part A: Density of Rocks
Write hypothesis: Simply based on your observation of the rocks, order the rocks from the
highest density to the lowest density. Give a brief explanation.
______________________________________________________________________________
_____________________________________________________________________________
Rock 1 Rock 2 Rock 3
Color of the rock ______________ ______________ ______________
Texture of the rock ______________ ______________ ______________
Mass of the rock ______________ ______________ ______________
Initial water level in the cylinder ______________ ______________ ______________
Final water level in the cylinder ______________ ______________ ______________
Volume of the rock ______________ ______________ ______________
Calculation for density of rocks (show work in the space provided below)
Rock 1 Rock 2 Rock 3
Density of the rocks from above calculation _______________________ (rock 1)
_______________________ (rock 2)
_______________________ (rock 3)

12 | E a r t h S c i e n c e L a b M a n u a l
Answer the following questions:
Q1. Was your hypothesis about the rock density proved? Reorder the rocks based on the calculated
density.
Q2. If you splashed water while placing the rock, how would it affect the density of the rock?
Q3. Why is density of rock important to measure?
Q4. How is density of rocks related to hardness?
Q5. Make a general conclusion from the observation of densities of rocks above.

13 | E a r t h S c i e n c e L a b M a n u a l
Part B: Density of water at different temperatures
Write hypothesis: Propose a hypothesis about the density of water at different temperatures,
will it decrease or increase with temperature? How drastically will it change with temperatures?
______________________________________________________________________________
______________________________________________________________________________
Mass of the 100 mL-beaker, dry and clean ____________
Room Temp 50
o
C – 60
o
C 95
o
C – 100
o
C
Actual volume of water measured ______________ ______________ ______________
Actual temperature of water measured ______________ ______________ ______________
Mass of beaker + water ______________ ______________ ______________
Mass of water by subtraction ______________ ______________ ______________
Calculate the density of water below:
Room Temp 55
o
C – 60
o
C 95
o
C – 100
o
C
Calculated density of water from above _______________________ Room Temp
________________________ 55
o
C – 60
o
C
________________________ 95
o
C – 100
o
C

14 | E a r t h S c i e n c e L a b M a n u a l
Answer the following questions.
Q1. Was your hypothesis proved or disproved? Explain your observation with a scientific reasoning.
Q2. Make a general conclusion from your observation above
Q3. If you evaporated some of your water during the process of measuring the density, how will this
affect your result?
Q4. Is the water in the equatorial seas heavier or lighter than the polar seas? Justify your answer.

15 | E a r t h S c i e n c e L a b M a n u a l
Experiment 2: Salinity and Density
Objective: 1. To prepare saline solutions of different composition.
2. To measure and compare the density of the prepared solutions.
Introduction
Salinity is defined as the amount of dissolved salts in water. It is usually expressed in terms of parts per
thousand (ppt) i.e. parts of salt present per thousand parts water. For example, if salinity of the water
collected from an estuary is 45 ppt, the water has 45 grams of salt per 1000 grams of water (or it could be
45 kg salt per 1000 kg water). In seawater there are many dissolved salts but sodium chloride (table salt)
is the most abundant salt.
Solution is a uniform mixture of a solute (the one that gets dissolved, usually solid) and a solvent (the
dissolver, usually liquid). For example, in a sugar-water solution, the solute is sugar and the solvent is
water. However, to make a solution, it does not have to be always a liquid/solid combination, other
combinations can also make solution.
In a solution, solute is always the smaller fraction and solvent is a larger fraction. Being a larger fraction
of the solution, the solvent has the duty to dissolve the solute in order to make a proper solution. The
process of making a solution using a solute and a solvent is called dissolution.
Part A: Preparation of saline solutions
I this laboratory, we will prepare natural-like saline solutions using sodium chloride and water. Since
sodium chloride is the most common salt found in natural sea water, we will try to mimic nature by
preparing salt solutions of different concentrations using right amount of salt and water needed. We will
also learn to convert the grams of salt present in the solution into the parts per thousand using appropriate
conversions needed.
Care must be given in measuring right amount of salt and water to make proper solution. Also, the salt
must be properly dissolved to have the concentration needed for the solution. If the salt remains
undissolved, it will be counted in the mass but not in the solution, so the measurement of volume will be
wrong and the calculated density eventually becomes wrong.
Part B: Measurement of density of solutions
You have learned in pervious chapter (Experiment #1) to measure the mass and volume of the liquid at
the same time so that we can calculate the density of the solution. Here, you will follow exactly the same
procedure to measure the mass and the volume of the five solutions made in part A. You will need to
place the graduated cylinder on the digital balance pan and zero it. And add the specified amount of
solution into the cylinder to measure the mass. The volume can be read directly from the graduated scale
of the cylinder.
Once we know the mass and volume of the solution, we can use the same formula we used in previous
chapter for density of solutions, i.e. density = mass / volume

16 | E a r t h S c i e n c e L a b M a n u a l
Once you have computed the density of different solutions and the corresponding salinity, you will also
need to plot the graph in the given grid to find a correlation between the two. The graph will be used to
express the relationship between these two quantities to draw necessary conclusion.
Materials Required
Table salt, five 150-mL beakers, digital balance, five 25-mL graduated cylinders, scoop, five clean and
dry glass rods, disposable pipets.
Procedure
Follow the given procedure for each part of this experiment in the order given. Record all the
measurements in the data sheet and carry out proper calculations using appropriate formula.
Part A: Preparation of saline solutions
1. Obtain five 150-mL clean and dry beakers. If not all available, can use 100- or 50-mL beakers as
well, but use beakers of same size.
2. Label the beakers with a marker from numbers 1 through 5.
3. Place beaker #1 on the digital balance pan and zero it.
4. Add 0.2 g salt slowly and carefully to avoid spillage. If spilled, clean up your mess!
5. Add DI water with a dropper to make the total solution weigh 20 grams.
6. Stir the solution using a glass rod until the salt completely dissolves.
7. Repeat the process for beakers #2 through #5 but using 0.4 g, 0.6 g, 0.8 g and 1.0 g salt
respectively, and adding water in each one to make total mass 20 grams every time. Remember,
the water has to be added when the beaker is still on the balance pan until you read 20 grams as
the total mass on the scale, not outside of the scale.
8. Use separate stirring rods for each solution to avoid contamination.
Part B: measurement of density of solutions
1. Place a clean dry 25-mL graduated cylinder on the pan and tare it.
2. Add all the salt solution from beaker #1 into it. Record the mass of the salt solution.
3. Also record the exact volume of the solution in the cylinder to one decimal place.
4. Repeat the process for remaining four solutions and record the appropriate mass and volume of
the solutions in the data table.

17 | E a r t h S c i e n c e L a b M a n u a l
Experiment 2: Salinity and Density
Pre-laboratory Questions
Complete this page before coming to the lab. Read the information given to answer the following
questions.
Q1. Identify solute and solvent in the following solutions
a. 10.0 g salt and 50.0 g water solute = solvent =
b. 2.0 g salt and 3.0 g alcohol solute = solvent =
c. 10.0 g glycerol and 5.0 g methanol solute = solvent =
d. 1.0 g methanol and 0.5 g ethanol solute = solvent =
Q2. Why is salt present in oceans?
Q3. If a 50-gram solution has 2.0 g salt, what is the ppt (0/00) of the solution?
Q4. Why is it important to know the density of water with different amount of salt in it?
Q5. If you measured the mass and the volume of a solution without completely dissolving the salt, what
will be the effect in your density measurement?
Instructor’s approval____________________

18 | E a r t h S c i e n c e L a b M a n u a l

19 | E a r t h S c i e n c e L a b M a n u a l
Date
Name
Lab Partner
Experiment 2: Salinity and Density
Data Sheet
Write hypothesis: Write the correlation of the salinity of water to its density. Would you expect
the increase or decrease of density with salinity will be uniform or non-uniform?
______________________________________________________________________________
_____________________________________________________________________________
Part A: Preparation of saline solutions
Solution #1: 0.2 g salt in 20 ml water
Actual grams of salt taken __________
Per 20-gram solution, amount salt present ___________
Per 100-gram solution, amount of salt present __________
Per 1000-gram solution, amount of salt present ________
0/00 (PPT) of the Solution #1 ___________
Solution #2: 0.4 g salt in 20 ml water
Actual grams of salt taken __________
Per 20-gram solution, amount salt present ___________
Per 100-gram solution, amount of salt present __________
Per 1000-gram solution, amount of salt present ________
0/00 (PPT) of the Solution #2 ___________

20 | E a r t h S c i e n c e L a b M a n u a l
Solution #3: 0.6 g salt in 20 ml water
Actual grams of salt taken __________
Per 20-gram solution, amount salt present ___________
Per 100-gram solution, amount of salt present __________
Per 1000-gram solution, amount of salt present ________
0/00 (PPT) of the Solution #3 ___________
Solution #4: 0.8 g salt in 20 ml water
Actual grams of salt taken __________
Per 20-gram solution, amount salt present ___________
Per 100-gram solution, amount of salt present __________
Per 1000-gram solution, amount of salt present ________
0/00 (PPT) of the Solution #4 ___________
Solution #5: 1.0 g salt in 20 ml water
Actual grams of salt taken __________
Per 20-gram solution, amount salt present ___________
Per 100-gram solution, amount of salt present __________
Per 1000-gram solution, amount of salt present ________
0/00 (PPT) of the Solution #5 ___________
Part B: measurement of density of solutions
Solution #1
Total mass of the solution __________
Total volume of the solution ___________
Density of the solution ___________

21 | E a r t h S c i e n c e L a b M a n u a l
Solution #2
Total mass of the solution __________
Total volume of the solution ___________
Density of the solution ___________
Solution #3
Total mass of the solution __________
Total volume of the solution ___________
Density of the solution ___________
Solution #4
Total mass of the solution __________
Total volume of the solution ___________
Density of the solution ___________
Solution #5
Total mass of the solution __________
Total volume of the solution ___________
Density of the solution ___________
In the following table copy the data for solutions #1 through #5 you calculated from above.
Solution
Salinity
Density
1
2
3
4
5
Now plot the salinity versus density curve for these solutions in the grid provided below. Use a colored
pen for the curve.
22 | E a r t h S c i e n c e L a b M a n u a l
10 20 30 40 50 60
Salinity (ppt)
Answer the following questions:
Q1. Was your hypothesis proved about density and salinity correlation? Explain briefly.
Q2. What are the possible sources of error in this experiment?
D
e
n
s
i
t
y

23 | E a r t h S c i e n c e L a b M a n u a l
Q3. In a sea there are two types of saline waters, one with salinity 35.60 ppt and another with 40.21 ppt.
which water will have higher density? Why?
Q4. Of the waters given in question 3, which water should make the lower layer in the sea? Why?
Q5. What direct conclusion could you draw from the graph you made above?

24 | E a r t h S c i e n c e L a b M a n u a l

25 | E a r t h S c i e n c e L a b M a n u a l
Experiment 3: Latent Heat and Differential Heating of Land and Water
Objective: 1. To heat sand and water separately using the same source of heat for same time.
2. To plot curves for heating sand and water to compare the rates of heating of land and water.
Introduction
Latent heat is the heat given to or taken away form a substance in such a way that the temperature
change is not observed. In other words, even if heat is supplied to (or taken from) the substance, the
temperature remains the same.
To elaborate latent heat, let’s take an example of a burning candle. To convert the wax from solid to
liquid, we need to heat (i.e. supply heat to the wax). What happens as we heat wax for the first time? In
the beginning, the wax starts absorbing the supplied heat instead of increasing temperature. This absorbed
heat causes wax to change from solid to liquid, not increasing the temperature yet! This kind of heat used
to change the state of the substance rather than to change the temperature is called latent heat. After the
latent heat phase, the heat supplied is then used to increase the temperature. Latent heat also occurs during
liquid to gas phase change.
The phenomenon of latent heat is common in nature during melting of ice and vaporization of water. Ice
can change to water at 32
o
F (0
o
C) by absorbing heat from the surrounding but keeps the temperature
unchanged at 32
o
F. Formation of slippery sleet under icy road conditions is due to this nature of water.
Addition of salt to the icy roads decreases the melting temperature of ice so that ice starts melting at lower
temperatures than 32
o
F and the roads get cleared of ice easily. This is one good example of study of
science directly applied in solving problems.
In part A of this experiment, you will learn to record the latent heat phenomena for water at two stages of
change of state: one at ice to water conversion stage and another at water to vapor conversion stage. For
this you should start from the ice phase and gradually change to vapor phase over time. Since you will be
constantly supplying heat, it is assumed that the supplied heat is constantly absorbed by the contents of
the beaker. If temperature does not change even after supplying heat, this stage is known as latent heat
stage.
Heat absorbing capacity of different substances is different. This is based on the material of which the
substance is made. Land and water absorb heat very differently. Due to this difference in absorption of
heat we see several weather patterns coming in or going out from land to water and water to land i.e.
hydrosphere to geosphere heat interaction and geosphere to hydrosphere heat interaction.
In Part B of this experiment, you will see the difference between heat absorbing capacity of water and
land. Of all land components, sand (dessert) shows most significant heat absorption/loss phenomenon, so
we will use sand to represent the land mass for differential heat absorption experiment.
Materials Required
125 mL beaker, beaker tongs or heat glove, heating set up, ice, thermometer, sand, timer.

26 | E a r t h S c i e n c e L a b M a n u a l
Procedure
Part A: Latent heat
Follow the following procedure to record the data for heating ice-water.
1. Bring a clean 125-mL beaker and place on the digital balance. Add 90 grams of ice (better if
shaved). Add water to make the total mass 100 grams. Record the mass in the data sheet.
2. Immediately insert a thermometer.
3. Prepare a heating set up using stand, Bunsen burner, ring clamp, and a wire gauze.
4. Light the burner and start heating the ice. Set the timer on and record the initial constant
temperature of the ice-water in the data sheet. Keep recording the temperature every two minutes
until the water reaches to boiling and 10 more minutes (5 data points) even after boiling.
5. Stop heating by removing the burner (do not turn off the burner because you will need the same-
sized flame to keep the heat source constant for sand experiment, Part B).
6. Using a heat glove or beaker tongs, remove the beaker and throw the water into the sink. Clean
the beaker with running tap water and wipe it dry for Part B.
Part B: Land and water heating rate
Follow the following procedure to record the data for heating sand
1. Bring the 125-mL beaker you dried in Part A and place it on the digital balance. Add 100 g sand.
Record the mass in the data sheet.
2. Insert a thermometer and record the initial temperature.
3. Set the beaker for heating on the wire gauze and bring the burner in to start heating. Immediately
start the timer on.
4. Keep recording the temperature every two minutes until the temperature reaches to 100
o
C or total
of twenty data points are recorded, whichever is earlier.
5. Stop heating by turning off the burner this time. Let the beaker of sand cool for some time while
you plot your data points in the graph provided.
6. Using a heat glove or beaker tongs, remove the beaker and throw the sand into a designated
container. Clean the beaker and set it for drying.

27 | E a r t h S c i e n c e L a b M a n u a l
Experiment 3: Latent Heat and Differential Heating of Land and Water
Pre-laboratory Questions
Complete this page before coming to the lab. Read the information given to answer the following
questions.
Q1. What is latent heat?
Q2. Why does the candle melt at the beginning of its burning?
Q3. State two temperature conditions under which latent heat of ice/water/vapor system occurs.
Q4. Why do we put salts on icy roads?
Q5. On which factor does heat absorption by a matter depend?
Instructor’s approval____________________

28 | E a r t h S c i e n c e L a b M a n u a l

29 | E a r t h S c i e n c e L a b M a n u a l
Date
Name
Lab Partner
Experiment 3: Latent Heat and Differential Heating of Land and Water
Data Sheet
Write hypothesis Part A: Around which temperatures do you think the latent heat event(s)
might occur while heating ice-water to boiling?
______________________________________________________________________________
______________________________________________________________________________
Write hypothesis Part B: Which substance will have faster heating rate between water and
sand?
_____________________________________________________________________________
Part A: Latent heat
Mass of ice taken _______________
Mass of water added ______________
Total mass of ice-water ____________
Table for heating rate of ice water
Time
Temperature
Time
Temperature
0 min

30 | E a r t h S c i e n c e L a b M a n u a l
Part B: Land and water heating rate
Mass of sand taken ___________
Table for heating rate of sand
Time
Temperature
Time
Temperature
0 min
Answer the following questions.
Q1. What is the purpose of keeping the flame size same for both experiments?
Q2. Why is it important to keep the mass of water and sand same?
Q3. What difference did you observe from the collected data for heating rates of water and sand?

31 | E a r t h S c i e n c e L a b M a n u a l
Now Plot the graph of the heating rate of ice-water as well as heating rate of sand in the same graph sheet
given in the following page. Use different colors for ice-water and sand curves.
Time
T
e
m
p
e
r
a
t
u
r
e

32 | E a r t h S c i e n c e L a b M a n u a l
Answer the following questions.
Q1. Observe the curve in the graph for ice-water heating carefully. Find two temperature regions from the
graph where you find not a significant increase in temperature with time.
_________________ ________________
Q2. Was your hypothesis on Part A proved? Briefly explain.
Q3. From the graphical curve, explain your understanding about latent heat.
Q4. Explain what you found while comparing the heating curve for sand versus heating curve for water.
Q5. How the findings of this experiment are important in real-life situation?

33 | E a r t h S c i e n c e L a b M a n u a l
Experiment 4: Magma Viscosity and Isostasy of Mountains
Objective: 1. To study the viscosity of liquids by drop-count method
2. To study the correlation between mountain height and the mountain root
Introduction
Part A: Viscosity
Section 6.2 in the textbook (Page 142 – 144) explains about the effect of magma viscosity in determining
the nature of volcano and its nature of explosion. In the same section we also study the effect of
temperature on viscosity of magma. The main objective of this experiment is to give you first-hand
experience with the materials of different viscosity and their flow in a controlled passage. In this
experiment, we will also see the effect of temperature on the substance’s viscosity.
Viscosity is resistance to flow. You have seen that liquids flow. Some liquids flow fast and some flow
slowly. A syrup relatively flows slower than water. What does this mean about its viscosity? If substance
A flows at a slower rate than substance B, then the viscosity of A is higher than viscosity of B. This means
that A has more resistance to flow. In order to check the viscosity or flow rates of two substances, care
should be taken in that the both substances are made to flow through same, or at least, similar passages.
This minimizes the effect caused by the passage itself to the material.
In this experiment, in order to avoid discrepancy, we will use similar two pipets with similar narrow
capillary tubes and allow our test materials to flow through it. The total number of drops made by that
material while passing through the similar passage will give the relative rate of flow. The higher is the
number of drops, the faster has the material flown and lower is its viscosity. On the same token, the lower
is the number of drops, slower has the material flown and higher is the viscosity.
Viscosity also depends on temperature (Page 143, section 6.2 textbook). When temperature increases,
the mobility of the molecules increases and, as a result, the flow increases. What does this mean in terms
of viscosity? It means that the viscosity decreases.
Part B: Height of Mountains and Isostasy
Refer to Section 6.7 in our textbook (page 166 – 167) for this part of the experiment. Density of the
materials of which a mountain is made determines how tall a mountain can be and how deep it can go
under the crust. This analogy and relationship between mountain height and the density can be
demonstrated in laboratory experiments using wooden blocks and water. As you have seen in previous
experiments that if a material is compactly built, its density is high and loosely packed materials have less
density. And if the density of the material is high, its weight is also high. That means it pushes (forces
itself) downward with a greater gravitational force. This concept directly applies to the mountain height
and their push on the Earth’s crust in order to maintain that height.
Isostasy is the balance between the topography of the Earth’s crust and its thickness and the density of the
rocks it is standing on. In order to maintain this isostasy, the removal or addition of materials on the
Earth’s crust has to bring changes in the downward forces and arrangement of the rocks so that the same
balance is maintained even in the new scenario. For example, if you add some material on the top of a
mountain, the mountain becomes heavier now and its root now increases in size. That means, isostasy
compensates for added material by making the submerged root bigger thereby adding only slightly the

34 | E a r t h S c i e n c e L a b M a n u a l
total height of the mountain. Similarly, if material is removed by erosion, the root decreases in height,
and again the total height of the mountain changes only slightly.
In this experiment, you will see the changes explained above by using the wooden blocks as mountain
materials and water as the underlying crust. Even though, the exact isostasy processes and forces will be
different than what is observed between wood and water (because we are discussing totally different
materials rock and soil versus woods and water) but the underlying principle is basically same. And of
course, it is totally impossible to perform the actual experiment involving a mountain, for which, we need
to be a giant monster bigger than the mountain itself!!!
Materials
Corn syrup, honey, clay putty (paper putty), disposable pipettes, two 5-mL pipets, an empty 20 Oz pop
plastic bottle, rubber cork with only one hole to fit the pipet, pipetting pump, two 100 mL beakers,
heating set up, 250-mL beaker, wooden blocks, 2000 mL beaker, ruler, thermometer.
Procedure
Part A: Viscosity Experiment
1. Bring two 125 mL clean and dry beakers and pour about 10 mL of corn syrup in one and 10 mL
honey in the other.
2. Bring a 5-mL pipet and insert the lower tip into a rubber cork so that the tip comes out of the cork
from the other side.
3. Cut the pop bottle from the middle to separate the top part (neck) and the bottom part (base).
4. Use the top part (having the neck) to fix the cork at the neck of the bottle so that the tip of the
pipet comes out 3 inches of the mouth of the bottle.
5. Fix the set-up vertically using a clamp and a stand. The bottle and the pipet should be vertically
standing after you fix with the clamp. To check if the bottle leaks, add some tap water into the
bottle. If it leaks, you should seal the leak or use another cork, or tighten the pipet, etc. whichever
is needed.
6. After this stage, you should become pro-active and need to start heating water for the second part
of this experiment. Bring a 250 mL beaker and fill about 2/3
rd
with the tap water. Set up a heating
arrangement using burner, ring clamp, wire gauge, and a stand. Set the beaker for heating.
7. Now returning back to the first part, bring a pipetting pump and fix it on the top of the pipet. With
the lower tip dipped in the corn syrup, pull the syrup up into the pipet using the pump. Stop when
you have reached the 5-mL mark. Remove the tip from the syrup and use a small piece of clay
putty to stopper the lower tip of the pipet. After properly sealing, remove the pump form the
pipet.
8. When you are ready with your timer, remove the putty and start the timer. One of you should also
count the number of drops falling from the pipet. Note down the time required to drop all 5 mL of
syrup from the pipet and also the number of drops in the data sheet.
9. Use the pipet pump to pump 5 mL syrup second time for the next part of the experiment. Put the
putty at the bottom of the pipet as before to seal it until you are ready.
10. Now your water should be around 80-90
o
C. For the second part of the experiment, place the hot
water into the bottle and let it heat the syrup in the pipet for 2 full minutes.
11. Now run the same drop counting and timing experiment after removing the putty from the pipet.
Note down the number of drops and total time taken to drop all 5 mL of syrup in the data sheet
12. Repeat the above two experiments (one without heat and one with heat) using honey this time.
Count the number of drops and total time required to drop all 5 mL of honey, both without
heating and with heating, in the data sheet.

35 | E a r t h S c i e n c e L a b M a n u a l
Part B: Height of Mountains and Isostasy
1. Bring a 2000 mL beaker and half fill with tap water.
2. Bring three wooden blocks and place two of the blocks, lying horizontally one on top of the other,
into the beaker.
3. From outside of the beaker, measure the submerged and floating depths of the combined blocks.
Note the depths on the data sheet.
4. Now add one more block on top of the two and measure the submerged and the floating depths of
the combined three blocks.
5. Now remove top two blocks and measure the submerged and floating depths of the single
remaining block.

36 | E a r t h S c i e n c e L a b M a n u a l

37 | E a r t h S c i e n c e L a b M a n u a l
Experiment 4: Magma Viscosity and Isostasy of Mountains
Pre-laboratory Questions
Complete this page before coming to the lab. Read the information given to answer the following
questions.
Q1. What is viscosity?
Q2. How is viscosity related to density?
Q3. How is viscosity related to temperature?
Q4. How is a mountain’s height related to its materials’ density?
Q5. What is isostasy?
Instructor’s approval____________________

38 | E a r t h S c i e n c e L a b M a n u a l
Date
Name
Lab Partner
Experiment 4: Magma Viscosity and Isostasy of Mountains
Data Sheet
Part A: Viscosity Experiment
Write hypothesis 1: Write a suitable hypothesis regarding the two liquids and number of drops they will
make during the same amount of time.
_____________________________________________________________________________________
Write hypothesis 2: Write a suitable hypothesis regarding the relationship between temperature and
number of drops.
_____________________________________________________________________________________
Room temperature experiment
Syrup Honey
Amount of material taken in the pipet ____________ _____________
Number of drops formed ____________ _____________
Total time taken to empty the pipet ____________ _____________
Elevated temperature experiment
Syrup Honey
Amount of material taken in the pipet ____________ _____________
Number of drops formed ____________ _____________
Total time taken to empty the pipet ____________ _____________

39 | E a r t h S c i e n c e L a b M a n u a l
Answer the following questions
Q1. Was your hypothesis 1 proved? Explain.
Q2. Was your hypothesis 2 proved? Explain.
Q3. Why is it important to know about the viscosity of magma?
Q4. Which type of magma cause explosive eruptions? What is the cause behind it?
Q5. What are the factors that control viscosity of a material?

40 | E a r t h S c i e n c e L a b M a n u a l
Part B: Height of Mountains and Isostasy
Write hypothesis 1: State what you think will happen to the submerged portion of the block when one
block is added.
_____________________________________________________________________________________
Write hypothesis 2: State what you think will happen to the submerged portion of the block when one
block is removed.
_____________________________________________________________________________________
Height of the submerged portion with two blocks of wood _______________________
Height of the floating portion of the two blocks of wood _______________________
Height of the submerged portion with three blocks of wood _______________________
Height of the floating portion of the three blocks of wood _______________________
Height of the submerged portion of one block of wood _______________________
Height of the floating portion of one block of wood _______________________
Ratio of submerged portions (one block: two blocks: three blocks) _____ : _______ : _______
Simplified ratio of submerged portions (one block: two blocks: three blocks) _____ : _______ : _______
(divide all three numbers by the smallest number)
Ratio of floating portions (one block: two blocks: three blocks) _____ : _______ : _______
Simplified ratio of floating portions (one block: two blocks: three blocks) _____ : _______ : _______
(divide all three numbers by the smallest number)
Answer the following questions.
Q1. Was your hypothesis 1 proved or disproved? Explain.

41 | E a r t h S c i e n c e L a b M a n u a l
Q2. Was your hypothesis 2 proved or disproved? Explain.
Q3. Is there a correlation between submerged portion and the floating portion? If yes, what type of
correlation? If no, why should there be no correlation?
Q4. By looking at the height of a mountain, what hypothesis can be made regarding its root?
Q5. How will the results change if used syrup instead of water? Would the ratios be still the same?

42 | E a r t h S c i e n c e L a b M a n u a l
43 | E a r t h S c i e n c e L a b M a n u a l
Experiment 5: Minerals and Rocks: Part I
Objective: 1. To observe and record prominent features of provided minerals and igneous rocks
2. To identify the provided unknown minerals and igneous rocks
Introduction
Minerals are naturally found inorganic solids. However, some minerals are also synthesized in
laboratory. Minerals are composed of various types of atoms arranged in a specific regular pattern. The
regular nature of the atomic arrangement gives unique shape, size, and color - characteristic to that
particular mineral, wherever it is formed and wherever it is found.
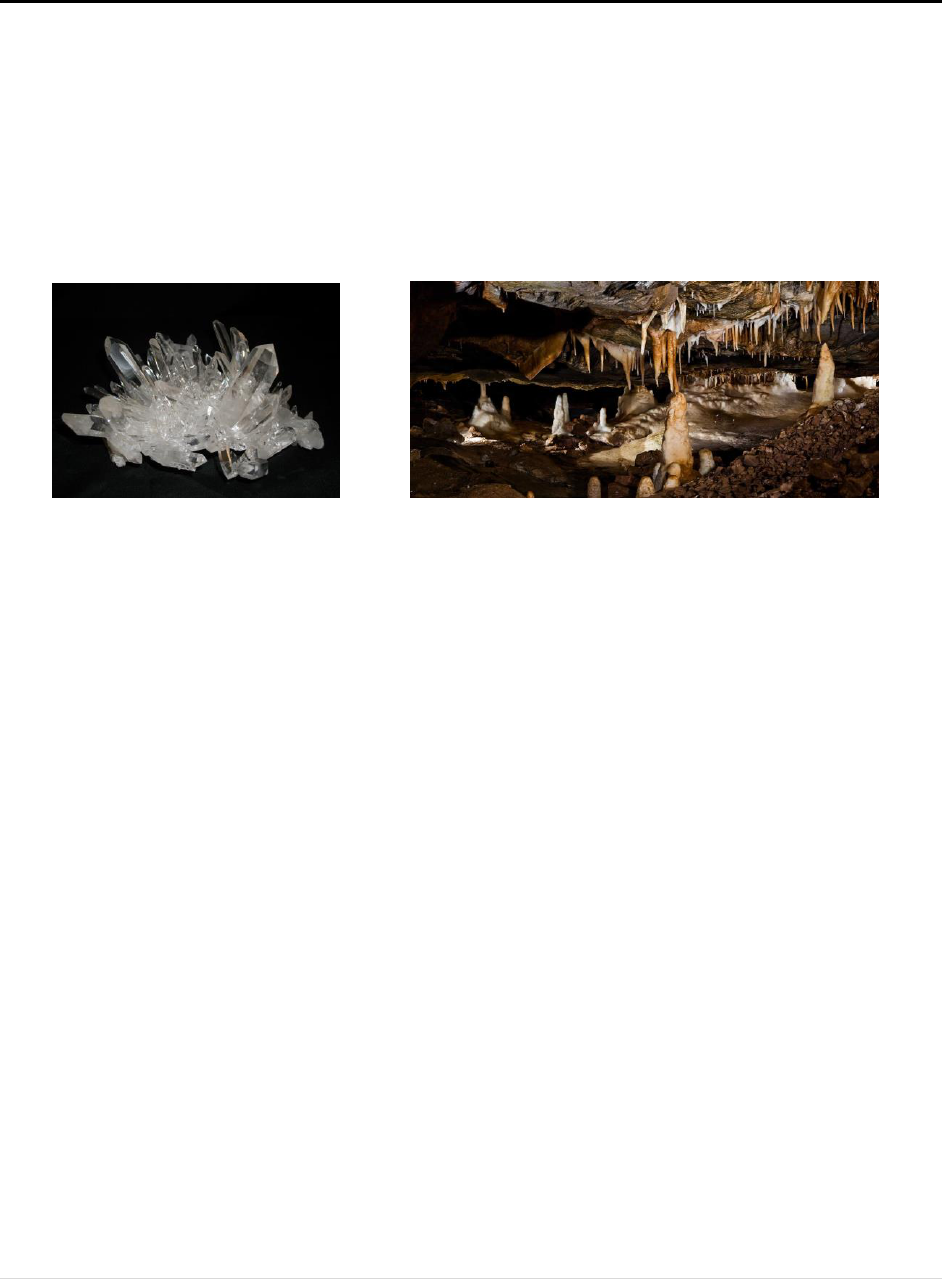
Quartz Crystals Mystic Cavern in Arkansas (Photo: mysticcaverns.com)
Figure 5.1: Typical pyramidal quartz crystal and inside of a cave where minerals form from their
solutions by deposition on a surface.
Minerals are usually formed from their solutions in nature. Crystallization is a common process of
formation of a mineral. Evaporation of the solution and deposition of the mineral on the surface causes
crystals to be formed. Sometimes one mineral solution mixes with other solution and precipitate out the
insoluble mineral. The precipitated mineral is solidified under pressure. This is an example of chemical
method of formation of minerals.
Most minerals are crystalline in shape. It means that the minerals have certain regular repeating shape.
You will get to prepare crystals of borax in Experiment 7 yourself to see exactly how crystals are formed
from their solution. For now, we will study the given mineral crystals and observe their properties. Atoms
and molecules in crystals align themselves in a way to minimize the energy needed to form. Some
possible crystal shapes are needles, cubes, prism, pyramid, and sheets. Note the pyramidal shape of the
quartz crystal in the above figure 5.1.
Crystals tend to break along one or more planes. Such a propensity of crystals is called Cleavage. If the
bonding in the mineral is ionic (metal/non-metal bond) the mineral tends to break easily as compared to
the covalent bonding (non-metal/non-metal bond) minerals. Micas are very good examples of single-
cleavage-plane minerals where the thin sheets, one lying on top of the other, easily separate along that
parallel planes to make thin sheets. Note that cleavages are the regular break planes and not any breaking
lines. Quartz, for example, does not have any cleavage plane and thus the breaking pattern is irregular.
Some minerals have good metallic luster which means they can reflect light like metals and thus appear
like metals. Pyrite has a good metallic luster (Fig 7.12, textbook). Some minerals tarnish after being
exposed and are called to have sub-metallic luster, which is a dull, faded luster. Some non-metallic lusters
are described as vitreous (glassy), dull (earthly), pearly (like pearl), silky (like satin cloth or silk), greasy
(oily) etc.

44 | E a r t h S c i e n c e L a b M a n u a l
Igneous rocks are formed by cooling of magma in two ways. If the cooling occurs outside the volcano,
now the magma is called lava, the igneous rocks are called volcanic rocks. However, if the magma cools
inside the Earth’s crust, the igneous rocks are called Plutonic rocks.
Texture of the rocks depend on the grain size of the mineral crystals that form the rock. Volcanic
igneous rocks cool very fast and have smaller grain size. This is because there is no time for slow and
continuous growth of the crystals once the lava is exposed outside the surface of Earth. Plutonic igneous
rocks cool slowly and have big grain size, because slow cooling allows the growth of large crystals over
time. According to texture the igneous rocks are classified as follows:
1. Phaneritic – coarse-grained, roughly equal size, and evenly distributed throughout - plutonic
2. Aphanitic – fine grained, grains not visible without magnification –volcanic
3. Porphyritic – mixture of coarse and fine grained, results when cools in two different
environments, phenocrysts (large grains) embedded in matrix (small-grained mass) - both
4. Glassy – resembles processed glass, formed by very quick cooling even before atoms arrange to
crystals, shiny/slippery surface – volcanic.
5. Vesicular – with voids for gases that escaped, fine grained glassy fibers with vesicles – volcanic
6. Pyroclastic – fragmental, fragments of vent walls in ashes or blobs, light-weight – both
Color of igneous rocks is an important indication of their composition of silica. Whether they are
volcanic or plutonic, the light-colored ones have high silica content and dark-colored ones have low
silica content. Refer to Fig. 7.20 of Textbook (page 186) to identify the silica content based on color.
Materials Required
Provided samples of minerals and rocks, feldspar, mica, pyrite, halite, quartz, amphibole, textbook, test
tubes, hydrochloric acid, provided igneous rocks.
Procedure
Part A: Minerals
1. Record the features of given rocks such as name, color, crystal shape, cleavage, luster, and any
additional features that will be helpful to identify the rock when no name is given.
2. Also write any additional features not visible to our eyes such as its formation, source, location it
was found or is mostly found, if it is provided on the mineral information.
3. Bring a piece of mineral calcite provided and place it in a test tube. Add a drop or two of
hydrochloric acid. Record the observations.
4. Dispose of the waste as directed by your instructor.
Part B: Igneous Rocks
1. Record the features of given rocks such as name, color, grain size, texture, silica content, whether
plutonic or volcanic, and any other feature which will be helpful for identifying the unknown
rocks.
2. Also write any additional features not visible to our eyes such as its formation, source, location it
was found or is mostly found, if it is provided on the mineral information.

45 | E a r t h S c i e n c e L a b M a n u a l
Part C: Unknown Minerals and Rocks
1. Record the features of given minerals and rocks just as you did for the known minerals and rocks
in order to identify them
2. Write the name of the given unknown minerals and rocks that is mostly suitable for the studied
mineral or rock.

46 | E a r t h S c i e n c e L a b M a n u a l

47 | E a r t h S c i e n c e L a b M a n u a l
Experiment 5: Minerals and Rocks Part I
Pre-laboratory Questions
Complete this page before coming to the lab. Read the information given to answer the following
questions.
Q1. What are minerals?
Q2. How are minerals formed?
Q3. What type of bond creates minerals with more cleavage? What is the reason behind it?
Q4. How do you distinguish volcanic and plutonic rocks based on their grain size?
Q5. How do you distinguish low or high silica content based on the rock color?
Instructor’s approval____________________

48 | E a r t h S c i e n c e L a b M a n u a l

49 | E a r t h S c i e n c e L a b M a n u a l
Date
Name
Lab Partner
Experiment 5: Minerals and Rocks Part I
Data Sheet
Part A: Minerals
Name of the
provided
mineral
Color
Crystal shape
Cleavage
Luster
Other notable
features

50 | E a r t h S c i e n c e L a b M a n u a l
Observation of calcite mineral before adding hydrochloric acid __________________________________
Observation of calcite mineral after adding acid _____________________________________________
Identification of unknown Minerals
Sample
Number
Color
Crystal shape
Cleavage
Luster
Other notable
features
Name of the
Mineral
1
2
3
4
Answer the following questions:
Q1. Which mineral had the most distinct color that helped in its identification?
Q2. Which of the minerals provided had good metallic luster, a sub-metallic luster, or a non-metallic
luster?
Q3. Why do minerals have different crystals shapes?

51 | E a r t h S c i e n c e L a b M a n u a l
Q4. Which mineral had many cleavage? What is the reason behind it?
Part B: Igneous Rocks
Name of
the
Provided
Rock
Grain
Size
(small/
large)
Texture
(one of six
types)
Color
Silica Content
(High/intermediate
/low)
Volcanic
or plutonic
Additional info

52 | E a r t h S c i e n c e L a b M a n u a l
Identification of Unknown Igneous Rocks
Sample
number
Grain Size
Texture
Color
Silica Content
Volcanic or
plutonic
Name of the
Unknown
Rock
1
2
3
4
Answer the following questions:
Q1. Which rocks provided had a distinct texture regarding its grain size? Did you have any rock that was
hard to distinguish the texture? Mention the name.
Q2. How many of your rocks were volcanic and how many plutonic?
Q3. What is the most distinguishing feature of a volcanic rock?
Q4. Classify the given known rocks based on silica content.
High: ________________________________
Intermediate: ________________________________
Low: ______________________________________

53 | E a r t h S c i e n c e L a b M a n u a l
Experiment 6: Minerals and Rocks Part II
Objective: 1. To observe and record prominent features of provided sedimentary and metamorphic rocks
2. To identify the provided unknown sedimentary and metamorphic rocks
Introduction
Sedimentary Rocks are stratified rocks. This means that they form layers or beds, one over the other. If
you see a clearly distinguishable regularly arranged layers of rocks on an exposed rocky surface, most
possibly it is a sedimentary rock layer laid there millions of years ago.
Formation of sedimentary rocks occurs in a wide range of environments from dunes, to lagoons, beaches,
continental shelves, river deltas, ocean basin, reefs, alluvial plains, stream shores, and swamps.
Sedimentary rocks give valuable information about the past geological events from mountain formation to
climate to plate movements.
Three different types of sedimentary rocks are based on composition and formation: clastic, biochemical,
and chemical sedimentary rocks. Clastic sedimentary rocks are formed from previous rocks after
erosion. First the parent rock is eroded into pieces (generation), secondly they are transported to
different places (transportation), and finally they are deposited (lithification). The type of
sedimentary rock that will finally be made depends on the grain size (smallest to largest: clay, silt, sand,
gravel), velocity of the transporting medium (sorts out the grain size), and the location of lithification.
If the lithification process occurs due to the action of living organisms or if the living organisms are
trapped along with the minerals the resulting rocks are biochemical sedimentary rocks. E.g. calcite is
precipitated from seawater to make limestone, a biochemical sedimentary rock, from the actions of corals.
Chalks are made of dead organisms called coccolithophores. When plants are deposited in layers and are
trapped under high pressure and temperature, coal results. Oil and gas are results of similar sedimentation
of animals.
Precipitation and crystallization of minerals from their solutions results into chemical sedimentary
rocks. Most common example is the table salt. When a salty seawater collects in a hot area the
evaporation of water makes the solution concentrated and the salt is finally precipitated. The precipitated
salt is trapped under layers and becomes a future underground salt mine. More on this is discussed in
Chapter 7, when you study and practice crystallization process.
Metamorphic rocks are made from pre-existing rocks by pressure or heat. When heated or pressurized,
the mineral composition and the particle arrangement changes and consolidates the materials already
present changing the final form of rock – metamorphosed rocks! Remember, the rocks should only be
heated to a certain degree (usually ranging from 200
o
C to 1100
o
C) and pressurized accordingly to make
metamorphic rocks. At higher temperatures plutonic igneous rocks will be formed.
According to how the rocks are made, there are two types of metamorphic rocks: contact and regional
metamorphic rocks.
When rocks (sedimentary or igneous) are subjected to high temperature (baked! without melting), their
chemical composition remains the same but the crystal pattern is deformed or re-formed. Such denser
rocks formed due to the effect of heat (contact) are called contact metamorphic rocks. The heating
process usually occurs near the magma inside the earth. Marble made from limestone (sedimentary) and
Quartzite made from quartz (igneous) are examples of contact metamorphism.

54 | E a r t h S c i e n c e L a b M a n u a l
Regional metamorphism results due to high temperature as well as high pressure. Since pressure is
applied along with high heat, the crystals grow in a directional way and the resulting crystals are oriented
in the same direction. This usually results into foliation because the unidirectional orientation of minerals
produces streaks of regular lines within the rock. Some sedimentary and igneous rocks also show some
degree of foliation but we can easily distinguish metamorphic foliation by the high degree of alignment
including bending and folding due to tremendous pressure. Whether foliation occurs or not depends not
only on applied pressure and heat but also whether the parent rock has suitable mineral grains.
Materials Required
Provided samples of sedimentary and metamorphic rocks, textbook, unknown rock samples.
Procedure
Part A: Sedimentary Rocks
1. Record the features of given rocks such as color, texture, composition, and their possible
classification in the data table provided.
2. Write other non-visible features such as its formation, source, and location it was found or is
mostly found.
Part B: Unknown sedimentary Rocks
1. Record the features of given rocks as you would do for known sedimentary rocks such as color,
texture, composition etc.
2. Classify whether it is a clastic, chemical, or biochemical sedimentary rock.
3. Write the name of the given unknown rocks that is closest for the given properties.
Part C: Metamorphic Rocks
1. Record the features of given rocks such as color, composition, grain type, how it was formed, etc.
2. Write other features not visible to our eyes such as its source, location it was collected from etc.
Part D: Unknown Metamorphic Rocks
1. Record the features of given unknown rocks as you would do for the known metamorphic rocks.
2. Classify whether it is a contact or a regional type and then foliated or non-foliated. Also write
other features that are helpful.
3. Write the name of the given unknown metamorphic rock that is closest to the known
metamorphic rocks.

55 | E a r t h S c i e n c e L a b M a n u a l
Experiment 6: Minerals and Rocks Part II
Pre-laboratory Questions
Complete this page before coming to the lab. Read the information given to answer the following
questions.
Q1. What are the sources of sedimentary rocks? Write four types of grain particles that make sedimentary
rocks.
Q2. What are three basic types of sedimentary rocks? Briefly describe each.
Q3. What are three steps by which clastic sedimentary rocks are made?
Q4. Why is temperature critical to form metamorphic rocks?
Q5. What is the main difference between contact metamorphic rocks and regional metamorphic rocks?
Instructor’s approval____________________

56 | E a r t h S c i e n c e L a b M a n u a l

57 | E a r t h S c i e n c e L a b M a n u a l
Date
Name
Lab Partner
Experiment 6: Minerals and Rocks Part II
Data Sheet
Part A: Sedimentary Rocks
Name of
the
Provided
Rock
Color
Composition
(what could it
be made of)
Texture
(Soft/
hard/
grainy)
Location or
origin
Clastic,
biochemical,
or chemical
Additional info

58 | E a r t h S c i e n c e L a b M a n u a l
Part B: Unknown Sedimentary Rocks
Sample
number
Color
Composition
(what could it
be made of)
Texture
(Soft/
hard/
grainy)
Location or
origin
Clastic,
biochemical,
or chemical
Identification of
the unknown
rock
1
2
3
4
Answer the following questions
Q1. What role did you find of animals or plants to make some of the sedimentary rocks you studied?
Q2. What type of sedimentary rock are you studying if you see that the rock was actually formed by
precipitation of minerals from its solution?
Q3. From what you observed while studying the rocks, can sedimentary rocks be made from any other
pre-existing rocks? How do you support your answer?

59 | E a r t h S c i e n c e L a b M a n u a l
Part C: Metamorphic Rocks
Name of
Provided
Rock
Color
Composition
(what could it
be made of)
Foliated or
Non-
foliated
Contact or
Regional
Parent rock
(sedimentary
or igneous)
Additional info
Answer the following question
Q1. Which metamorphic rock provided was with most prominent foliation feature? Why do you think this
type of foliation might have occurred?

60 | E a r t h S c i e n c e L a b M a n u a l
Part D: Unknown Metamorphic Rocks
Sample
Number
Color
Composition
(what could it
be made of)
Foliated
or Non-
foliated
Contact or
Regional
Parent rock
(sedimentary
or igneous)
Name of the
unknown rock
1
2
3
4
Answer the following questions
Q2. What are the features you could observe in your unknown rocks that help you to distinguish whether
they are contact or regional metamorphic rocks?
Q3. From what you studied, can we clearly say whether the rock was metamorphosed from a sedimentary
or an igneous rock? Give a brief reason.
61 | E a r t h S c i e n c e L a b M a n u a l
Experiment 7: Mineral Crystallization
Objective: 1. To prepare the saturated solution of borax
2. To make crystals of borax using the saturated solution
Introduction
We studied and observed minerals in Experiment 5. We studied that minerals are naturally found
inorganic compounds made of one or more common elements of earth. Minerals are formed from their
solutions in nature in a slow process on or under the surface of earth. This chapter is more focused on
crystallization process which is one of the process of formation of minerals in nature or in laboratory or
industry.
Crystallization is the process of formation of solid crystals from their solution. When the solution
containing the minerals in high concentration slowly cools down the solid crystals start to form. The
beginning of formation of crystals from the solution is called seeding. Once seeding starts, it accelerates
the growth of many crystals around and starts formation of more crystals in every direction. The slower is
the process of formation of crystals, more uniform and regular crystals can be prepared.
We studied in Experiment 2 that a solution is made of solute and solvent and is a homogenous mixture.
We also prepared some solutions and measured their density. In order to make crystals though we cannot
use an ordinary solution, we have to use something called saturated solution. A saturated solution is a
solution of a very large amount of solute in the solution to the extent that the solution does not dissolve
some of the added solute. We also need to heat the solution so that the dissolving proves becomes faster.
When the hot saturated solution of a mineral is cooled slowly over time, crystals of that mineral are
formed.
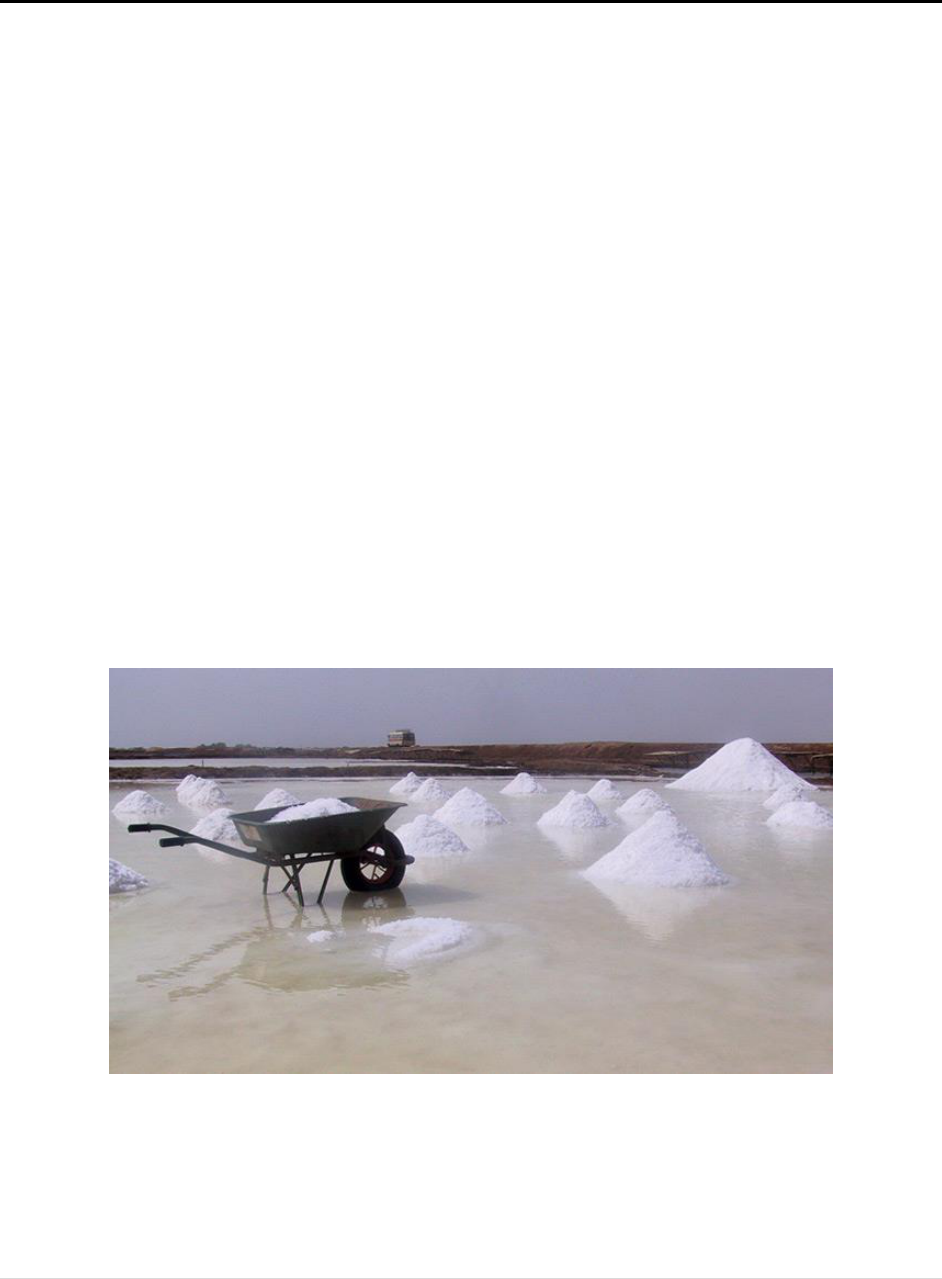
Figure 11.1 Salt evaporation lake in Thar, India
In nature, the crystallization process occurs in various ways. In some cases, the solution on a flat surface
such as a lake dries out to give a residue of salt crystals. Playa Lakes in Thar Desert area in India are one
of the great sources of salt in the world. Here, a hyper saline brine is subjected to extreme sunlight (and
no rainfall) causing the solution to precipitate in the form of salt crystals (see picture above). Solution

62 | E a r t h S c i e n c e L a b M a n u a l
mining is the most common way of obtaining commercial table salt form salt beds. Wells are make over
the salt beds and fresh water is sent into the wells. The resulting brine is pumped out and evaporated in
production plants. The resulting salt is purified. The USA is the current top producer of world’s salt.
In this lab, we will learn to prepare a saturated solution of borax and then to prepare crystals from the
saturated solution. We will use borax as our salt to prepare crystals. Borax is a tetra borate salt of sodium
and is not same as the table salt which in turn is sodium chloride. Borax also has 10 molecules of water in
its fully crystalline form with the formula Na
2
B
4
O
7
·10H
2
O. Evaporation by sunlight is a natural process of
making table salt but we will use crystallization method for obtaining borax salt from its appropriately
prepared solution.
For more information on minerals and crystals see page 180-184 in Textbook.
Materials
Borax, heating set-up, stirring rod, 250-mL beaker, 100-mL beaker, petri dish or watch glass, beaker
tongs or heat gloves, weigh boat, scoop, digital balance, pipe cleaners.
Procedure
Use following procedure in the order given.
1. Assemble the heating set-up.
2. Bring a 250-mL beaker and place exactly 100 mL of DI water.
3. Set the water for heating.
4. Bring a clean and dry 100-mL beaker and record its mass.
5. Bring a weigh boat and weigh out 10 grams of borax using a scoop form the stock container.
6. As the water starts boiling, add borax using a scoop, a little at a time to allow the proper
dissolution. Keep stirring every time you add borax into the solution until it completely dissolves.
7. If you are out of the weighed borax and still keeps dissolving, get more but keep track of the
borax added.
8. Once you see the added borax does not dissolve any more, you should stop adding more borax
and stop heating.
9. To find the total amount of borax added, subtract the amount left behind from the total you
weighed. Record the total mass of borax dissolved. You will need this amount to find the
10. Using the beaker tongs or heating gloves, transfer the solution only, not the undissolved borax,
slowly to a 100-mL beaker.
11. This is your saturated solution of borax.
12. This is the time to add some color to the solution if you want to prepare colorful crystals.
13. Bring a clean and dry petri dish and record its mass.
14. Pour a little of the solution into a petri-dish using the glass stirring rod to cover the bottom and set
it aside for cooling, undisturbed.
15. Bring a pipe cleaner and make a shape of your choice out of it but it should fit into the beaker
while hanging. Record the mass of the pipe cleaner. Hang the pipe cleaner from the top of the
beaker using a glass rod. Set this set-up aside for cooling.
16. Observe the petri-dish for any formation of crystals and record your observation in the data sheet.
17. Write your group’s name on the petri-dish and the beaker and let them sit for overnight. If you
have class next day, do not forget to check your crystallization process. If you wait until next
class time, you will probably miss the process of formation of crystals in the intermediate stage
and you will only see the fully crystallized product.

63 | E a r t h S c i e n c e L a b M a n u a l
18. After full crystallization process is complete, decant any water left behind in the petri-dish and
the beaker and set them for drying. When completely dry record the mass of the petri-dish with
the crystals as well as the beaker plus the crystals.
19. Form the total mass of everything, subtract the mass of the beaker, the petri dish and the pipe
cleaner to find how much total crystals you made.

64 | E a r t h S c i e n c e L a b M a n u a l

65 | E a r t h S c i e n c e L a b M a n u a l
Experiment 7: Mineral Crystallization
Pre-laboratory Questions
Complete this page before coming to the lab. Read the information given to answer the following
questions.
Q1. What is crystallization? What are conditions needed for crystallization process?
Q2. What substances undergo crystallization? Give some examples.
Q3. Define a saturated solution. What does heat do to a saturated solution?
Q4. What happens when a saturated solution cools under normal temperature?
Q5. Where in nature does crystallization occur? Give examples.
Instructor’s approval____________________

66 | E a r t h S c i e n c e L a b M a n u a l

67 | E a r t h S c i e n c e L a b M a n u a l
Date
Name
Lab Partner
Experiment 7: Mineral Crystallization
Data Sheet
Write hypothesis: State how do you expect the process of crystallization will occur. Will you get the
amount you started with at the end of the process?
_____________________________________________________________________________________
_____________________________________________________________________________________
_____________________________________________________________________________________
Mass of clean dry 100-mL beaker ______________
Amount of water used to make solution (mL) ___________________
Total amount of borax used in making saturated solution ____________________________
Appearance of borax before dissolution ______________________________________
Mass of the petri-dish _______________________
Mass of the pipe cleaner used for crystallization ___________________________
Appearance of the petri-dish as it is cooling __________________________
Description of the observation of the process of crystallization (next day)
Description of the final product after completing crystallization

68 | E a r t h S c i e n c e L a b M a n u a l
Total mass of crystals recovered from the whole experiment ______________________
(Don’t forget to subtract the beaker, petri-dish, and the pipe cleaner masses)
Change in mass than what you started with _______________________
Answer the following questions
Q1. Were your hypotheses proved? To which extent?
Q2. What was the purpose of dissolving the borax a little at a time?
Q3. Why should the process be allowed so much time?
Q4. What difference would you expect to find if the process was expedited by placing the solution in a
fridge?
Q5. What are the possible sources of error in this experiment?
Q6. Which natural processes are very close to the crystallization in the petri-dish and which process is
close to one in the beaker?

69 | E a r t h S c i e n c e L a b M a n u a l
Experiment 8: Albedo Effect
Objective: 1. To record the temperatures of various landmasses.
2. To identify and discuss the role of particular landmass in maintaining Earth’s temperature
Introduction
The ultimate source of light and heat for earth is sun. The electromagnetic radiation from sun reaches the
Earth through the atmosphere and in the process, much of the harmful radiations are captured and blocked
by the atmosphere. The remaining solar radiation that reaches the Earth surface is used to harvest energy
for plants for photosynthesis and is passed onto the other life forms. However, several processes happen
in the atmosphere and on the surface of Earth after receiving solar energy. Some of the processes are
described below.
Scattering of electromagnetic radiation causes the energy to scatter or spread out into the atmosphere and
beyond. When the electromagnetic radiation strikes small particles such as dust and gas molecules in the
atmosphere, it changes the direction. The sky looks blue due to this property of the radiation. Blue light is
scattered more easily than other colors and reaches to our eyes, making the sky appear blue. Same
phenomenon happens when light strikes the water molecule. They scatter the blue light which comes to
our eye.
Some of the electromagnetic radiation gets reflected back to the space from the particle or object which it
strikes. This is the property we will mainly focus on in this experiment. Light can be reflected by various
objects such as atmosphere itself (gases, dust, smoke etc.), clouds, trees, snow and ice, rocks, water, man-
made structures etc. The extent of reflection of radiation depends what the object is made of, what color it
is, and how smooth the surface is. The measure of reflecting capacity of objects is called albedo. Albedo
is usually measured in percentage unit. Above 90% albedo naturally means very high reflectivity and
below 10% albedo means very low reflectivity.
Some of the radiation gets absorbed by the molecules in which case the molecules do not give back the
energy but keep in themselves and change into other forms such as heat. If the object is keeping the
radiation it gets, obviously it is reflecting less, which means it has low albedo effect. Carbon dioxide gas
is very good absorber of heat because it can trap the solar radiation and gets itself heated. That is why, the
area that produces carbon dioxide a lot is relatively warm. Besides carbon dioxide, black soot from
burning object also have a very good absorbing capacity.
Greenhouse effect is a scenario where, like in a greenhouse, the incoming radiation is trapped in the
molecules themselves and will not be reflected back into the space. This increases the average
temperature of the atmosphere and the underlying places because after absorbing the radiation they
radiate hot infrared radiation. Therefore, places with less albedo have more greenhouse effect and have
higher temperature than places with high albedo.
For more information on albedo effect see Textbook page 388-389 and related content.
Materials
Temperature sensor probe, computer interface.

70 | E a r t h S c i e n c e L a b M a n u a l
Procedure
1. Bring a Vernier temperature probe and connect to the correct port of the Lab Quest computer
interface.
2. You should be able to see the temperature of the probe in the interface already. If it does not give
you the temperature, it is not well connected or is broken.
3. Check the probe by gripping between your fingers and see the temperature increase.
4. Bring the data page with you and get ready to collect data at different locations outside as
mentioned in the data sheet.
5. Record the temperatures in the shade and light of the same type at two different locations and find
the average.
6. Repeat the same for other locations and answer the given questions.

71 | E a r t h S c i e n c e L a b M a n u a l
Experiment 8: Albedo Effect
Pre-laboratory Questions
Complete this page before coming to the lab. Read the information given to answer the following
questions.
Q1. What represents Earth’s albedo?
Q2. What are three possibilities that happen to incoming solar radiation?
Q3. What types of objects absorb more sunlight and what types of objects reflect more?
Q4. What is greenhouse effect? What gas is mainly responsible for it?
Q5. Which area will usually have high temperature - right above the surface or high above the surface?
Why?
Instructor’s Approval____________________

72 | E a r t h S c i e n c e L a b M a n u a l

73 | E a r t h S c i e n c e L a b M a n u a l
Date
Name
Lab Partner
Experiment 8: Albedo Effect
Data Sheet
Write hypothesis: State which landmass will have the highest temperature and which will have the
lowest temperatures.
_____________________________________________________________________________________
_____________________________________________________________________________________
_____________________________________________________________________________________
Record the temperature of the following places around campus.
Location 1 Location 2 Average
Parking lot asphalt (shaded area) ____________ ____________ _____________
Parking lot asphalt (lighted area) ____________ ____________ _____________
Sidewalk cement (shaded area) ____________ ____________ _____________
Sidewalk cement (lighted area) ____________ ____________ _____________
Grass (shaded area) ____________ ____________ _____________
Grass (lighted area) ____________ ____________ _____________
Edge of a pond (shaded area) ____________ ____________ _____________
Edge of a pond (lighted area) ____________ ____________ _____________
Answer the following questions.
Q1. Was your hypothesis proved? Explain your observation.

74 | E a r t h S c i e n c e L a b M a n u a l
Q2. Between the lighted and shaded area of the same location, which one had the higher temperature?
What could be the possible cause of this?
Q3. Which location had the greatest albedo? What may be the possible cause of that?
Q4. Which location can cause the greatest greenhouse effect and keep the atmosphere warm?
Q5. Use the above data to interpret why we feel cool by a lakeside in a summer day.
Q6. Which roof color (dark or light) do you suggest for a house in an area that has yearly average
temperature of 40
o
F? Explain. What if the house was in Miami, Florida?

75 | E a r t h S c i e n c e L a b M a n u a l
Experiment 9: Psychrometer Experiment
Objective: 1. To use a psychrometer to measure temperatures of dry and moist air
2. To determine the relative humidity and the dew point temperature of surrounding air using
these temperatures and given standard tables
Introduction
Water vapor is one of the components of the atmosphere along with nitrogen, oxygen, carbon dioxide,
ozone, and other gases. Even though water vapor occupies only a little fraction of total volume of
atmospheric gases (0.1 to 4%), it actually has lot more importance regarding its role in maintaining the
atmospheric condition of a particular location. In simple terms the water vapor content of air is called its
humidity.
Water is continuously evaporating from the Earth’s surface into atmosphere. The pressure of water vapor
in the atmosphere is called vapor pressure. The vapor pressure increases when water keeps evaporating
from the surface. As soon as the vapor pressure reaches to a limit, the atmosphere can no longer hold any
more water vapor. This situation is called saturation. You have worked with a saturated solution in
Experiment 7 in which you prepared crystals from a saturated solution: the solution can no longer any
more solid. This is a similar analogy, but with water vapor this time. After saturation level is reached, the
water vapor accumulated in the atmosphere starts to gather more water molecules together (clumping) and
becomes heavy. This causes precipitation in the form of rain, hail, ice, or snowfall depending on
temperature.
Rather than absolute humidity, we frequently hear relative humidity in weather statements. Relative
humidity is a term used to express how close the air is from saturation level. Relative humidity is
mathematically calculated by finding the percentage of actual water vapor content in per kg of air
compared with the amount of water vapor needed per kg of air to make the air saturated.
Relative humidity = Actual amount of water vapor per kg x 100
Amount of water vapor needed per kg air to make it saturated
The amount of water vapor needed per kg of air to make the air saturated with water vapor is also called
mixing ratio. The value of relative humidity is expressed in percentage. The precipitation condition
mentioned above is reached when the relative humidity is 100%.
In this lab we will measure the relative humidity by using an instrument called psychrometer. This is the
method of finding the relative humidity using temperature difference. A typical psychrometer has two
thermometers: dry-bulb thermometer and wet-bulb thermometer. The bulb of a dry-bulb thermometer
directly measures the temperature of the surrounding air. The bulb of a wet-bulb thermometer is wrapped
around by a piece of a cloth which is made wet before actually measuring the temperature. When the
psychrometer is spun by using the handle, the wet bulb starts accelerated evaporation of water and cools
down the bulb fast. The difference between the dry- and wet-bulb temperatures is called the depression
of the wet bulb (how much below the wet-bulb temperature is from the dry-bulb temperature) and is used
to determine relative humidity using Table 1.
Dew-point temperature is the temperature at which the air can no longer hold the water vapor mixed in it
and starts forming liquid water. High dew-point temperature in a particular day means that there is high
amount of water vapor in the air and the formation of dew starts at that high temperature that day. Lower
dew-point temperature means that the dew formation starts only after reaching that lower temperature

76 | E a r t h S c i e n c e L a b M a n u a l
because the air has less water vapor in it. Dew-point temperature is also determined using the
psychrometer and a standard conversion table. You will use Table 2 below to determine the dew-point.
Table 1: Relative Humidity Conversion Table
Dry Bulb
Tempera-
ture (
o
C)
Difference between Dry bulb and Wet bulb temperatures (
o
C)
0
1
2
3
4
5
6
7
8
9
10
11
12
13
14
15
-20
100
28
-18
100
40
-16
100
48
-14
100
55
11
-12
100
61
23
-10
100
66
33
-8
100
71
41
13
-6
100
73
48
20
-4
100
77
54
32
11
-2
100
79
58
37
20
1
0
100
81
63
45
28
11
2
100
83
67
51
36
20
6
4
100
85
70
56
42
27
14
6
100
86
72
59
46
35
22
10
8
100
87
74
62
51
39
28
17
6
10
100
88
76
65
54
43
33
24
13
4
12
100
88
78
67
57
48
38
28
19
10
2
14
100
89
79
69
60
50
41
33
25
16
8
1
16
100
90
80
71
62
54
45
37
29
21
14
7
1
18
100
91
81
72
64
56
48
40
33
26
19
12
6
20
100
91
82
74
66
58
51
44
36
30
23
17
11
5
22
100
92
83
75
68
60
53
46
40
33
27
21
15
10
4
24
100
92
84
76
69
62
55
49
42
36
30
25
20
14
9
4
26
100
92
85
77
70
64
57
51
45
39
34
28
23
18
13
9
28
100
93
86
78
71
65
59
53
47
42
36
31
26
21
17
12
30
100
93
86
79
72
66
61
55
49
44
39
34
29
25
20
16
Materials
A psychrometer, beaker, the relative humidity chart, dew point chart, calculator
Procedure
Follow the given procedure.
1. Bring a psychrometer provided. Check if the cloth wrapped around the wet bulb thermometer is
loose. If it is loose, the chances are it will get removed while spinning the psychrometer. Also
make sure that the thermometer liquid (if red, it should be ethanol) is uniform all throughout the
capillary. If there are gaps, it will not give the right temperature.
2. Read the constant dry air temperature using the dry bulb thermometer and record it in the data
sheet
(… Continued after Table 2)

77 | E a r t h S c i e n c e L a b M a n u a l
Table 2: Dew-Point Conversion Table
Dry Bulb
Tempera-
ture (
o
C)
Difference between Dry bulb and Wet bulb temperatures (
o
C)
0
1
2
3
4
5
6
7
8
9
10
11
12
13
14
15
-20
-20
-33
-18
-18
-28
-16
-16
-24
-14
-14
-21
-36
-12
-12
-18
-28
-10
-10
-14
-22
-8
-8
-12
-18
-29
-6
-6
-10
-14
-22
-4
-4
-7
-12
-17
-29
-2
-2
-5
-8
-13
-20
0
0
-3
-6
-9
-15
-24
2
2
-1
-3
-6
-11
-17
4
4
1
-1
-4
-7
-11
-19
6
6
4
1
-1
-4
-7
-13
-21
8
8
6
3
1
-2
-5
-9
-14
10
10
8
6
4
1
-2
-5
-9
-14
-28
12
12
10
8
6
4
1
-2
-5
-9
-16
14
14
12
11
9
6
4
1
-2
-5
-10
-17
16
16
14
13
11
9
7
4
1
-1
-6
-10
-17
18
18
16
15
13
11
9
7
4
2
-2
-5
-10
-19
20
20
19
17
15
14
12
10
7
4
2
-2
-5
-10
-19
22
22
21
19
17
16
14
12
10
8
5
3
-1
-5
-10
-19
24
24
23
21
20
18
16
14
12
10
8
6
2
-1
-5
-10
-18
26
26
25
23
22
20
18
17
15
13
11
9
6
3
0
-4
-9
28
28
27
25
24
22
21
19
17
16
14
11
9
7
4
1
-3
30
30
29
27
26
24
23
21
19
18
16
14
12
10
8
5
1
Procedure (Continued…)
3. Bring a beaker (size does not matter) and half fill it with tap water.
4. Now dip the wet bulb of the psychrometer fully into water.
5. Lift the psychrometer up, make sure you have enough space for spinning, hold the handle firmly,
and spin the psychrometer for 1 full minute. Measure the lowest temperature reached and record
in the data sheet. You should do two more trials to make sure that you measured the lowest
temperature. If one of the trials does not seem right, repeat it.
6. Repeat above process of recording the dry bulb and wet bulb temperatures for two more
locations: one outside in the parking lot, and another near the pond. Take your beakers with water
with you while performing the experiment outside.
7. After recording all three location data, use the tables and appropriate formula to find the relative
humidity of air at these three locations.

78 | E a r t h S c i e n c e L a b M a n u a l

79 | E a r t h S c i e n c e L a b M a n u a l
Experiment 9: Psychrometer Experiment
Pre-laboratory Questions
Complete this page before coming to the lab. Read the information given to answer the following
questions.
Q1. What is humidity?
Q2. Which air is called a saturated air?
Q3. What is the difference between humidity and relative humidity?
Q4. How do you calculate depression of the wet-bulb temperature? If the dry bulb temperature is 32
o
C
and wet bulb temperature is 28.5
o
C, what is the depression of the wet-bulb?
Q5. What are the conditions of a rainfall to occur?
Instructor’s approval____________________

80 | E a r t h S c i e n c e L a b M a n u a l

81 | E a r t h S c i e n c e L a b M a n u a l
Date
Name
Lab Partner
Experiment 9: Psychrometer Experiment
Write hypothesis: Which area among the three mentioned in the data sheet probably has highest relative
humidity and which one has the lowest? Why do you think so?
_____________________________________________________________________________________
_____________________________________________________________________________________
_____________________________________________________________________________________
Data Sheet
Relative Humidity of a Laboratory Room
Trial 1 Trial 2 Trial 3
Dry-bulb thermometer temperature __________ __________ __________
Wet-bulb thermometer temperature __________ __________ __________
Difference between dry- and wet-bulb temperatures __________ __________ __________
Relative humidity using the table provided __________ __________ __________
Dew-point temperature using the table provided __________ __________ __________
Average relative humidity of the laboratory ____________
Dew-point temperature of the laboratory ____________
Relative Humidity of a Parking Lot
Trial 1 Trial 2 Trial 3
Dry-bulb thermometer temperature __________ __________ __________
Wet-bulb thermometer temperature __________ __________ __________
Difference between dry- and wet-bulb temperatures __________ __________ __________

82 | E a r t h S c i e n c e L a b M a n u a l
Relative humidity using the table provided __________ __________ __________
Dew-point temperature using the table provided __________ __________ __________
Average relative humidity of the parking lot ____________
Dew-point temperature of the parking lot ____________
Relative Humidity near a pond
Trial 1 Trial 2 Trial 3
Dry-bulb thermometer temperature __________ __________ __________
Wet-bulb thermometer temperature __________ __________ __________
Difference between dry- and wet-bulb temperatures __________ __________ __________
Relative humidity using the table provided __________ __________ __________
Dew-point temperature using the table provided __________ __________ __________
Average relative humidity near the pond ____________
Dew-point temperature near the pond ____________
Answer the following questions.
Q1. Was your hypothesis proved? Explain.
Q2. What may be the reason behind the average relative humidity values being not vastly different among
the places you experimented?

83 | E a r t h S c i e n c e L a b M a n u a l
Q3. Using the tables, determine the relative humidity and the dew point temperature of a place where the
dry bulb temperature is 40
o
C and the wet bulb temperature is 35
o
C.
Relative humidity value ______________
Dew-point temperature value _________________
Q4. Write your observation about the dew-point temperature values of three different places you tested.
Q5. What does it mean if the dew-point temperature of your location during mid-March is 32
o
F?

84 | E a r t h S c i e n c e L a b M a n u a l
85 | E a r t h S c i e n c e L a b M a n u a l
Experiment 10: Coriolis Effect
Objective: 1. To construct a Coriolis Effect experiment set-up
2. To observe the Coriolis Effect in the Northern and the Southern Hemispheres.
Introduction
Coriolis Effect is a deflective effect on moving objects such as wind and water on or above the surface of
Earth because of Earth’s rotation. It states that all free-moving objects are deflected to the right of their
path of motion in the Northern Hemisphere and to the left in the Southern Hemisphere. For Example, (See
Figure 10.1) if the wind is blowing in the direction from Oklahoma City to Tulsa, as the original route,
due to Coriolis Effect the wind will be deflected to somewhere near Muskogee, as shown in the map. This
deflection is to the right of the original direction since this location is in the Northern Hemisphere.
Figure 10.1: Coriolis Effect in Northern Hemisphere
Similar deflection occurs in the Southern Hemisphere, but to the left of the original direction.
Laws of physics and vector calculations can be used to compute exactly where the objects such as wind
will end up if we know the initial velocity of wind. Discussion, understanding of the laws and calculation
of these values is beyond the limit of this laboratory manual. But it will be a valuable information to
know the actual cause of Coriolis Effect, which is discussed below.
The Earth is rotating about its rotational axis at an approximate speed of 25,000 miles per day at the
equator region. Note that this speed is at the equator only and if you move towards the poles, the speed
goes on decreasing. At the pole the object is only rotating about its own axis because the rotation axis of
Earth passes right through the North and the South poles. 25,000 miles per day of speed means that an
object (or a man) right on the equator is moving at about the speed of 1042 mph! That is indeed a very
high speed and is hard to imagine. Why do we not feel it then? That is because along with us, every other
objects are also moving at the same speed, and relatively speaking we are not moving at all. This is like a
seat and a passenger in a moving car. Relative to the seat the passenger is not moving. This becomes more
imaginable if you take an example of a passenger in a flying plane in the very middle row with no
windows to compare the motion with outside objects.
Original route
Route after
Coriolis Effect

86 | E a r t h S c i e n c e L a b M a n u a l
Let’s go back to the point, what is the cause of Coriolis Effect? Since objects at different latitude are
moving at a different speed along with Earth’s rotation, the moving objects such as wind will be relatively
moving faster than the ground below, it reaches a further location earlier. Take the example of wind from
Oklahoma City to Tulsa. Since OKC is rotating faster than Tulsa (since it is close to equator than Tulsa),
the wind from OKC is travelling even faster than Tulsa (since wind itself has a speed), wind reaches to a
location further east of Tulsa, which is in right direction. If you were to throw a projectile from Tulsa to
OKC, it will reach to a place right of OKC, because by the time the projectile has reached OKC would
have moved further east due to its higher speed.
Now you can easily analyze that if the speed of rotation of the planet were to increase, we will observe
more Coriolis Effect, and if the speed of rotation decreases the Coriolis Effect decreases. If the size of
the planet were to increase keeping the rotation time same, the Coriolis Effect also increases. This is
because the object on the equator of a bigger planet has to cover much more distance in the same time
than the object on the equator of the smaller planet.
Ocean water currents are caused also due to Coriolis Effect and the atmospheric currents. The upper 100
meters of ocean water follows the overlying wind current and its force to determine where to go. The
ocean water follows the direction of the wind until blocked by a landmass. As a result, the ocean water
currents, known as gyres, rotate clockwise if it is the Northern Hemisphere and anticlockwise if it is the
Southern Hemisphere. It is these gyres which circulate the waters of the oceans from tropical regions to
the poles and from poles back to the tropical regions. This helps in maintaining the temperature and saline
content of the ocean waters.
In this lab you will learn to draw imaginary gyres of material (air or water) movement due to Coriolis
Effect and see the effect of rotation speed and direction in formation of these gyres. You will use simple
geometric techniques to construct your own Coriolis Effect diagrams.
For more information on Coriolis Effect see page 356 of textbook.
Materials
Blank white heavy paper, Cardboard paper, thumb tack, ruler, pencil, tape, scissors,
Procedure
1. Bring a flat head thumb tack and a piece of cardboard paper provided.
2. At the center of the cardboard paper, mark a circle and place the thumb tack on the circle with the
pin turning upward.
3. Use a piece or two of tape to hold the thumb tack in position.
4. You can tape the cardboard on the table top of your station so that it does not move when you
work with it.
5. Now bring a heavy paper and label it ‘no rotation’. Insert the pin of the thumb tack through the
center of the paper so that it sticks out of paper when the paper lies flat on the table.
6. Bring a ruler and place the straight edge of it, the side does not matter, against the pin of the
thumb tack.
7. With a pencil draw a straight line on the paper through the edge of the ruler passing through the
pin and along the whole length of the ruler. This line represents no rotation of the Earth. That is to
say “if the Earth were not rotating,” which means there is no Coriolis Effect. Draw an arrow
pointing from the starting point to the ending point of the line drawn.
8. To represent the Coriolis Effect on the Northern Hemisphere, bring another paper and label it
‘Northern Hemisphere’. Let your partner slowly rotate the paper counterclockwise while fixing

87 | E a r t h S c i e n c e L a b M a n u a l
the ruler in its position and draw the line through the straight edge of the ruler, just like you did in
the ‘no rotation’ case. Draw an arrow in the direction of the movement of the pencil. Label this
line (curve) ‘slow rotation’.
9. Now starting from the same point of the ruler, repeat step 8 two more times with the speed of
rotation increasing slightly each time. Label the second rotation curve ‘fast rotation’ and the third
rotation curve ‘very fast rotation’.
10. To represent the Coriolis Effect on the Southern Hemisphere, bring a new paper and label it
‘Southern Hemisphere’. Follow all procedures you did in step 9, except the rotation direction is
opposite, i.e. clockwise. Label all three arrows accordingly.
11. Compare and contrast the curves and lines in each case in the data sheet. Save these papers for
next week to attach with your lab report next week at the end of it, with the name of your lab
partner.

88 | E a r t h S c i e n c e L a b M a n u a l

89 | E a r t h S c i e n c e L a b M a n u a l
Experiment 10: Coriolis Effect
Pre-laboratory Questions
Complete this page before coming to the lab. Read the information given to answer the following
questions.
Q1. What is a Coriolis Effect?
Q2. Why does Coriolis Effect occur in opposite direction in the Northern and the Southern Hemispheres?
Q3. Why do we not feel that the Earth is rotating at a very high speed?
Q4. What effect is seen in Coriolis Effect if the rotation of Earth were to occur faster or slower?
Q5. What causes the ocean water circulation gyres? What would happen to the speed of gyres if the Earth
were to rotate faster?
Instructor’s approval____________________

90 | E a r t h S c i e n c e L a b M a n u a l

91 | E a r t h S c i e n c e L a b M a n u a l
Date
Name
Lab Partner
Experiment 10: Coriolis Effect
Write hypothesis: How are your results probably going to come out in all three cases mentioned below
in the data sheet?
_____________________________________________________________________________________
_____________________________________________________________________________________
_____________________________________________________________________________________
Data Sheet
No rotation
Shape of the arrow drawn _____________
Statement about the shape of the arrow drawn
_____________________________________________________________________________________
_____________________________________________________________________________________
_____________________________________________________________________________________
Northern Hemisphere
Shape of the curve drawn ‘slow rotation’ _____________
Shape of the curve drawn ‘fast rotation’ _____________
Shape of the curve drawn ‘very fast rotation’ _____________
Statement about the shapes of the curves drawn
_____________________________________________________________________________________
_____________________________________________________________________________________
_____________________________________________________________________________________

92 | E a r t h S c i e n c e L a b M a n u a l
Southern Hemisphere
Shape of the curve drawn ‘slow rotation’ _____________
Shape of the curve drawn ‘fast rotation’ _____________
Shape of the curve drawn ‘very fast rotation’ _____________
Statement about the shapes of the curves drawn
_____________________________________________________________________________________
_____________________________________________________________________________________
_____________________________________________________________________________________
Answer the following questions.
Q1. Was your hypothesis proved about the rotation patterns and the curves built? Explain.
Q2. What are the possible ways of errors in this experiment?
Q3. What was the effect of faster rotation compared to slower rotation in Coriolis Effect? Will Coriolis
Effect in Earth change over time?

93 | E a r t h S c i e n c e L a b M a n u a l
Q4. From what you have learned in this experiment, analyze the Coriolis Effect in the following two
planets:
a) Venus: about the same size as Earth, rotation period 244 days of Earth
b) Jupiter: much larger than Earth, rotation period 10 hours of Earth

94 | E a r t h S c i e n c e L a b M a n u a l

95 | E a r t h S c i e n c e L a b M a n u a l
Experiment 11: Insolation Pattern
Objective: 1. To measure the solar angle of your location over the spring season
2. To analyze the angle and solar energy distribution pattern based on the data collected
Introduction
As you are aware that sun plays vital role in not only providing the energy needed for life on Earth but
also for change of seasons, regulation of its temperature, and different atmospheric phenomena. Earth’s
orbit around the sun is not perfectly circular but is slightly elliptical. Due to this reason, the Earth comes a
little closer to the sun during the month of January and goes slightly farther in the month of July. If so,
why is the summer hot and winter cold in the Northern Hemisphere? This is where you should be careful
not to get confused. It is not the distance of the sun that is causing the seasons, it is the angle the solar
rays are falling on the surface of Earth. The amount of solar radiation distributed on Earth is called
Insolation. Insolation is high when the sun’s rays are falling vertically (at larger angle) on the Earth
surface and is low when the rays are falling at a slanting, smaller angle.
January is a winter month in the Northern Hemisphere. What does this mean? It means that the solar rays
reach the Earth’s surface at a smaller angle and have longer path through the atmosphere. This causes loss
of heat to the atmosphere. It also means that the solar rays cover the curved surface of the Earth causing
the energy to distribute over large area. So the temperature in the Northern Hemisphere during these
months are low.
What happens in the Equator region during these months then? Equator is directly facing the sun and
therefore gets direct solar rays during this time of year. Total amount of energy per unit area is high here
so the average temperature in this tropical region is high. Equator receives 2.5 times higher amount of
solar radiation than polar region.
Since the Earth’s rotation axis is tilted at 23.5
o
from the revolution plane (the vertical axis), days and
nights in the hemispheres are not equal and keep changing throughout the year. Only on the Equinoxes
(Spring Equinox, March 20 and Fall Equinox, September 22) the days and the nights are equal because
the sun is directly overhead at the Equator. Sun is overhead at the Tropic of Cancer (23.5
o
north of
Equator) on June 21(Summer Solstice) and at the Tropic of Capricorn (23.5
o
south of Equator) on
December 21 (Winter Solstice). These statistical values and data help us to analyze the differences in the
insolation pattern at different places on Earth.
In this experiment you will use a simple trigonometry formula to find the sun’s angle using a meter-stick
and measuring tape. A vertically standing meter-stick casts a shadow on the ground in a sunny day. The
stick represents the height of a right triangle and the shadow represents the base of the triangle as shown
in Figure 11.1. The sun’s angle is then represented by the angle on the base as shown in the diagram.
This angle decreases when the shadow gets longer, which is shown in the second triangle. The angle can
be calculated by using following formula:
Tan θ = height / base where, θ is the sun’s angle.
Or, θ = Tan
-1
(height / base)
To find θ, first divide the height by the base. Now, in your calculator use Tan
-1
(answer). This gives the
required angle.

96 | E a r t h S c i e n c e L a b M a n u a l
height same height
sun’s angle, θ smaller sun’s angle, θ
shadow = base longer shadow = longer base
Figure 11.1: Representation of a right triangle and dependence of its angle.
For more information on insolation see page 43 of Textbook.
Materials
A meter-stick, a piece of chalk, measuring tape, scientific calculator.
Procedure
This is a whole semester project. You will need to record the data each week on a sunny day afternoon.
Follow the procedure below to record data each day starting your first lab period of semester.
1. Bring a meter-stick, a piece of chalk, and a measuring tape with you outside of the building. Find
a spot on the side walk, parking lot, or any place that is suitable to record the data without
disturbance for the whole semester. Also identify a distinct mark on the spot so that you do not
forget it because you will need to do this experiment on the same spot every time.
2. After you and your partner agree upon the spot, one of you should position the meter-stick
vertically upright so that the shadow falls on a plane surface. If something comes on the way of
shadow, either remove the object or you should change the spot.
3. One of you should mark the tip of the shadow with a piece of chalk while the other holds the
meter stick upright. Now measure the distance between the bottom of the meter stick and the
chalk mark. This gives the base of the triangle. Measure the actual height of the meter-stick,
which is the height of the triangle. Now follow the method described above to find the sun’s
angle.
4. Repeat the steps 1-3 next week on the same day and time. Do this process until the semester ends
or your instructor tells that you have enough data.

97 | E a r t h S c i e n c e L a b M a n u a l
Experiment 11: Insolation Pattern
Pre-laboratory Questions
Complete this page before coming to the lab. Read the information given to answer the following
questions.
Q1. What do you mean by insolation?
Q2. On which factors does the insolation depend?
Q3. Why is January a cold month in the Northern Hemisphere?
Q4. Which places are above average temperatures throughout the year? What is the cause behind this
constantly high temperatures?
Q3. If the height of a right triangle is 4.5 cm and the base (of the shadow) is 8.0 cm, what is the sun’s
angle?
Instructor’s Approval __________________

98 | E a r t h S c i e n c e L a b M a n u a l

99 | E a r t h S c i e n c e L a b M a n u a l
Date
Name
Lab Partner
Experiment 11: Insolation Pattern
Write hypothesis: Write how the insolation pattern would change over the semester.
_____________________________________________________________________________________
_____________________________________________________________________________________
_____________________________________________________________________________________
Data Sheet
Fill out the following table for height and shadow length to find the sun’s angle.
Week
Date
Height (h)
Shadow length
(b)
b/h
θ (sun’s angle)
1
2
3
4
5
6
7
8
9
10
11
12
13
14
15
16
Show calculation of the sun’s angle for one of the data points in the space below.

100 | E a r t h S c i e n c e L a b M a n u a l
Plot the sun’s angle against the date (time of the year) in the graph below. The time of the year is
represented along the x-axis and the angle is represented along the y-axis. Use the format Jan 18, Feb 17
etc. for the date along the x-axis.

101 | E a r t h S c i e n c e L a b M a n u a l
Answer the following questions.
Q1. Was your hypothesis proved or disproved? Explain.
Q2. What were the limitations and obstacles during your experiment? How could they be possibly
overcome?
Q3. You did this experiment on the location (your college campus) which is about 34.6
o
north of Equator,
i.e. Northern Hemisphere. If you were to perform this experiment on the 34.6
o
south of Equator I.e.
Southern Hemisphere on the same days and time, how will the results be affected? Explain.
Q4. You did this experiment after December 21
st
, the shortest day, Winter Solstice. If you were to do the
same experiment after the Summer Solstice, June 21
st
, how will your results be affected? Explain.

102 | E a r t h S c i e n c e L a b M a n u a l

103 | E a r t h S c i e n c e L a b M a n u a l
References
1. Lutgens, F. K. and Tarbuck, E.J., Foundations of Earth Science, Seventh Edition, 2014, Pearson
Education Inc.
2. Ludman, A. and Marshak, S., Laboratory Manual for Introductory Geology, Second Edition,
2012, Norton Company, Inc.
3. McConnell, D. and Steer, D., The Good Earth Introduction to Earth Science, Third Edition, 2015,
McGraw Hill Education
4. Lutgens, F. K., Tarbuck, E.J., and Pinzke K. G., Applications and Investigations in Earth Science,
Eighth Edition, 2015, Pearson Education Inc.
