
PAYROLL AND TAX SELF-SERVICE INFORMATION IN PEOPLESOFT
Note: This document is designed to be used online and has a number of embedded links to processes
and additional information. We discourage the printing of manuals as they are updated frequently
and consume paper resources when printed.
If you have questions about information in this user guide, please e-mail Payroll Services.
TABLE OF CONTENTS
Overview .......................................................................................................... 2
Add or Edit Direct Deposit .............................................................................. 2
General Information: .................................................................................................. 3
Step-by-Step Instructions: Add Direct Deposit Information ....................................... 3
Step-by-Step Instructions: Edit Direct Deposit Information ........................................ 5
View, Add, Edit and End a Voluntary Deduction ........................................... 7
General Information: .................................................................................................. 7
Step-by-Step Instructions: View Voluntary Deductions ............................................. 7
Step-by-Step Instructions: Edit an Existing Deduction .............................................. 8
Step-by-Step Instructions: End an Existing Deduction ............................................ 10
View and Change W-4 Tax Information ........................................................ 11
General Information: ................................................................................................ 11
Step-by-Step Instructions: View W-4 Tax Information ............................................. 11
Step-by-Step Instructions: Change Federal W-4 Tax Information ........................... 12
Step-by-Step Instructions: Change State W-4 Tax Information ............................... 14
Troubleshooting Electronic W-4 Form: ....................................................... 15
General Information: ................................................................................................ 15
Step-by-Step Instructions: Downloading W-4 Fillable Form in Mozilla Firefox ........ 16
Step-by-Step Instructions: Downloading W-4 Fillable Form in Google Chrome ...... 17
Step-by-Step Instructions: Downloading W-4 Fillable Form in Microsoft Edge ....... 19
Step-by-Step Instructions: Enabling the Green Submit Button in W-4 PDF File ..... 20
Consent to an Electronic W-2 ....................................................................... 21
General Information: ................................................................................................ 21

Personal Information in PeopleSoft
Updated 8/30/23 Ctrl+Home to Table of Contents Page 2 of 28
Step-by-Step Instructions: Consent to an Electronic W-2 Form .............................. 21
View and Request a New W-2 ....................................................................... 23
General Information: ................................................................................................ 23
Step-by-Step Instructions: View W-2 Form ............................................................. 23
Step-by-Step Instructions: Requesting a New W-2 Form ........................................ 24
Printing a Pay Stub ....................................................................................... 25
General Information: ................................................................................................ 25
Step-by-Step Instructions: Printing a Pay Stub ........................................................ 25
Out of State Form .......................................................................................... 26
General Information: ................................................................................................ 26
Frequently Asked Questions ........................................................................ 27
Why am I not receiving a paper pay stub? .............................................................. 27
Can I view the UVM contribution to my 403b in PeopleSoft? .................................. 27
What is the $1.96 Life Credit in the earnings box on my pay stub?......................... 27
Can I print my pay stub using the Google Chrome web browser? .......................... 27
Can I print my pay stub using the Apple Safari web browser? ................................ 27
Can I print my pay stub using the Opera web browser? .......................................... 27
Can I print my pay stub using the Netscape web browser? ..................................... 27
Why do employees need to notify Payroll Services of their home and work location?
................................................................................................................................. 27
What if I am only working out of the State of Vermont for a short time?.................. 28
Resources ...................................................................................................... 28
Helpful Links ............................................................................................................ 28
Relevant UVM Departments .................................................................................... 28
Related Policies ....................................................................................................... 28
Overview
In this document, you will find directions on setting up your direct deposit, process for notifying Payroll
if you are working out of state, updating your W4 elections, accessing your W2 electronically, setting
up voluntary deductions and information regarding your first paycheck.
Add or Edit Direct Deposit
Personal Information in PeopleSoft
Updated 8/30/23 Ctrl+Home to Table of Contents Page 3 of 28
General Information:
•
When setting up a new direct deposit request or when changing banks, the direct
deposit will take two payrolls to process. A paper check will be issued in the first
payroll in which the change was made effective. The next check may be directly
deposited, depending on the date that direct deposit information is added it may be
two payroll cycles before the pay is transmitted via DD.
•
A confirmation e-mail will be sent at the end of the procedure.
•
As a US entity, the University of Vermont is obligated to comply with the requirements
of the United States Department of Treasury Office of Foreign Assets Control (OFAC),
which oversees payments sent outside the territorial jurisdiction of the United States.
This includes automated clearing house payments, such as direct deposits. If the direct
deposit is into a foreign bank or if there are instructions with the recipient bank to
immediately wire the full amount of the direct deposit to a foreign financial institution,
we request that a Direct Deposit Compliance form be completed that provides further
detail about the foreign transaction. Full information is on the UVM Division of Finance
website.
Step-by-Step Instructions: Add Direct Deposit Information
1. Log in to PeopleSoft through the Human Resources Login www.uvm.edu/~erp/portal
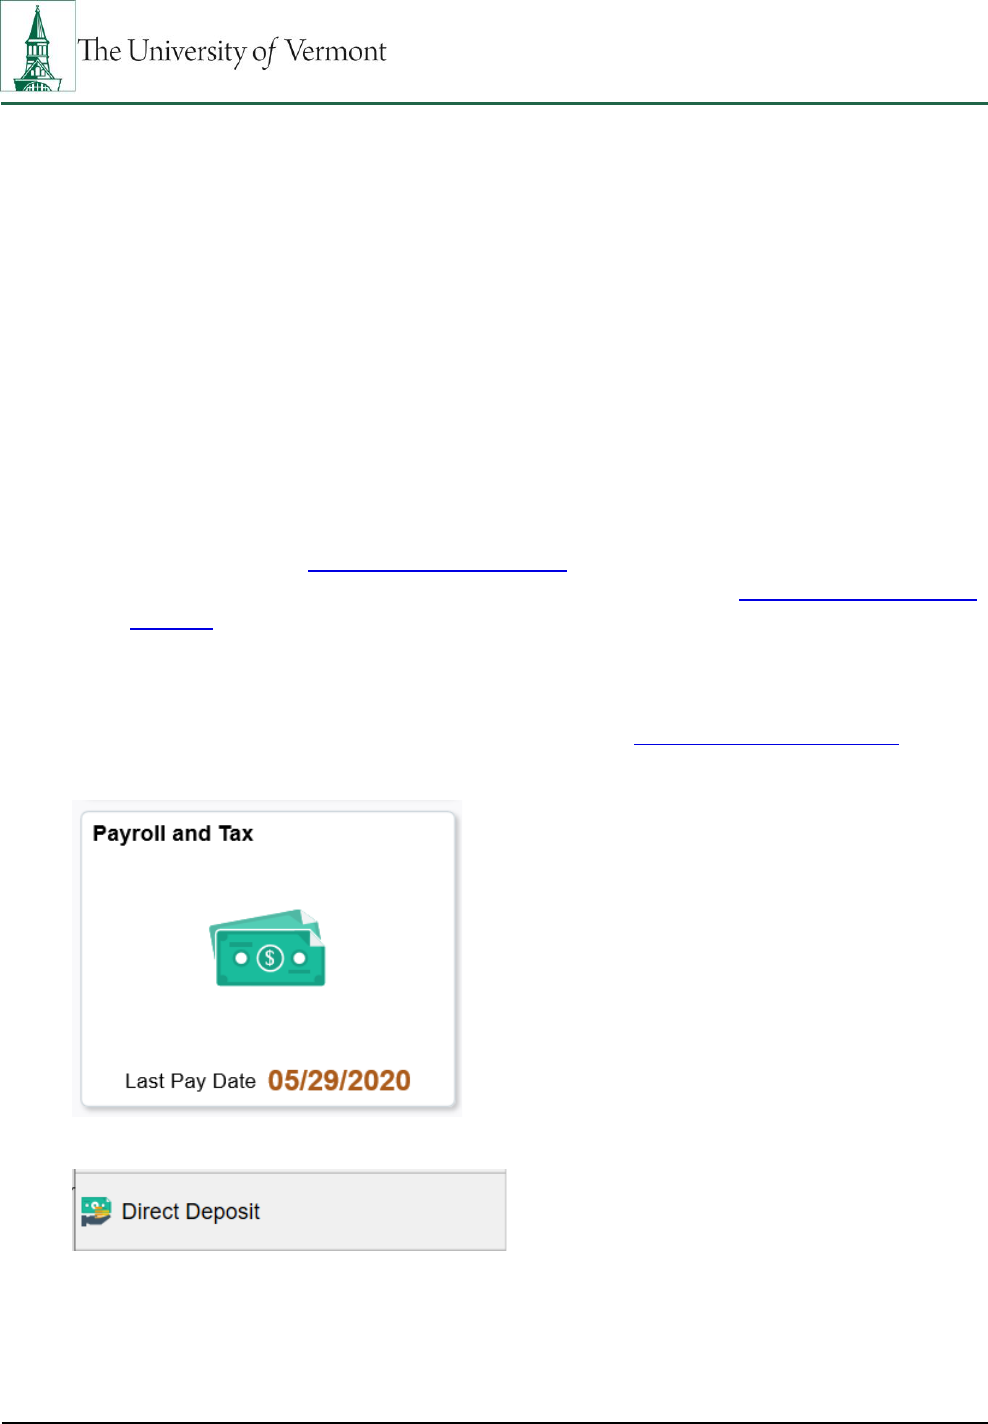
2. Navigation: UVM Employee > Select Payroll and Tax from tile selection
3. Select Direct Deposit from menu selection on the left.
4. If direct deposit exists, it will display on the screen.
5. Click the plus sign (Add Account) button.

Personal Information in PeopleSoft
Updated 8/30/23 Ctrl+Home to Table of Contents Page 4 of 28
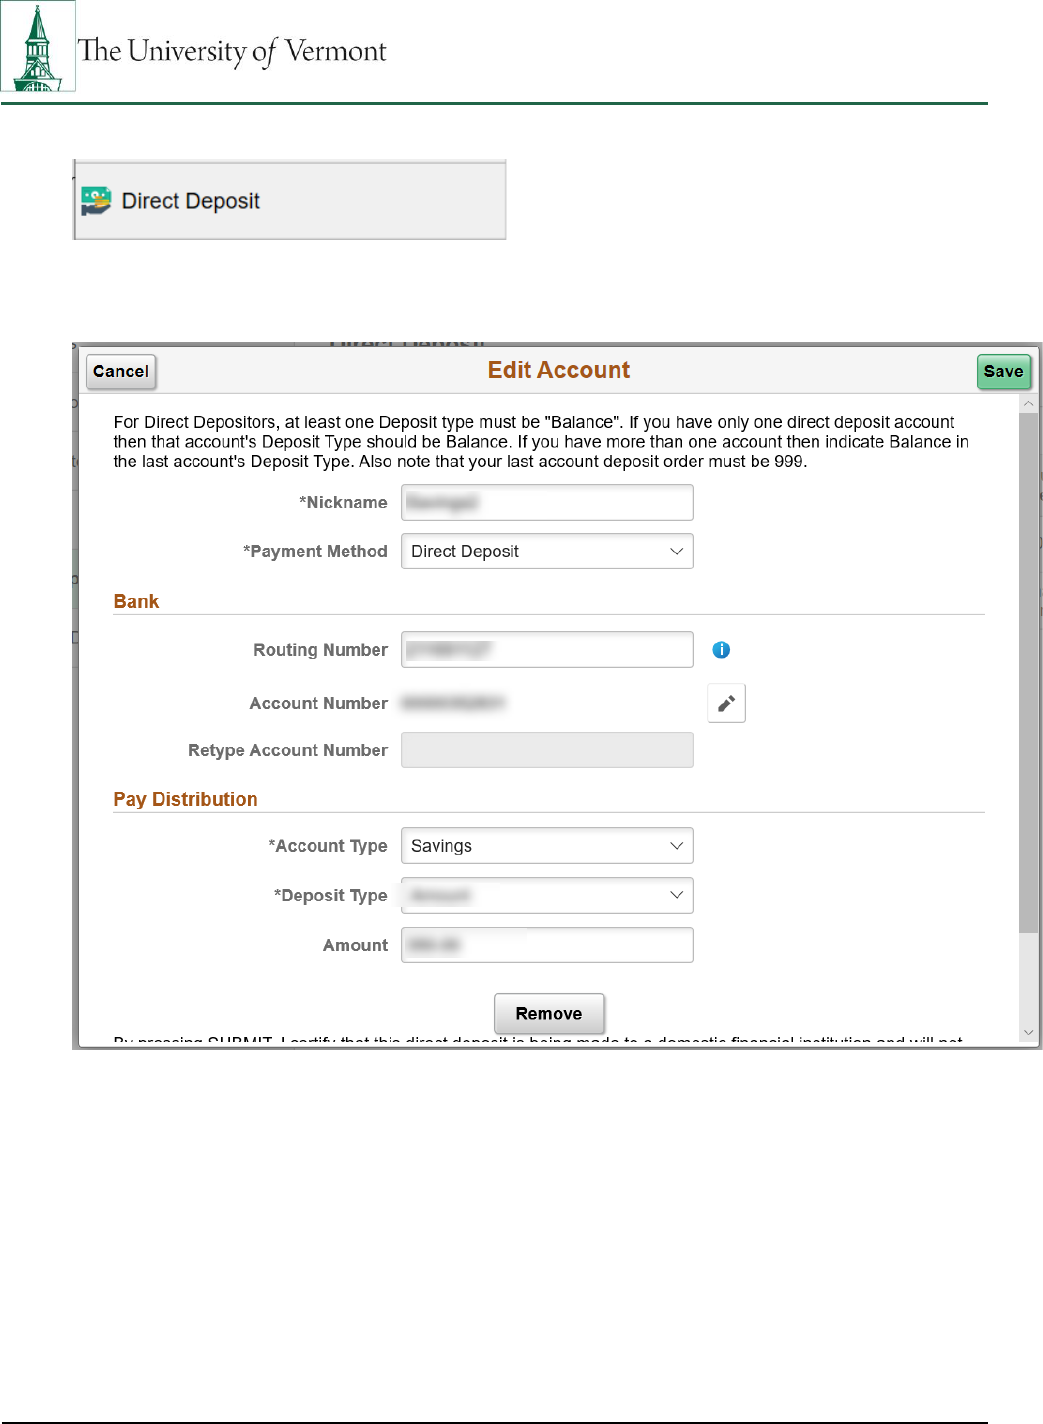
6. The Add Direct Deposit page is displayed. Fill in the appropriate information. Fields marked by
an asterisk (*) are required.
• *Account Type: Select Checking or Savings.
• *Deposit Type: Specify a flat amount, the balance of the paycheck, or a percent.
Note:
o If only one account is specified, choose Balance in this field.
o If multiple accounts are used, one of the accounts should receive the Balance of
the paycheck amount. This is particularly important when amount is chose for
any account.
Personal Information in PeopleSoft
Updated 8/30/23 Ctrl+Home to Table of Contents Page 5 of 28
o When using direct deposit, the total amount of the check must be distributed
electronically. A paper check cannot be issued for a partial distribution of the
check.
• Amount/Percent: To be used when amount or percent is chosen for the deposit type.
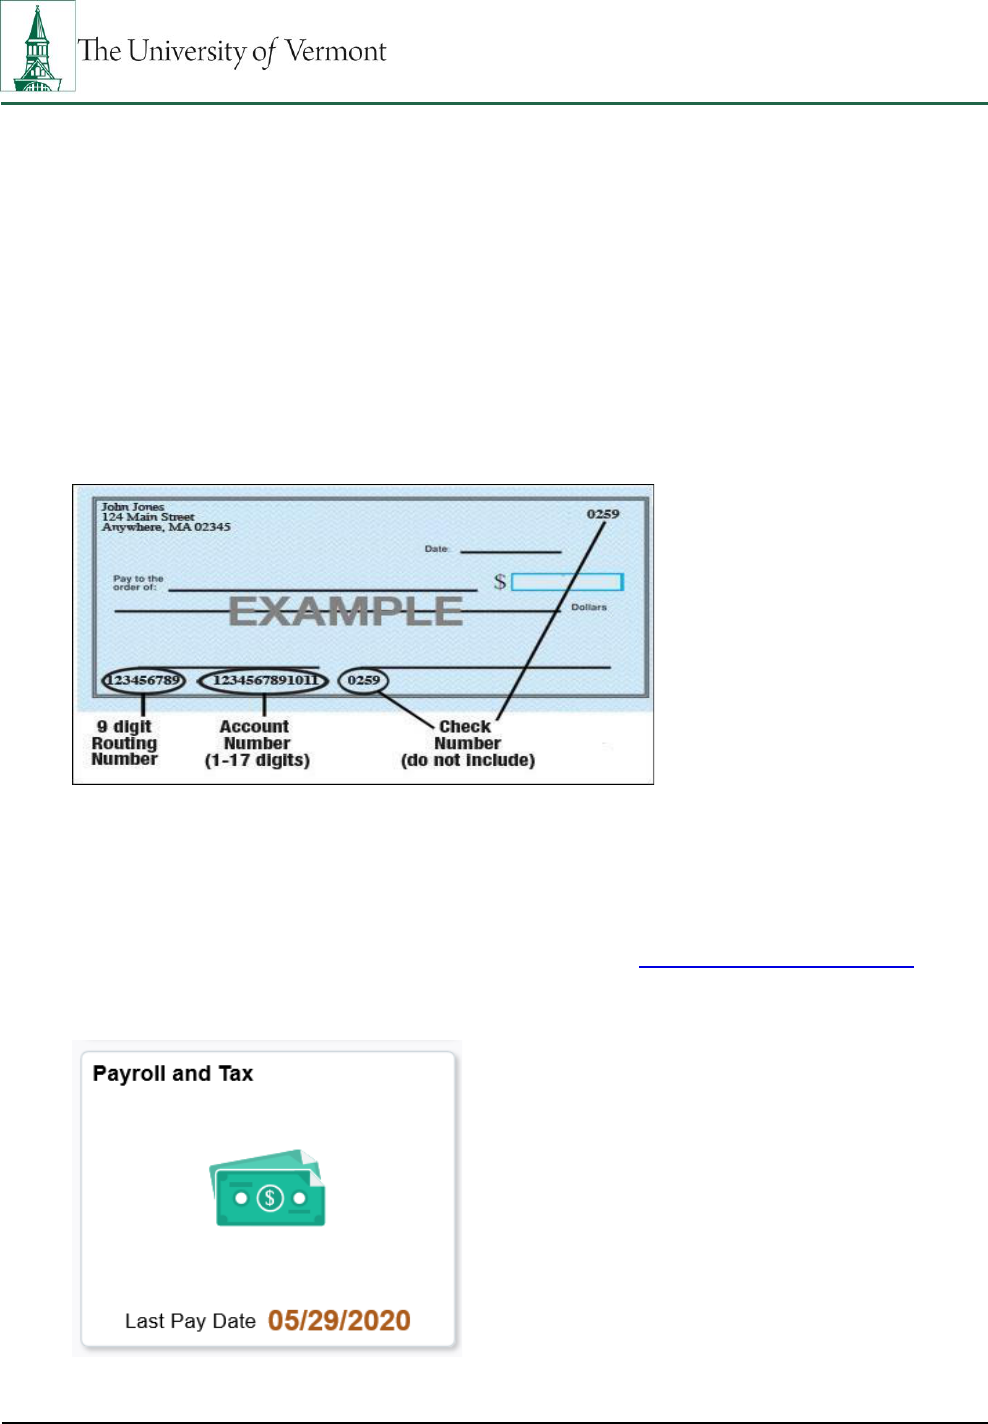
• Routing Number: This is the nine-digit number obtained from the bottom of a personal
check (see below for an example).
• Deposit Order: When depositing to more than one account, use Deposit Order to
indicate which distribution is made first, which is second, etc. (The deposit marked
Balance should be distributed last).
• Example: Depositing 6% into a savings account and the balance in a checking account:
The savings account would have a deposit order of 1, and the checking account a
deposit order of 2.
7. Click green Save button.
Step-by-Step Instructions: Edit Direct Deposit Information
1. Log into PeopleSoft through the Human Resources Login (www.uvm.edu/~erp/portal/).
2. Navigation: UVM Employee > Select Payroll and Tax from tile selection
Personal Information in PeopleSoft
Updated 8/30/23 Ctrl+Home to Table of Contents Page 6 of 28
3. Select Direct Deposit from menu selection on the left.
4. If a direct deposit exists, it will display on the screen.
5. Click the account you would like to Edit and the information will appear.
6. Make the necessary changes on this page. Select Remove if account should be removed
altogether.
7. Click the green Save button.
8. An e-mail will be generated.
Personal Information in PeopleSoft
Updated 8/30/23 Ctrl+Home to Table of Contents Page 7 of 28
View, Add, Edit and End a Voluntary Deduction
General Information:
•
Use the Voluntary Deductions page to add, change, or stop voluntary deductions.
•
This page allows updates to the following voluntary deductions: CATCARD, Staff
Emergency Loan Donation, and UVM Annual Giving.
•
Notification of the changes made on this screen will be sent to a UVM e-mail address.
Step-by-Step Instructions: View Voluntary Deductions
1. Log into PeopleSoft through the Human Resources Login (www.uvm.edu/~erp/portal/).
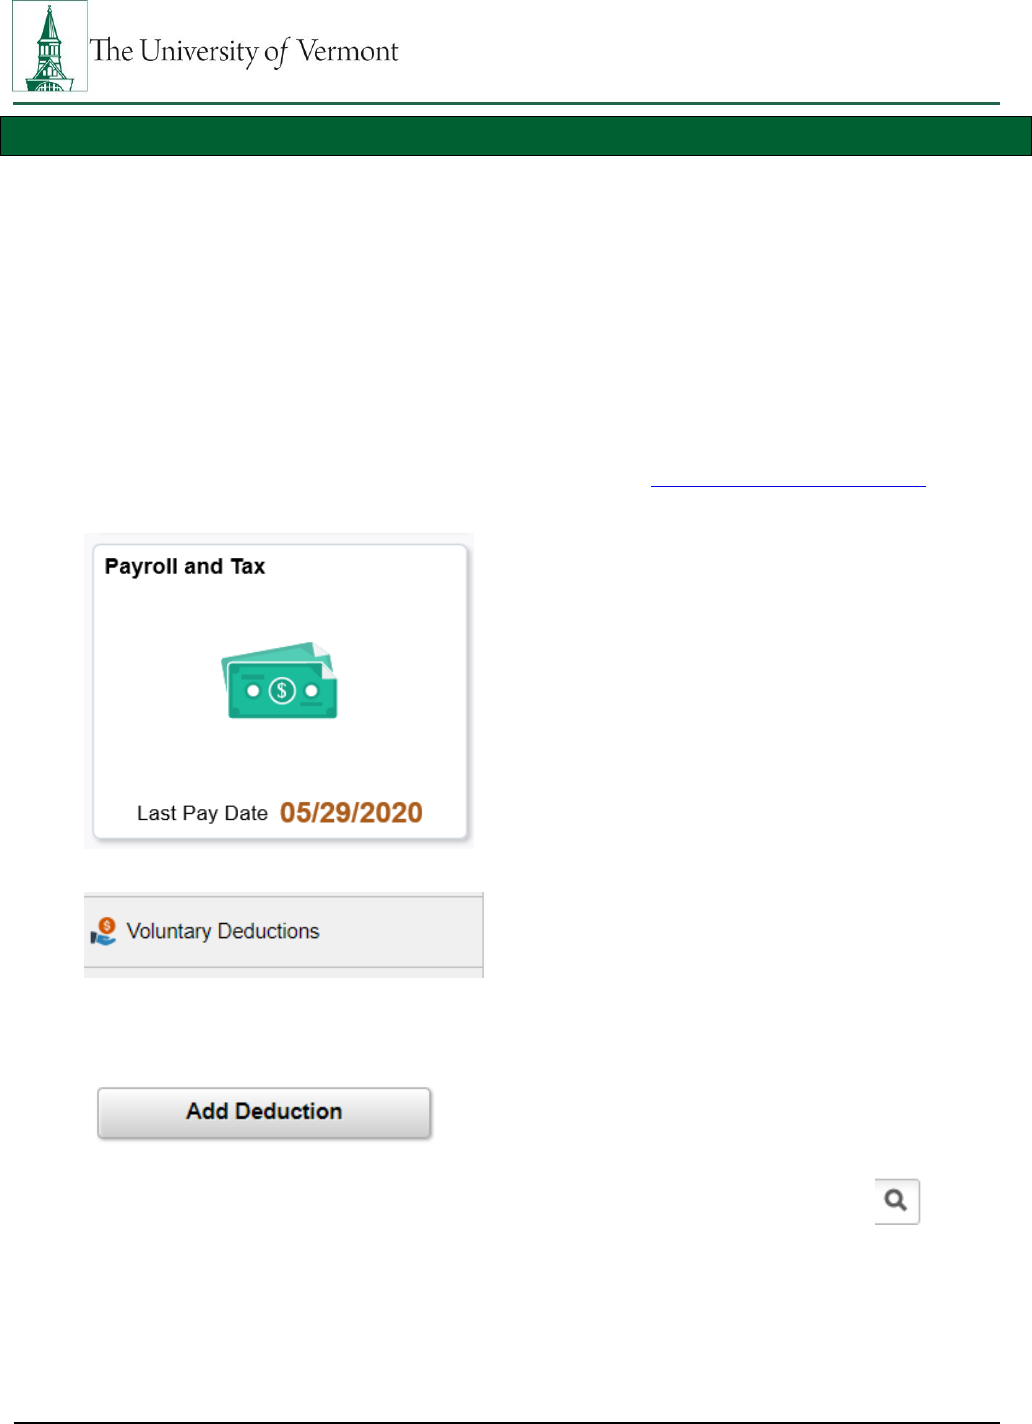
2. Navigation: UVM Employee > Select Payroll and Tax from tile selection.
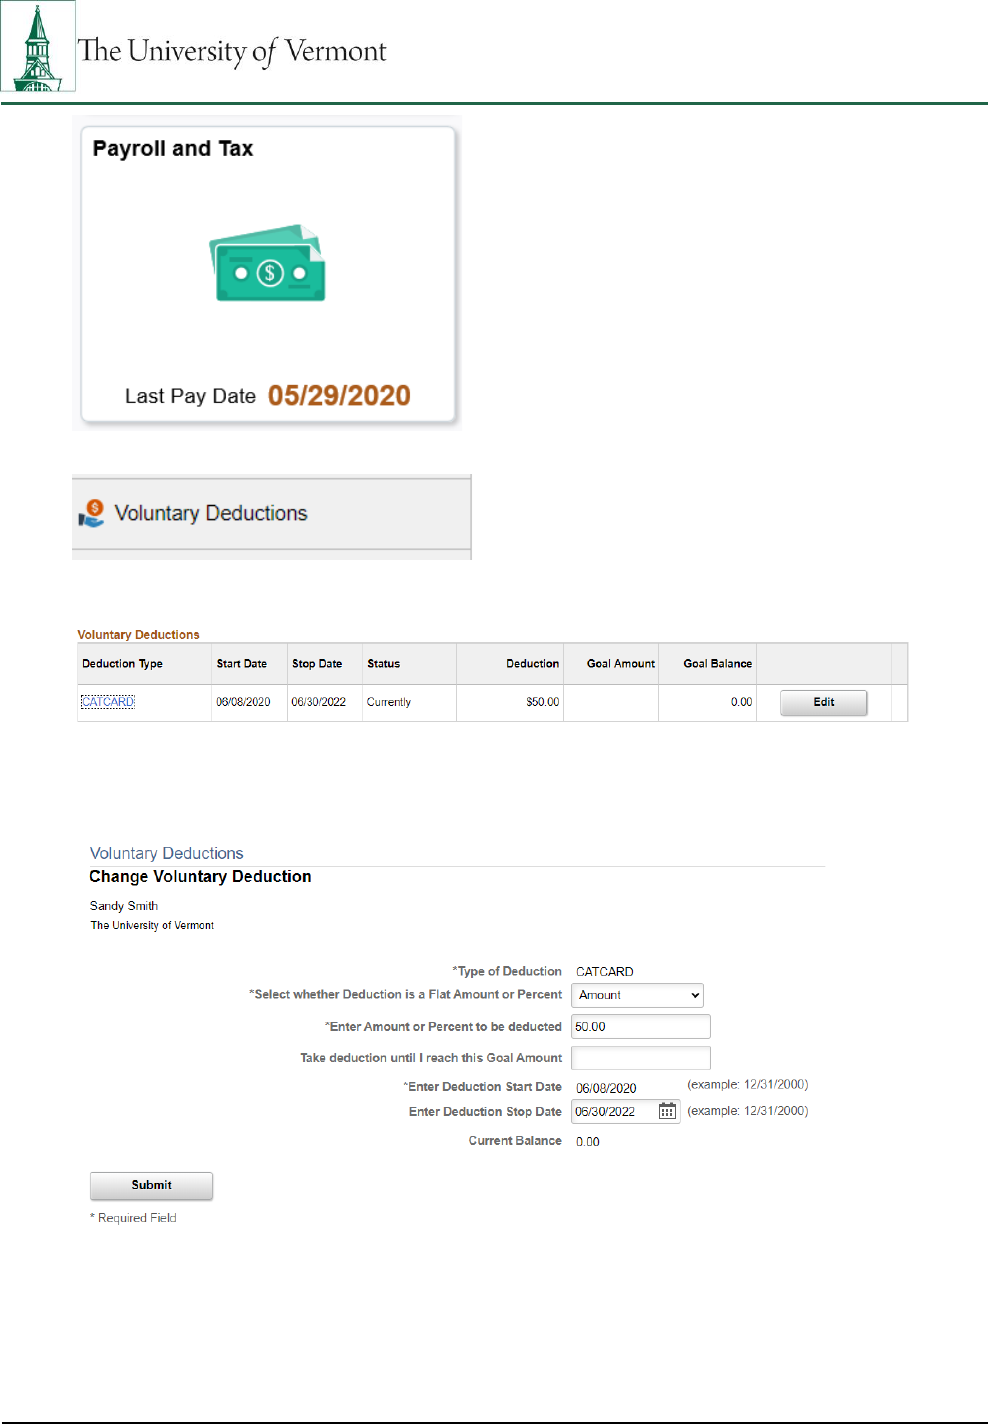
3. Select Voluntary Deductions from menu selection on left.
4. Click Voluntary Deductions icon and the Voluntary Deductions Summary will appear. Click Add
Deduction button.
5. The Voluntary Deduction Detail page will appear. Click the magnifying glass icon to select
from a list of available deductions.

Personal Information in PeopleSoft
Updated 8/30/23 Ctrl+Home to Table of Contents Page 8 of 28
6. Once the type of deduction is selected, Voluntary Detail page will reappear. Complete all
required fields and click Submit.
7. Click OK on the submission confirmation page.
Step-by-Step Instructions: Edit an Existing Deduction
1. Log into PeopleSoft through the Human Resources Login (www.uvm.edu/~erp/portal/).
2. Navigation: UVM Employee > Select Payroll and Tax from tile selection.
Personal Information in PeopleSoft
Updated 8/30/23 Ctrl+Home to Table of Contents Page 9 of 28
3. Select Voluntary Deductions from menu selection on left.
4. Click the Edit button next to the deduction to be changed.
5. To change the amount of the deduction, enter the new amount or percent into the Enter
Amount/Percent to be deducted field.
6. Click the Submit button.
7. Click the OK button on the submission confirmation page.

Personal Information in PeopleSoft
Updated 8/30/23 Ctrl+Home to Table of Contents Page 10 of 28
Step-by-Step Instructions: End an Existing Deduction
1. Log into PeopleSoft through the Human Resources Login (www.uvm.edu/~erp/portal/).
2. Navigation: UVM Employee > Select Payroll and Tax from tile selection.
3. Select Voluntary Deductions from menu selection on left.
4. Click the Edit button next to the deduction to be changed.
5. To end a voluntary deduction, enter an end date in the Deduction Stop Date field to stop
deduction.
6. Click the Submit button.
7. Click the OK button on the submission confirmation page.

Personal Information in PeopleSoft
Updated 8/30/23 Ctrl+Home to Table of Contents Page 11 of 28
View and Change W-4 Tax Information
General Information:
Both Federal W-4 and State W-4 withholdings can be changed through PeopleSoft. Federal W-
4 settings will default to Single and State W-4 settings will default to Single with 0 allowances,
unless an employee submits either or both forms in PeopleSoft. Once these forms are
submitted in PeopleSoft, they will automatically populate in the system and the next
unconfirmed payroll will pick up the changes.
Step-by-Step Instructions: View W-4 Tax Information
1.
Log in to PeopleSoft through the Human Resources Login (www.uvm.edu/~erp/portal/).
2.
Navigation: UVM Employee > Select Payroll and Tax from tile selection.
3.
Select Tax withholding from menu selection on the left.
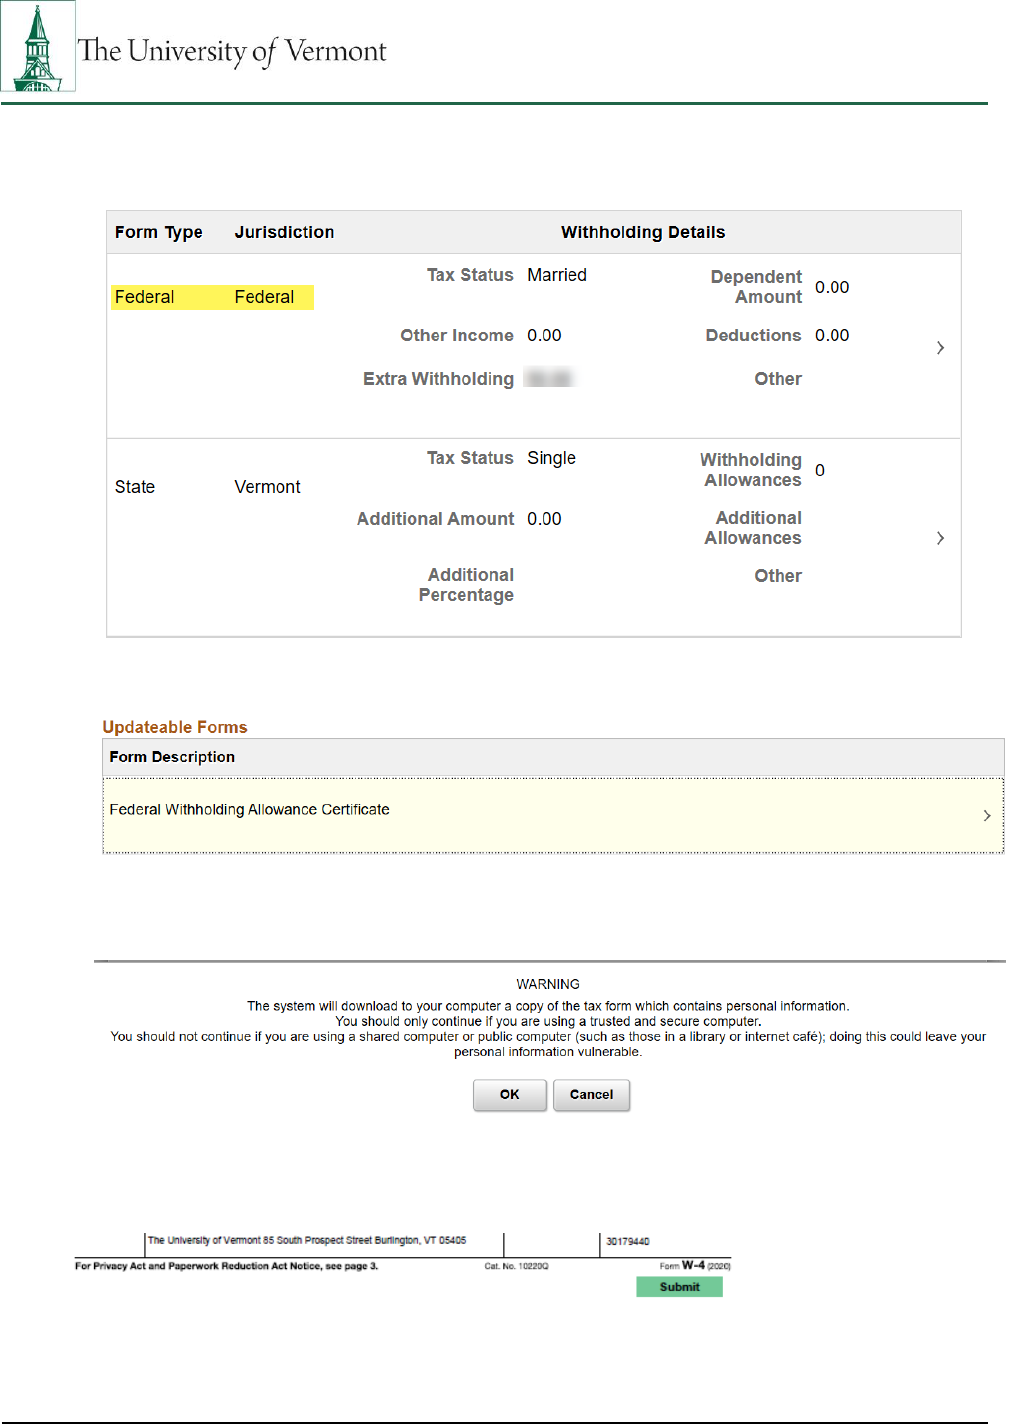
4.
Tax Withholdings Summary will appear.

Personal Information in PeopleSoft
Updated 8/30/23 Ctrl+Home to Table of Contents Page 12 of 28
Step-by-Step Instructions: Change Federal W-4 Tax Information
1.
Log in to PeopleSoft through the Human Resources Login (www.uvm.edu/~erp/portal/).
2.
Navigation: UVM Employee > Select Payroll and Tax from tile selection.
3.
Select Tax withholding from menu selection on the left.
Personal Information in PeopleSoft
Updated 8/30/23 Ctrl+Home to Table of Contents Page 13 of 28
4.
Tax Withholding Summary will appear.
5.
Select Federal Form.
6.
Select Federal Withholding Allowance Certificate from Updateable Forms list.
7.
You will receive a Warning notifying you that a tax form will download to your computer.
Select OK.
8.
A fillable Federal W-4 PDF form will download to your computer. Complete the form and
select green Submit button at the bottom of the form when it is complete.
9.
Click the OK button on the submission confirmation page. Your new Federal W-4 elections
will be picked up in the next unconfirmed payroll that runs.

Personal Information in PeopleSoft
Updated 8/30/23 Ctrl+Home to Table of Contents Page 14 of 28
Step-by-Step Instructions: Change State W-4 Tax Information
1. Log in to PeopleSoft through the Human Resources Login (www.uvm.edu/~erp/portal/).
2. Navigation: UVM Employee > Select Payroll and Tax from tile selection.
3. Select Tax withholding from menu selection on the left.
4. Tax Withholding Summary will appear.
5. Select State form.
Personal Information in PeopleSoft
Updated 8/30/23 Ctrl+Home to Table of Contents Page 15 of 28
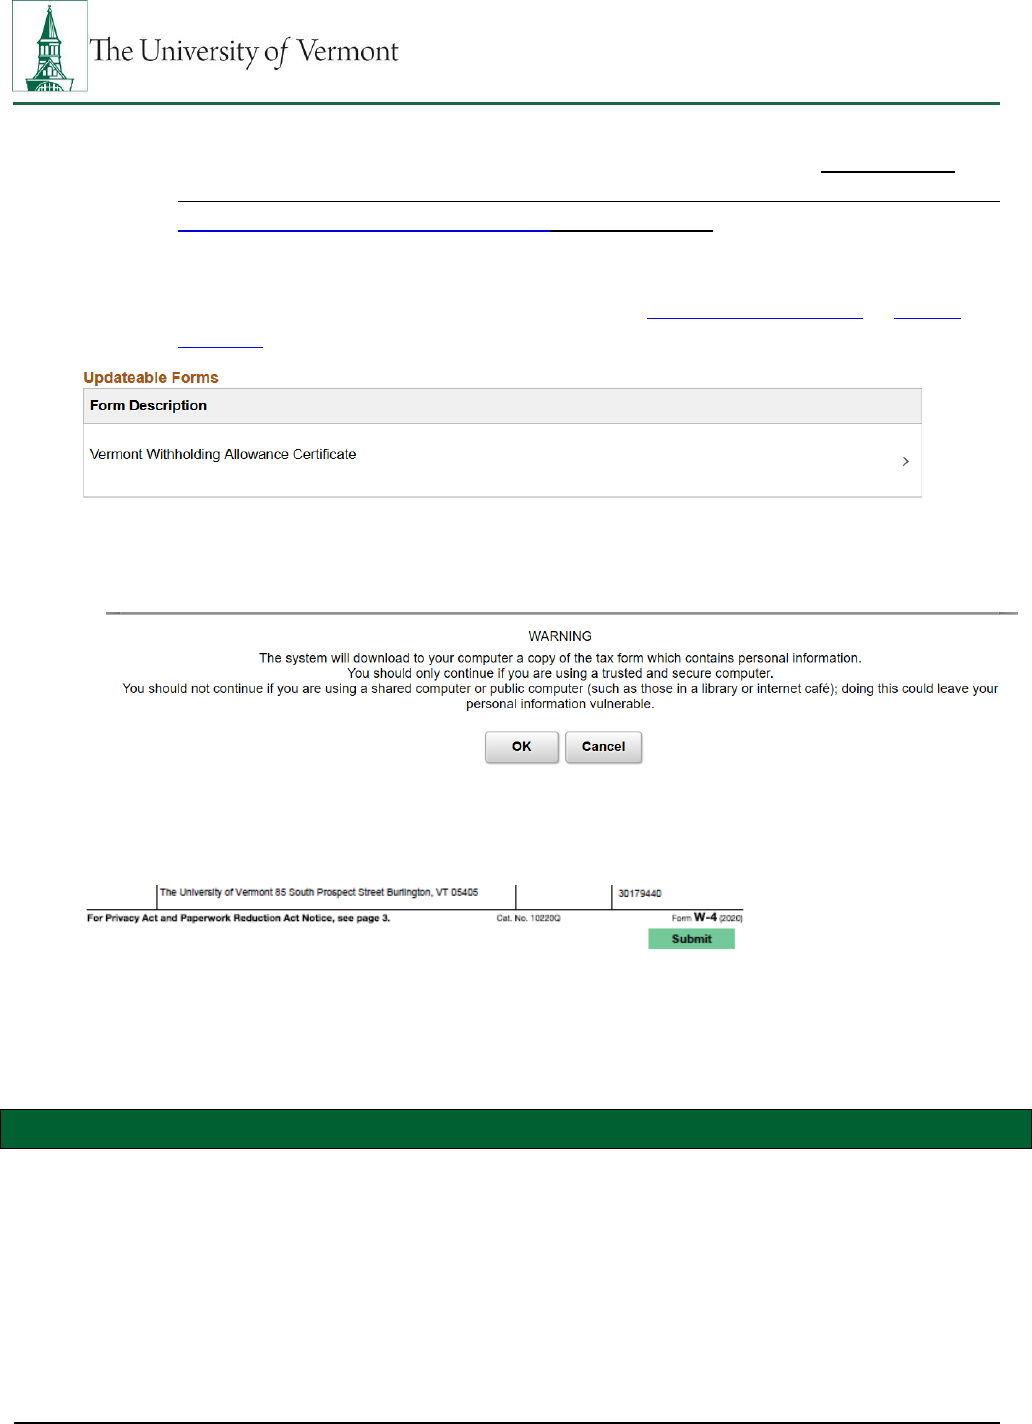
6. Select Vermont Withholding Allowance Certificate from Updateable Forms list.
• Note: PeopleSoft will default to Vermont as the State W-4 set up. If you are not
working in Vermont, Payroll & Tax Services must to be notified, and completing an
Electronic Out of State Questionnaire will be required (directions below).
• Note: New York State, Maryland, and Indiana State W-4 forms are not available online
and must be completed using a paper form and secure file transferred to Payroll
Services.
7. You will receive a Warning notifying you that a tax form will download to your computer.
Select OK.
8. A fillable State W-4 PDF form will download to your computer. Complete the form and select
green Submit button at the bottom of the form when it is complete.
9. Click the OK button on the submission confirmation page. Your new State W-4 elections will
be picked up in the next unconfirmed payroll that runs.
Troubleshooting Electronic W-4 Form:
General Information:
The fillable PDF form requires Adobe Acrobat DC or Adobe Acrobat Pro to work correctly. Once the
downloaded form is open in an acceptable form of Adobe, you may notice that there is no green
“Submit” button at the bottom of the first page of the file. If that is the case, please use the following
steps.

Personal Information in PeopleSoft
Updated 8/30/23 Ctrl+Home to Table of Contents Page 16 of 28
Step-by-Step Instructions: Downloading W-4 Fillable Form in Mozilla Firefox
1. After opening W-4 Form in PeopleSoft, the fillable form will download to a webpage in your
browser, and automatically save to your File Explorer Downloads folder.
2. Navigate to File Explorer Downloads folder and open the document named PYTWF_FEDE (if you
have downloaded the form multiple times, the file name will include a number, this does not
affect the form in any way).
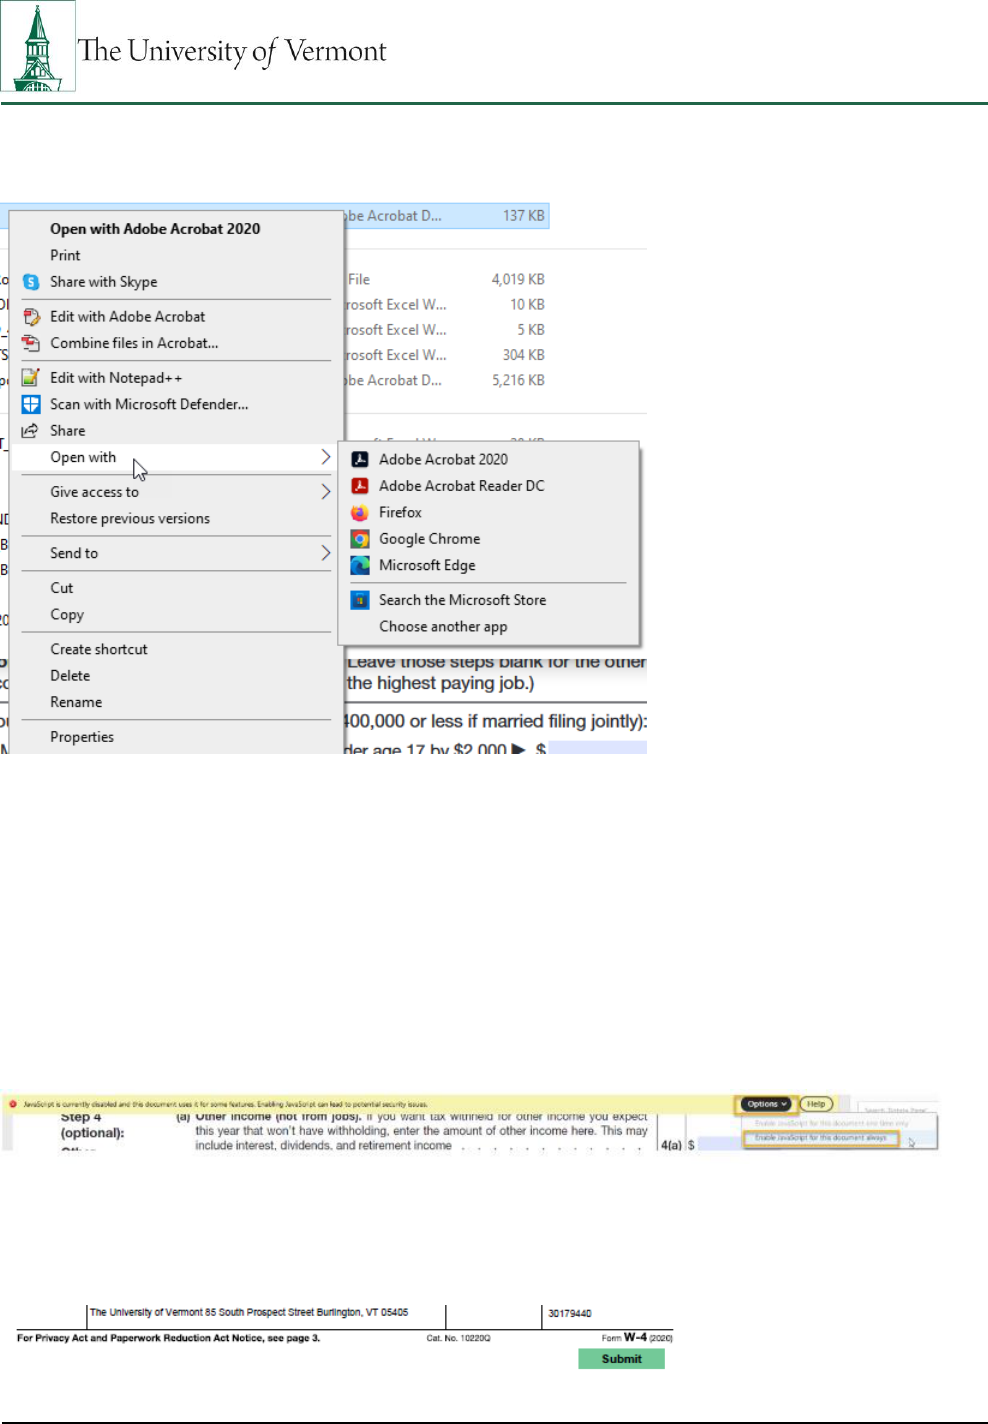
3. Right-click the file, select Open With, then select a supported version of Adobe Acrobat.

Personal Information in PeopleSoft
Updated 8/30/23 Ctrl+Home to Table of Contents Page 17 of 28
4. The file will open in Adobe Acrobat and will be fillable and should include the green Submit
button. If there is no green submit button, see Enabling the Green “Submit” Button in W-4 PDF
File below.
Step-by-Step Instructions: Downloading W-4 Fillable Form in Google Chrome
1. By default, Google Chrome attempts to open all PDF files in the browser window. To update
this setting before attempting to download the file, select the Menu button in Chrome in the
upper right-hand corner. Then, in the dropdown select Settings.

Personal Information in PeopleSoft
Updated 8/30/23 Ctrl+Home to Table of Contents Page 18 of 28
2. Select Privacy and Security from the left-hand side menu. The options in the middle of the page
should change, and you will then select Site Settings.
3. Scroll to the bottom of the Site Settings options and then select Additional Content Settings
dropdown.
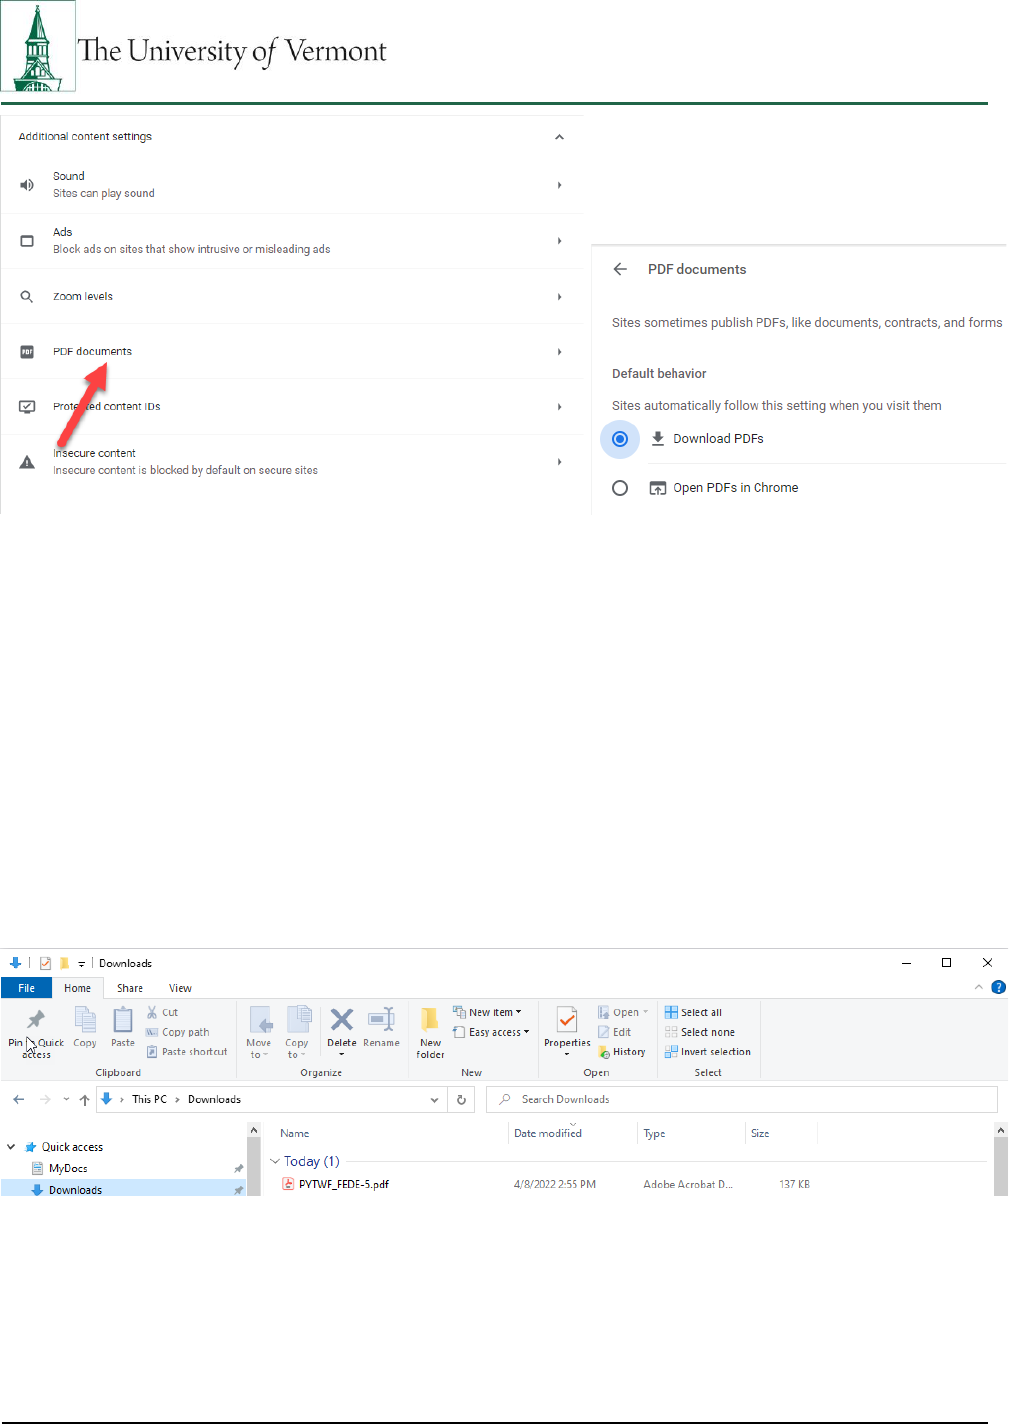
4. The dropdown will provide more options once it is selected. Select PDF Documents and this will
open a new page. On the new page, select Download PDFs option. Then exit the Settings page
by closing the tab.
Personal Information in PeopleSoft
Updated 8/30/23 Ctrl+Home to Table of Contents Page 19 of 28
5. The file can now be downloaded from PeopleSoft and opened in Adobe Acrobat DC or Adobe
Acrobat Pro. If the PDF does not display a green Submit button, see Enabling the Green
“Submit” Button in W-4 PDF File below.
Step-by-Step Instructions: Downloading W-4 Fillable Form in Microsoft Edge
1. After opening W-4 Form in PeopleSoft, the fillable form will automatically save to your File
Explorer Downloads folder.
2. Navigate to File Explorer Downloads folder and open the document named PYTWF_FEDE (if you
have downloaded the form multiple times, the file name will include a number, this does not
affect the form in any way).
Personal Information in PeopleSoft
Updated 8/30/23 Ctrl+Home to Table of Contents Page 20 of 28
3. Right-click the file, select Open With, then select a supported version of Adobe Acrobat.
4. The file will open in Adobe Acrobat and will be fillable and should include the green Submit
button. If there is no green submit button, see Enabling the Green “Submit” Button in W-4 PDF
File below.
Step-by-Step Instructions: Enabling the Green Submit Button in W-4 PDF File
1. At the top of the file, there should be a yellow ribbon security message that states “JavaScript is
currently disabled and this document uses it for some features. Enabling JavaScript can lead to
potential security issues.”
2. In the yellow security ribbon, select the Options button and a dropdown menu will appear.
3. Select Enable JavaScript for this document always and the green Submit button will appear.
Personal Information in PeopleSoft
Updated 8/30/23 Ctrl+Home to Table of Contents Page 21 of 28
Consent to an Electronic W-2
General Information:
Consenting to an electronic W-2 form allows you the ability to print a PDF version of your W-2. It is a
secure way to receive a W-2 as you will not receive a paper form in the mail.
Step-by-Step Instructions: Consent to an Electronic W-2 Form
1. Log in to PeopleSoft through the Human Resources Login (www.uvm.edu/~erp/portal/).
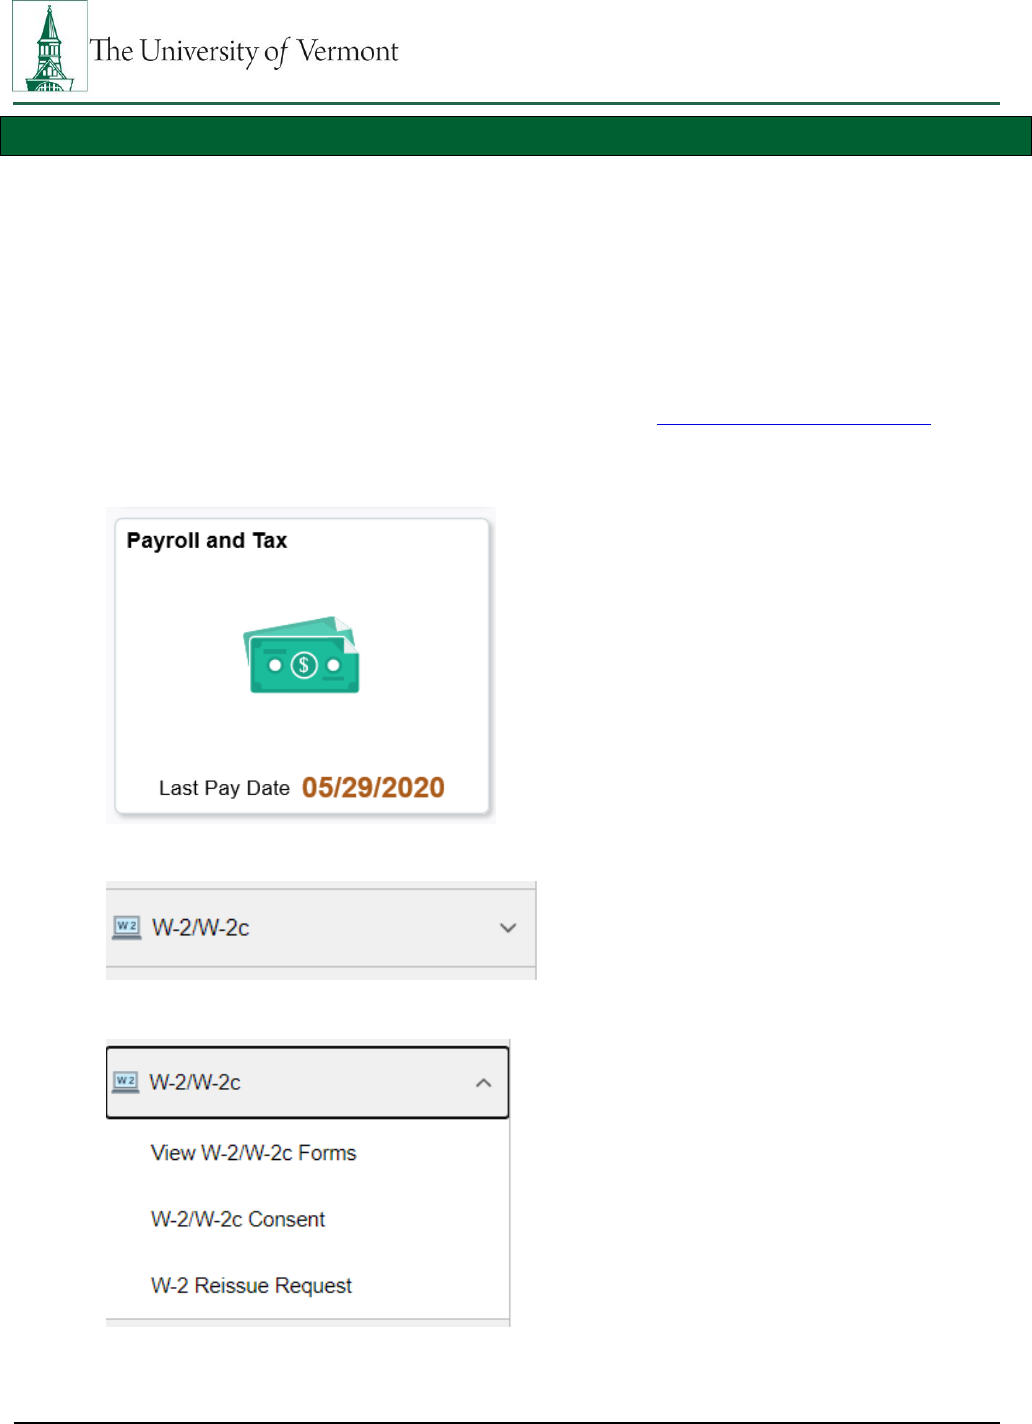
2. Navigation: UVM Employee > Select Payroll and Tax from tile selection.
3. Select W-2/W-2C from menu selection on the left.
4. Select W-2/W-2c Consent from drop down menu.
Personal Information in PeopleSoft
Updated 8/30/23 Ctrl+Home to Table of Contents Page 22 of 28
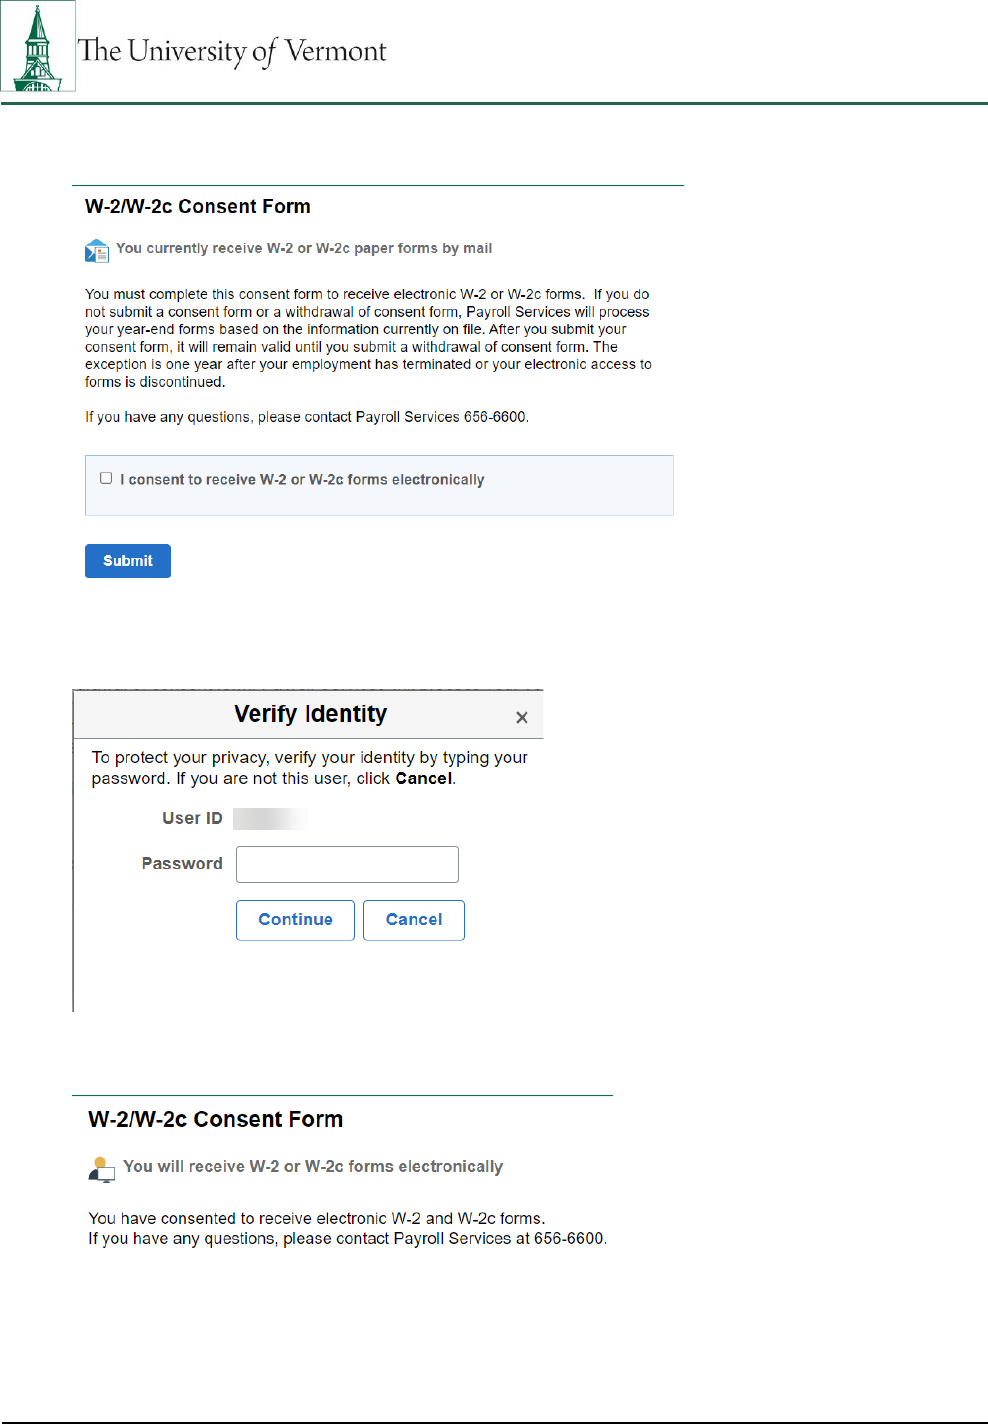
5. Read the disclaimer and check the box next to I consent to receive W-2 or W-2c forms
electronically. Select Submit.
6. You will be prompted to input your netID password for identity verification purposes. Enter
your password and select Continue.
7. You will receive confirmation that you’ve elected to receive electronic W-2/W-2c Forms.
Personal Information in PeopleSoft
Updated 8/30/23 Ctrl+Home to Table of Contents Page 23 of 28
View and Request a New W-2
General Information:
These screens can be used to view and request a copy of an existing W-2 Form.
Step-by-Step Instructions: View W-2 Form
1. Log in to PeopleSoft through the Human Resources Login (www.uvm.edu/~erp/portal/).
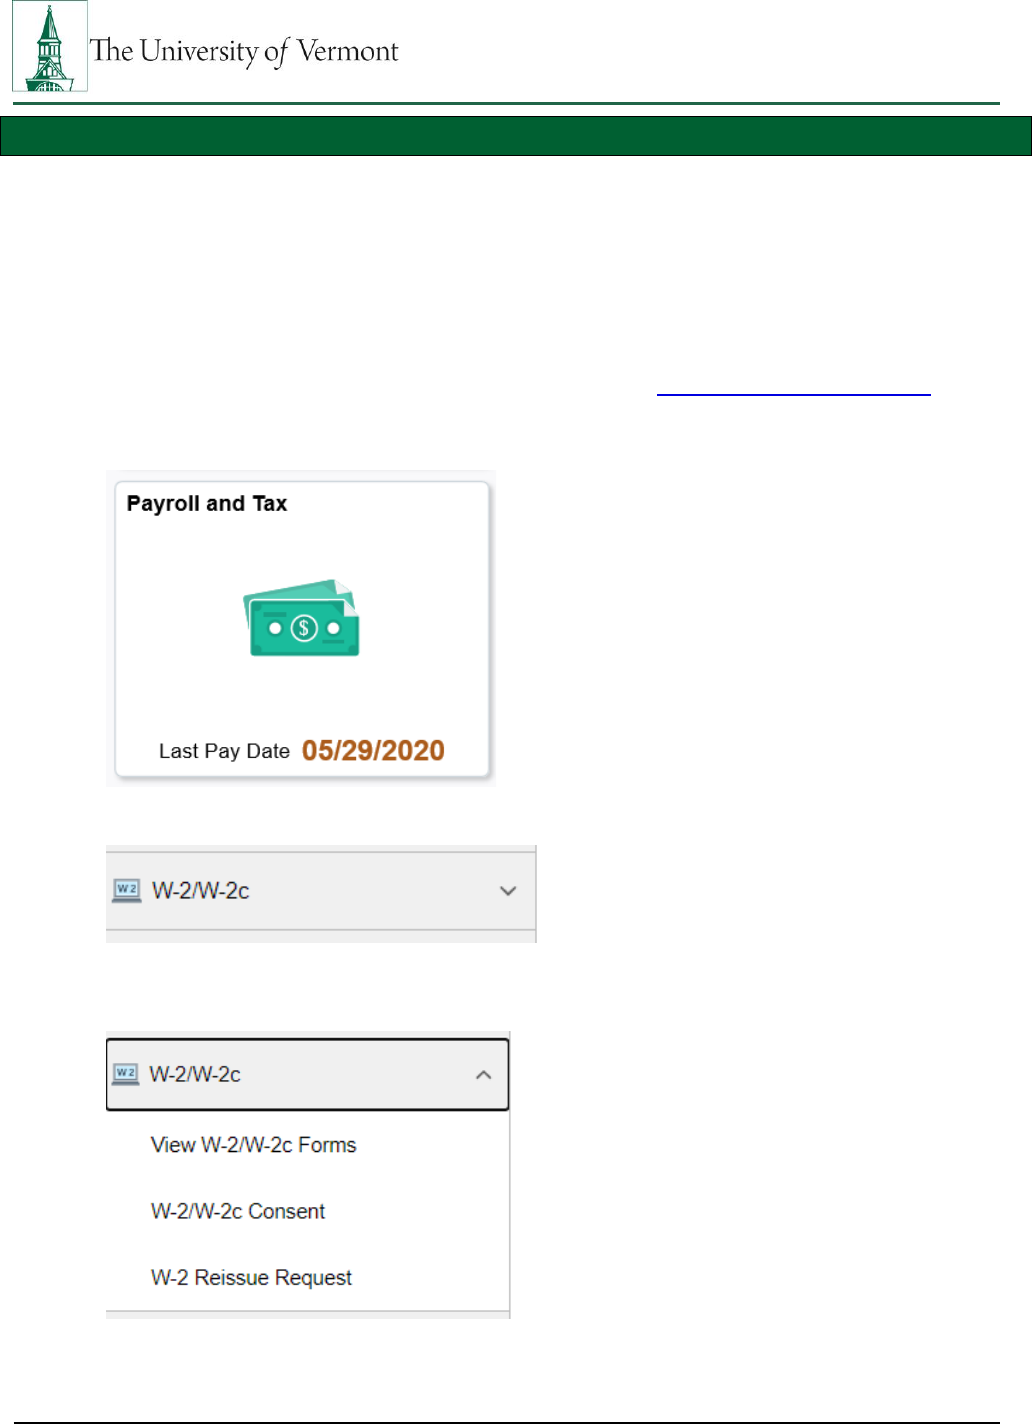
2. Navigation: UVM Employee > Select Payroll and Tax from tile selection.
3. Select W-2/W-2C from menu selection on the left.
4. Select View W-2/W-2c Forms from drop down menu.
5. Select the Tax Year from the drop down menu. The most recent Tax Year’s W-2 will auto
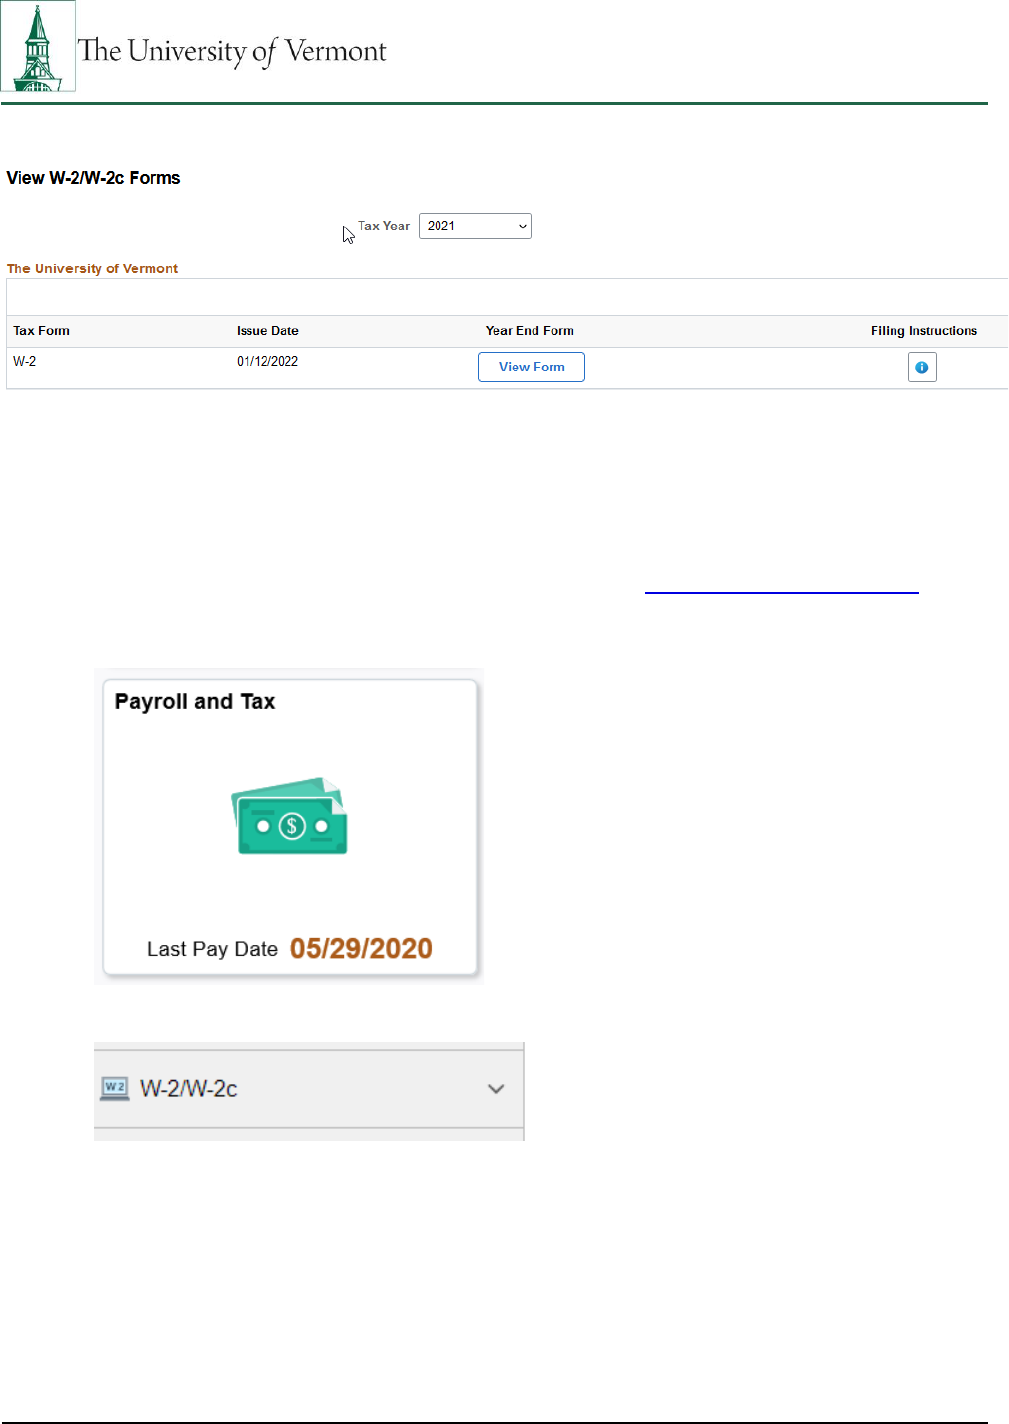
Personal Information in PeopleSoft
Updated 8/30/23 Ctrl+Home to Table of Contents Page 24 of 28
populate.
6. Select View Form and a PDF version will open in a browser tab.
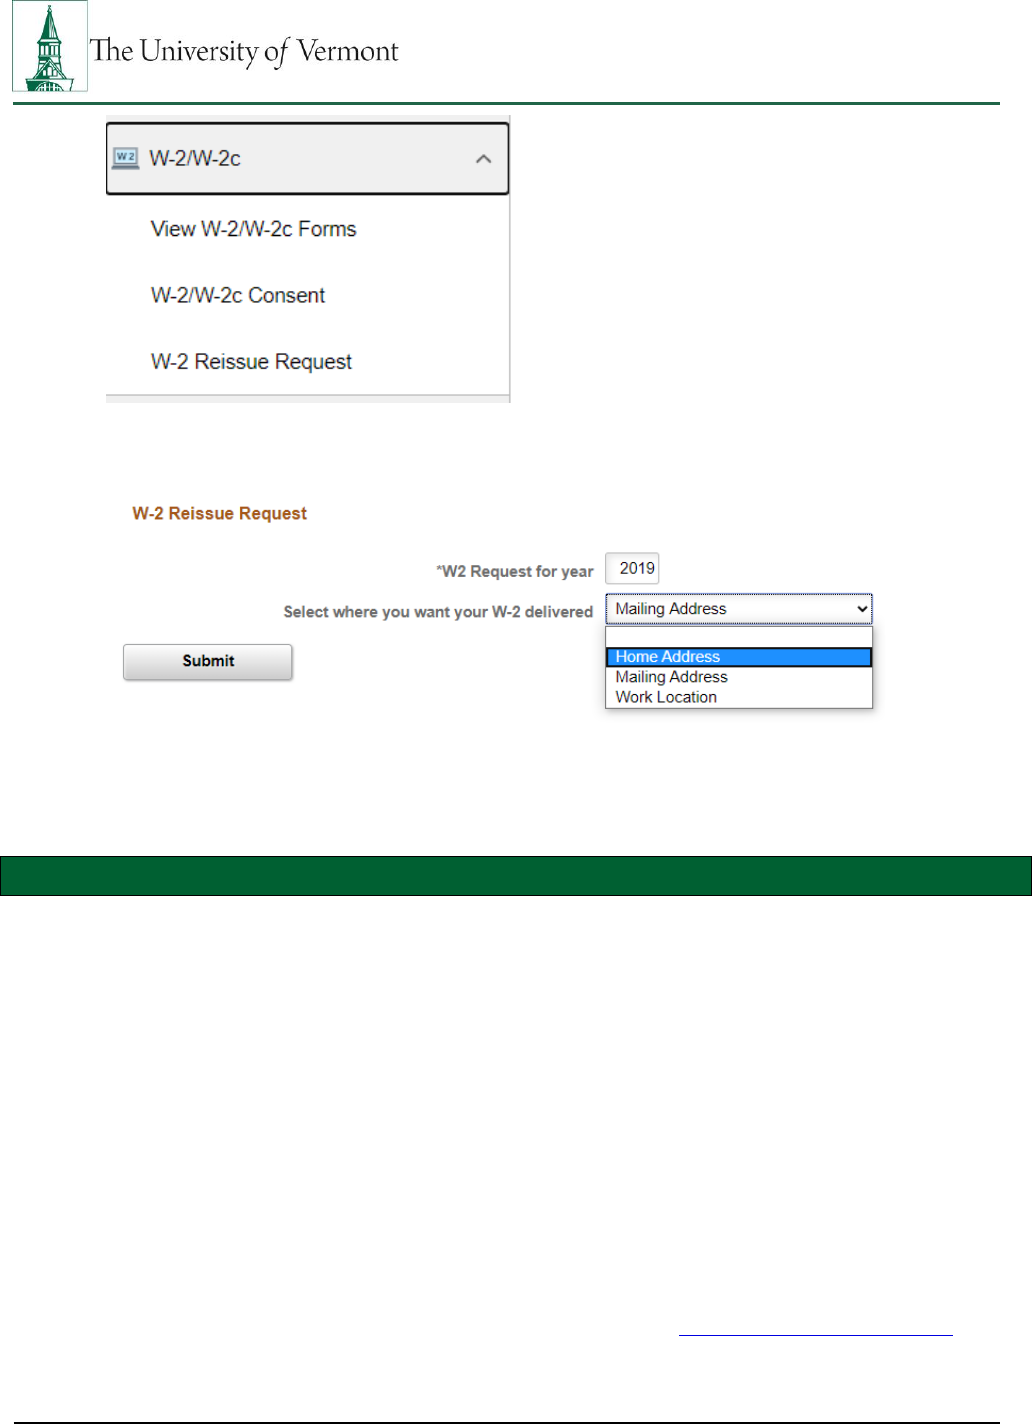
Step-by-Step Instructions: Requesting a New W-2 Form
1. Log in to PeopleSoft through the Human Resources Login (www.uvm.edu/~erp/portal/).
2. Navigation: UVM Employee > Select Payroll and Tax from tile selection.
3. Select W-2/W-2C from menu selection on the left.
4. Select W-2 Reissue Request from drop down menu.
Personal Information in PeopleSoft
Updated 8/30/23 Ctrl+Home to Table of Contents Page 25 of 28
5. Complete the W-2 Request for year field and select where the W-2 should be delivered.
6. Click the Submit button.
7. Click the OK button on the submission confirmation page.
Printing a Pay Stub
General Information:
Unnecessary printing of pay stubs should be avoided. When a copy of a pay stub is necessary, use
the procedures listed in this document.
WARNING: The printed pay stub displays the Direct Deposit account information. DO NOT leave a
printed copy unattended.
Printing a pay stub from PeopleSoft is easy and quick. Simply click the Printable Version button
found below the Check Date at the top of the page. A PDF of the paycheck being viewed will
appear. Follow the computers printing directions to print a copy of the PDF.
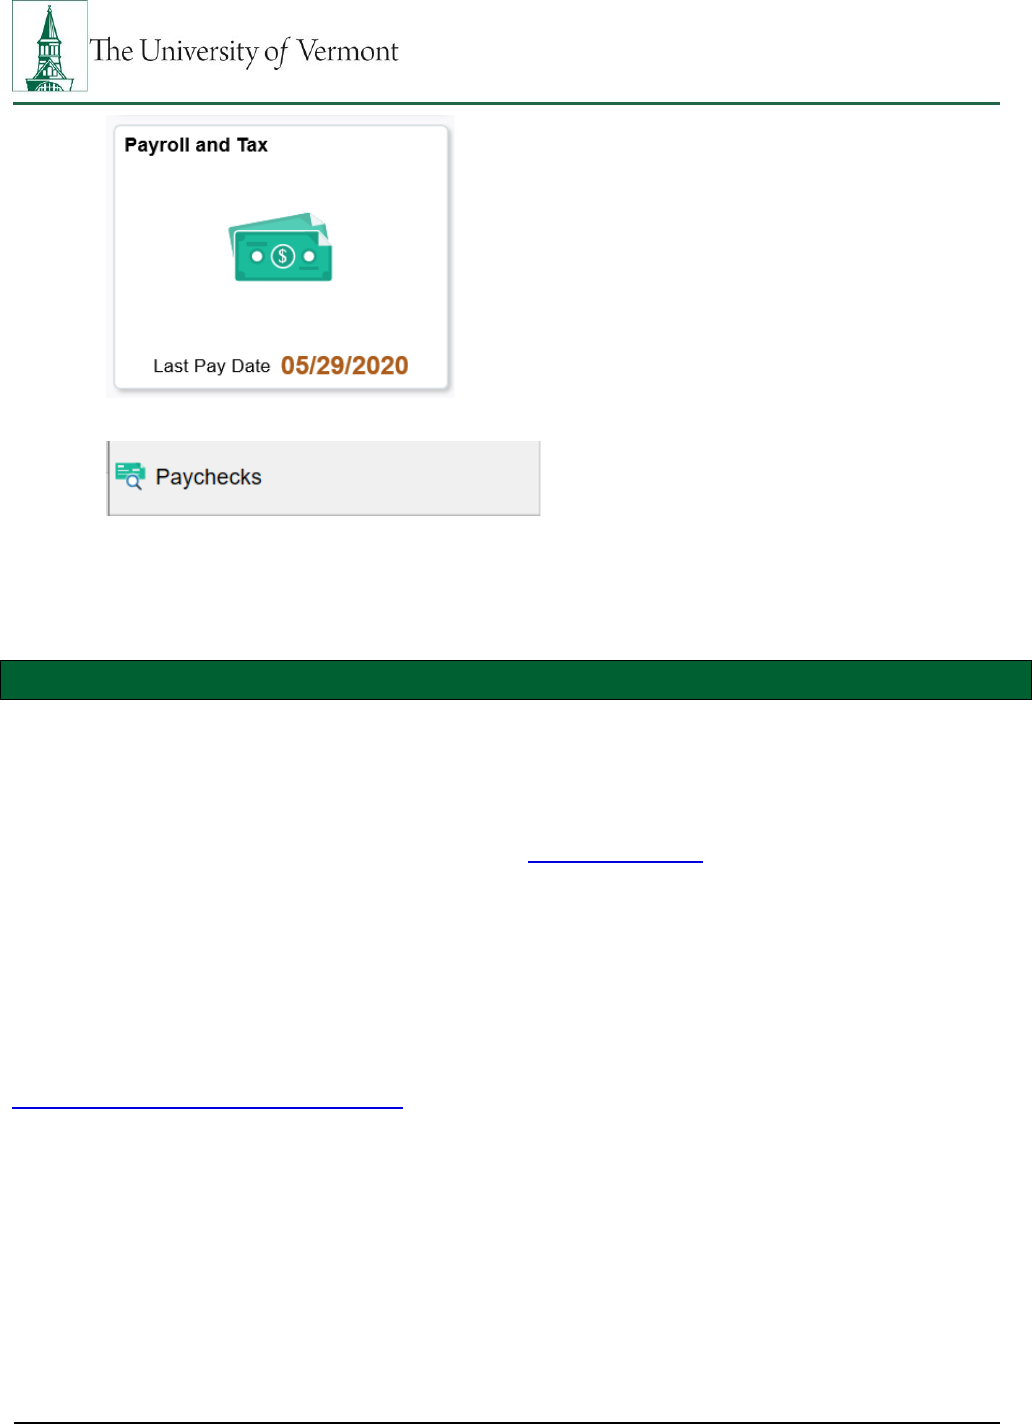
Step-by-Step Instructions: Printing a Pay Stub
1.
Log in to PeopleSoft through the Human Resources Login (www.uvm.edu/~erp/portal/).
2.
Navigation: UVM Employee > Select Payroll and Tax from tile selection.
Personal Information in PeopleSoft
Updated 8/30/23 Ctrl+Home to Table of Contents Page 26 of 28
3.
Select Paychecks from menu selection on the left.
4.
All existing paychecks will display. Select the paycheck that needs to be printed and a PDF of
the paycheck being viewed will appear. Follow the computers printing directions to print a
copy of the PDF.
Out of State Form
General Information:
The PeopleSoft Human Resources system (HCM) now features an Electronic Out of State Form for
employees living and/or working out of the State of Vermont. All employees living and/or working out
of the state of Vermont must notify Payroll Services ([email protected]) of their work location(s) for
the purpose of compliance with State Payroll Income Tax Reporting, Unemployment Insurance, and
Worker’s Compensation Insurance. Payroll & Tax Services is asking for this information when an
employee’s home address or work location is listed in PeopleSoft as outside the State of Vermont.
Additionally, if an existing employee changes their work location, Payroll Services must be notified and
a new form must be completed. Both the employee and the employee’s supervisor(s) must complete
the electronic form.
For detailed instructions for completing the Electronic Out of State Questionnaire Form, please see the
Electronic Out of State Form User Guide.

Personal Information in PeopleSoft
Updated 8/30/23 Ctrl+Home to Table of Contents Page 27 of 28
Frequently Asked Questions
Why am I not receiving a paper pay stub?
For employees with direct deposit, paper pay stubs are not generated.
Can I view the UVM contribution to my 403b in PeopleSoft?
It is found in the section of the pay stub entitled “Before Tax Deductions” and “After Tax
Deductions.
What is the $1.96 Life Credit in the earnings box on my pay stub?
This is UVM’s contribution to the cost of the basic life insurance policy.
Can I print my pay stub using the Google Chrome web browser?
PeopleSoft is designed to work best with either Microsoft Internet Explorer or Mozilla Firefox,
regardless if using a PC or a Mac. The use of other browsers such as Chrome, Safari, Opera or
Netscape is neither encouraged nor supported. However, printing successfully with alternate
browsers may be possible. Click one of the following links to download the most recent version of
Microsoft Internet Explorer or Mozilla Firefox.
Can I print my pay stub using the Apple Safari web browser?
PeopleSoft is designed to work best with either Microsoft Internet Explorer or Mozilla Firefox,
regardless if using a PC or a Mac. The use of other browsers such as Chrome, Safari, Opera or
Netscape is neither encouraged nor supported. However, printing successfully with alternate
browsers may be possible. Click one of the following links to download the most recent version of
Microsoft Internet Explorer or Mozilla Firefox.
Can I print my pay stub using the Opera web browser?
PeopleSoft is designed to work best with either Microsoft Internet Explorer or Mozilla Firefox,
regardless if using a PC or a Mac. The use of other browsers such as Chrome, Safari, Opera or
Netscape is neither encouraged nor supported. However, printing successfully with alternate
browsers may be possible. Click one of the following links to download the most recent version of
Microsoft Internet Explorer or Mozilla Firefox.
Can I print my pay stub using the Netscape web browser?
Development and support for Netscape was suspended on March 1, 2008. If using any version of
Netscape, the browser performance and security are not optimized. Click one of the following links
to download the most recent version of Microsoft Internet Explorer or Mozilla Firefox.
Why do employees need to notify Payroll Services of their home and work location?
All employees living and/or working out of the state of Vermont must notify Payroll Services
([email protected]) of their work location(s) for the purpose of compliance with State Payroll

Personal Information in PeopleSoft
Updated 8/30/23 Ctrl+Home to Table of Contents Page 28 of 28
Income Tax Reporting, Unemployment Insurance, and Worker’s Compensation Insurance.
What if I am only working out of the State of Vermont for a short time?
Payroll Services must be notified of any out of state work locations regardless of duration of the
assignment. Sending an email to [email protected] is the most efficient way to notify without
completing the electronic e-OOS Form if it is potentially not needed.
Resources
Helpful Links
• Payroll Deadline Schedule
Relevant UVM Departments
• Payroll Services
• Human Resource Services
Related Policies
• Staff Handbook
• University Policies and Operating Procedures
