Contents
1. Surface Repair
2. Fracture Repair
3. Tooth Repair
4. Hard Reline
5. Soft Reline
Illustrated Technique Guide
Lucitone Digital Print Denture
Repair and Reline
dsdigitaldentures@
dentsplysirona.com
Technical Support
800-243-1942
ext. 54212
3Repair and Reline2 Repair and Reline
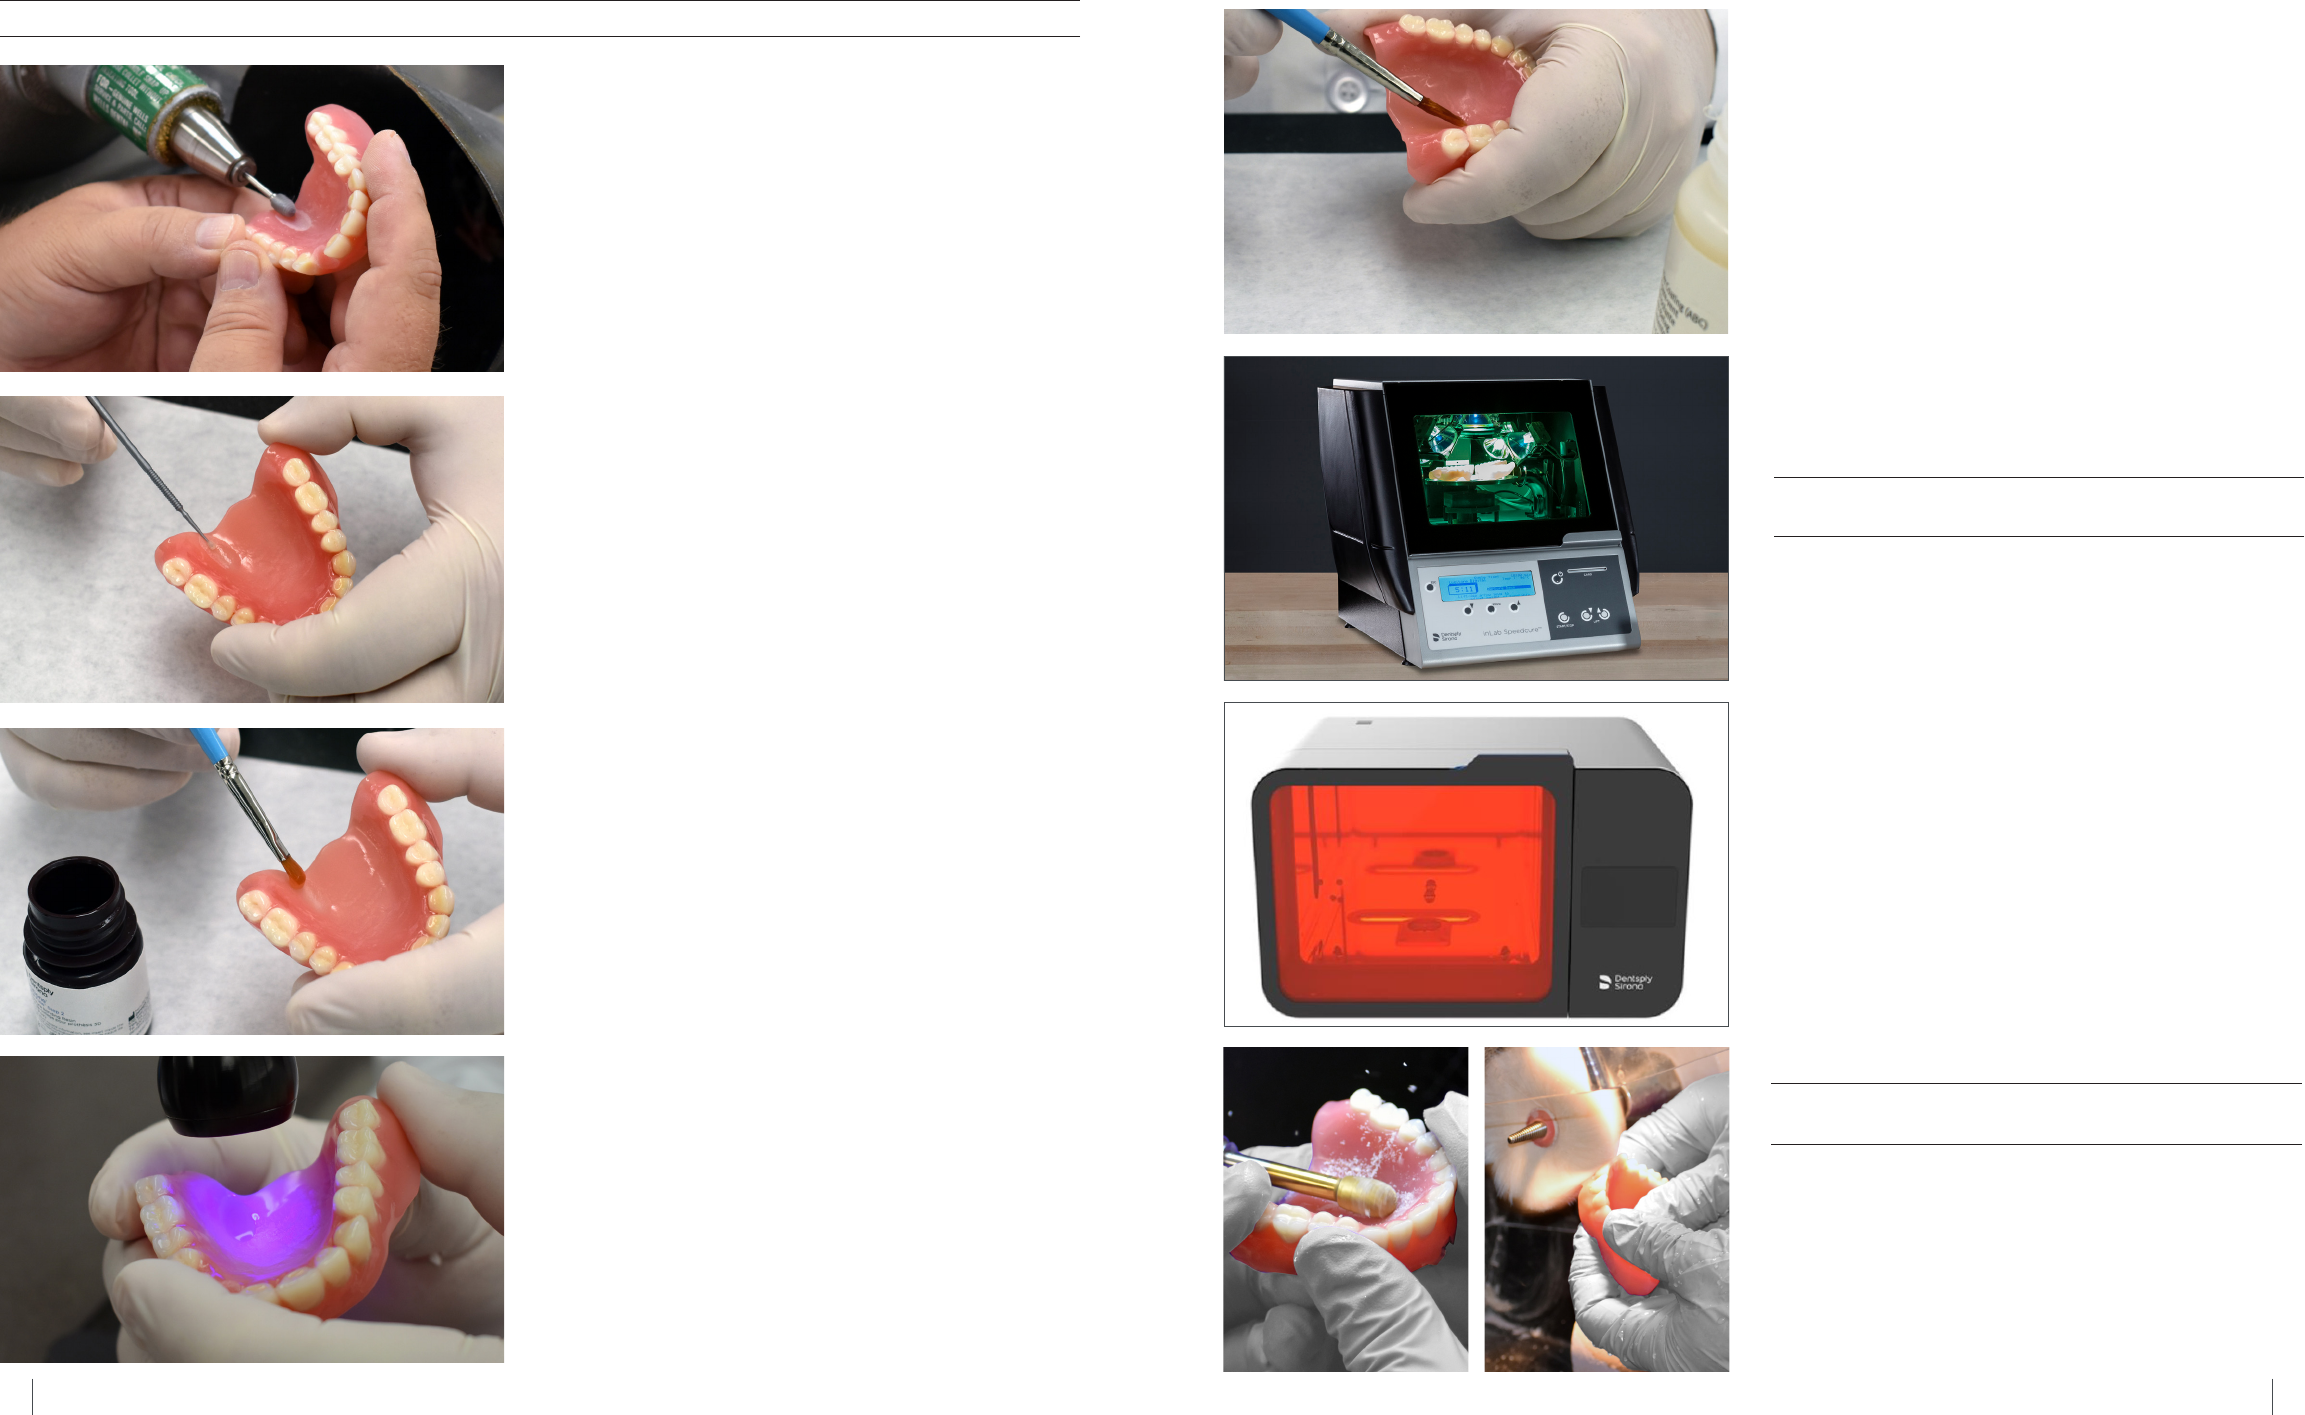
1.0 Surface Repair
Prepare the repair area by grinding and roughening the
surface with a carbide bur
Apply Lucitone Digital Fuse™ Step - D Tooth Conditioning
Agent to the repair area and air dry for 1 minute
Apply Lucitone Digital Fuse™ Step - D Sealer or Lucitone
Digital Fuse™ Step - Total to the repair area The appliance
is now ready for post processing
Only use validated post-processing units
OPTION 1: Dentsply Sirona inLab Speedcure® Processing Unit
OPTION 2: Dentsply Sirona Digital Cure - Large Capacity Unit
Apply Lucitone Digital Fuse™ Step – D Denture Bonding
Resin to the repair area with a brush Allow the material to
flow into the repair area to avoid air pockets - do not brush
Tack cure the repair area for 10 seconds using the UV
Tack-Cure Light
OPTION 1: Dentsply Sirona inLab Speedcure® Processing Unit
Place the appliance repair side up in the inLab Speedcure®
Processing Unit Select the menu option “Lucitone Digital”
and then “Repair” The program will run for minutes
followed by a -minute cooldown
CAUTION Only cure one repair denture at a time Only cure
one side of the arch - repair side up
CAUTION Use proper ventilation. Wear protective gloves, eye protection, and protective clothing
OPTION 2: Dentsply Sirona Digital Cure - Large Capacity Unit
Tack cure the sealer for one () minute using the UV Tack-
Cure Light Rotate the arch ensuring light exposure to all
tooth surfaces for a uniform tack cure The sealer will be
slightly stickytacky to the touch - avoid excess handling
Place the appliance repair side up in the unit Select the
“Lucitone Digital Appliances” menu selection The program
cycle will automatically run for minutes (“HEATING” will
display on the screen when the cycle starts) Note The
unit may require warming prior to the cycle start (“PRE-
HEATING” will display on the screen until the unit reaches
temperature) Cooldown Cycle Wait until the temperature
indicator in the upper right corner of the home screen
reaches ˚C before removing and finishing the appliance(s)
Finish and polish the denture using conventional techniques
CAUTION
Do not steam clean Lucitone Digital Print Denture
appliances
5Repair and Reline4 Repair and Reline
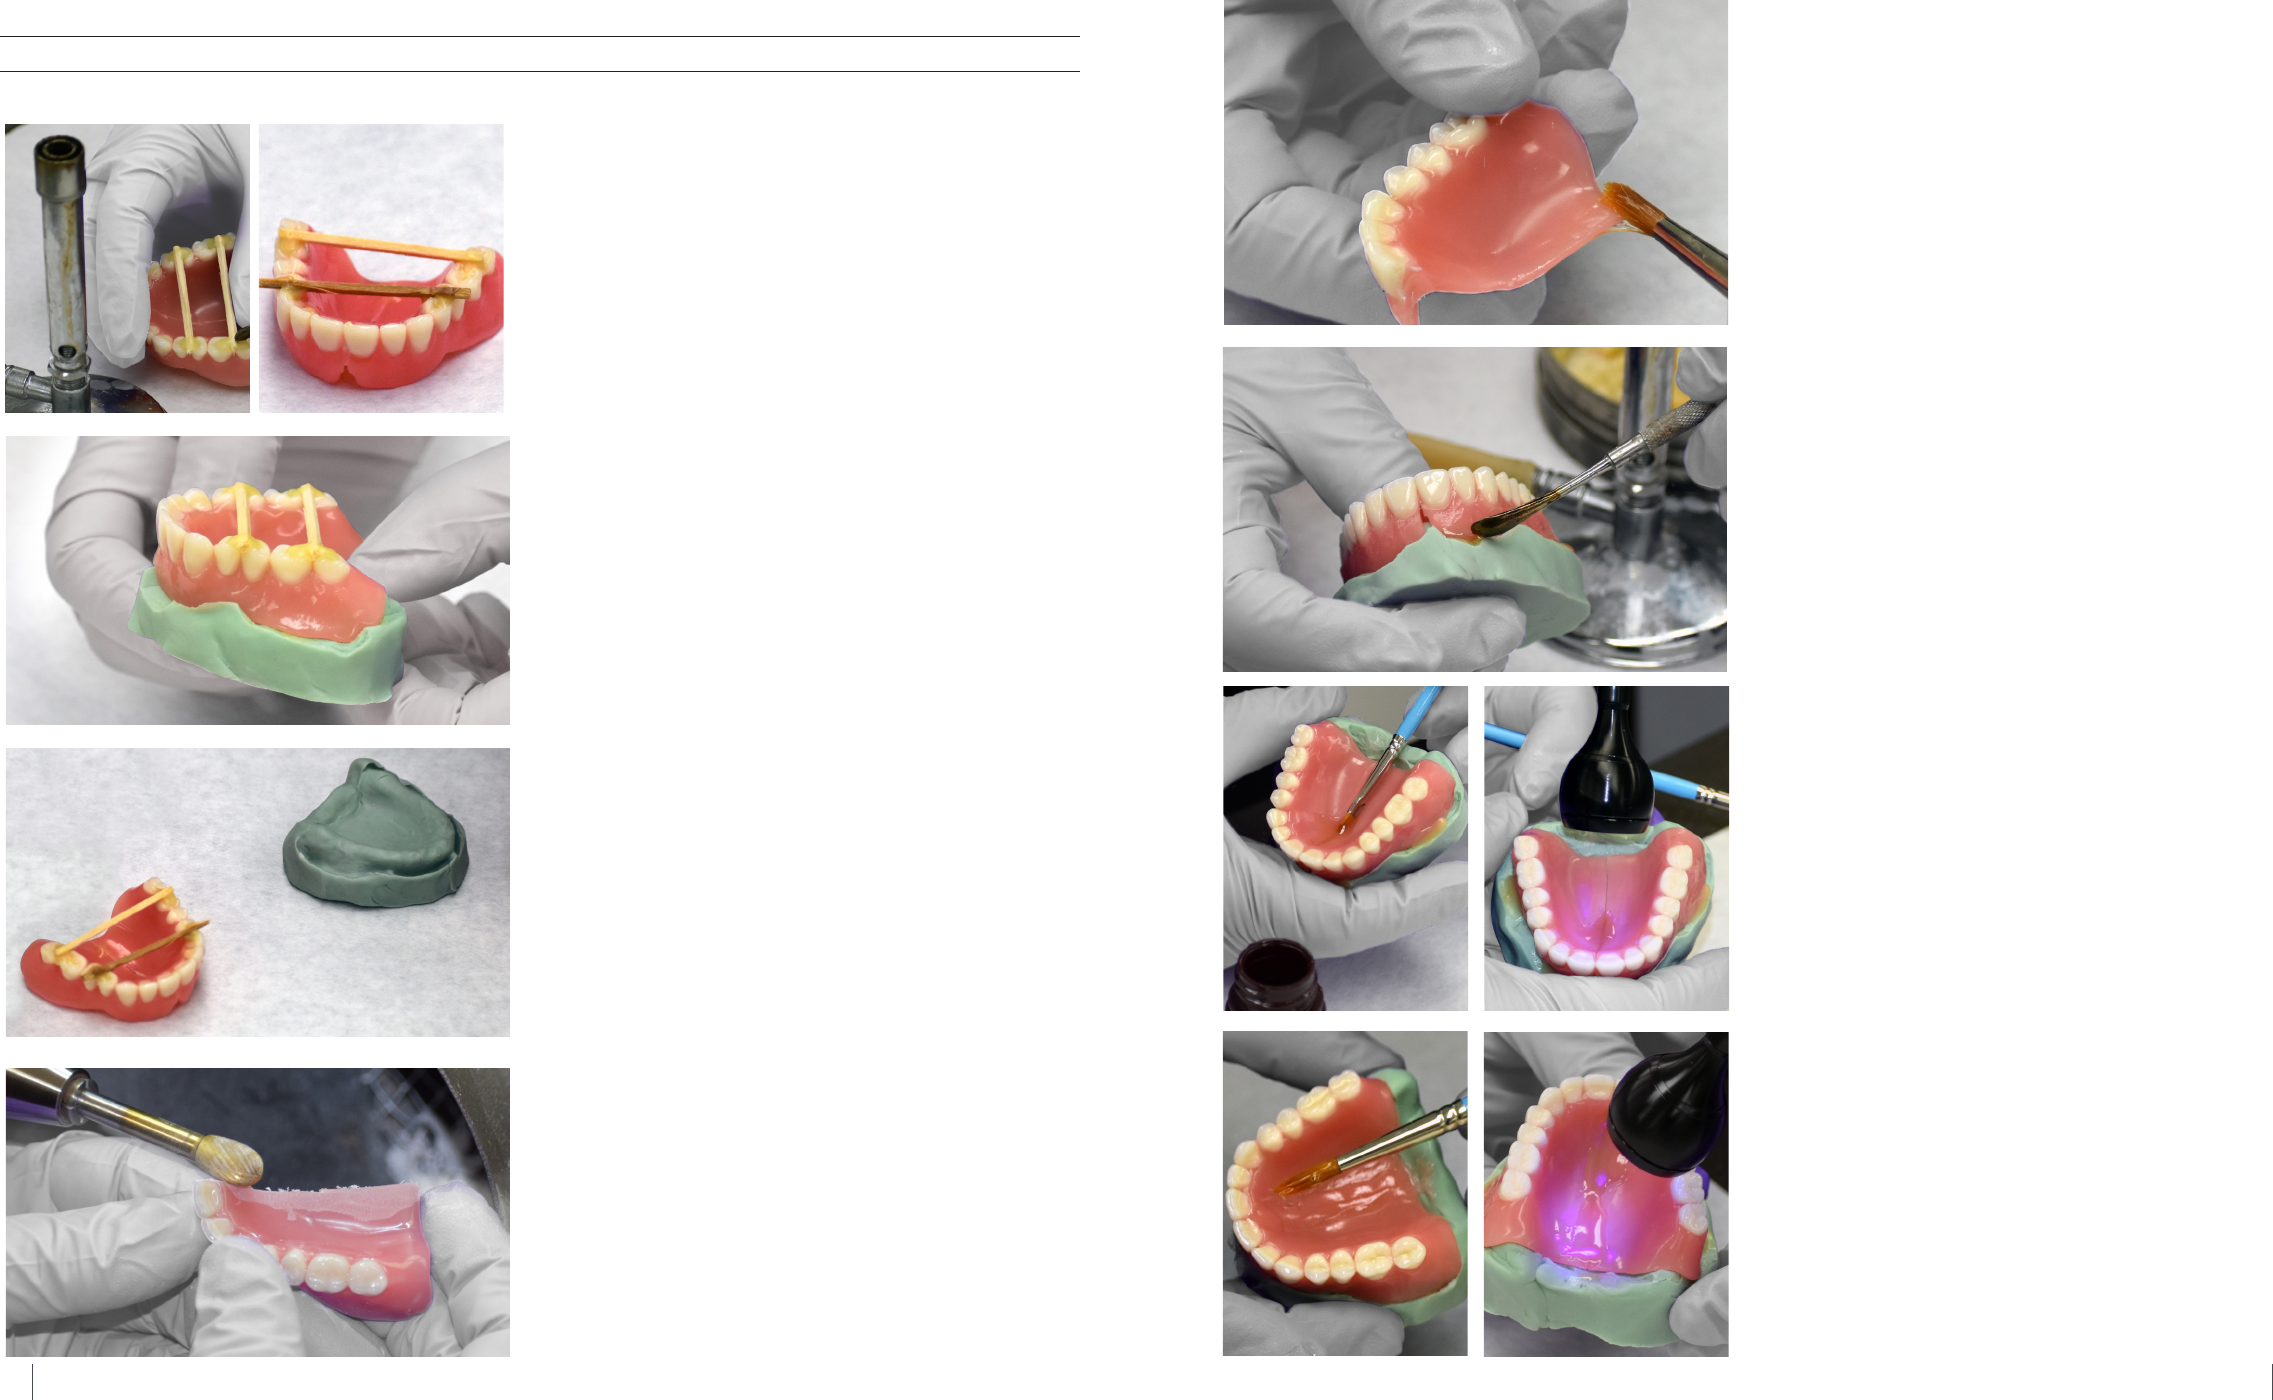
Tack the fractured denture together using an adhesive glue
or sticky wax
Fabricate a putty model using a silicone putty
After the model hardens remove the denture from the model
Prepare the repair area by grinding and roughening the
surface with a carbide bur
2.0 Fracture Repair - Lucitone Digital Fuse
Apply Lucitone Digital Fuse™ Step - D Tooth Conditioning
Agent to the repair surface and air dry for 1 minute.
Secure the denture on the putty model with sticky wax or a
similar type material
CAUTION
Use proper ventilation. Wear protective gloves, eye protection, and protective clothing.
Lucitone® HIPA - High Impact Pour Acrylic is an alternative fracture repair technique Refer to the Lucitone HIPA - High
Impact Pour Acrylic Instructions forUse “Repair Procedure” section for step-by-step instructions
Apply Lucitone Digital Fuse™ Step - D Denture Bonding
Resin to the repair area and tack cure for 10 seconds using
the UV Tack-Cure Light
Repeat the application of Fuse Step and tack curing to
achieve the desired repair thickness
7Repair and Reline6 Repair and Reline
Finish and polish the denture using conventional techniques
CAUTION
Do not steam clean Lucitone Digital Print Denture
appliances
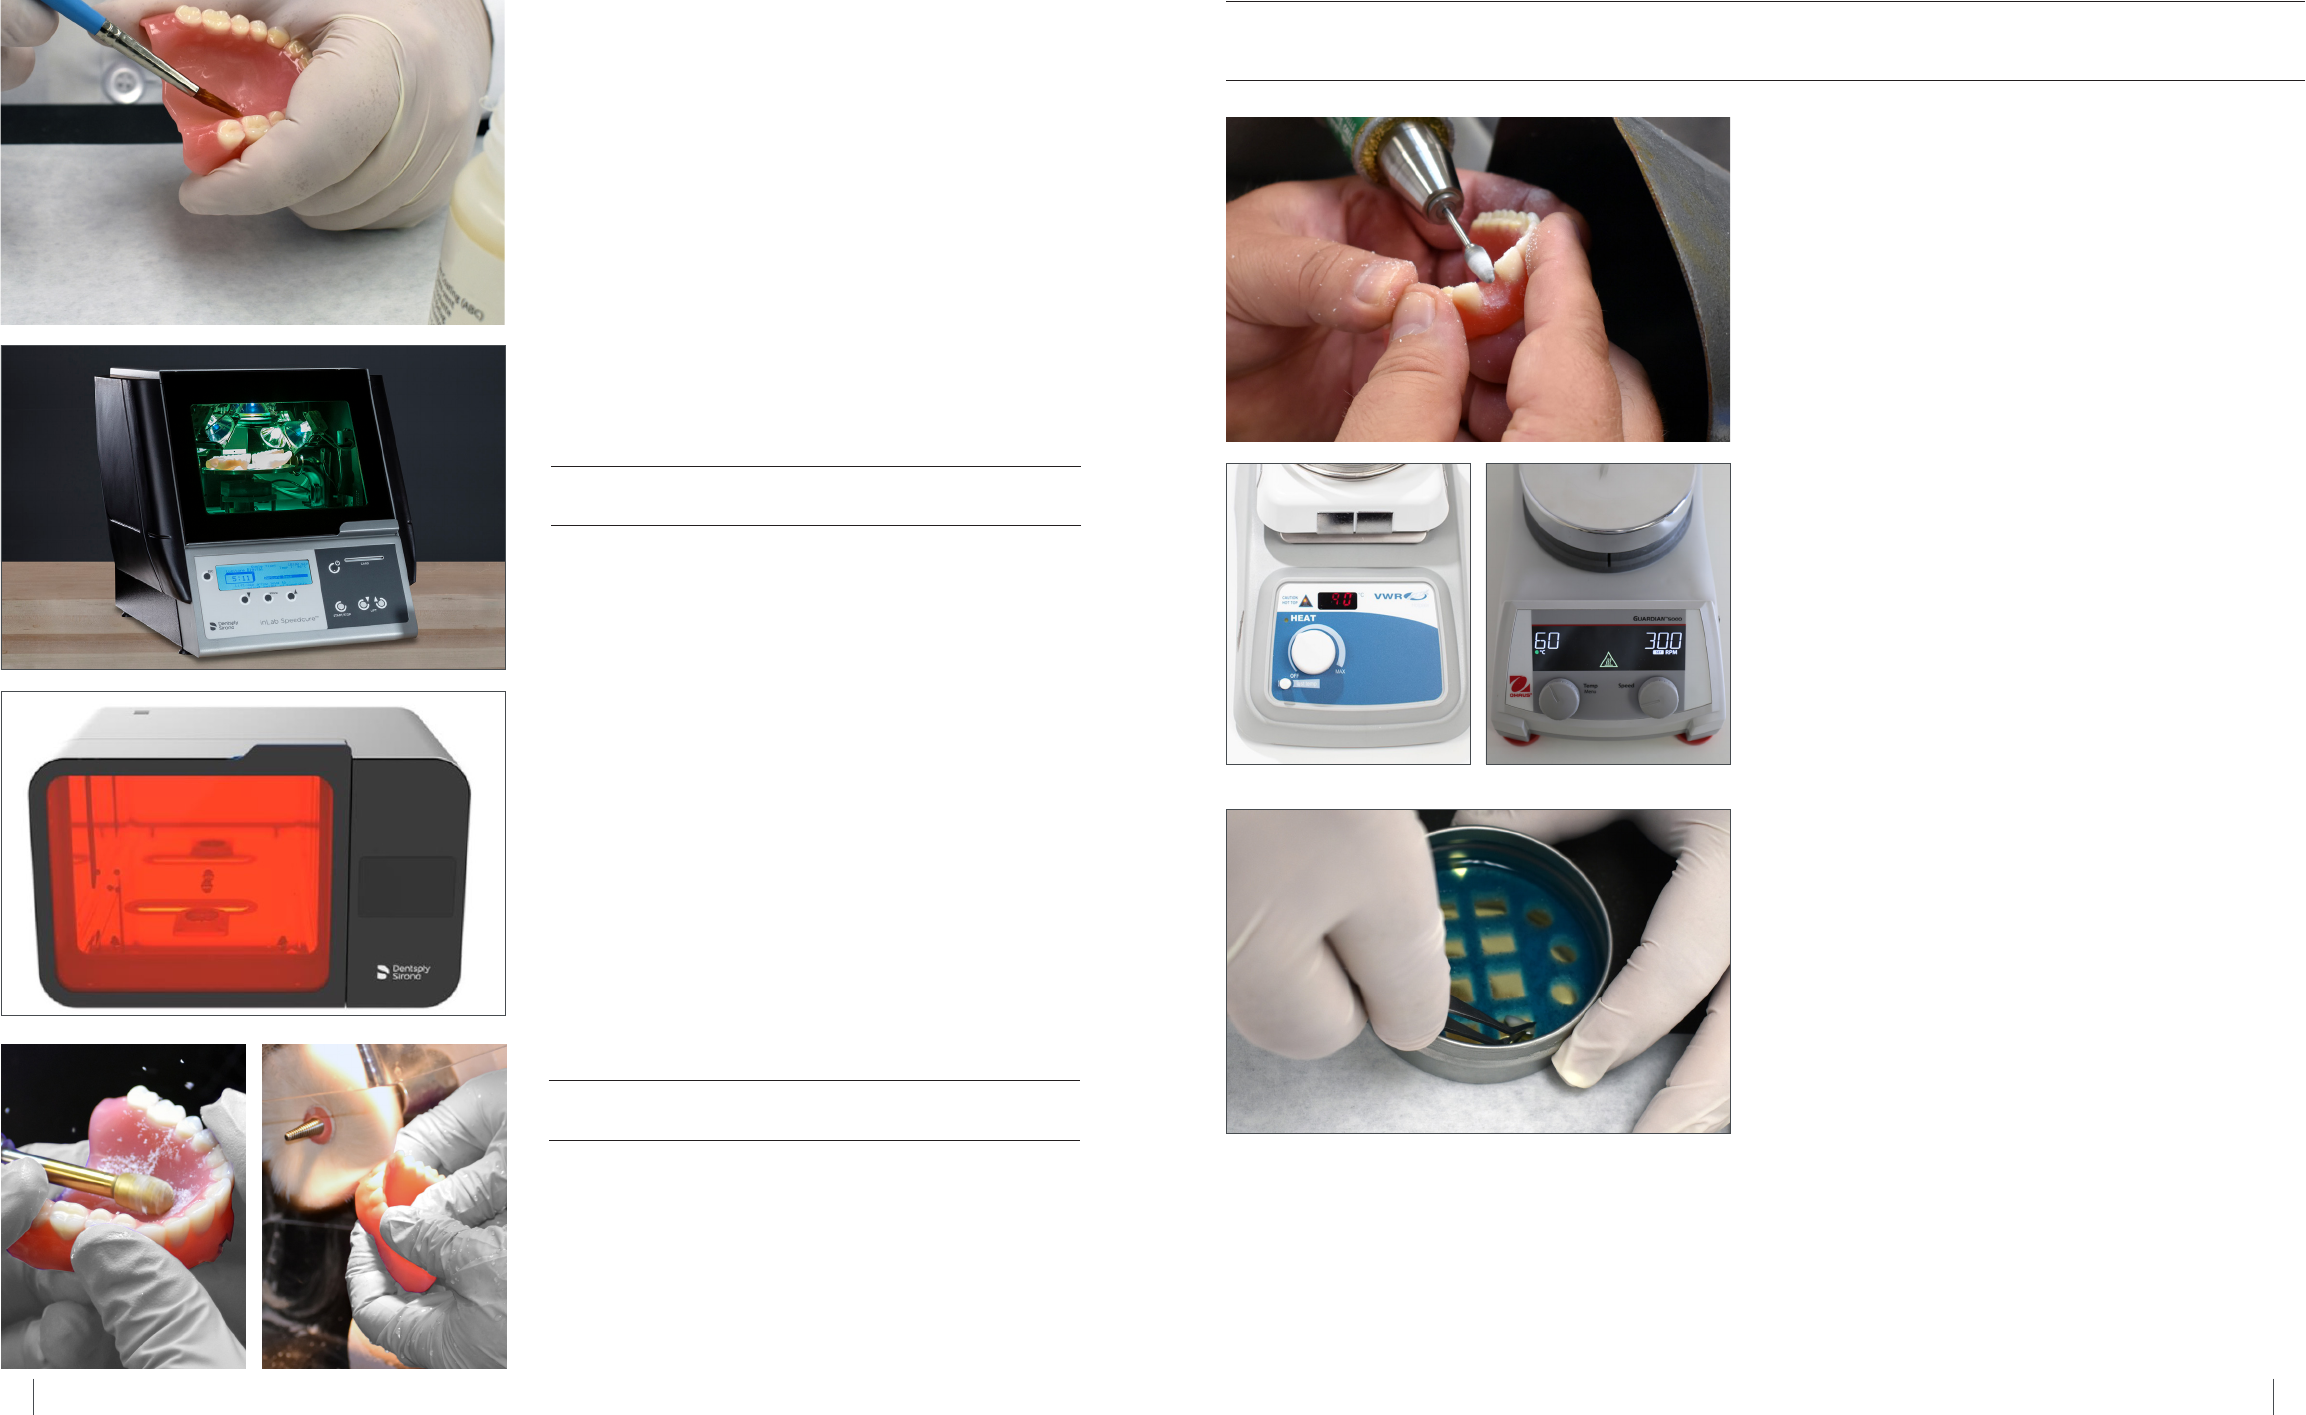
3.0 Tooth Repair - IPN 3D® Digital Denture Teeth
Prepare the repair area by grinding and roughening the
surface with a carbide bur
Use Lucitone Digital Fuse™ Step - D Tooth Conditioning
Agent to treatcondition the replacement toothteeth
Plug in the hotplate and set the temperature per below
Preheat for minutes
VWR Hotplates Temperature setting ˚C
OHAUS Hotplates Temperature setting ˚C
CAUTION:
• Use proper ventilation. Wear protective gloves, eye protection, and protective clothing.
• Keep the metal container and the foam insert free of any solid buildup. Buildup can compromise the tooth bond strength.
Shake the bottle and pour Fuse Step into the Metal
Container Place the foam insert into the Metal Container
Use Tweezers to place the toothteeth into the insert hole(s)
- ridge lap down and complete submersion into the liquid
Place the lid on the container
VWR OHAUS
OPTION 1: Dentsply Sirona inLab Speedcure® Processing Unit
Place the appliance repair side up in the inLab Speedcure®
Processing Unit Select the menu option “Lucitone Digital”
and then “Repair” The program will run for minutes
followed by a -minute cooldown
CAUTION Only cure one repair denture at a time Only cure
one side of the arch - repair side up
OPTION 2: Dentsply Sirona Digital Cure - Large Capacity Unit
Tack cure the sealer for one () minute using the UV Tack-
Cure Light Rotate the arch ensuring light exposure to all
tooth surfaces for a uniform tack cure The sealer will be
slightly stickytacky to the touch - avoid excess handling
Place the appliance repair side up in the unit Select the
“Lucitone Digital Appliances” menu selection The program
cycle will automatically run for minutes (“HEATING” will
display on the screen when the cycle starts) Note The
unit may require warming prior to the cycle start (“PRE-
HEATING” will display on the screen until the unit reaches
temperature) Cooldown Cycle Wait until the temperature
indicator in the upper right corner of the home screen
reaches ˚C before removing and finishing the appliance(s)
Apply Lucitone Digital Fuse™ Step - D Sealer or Lucitone
Digital Fuse™ Step - Total to the repair area The appliance
is now ready for post processing
Only use validated post-processing units
OPTION 1: Dentsply Sirona inLab Speedcure® Processing Unit
OPTION 2: Dentsply Sirona Digital Cure - Large Capacity Unit
9Repair and Reline8 Repair and Reline
Apply Fuse Step to the repair area using a Flocked
Applicator Tip or brush and air dry for minute
Use sticky wax to position the toothteeth for repair
Apply Lucitone Digital Fuse™ Step - D Denture Bonding
Resin to the repair area with a brush Allow the material to
flow into the repair area to avoid air pockets - do not brush
NOTE Fuse Step is available in all Lucitone Digital Print
D Denture Base shades Use Original shade as a universal
shade option except for with dark reddish pink
Apply a thin layer of Lucitone Digital Fuse™ Step - D
Sealer or Lucitone Digital Fuse™ Step - Total using a
Flocked Applicator Tip to the repair area including around
the margins and the interproximal areas The appliance is
now ready for post processing
Only use validated post-processing units
OPTION 1: Dentsply Sirona inLab Speedcure® Processing Unit
OPTION 2: Dentsply Sirona Digital Cure - Large Capacity Unit
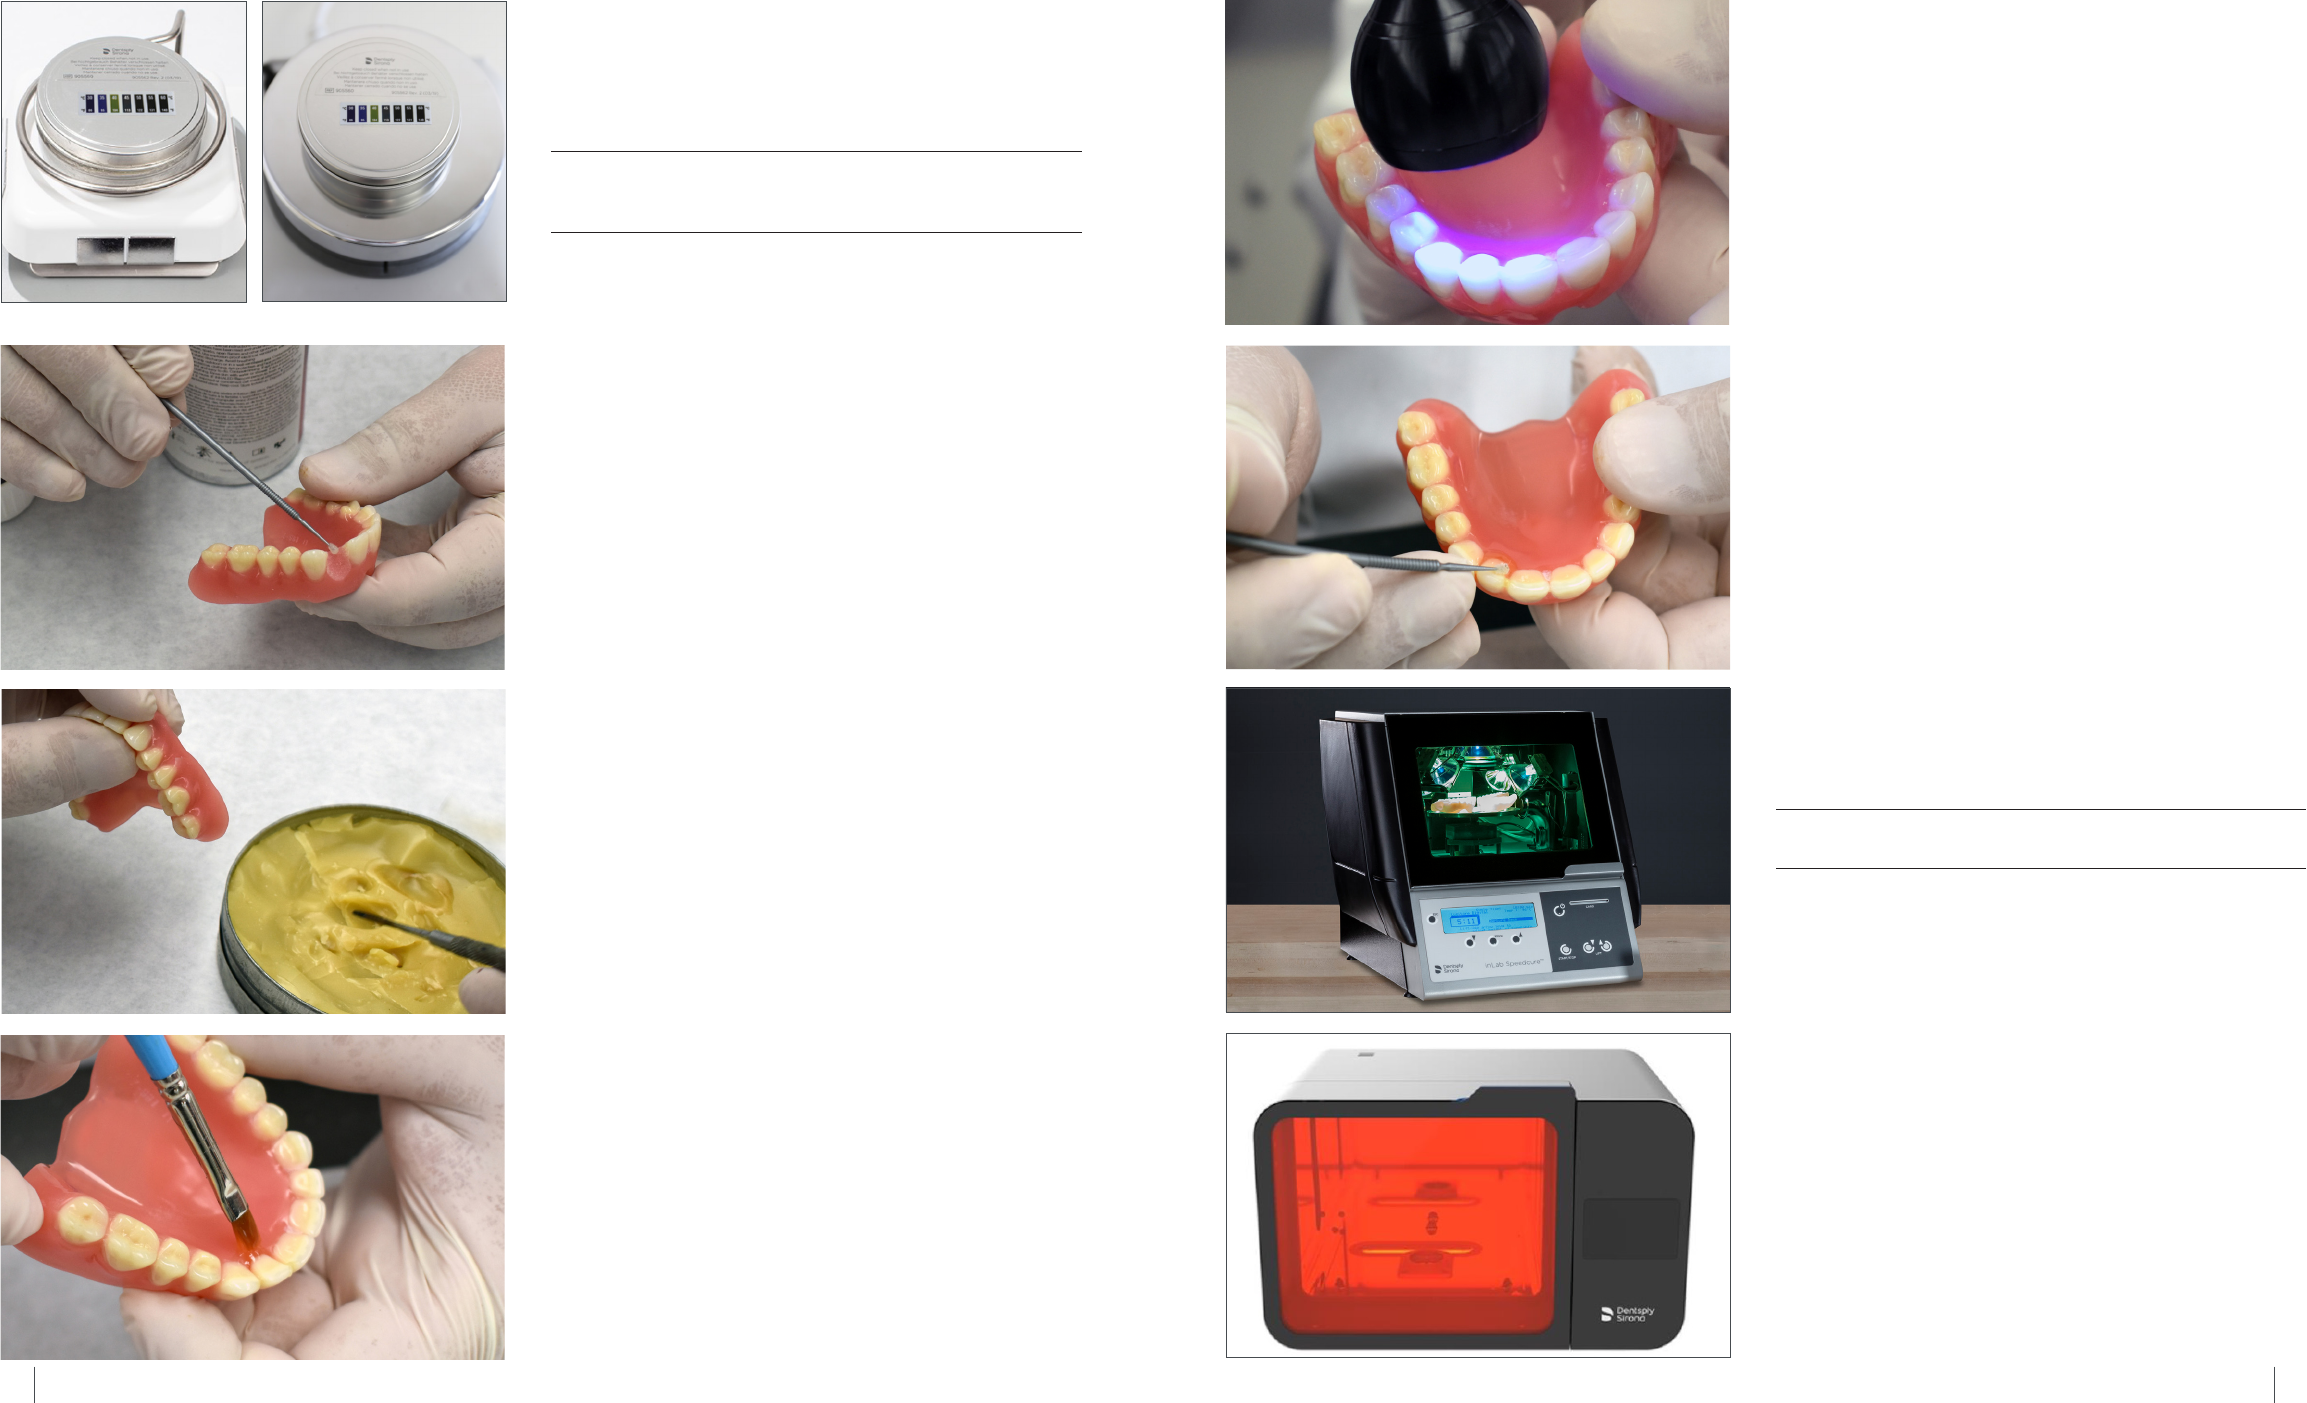
Tack cure the repair area for 10 seconds using the UV
Tack-Cure Light
Place the Metal Container (inside the metal ring for VWR
models only) on the hotplate until the temperature strip
reaches ˚C - approximately - minutes
Remove the toothteeth from the Metal Container using
Tweezers Air dry for minutes Do not wipe
CAUTION Failure to reach ˚C or using higher warming
temperatures to accelerate the process will compromise the
tooth bond strength
VWR OHAUS
OPTION 1: Dentsply Sirona inLab Speedcure® Processing Unit
Place the appliance repair side up in the inLab Speedcure®
Processing Unit Select the menu option “Lucitone Digital”
and then “Repair” The program will run for minutes
followed by a -minute cooldown
CAUTION Only cure one repair denture at a time Only cure
one side of the arch - repair side up
OPTION 2: Dentsply Sirona Digital Cure - Large Capacity Unit
Tack cure the sealer for one () minute using the UV Tack-
Cure Light Rotate the arch ensuring light exposure to all
tooth surfaces for a uniform tack cure The sealer will be
slightly stickytacky to the touch - avoid excess handling
Place the appliance repair side up in the unit Select the
“Lucitone Digital Appliances” menu selection The program
cycle will automatically run for minutes (“HEATING” will
display on the screen when the cycle starts) Note The
unit may require warming prior to the cycle start (“PRE-
HEATING” will display on the screen until the unit reaches
temperature) Cooldown Cycle Wait until the temperature
indicator in the upper right corner of the home screen
reaches ˚C before removing and finishing the appliance(s)
10 Repair and Reline
4.0 Hard Reline
CAUTION
Do not steam clean Lucitone Digital Print Denture appliances.
• Refer to the Dentsply Sirona Lucitone® HIPA - High Impact Pour Acrylic Instructions for Use “Indirect Reline Procedure”
section for step-by-step reline instructions
5.0 Soft Reline
CAUTION
Do not steam clean Lucitone Digital Print Denture appliances.
Dentsply Sirona recommends the following soft reline materials for use with Lucitone Digital Print Dentures
• Tokuyama SOFRELINER TOUGH® Soft and SOFRELINER TOUGH® Medium []
• GC Corporation GC RELINE
TM
II Soft RELINE
TM
II Extra Soft and GC RELINE
TM
II Extra Extra Soft []
Dentsply Sirona | 800-243-1942 | dentsplysirona.com
DP-0000502 Rev. 5 (09/2022)
[1] SOFRELINER TOUGH® Soft and SOFRELINER TOUGH® Medium are registered trademarks of Tokuyama Corporation.
[2] GC RELINE™ II Soft, RELINE™ II Extra Soft and GC RELINE™ II Extra Extra Soft are trademarks of GC Corporation.
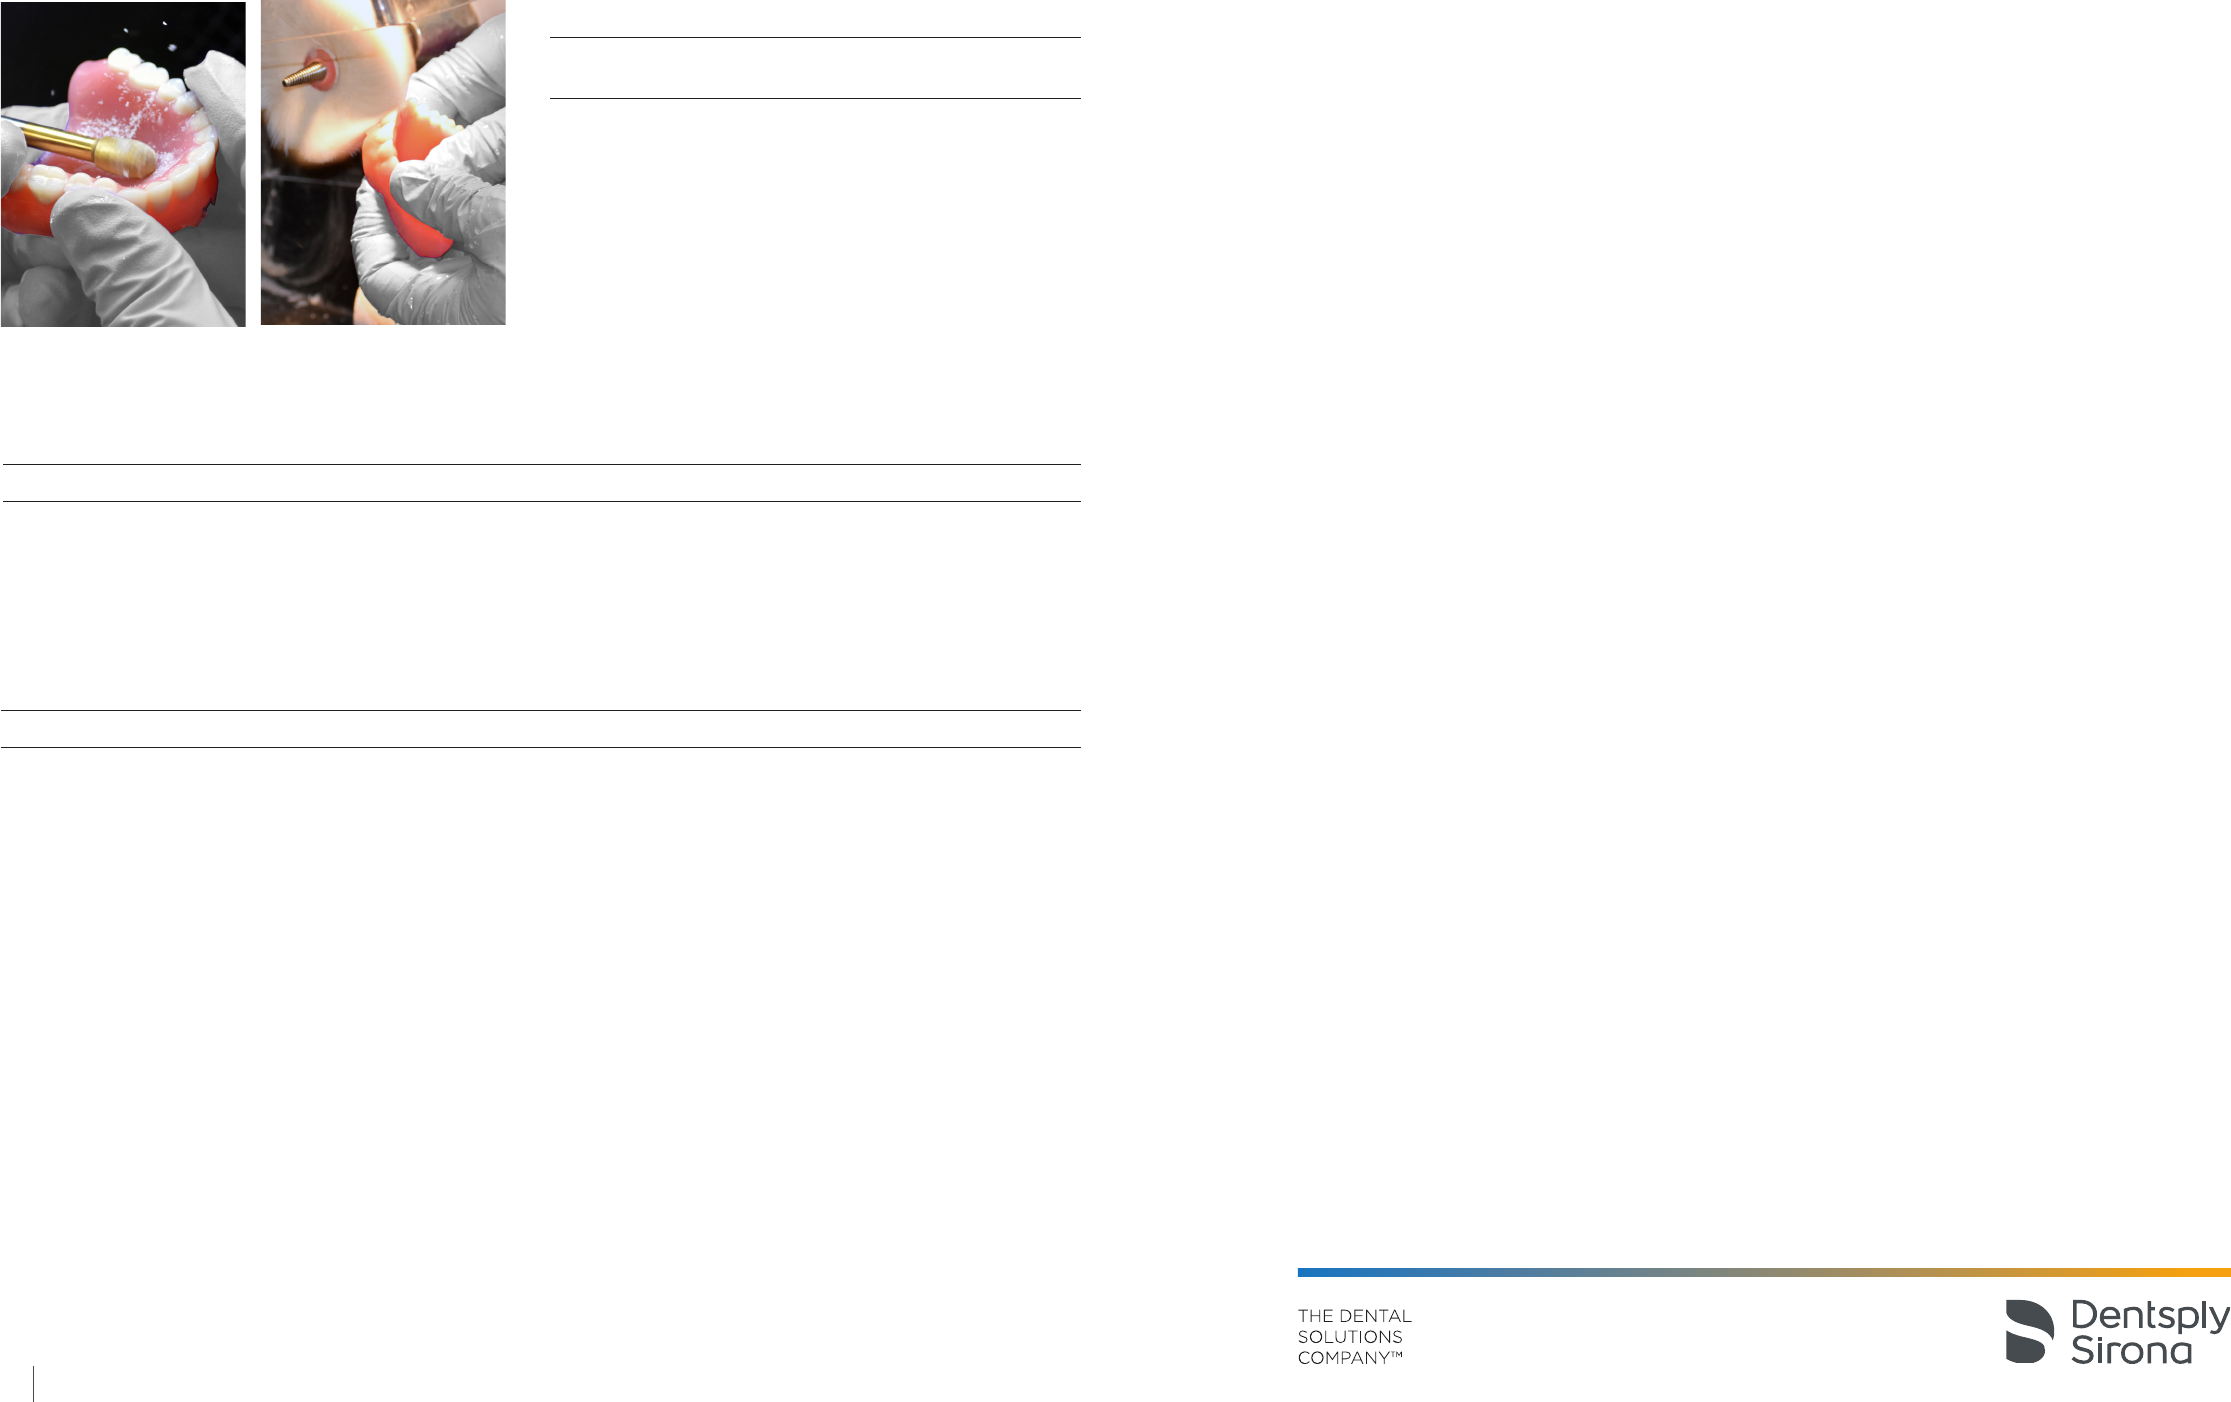
Finish and polish the denture using conventional techniques
CAUTION
Do not steam clean Lucitone Digital Print Denture
appliances
