NOTE : MUST TIGHTEN SCREWS PERIODCALLY WITH USE SCREW WILL BECOME LOOSE CHECK TIGHTNESS OF ALL SCREW EVERY 6-8 WEEKS.
NO
ITEM
Qty
A
MIRROR
1 PC
B
MIRROR SUPPORT RAIL
2 PCS
(Box 1)
BOX OF MIRROR
NO
ITEM
Qty
C
DRESSER
1 PC
NO
ITEM
Qty
1
Csk M4 x 32mm
12 PCS
CROWNMARK
B4610/B4620-1/B4610/B4620-11
DRESSER & MIRROR
(Box. 2)
BOX OF DRESSER
(Box. 1)
HARDWARE LIST
ASSEMBLY INSTRUCTION
COMPLETED
ASSEMBLY
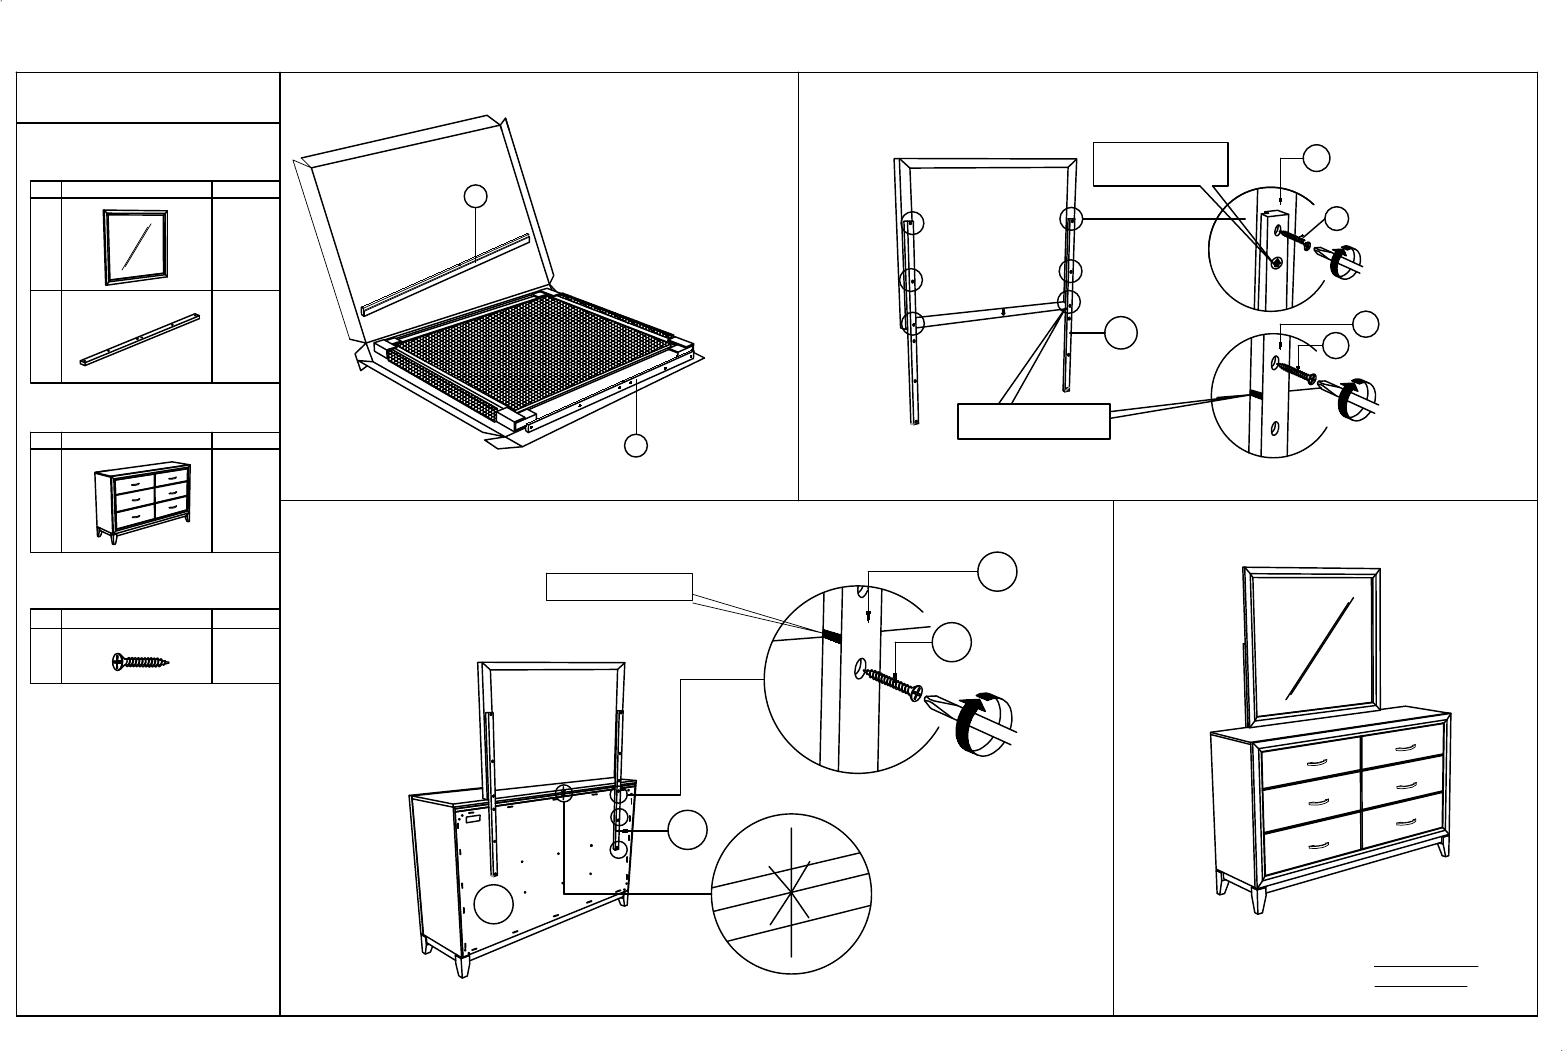
STEP 1 : Take out the mirror support ( B ) from the carton box.
B
B
STEP 2 : Attach Mirror Support Rail (B) to Mirror (A) as shown
and tighten with CSK Screw (1).
Arrow Must
Face to face
B
X6
1
B
Marking Line
C
C
X6
1
B
Follow marking line to
align support mirror
1
B
REMARK :
ARROW MUST UP
STEP 3 :
Tighten the CSK Screw (1) as shown.
STEP 3 :
CROWNMARK
B4610/B4620-K-HBFB-CK-RAIL
C.KING (4+8)
No ITEM Qty
A
Headboard
1 pc
B
Footboard
1 pc
C
Headboard Leg (L/R)
2 pcs
Attach Head Board Leg ( B ) to Head Board ( A ) as shown using
JCBC BOLT( 2 )with Spring Washer (3), Flat washer (4)
and securing with ALLEN KEY ( 5 ).
STEP 1 :
Hook SIDE RAIL (F) TO HEAD BOARD (A) closely and push down to fit. repeat step 2 with
other end of rail to hook onto FOOTBOARD (B).
STEP 2 :
6
F
F
x8
STEP 3.1 :
STEP 3.2 :
E
RIGHT
LEFT
C
5
2
3
4
x6
D
Bed Slats
4 pcs
E
Bed Slats Support
8 pcs
B
No ITEM Qty
F
Side Rail
2 pcs
D
E
leveler
STEP 3.2 :
STEP 3.3 :
E
leveler
A
D
BACK VIEW
A
LINE
MARKING
6
LOOSEN
F
TIGHTEN
F
D
1
No ITEM Qty
1
Csk M4 x 32mm
8 pcs
2
JCBC M6 x 30mm
6 pcs
3
SPRING WASHER 1/4"
Rbw
6 pcs
4
Flat Washer 1/4"ID x
13mmOD Blk
6 pcs
5
ALLEN KEY
m4x65mm Blk
1 pc
6
ALLEN KEY
m5x65mm Blk
1 pc
Tighten the 4 Corner with Allen Key (6).Fix the Bed Slat Support Leg (E ), to Bed Slat (D) as shown . Install the bed slat ( D ) to side
rail ( F ) and tighten with Csk Screw ( 1 ) as per diagram shown. (NOTE: THE SETUP MUST DONE AT THE DECIDED LOCATION FOR
THE BED TO OBTAIN PERFECT STABILITY)
Push the side rail(F) meet with wooden
slat(D) and fix the CSK screw (1)
by using the Screw Driver.
