
StoreFront 3.12
Citrix Product Documentation | docs.citrix.com November 11, 2021

StoreFront 3.12
Contents
StoreFront 3.12 3
About StoreFront 3
Fixed issues 4
Known issues 4
Third party notices 5
System requirements 5
Plan your StoreFront deployment 13
User access options 19
User authentication 28
Optimize the user experience 39
StoreFront high availability and multi‑site configuration 42
Install, set up, upgrade, and uninstall 46
Create a new deployment 57
Join an existing server group 65
Migrate Web Interface features to StoreFront 67
Configure server groups 74
Configure authentication and delegation 76
Configure the authentication service 77
Shared authentication service settings 84
XML service‑based authentication 85
Configure Kerberos constrained delegation for XenApp 6.5 85
Configure smart card authentication 89
Configure the password expiry notification period 94
© 1999–2021 Citrix Systems, Inc. All rights reserved. 2

StoreFront 3.12
Configure and manage stores 94
Create or remove a store 95
Create an unauthenticated store 103
Export store provisioning files for users 105
Advertise and hide stores to users 106
Manage the resources made available in stores 106
Manage remote access to stores through NetScaler Gateway 108
Configure two StoreFront stores to share a common subscription datastore 111
Store subscription data using Microso SQL Server 113
Advanced store settings 134
Manage a Citrix Receiver for Web site 138
Create a Citrix Receiver for Web site 139
Configure Citrix Receiver for Web sites 140
Support for the unified Citrix Receiver experience 146
Select a unified Citrix Receiver for Web site to associate with the store 147
Create and manage featured apps 148
Configure workspace control 150
Configure Citrix Receiver for HTML5 use of browser tabs 151
Configure communication time‑out duration and retry attempts 151
Configure user access 152
Set up highly available multi‑site stores 160
Integrate with NetScaler Gateway and NetScaler 178
Add a NetScaler Gateway connection 179
Import a NetScaler Gateway 182
© 1999–2021 Citrix Systems, Inc. All rights reserved. 3

StoreFront 3.12
Configure NetScaler Gateway connection settings 191
Configure two URLs for the same NetScaler Gateway 194
Load balancing with NetScaler 201
Configure NetScaler and StoreFront for Delegated Forms Authentication (DFA) 220
Authenticate using dierent domains 223
Configure beacon points 235
Advanced configurations 237
Configure Desktop Appliance sites 237
Create a single Fully Qualified Domain Name (FQDN) to access a store internally and ex‑
ternally 241
Configure Resource Filtering 258
Configure using configuration files 260
Configure StoreFront using the configuration files 260
Configure Citrix Receiver for Web sites using the configuration files 265
Secure your StoreFront deployment 267
Export and import the StoreFront configuration 274
StoreFront SDK 282
Troubleshoot StoreFront 300
© 1999–2021 Citrix Systems, Inc. All rights reserved. 4

StoreFront 3.12
StoreFront 3.12
October 15, 2018
StoreFront manages the delivery of desktops and applications from XenApp and XenDesktop
servers, and XenMobile servers in the data center to user devices. StoreFront enumerates and
aggregates available desktops and applications into stores. Users access StoreFront stores through
Citrix Receiver directly or by browsing to a Citrix Receiver for Web or Desktop Appliance site. Users
can also access StoreFront using thin clients and other end‑user‑compatible devices through a
XenApp Services site.
StoreFront keeps a record of each user’s applications and automatically updates their devices. Users
have a consistent experience as they roam between their smartphones, tablets, laptops, and desktop
computers. StoreFront is an integral component of XenApp 7.x and XenDesktop 7.x but can be used
with several versions of XenApp and XenDesktop.
About this documentation
Documentation for this product version is not the latest version. For the most recently updated con‑
tent, see the StoreFront current release documentation. This documentation is provided in HTML
format and as the following PDF.
StoreFront 3.12 (PDF Download)
Note:
Links to external websites foundinthePDF above take you to the correct pages, but links toother
sections within the PDF are no longer usable.
About StoreFront
October 25, 2018
What’s new in StoreFront
StoreFront 3.12 includes a number of fixed issues and known issues.
Integrate Citrix Online applications with stores. We made a deprecation announcement for this
feature in XenApp and XenDesktop 7.14 (StoreFront 3.11). In 3.12, this feature cannot be configured in
the StoreFront management console. If you upgrade to StoreFront 3.12, you can continue to use this
feature. To change your configuration, use the PowerShell cmdlet, Update‑DSGenericApplications.
For more information, see Integrate Citrix Online applications with stores.
© 1999–2021 Citrix Systems, Inc. All rights reserved. 5

StoreFront 3.12
Fixed issues
September 9, 2020
The following issues have been fixed since version 3.11:
• If the Administrator changes the group policy setting, MaxPasswordAge, the StoreFront default
domain service does not reload the new value. In StoreFront, the user may be shown the incor‑
rect “number of days until password expiry”.
Note: This issue is fixed, however it can take up to an hour for the new value to load. [#DNA‑
41380]
• Attempts to reconnect to disconnected sessions might fail within a multi‑Site aggregation de‑
ployment. As a result, you might receive a second instance of the same resource. [#LC7453]
• When any of the sources of an aggregated application are disabled, the application might be
unexpectedly hidden from the end user. [#LC7675]
• Attempts to disable the “Account Self‑Service” option in StoreFront might not take eect, even
though the option appears as disabled. [#LC7744]
• Attempts to remove shared authentication from Stores in StoreFront might result in the follow‑
ing error message while saving the changes:
An error occurred while saving your changes. [#LC7781]
• This release contains a fix which addresses a security vulnerability. For more information, see
Knowledge Center article CTX277455. [LCM‑7272]
Known issues
October 15, 2018
The following issues are known to exist in this release.
• The StoreFront management console does not open aer an upgrade to StoreFront 3.12.1000
(XenApp and XenDesktop 7.15 LTSR CU1) from StoreFront 3.12 (XenApp and XenDesktop 7.15
LTSR), or aer an install of StoreFront 3.12.1000. The StoreFront management console displays
the error “MMC could not create the snap‑in. The snap‑in might not have been installed cor‑
rectly.” To work around this issue, follow the steps described in CTX233206.
[# LC8935]
© 1999–2021 Citrix Systems, Inc. All rights reserved. 6

StoreFront 3.12
• Workspace control reconnects to only one app session instead of all the apps in the workspace.
This issue is seen if using Chrome to access the Receiver for Web site. To work around this issue,
click Connect on each disconnected app.
[# DNA‑25140]
• If a custom authentication form contains an element with ID=confirmBtn, users cannot log on
to Citrix Receiver for Web. To work around this issue, the authentication extension should use
a dierent ID value in the custom form.
[# 603196, DNA‑22593]
• Reconnecting apps inthe Chrome browser might fail. If you reconnectto published applications
and more than one session is in use, clicking Connect might only reconnect the first session. To
work around this issue, click Connect again to reconnect each additional session.
[# 575364, DNA‑22561]
Third party notices
October 15, 2018
StoreFront might include third party soware licensed under the terms defined in the following doc‑
ument:
StoreFront Third Party Notices (PDF Download)
System requirements
November 4, 2021
When planning your installation, Citrix recommends that you allow at least an additional 2 GB of RAM
for StoreFront over and above the requirements of any other products installed on the server. The sub‑
scription store service requires a minimum of 5 MB disk space, plus approximately 8 MB for every 1000
application subscriptions. All other hardware specifications must meet the minimum requirements
for the installed operating system.
Citrix has tested and provides support for StoreFront installations on the following platforms:
• Windows Server 2016 Datacenter and Standard editions
• Windows Server 2012 R2 Datacenter and Standard editions
• Windows Server 2012 Datacenter and Standard editions
• Windows Server 2008 R2 Service Pack 1 Enterprise and Standard editions
© 1999–2021 Citrix Systems, Inc. All rights reserved. 7

StoreFront 3.12
Upgrading the operating system version on a server running StoreFront is not supported. Citrix rec‑
ommends that you install StoreFront on a new installation of the operating system. All the servers
in a multiple server deployment must run the same operating system version with the same locale
settings.
StoreFront server groups containing mixtures of operating system versions and locales are not sup‑
ported. StoreFront server groups can contain a maximum of six servers. However, from a capacity
perspective based on simulations, there is no advantage of server groups containing more than three
servers. Ideally, all servers in a server group should reside in the same location (data center, availabil‑
ity zone), but server groups can span locations within the same region provided that links between
servers in the group meet minimum latency criteria. See Scalability.
Microso Internet Information Services(IIS) and Microso .NET Framework are required on the server.
If either of these prerequisites is installed but not enabled, the StoreFront installer enables them be‑
fore installing the product. Windows PowerShell and Microso Management Console, which are both
default components of Windows Server, must be installed on the web server before you can install
StoreFront. The relative path to StoreFront in IIS must be the same on all the servers in a group.
The StoreFront installer will add the IIS features it requires. If you pre‑install these features, below is
the required list:
On all platforms:
• Web‑Static‑Content
• Web‑Default‑Doc
• Web‑Http‑Errors
• Web‑Http‑Redirect
• Web‑Http‑Logging
• Web‑Mgmt‑Console
• Web‑Scripting‑Tools
• Web‑Windows‑Auth
• Web‑Basic‑Auth
• Web‑AppInit
On Windows Server 2008 R2:
• Web‑Asp‑Net
• As‑Tcp‑PortSharing
On Windows Server 2012 R2:
• Web‑Asp‑Net45
• Net‑Wcf‑Tcp‑PortSharing45
On Windows Server 2016
• Web‑Asp‑Net45
© 1999–2021 Citrix Systems, Inc. All rights reserved. 8

StoreFront 3.12
• Net‑Wcf‑Tcp‑PortSharing45
StoreFront uses the following ports for communications. Ensure your firewalls and other network
devices permit access to these ports.
• TCP ports 80 and 443 are used for HTTP and HTTPS communications, respectively, and must be
accessible from both inside and outside the corporate network.
• TCP port 808 is used for communications between StoreFront servers and must be accessible
from inside the corporate network.
• A TCP port randomly selected from all unreserved ports is used for communications between
the StoreFront servers in a server group. When you install StoreFront, a Windows Firewall rule
is configured enabling access to the StoreFront executable. However, since the port is assigned
randomly, you must ensure that any firewalls or other devices on your internal network do not
block traic to any of the unassigned TCP ports.
• TCP port 8008 is used by Citrix Receiver for HTML5, where enabled, for communications from
local users on the internal network to the servers providing their desktops and applications.
StoreFront supports both pure IPv6 networks and dual‑stack IPv4/IPv6 environments.
Infrastructure requirements
Citrix has tested and provides support for StoreFront when used with the following Citrix product ver‑
sions.
Citrix server requirements
StoreFront stores aggregate desktops and applications from the following products.
• XenApp and XenDesktop 7.15
• XenApp and XenDesktop 7.14
• XenApp and XenDesktop 7.13
• XenApp and XenDesktop 7.12
• XenApp and XenDesktop 7.11
• XenApp and XenDesktop 7.9
• XenApp and XenDesktop 7.8
• XenApp and XenDesktop 7.7
• XenApp and XenDesktop 7.6
• XenApp and XenDesktop 7.5
• XenDesktop 7.1
• XenDesktop 7
• XenApp 6.5
• XenMobile 9.0 or App Controller 9.0
© 1999–2021 Citrix Systems, Inc. All rights reserved. 9

StoreFront 3.12
NetScaler Gateway requirements
The following versions of NetScaler Gateway can be used to provide access to StoreFront for users on
public networks.
• Citrix Gateway 12.x
• NetScaler Gateway 12.0
• NetScaler Gateway 11.x
• NetScaler Gateway 10.5
• NetScaler Gateway 10.1
• Access Gateway 10 Build 69.4 (the version number is displayed at the top of the configuration
utility)
Citrix Receiver for HTML5 requirements
If you plan to enable users to access desktops and applicationsusing Citrix ReceiverforHTML5 running
on Receiver for Web sites, the following additional requirements apply.
For internal network connections, Citrix Receiver for HTML5 enables access to desktops and applica‑
tions provided by the following products.
• XenApp and XenDesktop 7.15
• XenApp and XenDesktop 7.14
• XenApp and XenDesktop 7.13
• XenApp and XenDesktop 7.12
• XenApp and XenDesktop 7.11
• XenApp and XenDesktop 7.9
• XenApp and XenDesktop 7.8
• XenApp and XenDesktop 7.7
• XenApp and XenDesktop 7.6
• XenApp and XenDesktop 7.5
• XenDesktop 7.1
• XenDesktop 7
• XenApp 6.5 Feature Pack 2
• XenApp 6.5 Feature Pack1 for Windows Server 2008 R2 (requiresHotfix XA650R01W2K8R2X64051,
which is available at http://support.citrix.com/article/CTX135757)
For remote users outside the corporate network, Citrix Receiver for HTML5 enables access to desktops
and applications through the following versions of NetScaler Gateway.
• Citrix Gateway 12.x
• NetScaler Gateway 12.0
• NetScaler Gateway 11.x
© 1999–2021 Citrix Systems, Inc. All rights reserved. 10

StoreFront 3.12
• NetScaler Gateway 10.1
• Access Gateway 10 Build 71.6014 (the version number is displayed at the top of the configuration
utility)
For users connecting through NetScaler Gateway, Citrix Receiver for HTML5 enables access to desk‑
tops and applications provided by the following products.
• XenApp and XenDesktop 7.15
• XenApp and XenDesktop 7.14
• XenApp and XenDesktop 7.13
• XenApp and XenDesktop 7.12
• XenApp and XenDesktop 7.11
• XenApp and XenDesktop 7.9
• XenApp and XenDesktop 7.8
• XenApp and XenDesktop 7.7
• XenApp and XenDesktop 7.6
• XenApp and XenDesktop 7.5
• XenDesktop 7.1
• XenDesktop 7
• XenApp 6.5
User device requirements
StoreFront provides a number of dierent options for users to access their desktops and applications.
Citrix Receiver users can either access stores through Citrix Receiver or use a web browser to log on
to a Citrix Receiver for Web site for the store. For users who cannot install Citrix Receiver, but have an
HTML5‑compatible web browser, you can provide access to desktops and applications directly within
the web browser by enabling Citrix Receiver for HTML5 on your Citrix Receiver for Web site.
Users with non‑domain‑joined desktop appliances access their desktops through their web browsers,
which are configured to access Desktop Appliance sites. In the case of domain‑joined desktop appli‑
ances and repurposed PCs running the Citrix Desktop Lock, along with older Citrix clients that cannot
be upgraded, users must connect through the XenApp Services URL for the store.
If you plan to deliver oline applications to users, the Oline Plug‑in is required in addition to Citrix
Receiver for Windows. If you want to deliver Microso Application Virtualization (App‑V) sequences to
users, a supported version of the Microso Application Virtualization Desktop Client is also required.
For more information, see Managing Streamed Applications. Users cannot access oline applications
or App‑V sequences through Citrix Receiver for Web sites.
It is assumed that all user devices meet the minimum hardware requirements for the installed oper‑
ating system.
© 1999–2021 Citrix Systems, Inc. All rights reserved. 11

StoreFront 3.12
Requirements for Citrix Receiver‑enabled stores
The following Citrix Receiver versions can be used to access StoreFront stores from both internal net‑
work connections and through NetScaler Gateway. Connections through NetScaler Gateway can be
made using both the NetScaler Gateway Plug‑in and/or clientless access. Citrix Receiver for Windows
4.3 is the minimum version required to receive the full StoreFront unified Citrix Receiver experience.
See Support for the unified Citrix Receiver experience.
• Citrix Receiver for Chrome 2.x
• Citrix Receiver for HTML5 2.x
• Citrix Receiver for Mac 12.x
• Citrix Receiver for Windows 4.x
• Citrix Receiver for Linux 13.x
Requirements for access to stores through Citrix Receiver for Web sites
To access Citrix Receiverfor Web sites from bothinternal network connectionsand through Citrix Gate‑
way, use latest version of the following browsers:
On Windows
• Internet Explorer 11
• MS Edge (based on Chromium)*
• Google Chrome
• Mozilla Firefox
* Microso Edge (based on Chromium) is supported on Windows 10 only.
Note:
Citrix support is dependent on the oicial Microso support/extended support for the underlying
OS and browser versions running on those OSs.
On Mac
• Safari
• Google Chrome
• Mozilla Firefox
On Linux
• Google Chrome
• Mozilla Firefox
© 1999–2021 Citrix Systems, Inc. All rights reserved. 12

StoreFront 3.12
Connections through Citrix Gateway can be made using the Citrix Gateway plug‑in, ICA proxy or client‑
less VPN (cVPN). Additionally, specific versions of Citrix Gateway are required to enable connections
from outside the corporate network. For more information, see Infrastructure requirements.
Requirements for access to desktops and applications through Receiver for HTML5
The following operating systems and web browsers are recommended for users to access desktops
and applications using Receiver for HTML5 running on Receiver for Web sites. Both internal network
connections and connections through NetScaler Gateway are supported. However, for connections
from the internal network, Receiver for HTML5 only enables access to resources provided by specific
products. Additionally, specific versions of NetScaler Gateway are required to enable connections
from outside the corporate network. For more information, see Infrastructure requirements.
• Browsers
– Microso Edge Legacy
– Internet Explorer 11 and 10 (HTTP connections only)
– Safari 7
– Safari 6
– Google Chrome
– Mozilla Firefox
• Operating systems
– Windows RT
– Windows 10 (32‑bit and 64‑bit editions)
– Windows 8.1 (32‑bit and 64‑bit editions)
– Windows 8 (32‑bit and 64‑bit editions)
– Windows 7 Service Pack 1 (32‑bit and 64‑bit editions)
– Windows Vista Service Pack 2 (32‑bit and 64‑bit editions)
– Windows Embedded XP
– Mac OS X 10.10 Yosemite
– Mac OS X 10.9 Mavericks
– Mac OS X 10.8 Mountain Lion
– Mac OS X 10.7 Lion
– Mac OS X 10.6 Snow Leopard
– Google Chrome OS 48
– Google Chrome OS 47
– Ubuntu 12.04 (32‑bit)
Requirements for access to stores through Desktop Appliance sites
The following Citrix Receiver, operating system, and web browser combinations are recommended for
users to access Desktop Appliance sites from the internal network. Connections through NetScaler
© 1999–2021 Citrix Systems, Inc. All rights reserved. 13

StoreFront 3.12
Gateway are not supported.
• Citrix Receiver for Windows 4.5, Citrix Receiver for Windows 4.4, Citrix Receiver for Windows 4.3,
and Citrix Receiver for Windows 4.2.x, and Citrix Receiver for Windows 4.1
– Windows 8.1 (32‑bit and 64‑bit editions)
*
Internet Explorer 11 (32‑bit mode)
– Windows 8 (32‑bit and 64‑bit editions)
*
Internet Explorer 10 (32‑bit mode)
– Windows 7 Service Pack 1 (32‑bit and 64‑bit editions), Windows Embedded Standard 7
Service Pack 1, or Windows Thin PC
*
Internet Explorer 9 (32‑bit mode)
*
Internet Explorer 8 (32‑bit mode)
– Windows Embedded XP
*
Internet Explorer 8 (32‑bit mode)
• Citrix Receiver for Windows 4.0 or Citrix Receiver for Windows 3.4
– Windows 8 (32‑bit and 64‑bit editions)
*
Internet Explorer 10 (32‑bit mode)
– Windows 7 Service Pack 1 (32‑bit and 64‑bit editions), Windows Embedded Standard 7
Service Pack 1, or Windows Thin PC
*
Internet Explorer 9 (32‑bit mode)
*
Internet Explorer 8 (32‑bit mode)
– Windows Embedded XP
*
Internet Explorer 8 (32‑bit mode)
• Citrix Receiver for Windows Enterprise 3.4
– Windows 7 Service Pack 1 (32‑bit and 64‑bit editions), Windows Embedded Standard 7
Service Pack 1, or Windows Thin PC
*
Internet Explorer 9 (32‑bit mode)
*
Internet Explorer 8 (32‑bit mode)
– Windows Embedded XP
*
Internet Explorer 8 (32‑bit mode)
• Citrix Receiver for Linux 12.1
– Ubuntu 12.04 (32‑bit)
*
Mozilla Firefox 27
Requirements for access to stores through XenApp Services URLs
All the versions of Citrix Receiver listed above can be used to access StoreFront stores with reduced
functionality through XenApp Services URLs. In addition, you can use the older client that does not
support other access methods ‑ Citrix Receiver for Linux 12.0 (internal network connections only) ‑ to
access stores through XenApp Services URLs. Connections through NetScaler Gateway, where sup‑
© 1999–2021 Citrix Systems, Inc. All rights reserved. 14

StoreFront 3.12
ported, can be made using both the NetScaler Gateway Plug‑in and clientless access.
Smart card requirements
Requirement for using Citrix Receiver for Windows 4.X with smart cards
Citrix tests for compatibility with the U.S. Government Dept. Of Defense Common Access Card (CAC),
U.S. National Institute of Standards and Technology Personal Identity Verification (NIST PIV) cards,
and some USB smart card tokens. You can use contact card readers that comply with the USB Chip/S‑
mart Card Interface Devices (CCID)specification and are classified by the German Zentraler Kreditauss‑
chuss (ZKA) as Class 1 smart card readers. ZKA Class 1 contact card readers require that users insert
their smart cards into the reader. Other types of smart card readers, including Class 2 readers (which
have keypads for entering PINs), contactless readers, and virtual smart cards based on Trusted Plat‑
form Module (TPM) chips, are not supported.
For Windows devices, smart card support is based on Microso Personal Computer/Smart Card
(PC/SC) standard specifications. As a minimum requirement, smart cards and card readers must be
supported by the operating system and have received Windows Hardware Certification.
For more information about Citrix‑compatible smart cards and middleware, see Smart cards in the
XenApp and XenDesktop documentation, and http://www.citrix.com/ready.
Requirements for using Desktop Appliance sites with smart cards
Forusers with desktop appliances and repurposed PCs running the Citrix Desktop Lock, Citrix Receiver
for Windows Enterprise 3.4 is required for smart card authentication. On all other Windows devices,
Citrix Receiver for Windows 4.1 can be used.
Requirements for authentication through NetScaler Gateway
The following versions of NetScaler Gateway can be used to provide access to StoreFront for users on
public networks authenticating with smart cards.
• NetScaler Gateway 11.x
• NetScaler Gateway 10.5
• NetScaler Gateway 10.1
• Access Gateway 10 Build 69.4 (the version number is displayed at the top of the configuration
utility)
Plan your StoreFront deployment
February 11, 2021
© 1999–2021 Citrix Systems, Inc. All rights reserved. 15

StoreFront 3.12
StoreFront employs Microso .NET technology running on Microso Internet Information Services
(IIS) to provide enterprise app stores that aggregate resources and make them available to users.
StoreFront integrates with your XenDesktop, XenApp, and App Controller deployments, providing
users with a single, self‑service access point for their desktops and applications.
StoreFront comprises the following core components:
• The authenticationservice authenticatesuserstoMicrosoActiveDirectory, ensuring that users
do not need to log on again to access their desktops and applications. For more information,
see User authentication.
• Stores enumerate and aggregate desktops and applications from XenDesktop, XenApp, and App
Controller. Users access stores through Citrix Receiver, Citrix Receiver for Web sites, Desktop
Appliance sites, and XenApp Services URLs. For more information, see User access options.
• The subscription store service records details of users’ application subscriptions and updates
their devices to ensure a consistent roaming experience. For more information about enhancing
the experience for your users, see Optimize the user experience.
StoreFront can be configured either on a single server or as a multiple server deployment. Multiple
server deployments not only provide additional capacity, but also greater availability. The modular
architecture of StoreFront ensures that configuration information and details of users’ application
subscriptions are stored on and replicated between all the servers in a server group. This means that
if a StoreFront server becomes unavailable for any reason, users can continue to access their stores
using the remaining servers. Meanwhile, the configuration and subscription data on the failed server
are automatically updated when it reconnects to the server group. Subscription data is updated when
the server comes back online but you must propagate configuration changes if any were missed by
the server while oline. In the event of a hardware failure that requires replacement of the server,
you can install StoreFront on a new server and add it to the existing server group. The new server is
automatically configured and updated with users’ application subscriptions when it joins the server
group.
The figure shows a typical StoreFront deployment.
© 1999–2021 Citrix Systems, Inc. All rights reserved. 16

StoreFront 3.12
Load balancing
For multiple server deployments, external load balancing through, for example, NetScaler or Win‑
dows Network Load Balancing is required. Configure the load balancing environment for failover
between servers to provide a fault‑tolerant deployment. For more information about load balancing
with NetScaler, see Load Balancing. For more information about Windows Network Load Balancing,
see https://docs.microsoft.com/en‑us/previous‑versions/windows/it‑pro/windows‑server‑2012‑R2‑
and‑2012/hh831698(v=ws.11).
Active load balancing of requests sent from StoreFront to XenDesktop sites and XenApp farms is rec‑
ommended for deployments with thousands of users or where high loads occur, such as when a large
number of users log on over a short period of time. Use a load balancer with built‑in XML monitors
and session persistency, such as NetScaler.
If you deploy SSL‑terminating load balanceror if you need to troubleshoot, you canuse the PowerShell
cmdlet Set‑STFWebReceiverCommunication.
Syntax:
1 Set-STFWebReceiverCommunication [-WebReceiverService] <
WebReceiverService> [[-Loopback] <On | Off |
2 OnUsingHttp>] [[-LoopbackPortUsingHttp] <Int32>]
© 1999–2021 Citrix Systems, Inc. All rights reserved. 17

StoreFront 3.12
3 <!--NeedCopy-->
The valid values are:
• On ‑ This is the default value for new Citrix Receiver for Web sites. Citrix Receiver for Web uses
the schema (HTTPS or HTTP) and port number from the base URL but replaces the host with
the loopback IP address to communicate with StoreFront Services. This works for single server
deployments and deployments with a non SSL‑terminating load balancer.
• OnUsingHttp ‑ Citrix Receiver for Web uses HTTP and the loopback IP address to communicate
with StoreFront Services. If you are using an SSL‑terminating load balancer, select this value.
You must also specify the HTTP port if it is not the default port 80.
• O ‑ This turns o loopback and Citrix Receiver for Web uses the StoreFront base URL to com‑
municate with StoreFront Services. If you perform an in‑place upgrade, this is the default value
to avoid disruption to your existing deployment.
For example, if you are using an SSL‑terminating load balancer, your IIS is configured to use port 81 for
HTTP and the path of your Citrix Receiver for Web site is /Citrix/StoreWeb, you can run the following
command to configure the Citrix Receiver for Web site:
1 $wr = Get-STFWebReceiverService -VirtualPath /Citrix/StoreWeb
2 Set-STFWebReceiverCommunication -WebReceiverService $wr -Loopback
OnUsingHttp -LoopbackPortUsingHttp 81
3 <!--NeedCopy-->
Note that you have to switch o loopback to use any web proxy tool like Fiddler to capturethe network
traic between Citrix Receiver for Web and StoreFront Services.
Active Directory considerations
For single server deployments you can install StoreFront on a non‑domain‑joined server (but certain
functionality will be unavailable); otherwise, StoreFront servers must reside either within the Active
Directory domain containing your users’ accounts or within a domain that has a trust relationship
with the user accounts domain unless you enable delegation of authentication to the XenApp and
XenDesktop sites or farms. All the StoreFront servers in a group must reside within the same domain.
User connections
In a production environment, Citrix recommends using HTTPS to secure communications between
StoreFront and users’ devices. To use HTTPS, StoreFront requires that the IIS instance hosting the au‑
thentication service and associated stores is configured for HTTPS. In the absence of the appropriate
IIS configuration, StoreFront uses HTTP for communications. You can change from HTTP to HTTPS at
any time, provided the appropriate IIS configuration is in place.
© 1999–2021 Citrix Systems, Inc. All rights reserved. 18

StoreFront 3.12
If you plan to enable access to StoreFront from outside the corporate network, NetScaler Gateway
is required to provide secure connections for remote users. Deploy NetScaler Gateway outside the
corporate network, with firewalls separating NetScaler Gateway from both the public and internal
networks. Ensure that NetScaler Gateway is able to access the Active Directory forest containing the
StoreFront servers.
Multiple Internet Information Services (IIS) websites
StoreFront enables you to deploy dierent Stores in dierent IIS websites per Windows server so that
each store can have a dierent host name and certificate binding.
Start by creating two websites, in addition to the default web site. Aer creating multiple websites in
IIS, use the PowerShell SDK to create a StoreFront deployment in each of those IIS websites. For more
information about creating websites in IIS, see Create a Web Site.
Note: The StoreFront and PowerShell consoles cannot be open at the same time. Always close the
StoreFront management console before using the PowerShell console to administer your StoreFront
configuration. Likewise, close all instances of PowerShell before opening the StoreFront console.
Example: To create two IIS website deployments ‑ one for applications and one for desktop.
1. Add‑STFDeployment ‑SiteID 1 ‑HostBaseURL “https://www.storefront.app.com”
2. Add‑STFDeployment ‑SiteID 2 ‑HostBaseURL “https://www.storefront.desktop.com”
StoreFront disables the management console when it detects multiple sites and displays a message
to that eect.
For more information, see Before installing and configuring.
Scalability
The number of Citrix Receiver users supported by a StoreFront server group depends on the hardware
you use and on the level of user activity. Based on simulated activity where users log on, enumerate
100 published applications, and start one resource, expect a single StoreFront server with the mini‑
mum recommended specification of two virtual CPUs running on an underlying dual Intel Xeon L5520
2.27Ghz processor server to enable up to 30,000 user connections per hour.
Expect a server group with two similarly configured servers in the group to enable up to 60,000 user
connections per hour; three nodes up to 90,000 connections per hour; four nodes up to 120,000 con‑
nections per hour; five nodes up to 150,000 connectionsper hour; six nodes up to 175,000 connections
per hour.
The throughput of a single StoreFront server can also be increased by assigning more virtual CPUs to
the system, with four virtual CPUs enabling up to 55,000 user connections per hour and eight virtual
CPUs enabling 80,000 connections per hour.
© 1999–2021 Citrix Systems, Inc. All rights reserved. 19

StoreFront 3.12
The minimum recommended memory allocation for each server is 4GB. When using Citrix Receiver
for Web, assign an additional 700 bytes per resource, per user in addition to the base memory alloca‑
tion. As with using Web Receiver, when using Citrix Receiver, design environments to allow an extra
700 bytes per resource, per user on top of the base 4 GB memory requirements for this version of
StoreFront.
As your usage patterns might be dierent than those simulated above, your servers might support
more or fewer numbers of users connections per hour.
Important:
StoreFront server group deployments are only supported where links between servers in a server
group have latency of less than 40 ms (with subscriptions disabled) or less than 3 ms (with sub‑
scriptions enabled). Ideally, all servers in a server group should reside in the same location (data
center, availability zone), but server groups can span locations within the same region provided
that links between servers in the group meet these latency criteria. Examples include server
groups spanning availability zones within a cloud region, or between metropolitan area data
centers. Note that latency between zones varies by cloud provider. Citrix do not recommend
spanning locations as a disaster recovery configuration, but it may be suitable for high availabil‑
ity.
StoreFront server groups containing mixtures of operating system versions, or mixtures of oper‑
ating system languages or locale configurations, are not supported.
Timeout considerations
Occasionally, network issues or other problems can occur between a StoreFront store and the servers
that it contacts, causing delays or failures for users. You can use the timeout settings for a storeto tune
this behavior. If you specify a short timeout setting, StoreFront quickly abandons a server and tries
another one. This is useful if, for example, you have configured multiple servers for failover purposes.
If you specify a longer timeout, StoreFront waits longer for a response from a single server. This is
beneficial in environments where network or server reliability is uncertain and delays are common.
Citrix Receiver for Web also has a timeout setting, which controls how long a Citrix Receiver for Web
site waits for a response from the store. Set this timeout setting to a value at least as long as the store
timeout. A longer timeout setting allows for better fault tolerance, but users might experience long
delays. A shorter timeout setting reduces delays for users, but they might experience more failures.
For information about setting timeouts, see Communication time‑out duration and server retry at‑
tempts and Communication time‑out duration and retry attempts.
© 1999–2021 Citrix Systems, Inc. All rights reserved. 20

StoreFront 3.12
User access options
January 4, 2019
Four dierent methods are available for users to access StoreFront stores.
• Citrix Receiver ‑ Users with compatible versions of Citrix Receiver can access StoreFront stores
within the Citrix Receiver user interface. Accessing stores within Citrix Receiver provides the
best user experience and the greatest functionality.
• Citrix Receiver for Web sites ‑ Users with compatible web browsers can access StoreFront stores
by browsing to Citrix Receiver for Web sites. By default, users also require a compatible version
of Citrix Receiver to access their desktops and applications. However, you can configure your
Citrix Receiver for Web sites to enable users with HTML5‑compatible browsers to access their
resources without installing Citrix Receiver. When you create a new store, a Citrix Receiver for
Web site is created for the store by default.
• Desktop Appliance sites ‑ Users with non‑domain‑joined desktop appliances can access their
desktops through the web browserson their appliances,which are configuredtoaccess Desktop
Appliance sites in full‑screen mode. When you create a new store for a XenDesktop deployment
using Citrix Studio, a Desktop Appliance site is created for the store by default.
• XenApp Services URLs ‑ Users of domain‑joined desktop appliances and repurposed PCs run‑
ning the Citrix Desktop Lock, along with users who have older Citrix clients that cannot be up‑
graded, can access stores using the XenApp Services URL for the store. When you create a new
store, the XenApp Services URL is enabled by default.
The figure shows the options for users to access StoreFront stores:
© 1999–2021 Citrix Systems, Inc. All rights reserved. 21

StoreFront 3.12
Citrix Receiver
Accessing stores from within the Citrix Receiver user interface provides the best user experience and
the greatest functionality. For the Citrix Receiver versions that can be used to access stores in this way,
see System Requirements.
Citrix Receiver uses internal and external URLs as beacon points. By attempting to contact these bea‑
con points, Citrix Receiver can determine whether users are connected to local or public networks.
When a user accesses a desktop or application, the location information is passed to the server pro‑
viding the resource so that appropriate connection details can be returned to Citrix Receiver. This
enables Citrix Receiver to ensure that users are not prompted to log on again when they access a
desktop or application. For more information, see Configure beacon points.
Aer installation, Citrix Receiver must be configured with connection details for the stores providing
users’ desktops and applications. You can make the configuration process easier for your users by
providing them with the required information in one of the following ways.
Important: By default, Citrix Receiver requires HTTPS connections to stores. If StoreFront is not con‑
figured for HTTPS, users must carry out additional configuration stepsto use HTTP connections. Citrix
strongly recommends that you do not enable unsecured user connections to StoreFront in a produc‑
tion environment. For more information, see Configure and install
Citrix Receiver for Windows using command‑line parameters in the Citrix Receiver for Windows docu‑
mentation.
Provisioning files
You can provide users with provisioning files containing connection details for their stores. Aer in‑
stalling Citrix Receiver, users open the .cr file to automatically configure accounts for the stores. By
default, Citrix Receiver for Web sites oer users a provisioning file for the single store for which the
site is configured. You could instruct your users to visit the Receiver for Web sites for the stores they
want to access and download provisioning files from those sites. Alternatively, for a greater level of
control, you can use the Citrix StoreFront management console to generate provisioning files contain‑
ing connection details for one or more stores. You can then distribute these files to the appropriate
users. For more information, see
Export store provisioning files for users.
Auto‑generated setup URLs
For users running Mac OS, you can use the Citrix Receiver for Mac Setup URL Generator to create a
URL containing connection details for a store. Aer installing Citrix Receiver, users click on the URL to
configure an account for the store automatically. Enter details of your deployment into the tool and
generate a URL that you can distribute to your users.
© 1999–2021 Citrix Systems, Inc. All rights reserved. 22

StoreFront 3.12
Manual configuration
More advanced users can create new accounts by entering store URLs into Citrix Receiver. Remote
users accessing StoreFront through NetScaler Gateway 10.1 and Access Gateway 10 enter the appli‑
ance URL. Citrix Receiver obtains the required account configuration information when the connec‑
tion is first established. For connections through Access Gateway 9.3, users cannot set up accounts
manually and must use one of the alternative methods above. For more information, see the Citrix
Receiver documentation.
Email‑based account discovery
Users who install Citrix Receiver on a device for the first time can set up accounts by entering their
email addresses, provided that they download Citrix Receiver from the Citrix website or a Citrix Re‑
ceiver download page hosted within your internal network. You configure Service Location (SRV) lo‑
cator resource records for NetScaler Gateway or StoreFront on your Microso Active Directory Domain
Name System (DNS) server. Users do not need to know the access details for their stores, instead they
enter their email addresses during the Citrix Receiver initial configuration process. Citrix Receiver con‑
tacts the DNS server for the domain specified in the email address and obtains the details you added
to the SRV resource record. Users are then presented with a list of stores that they can access through
Citrix Receiver.
Configure email‑based account discovery
Configure email‑based account discovery to enable users who install Citrix Receiver on a device for
the first time to set up their accounts by entering their email addresses. Provided that they download
Citrix Receiver from the Citrix website or a Citrix Receiver download page hosted within your internal
network, users do not need to know the access details for their stores when they install and config‑
ure Citrix Receiver. Email‑based account discovery is available if Citrix Receiver is downloaded from
any other location, such as a Receiver for Website. Note that ReceiverWeb.exe or ReceiverWeb.dmg
downloaded from Citrix Receiver for Web does not prompt users to configure a store. Users can still
use Add Account and enter their email address
During the initial configuration process, Citrix Receiver prompts users to enter either an email address
or a store URL. When a user enters an email address, Citrix Receiver contacts the Microso Active Di‑
rectory Domain Name System (DNS) server for the domain specified in the email address to obtain a
list of available stores from which the user can select.
To enable Citrix Receiver to locate available stores on the basis of users’ email addresses, you config‑
ure Service Location (SRV) locator resource records for NetScaler Gateway or StoreFront on your DNS
server. As a fallback, you can also deploy StoreFront on a server named “discoverReceiver.domain,”
where domain is the domain containing your users’ email accounts. If no SRV record is found in the
© 1999–2021 Citrix Systems, Inc. All rights reserved. 23

StoreFront 3.12
specified domain, Citrix Receiver searchesfor a machine named “discoverReceiver” to identify a Store‑
Front server.
You must install a valid server certificate on the NetScaler Gateway appliance or StoreFront server to
enable email‑based account discovery. The full chain to the root certificate must also be valid. For
the best user experience, install a certificate with a Subject or Subject Alternative Name entry of dis‑
coverReceiver.domain,where domain is the domain containing your users’ email accounts. Although
you can use a wildcard certificate for the domain containing your users’ email accounts, you must
first ensure that the deployment of such certificates is permitted by your corporate security policy.
Other certificates for the domain containing your users’ email accounts can also be used, but users
will see a certificate warning dialog box when Citrix Receiver first connects to the StoreFront server.
Email‑based account discovery cannot be used with any other certificate identities.
To enable email‑based account discovery for users connecting from outside the corporate network,
you must also configure NetScaler Gateway with the StoreFront connection details. For more infor‑
mation, see Connecting to StoreFront by Using Email‑Based Discovery.
Add an SRV record to your DNS server
1. On the Windows Start screen, click Administrative Tools and, in the Administrative Tools
folder, click DNS.
2. In the le pane of DNS Manager, select your domain in the forward or reverse lookup zones.
Right‑click the domain and select Other New Records.
3. In the Resource Record Type dialog box, select Service Location (SRV) and then click Create
Record.
4. In the New Resource Record dialog box, enter in the Service boxthehostvalue_citrixreceiver.
5. Enter in the Protocol box the value _tcp.
6. In the Host oering this service box, specify the fully qualified domain name (FQDN) and port
for your NetScaler Gateway appliance (to support both local and remote users) or StoreFront
server (to support local users only) in the form* servername.domain:port*.
If your environment includes both internal and external DNS servers, you can add a SRV record
specifying the StoreFront server FQDN on your internal DNS server and another record on your
external server specifying the NetScaler Gateway FQDN. With this configuration, local users are
provided with the StoreFront details, while remote users receive NetScaler Gateway connection
information.
7. If you configured an SRV record for your NetScaler Gateway appliance, add the StoreFront con‑
nection details to NetScaler Gateway in a session profile or global setting.
© 1999–2021 Citrix Systems, Inc. All rights reserved. 24

StoreFront 3.12
Citrix Receiver for Web sites
Users with compatible web browsers can access StoreFront stores by browsing to Citrix Receiver for
Web sites. When you create a new store, a Citrix Receiver for Web site is automatically created for the
store. Thedefaultconfiguration for Citrix ReceiverforWeb sites requiresthatusersinstall a compatible
version of Citrix Receiver to access their desktops and applications. For more information about the
Citrix Receiver and web browser combinations that can be used to access Citrix Receiver for Web sites,
see User device requirements.
By default, when a user accesses a Citrix Receiver for Web site from a computer running Windows or
Mac OS X, the site attempts to determine whether Citrix Receiver is installed on the user’s device. If
Citrix Receiver cannotbe detected, the user is promptedto download and install the appropriate Citrix
Receiver for their platform. The default download location is the Citrix website, but you can also copy
the installation files to the StoreFront server and provide users with these local files instead. Storing
the Citrix Receiver installation files locally enables you to configure the site to oer users with older
clients the option to upgrade to the version on the server. For more information about configuring
deployment of Citrix Receiver for Windows and Citrix Receiver for Mac, see Configure Citrix Receiver
for Web sites.
Citrix Receiver for HTML5
Citrix ReceiverforHTML5 is a component of StoreFrontthat is integrated by defaultwith Citrix Receiver
for Web sites. You can enable Citrix Receiver for HTML5 on your Citrix Receiver for Web sites so that
users who cannot install Citrix Receiver can still access their resources. With Citrix Receiver for HTML5,
users can access desktops and applications directly within HTML5‑compatible web browsers without
needing to install Citrix Receiver. When a site is created, Citrix Receiver for HTML5 is disabled by de‑
fault. For more information about enabling Citrix Receiver for HTML5, see citrix‑receiver‑download‑
page‑template.html.
To access their desktops and applications using Citrix Receiver for HTML5, users must access the Citrix
Receiver for Web site with an HTML5‑compatible browser. For more information about the operating
systems and web browsers that can be used with Citrix Receiver for HTML5, see User device require‑
ments.
Citrix Receiver for HTML5 can be used by both users on the internal network and remote users connect‑
ing through NetScaler Gateway. For connections from the internal network, Citrix Receiver for HTML5
only supports access to desktops and applications provided by a subset of the products supported
by Citrix Receiver for Web sites. Users connecting through NetScaler Gateway can access resources
provided by a wider range of products if you chose Citrix Receiver for HTML5 as an option when con‑
figuring StoreFront. Specific versions of NetScaler Gateway are required for use with Citrix Receiver
for HTML5. For more information, see Infrastructure requirements.
For local users on the internal network, access through Citrix Receiver for HTML5 to resources pro‑
© 1999–2021 Citrix Systems, Inc. All rights reserved. 25

StoreFront 3.12
vided by XenDesktop and XenApp is disabled by default. To enable local access to desktops and appli‑
cations using Citrix Receiver for HTML5, you must enable the ICA WebSockets connections policy on
your XenDesktop and XenApp servers. Ensure your firewalls and other network devices permit access
to the Citrix Receiver for HTML5 port specified in the policy. For more information, see WebSockets
policy settings.
By default, Citrix Receiver for HTML5 starts desktops and applications in a new browser tab. However,
when users start resources from shortcuts using Citrix Receiver for HTML5, the desktop or application
replaces the Citrix Receiver for Web site in the existing browser tab rather than appearing in a new tab.
You can configure Citrix Receiver for HTML5 so that resources are always started in the same tab as the
Receiver for Web site. For more information, see Configure Citrix Receiver for HTML5 use of browser
tabs.
Resource shortcuts
You can generate URLs that provide access to desktops and applications available through Citrix Re‑
ceiver for Web sites. Embed these links on websites hosted on the internal network to provide users
with rapid access to resources. Users click on a link and are redirected to the Receiver for Web site,
where they log on if they have not already done so. The Citrix Receiver for Web site automatically
starts the resource. In the case of applications, users are also subscribed to the application if they
have not subscribed previously. For more information about generating resource shortcuts, see Con‑
figure Citrix Receiver for Web sites.
As with all desktops and applications accessed from Citrix Receiver for Web sites, users must either
have installed Citrix Receiver or be able to use Citrix Receiver for HTML5 to access resources through
shortcuts. The method used by a Citrix Receiver for Web site depends on the site configuration, on
whether Citrix Receiver can be detected on users’ devices, and on whether an HTML5‑compatible
browser is used. For security reasons, Internet Explorer users may be prompted to confirm that they
want to start resources accessed through shortcuts. Instruct your users to add the Receiver for Web
site to the Local intranet or Trusted sites zones in Internet Explorer to avoid this extra step. By default,
both workspace control and automatic desktop starts are disabled when users access Citrix Receiver
for Web sites through shortcuts.
When you create an application shortcut, ensure that no other applications available from the Citrix
Receiver for Web site have the same name. Shortcuts cannot distinguish between multiple instances
of an application with the same name. Similarly, if you make multiple instances of a desktop from
a single desktop group available from the Citrix Receiver for Web site, you cannot create separate
shortcuts for each instance. Shortcuts cannot pass command‑line parameters to applications.
To create application shortcuts, you configure StoreFront with the URLs of the internal websites that
will host the shortcuts. When a user clicks on an application shortcut on a website, StoreFront checks
that website against the list of URLs you entered to ensure that the request originates from a trusted
© 1999–2021 Citrix Systems, Inc. All rights reserved. 26

StoreFront 3.12
website. However, for users connecting through NetScaler Gateway, websites hosting shortcuts are
not validated because the URLs are not passed to StoreFront. To ensure that remote users can only
access application shortcuts on trusted internal websites, configure NetScaler Gateway to restrict
user access to only those specific sites. For more information, see http://support.citrix.com/article/
CTX123610.
Customize your sites
Citrix Receiver for Web sites provide a mechanism for customizing the user interface. You can cus‑
tomize strings, the cascading style sheet, and the JavaScript files. You can also add a custom pre‑
logon or post‑logon screen, and add language packs.
Important considerations
Users accessing stores through a Citrix Receiver for Web site benefit from many of the features avail‑
able with store access within Citrix Receiver, such as application synchronization. When you decide
whether to use Citrix Receiver for Web sites to provide users with to access your stores, consider the
following restrictions.
• Only a single store can be accessed through each Citrix Receiver for Web site.
• Citrix Receiver for Web sites cannot initiate Secure Sockets Layer (SSL) virtual private network
(VPN) connections. Users logging on through NetScaler Gateway without a VPN connection can‑
not access web applications for which App Controller requires that such a connection is used.
• Subscribed applications are not available on the Windows Start screen when accessing a store
through a Citrix Receiver for Web site.
• File type association between local documents and hosted applications accessed through Citrix
Receiver for Web sites is not available.
• Oline applications cannot be accessed through Citrix Receiver for Web sites.
• Citrix Receiver for Web sites do not support Citrix Online products integrated into stores. Citrix
Online productsmustbe delivered with App Controlleror made available as hostedapplications
to enable access through Citrix Receiver for Web sites.
• Citrix Receiver for HTML5 can be used over HTTPS connections if the VDA is XenApp 7.6 or Xen‑
Desktop 7.6 and has SSL enabled or if the user is connecting using NetScaler Gateway.
• To use Citrix Receiver for HTML5 with Mozilla Firefox over HTTPS connections, users must type
about:configin the Firefoxaddressbarandsetthe network.websocket.allowInsecureFromHTTPS
preference to true.
Desktop Appliance sites
Users with non‑domain‑joined desktop appliances can access their desktops through Desktop Appli‑
ance sites. Non‑domain‑joined in this context means devices that are not joined to a domain within
© 1999–2021 Citrix Systems, Inc. All rights reserved. 27

StoreFront 3.12
the Microso Active Directory forest containing the StoreFront servers.
When you create a new store for a XenDesktop deployment using Citrix Studio, a Desktop Appliance
site is created for the store by default. Desktop Appliance sites are only created by default when Store‑
Front is installed and configured as part of a XenDesktop installation. You can create Desktop Ap‑
pliance sites manually using Windows PowerShell commands. For more information, see Configure
Desktop Appliance sites.
Desktop Appliance sites provide a user experience that is similar to logging on to a local desktop. The
web browsers on desktop appliances are configured to start in full‑screen mode displaying the logon
screen for a Desktop Appliance site. When a user logs on to a site, by default, the first desktop (in
alphabetical order) available to the user in the store for which the site is configured starts automati‑
cally. If you provide users with access to multiple desktops in a store, you can configure the Desktop
Appliance site to display the available desktops so users can choose which one to access. For more
information, see Configure Desktop Appliance sites.
When a user’s desktop starts, it is displayed in full‑screen mode, obscuring the web browser. The user
is automatically logged out from the Desktop Appliance site. When the user logs o from the desktop,
the web browser, displaying the Desktop Appliance site logon screen, is visible again. A message is
displayed when a desktop is started, providing a link for the user to click to restart the desktop if it
cannot be accessed. To enable this functionality, you must configure the Delivery Group to enable
users to restart their desktops. For more information, see Delivery groups.
To provide access to desktops, a compatible version of Citrix Receiver is required on the desktop appli‑
ance. Typically, XenDesktop‑compatible appliance vendors integrate Citrix Receiver into their prod‑
ucts. For Windows appliances, the Citrix Desktop Lock must also be installed and configured with the
URL for your Desktop Appliance site. If Internet Explorer is used, the Desktop Appliance site must be
added to the Local intranet or Trusted sites zones. For more information about the Citrix Desktop
Lock, see Prevent user access to the local desktop.
Important considerations
Desktop Appliance sites are intended for local users on the internal network accessing desktops from
non‑domain‑joined desktop appliances. When you decide whether to use Desktop Appliance sites to
provide users with access to your stores, consider the following restrictions.
• If you plan to deploy domain‑joined desktop appliances and repurposed PCs, do not config‑
ure them to access stores through Desktop Appliance sites. Though you can configure Citrix
Receiver with the XenApp Services URL for the store, we recommend the new Desktop Lock
for both domain‑joined and nondomain‑joined use cases. For more information, see Citrix Re‑
ceiver Desktop Lock.
• Desktop Appliance sites do not support connections from remote users outside the corporate
network. Users logging on to NetScaler Gateway cannot access Desktop Appliance sites.
© 1999–2021 Citrix Systems, Inc. All rights reserved. 28

StoreFront 3.12
XenApp Services URLs
Users with older Citrix clients that cannot be upgraded can access stores by configuring their clients
with the XenApp Services URL for a store. You can also enable access to your stores through XenApp
Services URLs from domain‑joined desktop appliances and repurposed PCs running the Citrix Desktop
Lock. Domain‑joined in this context means devices that are joined to a domain within the Microso
Active Directory forest containing the StoreFront servers.
StoreFront supports pass‑through authentication with proximity cards through Citrix Receiver to Xe‑
nApp Services URLs. Citrix Ready partner products use the Citrix Fast Connect API to streamline user
logons through Citrix Receiver for Windows to connect to stores using the XenApp Services URL. Users
authenticate to workstations using proximity cards and are rapidly connected to desktops and ap‑
plications provided by XenDesktop and XenApp. For more information, see the most recent Citrix
Receiver for Windows documentation.
When you create a new store, the XenApp Services URL for the store is enabled by default. The XenApp
Services URL for a store has the form http[s]://serveraddress/Citrix/storename/PNAgent/config.xml,
where serveraddress is the fully qualified domain name of the server or load balancing environment
foryour StoreFrontdeployment and storename is the name specified forthe store when it was created.
This allows Citrix Receivers that can only use the PNAgent protocol to connect to Storefront. For the
clients that can be used to access storesthrough XenApp Services URLs, see User device requirements.
Important considerations
XenApp Services URLs are intended to support users who cannot upgrade to Citrix Receiver and for
scenarios where alternative access methods are not available. When you decide whether to use Xe‑
nApp Services URLs to provide users with access to your stores, consider the following restrictions.
• You cannot modify the XenApp Services URL for a store.
• You cannot modify XenApp Services URL settings by editing the configuration file, config.xml.
• XenApp Services URLs support explicit, domain pass‑through, smart card authentication, and
pass‑through with smart card authentication. Explicit authentication is enabled by default.
Only one authentication method can be configured for each XenApp Services URL and only one
URL is available per store. If you need to enable multiple authentication methods, you must
create separate stores, each with a XenApp Services URL, for each authentication method. Your
users must then connect to the appropriate store for their method of authentication. For more
information, see XML‑based authentication.
• Workspace control is enabled by default for XenApp Services URLs and cannot be configured or
disabled.
• User requests to change their passwords are routed to the domain controller directly through
the XenDesktop and XenApp servers providing desktops and applications for the store, bypass‑
ing the StoreFront authentication service.
© 1999–2021 Citrix Systems, Inc. All rights reserved. 29

StoreFront 3.12
User authentication
October 13, 2020
StoreFront supports a number of dierent authentication methods for users accessing stores;
although, not all are available depending on the user access method and their network location. For
security reasons, some authentication methods are disabled by default when you create your first
store. For more information about enabling and disabling user authentication methods, see Create
and configure the authentication service.
User name and password
Users enter their credentials and are authenticated when they access their stores. Explicit authenti‑
cation is enabled by default. All user access methods support explicit authentication.
When a user employs NetScaler Gateway to access Citrix Receiver for Web, NetScaler Gateway handles
the logon and password change at expiration. Users can make elective password changes with the Cit‑
rix Receiver for Web UI. Aer an elective password change, the NetScaler Gateway session terminates
and the user must log on again. Citrix Receiver for Linux users can change only expired passwords.
SAML authentication
Usersauthenticatetoa SAML Identity Providerand are automatically logged on when they access their
stores. StoreFront can support SAML authentication directly within the corporate network, without
the need to go through NetScaler.
SAML (Security Assertion Markup Language) is an open standard used by identity and authentication
products such as Microso AD FS (Active Directory Federation Services). With the integration of SAML
authentication through StoreFront, administrators can allow users to, for example, log on once to
their corporate network and then get single sign‑on to their published apps.
Requirements:
• Implementation of the Citrix Federated Authentication Service.
• SAML 2.0‑compliant identity providers (IdPs):
– Microso AD FS v4.0 (Windows Server 2016) using SAML bindings only (not WS‑Federation
bindings). For more information, see AD FS Deployment and AD FS Operations.
– Microso AD FS v3.0 (Windows Server 2012 R2)
– Microso AD FS v2.0 (Windows Server 2008 R2)
– NetScaler Gateway (configured as an IdP)
• Configure SAML authentication in StoreFront using the StoreFront management console in a
new deployment (see Create a new deployment), or in an existing deployment (see Configure
© 1999–2021 Citrix Systems, Inc. All rights reserved. 30

StoreFront 3.12
the authentication service). You can also configure SAML authentication using PowerShell
cmdlets, see StoreFront SDK.
• Citrix Receiver for Windows (4.6 and higher) or Citrix Receiver for Web.
Using SAML authentication with NetScaler is currently supported with Receiver for Web sites.
Domain pass‑through
Users authenticate to their domain‑joined Windows computers, and their credentials are used to log
them on automatically when they access their stores. When you install StoreFront, domain pass‑
through authentication is disabled by default. Domain pass‑through authentication can be enabled
for users connecting to stores through Citrix Receiver and XenApp Services URLs. Citrix Receiver for
Web sites support domain pass‑through authentication for Internet Explorer, Microso Edge, Mozilla
Firefox, and Google Chrome. Enable domain pass‑through authentication in the Citrix Receiver for
Web site node in the administration console and requires you to configure SSON on Citrix Receiver for
Windows. Citrix Receiver for HTML5 does not support domain pass‑through authentication. To use
domain pass‑through authentication, users require Citrix Receiver for Windows or the Online Plug‑in
for Windows. Pass‑through authentication must be enabled when Citrix Receiver for Windows or the
Online Plug‑in for Windows are installed on users’ devices.
Pass‑through from NetScaler Gateway
Users authenticate to NetScaler Gateway and are automatically logged on when they access their
stores. Pass‑through from NetScaler Gateway authentication is enabled by default when you first con‑
figure remote access to a store. Users can connect through NetScaler Gateway to stores using Citrix
Receiver or Citrix Receiver for Web sites. Desktop Appliance sites do not support connections through
NetScaler Gateway. For more information about configuring StoreFront for NetScaler Gateway, see
Add a NetScaler Gateway connection.
StoreFront supports pass‑through with the following NetScaler Gateway authentication methods.
• Security token. Users log on to NetScaler Gateway using passcodes that are derived from to‑
kencodes generated by security tokens combined, in some cases, with personal identification
numbers. If you enable pass‑through authentication by security token only, ensure that the
resources you make available do not require additional or alternative forms of authentication,
such as users’ Microso Active Directory domain credentials.
• Domain and security token. Users logging on to NetScaler Gateway are required to enter both
their domain credentials and security token passcodes.
• Client certificate. Users log on to NetScaler Gateway and are authenticated based on the at‑
tributes of the client certificate presented to NetScaler Gateway. Configure client certificate
authentication to enable users to log on to NetScaler Gateway using smart cards. Client certifi‑
© 1999–2021 Citrix Systems, Inc. All rights reserved. 31

StoreFront 3.12
cate authentication can also be used with other authentication types to provide double‑source
authentication.
StoreFront uses the NetScaler Gateway authentication service to provide pass‑through authentica‑
tion for remote users so that they only need to enter their credentials once. However, by default,
pass‑through authentication is only enabled for users logging on to NetScaler Gateway with a pass‑
word. To configure pass‑through authentication from NetScaler Gateway to StoreFront for smart card
users, delegate credential validation to NetScaler Gateway. For more information, see Create and con‑
figure the authentication service.
Users can connect to stores within Citrix Receiver with pass‑through authentication through a Secure
Sockets Layer (SSL) virtual private network (VPN) tunnel using the NetScaler GatewayPlug‑in. Remote
users who cannot install the NetScaler Gateway Plug‑in can use clientless access to connect to stores
within Citrix Receiver with pass‑through authentication. To use clientless access to connect to stores,
users require a version of Citrix Receiver that supports clientless access.
Additionally, you can enable clientless access with pass‑through authentication to Citrix Receiver for
Web sites. To do this, configure NetScaler Gateway to act as a secure remote proxy. Users log on to
NetScalerGateway directly and use the Citrix Receiver for Web site to accesstheir applicationswithout
needing to authenticate again.
Users connecting with clientless access to App Controller resources can only access external soware‑
as‑a‑service (SaaS) applications. To access internal web applications, remote users must use the
NetScaler Gateway Plug‑in.
If you configure double‑source authentication to NetScaler Gateway for remote users accessing stores
from within Citrix Receiver, you must create two authentication policies on NetScaler Gateway. Con‑
figure RADIUS (Remote Authentication Dial‑In User Service) as the primary authentication method
and LDAP (Lightweight Directory Access Protocol) as the secondary method. Modify the credential
index to use the secondary authentication method in the session profile so that LDAP credentials are
passed to StoreFront. When you add the NetScaler Gateway appliance to your StoreFront configura‑
tion, set the Logon type to Domain and security token. For more information, see http://support.citrix.
com/article/CTX125364
To enable multidomain authentication through NetScaler Gateway to StoreFront, set SSO Name At‑
tribute to userPrincipalName in the NetScaler Gateway LDAP authentication policy for each domain.
You can require users to specify a domain on the NetScaler Gateway logon page so that the appropri‑
ate LDAP policy to use can be determined. When you configure the NetScaler Gateway session profiles
for connections to StoreFront, do not specify a single sign‑on domain. You must configure trust rela‑
tionships between each of the domains. Ensure that you allow users to log on to StoreFront from any
domain by not restricting access to explicitly trusted domains only.
Where supported by your NetScaler Gateway deployment, you can use SmartAccess to control user
access to XenDesktop and XenApp resources on the basis of NetScaler Gateway session policies. For
© 1999–2021 Citrix Systems, Inc. All rights reserved. 32

StoreFront 3.12
more information about SmartAccess, see How SmartAccess works for XenApp and XenDesktop.
Smart cards
Users authenticate using smart cards and PINs when they access their stores. When you install Store‑
Front, smart card authentication is disabled by default. Smart card authentication can be enabled for
users connecting to stores through Citrix Receiver, Citrix Receiver for Web, Desktop Appliance sites,
and XenApp Services URLs.
Use smart cardauthentication to streamline the logon process for your users while also enhancing the
security of user access to your infrastructure. Access to the internal corporate network is protected by
certificate‑based two‑factor authentication using public key infrastructure. Private keys are protected
by hardware controls and never leave the smart card. Your users get the convenience of accessing
their desktops and applications from a range of corporate devices using their smart cards and PINs.
You can use smart cards for user authentication through StoreFront to desktops and applications pro‑
vided by XenDesktop and XenApp. Smart card users logging on to StoreFront can also access applica‑
tions provided by App Controller. However, users must authenticate again to access App Controller
web applications that use client certificate authentication.
To enable smart card authentication, users’ accounts must be configured either within the Microso
Active Directory domain containing the StoreFront servers or within a domain that has a direct two‑
way trust relationship with the StoreFront server domain. Multi‑forest deployments involving two‑
way trusts are supported.
The configuration of smart card authentication with StoreFront depends on the user devices, the
clients installed, and whether the devices are domain‑joined. In this context, domain‑joined means
devices that are joined to a domain within the Active Directory forest containing the StoreFront
servers.
Use smart cards with Citrix Receiver for Windows
Users with devices running Citrix Receiver for Windows can authenticate using smart cards, either
directly or through NetScaler Gateway. Both domain‑joined and non‑domain‑joined devices can be
used, although the user experience is slightly dierent.
The figure shows the options for smart card authentication through Citrix Receiver for Windows.
© 1999–2021 Citrix Systems, Inc. All rights reserved. 33

StoreFront 3.12
For local users with domain‑joined devices, you can configure smart card authentication so that users
are only prompted for their credentials once. Users log on to their devices using their smart cards and
PINs and, with the appropriate configuration in place, are not prompted for their PINs again. Users are
silently authenticated to StoreFront and also when they access their desktops and applications. To
achieve this, you configure Citrix Receiver for Windows for pass‑through authentication and enable
domain pass‑through authentication to StoreFront.
Users log on to their devices and then authenticate to Citrix Receiver for Windows using their PINs.
There is no further PIN prompts when they try to start apps and desktops
Because users of non‑domain‑joined devices log on to Citrix Receiver for Windows directly, you can
enable users to fall back to explicit authentication. If you configure both smart card and explicit au‑
thentication, users are initially prompted to log on using their smart cards and PINs but have the
option to select explicit authentication if they experience any issues with their smart cards.
Users connecting through NetScaler Gateway must log on using their smart cards and PINs at least
twice to access their desktops and applications. This applies to both domain‑joined and non‑domain‑
joined devices. Users authenticate using their smart cards and PINs, and, with the appropriate config‑
uration in place, are only prompted to enter their PINs again when they access their desktops and ap‑
© 1999–2021 Citrix Systems, Inc. All rights reserved. 34

StoreFront 3.12
plications. To achieve this, you enable pass‑through with NetScaler Gateway authentication to Store‑
Front and delegate credential validation to NetScaler Gateway. Then, create an additional NetScaler
Gateway virtual server through which you route user connections to resources. In the case of domain‑
joined devices, you must also configure Citrix Receiver for Windows for pass‑through authentication.
Note: If you are using Citrix Receiver for Windows 4.2 ‑ the current version, you can set up a second
vServer and use the optimal gateway routing feature to remove the need for PIN prompts when start‑
ing apps and desktops.
Users can log on to NetScaler Gateway using either their smart cards and PINs, or with explicit cre‑
dentials. This enables you to provide users with the option to fall back to explicit authentication for
NetScaler Gateway logons. Configure pass‑through authentication from NetScaler Gateway to Store‑
Front and delegate credential validation to NetScaler Gateway for smart card users so that users are
silently authenticated to StoreFront.
Use smart cards with Desktop Appliance sites
Non‑domain‑joined Windows desktop appliances can be configured to enable users to log on to their
desktops using smart cards. The Citrix Desktop Lock is requiredon the appliance and Internet Explorer
must be used to access the Desktop Appliance site.
The figure shows smart card authentication from a non‑domain‑joined desktop appliance.
When users access their desktop appliances, Internet Explorer starts in full‑screen mode displaying
the logon screen for a Desktop Appliance site. Users authenticate to the site using their smart cards
and PINs. If the Desktop Appliance site is configured for pass‑through authentication, users are auto‑
matically authenticated when they access their desktops and applications. Users are not prompted
for their PINs again. Without pass‑through authentication, users must enter their PINs a second time
when they start a desktop or application.
You can enable users to fall back to explicit authentication if they experience any issues with their
smart cards. To do this, you configure the Desktop Appliance site for both smart card and explicit
authentication. In this configuration, smart card authentication is considered to be primary access
© 1999–2021 Citrix Systems, Inc. All rights reserved. 35
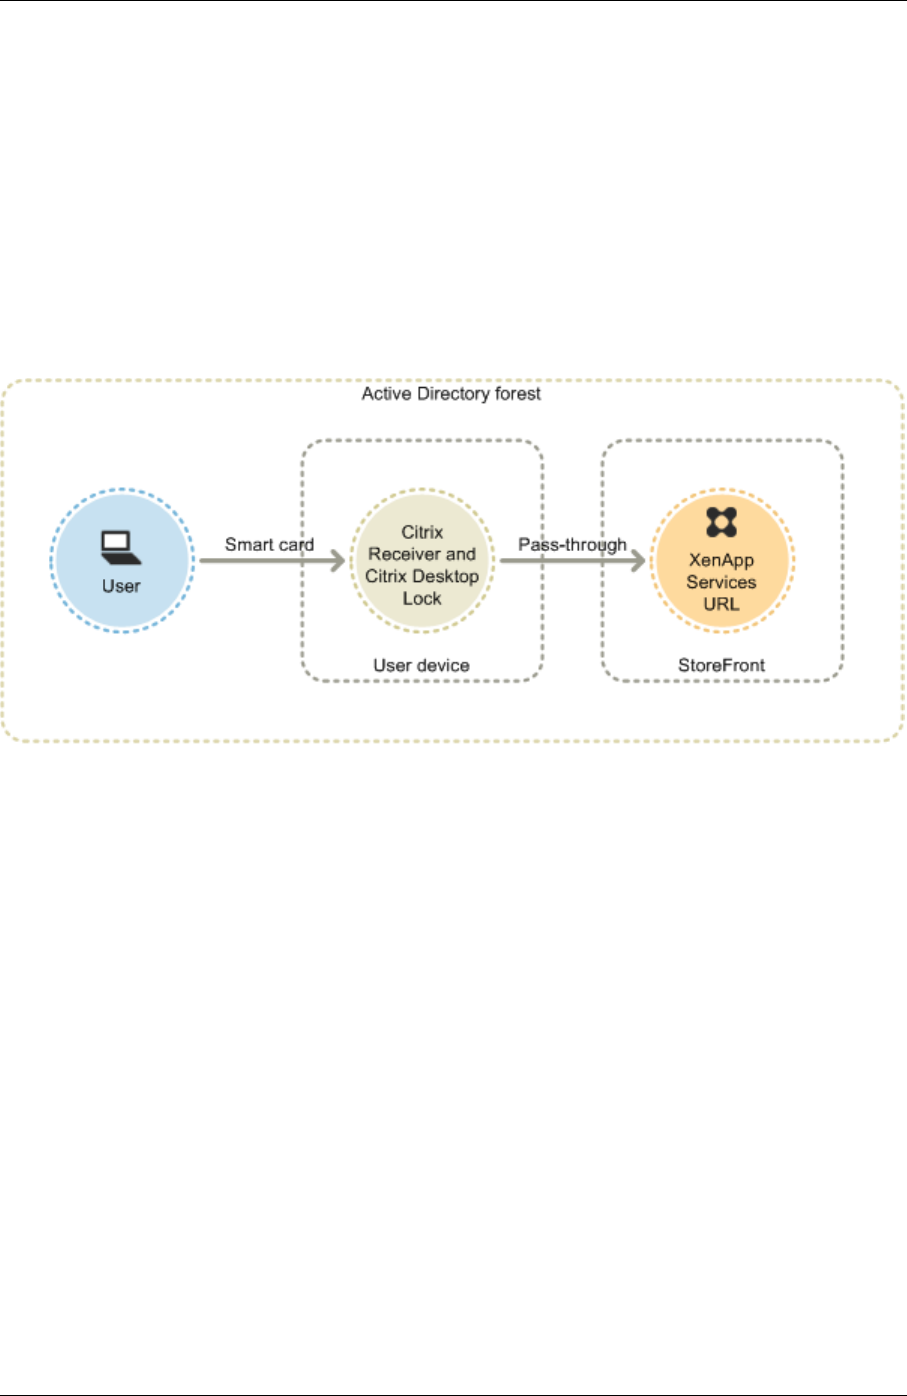
StoreFront 3.12
method so users are prompted for their PINs first. However, the site also provides a link that enables
users to log on with explicit credentials instead.
Use smart cards with XenApp Services URLs
Users of domain‑joined desktop appliances and repurposed PCs running the Citrix Desktop Lock can
authenticate using smart cards. Unlike other access methods, pass‑through of smart card credentials
is automatically enabled when smart card authentication is configured for a XenApp Services URL.
The figure shows smart card authentication from a domain‑joined device running the Citrix Desktop
Lock.
Users log on to their devices using their smart cards and PINs. The Citrix Desktop Lock then silently
authenticates users to StoreFront through the XenApp Services URL. Users are automatically authen‑
ticated when they access their desktops and applications, and are not prompted for their PINs again.
Use smart cards with Citrix Receiver for Web
You can enable smart card authentication to Citrix Receiver for Web from the StoreFront Administra‑
tion Console.
1. Select the Citrix Receiver for Web node in the le panel.
2. Select the site you want to use smart card authentication.
3. Select the Choose Authentication Methods task in the right panel.
4. Check the Smart card checkbox in the popup dialog screen and click OK.
If you enable pass‑through with smart card authentication to XenDesktop and XenApp for Citrix Re‑
ceiver for Windows users with domain‑joined devices who do not access stores through NetScaler
Gateway, this setting applies to all users of the store. To enable both domain pass‑through and pass‑
through with smart cardauthenticationto desktops and applications, you must createseparate stores
© 1999–2021 Citrix Systems, Inc. All rights reserved. 36

StoreFront 3.12
for each authentication method. Your users must then connect to the appropriate store for their
method of authentication.
If you enable pass‑through with smart card authentication to XenDesktop and XenApp for Citrix Re‑
ceiver for Windows users with domain‑joined devices accessing stores through NetScaler Gateway,
this setting applies to all users of the store. To enable pass‑through authentication for some users
and require others to log on to their desktops and applications, you must create separate stores for
each group of users. Then, direct your users to the appropriate store for their method of authentica‑
tion.
Use smart cards with Citrix Receiver for iOS and Android
Users with devices running Citrix Receiver for iOS and Citrix Receiver for Android can authenticate
using smart cards, either directly or through NetScaler Gateway. Non‑domain‑joined devices can be
used.
In the case of devices on the local network, the minimum number of logon prompts that users can
receive is two. When users authenticate to StoreFront or initially create the store, they are prompted
for the smart card PIN. With the appropriate configuration in place, users are prompted to enter their
PINs again only when they access their desktops and applications. To achieve this, you enable smart
card authentication to StoreFront and install smart card drivers on the VDA.
With these Citrix Receivers, you have the option of specifying smart cards OR domain credentials.
If you created a store to use smart cards and you want to connect to the same store using domain
credentials, you must add a separate store without turning on smart cards.
Users connecting through NetScaler Gateway must log on using their smart cards and PINs at least
twice to access their desktops and applications. Users authenticate using their smart cards and PINs,
and, with the appropriate configuration in place, are only prompted to enter their PINs again when
they access their desktops and applications. To achieve this, you enable pass‑through with NetScaler
Gateway authentication to StoreFront and delegate credential validation to NetScalerGateway. Then,
create an additional NetScaler Gateway virtual server through which you route user connections to
resources.
© 1999–2021 Citrix Systems, Inc. All rights reserved. 37

StoreFront 3.12
Users can log on to NetScaler Gateway using either their smart cards and PINs or with explicit creden‑
tials, depending on how you specified the authentication for the connection. Configure pass‑through
authentication from NetScaler Gateway to StoreFront and delegate credential validation to NetScaler
Gateway for smart card users so that users are silently authenticated to StoreFront. If you want to
change the authentication method, you must delete and recreate the connection.
Use smart cards with Citrix Receiver for Linux
Users with devices running Citrix ReceiverforLinux can authenticateusing smart cards in a similar way
to users of non‑domain‑joined Windows devices. Even if the user authenticates to the Linux device
with a smart card, Citrix Receiver for Linux has no mechanism to acquire or reuse the PIN entered.
Configure the server side components for smart cards the same way you configure them for use with
the Citrix Receiver for Windows. Refer to How To Configure StoreFront 2.x and Smart Card Authenti‑
cation for Internal Users using Stores and for instructions on using smart cards, see Citrix Receiver for
Linux.
The minimum number of logon prompts that users can receive is one. Users log on to their devices
and then authenticate to Citrix Receiver for Linux using their smart cards and PINs. Users are not
prompted to enter their PINs again when they access their desktops and applications. To achieve
this, you enable smart card authentication to StoreFront.
Because users log on toCitrix Receiverfor Linux directly, you can enable users to fallback to explicit au‑
thentication. If you configure both smart card and explicit authentication, users are initially prompted
to log on using their smart cards and PINs but have the option to select explicit authentication if they
experience any issues with their smart cards.
Users connecting through NetScaler Gateway must log on using their smart cards and PINs at least
once to access their desktops and applications. Users authenticate using their smart cards and PINs
and, with the appropriate configuration in place, are not prompted to enter their PINs again when
they access their desktops and applications. To achieve this, you enable pass‑through with NetScaler
Gateway authentication to StoreFront and delegate credential validation to NetScalerGateway. Then,
create an additional NetScaler Gateway virtual server through which you route user connections to
resources.
Users can log on to NetScaler Gateway using either their smart cards and PINs, or with explicit cre‑
dentials. This enables you to provide users with the option to fall back to explicit authentication for
NetScaler Gateway logons. Configure pass‑through authentication from NetScaler Gateway to Store‑
Front and delegate credential validation to NetScaler Gateway for smart card users so that users are
silently authenticated to StoreFront.
Smart cards for Citrix Receiver for Linux are not supported with the XenApp Services Support sites.
© 1999–2021 Citrix Systems, Inc. All rights reserved. 38

StoreFront 3.12
Once smart card support is enabled for both the server and Citrix Receiver, provided the application
policy of the smart card certificates allow it, you can use smart cards for the following purposes:
• Smart card logon authentication. Use smart cards to authenticate users to Citrix XenApp and
XenDesktop servers.
• Smart card application support. Enable smart card‑aware published applications to access lo‑
cal smart card devices.
Use smart cards with XenApp Services Support
Users logging on to XenApp ServicesSupport sites to startapplicationsand desktops can authenticate
using smart cards without depending on specific hardware, operating systems, and Citrix Receivers.
When a user accesses a XenApp Services Support site and successfully enters a smart card and PIN,
PNA determines the user identity, authenticates the user with StoreFront, and returns the available
resources.
For pass‑through and smart card authentication to work, you must enable Trust requests sent to the
XML service.
Use an account with local administrator permissions on the Delivery Controller to start Windows Pow‑
erShell and, at a command prompt, enter the following commands to enable the Delivery Controller
to trust XML requests sent from StoreFront. The following procedure applies to XenApp 7.5 through
7.8 and XenDesktop 7.0 through 7.8.
1. Load the Citrix cmdlets by typing asnp Citrix*. (including the period).
2. Type Add‑PSSnapin citrix.broker.admin.v2.
3. Type Set‑BrokerSite ‑TrustRequestsSentToTheXmlServicePort $True
4. Close PowerShell.
For information about configuring the XenApp Services Support smart card authentication method,
see Configure authentication for XenApp Services URLs.
Important considerations
Use of smart cards for user authentication with StoreFront is subject to the following requirements
and restrictions.
• To use virtual private network (VPN) tunnels with smart card authentication, users must install
the NetScaler Gateway Plug‑in and log on through a web page, using their smart cards and
PINs to authenticate at each step. Pass‑throughauthenticationto StoreFront with the NetScaler
Gateway Plug‑in is not available for smart card users.
• Multiple smart cards and multiple readers can be used on the same user device, but if you en‑
able pass‑through with smart card authentication, users must ensure that only one smart card
is inserted when accessing a desktop or application.
© 1999–2021 Citrix Systems, Inc. All rights reserved. 39

StoreFront 3.12
• When a smart card is used within an application, such as for digital signing or encryption, users
might see additional prompts to insert a smart card or enter a PIN. This can occur if more than
one smart card has been inserted at the same time. It can also occur due to configuration set‑
tings ‑ such as middleware settings like PIN caching that are typically configured using group
policy.Users who are prompted to insert a smart card when the smart card is already in the
reader must click Cancel. If users are prompted for a PIN, they must enter their PINs again.
• If you enable pass‑through with smart card authentication to XenDesktop and XenApp for Cit‑
rix Receiver for Windows users with domain‑joined devices who do not access stores through
NetScaler Gateway, this setting applies to all users of the store. To enable both domain pass‑
through and pass‑through with smart card authentication to desktops and applications, you
must create separate stores for each authentication method. Your users must then connect to
the appropriate store for their method of authentication.
• If you enable pass‑through with smart card authentication to XenDesktop and XenApp for Cit‑
rix Receiver for Windows users with domain‑joined devices accessing stores through NetScaler
Gateway, this setting applies to all users of the store. To enable pass‑through authentication
for some users and require others to log on to their desktops and applications, you must create
separate stores for each group of users. Then, direct your users to the appropriate store for their
method of authentication.
• Only one authentication method can be configured for each XenApp Services URL and only
one URL is available per store. If you need to enable other types of authentication in addition
to smart card authentication, you must create separate stores, each with a XenApp Services
URL, for each authentication method. Then, direct your users to the appropriate store for their
method of authentication.
• When StoreFront is installed, the default configuration in Microso Internet Information Ser‑
vices (IIS) only requires that client certificates are presented for HTTPS connections to the cer‑
tificate authentication URL of the StoreFront authentication service. IIS does not request client
certificates for any other StoreFront URLs. This configuration enables you to provide smart card
users with the option to fall back to explicit authentication if they experience any issues with
their smart cards. Subject to the appropriate Windows policy settings, users can also remove
their smart cards without needing to reauthenticate.
If you decide to configure IIS to require client certificates for HTTPS connections to all Store‑
Front URLs, the authentication service and stores must be collocated on the same server. You
must use a client certificate that is valid for all the stores. With this IIS site configuration, smart
card users cannot connect through NetScaler Gateway and cannot fall back to explicit authen‑
tication. Users must log on again if they remove their smart cards from their devices.
© 1999–2021 Citrix Systems, Inc. All rights reserved. 40

StoreFront 3.12
Optimize the user experience
January 4, 2019
StoreFront includes features designed to enhance the user experience. These features are configured
by default when you create new stores and their associated Citrix Receiver for Web sites, Desktop
Appliance sites, and XenApp Services URLs.
Workspace control
As users move between devices, workspacecontrol ensures that the applicationsthey are using follow
them. Users can keep working with the same application instances across multiple devices rather
than having to restart all their applications each time they log on to a new device. This enables, for
example, clinicians in hospitals to save time as they move from workstation to workstation accessing
patient data.
Workspace control is enabled by default for Citrix Receiver for Web sites and connections to stores
through XenApp Services URLs. When users log on, they are automatically reconnected to any appli‑
cations that they le running. For example, consider a user logging on to a store, either through the
Citrix Receiver for Web site or the XenApp Services URL, and starting some applications. If the user
then logs on to the same store using the same access method but on a dierent device, the running
applications are automatically transferred to the new device. All the applications that the user starts
from a particular store are automatically disconnected, but not shut down, when the user logs o
from that store. In the case of Citrix Receiver for Web sites, the same browser must be used to log on,
start the applications, and log o.
Workspace control for XenApp Services URLs cannot be configured or disabled. For more informa‑
tion about configuring workspace control for Citrix Receiver for Web sites, see Configure workspace
control.
Use of workspace control on Citrix Receiver for Web sites is subject to the following requirements and
restrictions.
• Workspace control is not available when Citrix Receiver for Web sites are accessed from hosted
desktops and applications.
• For users accessing Citrix Receiver for Web sites from Windows devices, workspace control is
only enabled if the site can detect that Citrix Receiver is installed on users’ devices or if Citrix
Receiver for HTML5 is used to access resources.
• To reconnectto disconnected applications, users accessingCitrix Receiver for Web sites through
Internet Explorer must add the site to the Local intranet or Trusted sites zones.
• If there is only one desktop available for a user on a Citrix Receiver for Web site that is configured
to start single desktops automatically when the user logs on, that user’s applications are not
© 1999–2021 Citrix Systems, Inc. All rights reserved. 41

StoreFront 3.12
reconnected, regardless of the workspace control configuration.
• Users must disconnect from their applications using the same browser that was originally used
to start them. Resources started using a dierent browser or started locally from the desktop
or Start menu using Citrix Receiver cannot be disconnected or shut down by Citrix Receiver for
Web sites.
Content redirection
Where users have subscribed to the appropriate application, content redirection enables local files
on users’ devices to be opened using subscribed applications. To enable redirection of local files,
associate the application with the required file types in XenDesktop or XenApp. File type association
is enabled by default for new stores. For more information, see Disable file type association.
User changed password
You can enable Citrix Receiver for Web site users logging on with Microso Active Directory domain
credentials to change their passwords at any time. Alternatively, you can restrict password changes
to users whose passwords have expired. This means you can ensure that users are never prevented
from accessing their desktops and applications by an expired password.
If you enable Citrix Receiver for Web site users to change their passwords at any time, local users
whose passwords are about to expire are shown a warning when they log on. By default, the noti‑
fication period for a user is determined by the applicable Windows policy setting. Password expiry
warnings are only displayed to users connecting from the internal network. For more information
about enabling users to change their passwords, see Configure the authentication service.
Users logging on to Desktop Appliance sites can only change expired passwords, even if you enable
users to change their passwords at any time. Desktop Appliance sites do not provide controls to en‑
able users to change their passwords aer they have logged on.
When you create the authentication service, the default configuration prevents Citrix Receiver for Web
site users from changing their passwords, even if the passwords have expired. If you decide to enable
this feature, ensure that the policies for the domains containing your servers do not prevent users
from changing their passwords. StoreFront must be able to contact the domain controller to change
users’ passwords.
Enabling users to change their passwords exposes sensitive security functions to anyone who can
access any of the stores that use the authentication service. If your organization has a security policy
that reserves user password change functions for internal use only, ensure that none of the stores are
accessible from outside your corporate network.
© 1999–2021 Citrix Systems, Inc. All rights reserved. 42

StoreFront 3.12
Citrix Receiver for Web site desktop and application views
When both desktops and applications are available from a Citrix Receiverfor Web site, the site displays
separate desktop and application views by default. Users see the desktop view first when they log on
to the site. Regardless of whether applications are also available from a Citrix Receiver for Web site, if
only a single desktop is available for a user, the site starts that desktop automatically when the user
logs on. You can configure which views appear for your sites and prevent Citrix Receiver for Web sites
from automatically starting desktops for users. For more information, see Configure how resources
are displayed for users.
The behavior of the views on Citrix Receiver for Web sites depends on the types of resources being
delivered. For example, users must subscribe to applications before they appear in the application
view, whereas all the desktops available to a user are automatically displayed in the desktop view.
For this reason, users cannot remove desktops from the desktop view and cannot reorganize them
by dragging and dropping the icons. When desktop restarts are enabled by the XenDesktop adminis‑
trator, controls that enable users to restart their desktops are provided in the desktop view. If users
have access to multiple instances of a desktop from a single desktop group, Citrix Receiver for Web
sites dierentiate the desktops for users by appending numerical suixes to the desktop names.
For users connecting to stores within Citrix Receiver or through XenApp Services URLs, the way in
which desktops and applications are displayed, and their behavior, is determined by the Citrix client
being used.
Additional recommendations
When delivering applications with XenDesktop and XenApp, consider the following options to en‑
hance the experience for users when they access their applications through your stores. For more
information about delivering applications, see Create a Delivery Group application.
• Organize applications into folders to make it easier for users to find what they need when brows‑
ing through the available resources. The folders you create in XenDesktop and XenApp appear
as categories in Citrix Receiver. You could, for example, group applications according to type
or, alternatively, create folders for dierent user roles in your organization.
• Ensure that you include meaningful descriptions when you deliver applications, as these de‑
scriptions are visible to users in Citrix Receiver.
• You can specify that all users have a coreset of applicationsthatcannotbe removed from the Cit‑
rix Receiver home screen by appending the string KEYWORDS:Mandatory to the application de‑
scription. Users can still use the self‑service UI to add more applications or remove nonmanda‑
tory applications.
• You can automatically subscribe all users of a store to an application by appending the string
KEYWORDS:Auto to the description you provide when you deliver the application. When users
log on to the store, the application is automatically provisioned without users needing to man‑
© 1999–2021 Citrix Systems, Inc. All rights reserved. 43

StoreFront 3.12
ually subscribe.
• To automatically subscribe all users of a store to a web or soware‑as‑a‑service (SaaS) applica‑
tion managed by App Controller, select the App is available in Citrix Receiver to all users auto‑
matically check box when you configure the application settings.
• Advertise XenDesktop applications to users or make commonly used applications easier
to find by listing them in the Featured list in Citrix Receiver. To do this, append the string
KEYWORDS:Featured to the application description.
Note: Multiple keywords must be separated by spaces only; for example,
KEYWORDS:Auto Featured.
• By default, XenDesktop and XenApp hosted shared desktops are treated like other desktops by
Citrix Receiver for Web sites. To change this behavior, append the string KEYWORDS:TreatAsApp
to the desktop description. The desktop is displayed in the application views of Citrix Receiver
for Web sites rather than the desktop views and users are required to subscribe before they can
access the desktop. In addition, the desktop is not automatically started when the user logs on
to the Citrix Receiver for Web site and is not accessed with the Desktop Viewer, even if the site
is configured to do this for other desktops.
• For Windows users, you can specify that the locally installed version of an application should be
used in preference to the equivalent delivered instance if both are available. To do this, append
the string KEYWORDS:prefer=”application” to the application description, where application
is either one or more complete words in the name of the local application as given by the short‑
cut file name, or the absolute path including the executable file name to the local application
from the \Start Menu folder. When a user subscribes to an application with this keyword, Cit‑
rix Receiver searches for the specified name or path on the user’s device to determine whether
the application is already installed locally. If the application is found, Citrix Receiver subscribes
the user to the delivered application, but does not create a shortcut. When the user starts the
delivered application from Citrix Receiver, the locally installed instance runs instead. For more
information, see Configure application delivery.
StoreFront high availability and multi‑site configuration
October 15, 2018
StoreFront includes a number of features that combine to enable load balancing and failover between
the deployments providing resources for stores. You can also specify dedicated disaster recovery de‑
ployments for increased resiliency. These features enable you to configure StoreFront deployments
distributed over multiple sites to provide high availability for your stores. For more information, see
Set up highly available multi‑site store configurations.
© 1999–2021 Citrix Systems, Inc. All rights reserved. 44

StoreFront 3.12
Resource aggregation
By default, StoreFront enumerates all the deployments providing desktops and applications for a
store and treats all those resources as distinct. This means that if the same resource is available from
several deployments, users see an icon for each resource, which might be confusing if the resources
have the same name. When you set up highly available multi‑site configurations, you can group Xen‑
Desktop and XenApp deployments that deliver the same desktop or application so that identical re‑
sources can be aggregated for users. Grouped deployments do not need to be identical, but resources
must have the same name and path on each server to be aggregated.
When a desktop or application is available from multiple XenDesktop and XenApp deployments con‑
figured for a particular store, StoreFront aggregates all instances of that resource and presents users
with a single icon. App Controller applications cannot be aggregated. When a user starts an aggre‑
gated resource, StoreFront determines the most appropriate instance of that resource for the user on
the basis of server availability, whether the user already has an active session, and the ordering you
specified in your configuration.
StoreFront dynamically monitors serversthat fail to respond to requestson the basis that such servers
are either overloaded or temporarily unavailable. Users are directed to resource instances on other
servers until communications are re‑established. Where supported by the servers providing the re‑
sources, StoreFront attempts to reuse existing sessions to deliver additional resources. If a user al‑
ready has an active session on a deployment that also provides the requested resource, StoreFront
reuses the session if it is compatible with that resource. Minimizing the number of sessions for each
user reduces the time taken to start additional desktops or applications and can allow for more ei‑
cient use of product licenses.
Aer checking for availabilityand existing user sessions, StoreFront uses the ordering specified in your
configuration to determine the deployment to which the user is connected. If multiple equivalent de‑
ployments are available to the user, you can specify that users are connected either to the first avail‑
able deployment or randomly to any deployment in the list. Connecting users to the first available
deployment enables you to minimize the number of deployments in use for the current number of
users. Randomly connecting users provides a more even distribution of users across all the available
deployments.
You can override the specified deployment ordering for individual XenDesktop and XenApp resources
to define preferred deployments to which users are connected when they access a particular desktop
or application. This enables you to, for example, specify that users are preferentially connected to a
deployment specifically adapted to deliver a particular desktop or application, but use other deploy‑
ments for other resources. To do this, append the string KEYWORDS:Primary to the description of the
desktop or application on the preferred deployment and KEYWORDS:Secondary to the resource on
other deployments. Where possible, users are connected to the deployment providing the primary
resource, regardless of the deployment ordering specified in your configuration. Users are connected
to deployments providing secondary resources when the preferred deployment is unavailable.
© 1999–2021 Citrix Systems, Inc. All rights reserved. 45

StoreFront 3.12
Map users to resources
By default, users accessing a store see an aggregate of all the resources available from all the deploy‑
ments configured for that store. To provide dierent resources for dierent users, you can configure
separate stores or even separate StoreFront deployments. However, when you set up highly avail‑
able multi‑site configurations, you can provide access to particular deployments on the basis of users’
membership of Microso Active Directory groups. This enables you to configure dierent experiences
for dierent user groups through a single store.
For example, you can group common resources for all users on one deployment and finance applica‑
tions for the Accounts department on another deployment. In such a configuration, a user who is not
a member of the Accounts user group sees only the common resources when accessing the store. A
member of the Accounts user group is presented with both the common resources and the finance
applications.
Alternatively, you can create a deployment for power users that provides the same resources as your
other deployments, but with faster and more powerful hardware. This enables you to provide an
enhanced experience for business‑critical users, such as your executive team. All users see the same
desktops and applications when they log on to the store, but members of the Executives user group
are preferentially connected to resources provided by the power user deployment.
Subscription synchronization
If you enable your users to access the same applications from similar stores in dierent StoreFront
deployments, users’ application subscriptions must be synchronized between the server groups. Oth‑
erwise, users who subscribe to an application in a store on one StoreFront deployment might need
to resubscribe to the application when they log on to a dierent server group. To provide a seamless
experience for users moving between separate StoreFront deployments, you can configure periodic
synchronization of users’ application subscriptions between stores in dierent server groups. Choose
between regular synchronization at a specific interval or schedule synchronization to occur at partic‑
ular times throughout the day. For more information, see Configure subscription synchronization.
Dedicated disaster recovery resources
You can configure specific disaster recovery deployments that are not used unless all other deploy‑
ments are unavailable. Typically, disaster recovery deployments are not collocated with the main
deployments, provide only a subset of the resources that are normally available, and might oer a
degraded user experience. When you specify that a deployment is to be used for disaster recovery,
the deployment will not be used for load balancing or failover. Users cannot access desktops and ap‑
plications provided by disaster recovery deployments unless all the other deployments for which the
disaster recovery deployments are configured become unavailable.
© 1999–2021 Citrix Systems, Inc. All rights reserved. 46

StoreFront 3.12
When access to any other deployment is re‑established, users cannot start more disaster recovery
resources, even if they are already using such a resource. Users running disaster recovery resources
are not disconnected from those resources when access to other deployments is restored. However,
they cannot start disaster recovery resources again once they have exited these resources. Similarly,
StoreFrontdoes not attempttoreuseexisting sessions with disasterrecovery deploymentsif any other
deployments have subsequently become available.
Optimal NetScaler Gateway routing
If you have configured separate NetScaler Gateway appliances for your deployments, StoreFront en‑
ables you to define the optimal appliance for users to access each of the deployments providing re‑
sources for a store. For example, if you create a store that aggregates resources from two geographical
locations, each with a NetScaler Gateway appliance, users connecting through an appliance in one lo‑
cation can start a desktop or application in the other location. However, by default, the connection
to the resource is then routed through the appliance to which the user originally connected and must
therefore traverse the corporate WAN.
To improve the user experience and reduce network traic over the WAN, you can specify the optimal
NetScaler Gateway appliance for each of your deployments. With this configuration, user connections
to resources are automatically routed through the appliance local to the deployment providing the
resources, regardless of the location of the appliance through which the user accesses the store.
Optimal NetScaler Gateway routing can also be used in the special case where local users on the inter‑
nal network are required to log on to NetScalerGateway for endpoint analysis. With this configuration,
users connect to the store through the NetScaler Gateway appliance, but there is no need to route the
connection to the resource through the appliance as the user is on the internal network. In this case,
you enable optimal routing, but do not specify an appliance for the deployment, so user connections
to desktops and applications are routed directly and not through NetScaler Gateway. Note that you
must also configure a specific internal virtual server IP address for the NetScaler Gateway appliance.
Additionally, specify an inaccessible internal beacon point so that Citrix Receiver is always prompted
to connect to NetScaler Gateway, regardless of the user’s network location.
NetScaler Gateway global server load balancing
StoreFront supports NetScaler Gateway deployments configuredfor global server loadbalancing with
multiple appliances configured with a single fully qualified domain name (FQDN). For user authenti‑
cation and to route user connections through the appropriate appliance, StoreFront must be able to
distinguish between the appliances. Because the appliance FQDN cannot be used as a unique iden‑
tifier in a global server load balancing configuration, you must configure StoreFront with unique IP
addresses for each of the appliances. Typically, this is the IP address of the NetScaler Gateway virtual
server.
© 1999–2021 Citrix Systems, Inc. All rights reserved. 47

StoreFront 3.12
For information about load balancing, see Load balancing with NetScaler.
Important considerations
When you decide whether to set up highly available multi‑site configurations for your stores, consider
the following requirements and restrictions.
• Desktops and applications must have the same name and path on each server to be aggregated.
In addition, the properties of aggregated resources, such as names and icons, mustbe the same.
If this is not the case, users could see the properties of their resources change when Citrix Re‑
ceiver enumerates the available resources.
• Assigned desktops, both pre‑assigned and assigned‑on‑first‑use, should not be aggregated. En‑
sure that Delivery Groups providing such desktops do not have the same name and path in sites
that you configure for aggregation.
• App Controller applications cannot be aggregated.
• If you configure synchronization of users’ application subscriptions between stores on separate
StoreFront deployments, the stores must have the same name in each server group. In addi‑
tion, both server groups must reside within the Active Directory domain containing your users’
accounts or within a domain that has a trust relationship with the user accounts domain.
• StoreFront only provides access to backup deployments for disaster recovery when all the pri‑
mary sites in the equivalent deployment set are unavailable. If a backup deployment is shared
between multiple equivalent deployment sets, all the primary sites in each of the sets must be
unavailable before users can access the disaster recovery resources.
Install, set up, upgrade, and uninstall
February 25, 2021
Warning
The StoreFront managementconsoledoes not open aer an upgrade to StoreFront 3.12.1000 (Xe‑
nApp and XenDesktop 7.15 LTSR CU1) from StoreFront 3.12 (XenApp and XenDesktop 7.15 LTSR),
or aer an install of StoreFront 3.12.1000. The StoreFront management console displays the er‑
ror “MMC could not create the snap‑in. The snap‑in might not have been installed correctly.” To
work around this issue, follow the steps described in CTX233206.
Before installing and configuring
To install and configure StoreFront, complete the following steps in order:
© 1999–2021 Citrix Systems, Inc. All rights reserved. 48

StoreFront 3.12
1. If you plan to use StoreFront to deliver XenDesktop and XenApp resources to users, ensure that
the StoreFront server is joined to either the Microso Active Directory domain containing your
users’ accounts or a domain that has a trust relationship with the user accounts domain.
Important:
• For single server deployments you can install StoreFront on a non‑domain‑joined server.
• StoreFront cannot be installed on a domain controller.
2. If not already present, StoreFront requires Microso .NET 4.5 Framework, which can be down‑
loaded from Microso. You must have Microso .NET 4.5 installed before you can install Store‑
Front.
3. Optionally, if you plan to configure a multiple server StoreFront deployment, set up a load bal‑
ancing environment for your StoreFront servers.
To use NetScaler for load balancing, you define a virtual server to proxy your StoreFront servers.
For more information on configuring NetScaler for load balancing, see Load balancing with
NetScaler.
a) Ensure that load balancing is enabled on your NetScaler appliance.
b) For each StoreFront server, create individual HTTP or TLS load balancing services, as ap‑
propriate, using the StoreFront monitor type.
c) Configure the services to insert the client IP address into the X‑Forwarded‑For HTTP
header of requests forwarded to StoreFront, overriding any global policies.
StoreFront requires users’ IP addresses to establish connections to their resources.
d) Create a virtual server and bind the services to the virtual server.
e) On the virtual server, configure persistence using the cookie insert method if you have the
latest Citrix Receivers installed on all platforms and you have no need to support Android;
otherwise, configure persistence on the basis of source IP address. Ensure the Time To
Live (TTL) is suicient to enable users to stay logged on to the server as long as required.
Persistence ensures that only the initial user connection is load balanced, aer which sub‑
sequent requests from that user are directed to the same StoreFront server.
4. Optionally, enable the following features.
• .NET Framework 4.5 Features > .NET Framework 4.5, ASP.NET 4.5
Optionally, enable the following roles and their dependencies on the StoreFront server.
• Web Server (IIS) > Web Server > Common HTTP Features > Default Document, HTTP Errors,
Static Content, HTTP Redirection
• Web Server (IIS) > Web Server > Health and Diagnostics > HTTP Logging
© 1999–2021 Citrix Systems, Inc. All rights reserved. 49

StoreFront 3.12
• Web Server (IIS) > Web Server > Security > Request Filtering, Windows Authentication
• On Windows Server 2012 servers:
Web Server (IIS) > Web Server > Application Development > .NET Extensibility 4.5, Applica‑
tion Initialization, ASP.NET 4.5, ISAPI Extensions, ISAPI Filters
On Windows Server 2008 R2 servers:
Web Server (IIS) > Web Server > Application Development > .NET Extensibility, Application
Initialization, ASP.NET, ISAPI Extensions, ISAPI Filters
• Web Server (IIS) > Management Tools > IIS Management Console, IIS Management Scripts
and Tools
The StoreFront installer checks that all the features and server roles above are enabled.
5. Install StoreFront.
If you intend the server to be part of a server group, both the StoreFront installation location
and IIS website settings, physical path and site IDs must be consistent across them.
6. Optionally, configure Microso Internet Information Services (IIS) for HTTPS if you plan to use
HTTPS to secure communications between StoreFront and users’ devices.
HTTPS is required for smart card authentication. By default, Citrix Receiver requires HTTPS con‑
nections to stores. You can change from HTTP to HTTPS at any time aer installing StoreFront,
provided the appropriate IIS configuration is in place.
To configure IIS for HTTPS, use the Internet Information Services (IIS) Manager console
on the StoreFront server to create a server certificate signed by your domain certifica‑
tion authority. Then, add HTTPS binding to the default website. For more information
about creating a server certificate in IIS, see https://docs.microsoft.com/en‑us/previous‑
versions/windows/it‑pro/windows‑server‑2012‑R2‑and‑2012/hh831637(v=ws.11). For more
information about adding HTTPS binding to an IIS site, see https://docs.microsoft.com/en‑
us/previous‑versions/orphan‑topics/ws.11/hh831632(v=ws.11).
7. Ensure your firewalls and other network devices permit access to TCP port 80 or 443, as ap‑
propriate, from both inside and outside the corporate network. In addition, ensure that any
firewalls or other devices on your internal network do not block traic to any of the unassigned
TCP ports.
When you install StoreFront, a Windows Firewall rule is configured enabling access to the Store‑
Front executable through a TCP port randomly selected from all unreserved ports. This port is
used for communications between the StoreFront servers in a server group.
8. If you plan to use multiple Internet Information Services (IIS) websites, aer creating the web‑
sites in IIS, use the PowerShell SDK to create a StoreFront deployment in each of those IIS web‑
sites. For more information, seeMultiple Internet Information Services (IIS) websites.
© 1999–2021 Citrix Systems, Inc. All rights reserved. 50

StoreFront 3.12
Note: StoreFront disables the management console when it detects multiple sites and displays
a message to that eect.
9. Use the Citrix StoreFront management console to configure your server.
Install StoreFront
Important
• To avoid potential errors and data loss when installing StoreFront, ensure all applications
are closed and no other tasks or operations are running on the target system.
• From StoreFront 3.12.6000 onwards, to install StoreFront in a custom location for the first
time, you must install from the command prompt using the ‑INSTALLDIR argument to spec‑
ify the location. See To install StoreFront at a command prompt.
1. Download the installer from the download page.
2. Log on to the StoreFront server using an account with local administrator permissions.
3. Ensure that the required Microso .NET 4.5 Framework is installed on the server.
4. Browse the download package, locate CitrixStoreFront‑x64.exe, and run the file as an adminis‑
trator.
Note: On Windows Server 2008 R2 servers, a message may be displayed indicating that the .NET
feature will be enabled. If this message appears, click
Yes.
5. Read and accept the license agreement, and click Next.
6. If the Review prerequisites page appears, click Next.
7. On the Ready to install page, check the prerequisites and StoreFront components that are listed
for installation and click Install.
Before the components are installed, the following roles are enabled if they are not already con‑
figured on the server.
• Web Server (IIS) > Web Server > Common HTTP Features > Default Document, HTTP Errors,
Static Content, HTTP Redirection
• Web Server (IIS) > Web Server > Health and Diagnostics > HTTP Logging
• Web Server (IIS) > Web Server > Security > Request Filtering, Windows Authentication
• On Windows Server 2012 servers:
Web Server (IIS) > Web Server > Application Development > .NET Extensibility 4.5, Applica‑
tion Initialization, ASP.NET 4.5, ISAPI Extensions, ISAPI Filters
On Windows Server 2008 R2 servers:
© 1999–2021 Citrix Systems, Inc. All rights reserved. 51

StoreFront 3.12
Web Server (IIS) > Web Server > Application Development > .NET Extensibility, Application
Initialization, ASP.NET, ISAPI Extensions, ISAPI Filters
• Web Server (IIS) > Management Tools > IIS Management Console, IIS Management Scripts
and Tools
The following features are also enabled if they are not already configured.
• .NET Framework 4.5 Features > .NET Framework 4.5, ASP.NET 4.5
8. When the installationis complete, click Finish. The Citrix StoreFront management console starts
automatically. You can also open StoreFront from the Start screen.
Note:
From StoreFront 3.12.6000 onwards a restart is required aer StoreFront installation.
9. In the Citrix Storefront management console, click Create a new deployment.
a) Specify the URL of the StoreFront server in the Base URL box.
b) On the Store Name page, specify a name for your store, and click Next.
10. On the Delivery Controllers page, list the infrastructure – the details of the XenApp or XenDesk‑
top services ‑ that is providing the resources you want to make available in the store. You can
enter a “dummy” server here; however, no apps will display in the store.
© 1999–2021 Citrix Systems, Inc. All rights reserved. 52

StoreFront 3.12
11. Set the Transport type and the Port. You can specify HTTP and port 443 and click OK. Alterna‑
tively, copy settings from an existing Web Interface or StoreFront deployment.
12. On the Remote Access page, select None. If you are using NetScaler Gateway, select No VPN
Tunnel and enter your gateway details.
13. On the Remote Access page, select Create. Once the store has been created, click Finish.
Your store is now available for users to access through the Citrix Receiver for Web site, which enables
users to access their desktops and apps through a webpage.
The URL for users to access the Citrix Receiver for Web site for the new store is displayed. For exam‑
ple: example.net/Citrix/MarketingWeb/. Log on and you will access the new user interface in Citrix
Receiver.
CEIP
If you participate in the Citrix Customer Experience Improvement Program (CEIP), anonymous statis‑
tics and usage information are sent to Citrix toimprovethe quality and performance of Citrix products.
By default, you are automatically enrolled in CEIP when you install StoreFront. The first upload of data
occurs approximately seven days aer you install StoreFront. You can change this default in a registry
setting. If you change the registry setting before installing StoreFront, that value will be used. If you
change the registry setting before upgrading StoreFront, that value will be used.
Warning
Editing the registry incorrectly can cause serious problems that may require you to reinstall your
operating system. Citrix cannot guarantee that problems resulting from the incorrect use of Reg‑
istry Editor can be solved. Use Registry Editor at your own risk. Be sure to back up the registry
© 1999–2021 Citrix Systems, Inc. All rights reserved. 53

StoreFront 3.12
before you edit it.
Registry setting that controls automatic upload of analytics (default = 1):
Location: HKLM:\Soware\Citrix\Telemetry\CEIP
Name: Enabled
Type: REG_DWORD
Value: 0 = disabled, 1 = enabled
By default, the “Enabled” property is hidden in the registry. When it remains unspecified, the auto‑
matic upload feature is enabled.
Using PowerShell, the following cmdlet disables enrollment in CEIP:
New‑ItemProperty ‑Path HKLM:\SOFTWARE\Citrix\Telemetry\CEIP ‑Name Enabled ‑PropertyType
DWORD ‑Value 0
Note: The registry setting controls the automatic upload of anonymous statistics and usage informa‑
tion for all components on the same server. For example, if you have installed StoreFront on the same
server as the Delivery Controller and decide to opt out of CEIP using the registry setting, the opt out
will apply to both components.
CEIP data collected from StoreFront
The following table gives examples of the type of anonymous information collected. The data does
not contain any details that identify you as a customer.
Data Description
StoreFront version String denoting the installed version of
Storefront. For example, “3.8.0.0”
Stores count A counter for the number of Stores in the
deployment.
Server Count in server group A counter for the number of Servers in the
Server group.
Delivery Controller Count per store List of numeric values indicating the number of
Delivery Controllers available for each Store in
the Deployment.
HTTPS enabled String denoting whether https is enabled for
the deployment. “True” or “False”.
Classic experience enabled for Citrix Receiver List of Booleans denoting whether “Classic
Experience” is enabled for each Web Receiver.
TRUE or FALSE for each Web Receiver.
© 1999–2021 Citrix Systems, Inc. All rights reserved. 54

StoreFront 3.12
Data Description
HTML5 setting for Citrix Receiver List of Strings denoting the HTML5 Receiver
setting for each Web Receiver.
“Always”,”Fallback”,”O” for each Web Receiver.
Workspace control enabled for Citrix Receiver List of Booleans denoting whether “Workspace
Control” is enabled for each Web Receiver.
TRUE or FALSE for each Web Receiver.
Remote Access enabled for store List of Strings denoting whether “Remote
Access” is enabled for each Store in the
Deployment. “ENABLED” or “DISABLED” for
each store.
Gateways count A counter for the number of NetScaler
Gateways configured in the deployment.
To install StoreFront at a command prompt
1. Log on to the StoreFront server using an account with local administrator permissions.
2. Ensure that all of the requirements for installation of StoreFront are met before installing Store‑
Front. Refer to Before installing and configuring for details.
3. Browse your installation media or download package, locate CitrixStoreFront‑x64.exe, and copy
the file to a temporary location on the server.
4. At a command prompt, navigate to the folder containing the installation file and type the fol‑
lowing command.
1 CitrixStoreFront-x64.exe [-silent] [-INSTALLDIR
installationlocation]
2 [-WINDOWS_CLIENT filelocation\filename.exe]
3 [-MAC_CLIENT filelocation\filename.dmg]
4 <!--NeedCopy-->
Use the ‑silent argument to perform a silent installation of StoreFront and all the prerequisites.
By default, StoreFront is installed at C:\Program Files\Citrix\Receiver StoreFront\. However, you
can specify a dierent installation location using the ‑INSTALLDIR argument, where installation‑
location is the directory in which to install StoreFront. Note that if you intend the server to be
part of a server group, both the StoreFront installation location and IIS website settings, physi‑
cal path and site IDs must be consistent across them.
By default, if a Citrix Receiver for Web site cannot detect Citrix Receiver on a Windows or Mac OS
© 1999–2021 Citrix Systems, Inc. All rights reserved. 55

StoreFront 3.12
X device, the user is prompted to download and install the appropriate Citrix Receiver for their
platform from the Citrix website. You can modify this behavior so that users download the Citrix
Receiver installation files from the StoreFront server instead. For more information, see Make
Citrix Receiver installation files available on the server.
If you plan to make this configuration change, specify the ‑WINDOWS_CLIENT and ‑MAC_CLIENT
arguments to copy Citrix Receiver for Windows and Citrix Receiver for Mac installation files, re‑
spectively, to the appropriate location in your StoreFront deployment. Replace filelocation with
the directory containing the installation file that you want to copy and filename with the name
of the Citrix Receiver installation file. Citrix Receiver for Windows and Citrix Receiver for Mac
installation files are included on your StoreFront installation media or download package.
Upgrade StoreFront
To upgrade existing StoreFront 2.0 through 3.x deployments to this version of StoreFront, run the in‑
stallation file for this version of StoreFront. Releases before StoreFront 2.0 cannot be upgraded di‑
rectly. Instead, you must first upgrade StoreFront 1.2 to StoreFront 2.0 before upgrading to this Store‑
Front. Similarly, you cannot upgrade Storefront 1.1 to this StoreFront directly. You must upgrade
Storefront 1.1 to StoreFront 1.2 and then again to StoreFront 2.0 before finally upgrading to this Store‑
Front.
Once the upgrade process is started, it cannot be rolled back. If the upgrade is interrupted or cannot
be completed, the existing configuration is removed but StoreFront is not installed. Before starting
to upgrade, you must disconnect users from the StoreFront deployment and prevent users from ac‑
cessing the servers while the upgrade is in progress. This ensures that all StoreFront files are acces‑
sible by the installer during the upgrade. If any files cannot be accessed by the installer, they cannot
be replaced and so the upgrade will fail, resulting in the removal of the existing StoreFront configura‑
tion. StoreFront does not support multiple server deployments containing dierent product versions,
so all servers in a group must be updated to the upgraded version before granting access to the de‑
ployment. Concurrent upgrade is not supported for multiple server deployments, servers must be
upgraded sequentially. Citrix recommends that you back up your data before upgrading.
Uninstalling StoreFront removes the authentication service, stores, users’ application subscriptions,
Citrix Receiver for Web sites, Desktop Appliance sites, and XenApp Services URLs. This means that if
you decide to uninstall StoreFront, you must manually recreate your services, stores, and sites when
you reinstall StoreFront. Upgrading also enables you to preserve your StoreFront configuration and
leaves users’ application subscription data intact so that users do not need to resubscribe to all of
their applications.
Upgrading the operating system version on a server running StoreFront is not supported. Citrix rec‑
ommends that you install StoreFront on a new installation of the operating system.
© 1999–2021 Citrix Systems, Inc. All rights reserved. 56

StoreFront 3.12
Important
Before you start the upgrade:
• Close all other applications on the StoreFront server.
• Close all command line and PowerShell windows.
• If you have made modifications to files in C:\inetpub\wwwroot\Citrix\<StoreName
>\App_Data, such as default.ica and usernamepassword.tfrm, back them up for each
store. Aer the upgrade you can restore them to reinstate your modifications.
**To upgrade existing StoreFront 2.0 through 3.x to this version of StoreFront **
1. Disable access to the deployment through the load balancing environment. Disabling the load
balancing URL prevents users from connecting to the deployment during the upgrade process.
2. Back up all the servers in the server group.
3. Remove one of the servers from the existing server group.
4. Restart the server you removed.
Note that you can use a parallel load balancer to check the new server group as you build it. The
variant that maximizes availability and further minimizes risk involves removing and upgrading
only one server from the original server group. You can then build the new group out of new
machines rather than machines taken out of the original server group.
5. Upgrade the server you removed using an admin account with no other installations running
and a minimum of other applications.
6. Check that the server you removed has upgraded successfully.
7. Remove another one of the servers in the existing server group from the load balancer.
8. Restart the server you removed for the same reasons noted in Step 1.
9. Uninstall the currently installed version of StoreFront and install the new version of StoreFront.
10. Join the newly installed server into a new server group consisting of all the upgraded servers
and the freshly installed servers, and check they are functioning correctly.
11. Repeat Steps 3‑10 until the new server group has suicient capacity to take over from the old
server group, point the load balancer at the new server group, and check that it is functioning
correctly.
12. Repeat Steps 3‑10 for the remaining servers, adding each one to the load balancer aer each
successful upgrade.
Note
• If you want to maximize availability, you can maintain access to the original server group
during the upgrade process until the new server group becomes available. To do this;
1. Skip Step 1.
2. Modify Step 11 to include disabling access to the original server group using the load
balancer. Export subscription data from the original server group and import it into
© 1999–2021 Citrix Systems, Inc. All rights reserved. 57

StoreFront 3.12
the new server group. Enable access to the new server group using the load balancer.
This ensures that any subscription changes made by users aer Step 3 and before Step 11 are
available in the new server group.
• You can further maximize availability by removing only one server from the original server
group and upgrading it, and then building the new server group using new servers rather
than servers removed from the original server group. When the new server group is in pro‑
duction, you can retire the old servers.
• Upgrades from StoreFront 2.x to 3.x followed by a propagation to the server group might
result in an entry for the pnaAuthenticationStartupModule being added to the authentica‑
tion configuration file. Because entries can be added only to authentication services that
have been enabled for PNA authentication services and PNA password change, the authen‑
tication service cannot start, as it’s missing the named start‑up module. To work around
this issue, remove the entry from the authentication configuration file. By default, the con‑
figuration file resides at C:\inetpub\wwwroot\Citrix\<Your_Auth_Service>\web.config.
• Save backups of the web.config file in a dierent location from the default IIS directory of
the store. Do not save backups in, for example, C:\inetpub\wwwroot\citrix\<storename>.
Saving backups in the same location as the default IIS directory of the store can interfere
with the upgrade of StoreFront.
Configure StoreFront
Note:
During installation and upgrade, members of the local admin group are copied to an internal
CitrixStoreFrontAdministrators group. This gives users who already belonged to the local admin
group, when StoreFront was last installed or upgraded, the ability to use the StoreFront manage‑
ment console to configure StoreFront server groups and perform related propagation and repli‑
cation tasks. If you later add users to the local admin group, you must manually copy them to the
CitrixStoreFrontAdministrators group before they can use the StoreFront management console
to configure StoreFront server groups and perform related propagation and replication tasks. If
you add a currently logged in user to the CitrixStoreFrontAdministrators group, they need to log
out and log in again to use the StoreFront management console.
When the Citrix StoreFront management console first starts, two options are available.
• Create a new deployment. Configure the first server in a new StoreFront deployment. Single‑
server deployments are ideal for evaluating StoreFront or for small production deployments.
Once you have configured your first StoreFront server, you can add more servers to the group
at any time to increase the capacity of your deployment.
• Join existing server group. Add another server to an existing StoreFront deployment. Select this
option to rapidly increase the capacity of your StoreFront deployment. External load balancing
© 1999–2021 Citrix Systems, Inc. All rights reserved. 58

StoreFront 3.12
is required for multiple server deployments. To add a new server, you will need access to an
existing server in the deployment.
Uninstall StoreFront
In addition to the product itself, uninstalling StoreFront removes the authentication service, stores,
Citrix Receiver for Web sites, Desktop Appliance sites, and XenApp Services URLs, and their associated
configurations. The subscription store service containing users’ application subscription data is also
deleted. In single‑server deployments, this means that details of users’ application subscriptions are
lost. However, in multiple server deployments these data are retained on other servers in the group.
Prerequisites enabled by the StoreFront installer, such as the .NET Framework features and the Web
Server (IIS) role services, are not removed from the server when StoreFront is uninstalled.
1. Log on to the StoreFront server using an account with local administrator permissions.
2. On the Windows Start screen or Apps screen, locate the Citrix StoreFront tile. Right‑click the
tile and click Uninstall.
3. In the Programs and Features dialog box, select Citrix StoreFront and click Uninstall to re‑
move all StoreFront components from the server.
4. In the Uninstall Citrix StoreFront dialog box, click Yes. When the uninstallation is complete,
click OK.
Create a new deployment
May 4, 2021
1. If the Citrix StoreFront management console is not already open aer installation of StoreFront,
on the Windows Start screen or Apps screen, locate and click the Citrix StoreFront tile.
2. In the results pane of the Citrix StoreFront management console, click Create a new deploy‑
ment.
3. Specify the URL of the StoreFront server or the load balancing environment for a multiple server
deployment in the Base URL box.
If you have notyetsetup your load balancing environment, enter the server URL. Youcanmodify
the base URL for your deployment at any time.
You can change from HTTP to HTTPS at any time using the Change Base URL task in the Store‑
Front management console, provided that Microso Internet Information Services (IIS) is con‑
figured for HTTPS.
4. Click Next to set up the authentication service, which authenticates users to Microso Active
Directory.
© 1999–2021 Citrix Systems, Inc. All rights reserved. 59

StoreFront 3.12
To use HTTPS to secure communications between StoreFront and users’ devices, you must con‑
figure Microso Internet Information Services (IIS) for HTTPS. In the absence of the appropriate
IIS configuration, StoreFront uses HTTP for communications.
By default, Citrix Receiver requires HTTPS connections to stores. If StoreFront is not configured
for HTTPS, users must carry out additional configuration steps to use HTTP connections. HTTPS
is required for smart card authentication. You can change from HTTP to HTTPS at any time
aer configuring StoreFront, provided the appropriate IIS configuration is in place. For more
information, see Configure server groups.
You can change from HTTP to HTTPS at any time using the Change Base URL task in the Store‑
Front management console, provided that Microso Internet Information Services (IIS) is con‑
figured for HTTPS.
5. On the Store Name page, specify a name for your store, whether you want to allow only unau‑
thenticated (anonymous) users access to the store, and click Next.
StoreFront stores aggregate desktops and applications, making them available to users. Store
names appear in Citrix Receiver under users’ accounts, so choose a name that gives users infor‑
mation about the content of the store.
6. On the Controllers page, list the infrastructure providing the resources that you want to make
available in the store. To add desktops and applications to the store, follow the appropriate pro‑
cedure below. You can configure stores to provide resources from any mixture of XenDesktop,
XenApp and XenMobile (App Controller) deployments. Repeat the procedures, as necessary, to
add all the deployments providing resources for the store.
• Add XenDesktop and XenApp resources to the store
• Add App Controller applications to the store
7. When you have added all the required resources to the store, on the Controllers page, click Next.
8. On the Remote Access page, specify whether and how users connecting from public networks
can access the internal resources.
• To make the store available to users on public networks, check the Enable remote access
box. If you leave this box unchecked, only local users on the internal network are able to
access the store.
• To make only resources delivered through the store available through NetScaler Gateway,
select Allow users to access only resources delivered through StoreFront (No VPN tun‑
nel).
• To make the store and all other resources on the internal network available through a
Secure Sockets Layer (SSL) virtual private network (VPN) tunnel, select Allows users to
access all resources on internal network (Full VPN tunnel). Users might require the
NetScaler Gateway Plug‑in to establish the VPN tunnel.
© 1999–2021 Citrix Systems, Inc. All rights reserved. 60

StoreFront 3.12
If you configure remote access to the store through NetScaler Gateway, the pass‑through from
NetScaler Gateway authentication method is automatically enabled. Users authenticate to
NetScaler Gateway and are automatically logged on when they access their stores.
9. If you enabled remote access, list the NetScaler Gateway deployments through which users can
access the store. To add a NetScaler Gateway deployment, follow the appropriate procedure
below. Repeat the procedures, as necessary, to add further deployments.
• Provide remote access to the store through a NetScaler Gateway appliance
• Provide remote access to the store through an Access Gateway 5.0 cluster
10. When you have added all your NetScaler Gateway deployments, select from the NetScaler Gate‑
way appliances list the deployments through which users can access the store. If you enable
access through multiple deployments, specify the default deployment to be used to access the
store. Click Next.
11. On the Authentication Methods page, select the methods your users will use to authenticate
to the store and click Next. You can select from the following methods:
• Username and password: Users enter their credentials and are authenticated when they ac‑
cess their stores.
• SAML Authentication: Users authenticate to an Identity Provider and are automatically logged
on when they access their stores.
• Domain passthrough†: Users authenticate to their domain‑joined Windows computers and
their credentials are used to log them on automatically when they access their stores.
• Smart card†: Users authenticate using smart cards and PINs when they access their stores.
• HTTP basic: Users authenticate with the StoreFront server’s IIS web server.
• Passthrough through NetScaler Gateway: Users authenticate to NetScaler Gateway and are
automatically logged on when they access their stores. This is automatically checked when the
remote access is enabled.
Note:
† Store authentication methods which do not propagate to the store’s Citrix Receiver for
Web sites. Configure these authentication methods independently for each Citrix Receiver
for Web site using the Manage Receiver for Web Sites task described in Configure Citrix
Receiver for Web sites.
The other store authentication methods described here do propagate to the store’s Citrix
Receiver for Web sites. (That is, a selection or deselection made here for the store dictates
the setting used by all its Receiver for Web sites.)
12. On the XenApp Services URL page, configure the XenApp Service URL for users who use PNAgent
to access the applications and desktops.
© 1999–2021 Citrix Systems, Inc. All rights reserved. 61

StoreFront 3.12
13. Aer creating the store, further options become available in the Citrix StoreFront management
console. For more information, see the various management articles.
Your store is now available for users to access with Citrix Receiver, which must be configured with
access details for the store. There are a number of ways in which you can provide these detailsto users
to make the configuration process easier for them. For more information, see User access options.
Alternatively, users can access the store through the Citrix Receiver for Web site, which enables users
to access their desktops and applications through a webpage. The URL for users to access the Citrix
Receiver for Web site for the new store is displayed when you create the store.
When you create a new store, the XenApp Services URL is enabled by default. Users of domain‑joined
desktop appliances and repurposed PCs running the Citrix Desktop Lock, along with users who have
older Citrix clients that cannot be upgraded, can access stores directly using the XenApp Services URL
forthe store. The XenApp ServicesURLhasthe form http[s]://serveraddress/Citrix/storename/PNAgent/config.xml,
where serveraddress is the fully qualified domain name of the server or load balancing environment
for your StoreFront deployment and storename is the name you specified for the store in Step 5.
You can quickly add more servers to your deployment by selecting the option to join an existing server
group when installing further instances of StoreFront.
Add XenDesktop and XenApp resources to the store
Complete the following steps to make desktopsand applicationsprovidedby XenApp and XenDesktop
available in the store that you create as part of the initial configuration of your StoreFront server. It
is assumed that you have completed Steps 1 to 6 in the “Create a new deployment” procedure at the
top of this article.
1. On the Controllers page of the StoreFront console Create Store UI, click Add.
2. In the Add Controllers dialog box, specify a name that will help you to identify the deployment
and indicate whether the resources that you want to make available in the store are provided
by XenDesktop, XenApp, or XenMobile.
3. Add the names or IP addresses of your servers to the Servers list. Specify multiple servers to
enable fault tolerance, listing the entries in order of priority to set the failover sequence. For
XenDesktop sites, give details of Controllers. In the case of XenApp farms, list servers running
the Citrix XML Service.
4. Select from the Transport type list the type of connections for StoreFront to use for communi‑
cations with the servers.
• To send data over unencrypted connections, select HTTP. If you select this option, you
must make your own arrangements to secure connections between StoreFront and your
servers.
© 1999–2021 Citrix Systems, Inc. All rights reserved. 62

StoreFront 3.12
• To send data over secure HTTP connections using Secure Sockets Layer (SSL) or Transport
Layer Security (TLS), select HTTPS. If you select this option for XenDesktop and XenApp
servers, ensure that the Citrix XML Service is set to share its port with Microso Internet
Information Services (IIS) and that IIS is configured to support HTTPS.
• To send data over secure connections to XenApp servers using the SSL Relay to perform
host authentication and data encryption, select SSL Relay.
Note: If you are using HTTPS or the SSL Relay to secure connections between StoreFront
and your servers, ensure that the names you specify in the
Servers list match exactly (including the case) the names on the certificates for those
servers.
5. Specify the port for StoreFront to use for connections to the servers. The default port is 80 for
connections using HTTP and the SSL Relay, and 443 for HTTPS connections. In the case of Xen‑
Desktop and XenApp servers, the specified port must be the port used by the Citrix XML Service.
In a Citrix Virtual Apps and Desktops on‑premises environment, Shared secret lets you allow
only approved StoreFront machines to communicate with Delivery Controllers by specifying a
key. For information about key generation, see Manage security keys.
In a Citrix Virtual Apps and Desktops service environment, Shared secret lets you allow only
approved StoreFront machines to communicate with Citrix Cloud by specifying a key. For infor‑
mation about key generation, see Manage security keys.
6. If you are using the SSL Relay to secure connections between StoreFront and XenApp servers,
specify the TCP port of the SSL Relay in the SSL Relay port box. The default port is 443. Ensure
that all the servers running the SSL Relay are configured to monitor the same port.
You can configure stores to provide resources from any mixture of XenDesktop, XenApp, and XenMo‑
bile deployments. To add further XenDesktop sites or XenApp farms, repeat the procedure above. To
make applications managed by App Controller available in the store, follow the steps in Add App Con‑
troller applications to the store. When you have added all the required resources to the store, return
to Step 7 in the “Create a new deployment” procedure at the top of this article.
Add App Controller applications to the store
Complete the following steps to make applications managed by App Controller available in the store
that you create as part of the initial configuration of your StoreFront server. It is assumed that you
have completed Steps 1 to 6 in the “Create a new deployment” procedure at the top of this article.
1. On the Delivery Controllers page of the Create Store wizard, click Add.
2. In the Add Delivery Controller dialog box, specify a name that will help you to identify the App
Controller virtual appliance managing the applications that you want to make available in the
store. Ensure that the name does not contain any spaces. Select AppController.
© 1999–2021 Citrix Systems, Inc. All rights reserved. 63

StoreFront 3.12
3. Enter the name or IP address of the App Controller virtual appliance in the Server box and spec‑
ify the port for StoreFront to use for connections to App Controller. The default port is 443.
You can configure stores to provide resources from any mixture of XenDesktop, XenApp, and App Con‑
troller deployments. To add applications managed by other App Controller virtual appliances, repeat
the procedure above. To make desktops and applications provided by XenDesktop and XenApp avail‑
able in the store, follow the steps in Add XenDesktop and XenApp resources to the store. When you
have added all the required resources to the store, return to Step 7 in the “Create a new deployment”
procedure at the top of this article.
Limitation: Apps published in AppController might not start. To work around this issue, use the
StoreFront PowerShell commands to manually create a store with an authentication service located
at http://sfserver/Citrix/Authentication.
Provide remote access to the store through a NetScaler Gateway appliance
Complete the following steps to configure remote access through a NetScaler Gateway appliance to
the store that you create as part of the initial configuration of your StoreFront server. It is assumed
that you have completed Steps 1 to 9 in the “Create a new deployment” procedure at the top of this
article.
1. On the Remote Access page of the StoreFront console Create Store UI, click Add.
2. In the Add NetScaler Gateway Appliance dialog box, specify a name for the appliance that will
help users to identify it.
Users see the display name you specify in Citrix Receiver, so include relevant information in the
name to help users decide whether to use that appliance. For example, you can include the
geographical location in the display names for your NetScaler Gateway deployments so that
users can easily identify the most convenient deployment for their location.
3. Enter the URL of the virtual server or user logon point (for Access Gateway 5.0) for your appli‑
ance. Specify the product version used in your deployment.
For information about creating a single Fully Qualified Domain Name (FQDN) to access a store
internally and externally, see Create a single Fully Qualified Domain Name (FQDN) to access a
store internally and externally.
4. If you are adding an Access Gateway 5.0 appliance, select from the Deployment mode list Ap‑
pliance. Otherwise, specify the subnet IP address of the NetScaler Gateway appliance, if neces‑
sary. A subnet IP address is required for Access Gateway 9.3 appliances, but optional for more
recent product versions.
The subnet address is the IP address that NetScaler Gateway uses to represent the user device
when communicating with servers on the internal network. This can also be the mapped IP
© 1999–2021 Citrix Systems, Inc. All rights reserved. 64

StoreFront 3.12
address of the NetScaler Gateway appliance. Where specified, StoreFront uses the subnet IP
address to verify that incoming requests originate from a trusted device.
5. If you are adding an appliance running NetScaler Gateway 10.1, Access Gateway 10, or Access
Gateway 9.3, select from the Logon type list the authentication method you configured on the
appliance for Citrix Receiver users.
The information you provide about the configuration of your NetScaler Gateway appliance is
added to the provisioning file for the store. This enables Citrix Receiver to send the appropriate
connection request when contacting the appliance for the first time.
• If users are required to enter their Microso Active Directory domain credentials, select
Domain.
• If users are required to enter a tokencode obtained from a security token, select Security
token.
• If users are requiredto enter both their domain credentials and a tokencode obtained from
a security token, select Domain and security token.
• If users are required to enter a one‑time password sent by text message, select SMS au‑
thentication.
• If users are required to present a smart card and enter a PIN, select Smart card.
If you configure smart card authentication with a secondary authentication method to which
users can fall back if they experience any issues with their smart cards, select the secondary
authentication method from the Smart card fallback list.
6. Complete the NetScaler Gateway authentication service URL in the Callback URL box. Store‑
Front automatically appends the standard portion of the URL. Click Next.
Enter the internally accessible URL of the appliance. StoreFront contacts the NetScaler Gateway
authentication service to verify that requests received from NetScaler Gateway originate from
that appliance.
7. If you are making resources provided by XenDesktop or XenApp available in the store, list on the
Secure Ticket Authority (STA) page URLs for servers running the STA. Add URLs for multiple STAs
to enable fault tolerance, listing the servers in order of priority to set the failover sequence.
The STA is hosted on XenDesktop and XenApp servers and issues session tickets in response to
connection requests. These session tickets form the basis of authentication and authorization
for access to XenDesktop and XenApp resources.
In a Citrix Virtual Apps and Desktops on‑premises environment, Shared secret lets you allow
only approvedStoreFront machines to communicate with Secure Ticket Authority (STA) by spec‑
ifying a key. For information about key generation, see Manage security keys.
In a Citrix Virtual Apps and Desktops service environment, Shared secret lets you allow only
approved StoreFront machines to communicate with Citrix Cloud by specifying a key. For infor‑
© 1999–2021 Citrix Systems, Inc. All rights reserved. 65

StoreFront 3.12
mation about key generation, see Manage security keys.
8. If you want XenDesktop and XenApp to keep disconnected sessions open while Citrix Receiver
attempts to reconnect automatically, select the Enable session reliability check box. If you con‑
figured multiple STAs and want to ensure that session reliability is always available, select the
Request tickets from two STAs, where available check box.
When the Request tickets from two STAs, where available check box is selected, StoreFront ob‑
tains session tickets from two dierent STAs so that user sessions are not interrupted if one STA
becomes unavailable during the course of the session. If, for any reason, StoreFront is unable
to contact two STAs, it falls back to using a single STA.
9. Click Create to add your NetScaler Gateway deployment to the list on the Remote Access page.
To add further deployments, repeat the procedure above. To configure remote access to the store
through an Access Gateway 5.0 cluster, follow the steps in Provide remote access to the store through
an Access Gateway 5.0 cluster. When you have added all your NetScaler Gateway deployments, return
to Step 10 in the “Create a new deployment” procedure at the top of this article.
Provide remote access to the store through an Access Gateway 5.0 cluster
Complete the following steps to configure remote access through an Access Gateway 5.0 cluster to the
store that you create as part of the initial configuration of your StoreFront server. It is assumed that
you have completed Steps 1 to 9 in the “Create a new deployment” procedure at the top of this article.
1. On the Remote Access page of the StoreFront console Create Store UI, click Add.
2. In the Add NetScaler Gateway Appliance dialog box, specify a name for the cluster that will help
users to identify it.
Users see the display name you specify in Citrix Receiver, so include relevant information in
the name to help users decide whether to use that cluster. For example, you can include the
geographical location in the display names for your NetScaler Gateway deployments so that
users can easily identify the most convenient deployment for their location.
3. Enter the URL of the user logon point for your cluster and select from the Version list 5.x.
4. From the Deployment mode list, select Access Controller and click Next.
5. On the Appliances page, list the IP addresses or fully qualified domain names (FQDNs) of the
appliances in the cluster and click Next.
6. On the Enable Silent Authentication page, list URLs for the authentication service running on
the Access Controller servers. Add URLs for multiple servers to enable fault tolerance, listing
the servers in order of priority to set the failover sequence. Click Next.
StoreFront uses the authentication service to authenticate remote users so that they do not
need to re‑enter their credentials when accessing stores.
© 1999–2021 Citrix Systems, Inc. All rights reserved. 66

StoreFront 3.12
7. If you are making resources provided by XenDesktop and XenApp available in the store, list on
the Secure Ticket Authority (STA) page URLs for servers running the STA. Add URLs for multiple
STAs to enable fault tolerance, listing the servers in order of priority to set the failover sequence.
The STA is hosted on XenDesktop and XenApp servers and issues session tickets in response to
connection requests. These session tickets form the basis of authentication and authorization
for access to XenDesktop and XenApp resources.
In a Citrix Virtual Apps and Desktops on‑premises environment, Shared secret lets you allow
only approvedStoreFront machines to communicate with Secure Ticket Authority (STA) by spec‑
ifying a key. For information about key generation, see Manage security keys.
In a Citrix Virtual Apps and Desktops service environment, Shared secret lets you allow only
approved StoreFront machines to communicate with Citrix Cloud by specifying a key. For infor‑
mation about key generation, see Manage security keys.
8. If you want XenDesktop and XenApp to keep disconnected sessions open while Citrix Receiver
attempts to reconnect automatically, select the Enable session reliability check box. If you con‑
figured multiple STAs and want to ensure that session reliability is always available, select the
Request tickets from two STAs, where available check box.
When the Request tickets from two STAs, where available check box is selected, StoreFront ob‑
tains session tickets from two dierent STAs so that user sessions are not interrupted if one STA
becomes unavailable during the course of the session. If, for any reason, StoreFront is unable
to contact two STAs, it falls back to using a single STA.
9. Click Create to add your NetScaler Gateway deployment to the list on the Remote Access page.
To add further clusters, repeat the procedure above. To configure remote access to the store through
NetScaler Gateway 10.1, Access Gateway 10, Access Gateway 9.3, or a single Access Gateway 5.0 appli‑
ance, follow the steps in Provide remote access to the store through a NetScaler Gateway appliance.
When you have added all your NetScaler Gateway deployments, return to Step 10 in the “Create a new
deployment” procedure at the top of this article.
Join an existing server group
October 15, 2018
Before installing StoreFront, ensure that the server you are adding to the group is running the same
operating system version with the same locale settings as the other servers in the group. StoreFront
server groups containing mixtures of operating system versions and locales are not supported. While
a server group can contain a maximum of five servers, from a capacity perspective based on simula‑
tions, there is no advantage of server groups containing more than three servers. In addition, ensure
© 1999–2021 Citrix Systems, Inc. All rights reserved. 67

StoreFront 3.12
that the relative path to StoreFront in IIS on the server you are adding is the same as on the other
servers in the group.
Important
When you add a new server to a server group, StoreFront service accounts are added as members
of the local administrators group on the new server. These services require local administrator
permissions to join and synchronize with the server group. If you use Group Policy to prevent
addition of new members to the local administrator group or if you restrict the permissions of
the local administrator group on your servers, StoreFront cannot join a server group.
1. If the Citrix StoreFront management console is not already open aer installation of StoreFront,
on the Windows Start screen or Apps screen, locate and click the Citrix StoreFront tile.
2. In the results pane of the Citrix StoreFront management console, click Join existing server
group.
3. Log on to a server in the StoreFront deployment that you wish to join and open the Citrix Store‑
Front management console. Select the Server Group node in the le pane of the console and,
in the Actions pane, click Add Server. Make a note of the authorization code that is displayed.
4. Return to the new server and, in the Join Server Group dialog box, specify the name of the exist‑
ing server in the Authorizing server box. Enter the authorization code obtained from that server
and click Join.
Once joined to the group, the configuration of the new server is updated to match the configu‑
ration of the existing server. All the other servers in the group are updated with details of the
new server.
To manage a multiple server deployment, use only one server at a time to make changes to the config‑
uration of the server group. Ensure that the Citrix StoreFront management console is not running on
any of the other servers in the deployment. Any configuration changes you make must be propagated
to the other servers in the group to ensure a consistent configuration across the deployment.
Remove a server from an existing server group
If a StoreFront server was a member of a server group and has been removed, you must run the Clear‑
DSConfiguration PowerShell cmdlet to reset the StoreFront server to a factory default state. Aer you
run the Clear‑DSConfiguration cmdlet on the disconnected server, you can add the server back to an
existing server group or to a dierent newly created server group.
1. Open the StoreFront administration console on the primary StoreFront server that you use to
manage your entire server group.
2. Select the server group node on the le pane and choose another server to remove.
3. Remove the selected server from the server group.
© 1999–2021 Citrix Systems, Inc. All rights reserved. 68

StoreFront 3.12
4. In the Actions pane, propagate changes from the server you used to disconnect one of your
servergroup members. Any other remaining server group members are now awarethat a server
has been removed from the group. Until you reset the disconnected server to a factory default
state, it is not aware that it is no longer a member of the group.
5. Close the administration console on the disconnected server.
6. Open a PowerShell session on your disconnected server aer it has been removed from the
groupand import the StoreFrontPowerShell modules using: & “$Env:PROGRAMFILES\Citrix\Receiver
StoreFront\Scripts\ImportModules.ps1”
7. Run the Clear‑DSConfiguration command, which resets the server to default settings.
8. Open the StoreFront administration console and the disconnected server is reset and ready to
be added to another server group.
Migrate Web Interface features to StoreFront
January 4, 2019
Many of the Web Interface customizations have equivalents in StoreFront by using JavaScript tweaks,
Citrix published APIs, or the StoreFront management console.
The table contains an overview of the customizations and basic information about how to achieve
them.
Folder locations
• For script customizations, append the examples to the script.js file found in
C:\inetpub\wwwroot\Citrix\StoreNameWeb\custom
• For style customization, append the example to the style.css file found in
C:\inetpub\wwwroot\Citrix\StoreNameWeb\custom
• For dynamic content, add the dynamic context to a text file in
C:\inetpub\wwwroot\Citrix\StoreNameWeb\customweb
• If you have a multiserver deployment, you can replicate any changes to other servers from the
StoreFront administration console or by using PowerShell.
Note: Web Interface enabled individual users to customize various settings. Currently, StoreFront
does not have this ability, and while it is possible to add more extensive customization to support it,
that is not the focus of this article.
© 1999–2021 Citrix Systems, Inc. All rights reserved. 69

StoreFront 3.12
Web Interface Feature StoreFront Equivalent
Customization with the Management
Console
• Layout‑low graphics
• Layout‑full graphics
• Allow users to choose
Not applicable. StoreFront auto detects and
adjusts the UI to device screen.
• Enable search
• Disable search
• Search is enabled by default.
• Disable. To hide the search boxes on the
desktop/web UI, add the following style
to style.css:
.search‑container {
display: none;
}
To hide the search boxes on the phone UI, add:
#searchBtnPhone {
display: none;
}
Enable refresh Enabled by default (browser refresh).
© 1999–2021 Citrix Systems, Inc. All rights reserved. 70

StoreFront 3.12
Enable return to last folder Not enabled by default.
Enable Return to last folder ‑ To remember the
current folder, and return to it on load, add the
following to script.js
CTXS.Extensions.aerDisplayHomeScreen =
function ()
{
// check if view was saved last time
CTXS.ExtensionAPI.localStorageGetItem(”view”,
function (view) {
if (view) {
// if view was saved, change to it
CTXS.ExtensionAPI.changeView(view);
}
if (view == ”store”) {
// if view is store, see if folder was saved
CTXS.ExtensionAPI.localStorageGetItem(”folder”,
function(folder) {
if (folder != ””) {
// if folder was saved, change to it
CTXS.ExtensionAPI.navigateToFolder(folder);
}
}
);
}
// set up monitoring of folder
CTXS.Extensions.onFolderChange =
function(folder) {
CTXS.ExtensionAPI.localStorageSetItem(”folder”,
folder);
};
// set up monitoring of view
CTXS.Extensions.onViewChange =
function(newview) {
// don’t retain search or appinfo views
// instead, remember parent view.
if ((newview != ”appinfo”) &&
(newview != ”search”)) {
CTXS.ExtensionAPI.localStorageSetItem(
”view”, newview);
}
};
});
};
© 1999–2021 Citrix Systems, Inc. All rights reserved. 71

StoreFront 3.12
Enable hints Citrix Receiver makes very limited use of tool
tips, as it is targeting touch and non‑touch
devices. You can add tool tips by custom script.
• Icon view
• Tree view
• Details view
• List view
• Group view
• Set Default view
• (Low graphics) Icon view
• (Low graphics) List view
(Low graphics) Default view
Citrix Receiver has a dierent UI so these
choices do not apply. You can use use the
StoreFront management console to configure
views. For more information see, Specify
dierent views for applications and desktops.
• Single tab UI
• Tabbed UI
– App tab
– Desktop tab
– Content tab
– (Tab order)
The Citrix Receiver UI is tabbed by default, with
apps and content in one tab and desktops in
the other. There is also an optional Favorite
tab.
• Header logo
• Text color
• Header background color
• Header background image
Equivalents for colors and logos using the
StoreFront administration console. Click
Customize Website Appearance in the
StoreFront administration console’s Actions
pane and make your customizations on the
screen that displays.
You can set the header to a background image
using a style customization. For example
.theme‑header‑bgcolor {
background‑image: url(’spirals.png’);
}
© 1999–2021 Citrix Systems, Inc. All rights reserved. 72

StoreFront 3.12
• Pre‑logon welcome message
(Pre‑locale)
– Title
– Text
– Hyperlink
– Button label
By default, there is no separate pre‑logon
screen.
This example script adds a click‑through
message box:
var doneClickThrough = false;
// Before web login
CTXS.Extensions.beforeLogon = function
(callback) {
doneClickThrough = true;
CTXS.ExtensionAPI.showMessage({
messageTitle: ”Welcome!”,
messageText: ”Only for <a
href=”http://www.WWc.com”
target=”_blank”>WWCo Employees”,
okButtonText: ”Accept”,
okAction: callback
});
};
// Before main screen (for native clients)
CTXS.Extensions.beforeDisplayHomeScreen
= function (callback) {
if (!doneClickThrough) {
CTXS.ExtensionAPI.showMessage({
messageTitle: ”Welcome!”,
messageText: ”Only for WWCo Employees”,
okButtonText: ”Accept”,
okAction: callback
});
} else {
callback();
}
};
© 1999–2021 Citrix Systems, Inc. All rights reserved. 73

StoreFront 3.12
• Logon screen title
• Logon screen message
• Logon screen system message
There are four areas for customization on the
logon screen(s). Top and bottom of screen
(header and footer) and top and bottom of the
logon box itself.
.customAuthHeader,
.customAuthFooter
.customAuthTop,
.customAuthBottom {
text‑align: center;
color: white;
font‑size: 16px;
}
Example script (static content)
$(’.customAuthHeader’).html(”Welcome to
ACME”);
Example script (dynamic content)
function setDynamicContent(txtFile,
element) {
CTXS.ExtensionAPI.proxyRequest({
url: ”customweb/”+txtFile,
success: function(txt)
{$(element).html(txt);}});
}
setDynamicContent(”Message.txt”,
”.customAuthTop”);
Note: Do not explicitly include dynamic
content in the script, or put it in the custom
directory, as changes made here force all
clients to reload the UI. Put dynamic content in
the customweb directory.
• Application screen welcome message
• Application screen system message
See the examples for CustomAuth welcome
screen above.
See examples for dynamic content above. Use
‘#customTop’ rather than ‘.customAuthTop’
to place content on the home screen.
© 1999–2021 Citrix Systems, Inc. All rights reserved. 74

StoreFront 3.12
Footer text (all screens) Example script:
#customBottom {
text‑align: center;
color: white;
font‑size: 16px;
}
Example static content using a script:
$(’#customBottom’).html(”Welcome to
ACME”);
Features with no direct equivalent
• Logon screen without headers
• Logon screen with headers
(including messages)
There is no direct equivalent in StoreFront.
However, you can create custom headers. See
“Logon Screen Title” above.
User settings By default, there are no user settings. You can
add menus and buttons from JavaScript.
Workspace control Equivalent functionality for administrator
settings. The extension APIs allow significant
additional flexibility.
See http://www.citrix.com/go/citrix‑
developer/storefront‑receiver‑developer‑
community/receiver‑customization‑api.html.
Deep Customizations (code)
ICA File generation hooks and other
call‑routing customizations.
Equivalent or better APIs.
http://www.citrix.com/go/citrix‑
developer/storefront‑receiver‑developer‑
community/store‑customization‑sdk.html
Authentication customizations Equivalent or better APIs.
http://www.citrix.com/go/citrix‑
developer/storefront‑receiver‑developer‑
community/store‑authentication‑sdks.html
JSP/ASP source access There are no equivalent APIs on StoreFront, as
the UI is not rendered in the same way. There
are many JavaScript APIs to enable
customization of the UI.
© 1999–2021 Citrix Systems, Inc. All rights reserved. 75

StoreFront 3.12
Configure server groups
September 10, 2019
The tasks below enable you to modify settings for multiple‑server StoreFront deployments. To man‑
age a multiple‑server deployment, use only one server at a time to make changes to the configuration
of the server group. Ensure that the Citrix StoreFront management console is not running on any of
the other servers in the deployment. Any configuration changes you make must be propagated to the
other servers in the group to ensure a consistent configuration across the deployment.
You must configure servers comprising a StoreFront server group identically in terms of both Store‑
Front installation location and IIS website settings, such as physical path and site IDs.
Add a server to a server group
Use the Add Server task to obtain an authorization code to enable you to join a newly installed Store‑
Front server to your existing deployment. For more information about adding new servers to existing
StoreFront deployments, see Join an existing server group. See the Scalability section of Plan your
Storefront deployment to assess how many servers you need in your group.
Remove servers from a server group
Use the Remove Server task to delete servers from a multiple‑server StoreFront deployment. You
can remove any server in the group apart from the server on which you are running the task. Before
removinga server from a multiple‑server deployment, first remove the server from the load‑balancing
environment.
Propagate local changes to a server group
Use the Propagate Changes task to update the configuration of all the other servers in a multiple‑
server StoreFront deployment to match the configuration of the current server. Propagation of con‑
figuration information is initiated manually so that you retain control over when and if the servers
in the group are updated with configuration changes. While running this task, you cannot make any
further changes until all the servers in the group have been updated.
Important:
Any changes made on other servers in the group are discarded during propagation. If you update
the configuration of a server, propagate the changes to the other servers in the group to avoid
losing those changes if you later propagate changes from dierent server in the deployment.
The information propagated between servers in the group includes the following:
© 1999–2021 Citrix Systems, Inc. All rights reserved. 76

StoreFront 3.12
• Contents of all web.config files, which contain the StoreFront configuration.
• Contents of C:\Program Files\Citrix\Receiver StoreFront\Receiver Clients,
such as C:\Program Files\Citrix\Receiver StoreFront\Receiver Clients\
Windows\CitrixWorkspaceAppWeb.exe and C:\Program Files\Citrix\Receiver
StoreFront\Receiver Clients\MAC\CitrixWorkspaceAppWeb.dmg.
• Contents of C:\inetpub\wwwroot\Citrix\StoreWeb\Custom\contrib.
• Contents of C:\inetpub\wwwroot\Citrix\StoreWeb\Custom\custom folder, such as
copied images and customisation.js files.
• Contents of the Citrix Delivery Services certificate store.
Note:
Subscription data is synchronized with the other servers independently of the Propagate
Changes mechanism. It happens automatically without the Propagate Changes task being
initiated.
Change the base URL for a deployment
Use the Change Base URL task to modify the URL that is used as the root of the URLs for the stores
and other StoreFront services hosted on a deployment. For multiple‑server deployments, specify the
load‑balanced URL. You can use this task to change from HTTP to HTTPS at any time, provided that
Microso Internet Information Services (IIS) is configured for HTTPS.
To configure IIS for HTTPS, use the Internet Information Services (IIS) Manager console on the Store‑
Front server to create a server certificate signed by your Microso Active Directory domain certifica‑
tion authority. Then add HTTPS binding to the default website. For more information about creating
a server certificate in IIS, see https://docs.microsoft.com/en‑us/previous‑versions/windows/it‑pro/
windows‑server‑2012‑R2‑and‑2012/hh831637(v=ws.11). For more information about adding HTTPS
binding to an IIS site, see https://docs.microsoft.com/en‑us/previous‑versions/orphan‑topics/ws.11/
hh831632(v=ws.11).
Configure server bypass behavior
To improve performance when some of the servers providing resources become unavailable, Store‑
Front temporarily bypasses servers that fail to respond. While a server is being bypassed, StoreFront
ignores that server and does not use it to access resources. Use these parameters to specify the dura‑
tion of the bypass behavior:
• All failed bypass duration specifies a reduced duration in minutes that StoreFront uses instead
of Bypass duration if all servers for a particular Delivery Controller are being bypassed. The
default is 0 minutes.
• Bypass duration specifies the time in minutes that StoreFront bypasses an individual server
aer a failed attempt to contact that server. The default bypass duration is 60 minutes.
© 1999–2021 Citrix Systems, Inc. All rights reserved. 77

StoreFront 3.12
Considerations when specifying All failed bypass duration
Setting a larger All failed bypass duration reduces the impact of unavailability of a particular De‑
livery Controller; however, it has the negative aect that resources from this Delivery Controller are
unavailable to users for the specified duration aer a temporary network outage or server unavail‑
ability. Consider the use of larger All failed bypass durationvalues when many Delivery Controllers
have been configured for a store, particularly for nonbusiness‑critical Delivery Controllers.
Setting a smaller All failed bypass duration increases the availability of resources served by that
Delivery Controller but increases the possibility of client‑side timeouts if many Delivery Controllers
are configured for a store and several of them become unavailable. It is worth keeping the default
0‑minute value when not many farms are configured and for business‑critical Delivery Controllers.
To change the bypass parameters for a store
Important: In multiple‑server deployments, use only one server at a time to make changes to the
configuration of the server group. Ensure that the Citrix StoreFront management console is not run‑
ning on any of the other servers in the deployment. Once complete, propagate your configuration
changes to the server group so the other servers in the deployment are updated.
1. On the Windows Start screen or Apps screen, locate and click the Citrix StoreFront tile.
2. Select the Stores node in the le pane of the Citrix StoreFront management console and click
Manage Delivery Controllers in the Actions pane.
3. Select a controller, click Edit, and then click Settings on the Edit Delivery Controller screen.
4. On the All failed bypass duration row, click in the second column and enter a time, in minutes,
for which a delivery controller is considered oline aer all its servers fail to respond.
5. On the Bypass duration row, click in the second column and enter a time, in minutes, for which
a single server is considered oline aer it fails to respond.
Configure authentication and delegation
October 15, 2018
Depending on your requirements, there are several authentication and delegations methods.
Configure the authentication service The authentication service authenticates users
to Microso Active Directory, ensuring that
users do not need to log on again to access
their desktops and applications.
© 1999–2021 Citrix Systems, Inc. All rights reserved. 78

StoreFront 3.12
XML service‑based authentication When StoreFront is not in the same domain as
XenApp or XenDesktop, and it is not possible to
put Active Directory trusts in place, you can
configure StoreFront to use the XenApp and
XenDesktop XML Service to authenticate the
user name and password credentials.
Kerberos constrained delegation for XenApp
6.5
Use the Configure Kerberos Delegation task to
specify whether StoreFront uses single‑domain
Kerberos constrained delegation to
authenticate to delivery controllers.
Smart card authentication Set up smart card authentication for all the
components in a typical StoreFront
deployment.
Password expiry notification period If you enable Citrix Receiver for Web site users
to change their passwords at any time, local
users whose passwords are about to expire are
shown a warning when they log on.
Configure the authentication service
October 25, 2018
Manage authentication methods
You can enable or disable user authentication methods set up when the authentication service was
created by selecting an authentication method in the results pane of the Citrix StoreFront manage‑
ment console and, in the Actions pane, clicking Manage Authentication Methods.
1. On the Windows Start screen or Apps screen, locate and click the Citrix StoreFront tile.
2. Select the Store node in the le pane of the Citrix StoreFront management console and, in the
Actions pane, click Manage Authentication Methods.
3. Specify the access methods that you want to enable for your users.
© 1999–2021 Citrix Systems, Inc. All rights reserved. 79

StoreFront 3.12
• Select the Username and password check box to enable explicit authentication. Users enter
their credentials when they access their stores.
• Select the SAML Authentication check box to enable integration with a SAML Identity Provider.
Users authenticate to an Identity Provider and are automatically logged when they access their
stores. From the Settings drop‑down menu:
– Select Identity Provider to configure the trust to the Identity Provider.
– Select Service Provider to configure the trust for the Service Provider. This information
is required by the Identity Provider.
• Select the Domain pass‑through check box to enable pass‑through of Active Directory domain
credentials from users’ devices. Users authenticate to their domain‑joined Windows computers
and are automatically logged on when they access their stores. In order to use this option, pass‑
through authentication must be enabled when Citrix Receiver for Windows is installed on users’
devices.
• Select the Smart card check box to enable smart card authentication. Users authenticate using
smart cards and PINs when they access their stores.
• Select the HTTP Basic check box to enable HTTP Basic authentication. Users authenticate with
the StoreFront server’s IIS web server.
• Select the Pass‑through from NetScaler Gateway check box to enable pass‑through authentica‑
tion from NetScaler Gateway. Users authenticate to NetScaler Gateway and are automatically
© 1999–2021 Citrix Systems, Inc. All rights reserved. 80

StoreFront 3.12
logged on when they access their stores.
To enable pass‑through authentication for smart card users accessing stores through NetScaler Gate‑
way, use the Configure Delegated Authentication task.
Configure trusted user domains
Use the Trusted Domains task to restrict access to stores for users logging on with explicit domain
credentials, either directly or using pass‑through authentication from NetScaler Gateway.
1. On the Windows Start screen or Apps screen, locate and click the Citrix StoreFront tile.
2. Select the Stores node in the le pane of the Citrix StoreFront management console and, in the
results pane, select the appropriate authentication method. In the Actions pane, click Manage
Authentication Methods.
3. From the User name and password (explicit) > Settings drop‑down menu, select Configure
Trusted Domains.
4. Select Trusted Domains only and click Add to enter the name of a trusted domain. Users with
accounts in that domain will be able to log on to all stores that use the authentication service.
To modify a domain name, select the entry in the Trusted domains list and click Edit. Select
a domain in the list and click Remove to discontinue access to stores for user accounts in that
domain.
The way in which you specify the domain name determines the formatin which users mustenter
their credentials. If you want users to enter their credentials in domain user name format, add
the NetBIOS name to the list. To require that users enter their credentials in user principal name
format, add the fully qualified domain name to the list. If you want to enable users to enter their
credentials in both domain user name format and user principal name format, you must add
both the NetBIOS name and the fully qualified domain name to the list.
5. If you configure multiple trusted domains, select from the Default domain list the domain that
is selected by default when users log on.
6. If you want to list the trusted domains on the logon page, select the Show domains list in logon
page check box.
Enable users to change their passwords
Use the Manage Password Options task to enable desktop Receivers and Receiver for Web site users
logging on with domain credentials to change their passwords. When you create the authentication
service, the default configuration prevents Citrix Receiver and Citrix Receiver for Web site users from
changing their passwords, even if the passwords have expired. If you decide to enable this feature,
ensure that the policies for the domains containing your servers do not prevent users from changing
© 1999–2021 Citrix Systems, Inc. All rights reserved. 81

StoreFront 3.12
their passwords. Enabling users to change their passwords exposes sensitive security functions to
anyone who can access any of the stores that use the authentication service. If your organization has
a security policy that reserves user password change functions for internal use only, ensure that none
of the stores are accessible from outside your corporate network.
1. Citrix Receiver for Web supports password changes on expiration, as well as elective password
changes. All desktop Citrix Receivers support password change through NetScaler Gateway on
expiration only. On the Windows Start screen or Apps screen, locate and click the Citrix Store‑
Front tile.
2. Select the Stores node in the le pane of the Citrix StoreFront management console and in the
Actions pane, click Manage Authentication Methods.
3. From the User name and passwords > Settings drop‑down menu select Manage Password
Options, specify the circumstances under which Citrix Receiver for Web site users logging on
with domain credentials are able to change their passwords.
• To enable users to change their passwords whenever they want, select At any time. Local
users whose passwords are about to expire are shown a warning when they log on. Pass‑
word expiry warnings are only displayed to users connecting from the internal network.
By default, the notification period for a user is determined by the applicable Windows pol‑
icy setting. For more information about setting custom notification periods, see Configure
the password expiry notification period. Supported only with Citrix Receiver for Web.
• To enable users to change their passwords only when the passwords have already expired,
select When expired. Users who cannot log on because their passwords have expired are
redirected to the Change Password dialog box. Supported for desktop Citrix Receivers and
Citrix Receiver for Web.
• To prevent users from changing their passwords, do not select Allow users to change
passwords. If you do not select this option, you must make your own arrangements to
support users who cannot access their desktops and applicationsbecausetheir passwords
have expired.
If you enable Citrix Receiver for Web site users to change their passwords at any time, ensure
that there is suicient disk space on your StoreFront servers to store profiles for all your users.
To check whether a user’s password is about to expire, StoreFront creates a local profile for that
user on the server. StoreFront must be able to contact the domain controller to change users’
passwords.
© 1999–2021 Citrix Systems, Inc. All rights reserved. 82

StoreFront 3.12
Citrix Receivers
User can change an
expired password if
enabled on
StoreFront
User is notified that
password will expire
User can change
password before it
expires if enabled on
StoreFront
Windows Yes
Mac Yes
Android
iOS
Linux Yes
Web Yes Yes Yes
Self‑Service Password Reset security questions
Self‑Service Password Reset enables end users to have greater control over their user accounts. Once
you configure Self‑Service Password Reset, if end users have problems logging on to their systems,
they can unlock their accounts or reset their passwords to something new by correctly answering
several security questions.
When setting up Self‑Service Password Reset, you specify which users are able to perform password
resets and unlock their accounts using the management console. If you enable these features for
the StoreFront, users might still be denied permission to perform these tasks based on the settings
configured in the Self‑Service Password Reset configuration console.
Self‑Service Password Reset is available only to users accessing StoreFront using HTTPS connections.
They cannot access StoreFront using an HTTP connection and have Self‑Service Password Reset avail‑
able. Self‑Service Password Reset is available only when authenticating directly to StoreFront with a
user name and password.
Before configuring Self‑Service Password Reset for a store, you must ensure that:
• The store is configured to use user name and password authentication.
• The store is configured to use only one Self‑Service Password Reset. If StoreFront is configured
to use multiple farms within the same or trusted domains, you must configure Self‑Service Pass‑
word Reset to accept credentials from all of those domains.
• The store is configured to allow users to change their password at any time if you want to enable
password reset functionality.
• You must associate a StoreFront store with a Receiver for Web site, and you must configure that
site to use the unified experience.
© 1999–2021 Citrix Systems, Inc. All rights reserved. 83
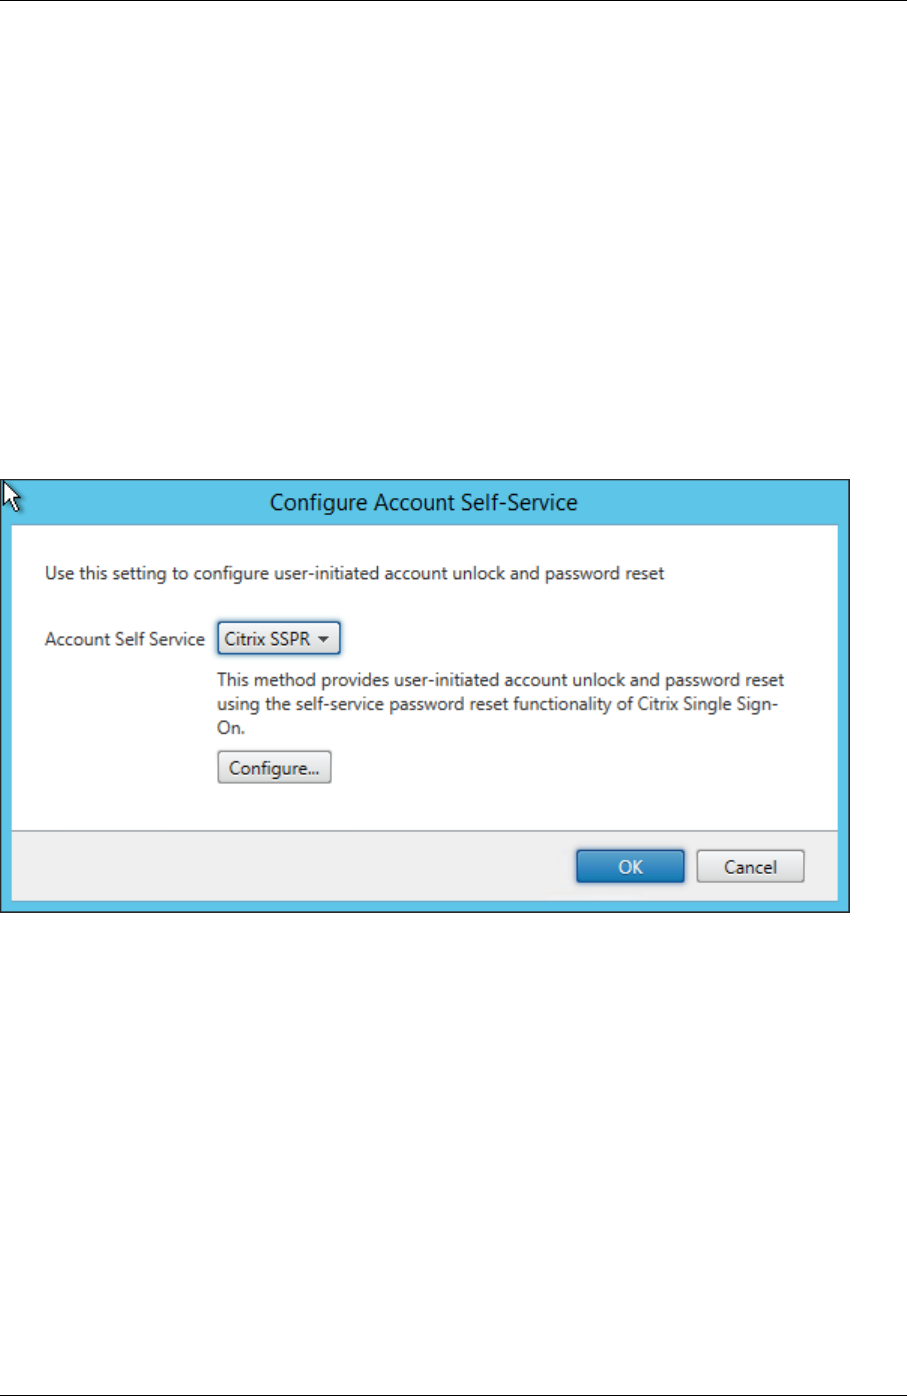
StoreFront 3.12
Before being able to use Self‑Service Password Reset, you must install and configure it. It is available
on the XenApp and XenDesktop media. For information, see the Self‑Service Password Reset docu‑
mentation.
1. Enable Self‑Service Password Reset support in StoreFront by selecting the Stores node in the
le pane of the Citrix StoreFront management console and in the Actions pane, click Manage
Authentication Methods > User name and Password, and choose Manage PasswordOptions
from the drop‑down menu.
2. Choose when you want users to change passwords and click OK.
3. From the User name and passwords drop‑down menu, choose Configure Account Self‑
Service, select Citrix SSPR from the drop‑down menu, and click OK.
4. Specify whether or not users can reset their passwords and unlock their accounts with Self‑
Service Password Reset, add the Password Reset Service account URL, click OK, and then click
OK.
This option is available only when the StoreFront base URL is HTTPS (not HTTP) and the
Enable pass‑
word reset option is available only aer you use Manage Password Options to allow users to change
passwords at any time.
© 1999–2021 Citrix Systems, Inc. All rights reserved. 84

StoreFront 3.12
The next time the user logs on to Citrix Receiver or Citrix Receiver for Web, security enrollment is avail‑
able. Aer clicking Start, questions are displayed to which the user must specify answers.
Once configured in StoreFront, users see the Account Self‑Service link on the Citrix Receiver for Web
logon screen (it displays as a button in other Citrix Receivers).
Clicking this link takes the user through a series of forms to first select between Unlock account and
Reset password (if both are available).
Aer choosing a radio button and clicking Next, the next screen prompts for a domain and username
(domain\user) if that information was not entered in the log on form. Note that account self‑service
© 1999–2021 Citrix Systems, Inc. All rights reserved. 85

StoreFront 3.12
They are required to answer the security question. If all the answers match those supplied by the user,
the requested operation (unlock or reset) is performed and the user is notified that it succeeded.
Shared authentication service settings
Use the SharedAuthentication ServiceSettings tasktospecify stores that will share the authentication
service enabling single sign on between them.
1. On the Windows Start screen or Apps screen, locate and click the Citrix StoreFront tile.
2. Select the Stores node in the le pane of the Citrix StoreFront management console and, in the
results pane, select a store. In the Actions pane, click Manage Authentication Methods.
3. From the Advanced drop‑down menu, select Shared authentication service settings.
4. Click the Use shared authentication service check box and select a store from the Store name
drop‑down menu.
Note: There is no functional dierence between a shared and dedicated authentication service. An
authentication service shared by more than two stores is treated as a shared authentication service
and any configuration changes aect the access to all the stores using the shared authentication ser‑
vice.
Delegate credential validation to NetScaler Gateway
Use the Configure Delegated Authentication task to enable pass‑through authentication for smart
card users accessing stores through NetScaler Gateway. This task is only available when Pass‑through
from NetScaler Gateway is enabled and selected in the results pane.
When credential validation is delegated to NetScaler Gateway, users authenticate to NetScaler Gate‑
way with their smart cards and are automatically logged on when they access their stores. This setting
is disabled by default when you enable pass‑through authentication from NetScaler Gateway, so that
pass‑through authentication only occurs when users log on to NetScaler Gateway with a password.
© 1999–2021 Citrix Systems, Inc. All rights reserved. 86

StoreFront 3.12
XML service‑based authentication
October 15, 2018
When StoreFront is not in the same domain as XenApp or XenDesktop, and it is not possible to put
Active Directory trusts in place, you can configure StoreFront to use the XenApp and XenDesktop XML
Service to authenticate the user name and password credentials.
Enable XML service‑based authentication
1. On the Windows Start screen or Apps screen, locate and click the Citrix StoreFront tile.
2. Select the Stores node in the le pane of the Citrix StoreFront management console and, in the
Actions pane, click Manage Authentication Methods.
3. On the Manage Authentication Methods page, from the User name and password > Settings
drop‑down menu, select Configure Password Validation .
4. From the Validation Password Via drop‑down menu, select Delivery Controllers, and then
click Configure.
5. Follow the Configure Delivery Controllers screens to add one or more Delivery Controllers
for validating the user credentials and click OK.
Disable XML service‑based authentication
1. On the Windows Start screen or Apps screen, locate and click the Citrix StoreFront tile.
2. Select the Stores node in the le pane of the Citrix StoreFront management console and, in the
Actions pane, click
Manage Authentication Methods
.
3. On the
Manage Authentication Methods
page, from the
User name and password
>
Settings
drop‑down menu, select Configure Password Validation.
4. From the Validation Password Via drop‑down menu, select Active Directory, and then click
OK.
Configure Kerberos constrained delegation for XenApp 6.5
October 15, 2018
Use the Configure Store Settings > Kerberos delegation task to specify whether StoreFront uses
single‑domain Kerberos constrained delegation to authenticate to delivery controllers.
Important: In multiple server deployments, use only one server at a time to make changes to the con‑
figuration of the server group. Ensure that the Citrix StoreFront management console is not running
© 1999–2021 Citrix Systems, Inc. All rights reserved. 87

StoreFront 3.12
on any of the other servers in the deployment. Once complete, propagate your configuration changes
to the server group so that the other servers in the deployment are updated.
1. On the Windows Start screen or Apps screen, locate and click the Citrix StoreFront tile.
2. Select the Stores node in the le pane of the Citrix StoreFront management console and, in the
results pane, select a store. In the Actions pane, click Configure Store Settings, and then click
Kerberos Delegation.
3. Select Enable or Disable Kerberos delegation to authenticate to delivery controllers, respec‑
tively, enable or disable Kerberos constrained delegation.
Configure the StoreFront server for delegation
Follow this procedure when StoreFront is not installed on the same machine as XenApp.
1. On the domain controller, open the MMC Active Directory Users and Computers snap‑in.
2. On the View menu, click Advanced Features.
3. In the le pane, click the Computers node under the domain name and select the StoreFront
server.
4. In the Action pane, click Properties.
5. On the Delegation tab, click Trust this computer for delegation to specified services only and
Use any authentication protocol, and then click Add.
6. In the Add Services dialog box, click Users or Computers.
7. In the Select Users or Computers dialog box, type the name of the server running the Citrix XML
Service (XenApp) in the Enter the object names to select box, click OK.
8. Select the HTTP service type from the list, click OK.
9. Apply the changes and close the dialog box.
Configure XenApp server for delegation
Configure Active Directory Trusted Delegation for each XenApp server.
1. On the domain controller, open the MMC Active Directory Users and Computers snap‑in.
2. In the le pane, click the Computers node under the domain name and select the server run‑
ning the Citrix XML Service (XenApp) that StoreFront is configured to contact.
3. In the Action pane, click Properties.
4. On the Delegation tab, click Trust this computer for delegation to specified services only
and Use any authentication protocol, and then click Add.
5. In the Add Services dialog box, click Users or Computers.
6. In the Select Users or Computers dialog box, type the name of the server running the Citrix
XML Service (XenApp) in the Enter the object names to select box, click OK.
7. Select the HOST service type from the list, click OK, and then click Add.
© 1999–2021 Citrix Systems, Inc. All rights reserved. 88

StoreFront 3.12
8. In the Select Users or Computers dialog box, type the name of the Domain Controller in the
Enter the object names to select box and click OK.
9. Select the cifs and ldap service types from the list and click OK. Note: If two choices appear for
the ldapservice, select the one that matches the FQDN of the domain controller.
10. Apply the changes and close the dialog box.
Important considerations
When you decide whethertouse Kerberosconstraineddelegation, consider the following information.
• Key Notes:
– You do not need ssonsvr.exe unless doing pass‑through authentication (or smart card pin
pass‑through authentication) without Kerberos constrained delegation.
• Storefront and Citrix Receiver for Web domain pass‑through:
– You do not need ssonsvr.exe on the client.
– You can set the Local username and password in the Citrix icaclient.adm template to any‑
thing (controls ssonsvr.exe function).
– The icaclient.adm template Kerberos setting is required.
– Add the Storefront Fully Qualified Domain Name (FQDN) to Internet Explorer trusted sites
list. Check the Use local username box in the Internet Explorer security settings for the
trusted zone.
– The client must be in a domain.
– Enable the Domain pass‑through authentication method on the StoreFront server and en‑
able for Citrix Receiver for Web.
• Storefront, Citrix Receiver for Web, and smart card authentication with PIN prompt:
– You do not need ssonsvr.exe on the client.
– Smart card authentication was configured.
– You can set the Local username and password in the Citrix icaclient.adm template to any‑
thing (controls ssonsvr.exe function).
– The icaclient.adm template Kerberos setting is required.
– Enable the Smart card authentication method on the StoreFront server and enable for
Citrix Receiver for Web.
– To ensure smart card authentication is chosen, do not check the Use local username box
in the Internet Explorer security settings for the StoreFront site zone.
– The client must be in a domain.
• NetScaler Gateway, StoreFront, Citrix Receiver for Web, and smart card authentication with PIN
prompt:
– You do not need ssonsvr.exe on the client.
– Smart card authentication was configured.
– You can set the Local username and password in the Citrix icaclient.adm template to any‑
thing (controls ssonsvr.exe function).
– The icaclient.adm template Kerberos setting is required.
© 1999–2021 Citrix Systems, Inc. All rights reserved. 89

StoreFront 3.12
– Enable the Pass‑through from NetScaler Gateway authentication method on the Store‑
Front server and enable for Citrix Receiver for Web.
– To ensure smart card authentication is chosen, do not check the Use local username box
in the Internet Explorer security settings for the StoreFront site zone.
– The client must be in a domain.
– Configure NetScaler Gateway for smart card authentication and configure an additional
vServer for launch using StoreFront HDX routing to route the ICA traic through the unau‑
thenticated NetScaler Gateway vServer.
• Citrix Receiver for Windows (AuthManager), smart card authentication with PIN prompt, and
StoreFront:
– You do not need ssonsvr.exe on the client.
– You can set the Local username and password in the Citrix icaclient.adm template to any‑
thing (controls ssonsvr.exe function).
– The icaclient.adm template Kerberos setting is required.
– The client must be in a domain.
– Enable the Smart card authentication method on the StoreFront server.
• Citrix Receiver for Windows (AuthManager), Kerberos, and StoreFront:
– You do not need ssonsvr.exe on the client.
– You can set the Local username and password in the Citrix icaclient.adm template to any‑
thing (controls ssonsvr.exe function).
– The icaclient.adm template Kerberos setting is required.
– Check the Use local username box in the Internet Explorer security settings for the trusted
zone.
– The client must be in a domain.
– Enable the Domain pass‑through authentication method on the StoreFront server.
– Ensure this registry key is set:
Caution: Editing the registry incorrectly can cause serious problems that may require you to reinstall
your operating system. Citrix cannot guarantee that problems resulting from the incorrect use of Reg‑
istry Editor can be solved. Use Registry Editor at your own risk. Be sure to back up the registry before
you edit it.
For32‑bitmachines: HKEY_LOCAL_MACHINE\SOFTWARE\Citrix\AuthManagerProtocols\integratedwindows
Name: SSONCheckEnabled
Type: REG_SZ
Value: true or false
For64‑bitmachines: HKEY_LOCAL_MACHINE\SOFTWARE\Wow6432Node\Citrix\AuthManagerProtocols\integratedwindows
Name: SSONCheckEnabled
Type: REG_SZ
Value: true or false
© 1999–2021 Citrix Systems, Inc. All rights reserved. 90

StoreFront 3.12
Configure smart card authentication
February 25, 2021
This article gives an overview of the tasks involved in setting up smart card authentication for all the
components in a typical StoreFront deployment. For more information and step‑by‑step configura‑
tion instructions, see the documentation for the individual products.
Smart card configuration for Citrix environments (PDF)
This overview for configuring a Citrix deployment for smart cards uses a specific smart card type. Note
that similar steps apply to smart cards from other vendors.
Prerequisites
• Ensure that accounts for all users are configured either within the Microso Active Directory
domain in which you plan to deploy your StoreFront servers or within a domain that has a direct
two‑way trust relationship with the StoreFront server domain.
• If you plan to enable pass‑through with smart card authentication, ensure that your smart card
reader types, middleware type and configuration, and middleware PIN caching policy permit
this.
• Install your vendor’s smart card middleware on the virtual or physical machines running the Vir‑
tual Delivery Agent that provide users’ desktops and applications. For more information about
using smart cards with XenDesktop, see Smart cards.
• Before continuing, ensure that your public‑key infrastructure is configured appropriately.
Check that certificate to account mapping is configured correctly for your Active Directory
environment and that user certificate validation can be performed successfully.
Configure NetScaler Gateway
• On your NetScaler Gateway appliance, install a signed server certificate from a certification au‑
thority. For more information, see Installing and Managing Certificates.
• Install on your appliance the root certificateof the certification authority issuing your smart card
user certificates. For more information, see To install a root certificate on NetScaler Gateway.
• Create and configure a virtual server for client certificate authentication. Create a certificate au‑
thentication policy, specifying SubjectAltName:PrincipalName for user name extraction from
the certificate. Then, bind the policy to the virtual server and configure the virtual server to re‑
quest client certificates. For more information, see Configuring and Binding a Client Certificate
Authentication Policy.
© 1999–2021 Citrix Systems, Inc. All rights reserved. 91

StoreFront 3.12
• Bind the certification authority root certificate to the virtual server. For more information, see
To add a root certificate to a virtual server.
• To ensure that users do not receive an additional prompt for their credentials at the virtual
server when connections to their resources are established, create a second virtual server.
When you create the virtual server, disable client authentication in the Secure Sockets Layer
(SSL) parameters. For more information, see Configuring smart card authentication.
You must also configure StoreFront to route user connections to resources through this addi‑
tional virtual server. Users log on to the first virtual server and the second virtual server is used
for connections to their resources. When the connection is established, users do not need to
authenticate to NetScaler Gateway but are required to enter their PINs to log on to their desk‑
tops and applications. Configuring a second virtual server for user connections to resources is
optional unless you plan to enable users to fall back to explicit authentication if they experience
any issues with their smart cards.
• Create session policies and profiles for connections from NetScaler Gateway to StoreFront and
bind them to the appropriate virtual server. For more information, see Access to StoreFront
Through NetScaler Gateway.
• If you configured the virtual server used for connections to StoreFront to require client certifi‑
cate authentication for all communications, you must create a further virtual server to provide
the callback URL for StoreFront. This virtual server is used only by StoreFront to verify requests
from the NetScaler Gateway appliance and so does not need to be publically accessible. A sepa‑
rate virtual server is required when client certificate authentication is mandatory because Store‑
Front cannot present a certificate to authenticate. For more information, see Creating Virtual
Servers.
Configure StoreFront
• You must use HTTPS for communications between StoreFront and users’ devices to en‑
able smart card authentication. Configure Microso Internet Information Services (IIS)
for HTTPS by obtaining an SSL certificate in IIS and then adding HTTPS binding to the
default website. For more information about creating a server certificate in IIS, see
https://docs.microsoft.com/en‑us/previous‑versions/windows/it‑pro/windows‑server‑
2012‑R2‑and‑2012/hh831637(v=ws.11). For more information about adding HTTPS
binding to an IIS site, see https://docs.microsoft.com/en‑us/previous‑versions/orphan‑
topics/ws.11/hh831632(v=ws.11).
• If you want to require that client certificates are presented for HTTPS connections to all Store‑
Front URLs, configure IIS on the StoreFront server.
When StoreFront is installed, the default configuration in IIS only requires that client certificates
are presented for HTTPS connections to the certificate authentication URL of the StoreFront au‑
© 1999–2021 Citrix Systems, Inc. All rights reserved. 92

StoreFront 3.12
thentication service. This configuration is required to provide smart card users with the option
to fall back to explicit authentication and, subject to the appropriate Windows policy settings,
enable users to remove their smart cards without needing to reauthenticate.
When IIS is configuredtorequire client certificatesforHTTPSconnections to all StoreFront URLs,
smart card users cannot connect through NetScaler Gateway and cannot fall back to explicit au‑
thentication. Users must log on again if they remove their smart cards from their devices. To
enable this IIS site configuration, the authentication service and stores must be collocated on
the same server, and a client certificate that is valid for all the stores must be used. Moreover,
this configuration where IIS is requiring client certificates for HTTPS connections to all Store‑
Front URLs, will conflict with authentication for Citrix Receiver for Web clients. For this reason,
this configuration should be used when Citrix Receiver for Web client access is not required.
If you are installing StoreFront on Windows Server 2012, note that non‑self‑signed certificates in‑
stalled in the Trusted Root Certification Authorities certificate store on the server are not trusted
when IIS is configured to use SSL and client certificate authentication. For more information
about this issue, see http://support.microsoft.com/kb/2802568.
• Install and configure StoreFront. Create the authentication service and add your stores, as re‑
quired. If you configure remote access through NetScaler Gateway, do not enable virtual private
network (VPN) integration. For more information, see Install and set up StoreFront.
• Enable smart card authentication to StoreFront for local users on the internal network. For
smart card users accessing stores through NetScaler Gateway, enable the pass‑through with
NetScaler Gateway authentication method and ensure that StoreFront is configured to delegate
credential validation to NetScaler Gateway. If you plan to enable pass‑through authentication
when you install Citrix Receiver for Windows on domain‑joined user devices, enable domain
pass‑through authentication. For more information, see Configure the authentication service.
To allow Citrix Receiver for Web client authentication with smart cards, you must enable the
authentication method per Citrix Receiver for Web site. For more information, see the Configure
Citrix Receiver for Web sites instruction.
If you want smart card users to be able to fall back to explicit authentication if they experience
any issues with their smart cards, do not disable the user name and password authentication
method.
• If you plan to enable pass‑through authentication when you install Citrix Receiver for Windows
on domain‑joined user devices, edit the default.ica file for the store to enable pass‑through of
users’ smart card credentials when they access their desktops and applications. For more in‑
formation, see Enable pass‑through with smart card authentication for Citrix Receiver for Win‑
dows.
• If you created an additional NetScaler Gateway virtual server to be used only for user connec‑
tions to resources, configure optimal NetScaler Gateway routing through this virtual server for
© 1999–2021 Citrix Systems, Inc. All rights reserved. 93

StoreFront 3.12
connections to the deployments providing the desktops and applications for the store. For
more information, see Configure optimal HDX routing for a store.
• To enable users of non‑domain‑joined Windows desktop appliances to log on to their desktops
using smart cards, enable smart card authentication to your Desktop Appliance sites. For more
information, see Configure Desktop Appliance sites.
Configure the Desktop Appliance site for both smart card and explicit authentication to enable users
to log on with explicit credentials if they experience any issues with their smart cards.
• To enable users of domain‑joined desktop appliances and repurposed PCs running the Citrix
Desktop Lock to authenticate using smart cards, enable pass‑through with smart card authen‑
tication to your XenApp Services URLs. For more information, see Configure authentication for
XenApp Services URLs.
Configure user devices
• Ensure that your vendor’s smart card middleware is installed on all user devices.
• For users with non‑domain‑joined Windows desktop appliances, install Receiver for Windows
Enterprise using an account with administrator permissions. Configure Internet Explorer to
start in full‑screen mode displaying the Desktop Appliance site when the device is powered on.
Note that Desktop Appliance site URLs are case sensitive. Add the Desktop Appliance site to
the Local intranet or Trusted sites zone in Internet Explorer. Once you have confirmed that you
can log on to the Desktop Appliance site with a smart card and access resources from the store,
install the Citrix Desktop Lock. For more information, see To install the Desktop Lock.
• For users with domain‑joined desktop appliances and repurposed PCs, install Receiver for Win‑
dows Enterprise using an account with administrator permissions. Configure Receiver for Win‑
dows with the XenApp Services URL for the appropriate store. Once you have confirmed that
you can log on to the device with a smart card and access resources from the store, install the
Citrix Desktop Lock. For more information, see To install the Desktop Lock.
• For all other users, install the appropriate version of Citrix Receiver on the user device. To en‑
able pass‑through of smart card credentials to XenDesktop and XenApp for users with domain‑
joined devices, use an account with administrator permissions to install Receiver for Windows
at a command prompt with the /includeSSON option. For more information, see Configure and
install Receiver for Windows using command‑line parameters.
Ensure that Receiver for Windows is configured for smart card authentication either through
a domain policy or a local computer policy. For a domain policy, use the Group Policy Man‑
agement Console to import the Receiver for Windows Group Policy Object template file, ica‑
client.adm, onto the domain controller for the domain containing your users’ accounts. To con‑
figure an individual device, use the Group Policy Object Editor on that device to configure the
© 1999–2021 Citrix Systems, Inc. All rights reserved. 94

StoreFront 3.12
template. For more information, see Configure Receiver with the Group Policy Object template.
Enable the Smart card authentication policy. To enable pass‑through of users’ smart card cre‑
dentials, select Use pass‑through authentication for PIN. Then, to pass users’ smart card cre‑
dentials through to XenDesktop and XenApp, enable the Local user name and password policy
and select Allow pass‑through authentication for all ICA connections. For more information,
see ICA Settings Reference.
If you enabled pass‑through of smart card credentials to XenDesktop and XenApp for users with
domain‑joined devices, add the store URL to the Local intranet or Trusted sites zone in Internet
Explorer. Ensure that Automatic logon with the current user name and password is selected in
the security settings for the zone.
• Where necessary, provide users with connection details for the store (for users on the internal
network) or NetScaler Gateway appliance (for remote users) using an appropriate method. For
more information about providing configuration information to your users, see Citrix Receiver.
Enable pass‑through with smart card authentication for Receiver for Windows
You can enable pass‑through authentication when you install Receiver for Windows on domain‑joined
user devices. To enable pass‑through of users’ smart card credentials when they access desktops and
applications hosted by XenDesktop and XenApp, you edit the default.ica file for the store.
Important: In multiple server deployments, use only one server at a time to make changes to the con‑
figuration of the server group. Ensure that the Citrix StoreFront management console is not running
on any of the other servers in the deployment. Once complete,
propagate your configuration changes to the server group so that the other servers in the deployment
are updated.
1. Use a text editor to open the default.ica file for the store, which is typically located in the
C:\inetpub\wwwroot\Citrix\storename\App_Data\ directory, where storename is the name
specified for the store when it was created.
2. To enable pass‑through of smart card credentials for users who access stores without NetScaler
Gateway, add the following setting in the [Application] section.
1 DisableCtrlAltDel=Off
2 <!--NeedCopy-->
This setting applies to all users of the store. To enable both domain pass‑through and pass‑
through with smart card authentication to desktops and applications, you must create separate
stores for each authentication method. Then, direct your users to the appropriate store for their
method of authentication.
© 1999–2021 Citrix Systems, Inc. All rights reserved. 95

StoreFront 3.12
3. To enable pass‑through of smart card credentials for users accessing stores through NetScaler
Gateway, add the following setting in the [Application] section.
1 UseLocalUserAndPassword=On
2 <!--NeedCopy-->
This setting applies to all users of the store. To enable pass‑through authentication for some
users and require others to log on to access their desktops and applications, you must create
separate stores for each group of users. Then, direct your users to the appropriate store for their
method of authentication.
Configure the password expiry notification period
October 15, 2018
If you enable Citrix Receiver for Web site users to change their passwords at any time, local users
whose passwords are about to expire are shown a warning when they log on. By default, the noti‑
fication period for a user is determined by the applicable Windows policy setting. To set a custom
notification period for all users, you edit the configuration file for the authentication service.
Important: In multiple‑server deployments, use only one server at a time to make changes to the
configuration of the server group. Ensure that the Citrix StoreFront management console is not run‑
ning on any of the other servers in the deployment. Once complete, propagate your configuration
changes to the server group so that the other servers in the deployment are updated.
1. On the Windows Start screen or Apps screen, locate and click the Citrix StoreFront tile.
2. Select the Stores node in the le pane of the Citrix StoreFront management console and, in the
Actions pane, click Manage Authentication Methods.
3. On the Manage Authentication Methods page, from the User name and password > Settings
drop‑down menu, select Manage Password Options, and select the Allow users to change
passwords check box.
4. Select At any time… **and make a choice under Remind users before their passwords ex‑
pire**.
Note: StoreFront does not support Fine Grained Password Policies in Active Directory.
Configure and manage stores
November 5, 2018
© 1999–2021 Citrix Systems, Inc. All rights reserved. 96

StoreFront 3.12
In Citrix StoreFront, you can create and manage stores that aggregate applications and desktops from
XenApp and XenDesktop giving users on‑demand, self‑service access to resources.
Create or remove a store Configure as many additional stores as you
need.
Create an unauthenticated store Configure additional unauthenticated stores to
support access for unauthenticated
(anonymous) users.
Export store provisioning files for users Generate files containing connection details for
stores, including any NetScaler Gateway
deployments and beacons configured for the
stores.
Hide and advertise stores to users Prevent stores being presented to users to add
to their accounts when they configure Citrix
Receiver through email‑based account
discovery or FQDN.
Manage the resources made available in stores Add and remove resources from stores.
Manage remote access to stores through
NetScaler Gateway
Configure access to stores through NetScaler
Gateway for users connecting from public
networks.
Integrate Citrix Online applications with stores Select the Citrix Online applications to include
in a store and specify the action that Citrix
Receiver takes when users subscribe to a Citrix
Online application.
Configure two StoreFront stores to share a
common subscription datastore
Configure two stores to share a common
subscription database.
Advanced store settings Configure advanced store settings.
Create or remove a store
February 15, 2021
Use the Create Store task to configure additional stores. You can create as many stores as you need;
for example, you can create a store for a particular group of users or to group together a specific set
© 1999–2021 Citrix Systems, Inc. All rights reserved. 97

StoreFront 3.12
of resources. You can also create an unauthenticated store that allows for anonymous, or unauthen‑
ticated store. To create this type of store, refer to the Create an unauthenticated store instruction.
To create a store, you identify and configure communications with the servers providing the resources
that you want to make available in the store. Then, optionally, you configure remote access to the
store through NetScaler Gateway.
Important: In multiple server deployments, use only one server at a time to make changes to the con‑
figuration of the server group. Ensure that the Citrix StoreFront management console is not running
on any of the other servers in the deployment. Once complete,
propagate your configuration changes to the server group so that the other servers in the deployment
are updated.
Add desktops and applications to the store
1. On the Windows Start screen or Apps screen, locate and click the Citrix StoreFront tile.
2. Select the Stores node in the le pane of the Citrix StoreFront management console and, in the
Actions pane, click Create Store.
3. On the Store Name page, specify a name for your store and click Next.
Store names appear in Citrix Receiver under users’ accounts, so choose a name that gives users
information about the content of the store.
4. On the Delivery Controllers page, list the infrastructure providing the resources that you want
to make available in the store. Click Add.
5. In the Add Delivery Controller dialog box, specify a name that will help you to identify the de‑
ployment and indicate whether the resources that you want to make available in the store are
provided by XenDesktop, XenApp, or AppController. For App Controller deployments, ensure
that the name you specify does not contain any spaces.
6. If you are adding details of XenDesktop or XenApp servers, continue to Step 7. To make appli‑
cations managed by App Controller available in the store, enter the name or IP address of an
App Controller virtual appliance in the Server box and specify the port for StoreFront to use for
connections to App Controller. The default port is 443. Continue to Step 11.
7. To make desktops and applications provided by XenDesktop or XenApp available in the store,
add the names or IP addresses of your servers to the Servers list. Specify multiple servers to
enable fault tolerance, listing the entries in order of priority to set the failover sequence. For
XenDesktop sites, give details of Delivery Controllers. In the case of XenApp farms, list servers
running the Citrix XML Service.
8. Select from the Transport type list the type of connections for StoreFront to use for communi‑
cations with the servers.
© 1999–2021 Citrix Systems, Inc. All rights reserved. 98

StoreFront 3.12
• To send data over unencrypted connections, select HTTP. If you select this option, you
must make your own arrangements to secure connections between StoreFront and your
servers.
• To send data over secure HTTP connections using Secure Sockets Layer (SSL) or Transport
Layer Security (TLS), select HTTPS. If you select this option for XenDesktop and XenApp
servers, ensure that the Citrix XML Service is set to share its port with Microso Internet
Information Services (IIS) and that IIS is configured to support HTTPS.
• To send data over secure connections to XenApp servers using the SSL Relay to perform
host authentication and data encryption, select SSL Relay.
Note: If you are using HTTPS or the SSL Relay to secure connections between StoreFront and
your servers, ensure that the names you specify in the
Servers list match exactly (including the case) the names on the certificates for those servers.
9. Specify the port for StoreFront to use for connections to the servers. The default port is 80 for
connections using HTTP and the SSL Relay, and 443 for HTTPS connections. In the case of Xen‑
Desktop and XenApp servers, the specified port must be the port used by the Citrix XML Service.
In a Citrix Virtual Apps and Desktops on‑premises environment, Shared secret lets you allow
only approved StoreFront machines to communicate with Delivery Controllers by specifying a
key. For information about key generation and configuration, see Manage security keys.
In a Citrix Virtual Apps and Desktops service environment, Shared secret lets you allow only
approved StoreFront machines to communicate with Citrix Cloud by specifying a key. For infor‑
mation about key generation and configuration, see Manage security keys.
10. If you are using the SSL Relay to secure connections between StoreFront and XenApp servers,
specify the TCP port of the SSL Relay in the SSL Relay port box. The default port is 443. Ensure
that all the servers running the SSL Relay are configured to monitor the same port.
11. Click OK. You can configure stores to provide resources from any mixture of XenDesktop, Xe‑
nApp, and App Controller deployments. Repeat Steps 4 to 11, as necessary, to list additional
deployments providing resources for the store. When you have added all the required resources
to the store, click Next.
12. On the Remote Access page, specify whether and how users connecting from public networks
can access the store through NetScaler Gateway.
• To make the store unavailable to users on public networks, make sure you do not check
Enable Remote Access. Only local users on the internal network will be able to access the
store.
• To enable remote access, check Enable Remote Access.
– To make only resources delivered through the store available through NetScaler Gate‑
way, select No VPN tunnel. Users log on directly to NetScaler Gateway and do not
need to use the NetScaler Gateway Plug‑in.
© 1999–2021 Citrix Systems, Inc. All rights reserved. 99

StoreFront 3.12
– To make the store and all other resources on the internal network available through
an SSL virtual private network (VPN) tunnel, select Full VPN tunnel. Users require the
NetScaler Gateway Plug‑in to establish the VPN tunnel.
If it is not already enabled, the pass‑through from NetScaler Gateway authentication method
is automatically enabled when you configure remote access to the store. Users authenticate to
NetScaler Gateway and are automatically logged on when they access their stores.
13. If you enabled remote access, continue to the next procedure to specify the NetScaler Gateway
deployments through which users can access the store. Otherwise, on the Remote Access page,
click Create. Once the store has been created, click Finish.
Provide remote access to the store through NetScaler Gateway
Complete the following steps to configure remote access through NetScaler Gateway to the store that
you created in the previous procedure. It is assumed that you have completed all the preceding steps.
1. On the Remote Access page of the Create Store wizard, select from the NetScaler Gateway
appliances list the deployments through which users can access the store. Any deployments
you configured previously for other stores are available for selection in the list. If you want to
add a further deployment to the list, click Add. Otherwise, continue to Step 12.
2. On the Add NetScaler Gateway Appliance General Settings page, specify a name for the
NetScaler Gateway deployment that will help users to identify it.
Users see the display name you specify in Citrix Receiver, so include relevant information in the
name to help users decide whether to use that deployment. For example, you can include the
geographical location in the display names for your NetScaler Gateway deployments so that
users can easily identify the most convenient deployment for their location.
3. Enter the URL of the virtual server or user logon point for your deployment. Specify the product
version used in your deployment.
The fully qualified domain name (FQDN) for your StoreFront deployment must be unique and
dierent from the NetScaler Gateway virtual server FQDN. Using the same FQDN for StoreFront
and the NetScaler Gateway virtual server is not supported.
4. Select the usage of the NetScaler Gateway from the available options.
+ Authentication and HDX routing: The NetScaler Gateway will be used for Authentication, as
well as for routing any HDX sessions.
+ Authentication Only: The NetScaler Gateway will be used for Authentication and not for any
HDX session routings.
+ HDX routing Only: The NetScaler Gateway will be used for HDX session routings and not for
Authentication.
© 1999–2021 Citrix Systems, Inc. All rights reserved. 100

StoreFront 3.12
5. On the Secure Ticket Authority (STA) page, if you are making resources provided by XenDesktop
or XenApp available in the store, list all the Secure Ticket Authority page URLs for servers run‑
ning the STA. Add URLs for multiple STAs to enable fault tolerance, listing the servers in order
of priority to set the failover sequence.
The STA is hosted on XenDesktop and XenApp servers and issues session tickets in response to
connection requests. These session tickets form the basis of authentication and authorization
for access to XenDesktop and XenApp resources.
In a Citrix Virtual Apps and Desktops on‑premises environment, Shared secret lets you allow
only approvedStoreFront machines to communicate with Secure Ticket Authority (STA) by spec‑
ifying a key. For information about key generation, see Manage security keys.
In a Citrix Virtual Apps and Desktops service environment, Shared secret lets you allow only
approved StoreFront machines to communicate with Citrix Cloud by specifying a key. For infor‑
mation about key generation, see Manage security keys.
6. Choose to set the Secure Ticket Authority to be load balanced. You can also specify the time
interval aer which the non‑responding STAs are bypassed.
7. If you want XenDesktop and XenApp to keep disconnected sessions open while Citrix Receiver
attempts to reconnect automatically, select the Enable session reliability check box. If you
configured multiple STAs and want to ensure that session reliability is always available, select
the Request tickets from two STAs, where available check box. StoreFront obtains session
tickets from two dierent STAs so that user sessions are not interrupted if one STA becomes
unavailable during the course of the session. If, for any reason, StoreFront is unable to contact
two STAs, it falls back to using a single STA.
8. On Authentication Settings page, select the version of NetScaler gateway you want to configure.
9. Specify the VServer IP address of the NetScaler Gateway appliance, if required. A VServer IP
address is required for Access Gateway 9.x appliances, but optional for more recent product
versions. The VServer IP address is the IP address that NetScaler Gateway uses to represent the
user device when communicating with servers on the internal network. This can also be the
mapped IP address of the NetScaler Gateway appliance. Where specified, StoreFront uses the
VServer IP address to verify that incoming requests originate from a trusted device.
10. Select from the Logon type list the authentication method you configured on the appliance for
Citrix Receiver users. The information you provide about the configuration of your NetScaler
Gateway appliance is added to the provisioning file for the store. This enables Citrix Receiver to
send the appropriate connection request when contacting the appliance for the first time.
• If users are required to enter their Microso Active Directory domain credentials, select
Domain.
• If users are required to enter a tokencode obtained from a security token, select Security
token.
© 1999–2021 Citrix Systems, Inc. All rights reserved. 101

StoreFront 3.12
• If users are requiredto enter both their domain credentials and a tokencode obtained from
a security token, select Domain and security token.
• If users are required to enter a one‑time password sent by text message, select SMS au‑
thentication.
• If users are required to present a smart card and enter a PIN, select Smart card.
If you configure smart card authentication with a secondary authentication method to which
users can fall back if they experience any issues with their smart cards, select the secondary
authentication method from theSmart card fallback list.
11. Enter the NetScaler Gateway authentication service URL in the Callback URL box. This is an
optional field. StoreFront automatically appends the standard portion of the URL. Enter the
internally accessible URL of the appliance. StoreFront contacts the NetScaler Gateway authen‑
tication service to verify that requests received from NetScaler Gateway originate from that ap‑
pliance.
12. Click Create to add your NetScaler Gateway deployment to the list on the Remote Access
page. Repeat Steps 1 to 11, as necessary, to add more NetScaler Gateway deployments to
the NetScaler Gateway appliances list. If you enable access through multiple deployments by
selecting more than one entry in the list, specify the default deployment to be used to access
the store.
13. On the Remote Access page, click Create. Once the store has been created, click Finish.
Your store is now available for users to access with Citrix Receiver, which must be configured with
access details for the store. There are a number of ways in which you can provide these detailsto users
to make the configuration process easier for them. For more information, see User access options.
Alternatively, users can access the store through the Receiver for Web site, which enables users to
access their desktops and applications through a webpage. The URL for users to access the Receiver
for Web site for the new store is displayed when you create the store.
When you create a new store, the XenApp Services URL is enabled by default. Users of domain‑joined
desktop appliances and repurposed PCs running the Citrix Desktop Lock, along with users who have
older Citrix clients that cannot be upgraded, can access stores directly using the XenApp Services URL
forthe store. The XenApp ServicesURLhasthe form http[s]://serveraddress/Citrix/storename/PNAgent/config.xml,
where serveraddress is the FQDN of the server or load balancing environment for your StoreFront
deployment and storename is the name you specified for the store in Step 3.
Create a store for single server deployments on a nondomain‑joined server
1. On the Windows Start screen or Apps screen, locate and click the Citrix StoreFront tile.
2. Select the Stores node in the le pane of the Citrix StoreFront management console and, in the
Actions pane, click Create Store.
© 1999–2021 Citrix Systems, Inc. All rights reserved. 102

StoreFront 3.12
3. On the Store Name page, specify a name for your store and click Next.
Store names appear in Citrix Receiver under users’ accounts, so choose a name that gives users
information about the content of the store.
4. On the Delivery Controllers page, list the infrastructure providing the resources that you want
to make available in the store. Click Add.
5. In the Add Delivery Controller dialog box, specify a name that will help you to identify the
deployment and indicate whether the resources that you want to make available in the store
are provided by XenDesktop, XenApp, or XenMobile AppController. For App Controller deploy‑
ments, ensure that the name you specify does not contain any spaces.
6. If you are adding details of XenDesktop or XenApp servers, continue to Step 7. To make appli‑
cations managed by App Controller available in the store, enter the name or IP address of an
App Controller virtual appliance in the Server box and specify the port for StoreFront to use for
connections to App Controller. The default port is 443. Continue to Step 11.
7. To make desktops and applications provided by XenDesktop or XenApp available in the store,
add the name or IP address of your server to the Servers box. For XenDesktop sites, give de‑
tails of Delivery Controllers. In the case of XenApp farms, list the server running the Citrix XML
Service.
8. Select from the Transport type list the type of connections for StoreFront to use for communi‑
cations with the server.
• To send data over unencrypted connections, select HTTP. If you select this option, you
must make your own arrangements to secure connections between StoreFront and your
server.
• To send data over secure HTTP connections using Secure Sockets Layer (SSL) or Transport
Layer Security (TLS), select HTTPS. If you select this option for XenDesktop and XenApp
servers, ensure that the Citrix XML Service is set to share its port with Microso Internet
Information Services (IIS) and that IIS is configured to support HTTPS.
• To send data over secure connections to XenApp servers using the SSL Relay to perform
host authentication and data encryption, select SSL Relay.
Note: If you are using HTTPS or the SSL Relay to secure connections between StoreFront
and your server, ensure that the name you specify in the Servers box matches exactly
(including the case) the name on the certificate for that server.
9. Specify the port for StoreFront to use for connections to the server. The default port is 80 for
connections using HTTP and the SSL Relay, and 443 for HTTPS connections. In the case of Xen‑
Desktop and XenApp servers, the specified port must be the port used by the Citrix XML Service.
In a Citrix Virtual Apps and Desktops on‑premises environment, Shared secret lets you allow
only approved StoreFront machines to communicate with Delivery Controllers by specifying a
© 1999–2021 Citrix Systems, Inc. All rights reserved. 103

StoreFront 3.12
key. For information about key generation, see Manage security keys.
In a Citrix Virtual Apps and Desktops service environment, Shared secret lets you allow only
approved StoreFront machines to communicate with Citrix Cloud by specifying a key. For infor‑
mation about key generation, see Manage security keys.
10. If you are using the SSL Relay to secure connections between StoreFront and the XenApp server,
specify the TCP port of the SSL Relay in the SSL Relay port box. The default port is 443. Ensure
that all the servers running the SSL Relay are configured to monitor the same port.
11. Click OK. You can configure stores to provide resources from any mixture of XenDesktop, Xe‑
nApp, and App Controller deployments. Repeat Steps 4 to 11, as necessary, to list additional
deployments providing resources for the store. When you have added all the required resources
to the store, click Next.
12. On the Remote Access page, specify whether and how users connecting from public networks
can access the store through NetScaler Gateway.
• To make the store unavailable to users on public networks, select None. Only local users
on the internal network will be able to access the store.
• To make only resources delivered through the store available through NetScaler Gateway,
select** No VPN tunnel**. Users log on directly to NetScaler Gateway and do not need to
use the NetScaler Gateway Plug‑in.
• To make the store and all other resources on the internal network available through an
SSL virtual private network (VPN) tunnel, select** Full VPN tunnel**. Users require the
NetScaler Gateway Plug‑in to establish the VPN tunnel.
If it is not already enabled, the pass‑through from NetScaler Gateway authentication
method is automatically enabled when you configure remote access to the store. Users
authenticate to NetScaler Gateway and are automatically logged on when they access
their stores.
13. If you enabled remote access, continue to Provide remote access to the store through NetScaler
Gateway to specify the NetScaler Gateway deployments through which users can access the
store. Otherwise, on the Remote Access page, click Next.
14. On the Configure Authentication Methods page, select the methods by which users will au‑
thenticate and access resources, and click Next.
15. On the Configure Password Validation page, select the delivery controllers toprovide the pass‑
word validation, click Next.
16. On the XenApp Services URL page, configure the URL for users who us PNAgent to access ap‑
plication and desktops and click Create.
© 1999–2021 Citrix Systems, Inc. All rights reserved. 104

StoreFront 3.12
Server Group Node in the le and Action panes is replaced by Change Base URL. The only option
available is to change the base URL, because server groups are not available in nondomain‑joined
servers.
Remove a store
Use the Remove Store task to delete a store. When you remove a store, any associated Receiver for
Web sites, Desktop Appliance sites, and XenApp Services URLs are also deleted.
Important: In multiple server deployments, use only one server at a time to make changes to the con‑
figuration of the server group. Ensure that the Citrix StoreFront management console is not running
on any of the other servers in the deployment. Once complete, propagate your configuration changes
to the server group so that the other servers in the deployment are updated.
Create an unauthenticated store
October 15, 2018
Use the Create Store task to configure additional unauthenticated stores to support access for unau‑
thenticated (anonymous) users. You can create as many unauthenticated stores as you need; for ex‑
ample, you can create an unauthenticated store for a particular group of users or to group together a
specific set of resources.
Remote access through a NetScaler Gateway cannot be applied to unauthenticated stores.
To create an unauthenticated store, you identify and configure communications with the servers pro‑
viding the resources that you want to make available in the store.
Important: In multiple server deployments, use only one server at a time to make changes to the con‑
figuration of the server group. Ensure that the Citrix StoreFront management console is not running
on any of the other servers in the deployment. Once complete,
propagate your configuration changes to the server group so that the other servers in the deployment
are updated.
Add desktops and applications to the store
1. On the Windows Start screen or Apps screen, locate and click the Citrix StoreFront tile.
2. Select the Stores node in the le pane of the Citrix StoreFront management console and, in the
Actions pane, click Create Store.
3. On the
Store Name page, specify a name for your store, select
**Allow only unauthenticated (anonymous) users to access this store, **and click
Next.
© 1999–2021 Citrix Systems, Inc. All rights reserved. 105

StoreFront 3.12
Store names appear in Citrix Receiver under users’ accounts, so choose a name that gives users
information about the content of the store.
4. On the Delivery Controllers page, list the infrastructure providing the resources that you want
to make available in the store. Click Add.
5. In the Add Delivery Controller dialog box, specify a name thatwill help you toidentify the deploy‑
ment and indicate whether the resources that you want to make available in the store are pro‑
vided by XenApp or XenMobile (AppController). For XenMobile (AppController) deployments,
ensure that the name you specify does not contain any spaces. When assigning Controllers,
ensure that you are only using those which support the anonymous apps feature. Configuring
your unauthenticated store with Controllers that do not support this feature may lead to no
anonymous apps being available from the store.
6. If you are adding details for XenApp servers, continue to Step 7. To make applications managed
by XenMobile (App Controller) availablein the store, enter the name or IP address of a XenMobile
(App Controller) virtual appliance in the Server box and specify the port for StoreFront to use
for connections to XenMobile (App Controller). The default port is 443. Continue to Step 10.
7. To make desktops and applications provided by XenApp available in the store, add the names
or IP addresses of your servers to the Servers list. Specify multiple servers to enable fault toler‑
ance, listing the entries in order of priority to set the failover sequence. For XenDesktop sites,
give details of Controllers. In the case of XenApp farms, list servers running the Citrix XML Ser‑
vice.
8. Select from the Transport type list the type of connections for StoreFront to use for communi‑
cations with the servers.
• To send data over unencrypted connections, select HTTP. If you select this option, you
must make your own arrangements to secure connections between StoreFront and your
servers.
• To send data over secure HTTP connections using Secure Sockets Layer (SSL) or Transport
Layer Security (TLS), select HTTPS. If you select this option for XenDesktop and XenApp
servers, ensure that the Citrix XML Service is set to share its port with Microso Internet
Information Services (IIS) and that IIS is configured to support HTTPS.
Note: If you are using HTTPS to secure connections between StoreFront and your servers,
ensure that the names you specify in the
Servers list match exactly (including the case) the names on the certificates for those
servers.
9. Specify the port for StoreFront to use for connections to the servers. The default port is 80 for
connections using HTTP and 443 for HTTPS connections. In the case of XenDesktop and XenApp
servers, the specified port must be the port used by the Citrix XML Service.
10. Click OK. You can configure stores to provide resources from any mixture of XenDesktop, Xe‑
nApp, and App Controller deployments. Repeat Steps 4 to 10, as necessary, to list additional
deployments providing resources for the store. When you have added all the required resources
© 1999–2021 Citrix Systems, Inc. All rights reserved. 106

StoreFront 3.12
to the store, click Create.
Your unauthenticated store is now available for use. To enable user access to the new store, Citrix
Receiver must be configured with access details for the store. There are a number of ways in which
you can provide these details to users to make the configuration process easier for them. For more
information, see
User access options.
Alternatively, users can access the store through the Receiver for Web site, which enables users to
access their desktops and applications through a web page. By default with unauthenticated stores,
Receiver for Web displays the applications in a folder hierarchy that includes a breadcrumb path. The
URL for users to access the Receiver for Web site for the new store is displayed when you create the
store.
When you create a new store, the XenApp Services URL is enabled by default. Users of domain‑joined
desktop appliances and repurposed PCs running the Citrix Desktop Lock, along with users who have
older Citrix clients that cannot be upgraded, can access stores directly using the XenApp Services URL
forthe store. The XenApp ServicesURLhasthe form http[s]://serveraddress/Citrix/storename/PNAgent/config.xml,
where serveraddress is the FQDN of the server or load balancing environment for your StoreFront
deployment and storename is the name you specified for the store in Step 3.
Note: In StoreFront configurations where the web.config file has been configured with the parameter
LogoAction=”terminate”, Citirx Receiver for Web sessions accessing this unauthenticated store will
not terminate. Typically, the web.config file can be found at C:\inetpub\wwwroot\Citrix\storename\,
where storename is the name specified for the store when it was created. To ensure these sessions
terminate properly, the XenApp server being used by this store must have the Trust XML requests op‑
tion enabled as shown in
Configuring the Citrix XML Service Port and Trust in the XenApp and XenDesktop documentation.
Export store provisioning files for users
October 15, 2018
Use the Export Multi‑Store Provisioning File and Export Provisioning File tasks to generate files con‑
taining connection details for stores, including any NetScaler Gateway deployments and beacons con‑
figured for the stores. Make these files available to users to enable them to configure Citrix Receiver
automatically with details of the stores. Users can also obtain Citrix Receiver provisioning files from
Receiver for Web sites.
Important: In multiple server deployments, use only one server at a time to make changes to the con‑
figuration of the server group. Ensure that the Citrix StoreFront management console is not running
on any of the other servers in the deployment. Once complete,
© 1999–2021 Citrix Systems, Inc. All rights reserved. 107

StoreFront 3.12
propagate your configuration changes to the server group so that the other servers in the deployment
are updated.
1. On the Windows Start screen or Apps screen, locate and click the Citrix StoreFront tile. Select
the Stores node in the le pane of the Citrix StoreFront management console.
2. To generate a provisioning file containing details for multiple stores, in the Actions pane, click
Export Multi‑Store Provisioning File and select the stores to include in the file.
3. Click Export and Save the provisioning file with a .cr extension to a suitable location on your
network.
Advertise and hide stores to users
October 15, 2018
Use the Hide Store task to prevent stores being presented to users to add to their accounts when
they configure Citrix Receiver through email‑based account discovery or FQDN. By default, when you
create a store it is presented as an option for users to add in Citrix Receiver when they discover the
StoreFront deployment hosting the store. Hiding a store does not make it inaccessible, instead users
must configure Citrix Receiver with connection details for the store, either manually, using a setup
URL, or with a provisioning file. To resume advertising a hidden store, use the Advertise Store task.
Important: In multiple server deployments, use only one server at a time to make changes to the con‑
figuration of the server group. Ensure that the Citrix StoreFront management console is not running
on any of the other servers in the deployment. Once complete,
propagate your configuration changes to the server group so that the other servers in the deployment
are updated.
1. On the Windows Start screen or Apps screen, locate and click the Citrix StoreFront tile.
2. Select the Stores node in the le pane of the Citrix StoreFront management console and, in the
Actions pane, click Configure Store Settings > Advertise Store.
3. On the Advertise Store page, select either Advertise Store or Hide Store.
Manage the resources made available in stores
October 15, 2018
Use the Manage Controllers task to add and remove from stores resources provided by XenDesktop,
XenApp, and App Controller, and to modify the details of the servers providing these resources.
Important: In multiple server deployments, use only one server at a time to make changes to the con‑
figuration of the server group. Ensure that the Citrix StoreFront management console is not running
© 1999–2021 Citrix Systems, Inc. All rights reserved. 108

StoreFront 3.12
on any of the other servers in the deployment. Once complete,
propagate your configuration changes to the server group so that the other servers in the deployment
are updated.
1. On the Windows Start screen or Apps screen, locate and click the Citrix StoreFront tile.
2. Select the Stores node in the le pane of the Citrix StoreFront management console and, in the
results pane, select a store. In the Actions pane, click Manage Delivery Controllers.
3. In the Manage Delivery Controllers dialog box, click Add to include desktops and applications
from another XenDesktop, XenApp, or App Controller deployment in the store. To modify the
settings for a deployment, select the entry in the Delivery controllers list and click Edit. Select
an entry in the list and click Remove to stop the resources provided by the deployment being
available in the store.
4. In the Add Controller or Edit Controller dialog box, specify a name that will help you to iden‑
tify the deployment and indicate whether the resources that you want to make available in the
store are provided by XenDesktop, XenApp, or AppController. For App Controller deployments,
ensure that the name you specify does not contain any spaces.
5. If you are adding details of XenDesktop or XenApp servers, continue to Step 6. To make appli‑
cations managed by App Controller available in the store, enter the name or IP address of an
App Controller virtual appliance in the Server box and specify the port for StoreFront to use for
connections to App Controller. The default port is 443. Continue to Step 10.
6. To make desktops and applications provided by XenDesktop or XenApp available in the store,
click Add to enter the name or IP address of a server. Depending on how the web.config file is
configured, specifying multiple servers enables either load balancing or failover, as indicated in
the dialog box. Load balancing is configured by default. If failover is configured, list the entries
in order of priority to set the failover sequence. For XenDesktop sites, give details of Delivery
Controllers. In the case of XenApp farms, list servers running the Citrix XML Service. To modify
the name or IP address of a server, select the entry in the Servers list and click Edit. Select an
entry in the list and click Remove to stop StoreFront contacting the server to enumerate the
resources available to the user.
7. Select from the Transport type list the type of connections for StoreFront to use for communi‑
cations with the servers.
• To send data over unencrypted connections, select HTTP. If you select this option, you
must make your own arrangements to secure connections between StoreFront and your
servers.
• To send data over secure HTTP connections using Secure Sockets Layer (SSL) or Transport
Layer Security (TLS), select HTTPS. If you select this option for XenDesktop and XenApp
servers, ensure that the Citrix XML Service is set to share its port with Microso Internet
Information Services (IIS) and that IIS is configured to support HTTPS.
• To send data over secure connections to XenApp servers using the SSL Relay to perform
host authentication and data encryption, select SSL Relay.
© 1999–2021 Citrix Systems, Inc. All rights reserved. 109

StoreFront 3.12
Note: If you are using HTTPS or the SSL Relay to secure connections between StoreFront
and your servers, ensure that the names you specify in the
Servers list match exactly (including the case) the names on the certificates for those
servers.
8. Specify the port for StoreFront to use for connections to the servers. The default port is 80 for
connections using HTTP and the SSL Relay, and 443 for HTTPS connections. In the case of Xen‑
Desktop and XenApp servers, the specified port must be the port used by the Citrix XML Service.
9. If you are using the SSL Relay to secure connections between StoreFront and XenApp servers,
specify the TCP port of the SSL Relay in the SSL Relay port box. The default port is 443. Ensure
that all the servers running the SSL Relay are configured to monitor the same port.
10. Click OK. You can configure stores to provide resources from any mixture of XenDesktop, Xe‑
nApp, and App Controller deployments. Repeat Steps 3 to 10, as necessary, to add or modify
other deployments in the Delivery controllers list.
Manage remote access to stores through NetScaler Gateway
October 15, 2018
Use the Remote Access Settings task to configure access to stores through NetScaler Gatewayfor users
connecting from public networks. Remote access through a NetScaler Gateway cannot be applied to
unauthenticated stores.
Important: In multiple server deployments, use only one server at a time to make changes to the con‑
figuration of the server group. Ensure that the Citrix StoreFront management console is not running
on any of the other servers in the deployment. Once complete,
propagate your configuration changes to the server group so that the other servers in the deployment
are updated.
1. On the Windows Start screen or Apps screen, locate and click the Citrix StoreFront tile.
2. Select the Stores node in the le pane of the Citrix StoreFront management console and, in the
results pane, select a store. In the Actions pane, click Configure Remote Access Settings.
3. In the Configure Remote Access Settings dialog box, specify whether and how users connecting
from public networks can access the store through NetScaler Gateway.
• To make the store unavailable to users on public networks, make sure you do not check
Enable remote access. Only local users on the internal network will be able to access the
store.
• To enable remote access, check Enable Remote Access.
– To make only resources delivered through the store available through NetScaler Gate‑
way, select No VPN tunnel. Users log on directly to NetScaler Gateway and do not
© 1999–2021 Citrix Systems, Inc. All rights reserved. 110

StoreFront 3.12
need to use the NetScaler Gateway Plug‑in.
– To make the store and other resources on the internal network available through a Se‑
cure Sockets Layer (SSL) virtual private network (VPN) tunnel, select Full VPN tunnel.
Users require the NetScaler Gateway Plug‑in to establish the VPN tunnel.
If it is not already enabled, the pass‑through from NetScaler Gateway authentication method
is automatically enabled when you configure remote access to the store. Users authenticate to
NetScaler Gateway and are automatically logged on when they access their stores.
4. If you enabled remote access, select from the NetScaler Gateway appliances list the deploy‑
ments through which users can access the store. Any deployments you configured previously
for this and other stores are available for selection in the list. If you want to add a further de‑
ployment to the list, click Add. Otherwise, continue to Step 16.
5. On the General Settings page, specify a name for the NetScaler Gateway deployment that will
help users to identify it.
Users see the display name you specify in Citrix Receiver, so include relevant information in the
name to help users decide whether to use that deployment. For example, you can include the
geographical location in the display names for your NetScaler Gateway deployments so that
users can easily identify the most convenient deployment for their location.
6. Enter the URL of the virtual server or user logon point (for Access Gateway 5.0) for your deploy‑
ment. Specify the product version used in your deployment.
The fully qualified domain name (FQDN) for your StoreFront deployment must be unique and
dierent from the NetScaler Gateway virtual server FQDN. Using the same FQDN for StoreFront
and the NetScaler Gateway virtual server is not supported.
7. If you are adding an Access Gateway 5.0 deployment, continue to Step 9. Otherwise, specify
the subnet IP address of the NetScaler Gateway appliance, if necessary. A subnet IP address is
required for Access Gateway 9.3 appliances, but optional for more recent product versions.
The subnet address is the IP address that NetScaler Gateway uses to represent the user device
when communicating with servers on the internal network. This can also be the mapped IP
address of the NetScaler Gateway appliance. Where specified, StoreFront uses the subnet IP
address to verify that incoming requests originate from a trusted device.
8. If you are adding an appliance running NetScaler Gateway 11, NetScaler Gateway 10.1, Access
Gateway 10, or Access Gateway 9.3, select from the Logon type list the authentication method
you configured on the appliance for Citrix Receiver users.
The information you provide about the configuration of your NetScaler Gateway appliance is
added to the provisioning file for the store. This enables Citrix Receiver to send the appropriate
connection request when contacting the appliance for the first time.
© 1999–2021 Citrix Systems, Inc. All rights reserved. 111

StoreFront 3.12
• If users are required to enter their Microso Active Directory domain credentials, select
Domain.
• If users are required to enter a tokencode obtained from a security token, select Security
token.
• If users are requiredto enter both their domain credentials and a tokencode obtained from
a security token, select Domain and security token.
• If users are required to enter a one‑time password sent by text message, select SMS au‑
thentication.
• If users are required to present a smart card and enter a PIN, select Smart card.
If you configure smart card authentication with a secondary authentication method to which
users can fall back if they experience any issues with their smart cards, select the secondary
authentication method from the Smart card fallback list. Continue to Step 10.
9. To add an Access Gateway 5.0 deployment, indicate whether the user logon point is hosted on
a standalone appliance or an Access Controller server that is part of a cluster. If you are adding
a cluster, click Next and continue to Step 11.
10. If you are configuring StoreFront for NetScaler Gateway 11, NetScalerGateway 10.1, Access Gate‑
way 10, Access Gateway 9.3, or a single Access Gateway 5.0 appliance, complete the NetScaler
Gateway authenticationservice URL in the Callback URL box. StoreFront automatically appends
the standard portion of the URL. Click Next and continue to Step 13.
Enter the internally accessible URL of the appliance. StoreFront contacts the NetScaler Gateway
authentication service to verify that requests received from NetScaler Gateway originate from
that appliance.
11. To configure StoreFront for an Access Gateway 5.0 cluster, list on the Appliances page the IP
addresses or FQDNs of the appliances in the cluster and click Next.
12. On the Enable Silent Authentication page, list URLs for the authentication service running on
the Access Controller servers. Add URLs for multiple servers to enable fault tolerance, listing
the servers in order of priority to set the failover sequence. Click Next.
StoreFront uses the authentication service to authenticate remote users so that they do not
need to re‑enter their credentials when accessing stores.
13. For all deployments, if you are making resources provided by XenDesktop or XenApp available
in the store, list on the Secure Ticket Authority (STA) page URLs for servers running the STA. Add
URLs for multiple STAs to enable fault tolerance, listing the servers in order of priority to set the
failover sequence.
The STA is hosted on XenDesktop and XenApp servers and issues session tickets in response to
connection requests. These session tickets form the basis of authentication and authorization
for access to XenDesktop and XenApp resources.
© 1999–2021 Citrix Systems, Inc. All rights reserved. 112

StoreFront 3.12
14. If you want XenDesktop and XenApp to keep disconnected sessions open while Citrix Receiver
attempts to reconnect automatically, select the Enable session reliability check box. If you con‑
figured multiple STAs and want to ensure that session reliability is always available, select the
Request tickets from two STAs, where available check box.
When the Request tickets from two STAs, where available check box is selected, StoreFront ob‑
tains session tickets from two dierent STAs so that user sessions are not interrupted if one STA
becomes unavailable during the course of the session. If, for any reason, StoreFront is unable
to contact two STAs, it falls back to using a single STA.
15. Click Createto add your NetScalerGateway deployment to the list in the Remote Access Settings
dialog box.
16. Repeat Steps 4 to 15, as necessary, to add more NetScaler Gateway deployments to the
NetScaler Gateway appliances list. If you enable access through multiple deployments by
selecting more than one entry in the list, specify the default deployment to be used to access
the store.
Configure two StoreFront stores to share a common subscription
datastore
November 5, 2018
As of version 2.0, StoreFront no longer uses an SQL database to maintain its subscription data. Citrix
replaced the SQL database with a Windows datastore that requires no additional configuration when
StoreFront is first installed. The installation installs the Windows datastore locally on each StoreFront
server. In StoreFrontservergroupenvironments,eachserveralsomaintainsacopyofthe subscription
data used by its store. This data is propagated to other servers to maintain user subscriptions across
the whole group. By default, StoreFront creates a single datastore for each store. Each subscription
datastore is updated independently from each other store.
Where dierent configurationsettings are required, it is common for administrators toconfigure Store‑
Front with two distinct stores; one for external access to resources using Netscaler Gateway and an‑
other for internal access using the corporate LAN. You can configure both “external” and “internal”
stores to share a common subscription datastore by making a simple change to the store web.config
file.
In the default scenario involving two stores and their corresponding subscription datastores, a user
must subscribe to the same resource twice. Configuring the two stores to share a common subscrip‑
tion database improves and simplifies the roaming experience when users access the same resource
from inside or outside the corporate network. With a shared subscription datastore it does not matter
whether they use the “external” or “internal” store when they initially subscribe to a new resource.
© 1999–2021 Citrix Systems, Inc. All rights reserved. 113

StoreFront 3.12
• Each store has a web.config file located in C:\inetpub\wwwroot\citrix\<storename>.
• Each store web.config contains a client endpoint for the Subscription Store Service.
1 <clientEndpoint uri="net.pipe://localhost/Citrix/Subscriptions/1
__Citrix_<StoreName>" authenticationMode="windows" transferMode="
Streamed">
2 <!--NeedCopy-->
The subscriptiondata for eachStoreis located in C:\Windows\ServiceProfiles\NetworkService\AppData\Roaming\Citrix\SubscriptionsStore\1_Citrix
For two stores to share a subscription datastore, you need only point one store to the subscription ser‑
vice end point of the other store. In the case of a server group deployment, all servers have identical
pairs of stores defined and identical copies of the shared datastore they both share.
Note: The XenApp, XenDesktop and AppC controllers configured on each store must match exactly;
otherwise, an inconsistent set of resource subscriptions on one store compared to another might oc‑
cur. Sharing a datastore is supported only when the two stores reside on the same StoreFront server
or server group deployment.
StoreFront subscription datastore endpoints
1. On a single StoreFront deployment, open the external store web.config file using Notepad and
search for the clientEndpoint. For example:
1 <subscriptionsStoreClient enabled="true">
2 <clientEndpoint uri="net.pipe://localhost/Citrix/Subscriptions/1
__Citrix_External" authenticationMode="windows" transferMode="
Streamed">
3 <clientCertificate thumbprint="0" />
4 </clientEndpoint>
5 </subscriptionsStoreClient>
6 <!--NeedCopy-->
2. Change the external to match the internal store endpoint:
1 <subscriptionsStoreClient enabled="true">
2 <clientEndpoint uri="net.pipe://localhost/Citrix/Subscriptions/1
__Citrix_Internal" authenticationMode="windows" transferMode="
Streamed">
3 <clientCertificate thumbprint="0" />
4 </clientEndpoint>
5 </subscriptionsStoreClient>
6 <!--NeedCopy-->
3. If using StoreFront server group then propagate any changes made to the web.config file of the
primary node to all other nodes.
© 1999–2021 Citrix Systems, Inc. All rights reserved. 114

StoreFront 3.12
Both stores are now set to share the internal store subscription datastore.
Store subscription data using Microso SQL Server
November 13, 2019
Note:
This document assumes basic knowledge of MS SQL server and T‑SQL queries. Administrators
must be comfortable configuring, using, and administering SQL server before attempting to fol‑
low this document.
Introduction
ESENT is an embeddable, transactional database engine which Windows can use. All versions of Store‑
Front support the use of a built in ESENT database by default. They can also connect to a Microso
SQL server instance if the store is configured to use an SQL connection string.
The main advantage of switching StoreFront to using SQL instead of ESENT is that T‑SQL update state‑
ments allow you to manage, modify, or delete subscription records. If you use SQL, you do not need
to export, modify and re import the entire ESENT subscription data whenever minor changes to the
subscription data are performed.
To migrate existing subscription data from ESENT to Microso SQL server, the flat ESENT data ex‑
ported from StoreFront needs to be transformed into an SQL friendly format for bulk import. For new
deployments without any new subscription data, this step is not required. The data transformation
step is only needed once. This article describes the supported configuration which can be used in
all StoreFront versions from version 3.5, which introduced the ‑STF PowerShell SDK referenced in the
article.
Note:
Failures to connect to the SQL server instance used by StoreFront to store the subscription data
due to network outages do not render the StoreFront deployment unusable. Outages only result
in a temporarily degraded user experience; users cannot add, remove, or view favorite resources
until the connection to SQL server is restored. Resources can still be enumerated and launched
during the outage. The expected behavior is the same as if the Citrix Subscription Store service
were to stop while using ESENT.
Tip:
Resources configured with KEYWORDS:Auto or KEYWORDS:Mandatory behave the same way
when using both ESENT or SQL. New SQL subscription records are created automatically when
© 1999–2021 Citrix Systems, Inc. All rights reserved. 115

StoreFront 3.12
a user first logs on if either KEYWORD is included in the user’s resources.
Advantages of ESENT and SQL server
ESENT SQL
Default and requires no addition configuration
to use StoreFront “out of the box”.
Much more manageable and subscription data
can be manipulated or updated easily using
T‑SQL queries. Allows records per user to be
deleted or updated Allows easy means to
count records per application, delivery
controller or user. Allows easy means to
remove unnecessary user data for users who
have le the company/organization. Allows
easy means to update delivery controller
references such as when the admin switches to
using aggregation or new delivery controllers
are provisioned.
Simpler to configure replication between
dierent server groups using subscription
syncing and pull schedules. See Configure
subscription synchronization
Decoupled from StoreFront so no need to back
up the subscription data before StoreFront
upgrade as the data is maintained on a
separate SQL server. Subscription backup is
independent of StoreFront and uses SQL
backup strategies and mechanisms.
SQL unnecessary when subscription
management is not needed. If the subscription
data will never need updating, ESENT is likely
to meet customer needs.
Single copy of the subscription data shared by
all members of the server group so less chance
of data dierences between servers or data
syncing issues.
Disadvantages of ESENT and SQL server
© 1999–2021 Citrix Systems, Inc. All rights reserved. 116

StoreFront 3.12
ESENT SQL
No easy means to manage subscription data
easily and in a granular manner. Requires
subscription manipulations to be done in
exported .txt files. The whole subscription
database must be exported and re imported.
Potentially thousands of records may need to
be changed using find and replace techniques,
which is labor intensive and potentially error
prone.
Requires basic SQL expertise and
infrastructure. Can require an SQL license to be
purchased, which increases total cost of
ownership of StoreFront deployment.
Although a Citrix Virtual Apps and Desktops
database instance can also be shared with
StoreFront to reduce costs.
A copy of the ESENT database must be
maintained on each StoreFront server within a
server group. On rare occasions this database
can get out of sync within a server group or
between dierent server groups.
Replicating subscription data between server
groups is a non‑trivial deployment task. It
requires multiple SQL instances and
transaction replication between each of them
per data center. This requires specialized MS
SQL expertise.
Data migration from ESENT and
transformation to SQL friendly format
required. This process is only required once.
Extra windows servers and licenses may be
needed.
Extra steps to deploy StoreFront.
Deployment scenarios
Note:
Each store configured within StoreFront requires either an ESENT database or a Microso SQL
database if you want to support user subscriptions. The method of storing the subscription data
is set at the store level within StoreFront.
Citrix recommended all store databases reside on the same Microso SQL server instance to reduce
management complexity and reduce the scope for misconfiguration.
Multiple stores can share the same database, provided they are all configured to use the same identi‑
cal connection string. It does not matter if they use dierent delivery controllers. The disadvantage of
multiple stores sharing a database is that there is no way to tell which store each subscription record
corresponds to.
A combination of the two data storage methods is technically possible on a single StoreFront deploy‑
ment with multiple stores. It is possible to configure one store to use ESENT and another to use SQL.
© 1999–2021 Citrix Systems, Inc. All rights reserved. 117

StoreFront 3.12
This is not recommended due to increased management complexity and the scope for misconfigura‑
tion.
There are four scenarios you can use for storing subscription data in SQL
Server:
Scenario 1: Single StoreFront Server or Server Group using ESENT (default)
By default, all versions of StoreFront since version 2.0 use a flat ESENT database to store and replicate
subscription data between members of a server group. Each member of the server group maintains
an identical copy of the subscription database, which is synced with all other members of the server
group. This scenario requires no additional steps to configure. This scenario is suitable for most cus‑
tomers who do not expect frequent changes to Delivery Controller names or do not need to perform
frequent management tasks on their subscription data like removing or updating old user subscrip‑
tions.
Scenario 2: Single StoreFront Server and a local Microso SQL server instance installed
StoreFront uses a locally installed SQL server instance and both components reside on the same
server. This scenario is suitable for a simple single StoreFront deployment where customers might
need to make frequent changes to Delivery Controller names, or they need to perform frequent
management tasks on their subscription data like removing or updating old user subscriptions, but
they do not require a high availability StoreFront deployment. Citrix do not recommend this scenario
for server groups because it creates a single point of failure on the server group member that hosts
the Microso SQL database instance. This scenario is not suitable for large enterprise deployments.
Scenario 3: StoreFront server group and a dedicated Microso SQL server instance configured
for high availability (recommended)
All StoreFront server group members connect to the same dedicated Microso SQL server instance
or SQL failover cluster. This is the most suitable model for large enterprise deployments where Citrix
administrators want to make frequent changes to delivery controller names or want to perform fre‑
quent management tasks on their subscription data like removing or updating old user subscriptions
and require high availability.
© 1999–2021 Citrix Systems, Inc. All rights reserved. 118
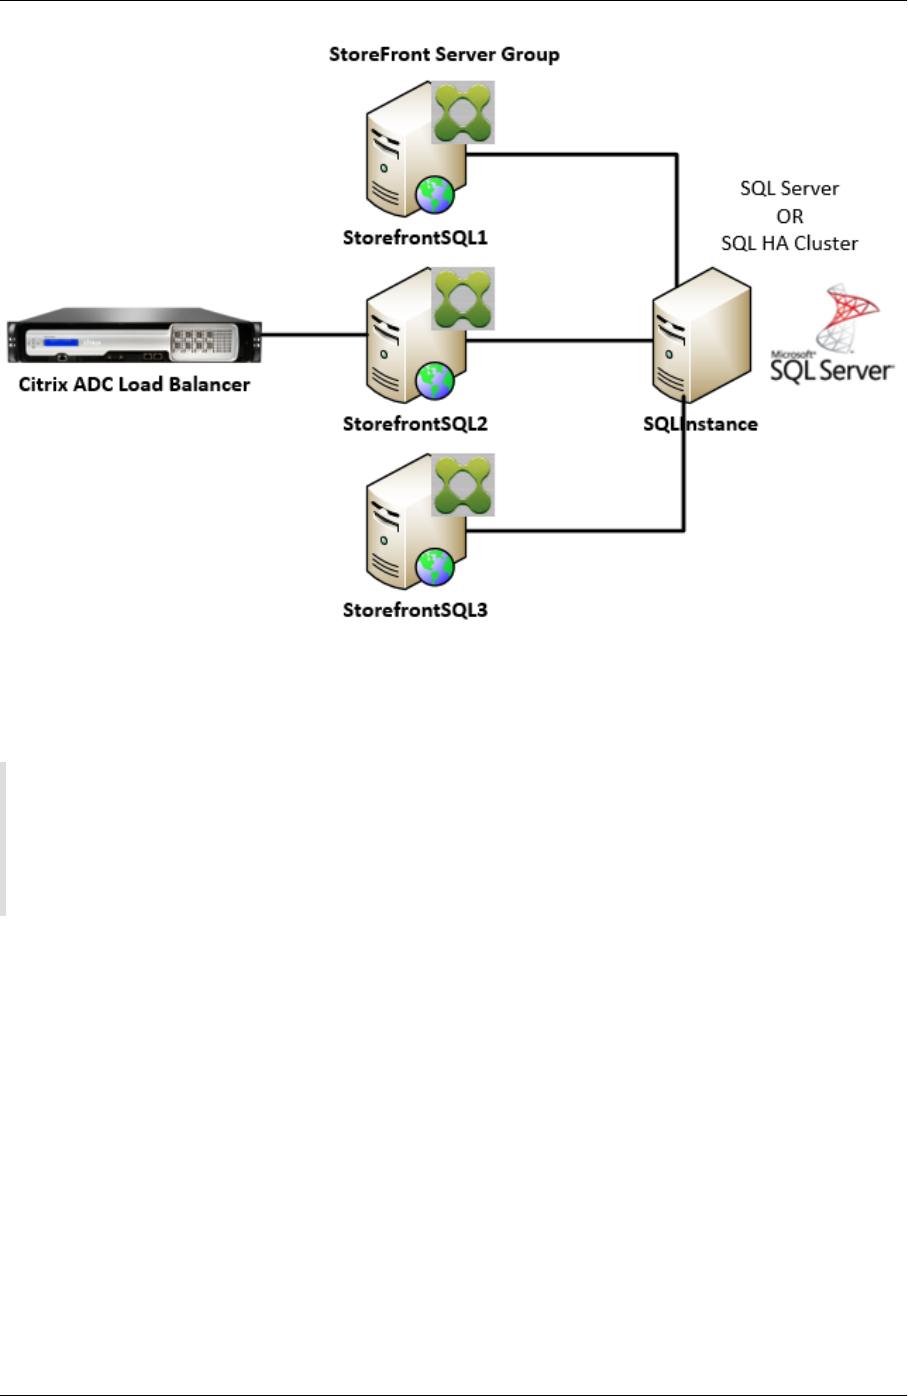
StoreFront 3.12
Scenario 4: Multiple StoreFront server groups and a dedicated Microso SQL server instance in
each data center per server group
Note:
This is an advanced configuration. Only attempt it if you are an experienced SQL server admin‑
istrator familiar with transaction replication, and you have the necessary skills to deploy it suc‑
cessfully.
This is the same as scenario 3, but extends it to situations where multiple StoreFront server groups are
required in dierent remote data centers. Citrix Administrators may choose to synchronize subscrip‑
tion data between dierent server groups in the same or dierent data centers. Each server group in
the data center connects to its own dedicated Microso SQL server instance for redundancy, failover,
and performance. This scenario requires considerable extra Microso SQL server configuration and
infrastructure. It relies entirely on Microso SQL technology to replicate the subscription data and its
SQL transactions.
© 1999–2021 Citrix Systems, Inc. All rights reserved. 119

StoreFront 3.12
Resources
You can download the following scripts from https://github.com/citrix/sample‑scripts/tree/master/
storefront to help you:
Configuration scripts
• Set‑STFDatabase.ps1– setsthe MS SQL connectionstringforeachStore. Runon the StoreFront
server.
• Add‑LocalAppPoolAccounts.ps1 – grants the local StoreFront server’s app pools read and
write access to the SQL database. Run for scenario 2 on the SQL server.
• Add‑RemoteSFAccounts.ps1 – grants the all StoreFront serversin a servergroupreadandwrite
access to the SQL database. Run for scenario 3 on the SQL server.
• Create‑StoreSubscriptionsDB‑2016.sql – creates the SQL database and schema. Run on the
SQL server.
Data transformation and import scripts
• Transform‑SubscriptionDataForStore.ps1 – exports and transforms existing subscription
data within ESENT into an SQL friendly format for import.
© 1999–2021 Citrix Systems, Inc. All rights reserved. 120

StoreFront 3.12
• Create‑ImportSubscriptionDataSP.sql – creates a stored procedure to import the data trans‑
formed by Transform‑SubscriptionDataForStore.ps1. Run this script once on the SQL server af‑
ter you have created the database schema using Create‑StoreSubscriptionsDB‑2016.sql.
Configure the StoreFront server’s local security group on the SQL Server
Scenario 2: Single StoreFront Server and a local Microso SQL server instance installed
Create a local security group called <SQLServer>\StoreFrontServers on the Microso SQL
server, and add the virtual accounts for the IIS APPPOOL\DefaultAppPool and IIS APPPOOL\
Citrix Receiver for Web to allow the locally installed StoreFront to read and write to SQL. This
security group is referenced in the .SQL script that creates the store subscription database schema,
so ensure that the group name matches.
You can download the script Add‑LocalAppPoolAccounts.ps1 to help you.
Install StoreFront before running the Add‑LocalAppPoolAccounts.ps1 script. The script depends on the
ability to locate the IIS APPPOOL\Citrix Receiver for Web virtual IIS account, which does not
exist until StoreFront has been installed and configured. IIS APPPOOL\DefaultAppPool is created
automatically by installing the IIS webserver role.
1 # Create Local Group for StoreFront servers on DB Server
2 $LocalGroupName = "StoreFrontServers"
3 $Description = "Contains StoreFront Server Machine Accounts or
StoreFront AppPool Virtual Accounts"
4
5 # Check whether the Local Group Exists
6 if ([ADSI]::Exists("WinNT://$env:ComputerName/$LocalGroupName"))
7 {
8
9 Write-Host "$LocalGroupName already exists!" -ForegroundColor "
Yellow"
10 }
11
12 else
13 {
14
15 Write-Host "Creating $LocalGroupName local security group" -
ForegroundColor "Yellow"
16
17 # Create Local User Group
18 $Computer = [ADSI]"WinNT://$env:ComputerName,Computer"
19 $LocalGroup = $Computer.Create("group",$LocalGroupName)
20 $LocalGroup.setinfo()
21 $LocalGroup.description = $Description
© 1999–2021 Citrix Systems, Inc. All rights reserved. 121

StoreFront 3.12
22 $Localgroup.SetInfo()
23 Write-Host "$LocalGroupName local security group created" -
ForegroundColor "Green"
24 }
25
26 $Group = [ADSI]"WinNT://$env:ComputerName/$LocalGroupName,group"
27
28 # Add IIS APPPOOL\DefaultAppPool
29 $objAccount = New-Object System.Security.Principal.NTAccount("IIS
APPPOOL\DefaultAppPool")
30 $StrSID = $objAccount.Translate([System.Security.Principal.
SecurityIdentifier])
31 $DefaultSID = $StrSID.Value
32
33 $Account = [ADSI]"WinNT://$DefaultSID"
34 $Group.Add($Account.Path)
35
36 # Add IIS APPPOOL\Citrix Receiver for Web
37 $objAccount = New-Object System.Security.Principal.NTAccount("IIS
APPPOOL\Citrix Receiver for Web")
38 $StrSID = $objAccount.Translate([System.Security.Principal.
SecurityIdentifier])
39 $WebRSID = $StrSID.Value
40
41 $Account = [ADSI]"WinNT://$WebRSID"
42 $Group.Add($Account.Path)
43
44 Write-Host "AppPools added to $LocalGroupName local group" -
ForegroundColor "Green"
45 <!--NeedCopy-->
Enable named pipes within your local SQL instance using SQL server configuration manager. Named
pipes are required for interprocess communication between StoreFront and SQL server.
© 1999–2021 Citrix Systems, Inc. All rights reserved. 122

StoreFront 3.12
Ensure the Windows firewall rules are correctly configured to allow SQL server connections using ei‑
ther a specific port or dynamic ports. Refer to Microso documentation for how to do this in your
environment.
Tip:
If connection to the local SQL instance fails, check that localhost or <hostname> used in the
connection string resolves to the correct IPv4 address. Windows may attempt to use IPv6 instead
of IPv4, and DNS resolution of localhost may return ::1 instead of the correct IPv4 address of the
StoreFront and SQL server. Completely disabling the IPv6 network stack on the host server may
be required to resolve this problem.
Scenario 3: StoreFront server group and a dedicated Microso SQL server instance
Createa local security group called <SQLServer>\StoreFrontServers on the MicrosoSQL server
and add all members of the StoreFront server group. This security group is referenced later in the
Create‑StoreSubscriptionsDB‑2016.sql script that creates the subscription database schema within
SQL.
© 1999–2021 Citrix Systems, Inc. All rights reserved. 123

StoreFront 3.12
Add all StoreFront server groupdomain computeraccounts to the <SQLServer>\StoreFrontServers
group. Only StoreFront server domain computer accounts listed in the group will be able to read
and write subscription records in SQL if Windows authentication is used by SQL server. The following
PowerShell function, provided in script Add‑RemoteSFAccounts.ps1, creates the local security group
and adds two StoreFront servers to it named StoreFrontSQL1 and StoreFrontSQL2.
1 function Add-RemoteSTFMachineAccounts
2 {
3
4 [CmdletBinding()]
5 param([Parameter(Mandatory=$True)][string]$Domain,
6 [Parameter(Mandatory=$True)][array]$StoreFrontServers)
7
8 # Create Local Group for StoreFront servers on DB Server
9 $LocalGroupName = "StoreFrontServers"
10 $Description = "Contains StoreFront Server Machine Accounts or
StoreFront AppPool virtual accounts"
11
12 # Check whether the Local Security Group already exists
13 if ([ADSI]::Exists("WinNT://$env:ComputerName/$LocalGroupName"))
14 {
15
16 Write-Host "$LocalGroupName already exists!" -ForegroundColor "
Yellow"
17 }
18
19 else
© 1999–2021 Citrix Systems, Inc. All rights reserved. 124

StoreFront 3.12
20 {
21
22 Write-Host "Creating $LocalGroupName local group" -ForegroundColor
"Yellow"
23
24 # Create Local Security Group
25 $Computer = [ADSI]"WinNT://$env:ComputerName,Computer"
26 $LocalGroup = $Computer.Create("group",$LocalGroupName)
27 $LocalGroup.setinfo()
28 $LocalGroup.description = $Description
29 $Localgroup.SetInfo()
30 Write-Host "$LocalGroupName local group created" -ForegroundColor "
Green"
31 }
32
33 Write-Host "Adding $StoreFrontServers to $LocalGroupName local group" -
ForegroundColor "Yellow"
34
35 foreach ($StoreFrontServer in $StoreFrontServers)
36 {
37
38 $Group = [ADSI]"WinNT://$env:ComputerName/$LocalGroupName,group"
39 $Computer = [ADSI]"WinNT://$Domain/$StoreFrontServer$"
40 $Group.Add($Computer.Path)
41 }
42
43 Write-Host "$StoreFrontServers added to $LocalGroupName" -
ForegroundColor "Green"
44 }
45
46 Add-RemoteSTFMachineAccounts -Domain "example" -StoreFrontServers @("
StoreFrontSQL1","StoreFrontSQL2")
47 <!--NeedCopy-->
Configure the subscription database schema within Microso SQL Server for each
store
Create a named instance on your Microso SQL server for use by StoreFront. Set the path within the
.SQL script to correspond to where your version of SQL is installed, or its database files are stored. The
example script Create‑StoreSubscriptionsDB‑2016.sql uses SQL Server 2016 Enterprise.
Create an empty database using SQL Server Management Studio (SSMS) by right clicking Databases
then selecting
New Database
.
© 1999–2021 Citrix Systems, Inc. All rights reserved. 125

StoreFront 3.12
Type a Database name to match your store, or choose a dierent name such as STFSubscriptions.
Before running the script, for each store in your StoreFront deployment, modify the references in the
example script to match your StoreFront and SQL deployments. For example, modify:
• Name each databaseyou createtomatchthe store name in StoreFrontin USE [STFSubscriptions
].
• Set the path to the database .mdf and .ldf files to where you want to store the database.
C:\Program Files\Microsoft SQL Server\MSSQL13.SQL2016\MSSQL\DATA\
STFSubscriptions.mdf
C:\Program Files\Microsoft SQL Server\MSSQL13.SQL2016\MSSQL\DATA\
© 1999–2021 Citrix Systems, Inc. All rights reserved. 126

StoreFront 3.12
STFSubscriptions.ldf
• Set the reference to your SQL server’s name within the script:
CREATE LOGIN [SQL2016\StoreFrontServers] FROM WINDOWS;
ALTER LOGIN [SQL2016\StoreFrontServers]
Run the script. Aer successful configuration of the schema, three database tables are created:
SchemaDetails, Subscription, and User.
The following database diagram shows the subscriptions database schema that the Create‑
StoreSubscriptionsDB‑2016.sql script creates:
© 1999–2021 Citrix Systems, Inc. All rights reserved. 127

StoreFront 3.12
Configure the SQL Server Connection String for each StoreFront store
Scenario 1
Tip:
The original subscription data stored on disk in the ESENT database is not destroyed or removed.
If you decide to revert from Microso SQL server to using ESENT, it is possible to remove the store
connection stringand simply switch back to using the original data. Any additional subscriptions
that were created while SQL was in use for the store will not exist in ESENT and users will not see
these new subscription records. All original subscriptions records will still be present.
To re‑enable ESENT subscriptions on a store
Open the PowerShell ISE and select Run as Administrator.
Use the ‑UseLocalStorage option to specify the store you want to re‑enable ESENT subscriptions on:
1 $SiteID = 1
2 $StoreVirtualPath = "/Citrix/Store1"
3
© 1999–2021 Citrix Systems, Inc. All rights reserved. 128

StoreFront 3.12
4 # Sets SQL DB Connection String
5 $StoreObject = Get-STFStoreService -SiteID $SiteID -VirtualPath
$StoreVirtualPath
6
7 # Removes the SQL DB Connection string and reverts back to using ESENT
8 Set-STFStoreSubscriptionsDatabase -StoreService $StoreObject -
UseLocalStorage
9 Get-STFStoreSubscriptionsDatabase -StoreService $StoreObject
10 <!--NeedCopy-->
Scenarios 2, 3 and 4
Open the PowerShell ISE and select Run as Administrator.
Specify the store you want to set a connection string for using $StoreVirtualPath
1 $SiteID = 1
2 $VirtualPath= "/Citrix/Store1"
3 $DBName = "Store1"
4 $DBServer = "SQL2016Ent"
5 $DBLocalServer = "localhost"
6 $DBInstance = "StoreFrontInstance"
7
8 # For a remote database instance
9 $ConnectionString = "Server=$DBServer\$SQLInstance;Database=$DBName;
Trusted_Connection=True;" Database=$DBName;Trusted_Connection=True;"
10 <!--NeedCopy-->
OR
1 # For a locally installed database instance
2 $ConnectionString = "$DBLocalServer\$SQLInstance;Database=$DBName;
Trusted_Connection=True;"
3
4 # Sets SQL DB Connection String
5 $StoreObject = Get-STFStoreService -SiteID $SiteID -VirtualPath "/
Citrix/Store"
6 Set-STFStoreSubscriptionsDatabase -StoreService $StoreObject -
ConnectionString $ConnectionString
7 Get-STFStoreSubscriptionsDatabase -StoreService $StoreObject
8 <!--NeedCopy-->
Repeat the process for every store in your deployment if you want to configure them all to use an SQL
connection string.
© 1999–2021 Citrix Systems, Inc. All rights reserved. 129

StoreFront 3.12
Migrate existing data from ESENT into Microso SQL Server
To migrate your existing ESENT data to SQL a two‑step data transformation process is required. Two
scripts are provided to assist you in performing this one‑time operation. If the connection string in
StoreFront and the SQL instance are correctly configured, then all new subscriptions are created au‑
tomatically within SQL in the correct format. Aer migration, the historic ESENT subscription data is
transformed into an SQL format and users can also see their previously subscribed resources.
Example: four SQL subscriptions for the same domain user
Step 1 Use the Transform‑SubscriptionDataForStore.ps1 script to convert the ESENT data into
an SQL friendly format for bulk import
Log into the StoreFront server that you want to transform ESENT data from.
Any member of a server group is suitable provided they all contain the same number of subscription
records.
Open the PowerShell ISE and select Run as Administrator.
Run the script Transform‑SubscriptionDataForStore.ps1 which exports a <StoreName>.txt file from
the ESENT database to the current user’s desktop.
The PowerShell script provides verbose feedback on each subscription row that is processed to aid
debugging and help you assess the success of the operation. This may take a long time to process.
The transformed data is written out to <StoreName>SQL.txt on the current user’s desktop aer the
script has completed. The script summarizes the number of unique user records and the total number
of subscriptions processed.
Repeat this process for every store you want to migrate to SQL server.
Step 2 Use a T‑SQL stored procedure to bulk SQL import the transformed data
Each store’s data must be imported one store at a time.
Copy the <StoreName>SQL.txt file created in Step 1 from the StoreFront server’s desktop to C:\ on
the Microso SQL server and rename it to SubscriptionsSQL.txt.
The Create‑ImportSubscriptionDataSP.sql script creates a T‑SQL stored procedure to bulk import the
subscription data. It removes duplicate entries for each unique user so the resulting SQL data is cor‑
rectly normalized and split into the correct tables.
© 1999–2021 Citrix Systems, Inc. All rights reserved. 130
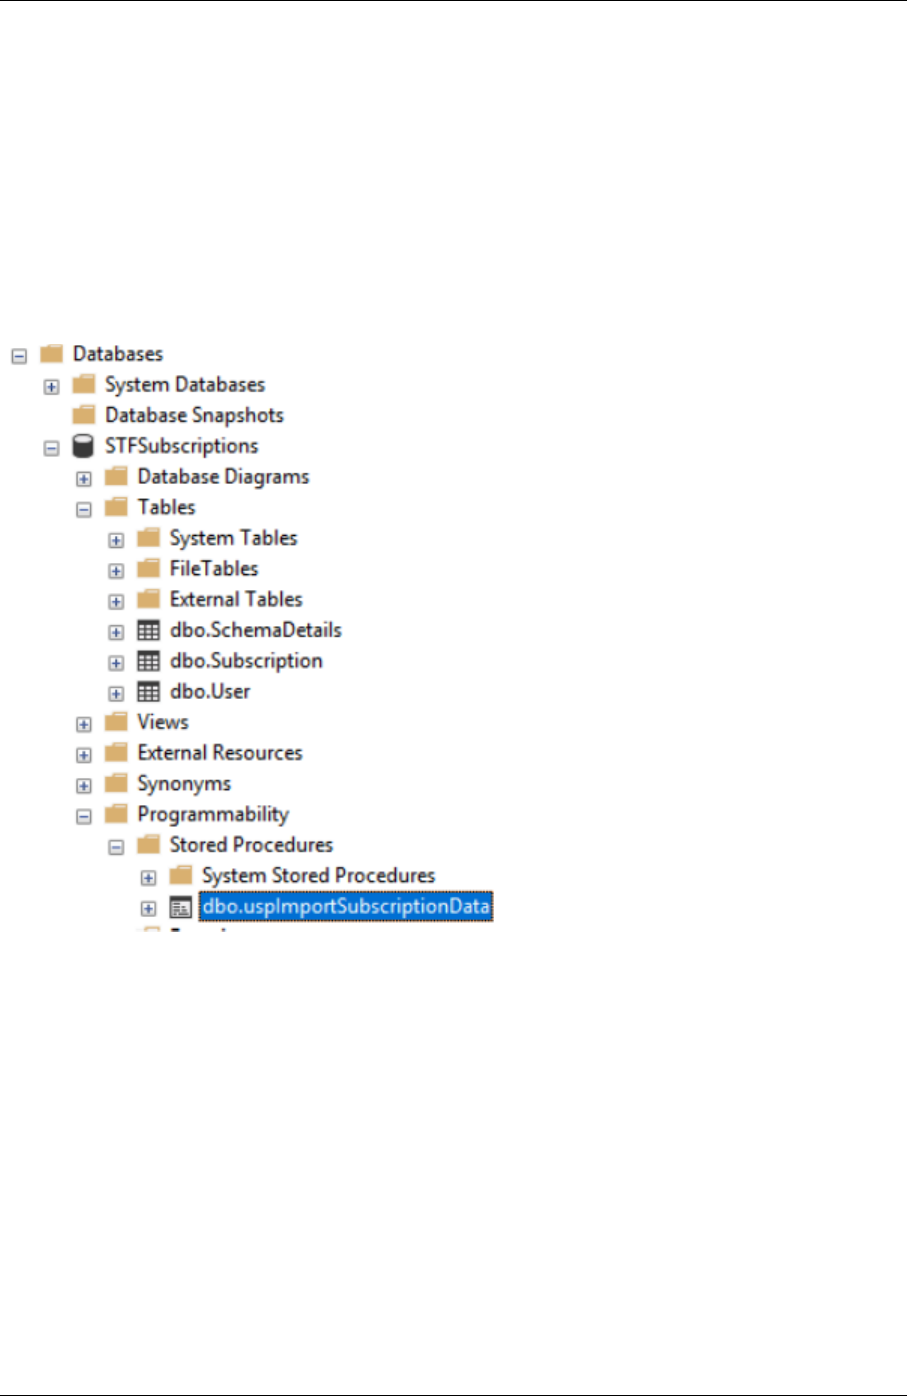
StoreFront 3.12
Before executing Create‑ImportSubscriptionDataSP.sql, change USE [STFSubscriptions] to
match the database under which you want to create the Stored Procedure.
Open the Create‑ImportSubscriptionDataSP.sql file using SQL Server Management Studio and execute
the code within it. This script adds the ImportSubscriptionDataSP Stored Procedure to the database
you created earlier.
Aer successful creation of the Stored Procedure the following message is shown in the SQL console,
and the ImportSubscriptionDataSP Stored Procedure is added to the database:
Commands completed successfully.
Execute the Stored Procedure by right clicking it, then select Execute Stored Procedure, and click
OK.
© 1999–2021 Citrix Systems, Inc. All rights reserved. 131

StoreFront 3.12
Return value 0 indicates all data imported successfully. Any problems on import are logged to the SQL
console. Aer the stored procedure has run successfully, compare the total number of subscription
records and unique users that Transform‑SubscriptionDataForStore.ps1 provides with the result of
the two SQL queries below. The two totals should match.
The total number of subscriptions from the transformation script should match the total number re‑
ported from SQL by
1 SELECT COUNT(*) AS TotalSubscriptions
2 FROM [Subscription]
3 <!--NeedCopy-->
The number of unique uses from the transformation script should match the number of records in the
User table reported from SQL by
1 SELECT COUNT(*) AS TotalUsers
2 FROM [User]
3 <!--NeedCopy-->
If the transformation script shows 100 unique users and 1000 total subscription records, then SQL
should show the same two numbers aer successful migration.
Log in to StoreFront to check whether existing users can see their subscription data. Existing subscrip‑
tion records are updated in SQL when users subscribe or unsubscribe their resources. New users and
subscription records are also created in SQL.
Step 3 Run T‑SQL queries on your imported data
© 1999–2021 Citrix Systems, Inc. All rights reserved. 132

StoreFront 3.12
Note:
All Delivery Controller names are case sensitive and must exactly match the case and name used
within StoreFront.
1 -- Get all SQL subscription records
2 Use [STFSubscriptions]
3 SELECT * FROM [Subscription]
4 SELECT * FROM [User]
5 <!--NeedCopy-->
1 -- Get all subscription records for a particular user SID
2 Use [STFSubscriptions]
3 SELECT * FROM [Subscription]
4 INNER JOIN [User]
5 ON [Subscription].[user_id] = [User].[id]
6 WHERE [User].[username] = 'S-1-5-21-xxxxxxxxxx-xxxxxxxxxx-xxxxxxxxxx-
xxxx'
7
8 -- Get total number of Subscription records for a particular user SID
9 Use [STFSubscriptions]
10 SELECT COUNT(Subscription.id)
11 FROM [Subscription]
12 INNER JOIN [User]
13 ON [Subscription].[user_id] = [User].[id]
14 WHERE [User].[username] = 'S-1-5-21-xxxxxxxxxx-xxxxxxxxxx-xxxxxxxxxx-
xxxx'
15 <!--NeedCopy-->
1 -- Get all subscription records for a particular delivery controller
2 Use [STFSubscriptions]
3 SELECT * FROM [Subscription]
4 WHERE [resource_id] LIKE 'DeliveryController.%'
5
6 -- OR for aggregated resources use the name of the aggregation group
7 Use [STFSubscriptions]
8 SELECT * FROM [Subscription]
9 WHERE [resource_id] LIKE 'DefaultAggregationGroup.%'
10
11 -- Get all subscription records for a particular application
12 Use [STFSubscriptions]
13 SELECT * FROM [Subscription]
14 WHERE [resource_id] = ' DeliveryController.Application'
15 <!--NeedCopy-->
© 1999–2021 Citrix Systems, Inc. All rights reserved. 133

StoreFront 3.12
Update or delete existing subscription records using T‑SQL
DISCLAIMER:
All example SQL update and delete statements are used entirely at your own risk. Citrix is not
responsible for any loss or accidental alteration of your subscription data by incorrect use of the
provided examples. The following T‑SQL statements are provided as a guide to enable simple
updates to be performed. Back up all subscription data in SQL database full backups before
attempting to update your subscriptions or remove obsolete records. Failure to perform the nec‑
essary backups may result in data loss or corruption. Before executing your own T‑SQL UPDATE
or DELETE statements against the production database, test them on dummy data or on a redun‑
dant copy of the production data away from the live production database.
Note:
All Delivery Controller names are case sensitive and must exactly match the case and name used
within StoreFront.
1 -- Update the delivery controller used in all subscriptions.
2 Use [STFSubscriptions]
3 UPDATE [Subscription]
4 SET [resource_id] = REPLACE(resource_id,'OldDeliveryController.','
NewDeliveryController.')
5 WHERE [resource_id] LIKE 'OldDeliveryController.%'
6
7 -- OR for aggregated resources use the name of the aggregation group
8 Use [STFSubscriptions]
9 UPDATE [Subscription]
10 SET [resource_id] = REPLACE(resource_id,'OldDeliveryController.','
DefaultAggregationGroup.')
11 WHERE [resource_id] LIKE 'OldDeliveryController.%'
12 <!--NeedCopy-->
1 -- Delete all subscription records for a particular Delivery Controller
2 Use [STFSubscriptions]
3 DELETE FROM [Subscription]
4 WHERE [resource_id] LIKE 'DeliveryController.%'
5
6 -- OR for aggregated resources use the name of the aggregation group
7 Use [STFSubscriptions]
8 DELETE FROM [Subscription]
9 FROM [Subscription]
10 WHERE [resource_id] LIKE 'DefaultAggregationGroup.%'
11
12 -- Delete all subscription records for a particular application
13 Use [STFSubscriptions]
© 1999–2021 Citrix Systems, Inc. All rights reserved. 134

StoreFront 3.12
14 DELETE FROM [Subscription]
15 FROM [Subscription]
16 WHERE [resource_id] LIKE '%.Application'
17
18 -- Delete all subscription records for an application published via a
specific delivery controller
19 Use [STFSubscriptions]
20 DELETE FROM [Subscription]
21 FROM [Subscription]
22 WHERE [resource_id] = 'DeliveryController.Application'
23 <!--NeedCopy-->
1 -- Delete all subscription records for a particular user SID
2 Use [STFSubscriptions]
3 DELETE FROM [Subscription]
4 INNER JOIN [User]
5 ON [Subscription].[user_id] = [User].[id]
6 WHERE [User].[username] = 'S-1-5-21-xxxxxxxxxx-xxxxxxxxxx-xxxxxxxxxx-
xxxx'
7
8 Use [STFSubscriptions]
9 DELETE FROM [User]
10 WHERE [User].[username] = 'S-1-5-21-xxxxxxxxxx-xxxxxxxxxx-xxxxxxxxxx-
xxxx'
11 <!--NeedCopy-->
1 -- Delete ALL subscription data from a particular database and reset
the primary key clustered index to start numbering from 0.
2 -- USE WITH EXTREME CARE AND NOT ON LIVE PRODUCTION DATABASES.
3 -- Can be useful whilst debugging data import issues to start with a
clean database.
4
5 Use [STFSubscriptions]
6 DELETE FROM [Subscription]
7 DBCC CHECKIDENT ([Subscription], RESEED, 0)
8 DELETE FROM [User]
9 DBCC CHECKIDENT ([User], RESEED, 0)
10 <!--NeedCopy-->
© 1999–2021 Citrix Systems, Inc. All rights reserved. 135

StoreFront 3.12
Advanced store settings
October 15, 2018
You can configure advanced store properties by using the Advanced Settings page in the Configure
Store Settings.
Important
In multiple server deployments, use only one server at a time to make changes to the configura‑
tion of the server group. Ensure that the Citrix StoreFront management console is not running
on any of the other servers in the deployment. Once complete, propagate your configuration
changes to the server group so that the other servers in the deployment are updated.
1. On the Windows Start screen or Apps screen, locate and click the Citrix StoreFront tile.
2. Select the Stores node in the le pane of the Citrix StoreFront management console, select a
store in the center pane, and in the Action pane, select Configure Store Settings.
3. On the Configure Store Settings page, select Advanced Settings, select the advance option
you want to configure, make the required change, and click OK.
Address resolution type
Use the Advanced Settings task to specify the type of address to request from the server. The default
is DnsPort. From the Address resolution type drop‑down menu on Advanced Settings, select one
of the following:
• Dns
• DnsPort
• IPV4
• IPV4Port
• Dot
• DotPort
• Uri
• NoChange
Allow font smoothing
You can specify if you want font smoothing for HDX sessions. The default is On.
Use the Advanced Settings task, check the Allow font smoothing check box, and click OK.
© 1999–2021 Citrix Systems, Inc. All rights reserved. 136

StoreFront 3.12
Allow session reconnect
You can specify if you want HDX sessions to be reconnected. The default is On.
Use the Advanced Settings task, check the Allow session reconnect check box, and click OK to en‑
able session reconnect.
Allow special folder redirection
Use the Advanced Settings task to enable or disable special folder redirection. With special folder
redirection configured, users can map Windows special folders for the server to those on their local
computers. Special folders refer to standard Windows folders, such as \Documents and \Desktop,
which are always presented in the same way regardless of the operating system.
Use the Advanced Settings task, check or uncheck the** Allow special folder redirection** check box
to enable or disable special folder redirection, and click OK.
Background health check polling period
StoreFront runs periodic health checks on each XenDesktop broker and XenApp server to reduce the
impact of intermittent server availability. The default is every minute (00:01:00). Use the Advanced
Settings task, specify a time for the Background health‑check Polling period, and click OK to control
the frequency of the health check.
Communication time‑out duration
By default, requests from StoreFront to a server providing resources for a store time out aer 30 sec‑
onds. The server is considered unavailable aer 1 unsuccessful communication attempt. Use the
Advanced Settings task, make your changes to the default time, and click OK to change these set‑
tings.
Connection timeout
You can specify the number of seconds to wait when establishing an initial connection with a Delivery
Controller. The default is 6.
Use the Advanced Settings task, specify the seconds to wait when establishing the initial connection,
and click OK
Enable enhanced enumeration
You can enable (or disable) parallel communication with Delivery Controllers. The default is On.
© 1999–2021 Citrix Systems, Inc. All rights reserved. 137

StoreFront 3.12
Use the Advanced Settings task, check (or uncheck) the Enable enhanced enumeration check box,
and click OK.
Enable socket spooling
Socket pooling is disabled by default in stores. When socket pooling is enabled, StoreFront main‑
tains a pool of sockets, rather than creating a socket each time one is needed and returning it to the
operating system when the connection is closed. Enabling socket pooling enhances performance,
particularly for Secure Sockets Layer (SSL) connections. To enable socket pooling, you edit the store
configuration file. Use the Advanced Settings task, check the** Enable socket spooling** check box,
and click OK to enable socket pooling.
Filter resources by excluded keywords
You can filter matching resources by excluded keywords. Specifying exclusion keywords removes any
previously configured inclusion keywords. The default is No filtering (no resource types excluded).
Use the Advanced Settings task, select Filter resources by excluded keywords, click to the right of
it, enter a semicolon‑separated list of keywords in the enter keywords box, and click OK.
Filter resources by included keywords
You can filter matching resources by inclusion keywords. Specifying inclusion keywords removes any
previously configured exclusion keywords. The default is No filtering (no resource types excluded).
© 1999–2021 Citrix Systems, Inc. All rights reserved. 138

StoreFront 3.12
Use the Advanced Settings task, select Filter resources by included keywords, click to the right of
it, enter a semicolon‑separated list of keywords in the enter keywords box, and click OK.
Filter resources by type
Choose the resource types to be included in resource enumeration. The default is No filtering (all
resource types included).
Use the Advanced Settings task, select Filter resources by type, click to the right of it, choose the
resource types to include in the enumeration, and click OK.
Maximum concurrent enumerations
Specify the maximum number of concurrent requests to send to dierent Delivery Controllers. The
default is 0 (No Limit).
Use the Advanced Settings task, select Maximum concurrent enumerations, enter a number, and
click OK.
Minimum farms for concurrent enumeration
Specify the minimum number of Delivery Controllers before enumerations occur in parallel. The de‑
fault is 3.
Use the Advanced Settings task, select Minimum farms for concurrent enumerations, enter a num‑
ber, and click OK.
Override ICA client name
Overrides the client name setting in the .ica launch file with an ID generated by Citrix Receiver for Web.
When disabled, Citrix Receiver specifies the client name. The default is O.
Use the Advanced Settings task, check the Override the ICA client name check box, and click OK.
Require token consistency
When enabled, StoreFront enforces consistency between the gateway used to authenticate and the
gateway used to access the store. When the values are inconsistent, users must reauthenticate. You
must enable this for Smart Access. The default is On.
Use the Advanced Settings task, check the Require token consistency check box, and click OK.
© 1999–2021 Citrix Systems, Inc. All rights reserved. 139

StoreFront 3.12
Server communication attempts
Specify the number of attempts to communicate with Delivery Controllers before marking them un‑
available. The default is 1.
Use the Advanced Settings task, select Server communication attempts, enter a number, and click
OK.
Show Desktop Viewer for legacy clients
Specify whether to show the Citrix Desktop Viewer window and toolbar when users access their desk‑
top from legacy clients. The default is O.
Use the Advanced Settings task, check the Show Desktop Viewer for legacy clients check box, and
click OK.
Manage a Citrix Receiver for Web site
October 15, 2018
Citrix Receiver for Web allows access to applications, data, and desktops easily and securely from a
wide range of devices. Use StoreFront to configure Citrix Receiver for Web app selection for the Citrix
Receiver for Web.
Use the StoreFront management console to do the following Citrix Receiver for Web‑related tasks:
Create a Citrix Receiver for Web site Create Citrix Receiver for Web sites, which
enable users to access stores through a web
page.
Configure Citrix Receiver for Web sites Modify settings for your Receiver for Web sites.
Configure support for the unified Citrix
Receiver experience
StoreFront supports both the classic and
unified user experiences. The unified
experience delivers a centrally managed
HTML5 user experience.
Create and manage featured apps Create product featured app groups for your
end users that are related to or fit in a specific
category.
Configure workspace control Workspace control lets applications follow
users as they move between devices.
© 1999–2021 Citrix Systems, Inc. All rights reserved. 140

StoreFront 3.12
Configure the Citrix Receiver for HTML5 use of
browser tabs
Specify when users start resources from
shortcuts using Citrix Receiver for HTML5,
whether the desktop or application replaces
the Citrix Receiver for Web site in the existing
browser tab rather than appearing in a new
tab.
Configure communication time‑out duration
and retry attempts
By default, requests from a Citrix Receiver for
Web site to the associated store time out aer
three minutes. The store is considered
unavailable aer one unsuccessful
communication attempt. You can change the
default settings.
Create a Citrix Receiver for Web site
January 4, 2019
Use the Create Website task to add Receiver for Web sites, which enable users to access stores through
a webpage.
Important: In multiple server deployments, use only one server at a time to make changes to the con‑
figuration of the server group. Ensure that the Citrix StoreFront management console is not running
on any of the other servers in the deployment. Once complete,
propagate your configuration changes to the server group so that the other servers in the deployment
are updated.
1. On the Windows Start screen or Apps screen, locate and click the Citrix StoreFront tile.
2. Select the Store node in the le pane of the Citrix StoreFront management console, select the
store for which you want to create the Citrix Receiver for Web site, and in the Actions pane, click
Manage Receiver for Web Sites.
3. Click Add to create a new Citrix Receiver for Web site. Specify the desired URL in the Website
path Box and click Next.
4. Select the Citrix Receiver experience and click Next.
5. Choose an authentication method, click Create and then, once the site has been created, click
Finish.
© 1999–2021 Citrix Systems, Inc. All rights reserved. 141

StoreFront 3.12
The URL for users to access the Citrix Receiver for Web site is displayed. For more information
about modifying settings for Citrix Receiver for Web sites, see Configure Citrix Receiver for Web
sites.
By default, when a user accesses a Receiver for Web site from a computer running Windows or Mac
OS X, the site attempts to determine whether Citrix Receiver is installed on the user’s device. If Citrix
Receiver cannot be detected, the user is prompted to download and install the appropriate Citrix Re‑
ceiver for their platform from the Citrix website. For more information about modifying this behavior,
see Disable detection and deployment of Citrix Receiver.
The default configuration for Receiver for Web sites requires that users install a compatible version
of Citrix Receiver to access their desktops and applications. However, you can enable Receiver for
HTML5 on your Receiver for Web sites so that users who cannot install Citrix Receiver can still access
resources. For more information, see Configure Citrix Receiver for Web sites.
Configure Citrix Receiver for Web sites
May 4, 2021
Citrix Receiver for Web sites enable users to access stores through a webpage. The tasks below enable
you to modify settings for your Citrix Receiver for Web sites. Some advanced settings can only be
changed by editing the site configuration files. For more information, see Configure Citrix Receiver
for Web sites using the configuration files.
Important: In multiple server deployments, use only one server at a time to make changes to the con‑
figuration of the server group. Ensure that the Citrix StoreFront management console is not running
on any of the other servers in the deployment. Once complete,
propagate your configuration changes to the server group so that the other servers in the deployment
are updated.
Choose authentication methods
Use the Authentication Methods task to assign authentication methods for users connecting to the
Citrix Receiver for Web site. This action allows you to specify a subset of authentication methods for
each Receiver for Web site.
1. On the Windows Start screen or Apps screen, locate and click the Citrix StoreFront tile.
2. Select the Stores node in the le pane of the Citrix StoreFront management console and select
the relevant store that you want to modify from the results pane.
3. In the Actions pane, click Manage Receiver for Web Sites, click Configure, and choose Au‑
thentication Methods to specify the access methods that you want to enable for your users.
© 1999–2021 Citrix Systems, Inc. All rights reserved. 142

StoreFront 3.12
Note:
† Citrix Receiver for Web site authentication methods marked † are not defined by settings
in the store’s authentication methods. Configure these authentication methods indepen‑
dently for each Citrix Receiver for Web site. The other authentication methods described
here are defined by the store’s authentication methods. (That is, a selection or deselec‑
tion made here for the Citrix Receiver for Web site is replaced by the setting for the store
described in Create a new deployment.)
• Select the User name and password check box to enable explicit authentication. Users
enter their credentials when they access their stores.
• Select the SAML Authentication check box to enable integration with a SAML Identity
Provider. Users authenticatetoan Identity Provider and are automatically logged on when
they access their stores. From the Settings drop‑down menu:
– Select Identity Provider to configure the trust to the Identity Provider.
– Select Service Provider to configure the trust for the Service Provider. This informa‑
tion is required by the Identity Provider.
• Select the Domain pass‑through† check box to enable pass‑through of Active Directory
domain credentials from users’ devices. Users authenticate to their domain‑joined Win‑
dows computers and are automatically logged on when they access their stores. In order
to use this option, pass‑through authentication must be enabled when Citrix Receiver for
Windows is installed on users’ devices. Note that Domain pass‑through for Citrix Receiver
for Web is limited to Windows operating systems using Internet Explorer, Microso Edge,
Mozilla Firefox, and Google Chrome.
• Select the Smart card† check box to enable smart card authentication. Users authenti‑
cate using smart cards and PINs when they access their stores.
• Select the Pass‑through from NetScaler Gateway check box to enable pass‑through au‑
thentication from NetScaler Gateway. Users authenticate to NetScaler Gateway and are
automatically logged on when they access their stores.
4. Once the authentication method has been selected, click OK.
For more information about modifying settings for authentication methods, see Configure the
authentication service.
Add resource shortcuts to other websites
Use the Add Shortcuts to Websites task to provide users with rapid access to desktops and applica‑
tions from trusted websites hosted on the internal network. You generate URLs for resources available
through the Citrix Receiver for Web site and embed these links on your websites. Users click on a link
and are redirected to the Receiver for Web site, where they log on if they have not already done so.
The Receiver for Web site automatically starts the resource. In the case of applications, users are also
© 1999–2021 Citrix Systems, Inc. All rights reserved. 143

StoreFront 3.12
subscribed to the application if they have not subscribed previously.
Before you can generate resource shortcuts, you must add the URLs of host websites to the “trusted
URLs” list, using the Citrix StoreFront management console or using PowerShell. Trusted URLs
are listed in the <trustedUrls> section of the web.config file for the Citrix Receiver for Web site.
web.config is typically located in the C:\inetpub\wwwroot\Citrix\storenameWeb\ directory,
where storename is the name specified for the store when it was created.
By default, StoreFront warns users if they attempt to launch resource shortcuts from untrusted web‑
sites, but users can still choose to launch the resource. To stop these warnings appearing, in the Stores
pane click Manage Receiver for Web Sites, click Configure, choose Advanced Settings, and clear
the option Prompt for untrusted shortcuts.
Add trusted websites using the management console
1. On the Windows Start screen or Apps screen, locate and click the Citrix StoreFront tile.
2. Select the Stores node in the le pane of the Citrix StoreFront management console and select
the site from the results pane.
3. In the Actions pane, click Manage Receiver for Web Sites, click Configure, and choose Web‑
site Shortcuts.
4. Click Add to enter the URL for a website on which you plan to host shortcuts. URLs must be
specified in the form http[s]://hostname[:port], where hostname is the fully qualified domain
name of the website host and port is the port used for communication with the host if the default
port for the protocol is not available. Paths to specific pages on the website are not required. To
modify a URL, select the entry in the Websites list and click Edit. Select an entry in the list and
click Remove to delete the URL for a website on which you no longer want to host shortcuts to
resources available through the Citrix Receiver for Web site.
5. Click Get shortcuts and then click Save when you are prompted to save your configuration
changes.
6. Log on to the Citrix Receiver for Web site and copy the URLs you require to your website.
Add trusted websites using PowerShell
You can add ‘trusted’ URLs using the Set‑STFWebReceiverApplicationShortcuts PowerShell cmdlet
described in https://developer‑docs.citrix.com/projects/storefront‑powershell‑sdk/en/latest/Citrix.
StoreFront.SubscriptionsStore/.
Set session timeout
By default, user sessions on Citrix Receiver for Web sites time out aer 20 minutes of inactivity. When a
session times out, users can continue to use any desktops or applications that are already running but
© 1999–2021 Citrix Systems, Inc. All rights reserved. 144

StoreFront 3.12
must log on again to access Citrix Receiver for Web site functions such as subscribing to applications.
Use the Session Timeout task in the Manage Receiver for Web Sites to change the session timeout
value.
1. On the Windows Start screen or Apps screen, locate and click the Citrix StoreFront tile.
2. Select the Stores node in the le pane and in the Actions pane, click Manage Receiver for
Web Sites, click Configure, choose Session Settings. You can specify minutes and hours for
Session timeout. The minimum value for all time intervals is 1. The maximum equates to 1
year for each time interval.
Specify dierent views for applications and desktops
Use the Application and Desktops view on Receiver for Web task in the Manage Receiver for Web
Sites to change the session timeout value.
1. On the Windows Start screen or Apps screen, locate and click the Citrix StoreFront tile.
2. Select the Stores node in the le pane and in the Actions pane, click Manage Receiver for Web
Sites, click Configure, and choose Client Interface Settings.
3. From the Select view and Default view drop‑down menus, select the views you want
displayed.
To enable folder view:
1. On the Windows Start screen or Apps screen, locate and click the Citrix StoreFront tile.
2. Select the Stores node in the le pane and in the Actions pane, click Manage Receiver for Web
Sites and click Configure.
3. Select Advanced Settings and check Enable folder view.
Stop oering provisioning files to users
By default, Citrix Receiver for Web sites oer provisioning files that enable users to configure Citrix Re‑
ceiver automatically for the associated store. The provisioning files contain connection details for the
store that provides the resources on the site, including details of any NetScaler Gateway deployments
and beacons configured for the store.
Use the Enable Receiver configuration task in the Manage Receiver for Web Sites to change the
session timeout value.
1. On the Windows Start screen or Apps screen, locate and click the Citrix StoreFront tile.
2. Select the Stores node in the le pane and in the Actions pane, click Manage Receiver for Web
Sites, click Configure, and choose Client Interface Settings.
3. Select Enable Receiver configuration.
© 1999–2021 Citrix Systems, Inc. All rights reserved. 145

StoreFront 3.12
Configure site behavior for users without Citrix Receiver
Use the Deploy Citrix Receiver task to configure the behavior of a Citrix Receiver for Web site when a
Windows or Mac OS X user without Citrix Receiver installed accesses the site. Bydefault, Citrix Receiver
for Web sites automatically attempt to determine whether Citrix Receiver is installed when accessed
from computers running Windows or Mac OS X.
If Citrix Receiver cannot be detected, the user is prompted to download and install the appropriate
Citrix Receiver for their platform. The default download location is the Citrix website, but you can also
copy the installation files to the StoreFront server and provide users with these local files instead.
For users who cannot install Citrix Receiver, you can enable Citrix Receiver for HTML5 on your Citrix
Receiver for Web sites. Citrix Receiver for HTML5 enables users to access desktops and applications
directly within HTML5‑compatible web browsers without needing to install Citrix Receiver. Both in‑
ternal network connections and connections through NetScaler Gateway are supported. However,
for connections from the internal network, Citrix Receiver for HTML5 only enables access to resources
provided by specific products. Additionally, specific versions of NetScaler Gateway are required to
enable connections from outside the corporate network. For more information, see Infrastructure
requirements.
For local users on the internal network, access through Citrix Receiver for HTML5 to resources pro‑
vided by XenDesktop and XenApp is disabled by default. To enable local access to desktops and appli‑
cations using Citrix Receiver for HTML5, you must enable the ICA WebSockets connections policy on
your XenDesktop and XenApp servers. XenDesktop and XenApp use port 8008 for Citrix Receiver for
HTML5 connections. Ensure your firewalls and other network devices permit access to this port. For
more information, see WebSockets policy settings.
Citrix Receiver for HTML5 can only be used with Internet Explorer over HTTP connections. To use Citrix
Receiver for HTML5 with Mozilla Firefox over HTTPS connections, users must type about:config in the
Firefox address bar and set the network.websocket.allowInsecureFromHTTPS preference to true.
1. On the Windows
Start
screen or
Apps
screen, locate and click the Citrix StoreFront tile.
2. Select the Stores node in the le pane of the Citrix StoreFront management console and, in the
results pane, select a site. In the Actions pane, click Manage Receiver for Web Sites and click
Configure.
3. Choose Deploy Citrix Receiver and specify the response of the Citrix Receiver for Web site if
Citrix Receiver cannot be detected on a user’s device.
• If you want the site to prompt the user to download and install the appropriate Citrix Receiver
for their platform, select Install locally. Users must install Citrix Receiver to access desktops
and applications through the site.
– If you select Allow users to download HDX engine (plug in), the Citrix Receiver for Web
allows the user to download and install Citrix Receiver on the end user client if the Citrix
Receiver is not available.
© 1999–2021 Citrix Systems, Inc. All rights reserved. 146

StoreFront 3.12
– If you select Upgrade plug‑in at logon, the Citrix Receiver for Web upgrades the Citrix
Receiver client when the user logs on. To enable this feature, ensure the Citrix Receiver
files are available on the StoreFront server.
– Select a source from the drop‑down menu.
• If you want the site to prompt the user to download and install Citrix Receiver but fall back to
Citrix Receiver for HTML5 if Citrix Receiver cannot be installed, select Use Receiver for HTML5
if local Receiver is unavailable. Users without Citrix Receiver are prompted to download and
install Citrix Receiver every time they log on to the site.
• If you want the site to enable access to resources through Citrix Receiver for HTML5 without
prompting the user to download and install Citrix Receiver, select Always use Receiver for
HTML5. With that option selected, users always access desktops and applications on the site
through Citrix Receiver for HTML5, provided they use an HTML5‑compatible browser. Users
without an HTML5‑compatible browser have to install the native Citrix Receiver.
Make Citrix Receiver installation files available on the server
By default, when a user accesses a Citrix Receiver for Web site from a computer running Windows or
Mac OS X, the site attempts to determine whether Citrix Receiver is installed on the user’s device. If
Citrix Receiver cannotbe detected, the user is promptedto download and install the appropriate Citrix
Receiver for their platform from the Citrix website.
1. On the Windows Start screen or Apps screen, locate and click the Citrix StoreFront tile.
2. Select the
Stores
node in the le pane of the Citrix StoreFront management console and, in the
results pane, select a site. In the Actions pane, click Manage Receiver for Web Sites and click
Configure.
3. Choose Deploy Citrix Receiver and Source for Receivers, and then browse to the installation
files.
Run the prompt to install Citrix Receiver aer logon
Before logging on to StoreFront, Citrix Receiver for Web prompts a user to install the latest Citrix Re‑
ceiver if Citrix Receiver is not already installed on the user’s computer (for Internet Explorer, Firefox,
and Safari users) or the first time that the user visits the site (for Chrome users). Depending on the con‑
figuration, the prompt might also display if the user’s installation of Citrix Receiver can be upgraded.
You can configure Citrix Receiver for Web to display the prompt aer logging on to StoreFront.
1. On the Windows Start screen or Apps screen, locate and click the Citrix StoreFront tile.
2. Select the Stores node in the le pane of the Citrix StoreFront management console and select
the site from the results pane.
3. In the Actions pane, click Manage Receiver for Web Sites, click Configure.
4. Select Advanced Settings and check Prompt to install Citrix Receiver aer logon.
© 1999–2021 Citrix Systems, Inc. All rights reserved. 147

StoreFront 3.12
Remove Citrix Receiver for Web sites
Use the Manage Receiver for Web Sites in the Actions pane to delete a Citrix Receiver for Web site.
When you remove a site, users can no longer use that webpage to access the store.
Support for the unified Citrix Receiver experience
October 15, 2018
StoreFront supports both the classic and unified user experiences. With the classic experience, each
Citrix Receiver platform is responsible for delivering its own user experience. The new unified experi‑
ence delivers a centrally managed HTML5 user experience to all web and native Citrix Receivers. This
supports customization and featured app groups management.
Stores created using this version of StoreFront use the unified experience by default, but for upgrades
Citrix retains the classic experience by default. To support the unified experience you must associate
a StoreFront store with a Receiver for Web site, and that site must be configured to use the unified
experience.
Important: The unified experience is not supported if the Receiver for Web site is added to the Re‑
stricted zone. If you must add the Receiver for Web site to the Restricted zone, configure your store to
use the classic experience.
Use the StoreFront management console to do the following Citrix Receiver for Web related tasks:
• Create a Citrix Receiver for Web site.
• Change the Citrix Receiver for Web site experience.
• Select a unified Citrix Receiver for Web site to associate with the store.
• Customize the Receiver appearance.
Important: In multiple server deployments, use only one server at a time to make changes to the con‑
figuration of the server group. Ensure that the Citrix StoreFront management console is not running
on any of the other servers in the deployment. Once complete, propagate your configuration changes
to the server group so that the other servers in the deployment are updated.
Note
If using XenApp 6.x, applications set to Stream to client or Streamed if possible, otherwise
accessed from a server are not supported with the unified experience enabled.
Create a Citrix Receiver for Web website
A Citrix Receiver for Web site is created automatically, whenever you create a store. You can also create
additional Receiver for Web sites using this procedure.
© 1999–2021 Citrix Systems, Inc. All rights reserved. 148

StoreFront 3.12
1. On the Windows Start screen or Apps screen, locate and click the Citrix StoreFront tile.
2. Select the Stores node in the le pane of the Citrix StoreFront management console and, in the
Actions pane, click Manage Receiver for Web Sites > Add and follow the wizard.
Change the Citrix Receiver experience
You can select if a Citrix Receiver for Web website delivers the classic or unified experience. Note
that enabling the classic experience disables the advanced customizations and featured app group
management.
1. On the Windows Start screen or Apps screen, locate and click the Citrix StoreFront tile.
2. Select the Stores node in the le pane of the Citrix StoreFront management console, select the
store that you want to change in the center pane, and click Manage Receiver for Web Sites in
the Actions pane, and then click Configure.
3. Select Receiver Experience and choose Disable classic experience or Enable classic experi‑
ence.
Select a unified Citrix Receiver for Web site to associate with the store
When a new store is created using StoreFront, a Citrix Receiver for Web site in unified mode is auto‑
matically created and associated with the store. However if you upgrade from a previous version of
StoreFront, it defaults to the classic experience.
To select a Citrix Receiver for Web site to provide the unified experience for a store, you must have at
least one Citrix Receiver for Web site created with the classic experience disabled.
1. On the Windows Start screen or Apps screen, locate and click the Citrix StoreFront tile.
2. Select the Stores node in the le pane of the Citrix StoreFront management console, select a
store in the center pane, and click Configure Unified Experience in the Actions pane. Only
websites that support the unified experience (classic experience disabled) can be used for set‑
ting as the default for the store. If you do not have a Citrix Receiver for Web website created, a
message displays including a link to the Create a new Receiver for Web website. You can also
change an existing Receiver for Web site into a Receiver for Web website. See Change the Citrix
Receiver experience.
3. When you have a Citrix Receiver for Web site created, choose Configure Unified Experience for
this store and choose the specific website.
Important
If you change the unified experience to the classic experience on a Receiver for Web site, this
might aect the native Citrix Receiver clients. Changing the experience back to the unified expe‑
rience on this Receiver for Web site does not update the experience to the unified experience for
© 1999–2021 Citrix Systems, Inc. All rights reserved. 149
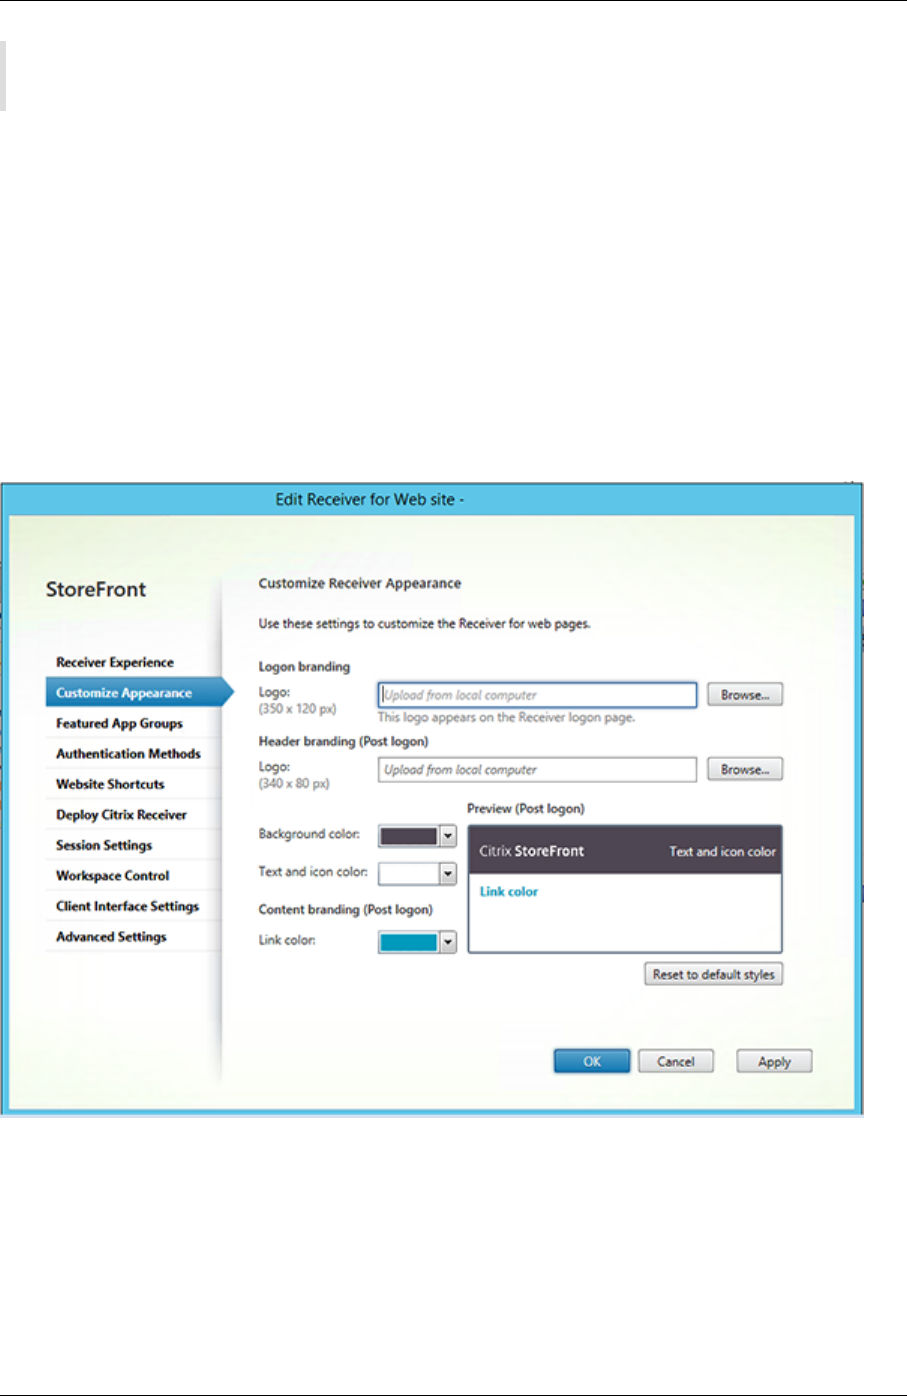
StoreFront 3.12
the native Citrix Receiver clients. You must reset the unified experience in the Stores node on the
management console.
Customize the Citrix Receiver appearance
To customize the Citrix Receiver appearance, your Citrix Receiver for Web website must have the clas‑
sic Citrix Receiver experience disabled.
1. On the Windows Start screen or Apps screen, locate and click the Citrix StoreFront tile.
2. Select the Stores node in the le pane of the Citrix StoreFront management console and in the
Actions pane, click Manage Receiver for Web Sites and click Configure.
3. Select Receiver Experience > Disable classic experience.
4. Select Customize Appearance and makeselectionstocustomizehow the websitedisplays aer
logging on.
Create and manage featured apps
October 15, 2018
© 1999–2021 Citrix Systems, Inc. All rights reserved. 150

StoreFront 3.12
You can create product featured app groups for your end users that are related to or fit in a specific cat‑
egory. For example, you can create a Sales Department featured app group containing applications
that are used by that department. You can define featured apps in the StoreFront administration con‑
sole by using application names or by using keywords or application categories that were defined in
the Studio console.
Use the Featured App Groups task to add, edit, or remove featured app groups.
Important: In multiple server deployments, use only one server at a time to make changes to the con‑
figuration of the server group. Ensure that the Citrix StoreFront management console is not running
on any of the other servers in the deployment. Once complete,
propagate your configuration changes to the server group so that the other servers in the deployment
are updated.
Note that this functionality is available only when the Classic experience is disabled.
1. On the Windows Start screen or Apps screen, locate and click the Citrix StoreFront tile.
2. Select the Stores node in the le pane of the Citrix StoreFront management console and in the
Actions pane, click Manage Receiver for Web Sites and click Configure.
3. Select Featured App Groups.
4. In the Featured App Groups dialog box, click Create to define a new featured app group.
5. In the Create Featured App Group dialog box, specify a featured app group name, description
(optional), background, and the method by which you define the featured app groups. You can
choose keywords, application names, or application category, and click OK.
Option Description
Keywords Define the keywords in Studio.
Application category Define the application category in Studio.
Application names Use the application name to define the
featured app group. All applications names
matching the name included here in the Create
a Featured App Group dialog screen are
included in the featured app group.
StoreFront does not support wildcards in
application names. The match is not case
sensitive, but it does match whole words. For
example, if you type Excel, StoreFront matches
a published app named Microso Excel 2013
but typing Exc does not match anything.
Example:
© 1999–2021 Citrix Systems, Inc. All rights reserved. 151

StoreFront 3.12
We created two featured app groups:
• Collaboration ‑ Created by matching apps in the Collaboration category in Studio.
• Engineering ‑ Created by naming the app group and specifying a collection of app names.
Configure workspace control
October 25, 2018
Workspace control lets applications follow users as they move between devices. This enables, for
example, clinicians in hospitals to move from workstation to workstation without having to restart
their applications on each device. Workspace control is enabled by default for Citrix Receiver for Web
sites. To disable or configure workspace control, you edit the site configuration file.
Important: In multiple server deployments, use only one server at a time to make changes to the con‑
figuration of the server group. Ensure that the Citrix StoreFront management console is not running
on any of the other servers in the deployment. Once complete, propagate your configuration changes
to the server group so that the other servers in the deployment are updated.
1. On the Windows Start screen or Apps screen, locate and click the Citrix StoreFront tile.
© 1999–2021 Citrix Systems, Inc. All rights reserved. 152

StoreFront 3.12
2. In the le pane, select Stores and in the Action pane, select Manage Receiver for Web Sites,
and click Configure.
3. Select Workspace Control.
4. Configure default settings for workspace control, which include:
• Enabling workspace control
• Setting session reconnection options
• Specifying log o action
Configure Citrix Receiver for HTML5 use of browser tabs
October 15, 2018
By default, Citrix Receiver for HTML5 starts desktops and applications in a new browser tab. However,
when users start resources from shortcuts using Citrix Receiver for HTML5, the desktop or application
replaces the Citrix Receiver for Website in the existing browser tab rather than appearing in a new tab.
Important: In multiple server deployments, use only one server at a time to make changes to the con‑
figuration of the server group. Ensure that the Citrix StoreFront management console is not running
on any of the other servers in the deployment. Once complete, propagate your configuration changes
to the server group so that the other servers in the deployment are updated.
1. On the Windows Start screen or Apps screen, locate and click the Citrix StoreFront tile.
2. In the le pane, select Stores and in the Action pane, select Manage Receiver for Web Sites,
**and click Configure**.
3. Select Deploy Citrix Receiver.
4. Select Always use HTML 5 Receiver from the Deployment options drop‑down menu and de‑
pending on the tab in which you want to start applications, select or deselect Launch applica‑
tions in the same tab as Receiver for Web.
Configure communication time‑out duration and retry attempts
October 15, 2018
By default, requests from a Citrix Receiver for Web site to the associated store time out aer three
minutes. The store is considered unavailable aer one unsuccessful communication attempt. Use
the Session Settings task to change the default settings.
Important: In multiple server deployments, use only one server at a time to make changes to the con‑
figuration of the server group. Ensure that the Citrix StoreFront management console is not running
© 1999–2021 Citrix Systems, Inc. All rights reserved. 153

StoreFront 3.12
on any of the other servers in the deployment. Once complete, propagate your configuration changes
to the server group so that the other servers in the deployment are updated.
1. On the Windows Start screen or Apps screen, locate and click the Citrix StoreFront tile.
2. Select the Stores node in the le pane of the Citrix StoreFront management console, select a
store in the center pane, and in the Action pane, select Manage Receiver for Web Site, and
click Configure.
3. Select Session Settings, make your changes, and click OK/Apply to save the changes.
Configure user access
January 4, 2019
Important
In multiple server deployments, use only one server at a time to change the configuration of the
server group. Ensure that the Citrix StoreFront management console is not running on any of the
other servers in the deployment. Once complete, propagate your configuration changes to the
server group so that the other servers in the deployment are updated.
Configure support for connections through XenApp Services URLs
Use the Configure XenApp Services Support task to configure access to your stores through XenApp
Services URLs. Users of domain‑joined desktop appliances and repurposed PCs running the Citrix
Desktop Lock, along with users who have older Citrix clients that cannot be upgraded, can access
stores directly using the XenApp Services URL for the store. When you create a new store, the XenApp
Services URL is enabled by default.
Important: In multiple server deployments, use only one server at a time to make changes to the con‑
figuration of the server group. Ensure that the Citrix StoreFront management console is not running
on any of the other servers in the deployment. Once complete, propagate your configuration changes
to the server group so that the other servers in the deployment are updated.
1. On the Windows
Start
screen or
Apps
screen, locate and click the
Citrix StoreFront
tile.
2. Select the Stores node in the le pane of the Citrix StoreFront management console and, in the
results pane, select a store. In the Actions pane, click Configure XenApp Services Support.
3. Select or clear the Enable XenApp Services Support check box to, respectively, enable or dis‑
able user access to the store through the displayed XenApp Services URL.
The XenApp ServicesURLforastorehas the form http[s]://serveraddress/Citrix/storename/PNAgent/config.xml,
where serveraddress is the fully qualified domain name of the server or load balancing environ‑
© 1999–2021 Citrix Systems, Inc. All rights reserved. 154

StoreFront 3.12
ment for your StoreFront deployment and storename is the name specified for the store when
it was created.
4. If you enable XenApp Services Support, optionally specify a default store in your StoreFront
deployment for users with the Citrix Online Plug‑in.
Specify a default store so that your users can configure the Citrix Online Plug‑in with the server
URL or load‑balanced URL of the StoreFront deployment, rather than the XenApp Services URL
for a particular store.
Disable or enable workspace control reconnect for all Citrix Receivers
Workspace control enables applications to follow users as they move between devices. This allows,
for example, clinicians in hospitals to move from workstation to workstation without having to restart
their applications on each device.
StoreFront contains a configuration to disable workspace control reconnect in the Store Service for
all Citrix Receivers. Manage this feature by using the StoreFront console or PowerShell.
Use the StoreFront management console
1. On the Windows Start screen or Apps screen, locate and click the Citrix StoreFront tile.
2. Select the Stores node in the le pane of the Citrix StoreFront management console and, in the
Actions pane, click Configure Store Settings.
3. Select Advanced Settings and check or uncheck Allow session reconnect.
Use PowerShell
Make sure that you close the Administration Console. Run the following code snippet to import the
StoreFront PowerShell modules:
1 $dsInstallProp = Get-ItemProperty \`
2 \-Path HKLM:\\SOFTWARE\\Citrix\\DeliveryServicesManagement -Name
InstallDir
3 $dsInstallDir = $dsInstallProp.InstallDir
4 & $dsInstallDir\\..\\Scripts\\ImportModules.ps1
5 <!--NeedCopy-->
Then the PowerShell command Set‑DSAllowSessionReconnect turns Workspace control reconnect
on or o.
Syntax
1 Set-DSAllowSessionReconnect \[\[-SiteId\] \<Int64\>\] \[\[-VirtualPath
\] \<String\> \] \`
2 \[\[-IsAllowed\] \<Boolean\>\]
3 <!--NeedCopy-->
© 1999–2021 Citrix Systems, Inc. All rights reserved. 155

StoreFront 3.12
For example, to turn o workspace control reconnect for a store in /Citrix/Store, the following com‑
mand configures the store:
1 Set-DSAllowSessionReconnect -SiteId 1 -VirtualPath /Citrix/Store \` -
IsAllowed $false
2 <!--NeedCopy-->
Configure user subscriptions
Use the User Subscriptions task to do select one of the following options:
• Require users to subscribe to applications before using them (Self Service Store).
• Enable users to receive all applications when they connect to the store (Mandatory Store).
Disabling user subscriptions for a store within StoreFront also prevents the display of the Favorites
tab to users in Citrix Receiver. Disabling subscriptions does not delete the Store subscription data.
Re‑enabling subscriptions for the store will allow the user to see their subscribed apps in Favorites
whenever they next log on.
1. On the Windows Start screen or Apps screen, locate and click the** Citrix StoreFront** tile.
2. Select the Stores node in the le pane of the Citrix StoreFront management console and, in
the results pane, select a store. In the Actions pane, click Configure Store Settings > User
Subscriptions to toggle the user subscriptions feature o or on.
3. Choose Enable user subscriptions (Self Service Store) to make users subscribe to the appli‑
cations to use them. Any previously specified subscriptions are still available.
4. Choose Disable user subscriptions (Mandatory Store) to make all applications published to
the users available on the Home screen without users subscribing to them. Their subscriptions
are not deleted and they can recover them if you re‑enable the feature.
© 1999–2021 Citrix Systems, Inc. All rights reserved. 156

StoreFront 3.12
In StoreFront 3.5 or later, you can use the following PowerShell script to configure user subscriptions
for a store:
$StoreObject = Get‑STFStoreService ‑SiteID 1 ‑VirtualPath “/citrix/<yourstore>”
Set‑STFStoreService ‑StoreService $StoreObject ‑LockedDown $True ‑Confirm:$False
For more information on Get‑STFStoreService, see https://developer‑docs.citrix.com/projects/
storefront‑powershell‑sdk/en/latest/Get‑STFStoreService/
Manage subscription data for a store
Manage subscription data for a store using PowerShell cmdlets.
Note
Use either the StoreFront management console or PowerShell to manage StoreFront. Do not use
both methods at the same time. Always close the StoreFront management console before using
PowerShell to change your StoreFront configuration. Citrix also recommends that you take a
backup of your existing subscription data before making changes so that rollback to a previous
state is possible.
© 1999–2021 Citrix Systems, Inc. All rights reserved. 157

StoreFront 3.12
Purge subscription data
A folder and datastore containing subscription data exists for each store in your deployment.
1. Stop the Citrix Subscriptions Store service on the StoreFront server. If the Citrix Subscriptions
Store service is running, it is not possible to delete subscription data for any of your stores.
2. Locatethesubscriptionstorefolderonthe StoreFront server: C:\Windows\ServiceProfiles\NetworkService\AppData\Roaming\Citrix\SubscriptionsStore\1__Citrix_<StoreName>
3. Delete the contents of the subscription store folder, but do not delete the folder itself.
4. Restart the Citrix Subscriptions Store service on the StoreFront server.
In StoreFront 3.5 or later, you can use the following PowerShell script to purge subscription data for a
store. Run this PowerShell function as an administrator with rights to stop or start services and delete
files. This PowerShell function achieves the same result as the manual steps described above.
To run the cmdlets successfully, the Citrix Subscriptions Store service must be running on the server.
1 function Remove-SubscriptionData
2
3 {
4
5
6 [CmdletBinding()]
7
8 [Parameter(Mandatory=$False)][String]$Store = "Store"
9
10 $SubsService = "Citrix Subscriptions Store"
11
12 # Path to Subscription Data in StoreFront version 2.6 or higher
13
14 $SubsPath = "C:\Windows\ServiceProfiles\NetworkService\AppData\
Roaming\Citrix\SubscriptionsStore\1__Citrix_$Store\*"
15
16 Stop-Service -displayname $SubsService
17
18 Remove-Item $SubsPath -Force -Verbose
19
20 Start-Service -displayname $SubsService
21
22 Get-Service -displayname $SubsService
23
24 }
25
26
27 Remove-SubscriptionData -Store "YourStore"
Export subscription data
© 1999–2021 Citrix Systems, Inc. All rights reserved. 158
StoreFront 3.12
You can obtain a backup of the Store subscription data in the form of a tab separated .txt file using the
following PowerShell cmdlet.
1 $StoreObject = Get-STFStoreService -SiteID 1 -VirtualPath "/citrix/<
yourstore>"
2
3 Export-STFStoreSubscriptions -StoreService $StoreObject -FilePath "$env
:USERPROFILE\Desktop\Subscriptions.txt"
If you are managing a multiple‑server deployment, you can run this PowerShell cmdlet on any server
within the StoreFrontservergroup. Eachserver in the servergroup maintainsan identical synced copy
of the subscription data from its peers. If you believe you are experiencing issues with subscription
synchronization between the Storefront servers, then export the data from all servers in the group
and compare them to see dierences.
Restore subscription data
Use Restore‑STFStoreSubscriptions to overwrite your existing subscription data. You can restore a
Store’s subscription data using the tab separated .txt file backup you created earlier using Export‑
STFStoreSubscriptions.
1 $StoreObject = Get-STFStoreService -SiteID 1 -VirtualPath "/citrix/<
yourstore>"
2
3 Restore-STFStoreSubscriptions -StoreService $StoreObject -FilePath "
$env:USERPROFILE\Desktop\Subscriptions.txt"
For more information on Restore‑STFStoreSubscriptions, see https://developer‑docs.citrix.com/
projects/storefront‑powershell‑sdk/en/latest/Restore‑STFStoreSubscriptions/.
Restoring Data on a Single StoreFront Server
In a single server deployment, there is no need to shut down the Subscriptions Store service. There is
also no need to purge the existing subscription data before restoring the subscription data.
Restoring Data on a StoreFront Server Group
To restore subscription data to a server group, the following steps are required.
Example Server Group Deployment containing three StoreFront servers.
StoreFrontA
StoreFrontB
StoreFrontC
1. Back up of the existing subscription data from any of the three servers.
© 1999–2021 Citrix Systems, Inc. All rights reserved. 159

StoreFront 3.12
2. Stop the Subscriptions Store service on servers StoreFrontB and C. This action prevents the
servers from sending or receiving subscription data during the update of StoreFrontA.
3. Purge the subscription data from servers StoreFrontB and C. This action prevents mismatch of
the restored subscription data.
4. Restore the data on StoreFrontA using the Restore‑STFStoreSubscriptions cmdlet. It is not nec‑
essary to stop the Subscriptions Store service, or to purge the subscription data on StoreFrontA
(it is overwritten during the restore operation).
5. Restart the Subscriptions Store serviceon servers StoreFrontBand StoreFrontC. The serverscan
then receive a copy of the data from StoreFrontA.
6. Wait for synchronization to occur between all servers. The time required depends on the num‑
ber of recordsthat existon StoreFrontA. If all serversare on a local network connection, synchro‑
nization normally occurs quickly. Synchronization of subscriptions across a WAN connection
may take longer.
7. Export the data from StoreFrontB and C to confirm that the synchronization has completed, or
view the Store Subscription counters.
Import subscription data
Use Import‑STFStoreSubscriptions when there is no subscription data for the Store. This cmdlet also
allows subscription data to be transferred from one Store to another or if subscription datais imported
to newly provisioned StoreFront servers.
1 $StoreObject = Get-STFStoreService -SiteID 1 -VirtualPath "/citrix/<
yourstore>"
2
3 Import-STFStoreSubscriptions -StoreService $StoreObject -FilePath "$env
:USERPROFILE\Desktop\Subscriptions.txt"
For more information on Import‑STFStoreSubscriptions, see https://developer‑docs.citrix.com/
projects/storefront‑powershell‑sdk/en/latest/Import‑STFStoreSubscriptions/.
Subscription data file details
The subscription data file is a text file containing one line per user subscription. Each line is a tab‑
separated sequence of values:
<user‑identifier> <resource‑id> <subscription‑id> <subscription‑status> <property‑name> <property‑
value> <property‑name> <property‑value> …
The values are defined as follows:
• <user‑identifier> ‑ Required. A sequence of characters identifying the user. This identifier is the
user’s Windows Security Identifier.
• <resource‑id> ‑ Required. A sequence of characters identifying the subscribed resource.
© 1999–2021 Citrix Systems, Inc. All rights reserved. 160

StoreFront 3.12
• <subscription‑id> ‑ Required. A sequence of characters uniquely identifying the subscription.
This value is not used (although, a value must be present in the data file).
• <subscription‑status> ‑ Required. The status of the subscription: subscribed or unsubscribed.
• <property‑name> and <property‑value> ‑Optional. A sequence of zero or more pairs of
<property‑name> and <property‑value> values. These represent properties associated with the
subscription by a StoreFront client (typically a Citrix Receiver). A property with multiple values
that is represented by multiple name/value pairs that have the same name (for example, “…
MyProp A MyProp B …” represents the property MyProp with values A, B).
Example:
S‑0‑0‑00‑0000000000‑0000000000‑0000000000‑0000 XenApp.Excel 21EC2020‑3AEA‑4069‑A2DD‑
08002B30309D Subscribed dazzle:position 1
Size of subscription data on the StoreFront server disk
Size of import and export .txt files
© 1999–2021 Citrix Systems, Inc. All rights reserved. 161

StoreFront 3.12
Store Subscription Counters
You can use Microso Windows Performance Monitor counters (Start > Run > perfmon) to show, for
example, the total numbers of subscription records on the server or number of records synchronized
between StoreFront server groups.
View the Subscription Counters using PowerShell
1 Get-Counter -Counter "\Citrix Subscription Store(1__citrix_store)\
Subscription Entries Count (including unpurged deleted records)"
2
3 Get-Counter -Counter "\Citrix Subscription Store Synchronization\
Subscriptions Store Synchronizing"
4
5 Get-Counter -Counter "\Citrix Subscription Store Synchronization\Number
Subscriptions Synchronized"
6
7 Get-Counter -Counter "\Citrix Subscription Store Synchronization\Number
Subscriptions Transferred"
8
9 <!--NeedCopy-->
Set up highly available multi‑site stores
February 25, 2021
For stores that aggregate resources from multiple deployments, particularly geographically dispersed
© 1999–2021 Citrix Systems, Inc. All rights reserved. 162

StoreFront 3.12
deployments, you can configure load balancing and failover between deployments, mapping of users
to deployments, and specific disaster recovery deployments to provide highly available resources.
Where you have configured separate NetScaler Gateway appliances for your deployments, you can
define the optimal appliance for users to access each of the deployments.
Since StoreFront 3.5, the StoreFront management console has supported common multi‑site scenar‑
ios. Citrix recommends you use the management console when it meets your requirements.
Configure user mapping and aggregation
The StoreFront management console enables you to:
• Map users to deployments: Based on Active Directory group membership, you can limit which
users have access to particular deployments.
• Aggregate deployments: You can specify which deployments have resources that you want
to aggregate. Matching resources from aggregated deployments are presented to the user as a
single highly‑available resource.
• Associate a zone with a deployment: When accessed with NetScaler Gateway in a global load‑
balancing configuration, StoreFront prioritizes deployments from zones matching the gateway
zone when launching resources.
Important: In multiple server deployments, use only one server at a time to make changes to the con‑
figuration of the server group. Ensure that the Citrix StoreFront management console is not running
on any of the other servers in the deployment. Once complete, propagate your configuration changes
to the server group so that the other servers in the deployment are updated.
1. Ensure that you have configured the store with details of all the XenDesktop and XenApp de‑
ployments that you want to use in your configuration. For more information about adding de‑
ployments to stores, see Manage the resources made available in stores.
2. On the Windows Start screen or Apps screen, locate and click the Citrix StoreFront tile.
3. Select the Stores node in the le pane of the Citrix StoreFront management console and click
Manage Delivery Controllers in the Actions pane.
4. If two or more controllers are defined, click User Mapping and Multi‑Site Aggregation Con‑
figuration > Configure.
5. Click Map users to controllers and make selections on the screens to specify which Delivery
Controllers are available to which users.
6. Click Aggregate resources, choose controllers, and click Aggregate to specify whether or not
Delivery Controllers are aggregated. If you enable aggregation of Delivery Controllers, applica‑
tions and desktops from those Delivery Controllers with the same display name and path are
presented as a single application/desktop in Citrix Receiver.
© 1999–2021 Citrix Systems, Inc. All rights reserved. 163

StoreFront 3.12
7. Choose one, or both, of the Aggregated Controller Settings check boxes and click OK.
Controllers publish identical resources ‑ When checked, StoreFront enumerates resources
from only one of the controllers in the aggregated set. When unchecked, StoreFront enumer‑
ates resources from all controllers in the aggregated set (to accumulate the user’s entire set of
available resources). Checking this option gives a performance improvement when enumerat‑
ing resources, but we do not recommend it unless you are certain that the list of resources is
identical across all aggregated deployments.
Load balance resources across controllers ‑ When checked, launches are distributed evenly
among the available controllers. When unchecked, launches are directed to the first controller
specified in the user mapping dialog screen, failing over to subsequent controllers if the launch
fails.
Advanced configurations
Although you can configure many common multi‑site and high availability operations with the Store‑
Front management console, you can still configure StoreFront using the configuration files in the same
manner as earlier StoreFront versions.
Extra functionality available using PowerShell or by editing the StoreFront configuration files:
• The ability to specify multiple groupings of deployments for aggregation.
– The management console allows only a single grouping of deployments, which is sui‑
cient for most cases.
– For stores with many deployments with disjointed sets of resources, multiple groupings
might give performance improvements.
• The ability tospecify complexpreference orders for aggregateddeployments. Themanagement
console allows aggregated deployments to be load balanced or to be used as a single failover
list.
• The ability to define disaster recovery deployments (deployments accessed only when all other
deployments are unavailable).
Warning: Aer configuring advanced multi‑site options by manually editing the configuration file,
some tasks become unavailable in the Citrix StoreFront management console to prevent misconfigu‑
ration.
Important: In multiple server deployments, use only one server at a time to make changes to the con‑
figuration of the server group. Ensure that the Citrix StoreFront management console is not running
on any of the other servers in the deployment. Once complete, propagate your configuration changes
to the server group so that the other servers in the deployment are updated.
1. Ensure that you have configured the store with details of all the XenDesktop and XenApp deploy‑
ments that you want to use in your configuration, including disaster recovery deployments. For
© 1999–2021 Citrix Systems, Inc. All rights reserved. 164

StoreFront 3.12
more information about adding deployments to stores, see Manage the resources made avail‑
able in stores.
2. Use a text editor to open the web.config file for the store, which is typically located in the
C:\inetpub\wwwroot\Citrix\storename\ directory, where storename is the name specified for
the store when it was created.
3. Locate the following section in the file.
<resourcesWingConfigurations>
<resourcesWingConfiguration name=”Default” wingName=”Default” />
</resourcesWingConfigurations>
4. Specify your configuration as shown below.
<resourcesWingConfigurations>
<resourcesWingConfiguration name=”Default” wingName=”Default”>
<userFarmMappings>
<clear />
<userFarmMapping name=”user_mapping”>
<groups>
<group name=”domain\usergroup” sid=”securityidentifier” />
<group … />
…
</groups>
<equivalentFarmSets>
<equivalentFarmSet name=”setname” loadBalanceMode=”{LoadBalanced | Failover}”
aggregationGroup=”aggregationgroupname”>
<primaryFarmRefs>
<farm name=”primaryfarmname” />
<farm … />
…
</primaryFarmRefs>
<backupFarmRefs>
<farm name=”backupfarmname” />
<farm … />
…
</backupFarmRefs>
</equivalentFarmSet>
<equivalentFarmSet … >
…
</equivalentFarmSet>
</equivalentFarmSets>
© 1999–2021 Citrix Systems, Inc. All rights reserved. 165

StoreFront 3.12
</userFarmMapping>
<userFarmMapping>
…
</userFarmMapping>
</userFarmMappings>
</resourcesWingConfiguration>
</resourcesWingConfigurations>
Use the following elements to define your configuration.
• userFarmMapping
Specifies groups of deployments and defines the load balancing and failover behavior between
those deployments. Identifies deployments to be used for disaster recovery. Controls user ac‑
cess to resources by mapping Microso Active Directory user groups to the specified groups of
deployments.
• groups
Specifies the names and security identifiers (SIDs) of Active Directory user groups to which
the associated mapping applies. User group names must be entered in the format do‑
main\usergroup. Where more than one group is listed, the mapping is only applied to users
who are members of all the specified groups. To enable access for all Active Directory user
accounts, set the group name & sid to everyone.
• equivalentFarmSet
Specifies a group of equivalent deployments providing resources to be aggregated for load bal‑
ancing or failover, plus an optional associated group of disaster recovery deployments.
The
loadBalanceMod
e attribute determines the allocation of users to deployments. Set the
value of the loadBalanceMode attribute to LoadBalanced to randomly assign users to deploy‑
ments in the equivalent deployment set, evenly distributing users across all the available de‑
ployments. When the value of the loadBalanceMode attribute is set to Failover, users are con‑
nected to the first available deployment in the order in which they are listed in the configura‑
tion, minimizing the number of deployments in use at any given time. Specify names for ag‑
gregation groups to identify equivalent deployment sets providing resources to be aggregated.
Resources provided by equivalent deployment sets belonging to the same aggregation group
are aggregated. To specify that the deployments defined in a particular equivalent deployment
set should not be aggregated with others, set the aggregation group name to the empty string
”“.
The identical attribute accepts the values true and false, and specifies whether all deploy‑
ments within an equivalentdeployment set provide exactly the same set of resources. When the
deployments are identical, StoreFront enumerates the user’s resources from just one primary
deployment in the set. When the deployments provide overlapping but not identical resources,
StoreFront enumerates from each deployment to obtain the full set of resources available to
© 1999–2021 Citrix Systems, Inc. All rights reserved. 166

StoreFront 3.12
a user. Load balancing (at launch time) can take place whether or not the deployments are
identical. The default value for the identical attribute is false, although it is set to true when
StoreFront is upgraded to avoid altering the pre‑existing behavior following an upgrade.
• primaryFarmRefs
Specifies a set of equivalent XenDesktop or XenApp sites where some or all of the resources
match. Enter the names of deployments that you have already added to the store. The names
of the deployments you specify must match exactly the names you entered when you added
the deployments to the store.
• optimalGatewayForFarms
Specifies groups of deployments and defines the optimal NetScaler Gateway appliances for
users to access resources provided by these deployments. Typically, the optimal appliance for a
deployment is colocated in the same geographical location as that deployment. You only need
to define optimal NetScaler Gateway appliances for deployments where the appliance through
which users access StoreFront is not the optimal appliance.
Configure subscription synchronization
To configure periodic pull synchronization of users’ application subscriptions from stores in dierent
StoreFront deployments, you execute Windows PowerShell commands.
Note: The StoreFront and PowerShell consoles cannot be open at the same time. Always close the
StoreFront admin console before using the PowerShell console to administer your StoreFront config‑
uration. Likewise, close all instances of PowerShell before opening the StoreFront console.
Important: In multiple server deployments, use only one server at a time to make changes to the con‑
figuration of the server group. Ensure that the Citrix StoreFront management console is not running
on any of the other servers in the deployment. Once complete,
propagate your configuration changes to the server groups so that the other servers in the deploy‑
ment are updated.
When establishing your subscription synchronization, note that the configured Delivery Controllers
must be named identically between the synchronized Stores and that the Delivery Controller names
are case sensitive. Failing to duplicate the Delivery Controller names exactly may lead to users having
dierent subscriptions across the synchronized Stores.
1. Use an account with local administrator permissions to start Windows PowerShell and, at a com‑
mand prompt, type the following commands to import the StoreFront modules.
1 Import-Module "installationlocation\Management\Cmdlets\UtilsModule
.psm1"
2 Import-Module "installationlocation\Management\Cmdlets\
3 SubscriptionSyncModule.psm1"
4 <!--NeedCopy-->
© 1999–2021 Citrix Systems, Inc. All rights reserved. 167

StoreFront 3.12
Where installationlocation is the directory in which StoreFront is installed, typically C:\Program
Files\Citrix\Receiver StoreFront\.
2. To specify the remote StoreFront deployment containing the store to be synchronized, type the
following command.
1 Add-DSSubscriptionsRemoteSyncCluster -clusterName deploymentname
2 -clusterAddress deploymentaddress
3 <!--NeedCopy-->
Where deploymentname is a name that helps you identify the remote deployment and deploy‑
mentaddress is the externally accessible address of the StoreFront server or load‑balanced
server group for the remote deployment.
3. To specify the remote store with which to synchronize users’ application subscriptions, type the
following command.
1 Add-DSSubscriptionsRemoteSyncStore -clusterName deploymentname
2 -storeName storename
3 <!--NeedCopy-->
Where deploymentname is the name that you defined for the remote deployment in the previ‑
ous step and storename is the name specified for both the local and remote stores when they
were created. To synchronize application subscriptions between the stores, both stores must
have the same name in their respective StoreFront deployments.
4. To configure synchronization to occur at a particular time every day, type the following com‑
mand.
1 Add-DSSubscriptionsSyncSchedule -scheduleName
2 synchronizationname -startTime hh:mm
3 <!--NeedCopy-->
Where synchronizationname is a name that helps you identify the schedule you are creating.
Use the ‑startTime setting to specify a time of day at which you want to synchronize subscrip‑
tions between the stores. Configure further schedules to specify additional synchronization
times throughout the day.
5. Alternatively, to configure regular synchronization at a specific interval, type the following com‑
mand.
1 Add-DSSubscriptionsSyncReoccuringSchedule -scheduleName
2 synchronizationname -startTime hh:mm:ss -repeatMinutes interval
3 <!--NeedCopy-->
© 1999–2021 Citrix Systems, Inc. All rights reserved. 168

StoreFront 3.12
Where synchronizationname is a name that helps you identify the schedule you are creating.
Use the ‑startTime setting to specify the a time of day at which you want to start the reoccurring
schedule. For interval, specify the time in minutes between each synchronization.
6. Add the Microso Active Directory domain machine accounts for each StoreFront server in the
remote deployment to the local Windows user group CitrixSubscriptionSyncUsers on the cur‑
rent server.
This will allow the servers in the remote deployment to access the subscription store service
on the local deployment once you have configured a synchronization schedule on the remote
deployment. The CitrixSubscriptionSyncUsers group is automatically created when you im‑
port the subscription synchronization module in Step 1. For more information about modi‑
fying local user groups, see https://docs.microsoft.com/en‑us/previous‑versions/windows/it‑
pro/windows‑server‑2008‑R2‑and‑2008/cc772524(v=ws.11).
7. If your local StoreFront deployment consists of multiple servers, use the Citrix StoreFront man‑
agement console to propagate the configuration changes to the other servers in the group.
For more information about propagating changes in a multiple server StoreFront deployment,
see Configure server groups.
8. Repeat Steps 1 to 7 on the remote StoreFront deployment to configure a complementary sub‑
scription synchronization schedule from the remote deployment to the local deployment.
When configuring the synchronization schedules for your StoreFront deployments, ensure that
the schedules do not lead to a situation where the deployments are attempting to synchronize
simultaneously.
9. To start synchronizing users’ application subscriptions between the stores, restart the subscrip‑
tion store service on both the local and remote deployments. At a Windows PowerShell com‑
mand prompt on a server in each deployment, type the following command.
1 Restart-DSSubscriptionsStoreSubscriptionService
2 <!--NeedCopy-->
10. To remove an existing subscription synchronization schedule, type the following command.
Then, propagate the configuration change to the other StoreFront servers in the deployment
and restart the subscription store service.
1 Remove-DSSubscriptionsSchedule -scheduleName synchronizationname
2 <!--NeedCopy-->
Where synchronizationname is the name that you specified for the schedule when you created
it.
11. To list the subscription synchronization schedules currently configured for your StoreFront de‑
ployment, type the following command.
© 1999–2021 Citrix Systems, Inc. All rights reserved. 169

StoreFront 3.12
1 Get-DSSubscriptionsSyncScheduleSummary
2 <!--NeedCopy-->
Configure optimal HDX routing for a store
Important: In multiple server deployments, use only one server at a time to make changes to the con‑
figuration of the server group. Ensure that the Citrix StoreFront management console is not running
on any of the other servers in the deployment. Once complete,
propagate your configuration changes to the server group so that the other servers in the deployment
are updated.
The dierence between a farm and a zone when defining optimal gateway mappings for a store
In StoreFront versions released before 3.5, you could map an optimal gateway only to a farm or farms.
The concept of zones enables you to divide a XenApp 7.8 or XenDesktop 7.8 deployment into zones
based on the data center or geographic location where the XenApp or XenDesktop controllers and
published resources reside. Define zones in XenApp or XenDesktop 7.8 Studio. StoreFront now in‑
teroperates with XenApp 7.8 and XenDesktop 7.8 and any zones defined in StoreFront must exactly
match the zone names defined in XenApp and XenDesktop.
This version of StoreFront also allows you to create an optimal gateway mapping for all of the delivery
controllers located in the defined zone. Mapping a zone to an optimal gateway is almost identical to
creating mappings using farms, with which you might already be familiar. The only dierence is that
zones typically represent much larger containers with many more delivery controllers. You do not
need to add every delivery controller to an optimal gateway mapping. To place the controllers into
the desired zone, you need only tag each delivery controller with a zone name that matches a zone
already defined in XenApp or XenDesktop. You can map an optimal gateway to more than one zone,
but typically you should use a single zone. A zone usually represents a data center in a geographic
location. It is expected that each zone has at least one optimal NetScaler Gateway that is used for
HDX connections to resources within that zone.
For more information about zones, see
Zones.
Place a delivery controller into a zone
Set the zone attribute on every delivery controller you wish to place within a Zone.
1. On the Windows Start screen or Apps screen, locate and click the Citrix StoreFront tile.
2. Select the Stores node in the le pane of the Citrix StoreFront management console and click
Manage Delivery Controllers in the Actions pane.
3. Select a controller, click Edit, and then click Settings on the Edit Delivery Controller screen.
© 1999–2021 Citrix Systems, Inc. All rights reserved. 170

StoreFront 3.12
4. On the Zones row, click in the second column.
5. Click Add on the Delivery Controller Zone Names screen and then add a zone name.
Configure optimal NetScalerGateway routing to optimize the handling of ICA connection routing from
the HDX engine to published resources such as XenDesktop VDAs or XenApp or XenDesktop published
applications using StoreFront. Typically, the optimal gateway for a site is collocated in the same geo‑
graphical location.
You need only define optimal NetScaler Gateway appliances for deployments where the appliance
through which users access StoreFront is not the optimal gateway. If launches should be directed
back through the gateway making the launch request, StoreFront does this automatically.
Example scenario using farms
1 x UK Gateway ‑> 1 x UK StoreFront ‑> UK Apps and Desktops local
‑> US Apps and Desktops used only for UK
failover
1 x US Gateway ‑> 1 x US StoreFront ‑> US Apps and Desktops local
‑> UK Apps and Desktops used only for US
failover
A UK gateway provides remote access to UK hosted resources such as apps and desktops using a UK
© 1999–2021 Citrix Systems, Inc. All rights reserved. 171

StoreFront 3.12
StoreFront.
The UK storefront has both a UK based and US based NetScaler Gateway defined and UK and US farms
in its delivery controller list. UK users access remote resources through their geographically collo‑
cated gateway, StoreFront, and farms. If their UK resources become unavailable, they can connect to
US resources as a temporary failover alternative.
Without optimal gateway routing all ICA launches would pass through the UK gateway that made the
launch request regardless of where the resources are geographically located. By default, gateways
used to make launch requests are identified dynamically by StoreFront when the request is made.
Optimal gateway routing overrides this and forces US connections through the gateway closest to the
US farms that provides apps and desktops.
Note: You can map only a single optimal gateway per site for each StoreFront store.
Example scenario using zones
1 x CAMZone ‑> 2 x UK StoreFronts ‑> Cambridge, UK: Apps and Desktops
‑> Fort Lauderdale, Eastern US: Apps and
Desktops
‑> Bangalore, India: Apps and Desktops
1 x FTLZone ‑> 2 x US StoreFronts ‑> Fort Lauderdale, Eastern US: Apps and
Desktops
‑> Cambridge, UK: Apps and Desktops
‑> Bangalore, India: Apps and Desktops
1 x BGLZone ‑> 2 x IN StoreFronts ‑> Bangalore, India: Apps and Desktops
‑> Cambridge, UK: Apps and Desktops
‑> Fort Lauderdale, Eastern US: Apps and
Desktops
Figure 1. Suboptimal gateway routing
© 1999–2021 Citrix Systems, Inc. All rights reserved. 172

StoreFront 3.12
Figure 2. Optimal gateway routing
© 1999–2021 Citrix Systems, Inc. All rights reserved. 173

StoreFront 3.12
Use the Citrix StoreFront management console
Aer you configure separate NetScaler Gateway appliances for your deployments, you can define the
optimal appliance for users to access each of the deployments.
1. On the Windows Start screen or Apps screen, locate and click the Citrix StoreFront tile.
2. Select the Stores node in the le pane of the Citrix StoreFront management console and, in the
results pane, select a store. In the Actions pane, click Configure Store Settings.
3. On the Settings > Optimal HDX Routing page, select a gateway.
4. If you select the External Only check box, it is equivalent to ‑enabledOnDirectAccess = false
and Direct HDX Connection is equivalent to using Set‑DSFarmsWithNullOptimalGateway for
farms or zones.
Add a new gateway
One of the options in the previous procedure is to Add gateway. Aer you choose Add gateway, the
Add NetScaler Gateway screen displays.
1. On the General Settings screen, complete the Display name, NetScaler Gateway URL, and Us‑
age or Role settings to configure access to stores through NetScaler Gateway for users connect‑
ing from public networks. Remote access through a NetScaler Gateway cannot be applied to
unauthenticated stores.
2. On the Secure Ticket Authority (STA) screen, complete the options displayed. STA is hosted on
XenDesktop and XenApp servers and issues session tickets in response to connection requests.
These session tickets form the basis of authentication and authorization for access to XenDesk‑
top and XenApp resources.
3. On the Authentication Settings screen, enter the settings that specify how the remote user
provides authentication credentials.
© 1999–2021 Citrix Systems, Inc. All rights reserved. 174

StoreFront 3.12
Use PowerShell to configure optimal NetScaler Gateway routing for a store
PowerShell API parameters
‑SiteId (Int)—Site ID within IIS. This is typically 1 for the site in IIS where StoreFront is installed by
default.
‑ResourcesVirtualPath (String)—Path to the store that is to be configured to have a farm to optimal
gateway mapping.
Example: “/Citrix/Store”
‑GatewayName (String)—Name given to identify the Netscaler Gateway within StoreFront.
Example 1: ExternalGateway
Example 2: InternalGateway
‑Hostnames (String Array)—Specifies the fully qualified domain name (FQDN) and port of the opti‑
mal NetScaler Gateway appliance.
Example1 for standard vServer port 443: gateway.example.com
Example2 for nonstandard vServer port 500: gateway.example.com:500
‑Farms (String Array)—Specifies a set of (typically colocated) XenDesktop, XenApp, and App Con‑
troller deployments that share a common optimal NetScaler Gateway appliance. A farm can contain
just a single delivery controller or multiple delivery controller that provides published resources.
You can configure a XenDesktop site in StoreFront under delivery controllers as “XenDesktop”. This
represents a single farm. This could contain multiple delivery controllers in its failover list.
Example: “XenDesktop”
XenDesktop-A.example.com
XenDesktop-B.example.com
XenDesktop-C.example.com
‑Zones (String Array)—Specifies a data center or data centers containing many delivery controllers.
This requires you tag delivery controller objects in StoreFront with the appropriate zone to which you
want to allocate them.
‑staUrls (String Array)—Specifies the URLs for XenDesktop or XenApp servers running the Secure
Ticket Authority (STA). If using multiple farms, list the STA servers on each using a comma separated
list:
Example: http://xenapp-a.example.com/scripts/ctxsta.dll,http://xendesktop-a.
example.com/scripts/ctxsta.dll
© 1999–2021 Citrix Systems, Inc. All rights reserved. 175

StoreFront 3.12
‑StasUseLoadBalancing (Boolean)—Set to true: randomly obtains session tickets from all STAs,
evenly distributing requests across all the STAs. Set to false: users are connected to the first avail‑
able STA in the order in which they are listed in the configuration, minimizing the number of STAs in
use at any given time.
‑StasBypassDuration—Set the time period, in hours, minutes, and seconds, for which an STA is con‑
sidered unavailable aer a failed request.
Example: 02:00:00
‑EnableSessionReliability (Boolean)—Set to true: keeps disconnected sessions open while Re‑
ceiver attempts to reconnect automatically. If you configured multiple STAs and want to ensure that
session reliability is always available, set the value of the useTwoTickets attribute to true to obtain
session tickets from two dierent STAs in case one STA becomes unavailable during the session.
‑UseTwoTickets (Boolean)—Set to true: obtains session tickets from two dierent STAs in case one
STA becomes unavailable during the session. Set to false: uses only a single STA server.
‑EnabledOnDirectAccess (Boolean)—Set to true: ensures that when local users on the internal net‑
work log on to StoreFront directly, connections to their resources are still routed through the optimal
appliance defined for the farm. Set to false: connections to resources are not routed through the
optimal appliance for the farm unless users access StoreFront through a NetScaler Gateway.
When PowerShell scripts span multiple lines such as shown below, each line must end with the back‑
tick character.
Citrix recommends copying any code examples into the Windows PowerShell Integrated Scripting En‑
vironment (ISE) to validate the Powershell code using the format checker before you run it.
Configure an optimal gateway for a farm
Note
Configurationof Optimal HDXroutingwith the old PowerShell cmdlet, Set‑DSOptimalGatewayForFarms,
does not work.
To work around this issue:
1. Configure a global gateway with the settings you want for Optimal HDX routing using the
Add‑DSGlobalV10Gateway command and provide default values for the authentication set‑
tings.
2. Use the Add‑DSStoreOptimalGatewaycommand to add the optimal gateway configuration.
Example:
Add‑DSGlobalV10Gateway ‑Id 2eba0524‑af40‑421e‑9c5f‑a1ccca80715f ‑Name LondonGateway
‑Address “http://example” ‑Logon Domain ‑SecureTicketAuthorityUrls @(“http://staurl1”,
© 1999–2021 Citrix Systems, Inc. All rights reserved. 176

StoreFront 3.12
“http://staurl2”)
Add‑DSStoreOptimalGateway ‑SiteId 1 ‑VirtualPath /Citrix/Store1 ‑GatewayId 2eba0524‑af40‑
421e‑9c5f‑a1ccca80715f ‑Farms @(“Controller”) ‑EnabledOnDirectAccess $true
Example:
Create or overwrite Optimal Gateway For Farms mappings for the store Internal.
1 & "$Env:PROGRAMFILES\\Citrix\\Receiver StoreFront\\Scripts\\
ImportModules.ps1"
2
3 Set-DSOptimalGatewayForFarms -SiteId 1 \`
4
5 -ResourcesVirtualPath /Citrix/Internal \`
6 \-GatewayName "gateway1" \`
7 \-Hostnames "gateway1.example.com:500" \`
8 \-Farms "XenApp","XenDesktop" \`
9 \-StaUrls "https://xenapp.example.com/scripts/ctxsta.dll","https://
xendesktop.example.com/scripts/ctxsta.dll" \`
10 \-StasUseLoadBalancing:$false \`
11 \-StasBypassDuration 02:00:00 \`
12 \-EnableSessionReliability:$false \`
13 **-UseTwoTickets:$false \`
14 \-EnabledOnDirectAccess:$true
15 <!--NeedCopy-->
Configure an optimal gateway for a zone
Example:
Create or overwrite Optimal Gateway For Farms mappings for the zone “CAMZone”
“‘& “$Env:PROGRAMFILES\Citrix\Receiver StoreFront\Scripts\ImportModules.ps1”
Set‑DSOptimalGatewayForFarms ‑SiteId 1 ‘
‑ResourcesVirtualPath /Citrix/Internal ‘
‑GatewayName “gateway1” ‘
‑Hostnames “gateway1.example.com:500” ‘
‑Zones “CAMZone” ‘
‑StaUrls “https://xenapp.example.com/scripts/ctxsta.dll”,”https://xendesktop.example.com/scripts/ctxsta.dll”
‘
‑StasUseLoadBalancing:$false ‘
‑StasBypassDuration 02:00:00 ‘
‑EnableSessionReliability:$false ‘
‑UseTwoTickets:$false ‘
‑EnabledOnDirectAccess:$true
© 1999–2021 Citrix Systems, Inc. All rights reserved. 177

StoreFront 3.12
1 Example:
2
3 This script returns all Optimal Gateway For Farms mappings for the
store called Internal.
4
5 **Get-DSOptimalGatewayForFarms -SiteId 1 – ResourcesVirtualPath "/
Citrix/Internal"**
6
7 Example:
8
9 Remove all optimal gateway for farms mappings for store called Internal
.
10
11 **Remove-DSOptimalGatewayForFarms -SiteId 1 -ResourcesVirtualPath "/
Citrix/Internal"**
12
13 **Configure direct HDX connections for farms**
14
15 Example:
16
17 This script prevents all ICA launches from passing through a gateway
for the list of specified farms for the store calledInternal.
18
19 **Set-DSFarmsWithNullOptimalGateway -SiteId 1 -ResourcesVirtualPath /
Citrix/Store -Farms "Farm1","Farm2"**
20
21 Example:
22
23 This script returns all farms that are configured to prevent ICA
launches from passing through a gateway for a store called Internal.
24
25 **Get-DSFarmsWithNullOptimalGateway -SiteId 1 -ResourcesVirtualPath "/
Citrix/Internal"**
26
27
28
29 **Determine if your Optimal Gateway For Farms mappings are being used
by StoreFront**
30
31 1. Enable StoreFront tracing on all server group nodes using
PowerShell by running:
32
33 ```
34 & "$Env:PROGRAMFILES\\Citrix\\Receiver StoreFront\\Scripts\\
© 1999–2021 Citrix Systems, Inc. All rights reserved. 178

StoreFront 3.12
ImportModules.ps1"
35
36 \#Traces output is to c:\\Program Files\\Citrix\\Receiver
Storefront\\admin\\trace\\
37 Set-DSTraceLevel -All -TraceLevel Verbose
38 <!--NeedCopy-->
1. Open the Debug View tool on the desktop of a StoreFront server. If you are using a storefront
server group, you might have to do this on all nodes to ensure you obtain traces from the node
that receives the launch request.
2. Enable Capture Global Win32 events.
3. Save the trace output as a .log file and open the file with Notepad. Search for the log entries
shown in the example scenarios below.
4. Turn tracing o aerwards, as it consumes a lot of disk space on your StoreFront servers.
Set‑DSTraceLevel ‑All ‑TraceLevel O
Tested optimal gateway scenarios
• External client logs on Gateway1. Launch is directed through the designated optimal gate‑
way
Gateway2
for the farm
Farm2
.
Set‑DSOptimalGatewayForFarms ‑onDirectAccess=false
Farm2 is configured to use the optimal gateway Gateway2.
Farm2 has optimal gateway on direct access disabled.
The optimal gateway Gateway2 will be used for the launch.
• Internal client logs on using StoreFront. Launch is directed through the designated opti‑
mal gatewayGateway1 for the farm Farm1.
Set‑DSOptimalGatewayForFarms ‑onDirectAccess=true
No dynamically identified gateway in request. StoreFront was contacted directly.
© 1999–2021 Citrix Systems, Inc. All rights reserved. 179

StoreFront 3.12
Farm1 is configured to use the optimal gateway Gateway1.
Farm1 has optimal gateway on direct access enabled.
The optimal gateway Gateway1 will be used for the launch.
• Internal client logs on using Gateway1. Launches of resources on Farm1 are prevented
from passing through any gateway and StoreFront is contacted directly.
Set‑DSFarmsWithNullOptimalGateway
Dynamically identified gateway in request: Gateway1
Farm1 is configured to not use a gateway. No gateway will be used for launch.
Integrate with NetScaler Gateway and NetScaler
October 15, 2018
Use NetScaler Gateway with StoreFront to provide secure remote access for users outside the corpo‑
rate network and NetScaler to provide load balancing.
Plan gateway and server certificate usage
Integrating StoreFront with NetScaler Gateway and NetScaler requires a plan for gateway and server
certificate usage. Consider which Citrix components are going to require server certificate(s) within
your deployment:
• Plan to obtain certificates for Internet‑facing servers and gateways from external certificate au‑
thorities. Client devices may not automatically trust certificates signed by an internal certificate
authority.
• Plan for both external and internal server names. Many organizations have separate names‑
paces for internal and external use ‑ such as example.com (external) and example.net (internal).
A single certificate can contain both of these kinds of name by using the Subject Alternative
Name (SAN) extension. This is not normally recommended. A public certificate authority will
only issue a certificate if the top‑level domain (TLD) is registered with IANA. In this case, some
commonly used internal server names (such as example.local) cannot be used, and separate
certificates for external and internal names are required anyway.
• Use separate certificates for external and internal servers, where possible. A gateway may sup‑
port multiple certificates, either by binding a dierent certificate to each interface.
• Avoid sharing certificates between Internet‑facing and non‑Internet‑facing servers. These cer‑
tificates are likely to be dierent ‑ with dierent validity periods and dierent revocation poli‑
cies than certificates issued by your internal certificate authorities.
© 1999–2021 Citrix Systems, Inc. All rights reserved. 180

StoreFront 3.12
• Share “wildcard” certificates only between equivalent services. Avoid sharing a certificate be‑
tween dierent types of server (for example StoreFront servers, and other kinds of servers).
Avoid sharing a certificate between servers which are under dierent administrative control, or
which have dierent security policies. Typical examples of servers which provided equivalent
service are:
– A group of StoreFront servers and the server that performs load balancing between them.
– A group of Internet‑facing gateways within GSLB.
– A group of XenApp and XenDesktop 7.x controllers, which provide equivalent resources.
• Plan for hardware‑secured private key storage. Gateways and servers, including some
NetScaler models, can store the private key securely within a hardware security module (HSM)
or Trusted Platform Module (TPM). For security reasons, these configurations are not usually
intended to support sharing of certificates and their private keys, Consult the documentation
for the component. If implementing GSLB with NetScaler Gateway, this may require each
gateway within GSLB to have an identical certificate, which contains all the FQDNs you wish to
use.
For more information about securing your Citrix deployment, see the white paper End‑To‑End Encryp‑
tion with XenApp and XenDesktop and the XenApp and XenDesktop Secure section.
Add a NetScaler Gateway connection
October 15, 2018
Use the Add NetScaler Gateway Appliancetask to add NetScaler Gateway deployments through which
users can access your stores. You must enable the pass‑through from NetScaler Gateway authentica‑
tion method before you can configure remote access to your stores through NetScaler Gateway. For
more information about configuring NetScaler Gateway for StoreFront, see Using WebFront to Inte‑
grate with StoreFront.
Important: In multiple server deployments, use only one server at a time to make changes to the con‑
figuration of the server group. Ensure that the Citrix StoreFront management console is not running
on any of the other servers in the deployment. Once complete,
propagate your configuration changes to the server group so that the other servers in the deployment
are updated.
1. On the Windows Start screen or Apps screen, locate and click the Citrix StoreFront tile.
2. Select the Stores node in the le pane of the Citrix StoreFront management console and in the
Actions pane, click Manage NetScaler Gateways.
3. Click Add and General Settings, specify a name for the NetScaler Gateway deployment that will
help users to identify it.
© 1999–2021 Citrix Systems, Inc. All rights reserved. 181

StoreFront 3.12
Users see the display name you specify in Citrix Receiver, so include relevant information in the
name to help users decide whether to use that deployment. For example, you can include the
geographical location in the display names for your NetScaler Gateway deployments so that
users can easily identify the most convenient deployment for their location.
4. Enter the URL of the virtual server or user logon point (for Access Gateway 5.0) for your deploy‑
ment. Specify the product version used in your deployment.
The fully qualified domain name (FQDN) for your StoreFront deployment must be unique and
dierent from the NetScaler Gateway virtual server FQDN. Using the same FQDN for StoreFront
and the NetScaler Gateway virtual server is not supported.
5. If you are adding an Access Gateway 5.0 deployment, continue to Step 7. Otherwise, specify
the subnet IP address of the NetScaler Gateway appliance, if necessary. A subnet IP address is
required for Access Gateway 9.3 appliances, but optional for more recent product versions.
The subnet address is the IP address that NetScaler Gateway uses to represent the user device
when communicating with servers on the internal network. This can also be the mapped IP
address of the NetScaler Gateway appliance. Where specified, StoreFront uses the subnet IP
address to verify that incoming requests originate from a trusted device.
6. If you are adding an appliance running NetScaler Gateway 10.1 ‑ 11.0, Access Gateway 10 ‑ 11.0,
or Access Gateway9.3, select from the Logontypelisttheauthenticationmethodyouconfigured
on the appliance for Citrix Receiver users.
The information you provide about the configuration of your NetScaler Gateway appliance is
added to the provisioning file for the store. This enables Citrix Receiver to send the appropriate
connection request when contacting the appliance for the first time.
• If users are required to enter their Microso Active Directory domain credentials, select
Domain.
• If users are required to enter a tokencode obtained from a security token, select Security
token.
• If users are requiredto enter both their domain credentials and a tokencode obtained from
a security token, select Domain and security token.
• If users are required to enter a one‑time password sent by text message, select SMS au‑
thentication.
• If users are required to present a smart card and enter a PIN, select Smart card.
If you configure smart card authentication with a secondary authentication method to which
users can fall back if they experience any issues with their smart cards, select the secondary
authentication method from the Smart card fallback list. Continue to Step 8.
7. To add an Access Gateway 5.0 deployment, indicate whether the user logon point is hosted on
a standalone appliance or an Access Controller server that is part of a cluster. If you are adding
a cluster, click Next and continue to Step 9.
© 1999–2021 Citrix Systems, Inc. All rights reserved. 182

StoreFront 3.12
8. If you are configuring StoreFront for NetScaler Gateway 10.1 ‑ 11.0, Access Gateway 10 ‑ 11.0,
Access Gateway 9.3, or a single Access Gateway 5.0 appliance, complete the NetScaler Gateway
authentication service URL in the Callback URL box. StoreFront automatically appends the stan‑
dard portion of the URL. Click Next and continue to Step 11.
Enter the internally accessible URL of the appliance. StoreFront contacts the NetScaler Gateway
authentication service to verify that requests received from NetScaler Gateway originate from
that appliance.
9. To configure StoreFront for an Access Gateway 5.0 cluster, list on the Appliances page the IP
addresses or FQDNs of the appliances in the cluster and click Next.
10. On the Enable Silent Authentication page, list URLs for the authentication service running on
the Access Controller servers. Add URLs for multiple servers to enable fault tolerance, listing
the servers in order of priority to set the failover sequence. Click Next.
StoreFront uses the authentication service to authenticate remote users so that they do not
need to re‑enter their credentials when accessing stores.
11. For all deployments, if you are making resources provided by XenDesktop or XenApp available
in the store, list on the Secure Ticket Authority (STA) page URLs for servers running the STA. Add
URLs for multiple STAs to enable fault tolerance, listing the servers in order of priority to set the
failover sequence.
The STA is hosted on XenDesktop and XenApp servers and issues session tickets in response to
connection requests. These session tickets form the basis of authentication and authorization
for access to XenDesktop and XenApp resources.
12. If you want XenDesktop and XenApp to keep disconnected sessions open while Citrix Receiver
attempts to reconnect automatically, select the Enable session reliability check box. If you con‑
figured multiple STAs and want to ensure that session reliability is always available, select the
Request tickets from two STAs, where available check box.
When the Request tickets from two STAs, where available check box is selected, StoreFront ob‑
tains session tickets from two dierent STAs so that user sessions are not interrupted if one STA
becomes unavailable during the course of the session. If, for any reason, StoreFront is unable
to contact two STAs, it falls back to using a single STA.
13. Click Create to add details of your NetScaler Gateway deployment. Once the deployment has
been added, click Finish.
For more information about updating the details of your deployments, see Configure NetScaler
Gateway connection settings.
To provide access to stores through NetScaler Gateway, one internal beacon point and at least two
external beacon points are required. Citrix Receiver uses beacon points to determine whether users
© 1999–2021 Citrix Systems, Inc. All rights reserved. 183

StoreFront 3.12
are connected to local or public networks and then selects the appropriate access method. By de‑
fault, StoreFront uses the server URL or load‑balanced URL of your deployment as the internal beacon
point. The Citrix website and the virtual server or user logon point (for Access Gateway 5.0) URL of the
first NetScaler Gateway deployment you add are used as external beacon points by default. For more
information about changing beacon points, see Configure beacon points.
To enable users to access your stores through NetScaler Gateway, ensure that you configure remote
user access for those stores.
Import a NetScaler Gateway
October 25, 2018
Remote access settings configured within the NetScaler administration console have to be identical
to those configured in StoreFront. This article shows you how to import a NetScaler Gateway so that
NetScaler and StoreFront are configured correctly to work together.
Requirements
• NetScaler11.1.51.21 or higher is requiredtoexport multiple gateway vServers to a ZIP file. Note:
NetScaler can only export gateway vServers created using the XenApp and XenDesktop wizard.
• It must be possible for DNS to resolve, and for StoreFront to contact, all STA (Secure Ticket Au‑
thority) server URLs in the GatewayConfig.json file within the ZIP file generated by NetScaler.
• The GatewayConfig.json file within the ZIP file generated by NetScaler has to contain the URL
of an existing Citrix Receiver for Web site on the StoreFront server. NetScaler 11.1 and higher
takes care of this by contacting the StoreFront server and enumerating all existing stores and
Citrix Receiver for Web sites before generating the ZIP file for export.
• StoreFront must be able to resolve the callback URL in DNS to the gateway VPN vServer IP ad‑
dress for authentication using the imported gateway to succeed.
The callback URL and port combination you use is usually the same as the gateway URL and
port combination, as long as StoreFront can resolve this URL.
or
The callback URL and port combination may be dierent from the gateway URL and port combi‑
nation if you use dierent external and internal DNS namespaces in your environment. If your
gateway is located in a DMZ and uses a <example.com> URL and StoreFront is on your private
corporate network and uses a <example.local> URL you may use a <example.local> callback
URL to point back to the gateway vServer in the DMZ.
© 1999–2021 Citrix Systems, Inc. All rights reserved. 184

StoreFront 3.12
Import a NetScaler Gateway using the console
You can import one or multiple NetScaler Gateway appliances by importing a NetScaler configuration
file.
Important
Citrix does not support manual editing of the configuration file exported from NetScaler.
1. Select Stores in the le pane of the Citrix StoreFront management console, and in the Actions
pane, click Manage NetScaler Gateways.
2. On the Manage NetScaler Gateways screen, click the imported from file link.
3. Browse to the NetScaler Configuration ZIP file.
4. A list of gateway vServers from the selected ZIP file is displayed. Select the gateway vServer you
want to import and click Import. If you are repeating an import of a vServer, the Import button dis‑
plays as Update. If you choose Update, you will have the option later to overwrite or create a new
gateway.
© 1999–2021 Citrix Systems, Inc. All rights reserved. 185

StoreFront 3.12
5. Review the logon type for the selected gateway and specify a callback URL if required. The logon
type is the authentication method that you configured on the NetScaler Gateway appliance for Citrix
Receiver users. Some logon types require callback URLs (see table).
• Click Verify to check that the Callback URL is valid and reachable from the StoreFront server.
© 1999–2021 Citrix Systems, Inc. All rights reserved. 186
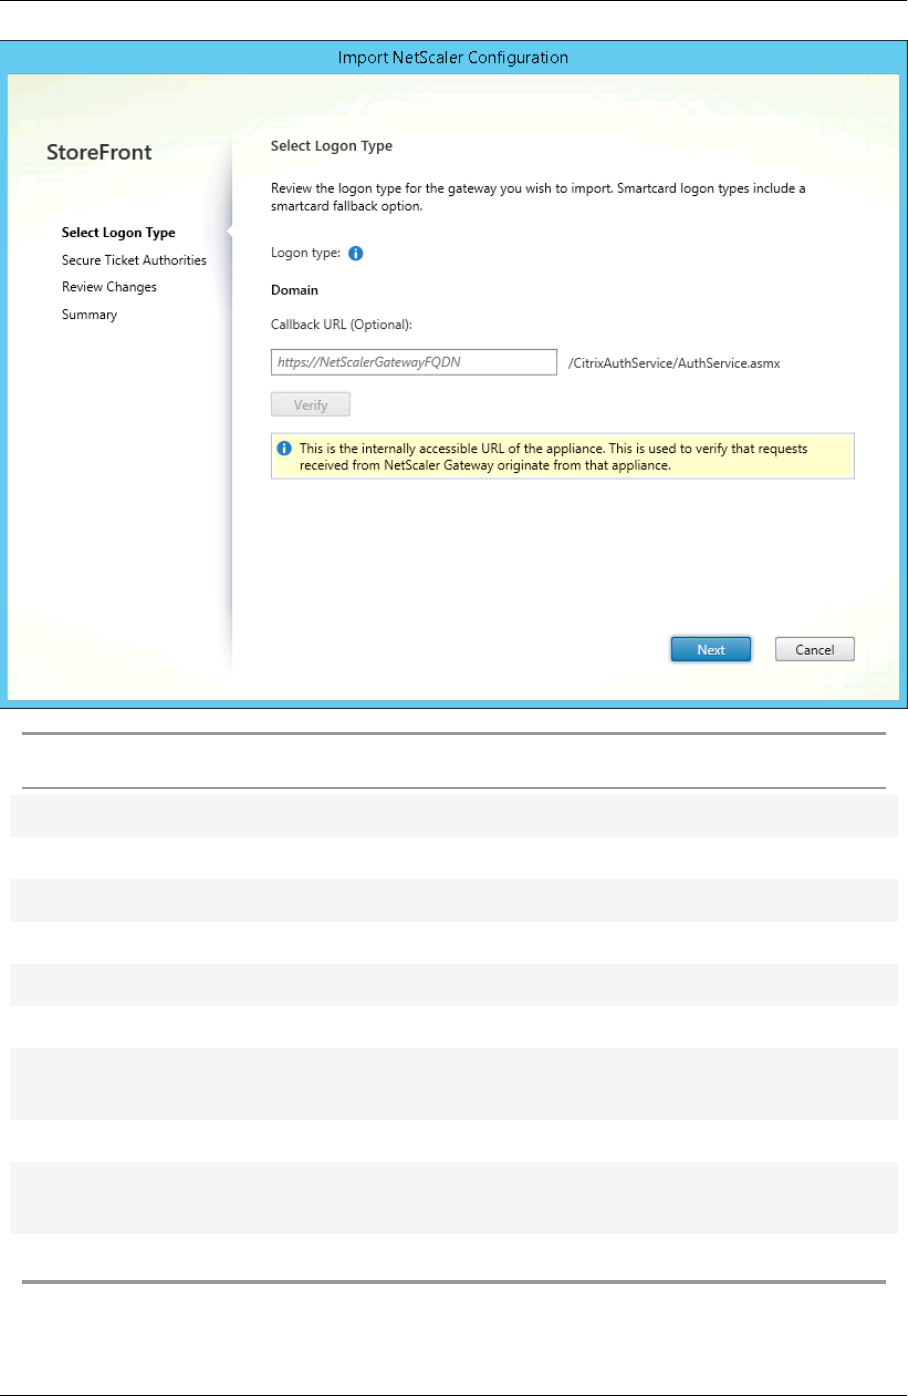
StoreFront 3.12
Logon type in console LogonType in JSON file Callback URL required
Domain Domain No
Domain and security token DomainAndRSA No
Security token RSA Yes
Smart card ‑ no fallback SmartCard Yes
Smart card ‑ domain SmartCardDomain Yes
Smart card ‑ domain and
security token
SmartCardDomainAndRSA Yes
Smart card ‑ security token SmartCardRSA Yes
Smart card ‑ SMS
authentication
SmartCardSMS Yes
SMS authentication SMS Yes
© 1999–2021 Citrix Systems, Inc. All rights reserved. 187

StoreFront 3.12
If a callback URL is required, StoreFront will autofill Callback URL based on the gateway URL found in
the ZIP file. You can change this to any valid URL that points back to the NetScaler Gateway vServer
IP.
If you want to use Smart Access, a Callback URL is required.
6. Click Next.
1. StoreFront contacts all the STA (Secure Ticket Authorities) server URLs listed in the ZIP file using
DNS, and validates that they are functional STA ticketing servers. The import will not continue
if one or more of the STA URLs is invalid.
8. Click Next.
1. Review the details of the import. If a gateway with the same gateway URL and port combination
(Gateway:port) already exists, use the drop‑down to select a gateway to overwrite it, or create
a new gateway.
© 1999–2021 Citrix Systems, Inc. All rights reserved. 188

StoreFront 3.12
StoreFront uses the GatewayURL:port combination to determine whether a gateway you are trying
to import matches an existing gateway that you may wish to update. If a gateway has a dierent
GatewayURL:port combination then StoreFront treats this as a new gateway. This table of gateway
settings shows which settings you can update.
Gateway Setting Can be updated
Gateway URL:Port Combination No
GSLB URL Yes
Netscaler Trust Certificate & Thumbprint Yes
Callback URL Yes
Receiver for Web Site URL Yes
Gateway Address/VIP Yes
STA URL and STA ID Yes
All Logon Types Yes
© 1999–2021 Citrix Systems, Inc. All rights reserved. 189

StoreFront 3.12
1. Click Import. If the StoreFront server is part of a server group, a message is displayed reminding
you to propagate the imported gateway settings to the other servers in the group.
11. Click Finish.
To import another vServer configuration, repeat the steps above.
Note
The default gateway for a store is the gateway that native Citrix Receivers try to connect through
unless they are configured to use a dierent gateway. If no gateways are configured for the store,
the first gateway imported from the ZIP file will become the default gateway used by native Citrix
Receivers. Importing subsequent gateways does not change the default gateway already set for
the store.
Import multiple NetScaler Gateways using PowerShell
Read‑STFNetScalerConfiguration
• Copy the ZIP file to the desktop of the currently logged on StoreFront administrator.
• Read the contents of the NetScaler ZIP file into memory and look at the three gateways it con‑
tains using their index values.
1 $ImportedGateways = Read-STFNetScalerConfiguration -path "$env:
USERPROFILE\desktop\GatewayConfig.zip"
View the three gateway objects in memory which were read in from the Netscaler ZIP import package
using the Read‑STFNetScalerConfiguration cmdlet.
1 $ImportedGateways.Document.Gateways[0]
2 $ImportedGateways.Document.Gateways[1]
3 $ImportedGateways.Document.Gateways[2]
4
5 GatewayMode : CVPN
6 CallbackUrl :
7 GslbAddressUri : https://gslb.example.com/
8 AddressUri : https://emeagateway.example.com/
9 Address : https://emeagateway.example.com:443
10 GslbAddress : https://gslb.example.com:443
11 VipAddress : 10.0.0.1
12 Stas : {
13 STA298854503, STA909374257 }
14
15 StaLoadBalance : True
16 CertificateThumbprints : {
17 F549AFAA29EBF61E8709F2316B3981AD503AF387 }
© 1999–2021 Citrix Systems, Inc. All rights reserved. 190

StoreFront 3.12
18
19 GatewayAuthType : Domain
20 GatewayEdition : Enterprise
21 ReceiverForWebSites : {
22 Citrix.StoreFront.Model.Roaming.NetScalerConfiguration.
ReceiverForWebSite }
23
24
25 GatewayMode : CVPN
26 CallbackUrl :
27 GslbAddressUri : https://gslb.example.com/
28 AddressUri : https://emeagateway.example.com/
29 Address : https://emeagateway.example.com:444
30 GslbAddress : https://gslb.example.com:443
31 VipAddress : 10.0.0.2
32 Stas : {
33 STA298854503, STA909374257 }
34
35 StaLoadBalance : True
36 CertificateThumbprints : {
37 F549AFAA29EBF61E8709F2316B3981AD503AF387 }
38
39 GatewayAuthType : DomainAndRSA
40 GatewayEdition : Enterprise
41 ReceiverForWebSites : {
42 Citrix.StoreFront.Model.Roaming.NetScalerConfiguration.
ReceiverForWebSite }
43
44
45 GatewayMode : CVPN
46 CallbackUrl : https://emeagateway.example.com:445
47 GslbAddressUri : https://gslb.example.com/
48 AddressUri : https://emeagateway.example.com/
49 Address : https://emeagateway.example.com:445
50 GslbAddress : https://gslb.example.com:443
51 VipAddress : 10.0.0.2
52 Stas : {
53 STA298854503, STA909374257 }
54
55 StaLoadBalance : True
56 CertificateThumbprints : {
57 F549AFAA29EBF61E8709F2316B3981AD503AF387 }
58
59 GatewayAuthType :SmartCard
60 GatewayEdition : Enterprise
© 1999–2021 Citrix Systems, Inc. All rights reserved. 191

StoreFront 3.12
61 ReceiverForWebSites : {
62 Citrix.StoreFront.Model.Roaming.NetScalerConfiguration.
ReceiverForWebSite }
Import‑STFNetScalerConfiguration without specifying a CallbackURL
Copy the ZIP file to the desktop of the currently logged in StoreFront administrator. Read in the
NetScaler ZIP import package into memory and look at the three gateways it contains using their
index values.
1 $ImportedGateways = Read-STFNetScalerConfiguration -path "$env:
USERPROFILE\desktop\GatewayConfig.zip"
Import three new gateways into StoreFront using the Import‑STFNetScalerConfiguration cmdlet and
specifying the gateway indexes you require. Using the ‑Confirm:$False parameter prevents the Pow‑
ershell GUI from prompting you to allow every gateway to be imported. Remove this if you wish to
carefully import one gateway at a time.
1 Import-STFNetScalerConfiguration -Configuration $ImportedGateways -
GatewayIndex 0 -Confirm:$False
2 Import-STFNetScalerConfiguration -Configuration $ImportedGateways -
GatewayIndex 1 -Confirm:$False
3 Import-STFNetScalerConfiguration -Configuration $ImportedGateways -
GatewayIndex 2 -Confirm:$False
Import‑STFNetScalerConfiguration specifying your own CallbackURL
Import three new gateways into StoreFront using the Import‑STFNetScalerConfiguration cmdlet and
specify a callback URL of your choice using the ‑callbackURL parameter.
1 $ImportedGateways = Read-STFNetScalerConfiguration -path "$env:
USERPROFILE\desktop\GatewayConfig.zip"
2
3 Import-STFNetScalerConfiguration -Configuration $ImportedGateways -
GatewayIndex 0 -CallbackUrl "https://emeagatewaycb.example.com:443 -
Confirm:$False
4
5 Import-STFNetScalerConfiguration -Configuration $ImportedGateways -
GatewayIndex 1 -CallbackUrl "https://emeagatewaycb.example.com:444 -
Confirm:$False
6
7 Import-STFNetScalerConfiguration -Configuration $ImportedGateways -
GatewayIndex 2 -CallbackUrl "https://emeagatewaycb.example.com:445 -
Confirm:$False
© 1999–2021 Citrix Systems, Inc. All rights reserved. 192

StoreFront 3.12
Import‑STFNetScalerConfiguration override the authentication method stored in the import
file and specify your own CallbackURL
• Import three new gateways into StoreFront using the Import‑STFNetScalerConfiguration
cmdlet and specify a callback URL of your choice using the ‑callbackURL parameter.
1 $ImportedGateways = Read-STFNetScalerConfiguration -path "$env:
USERPROFILE\desktop\GatewayConfig.zip"
2
3 Import-STFNetScalerConfiguration -Configuration $ImportedGateways -
GatewayIndex 0 -LogonType "SmartCard" -CallbackUrl "https://
emeagatewaycb.example.com:443" -Confirm:$False
4
5 Import-STFNetScalerConfiguration -Configuration $ImportedGateways -
GatewayIndex 1 -LogonType "SmartCard" -CallbackUrl "https://
emeagatewaycb.example.com:444" -Confirm:$False
6
7 Import-STFNetScalerConfiguration -Configuration $ImportedGateways -
GatewayIndex 2 -LogonType "SmartCard" -CallbackUrl "https://
emeagatewaycb.example.com:445" -Confirm:$False
Configure NetScaler Gateway connection settings
October 15, 2018
The tasks below enable you to update details of the NetScaler Gateway deployments through which
users access your stores. For more information about configuring NetScaler Gateway for StoreFront,
see Using WebFront to Integrate with StoreFront.
If you make any changes to your NetScaler Gateway deployments, ensure that users who access stores
through these deployments update Citrix Receiver with the modified connection information. Where
a Citrix Receiver for Web site is configured for a store, users can obtain an updated Citrix Receiver
provisioning file from the site. Otherwise, you can export a provisioning file for the store and make
this file available to your users.
Important: In multiple server deployments, use only one server at a time to make changes to the con‑
figuration of the server group. Ensure that the Citrix StoreFront management console is not running
on any of the other servers in the deployment. Once complete,
propagate your configuration changes to the server group so that the other servers in the deployment
are updated.
© 1999–2021 Citrix Systems, Inc. All rights reserved. 193

StoreFront 3.12
Change general NetScaler Gateway settings
Use the Change General Settings task to modify the NetScaler Gateway deployment names shown to
users and to update StoreFront with changes to the virtual server or user logon point URL, and the
deployment mode of your NetScaler Gateway infrastructure.
1. On the Windows Start screen or Apps screen, locate and click the Citrix StoreFront tile.
2. Select the Stores node in the le pane of the Citrix StoreFront management console and pane,
click Manage Netscaler Gateways.
3. Specify a name for the NetScaler Gateway deployment that will help users to identify it.
Users see the display name you specify in Citrix Receiver, so include relevant information in the
name to help users decide whether to use that deployment. For example, you can include the
geographical location in the display names for your NetScaler Gateway deployments so that
users can easily identify the most convenient deployment for their location.
4. Enter the URL of the virtual server or user logon point (for Access Gateway 5.0) for your deploy‑
ment. Specify the product version used in your deployment.
The fully qualified domain name (FQDN) for your StoreFront deployment must be unique and
dierent from the NetScaler Gateway virtual server FQDN. Using the same FQDN for StoreFront
and the NetScaler Gateway virtual server is not supported.
5. If your deployment is running Access Gateway 5.0, continue to Step 7. Otherwise, specify the
subnet IP address of the NetScaler Gateway appliance, if necessary. A subnet IP address is re‑
quired for Access Gateway 9.3 appliances, but optional for more recent product versions.
The subnet address is the IP address that NetScaler Gateway uses to represent the user device
when communicating with servers on the internal network. This can also be the mapped IP
address of the NetScaler Gateway appliance. Where specified, StoreFront uses the subnet IP
address to verify that incoming requests originate from a trusted device.
6. If your appliance is running NetScaler Gateway 10.1 ‑ 11.0, Access Gateway 10 ‑ 11.0, or Access
Gateway 9.3, select from the Logon type list the authentication method you configured on the
appliance for Citrix Receiver users.
The information you provide about the configuration of your NetScaler Gateway appliance is
added to the provisioning file for the store. This enables Citrix Receiver to send the appropriate
connection request when contacting the appliance for the first time.
• If users are required to enter their Microso Active Directory domain credentials, select
Domain.
• If users are required to enter a tokencode obtained from a security token, select Security
token.
• If users are requiredto enter both their domain credentials and a tokencode obtained from
a security token, select Domain and security token.
© 1999–2021 Citrix Systems, Inc. All rights reserved. 194

StoreFront 3.12
• If users are required to enter a one‑time password sent by text message, select SMS au‑
thentication.
• If users are required to present a smart card and enter a PIN, select Smart card.
If you configure smart card authentication with a secondary authentication method to which
users can fall back if they experience any issues with their smart cards, select the secondary
authentication method from the Smart card fallback list.
7. If your deployment consists of NetScaler Gateway 10.1 ‑ 11.0, Access Gateway 10 ‑ 11.0, Access
Gateway 9.3, or a single Access Gateway 5.0 appliance, complete the NetScaler Gateway authen‑
tication service URL in the Callback URL box. StoreFront automatically appends the standard
portion of the URL.
Enter the internally accessible URL of the appliance. StoreFront contacts the NetScaler Gateway
authentication service to verify that requests received from NetScaler Gateway originate from
that appliance.
Manage Access Gateway 5.0 appliances
Use the Manage Appliances task to add, edit, or remove from StoreFront the IP addresses or FQDNs of
the appliances in your Access Gateway 5.0 cluster.
Enable silent user authentication through Access Controller
Use the Enable Silent Authentication task to add, edit, or remove URLs for the authentication service
running on the Access Controller servers for your Access Gateway 5.0 cluster. Enter URLs for multiple
servers to enable fault tolerance, listing the servers in order of priority to set the failover sequence.
StoreFront uses the authentication service to authenticate remote users so that they do not need to
re‑enter their credentials when accessing stores.
Manage Secure Ticket Authorities
Use the Secure Ticket Authority task to update the list of Secure Ticket Authorities (STAs) from which
StoreFront obtains user session tickets and to configure session reliability. The STA is hosted on Xen‑
Desktop and XenApp servers and issues session tickets in response to connection requests. These
session tickets form the basis of authentication and authorization for access to XenDesktop and Xe‑
nApp resources.
1. On the Windows Start screen or Apps screen, locate and click the Citrix StoreFront tile.
2. Select the Stores node in the le pane of the Citrix StoreFront management console and, in
the results pane, select a NetScaler Gateway deployment. In the Actions pane, click Manage
NetScaler Gateways.
© 1999–2021 Citrix Systems, Inc. All rights reserved. 195

StoreFront 3.12
3. Click Add to enter the URL for a server running the STA. Specify URLs for multiple STAs to enable
fault tolerance, listing the servers in order of priority to set the failover sequence. To modify a
URL, select the entry in the Secure Ticket Authority URLs list and click Edit. Select a URL in the
list and click Remove to stop StoreFront obtaining session tickets from that STA.
4. If you want XenDesktop and XenApp to keep disconnected sessions open while Citrix Receiver
attempts to reconnect automatically, select the Enable session reliability check box. If you con‑
figured multiple STAs and want to ensure that session reliability is always available, select the
Request tickets from two STAs, where available check box.
When the Request tickets from two STAs, where available check box is selected, StoreFront ob‑
tains session tickets from two dierent STAs so that user sessions are not interrupted if one STA
becomes unavailable during the course of the session. If, for any reason, StoreFront is unable
to contact two STAs, it falls back to using a single STA.
Remove NetScaler Gateway deployments
In the Actions pane, use the Remove task from Manage NetScaler Gateways to delete the details of a
NetScaler Gateway deployment from StoreFront. Once a NetScaler Gateway deployment is removed,
users are no longer be able to access stores through that deployment.
Configure two URLs for the same NetScaler Gateway
October 25, 2018
In StoreFront, you can add a single NetScaler Gateway URL from the StoreFront management console
in Manage NetScaler Gateways> Add or Edit. It is also possible to add both a public NetScaler Gateway
URL and a GSLB (Global Server Load Balancing) URL in Manage NetScaler Gateways > imported from
file.
This article shows you how to use PowerShell cmdlets and the StoreFront PowerShell SDK to use an
optional parameter, ‑gslburl, to set the GslbLocation attribute of a gateway. This feature simplifies the
NetScaler Gateway administration in StoreFront in the following use cases:
1. GSLB and multiple NetScaler Gateways. Use GSLB and multiple NetScaler Gateways to load
balance remote connections to published resources in two or more locations within a large
global Citrix deployment.
2. Single NetScaler Gateway using a public or private URL. Use the same NetScaler Gateway
for external access using a public URL, and for internal access using a private URL.
This is an advanced feature. If you are new to GSLB concepts, see the Related information links at the
end of this article.
© 1999–2021 Citrix Systems, Inc. All rights reserved. 196

StoreFront 3.12
This feature oers the following benefits:
• Support two simultaneous URLs for a single gateway object.
• Users can switch between two dierent URLs to access the NetScaler Gateway without the ad‑
ministrator reconfiguring the StoreFront gateway object to match the gateway URL the user
wants to use.
• Shorter setup and test times to validate the StoreFront gateway configuration when using mul‑
tiple GSLB gateways.
• Use the same NetScaler Gateway object in StoreFront inside the DMZ for both external and in‑
ternal access.
• Support both URLs for optimal gateway routing. For more information on optimal gateway rout‑
ing, see Set up highly available multi‑site stores.
Deployment considerations when using two Gateway URLs
Important
Before configuring a second gateway URL using the ‑gslburl parameter, Citrix recommends re‑
viewing what server certificates you have in place and how your organization performs DNS res‑
olution. Any URLs that you want to use in your NetScaler and StoreFront deployment must be
present in your server certificates. For more information about server certificates, see Plan gate‑
way and server certificate usage.
DNS
• Split DNS. It is common for large enterprises to use split DNS. Split DNS involves using dierent
namespaces and dierent DNS servers for public and private DNS resolution. Check if you have
the existing DNS infrastructure to support this.
• Single URL for external and internal access to published resources. Decide if you want to use
the same URL to access published resources from both outside and inside your corporate net‑
work, or consider if two dierent URLs are acceptable such as example.com and example.net.
Server certificate examples
This section contains example server certificate deployments when using two Gateway URLs.
• Example server certificate for a load balanced StoreFront deployment
A privately signed wildcard server certificate should contain the FQDN *.storefront.example.net.
Or
A privately signed SAN server certificate should contain all the FQDNs needed to load balance three
StoreFront servers.
loadbalancer.storefront.example.net
server1.storefront.example.net
© 1999–2021 Citrix Systems, Inc. All rights reserved. 197

StoreFront 3.12
server2.storefront.example.net
server3.storefront.example.net
Set the host base URL of the Storefront server group to be the shared FQDN, which resolves to the
load balancer IP address.
loadbalancer.storefront.example.net
• Example server certificate for a group of XenApp and XenDesktop 7.x Delivery Controllers
A privately signed wildcard server certificate should contain the FQDN *.xendesktop.example.net.
Or
A privately signed SAN server certificate should contain all the server FQDNs needed for a XenDesktop
site containing four Controllers.
XD1A. xendesktop.example.net
XD1B. xendesktop.example.net
XD2A. xendesktop.example.net
XD2B. xendesktop.example.net
• Example server certificate for a NetScaler Gateway which is accessed both externally and
internally using split DNS
A publically signed SAN server certificate for both external and internal access should contain both
the external and internal FQDNs.
gateway.example.com
gateway.example.net
• Example server certificate for all GSLB Gateways which are accessed externally
A publically signed SAN server certificate for external access through GSLB should contain the FQDNs.
gslbdomain.example.com
emeagateway.example.com
usgateway.example.com
apacgateway.example.com
This allows the user to access the closest gateway using GSLB or to pick a gateway in the location of
their choice using its unique FQDN.
© 1999–2021 Citrix Systems, Inc. All rights reserved. 198

StoreFront 3.12
Use Case #1: GSLB and multiple NetScaler Gateways
The administrator uses GSLB and multiple NetScaler Gateways to load balance remote connections
to published resources in two or more locations within a large global Citrix deployment.
In this example:
• Each location or data center contains at least one gateway, one or more StoreFront servers,
and one or more XenApp and XenDesktop Controllers to provide published resources for that
location.
• Each GSLB service configured on the GSLB NetScalers within the global deployment represents
a gateway VPN vServer. All of the StoreFront servers in the deployment must be configured to
contain all of the NetScaler Gateway vServers that make up the GSLB layer.
• The GSLB NetScaler Gateways are used in active/active mode but can also provide failover if the
network connection, DNS, gateway, StoreFront server or XenApp and XenDesktop Controllers
at one location fail. Users are automatically directed to another gateway if a GSLB service is
unavailable.
• External clients are directed to the closest gateway based on the configured GSLB load balanc‑
ing algorithm such as round trip time (RTT) or Static Proximity when making remote connec‑
tions.
• The unique URL for each gateway allows users to manually select which data center they want
to launch resources from by choosing the location‑specific URL for the gateway they want to
use.
• GSLB can be bypassed when GSLB or a DNS delegation is not working as expected. Users can
continue to access remote resources at any data center using its location‑specific URL until any
GSLB related issues are resolved.
Use Case #2: Single NetScaler Gateway using a public or private URL
The administrator uses the same NetScaler Gateway for both external access using a public URL, and
also internally using a private URL.
In this example:
• The administrator wants all access to published resources and HDX launch traic to pass
through a NetScaler Gateway even if the client is internal.
• The NetScaler is located in a DMZ.
• There are two dierent network routes to the NetScaler Gateway through the two firewalls on
either side of the DMZ.
• The public‑facing, external namespace is dierent from the internal namespace.
© 1999–2021 Citrix Systems, Inc. All rights reserved. 199

StoreFront 3.12
PowerShell cmdlet examples
Use the PowerShell cmdlets Add‑STFRoamingGateway and Set‑STFRoamingGateway with the pa‑
rameter, ‑gslburl, to set the GslbLocation attribute on the StoreFront gateway object. For example:
1 Add-STFRoamingGateway -Name "EMEAGateway" -GatewayUrl "https://
emeagateway.example.com" -GSLBurl "https://gslb.example.com" -
SubnetIPAddress "10.0.0.1" -CallbackUrl "https://emeagateway.example
.com" -LogonType "DomainAndRSA" -SmartCardFallbackLogonType "None" -
Version "Version10_0_69_4" -SecureTicketAuthorityUrls "https://emea-
controller.example.com/scripts/ctxsta.dll,https://us-controller.
example.com/scripts/ctxsta.dll,https://apac-controller.example.com/
scripts/ctxsta.dll"
2 Set-STFRoamingGateway -Name "EMEAGateway" -GatewayUrl "https://
emeagateway.example.com" -GSLBurl "https://gslb.example.com"
3 Get-STFRoamingGateway -Name "EMEAGateway" (returns just the EMEA
gateway object)
4 Or
5 Get-STFRoamingGateway (returns all gateway object configured in
StoreFront)
For use case #1, you can remove the GSLBurl from the “EMEAGateway” by setting its GslbLocation to
NULL. The following PowerShell modifies the gateway object $EMEAGateway stored in memory. Set‑
STFRoamingGatway can then be passed $EMEAGateway to update the StoreFront config and remove
the GSLBurl.
1 $EMEAGateway = Get-STFRoamingGateway
2
3 $EMEAGateway.GslbLocation = $Null
4
5 Set-STFRoamingGateway -Gateway $EMEAGateway
For use case #1, the following gateways are returned using Get‑STFRoamingGateway:
1 Name: EMEAGateway
2 Location: https://emeagateway.example.com/ (Unique URL for the EMEA
Gateway)
3
4 GslbLocation: https://gslb.example.com/ (GSLB URL for all three
gateways)
5
6 Name: USGateway
7 Location: https://USgateway.example.com/ (Unique URL for the US
Gateway)
8
© 1999–2021 Citrix Systems, Inc. All rights reserved. 200

StoreFront 3.12
9 GslbLocation: https://gslb.example.com/ (GSLB URL for all three
gateways)
10
11 Name: APACGateway
12 Location: https://APACgateway.example.com/ (Unique URL for the APAC
Gateway)
13
14 GslbLocation: https://gslb.example.com/ (GSLB URL for all three
gateways)
For use case #2: the following gateways are returned using Get‑STFRoamingGateway:
1 Name: EMEAGateway
2 Location: https://emeagateway.example.com/ (Public URL for the Gateway
)
3
4 GslbLocation: https://emeagateway.example.net/ (Private URL for the
Gateway)
Forusecase#1, OptimalGatewayRoutingis returnedusing Get‑STFStoreRegisteredOptimalLaunchGateway:
1 $StoreObject = Get-STFStoreService -SiteId 1 -VirtualPath "/Citrix/<
YourStore>"
2
3 Get-STFStoreRegisteredOptimalLaunchGateway -StoreService $StoreObject
4
5 Hostnames: {
6 emeagateway.example.com, gslb.example.com }
7
8 Hostnames: {
9 usgateway.example.com, gslb.example.com }
10
11 Hostnames: {
12 apacgateway.example.com, gslb.example.com }
GSLB URL or Internal URL for each Gateway is stored in the Roaming service web.config file
StoreFrontdoes not display the GSLB URL or internalURL for eachGateway within the StoreFrontman‑
agement console, however it is possible to view the configured GSLBLocation path for all GSLB gate‑
waysbyopening the roaming serviceWeb.Configfilelocation in C:\inetpub\wwwroot\Citrix\Roaming\web.config
on the StoreFront server.
Use Case #1 Gateways in Roaming web.config file
© 1999–2021 Citrix Systems, Inc. All rights reserved. 201

StoreFront 3.12
<gateway id=”cca13269‑18c1‑10fd‑a0df‑7931b3897aa8” name=”EMEAGateway” default=”false”
edition=”Enterprise” version=”Version10_0_69_1” auth=”DomainAndRSA”
smartcardfallback=”None” ipaddress=”10.0.0.1” rwmode=”NONE” deployment=”Appliance”
callbackurl=https://emeagateway.example.com/CitrixAuthService/AuthService.asmx
sessionreliability=”true” requesttickettwosta=”false” stasUseLoadBalancing=”false”
stasBypassDuration=”01:00:00”>
<location path=”https://emeagateway.example.com/” /><gslbLocation
path=”https://gslb.example.com/” /><clusternodes>
<clear />
</clusternodes>
<silentauthenticationurls>
<clear />
</silentauthenticationurls>
<secureticketauthorityurls>
<clear />
<location path=”https://emea‑controller.example.com/scripts/ctxsta.dll” />
<location path=”https://us‑controller.example.com/scripts/ctxsta.dll” />
<location path=”https://apac‑controller.example.com/scripts/ctxsta.dll” />
</secureticketauthorityurls>
</gateway>
<gateway id=”b8ec720c‑d85e‑1889‑8188‑1cf08a2cf762” name=”USGateway” default=”false”
edition=”Enterprise” version=”Version10_0_69_1” auth=”DomainAndRSA”
smartcardfallback=”None” ipaddress=”10.0.0.2” rwmode=”NONE” deployment=”Appliance”
callbackurl=”https://usgateway.example.com/CitrixAuthService/AuthService.asmx”
sessionreliability=”true” requesttickettwosta=”false” stasUseLoadBalancing=”false”
stasBypassDuration=”01:00:00”><location path=”https://usgateway.example.com/”
/><gslbLocation path=”https://gslb.example.com/” /><clusternodes>
<clear />
</clusternodes>
<silentauthenticationurls>
<clear />
</silentauthenticationurls>
<secureticketauthorityurls>
<clear />
<location path=”https://emea‑controller.example.com/scripts/ctxsta.dll” />
<location path=”https://us‑controller.example.com/scripts/ctxsta.dll” />
<location path=”https://apac‑controller.example.com/scripts/ctxsta.dll” />
</secureticketauthorityurls>
</gateway>
<gateway id=”c57117b5‑e111‑1eed‑9117‑a1a1c8100e” name=”APACGateway” default=”false”
edition=”Enterprise” version=”Version10_0_69_1” auth=”DomainAndRSA”
smartcardfallback=”None” ipaddress=”10.0.0.3” rwmode=”NONE” deployment=”Appliance”
callbackurl=”https://apacgateway.example.com/CitrixAuthService/AuthService.asmx”
sessionreliability=”true” requesttickettwosta=”false” stasUseLoadBalancing=”false”
stasBypassDuration=”01:00:00”><location path=”https://apacGateway.example.com/”
/><gslbLocation path=”https://gslb.example.com/” /><clusternodes>
<clear />
</clusternodes>
<silentauthenticationurls>
<clear />
</silentauthenticationurls>
<secureticketauthorityurls>
<clear />
<location path=”https://emea‑controller.example.com/scripts/ctxsta.dll” />
<location path=”https://us‑controller.example.com/scripts/ctxsta.dll” />
<location path=”https://apac‑controller.example.com/scripts/ctxsta.dll” />
</secureticketauthorityurls>
</gateway>
© 1999–2021 Citrix Systems, Inc. All rights reserved. 202

StoreFront 3.12
Use Case #2: Gateways in Roaming web.config file
<gateway id=”cca13269‑18c1‑10fd‑a0df‑7931b3897aa8” name=”EMEAGateway” default=”false”
edition=”Enterprise” version=”Version10_0_69_1” auth=”Domain” smartcardfallback=”None”
ipaddress=”10.0.0.1” rwmode=”NONE” deployment=”Appliance”
callbackurl=”https://emeagateway.example.com/CitrixAuthService/AuthService.asmx”
sessionreliability=”true” requesttickettwosta=”false” stasUseLoadBalancing=”false”
stasBypassDuration=”01:00:00”>
<location path=”https://emeagateway.example.com/” />
<gslbLocation path=” https://emeagateway.example.net/” />
<clusternodes>
<clear />
</clusternodes>
<silentauthenticationurls>
<clear />
</silentauthenticationurls>
<secureticketauthorityurls>
<clear />
<location path=”https://emea‑controller.example.net/scripts/ctxsta.dll” />
</secureticketauthorityurls>
</gateway>
Load balancing with NetScaler
October 15, 2018
This article contains the information needed to use NetScaler to load balance two or more StoreFront
servers.
Configure a StoreFront server group and NetScaler load balancing
Plan your load balanced StoreFront deployment
This article provides guidance on how to deploy a StoreFront server group containing two or more
StoreFront servers in all active load balanced configuration. The article provides details of how to con‑
figure a NetScaler appliance to load balance incoming requests from Citrix Receiver/Citrix Receiver for
© 1999–2021 Citrix Systems, Inc. All rights reserved. 203

StoreFront 3.12
Web between all of the StoreFront nodes in the server group and how to configure the new Storefront
Monitor for use with a NetScaler or third party load balancer.
For load balancing configuration examples, see the sections “Scenario 1” and “Scenario 2” below.
Tested with the following environment
• Four Windows Server 2012 R2 StoreFront 3.0 nodes in a single server group.
• One NetScaler 10.5 load balancer configured for Least Connection and CookieInsert “sticky”
load balancing.
• One Windows 8.1 test client with Fiddler 4.0 and Citrix Receiver for Windows 4.3 installed.
Server certificate requirements for the load balanced deployment if you intend to use HTTPS
Review the section Plan gateway and server certificate usage.
Consider the following options before purchasing a certificate from a commercial certificate authority
or issuing one from your enterprise CA.
• Option 1: Use a *.example.com wildcard certificate on both the NetScaler load balancing
vServer and on the StoreFront server group nodes. This simplifies the configuration and allows
you to add extra StoreFront servers in the future without the need to replace the certificate.
• Option 2: Use a certificate including Subject Alternative Names (SANs) on both the NetScaler
load balancing vServer and on the StoreFront server group nodes. Extra SANs within the certifi‑
cate that match all of StoreFront server fully qualified domain names (FQDNs) are optional, but
recommended, as this allows greater flexibility in the StoreFront deployment. Include a SAN for
email‑based discovery discoverReceiver.example.com.
For details of email‑based discovery configuration, see http://blogs.citrix.com/2013/04/01/
configuring‑email‑based‑account‑discovery‑for‑citrix‑receiver/ .
Note: When exporting the private key associated with the certificate is not feasible. Use two separate
certificates: one on the NetScaler load balancing vServer and a dierent certificate on the StoreFront
server group nodes. Both certificates must include Subject Alternative Names.
© 1999–2021 Citrix Systems, Inc. All rights reserved. 204

StoreFront 3.12
Create a server certificate for the NetScaler load balancer and all StoreFront servers
Import a certificate issued from a Windows CA onto a NetScaler appliance using OpenSSL
© 1999–2021 Citrix Systems, Inc. All rights reserved. 205

StoreFront 3.12
• WinSCP is a useful third party and free tool to move files from a Windows machine to a NetScaler
file system. Copy certificates for import to the /nsconfig/ssl/ folder within the NetScaler file
system.
• You can also use OpenSSL tools on the NetScaler to extract the certificate and key from a
PKCS12/PFX file to create a two separate .CER and .KEY X.509 files in PEM format that NetScaler
can use.
1. Copy the PFX file into /nsconfig/ssl/ on the NetScaler appliance or VPX.
2. Open the NetScaler command line interface (CLI).
3. Type Shell to switch to exit the NetScaler CLI and switch to the FreeBSD shell.
4. Change directory using cd /nsconfig/ssl/.
5. Run openssl pkcs12 ‑in <imported cert file>.pfx ‑nokeys ‑out <certfilename>.cer and enter
the PFX password when prompted.
6. Run openssl pkcs12 ‑in <imported cert file>.pfx ‑nocerts ‑out <keyfilename>.key and enter
the PFX password when prompted, and then set the private key PEM passphrase to protect the
.KEY file.
7. Run ls ‑al to check the .CER and .KEY files have been successfully created inside /nsconfig/ssl/.
8. Type Exit to return to the NetScaler CLI.
Configure the server certificate on the NetScaler aer it is imported
1. Log onto the NetScaler management GUI.
2. Select Traic Management > SSL > SSL Certificates and click Install.
3. On the Install Certificate window, enter the certificate and private key pair names.
• Select the .cer certificate file on the NetScaler file system under /nsconfig/ssl/.
• Select the .key file containing the private key from the same location.
© 1999–2021 Citrix Systems, Inc. All rights reserved. 206
StoreFront 3.12
Create DNS records for the StoreFront server group load balancer
Create a DNS A and PTR record for your chosen shared FQDN. Clients within your network use this
FQDN to access the StoreFront server group using the NetScaler load balancer.
Example ‑ storefront.example.com resolves to the load balancing vServer virtual IP (VIP).
Scenario 1: An end to end HTPPS 443 secure connection between the client and NetScaler load
balancer and also between the load balancer and two or more StoreFront 3.0 servers.
This scenario uses a modified StoreFront monitor using port 443.
Add individual StoreFront server nodes to the NetScaler load balancer
© 1999–2021 Citrix Systems, Inc. All rights reserved. 207

StoreFront 3.12
1. Log onto the NetScaler management GUI.
2. Select Traic Management > Load Balancing > Servers > Add and add each of the four Store‑
Front nodes to be load balanced.
Example = 4 x 2012R2 StoreFront Nodes called 2012R2‑A to –D
3. Use IP based server configuration and enter the server IP address for each StoreFront node.
Define a StoreFront monitor to check the status of all StoreFront nodes in the server group
1. Log onto the NetScaler management GUI.
2. Select Traic Management > Load Balancing > Monitors > Add and add a new monitor called
StoreFront and accept all default settings.
3. From the Type drop down menu, select StoreFront.
4. Makes sure the Secure check box is checked if using HTTPS connections between your load
balancing vServer and StoreFront; otherwise leave this option disabled.
5. Specify the store name under the Special Parameters tab.
6. Check the Check Backend Services check box under the Special Parameters tab. This option
enables monitoring of services running on the StoreFront server. StoreFront services are moni‑
tored by probing a Windows service that runs on the StoreFront server, which returns the status
of all running StoreFront services.
© 1999–2021 Citrix Systems, Inc. All rights reserved. 208

StoreFront 3.12
Create an HTTPS 443 service group containing all of the StoreFront servers
1. Within your Service Group, select the Members option on the right hand side and add all of the
StoreFront server nodes you defined previously in the Servers section.
2. Set the SSL port and give each node a unique server ID as they are added.
© 1999–2021 Citrix Systems, Inc. All rights reserved. 209

StoreFront 3.12
3. On the Monitors tab, select the StoreFront monitor you created earlier.
4. On the Certificates tab, bind the server certificate you imported earlier.
5. Bind the CA certificate used to sign the server certificate you imported earlier and any other CAs
that might be part of the PKI chain of trust.
© 1999–2021 Citrix Systems, Inc. All rights reserved. 210
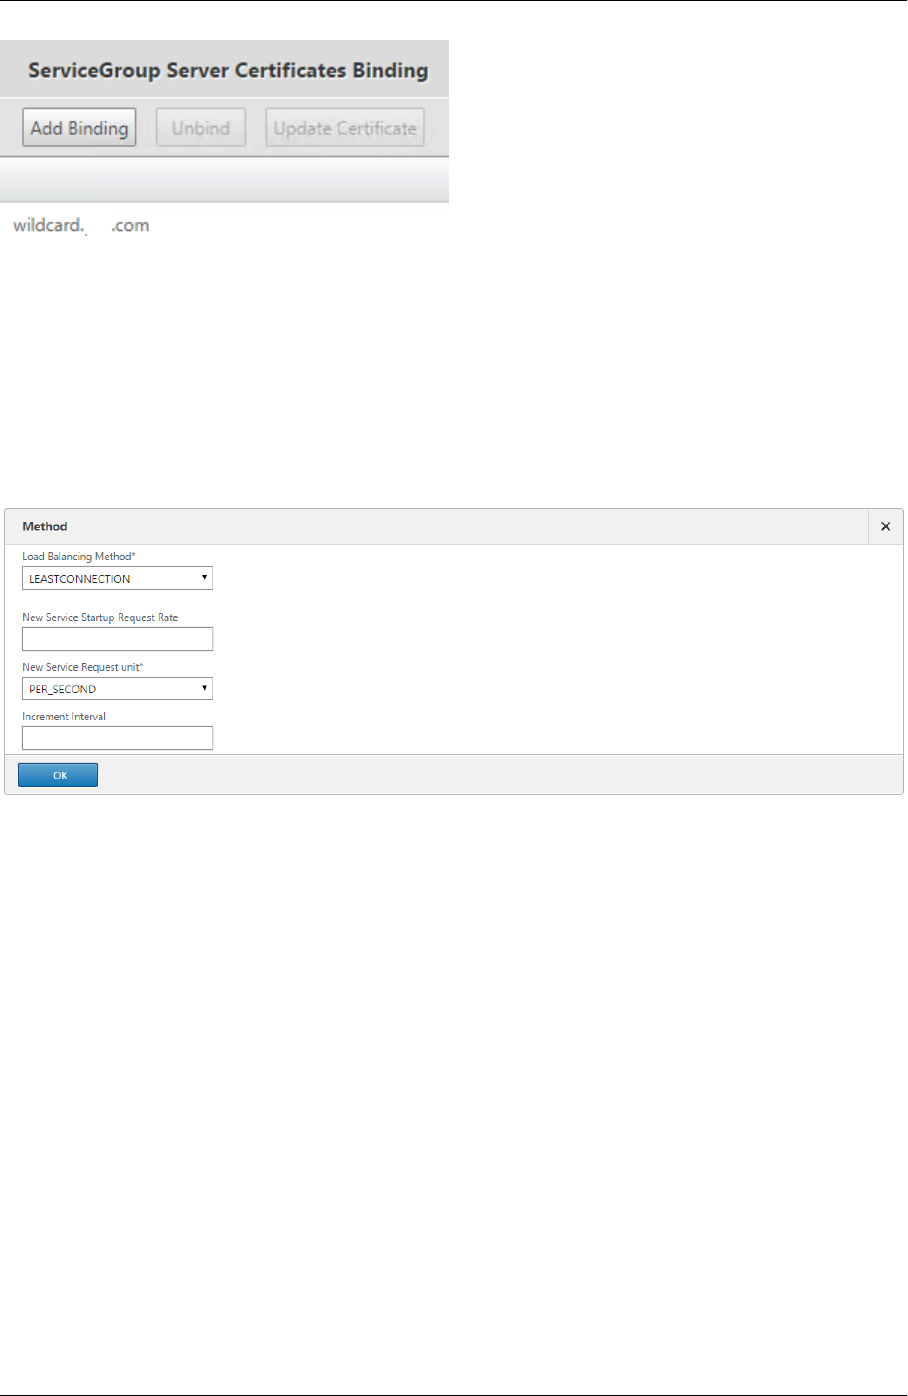
StoreFront 3.12
Create a load balancing vServer for user traic
1. Log onto the NetScaler management GUI.
2. Select Traic Management > Load Balancing > Virtual Servers > Add to create a new vServer.
3. Select the load balancing method for the vServer. Common choices for StoreFront load balancing
are round robin or least connection.
4. Bind the Service Group you created earlier to the load balancing vServer.
5. Bind the same server and CA certificate you previously bound to the service group, to the load
balancing vServer.
6. From within the load balancing vServer menu, select Persistence on the right hand side and set
the persistence method to be CookieInsert.
7. Name the cookie. For example, NSC_SFPersistence, as this makes it easy to identify in Fiddler
traces during debugging.
8. Set backup persistence to None.
© 1999–2021 Citrix Systems, Inc. All rights reserved. 211

StoreFront 3.12
Scenario 2: HTTPS termination ‑ HTTPS 443 communication between the client and NetScaler
load balancer and HTTP 80 connections between the load balancer and the StoreFront 3.0
servers behind it.
This scenario uses the default StoreFront monitor using port 8000.
Add individual StoreFront server servers to the NetScaler load balancer
1. Log onto the NetScaler management GUI.
2. Select Traic Management > Load Balancing > Servers > Add and add each of the four Store‑
Front servers to be load balanced.
Example = 4 x 2012R2 Storefront servers called 2012R2‑A to ‑D.
3. Use IP based Server configuration and enter the server IP address for each Storefront server.
© 1999–2021 Citrix Systems, Inc. All rights reserved. 212

StoreFront 3.12
Define an HTTP 8000 StoreFront monitor to check the status of all StoreFront servers in the
server group
1. Log onto the NetScaler management GUI.
2. Select Traic Management > Monitors > Add and add a new monitor called StoreFront.
3. Add a name for the new monitor and accept all default settings.
4. Select Type from the drop down menu as StoreFront.
5. Specify the store name under the Special Parameters tab.
6. Enter
8000
into destination port, as this matches the default monitor instance that is created
on each StoreFront server.
7. Tick the Check Backend Services check box under the Special Parameters tab. This option
enables monitoring of services running on the StoreFront server. StoreFront services are mon‑
itored by probing to a Windows service that runs on the StoreFront server, which returns the
status of all running StoreFront services.
Create an HTTP 80 service group containing all of the StoreFront servers
1. Within your Service Group, select the Members option on the right hand side and add all of the
StoreFront server nodes you defined previously in the Servers section.
2. Set the HTTP port to 80 and give each server a unique server ID as you add them.
3. On the Monitors tab, select the StoreFront monitor you created earlier.
Create an HTTPS terminating load balancing vServer for user traic
1. Select Traic Management > Load Balancing > Virtual Servers > Add to create a new vServer.
© 1999–2021 Citrix Systems, Inc. All rights reserved. 213

StoreFront 3.12
2. Select the load balancing method vServer will use. Common choices for StoreFront load bal‑
ancing are round robin or least connection.
3. Bind the Service Group you created earlier to the load balancing vServer.
4. Bind the same server and CA certificate you previously bound to the service group, to the load
balancing vServer.
Note: If the client is not allowed to store the HTTP cookie, the subsequent requests do not have
the HTTP cookie and Persistence is not used.
5. From within the load balancing vServer menu, select Persistence and set the persistence
method to be CookieInsert.
6. Name the cookie. For example, NSC_SFPersistence, as this makes it easy to identify in Fiddler
traces during debugging.
7. Set backup persistence to
None
.
© 1999–2021 Citrix Systems, Inc. All rights reserved. 214

StoreFront 3.12
Create a load balancing vServer for subscription synchronization between server
groups
Considerations before creating a load balancing vServer include the following:
• Option 1: Create a single vServer: To load balance only user traic. This is all that is needed if
performing only ICA launches of published apps and desktops. (Mandatory and usually all that
is required.)
• Option 2: Create a pair of vServers: One to load balance user traic for performing ICA launches
of published apps and desktops and another for load balancing subscription data synchroniza‑
tion operations. (Necessary only when propagating subscription data between two or more
load balanced StoreFront server groups in a large multisite deployment.)
If a multisite deployment consists of two or more StoreFront server groups located in separate ge‑
ographic locations, you can replicate subscription data between them using a pull strategy on a re‑
peating schedule. StoreFront subscription replication uses TCP port 808, so using an existing load
balancing vServer on HTTP port 80 or HTTPS 443 fails. To provide high availability for this service,
create a second vServer on each NetScaler in your deployment to load balance TCP port 808 for each
of the StoreFront server groups. When configuring the replication schedule, specify a server group
address that matches the subscription synching vServer virtual IP address. Ensure the server group
address is the FQDN of the load balancer for the server group at that location.
Configure a service group for subscription synchronization
1. Log onto the NetScaler management GUI.
2. Select Traic Management > Service Groups > Add and add a new service group.
3. Change the protocol to TCP.
4. Within your Service Group, select the Members option on the right hand side and add all of the
StoreFront server nodes you defined previously in the Servers section.
5. On the Monitors tab, select the TCP monitor.
© 1999–2021 Citrix Systems, Inc. All rights reserved. 215

StoreFront 3.12
Create a load balancing vServer for subscription synchronization between server groups
1. Log onto the NetScaler management GUI.
2. Select Traic Management > Service Groups > Add and add a new service group.
3. Set the load balancing method to round robin.
4. Change the protocol to TCP.
5. Enter 808 **and NOT 443** as the port number.
Membership within CitrixSubscriptionsSyncUsers
For StoreFront server A at Location A to request and pull subscription data from server B at a dier‑
ent location, server A must be a member of the CitrixSubscriptionsSyncUsers local security group
on server B. The CitrixSubscriptionsSyncUsers local group contains an access control list of all re‑
mote StoreFront servers authorized to pull subscription data from a particular server. For bidirec‑
tional subscription synchronization, server B must also be a member of the
CitrixSubscriptionsSyn‑
cUsers security group on server A to pull subscription data from it.
© 1999–2021 Citrix Systems, Inc. All rights reserved. 216
StoreFront 3.12
Configure the StoreFront server group for load balancing
1. Import the same certificate and private key that was deployed on the NetScaler load balancing
vServer to every StoreFront node in the server group.
2. Create an HTTPS binding in IIS on every StoreFront node, and then bind the certificate you imported
earlier to it.
© 1999–2021 Citrix Systems, Inc. All rights reserved. 217

StoreFront 3.12
3. Install StoreFront on every node in the server group.
4. During installation of StoreFront, set the host base URL on the primary node to be the shared FQDN
used by all members of the server group. You must use a certificate containing the load balanced
FQDN as a Common Name (CN) or Subject Alternative Name (SAN).
1 See the [Create a server certificate for the NetScaler load balancer
and StoreFront servers](/en-us/storefront/3-12/integrate-with-
netscaler-and-netscaler-gateway/load-balancing-with-netscaler.html#
create-a-server-certificate-for-the-netscaler-load-balancer-and-
storefront-servers).
5. When you complete the initial StoreFront configuration, join each of the nodes, one aer the other,
to the server group using the primary node.
6. Select Server Group > Add Server > Copy the Authorization Code to the joining Server.
7. Propagate the configuration from the primary node to all other server group nodes in the group.
© 1999–2021 Citrix Systems, Inc. All rights reserved. 218

StoreFront 3.12
8. Test the load balanced server group using a client that can contact and resolve the shared FQDN of
the load balancer.
Citrix Service Monitor
To enable external monitoring of the run‑state of the Windows services on which StoreFront relies for
correct operation, use the Citrix Service Monitor Windows service. This service has no other service
dependencies and canmonitorand report the failureofothercriticalStoreFrontservices. The monitor
enables the relative health of a StoreFront server deployment to be determined externally by other
Citrix components, such as NetScaler. Third party soware can consume the StoreFront monitor XML
response to monitor the health of essential StoreFront services.
Aer StoreFront is deployed, a default monitor that uses HTTP and port 8000 is created.
Note: Only a single instance of a monitor can exist within a Storefront deployment.
To make any changes to the existing default monitor, such as changing the protocol and port to HTTPS
443, use the three PowerShell cmdlets to view or reconfigure the StoreFront monitor service URL.
Remove the default Service Monitor and replace it with one that uses HTTPS and port 443
1. Open the PowerShell Integrated Scripting Environment (ISE) on the primary StoreFront server and
run the following commands to change the default monitor to HTTPS 443.
$ServiceUrl = “https://localhost:443/StorefrontMonitor”
Set‑STFServiceMonitor ‑ServiceUrl $ServiceUrl
Get‑STFServiceMonitor
2. Once completed, propagate the changes to all other servers in the StoreFront server group.
3. To perform a quick test on the new monitor, enter the following URL into the browser on the Store‑
Front server or any other machine with network access to the StoreFront server. The browser should
return an XML summary of the status of every Storefront service.
https://<loadbalancingFQDN>:443/StoreFrontMonitor/GetSFServicesStatus
© 1999–2021 Citrix Systems, Inc. All rights reserved. 219

StoreFront 3.12
NetScaler Gateway and load balancing vServers on the same NetScaler appliance
If you have configured the NetScaler Gateway vServer and load balancing vServer on the same
NetScaler appliance, internal domain users might experience issues when trying to access the
StoreFront load balanced host base URL directly rather than passing through the NetScaler Gateway
vServer.
In this scenario StoreFront assumes that the end user has already authenticated at the NetScaler Gate‑
way because StoreFront correlates the source IP address of the incoming user with the NetScaler Gate‑
way Subnet IP Address (SNIP). This triggers StoreFront attempt to use the AGBasic protocol to perform
NetScaler Gateway silent authentication, rather than actually prompting the user to log on with their
domain credentials. To avoid this issue, omit a SNIP address as shown below so that username and
password authentication is used instead of AGBasic.
Configure a Netscaler Gateway on the Storefront Server Group
© 1999–2021 Citrix Systems, Inc. All rights reserved. 220

StoreFront 3.12
Loopback options when load balancing a StoreFront server group using NetScaler
In previous versions of Storefront such as 2.6 or older, Citrix recommended that you manually modify
the hosts file on each StoreFront server to map the fully qualified domain name (FQDN) of the load
balancer to the loopback address or the IP address of the specific StoreFront server. This ensures
that Receiver for Web always communicates with the StoreFront services on the same server in a load
balanced deployment. This is necessary because an HTTP session is created during the explicit login
process between ReceiverforWeb and the authenticationservice and Receiver for Web communicates
with Storefront services using the base FQDN. If the base FQDN were to resolve to the load balancer,
the load balancer could potentially send the traic to a dierent StoreFront server in the group, lead‑
ing to authentication failure. This does not bypass the load balancer except when Receiver for Web
attempts to contact the Store service residing on the same server as itself.
You can set loopback options using PowerShell. Enabling loopback negates the need to create host
file entries on every StoreFront server in the server group.
Example Receiver for Web web.config file:
<communication attempts=”2” timeout=”00:01:00” loopback=”On” loopbackPortUs‑
ingHttp=”80”>
Example PowerShell command:
& “c:\program files\Citrix\receiver storefront\scripts\ImportModules.ps1”
Set‑DSLoopback ‑SiteId 1 ‑VirtualPath “/Citrix/StoreWeb” ‑Loopback “OnUsingHttp” ‑
LoopbackPortUsingHttp 81
The ‑Loopback parameter can take three possible values.
© 1999–2021 Citrix Systems, Inc. All rights reserved. 221

StoreFront 3.12
Value Context
On:
Changes the host of the URL to 127.0.0.1. The
schema and port (if specified) are not changed.
Cannot be used if SSL‑terminating load
balancer is used.
OnUsingHttp:
Changes the host to 127.0.0.1 and schema to
HTTP and modifies the port the value
configured for loopbackPortUsingHttp
attribute.
Use only when the load balancer is SSL
terminating. Communication between the load
balancer and StoreFront servers is with HTTP.
You can explicitly configure the HTTP port
using the ‑loopbackPortUsingHttp attribute.
O:
The URL in the request is not modified in any
way.
Use for trouble shooting. Tools like Fiddler
cannot capture the traic between Receiver for
Web and StoreFront Services if loopback is set
to “On”.
Configure NetScaler and StoreFront for Delegated Forms
Authentication (DFA)
November 5, 2018
Extensible authentication provides a single customizationpoint for extensionof NetScaler’s and Store‑
Front’s form‑based authentication. To achieve an authentication solution using the Extensible Au‑
thentication SDK, you must configure Delegated Form Authentication (DFA) between NetScaler and
StoreFront. The Delegated Forms Authentication protocol allows generation and processing of au‑
thentication forms, including credential validation, to be delegated to another component. For ex‑
ample, NetScaler delegates it authentication to StoreFront, which then interacts with a third party
authentication server or service.
Installation recommendations
• To ensure communication between NetScaler and StoreFront is protected, use HTTPS instead
of HTTP protocol.
• For cluster deployment, ensure that all the nodes have the same server certificate installed and
configured in IIS HTTPS binding prior to configuration steps.
• Ensure that Netscaler has the issuer of StoreFront’s server certificate as a trusted certificate au‑
thority when HTTPS is configured in StoreFront.
© 1999–2021 Citrix Systems, Inc. All rights reserved. 222

StoreFront 3.12
StoreFront cluster installation considerations
• Install a third party authentication plugin on all the nodes prior to joining them up together.
• Configure all the Delegated Forms Authentication related settings on one node and propagate
the changes to the others. See the “Enable Delegated Forms Authentication.”
Enable Delegated Forms Authentication
Because there is no GUI to setup Citrix pre‑shared key setting in StoreFront, use the PowerShell con‑
sole to install Delegated Forms Authentication.
1. Install Delegated Forms Authentication. It is not installed by default and you need to install it
using the PowerShell console.
1 PS C:\Users\administrator.PTD.000> cd 'C:\Program Files\Citrix\
Receiver StoreFront\Scripts'
2 PS C:\Program Files\Citrix\Receiver StoreFront\Scripts> & .\
ImportModules.ps1
3 Adding snapins
4 Importing modules
5 Loading 'C:\Program Files\Citrix\Receiver StoreFront\\Admin\Citrix
.DeliveryServices.ConfigurationProvider.dll'
6 Loading 'C:\Program Files\Citrix\Receiver StoreFront\\Admin\Citrix
.DeliveryServices.ConfigurationProvider.dll'
7
8 PS C:\Program Files\Citrix\Receiver StoreFront\Scripts> Install-
DSDFAServer
9 Id : bf694fbc-ae0a-4d56-8749-
c945559e897a
10 ClassType : e1eb3668-9c1c-4ad8-bbae-
c08b2682c1bc
11 FrameworkController : Citrix.DeliveryServices.Framework
.FileBased.FrameworkController
12 ParentInstance : 8dd182c7-f970-466c-ad4c-27
a5980f716c
13 RootInstance : 5d0cdc75-1dee-4df7-8069-7375
d79634b3
14 TenantId : 860e9401-39c8-4f2c-928d-34251102
b840
15 Data : {
16 }
17
18 ReadOnlyData : {
19 [Name, DelegatedFormsServer], [Cmdlet, Add-DSWebFeature], [Snapin
, Citrix.DeliverySer
© 1999–2021 Citrix Systems, Inc. All rights reserved. 223

StoreFront 3.12
20 vices.Web.Commands], [Tenant, 860
e9401-39c8-4f2c-928d-34251102
b840] }
21
22 ParameterData : {
23 [FeatureClassId, e1eb3668-9c1c-4ad8-bbae-c08b2682c1bc], [
ParentInstanceId, 8dd182c7-f
24 970-466c-ad4c-27a5980f716c], [
TenantId, 860e9401-39c8-4f2c
-928d-34251102b840] }
25
26 AdditionalInstanceDependencies : {
27 b1e48ef0-b9e5-4697-af9b-0910062aa2a3 }
28
29 IsDeployed : True
30 FeatureClass : Citrix.DeliveryServices.Framework
.Feature.FeatureClass
31 <!--NeedCopy-->
2. Add Citrix Trusted Client. Configure the shared secret key (passphrase) between StoreFront and
Netscaler. Your passphrase and client ID must be identical to what you configured in NetScaler.
1 PS C:\Program Files\Citrix\Receiver StoreFront\Scripts> Add-
DSCitrixPSKTrustedClient -clientId netscaler.fqdn.com -
passphrase secret
2 <!--NeedCopy-->
3. Set the Delegated Forms Authentication conversation factory to route all the traic to
the custom form. To find the conversation factory, look for ConversationFactory in
C:\inetpub\wwwroot\Citrix\Authentication\web.config.This is an example of what you might
see.
1 <example connectorURL="http://Example.connector.url:8080/adapters-
sf-aaconnector-webapp">
2 <routeTable order="1000">
3 <routes>
4 <route name="StartExampleAuthentication" url="Example-
Bridge-Forms/Start">
5 <defaults>
6 <add param="controller" value="
ExplicitFormsAuthentication" />
7 <add param="action" value="AuthenticateStart" />
8 <add param="postbackAction" value="Authenticate" />
9 <add param="cancelAction" value="CancelAuthenticate"
/>
© 1999–2021 Citrix Systems, Inc. All rights reserved. 224

StoreFront 3.12
10 <add param="conversationFactory" value="
ExampleBridgeAuthentication" />
11 <add param="changePasswordAction" value="
StartChangePassword" />
12 <add param="changePasswordController" value="
ChangePassword" />
13 <add param="protocol" value="CustomForms" />
14 </defaults>
15 </route>
16 <!--NeedCopy-->
4. In PowerShell, set the Delegated Forms Authentication conversation factory. In this example,
to ExampleBridgeAuthentication.
1 PS C:\Program Files\Citrix\Receiver StoreFront\Scripts> Set-
DSDFAProperty -ConversationFactory ExampleBridgeAuthentication
2 <!--NeedCopy-->
PowerShell argumentsarenotcase‑sensitive: ‑ConversationFactoryis identical to‑conversationfactory.
Uninstall StoreFront
Before you uninstall StoreFront, uninstall any third party authentication plugin, as it will impact the
functionality of StoreFront.
Authenticate using dierent domains
March 29, 2019
Some organizations have policies in place that do not allow you to give third‑party developers or con‑
tractors access to published resources in a production environment. This article shows you how to
give access to published resources in a test environment by authenticating through NetScaler Gate‑
way with one domain. You can then use a dierent domain to authenticate to StoreFront and the Re‑
ceiver for Web site. Authentication through NetScaler Gateway described in this article is supported
for users logging on through the Receiver for Web site. This authentication method is not supported
for users of native desktop or mobile Citrix Receivers.
Set up a test environment
This example uses a production domain called production.com and a test domain called
development.com.
© 1999–2021 Citrix Systems, Inc. All rights reserved. 225

StoreFront 3.12
production.com domain
The production.com domain in this example is set up as follows:
• NetScaler Gateway with production.com LDAP authentication policy configured.
• Authentication through the gateway occurs using a production\testuser1 account and pass‑
word.
development.com domain
The development.com domain in this example is set up as follows:
• StoreFront, XenApp and XenDesktop 7.0 or higher and VDAs are all on the development.com
domain.
• Authentication to the Citrix Receiver for Web site occursusing a development\testuser1account
and password.
• There is no trust relationship between the two domains.
Configure a NetScaler Gateway for the store
To configure a NetScaler Gateway for the store:
1. Select Stores in the le pane of the Citrix StoreFront management console, and in the Actions
pane, click Manage NetScaler Gateways.
2. On the Manage NetScaler Gateways screen, click the Add button.
3. Complete the General Settings, Secure Ticket Authority, and Authentication steps.
© 1999–2021 Citrix Systems, Inc. All rights reserved. 226

StoreFront 3.12
© 1999–2021 Citrix Systems, Inc. All rights reserved. 227
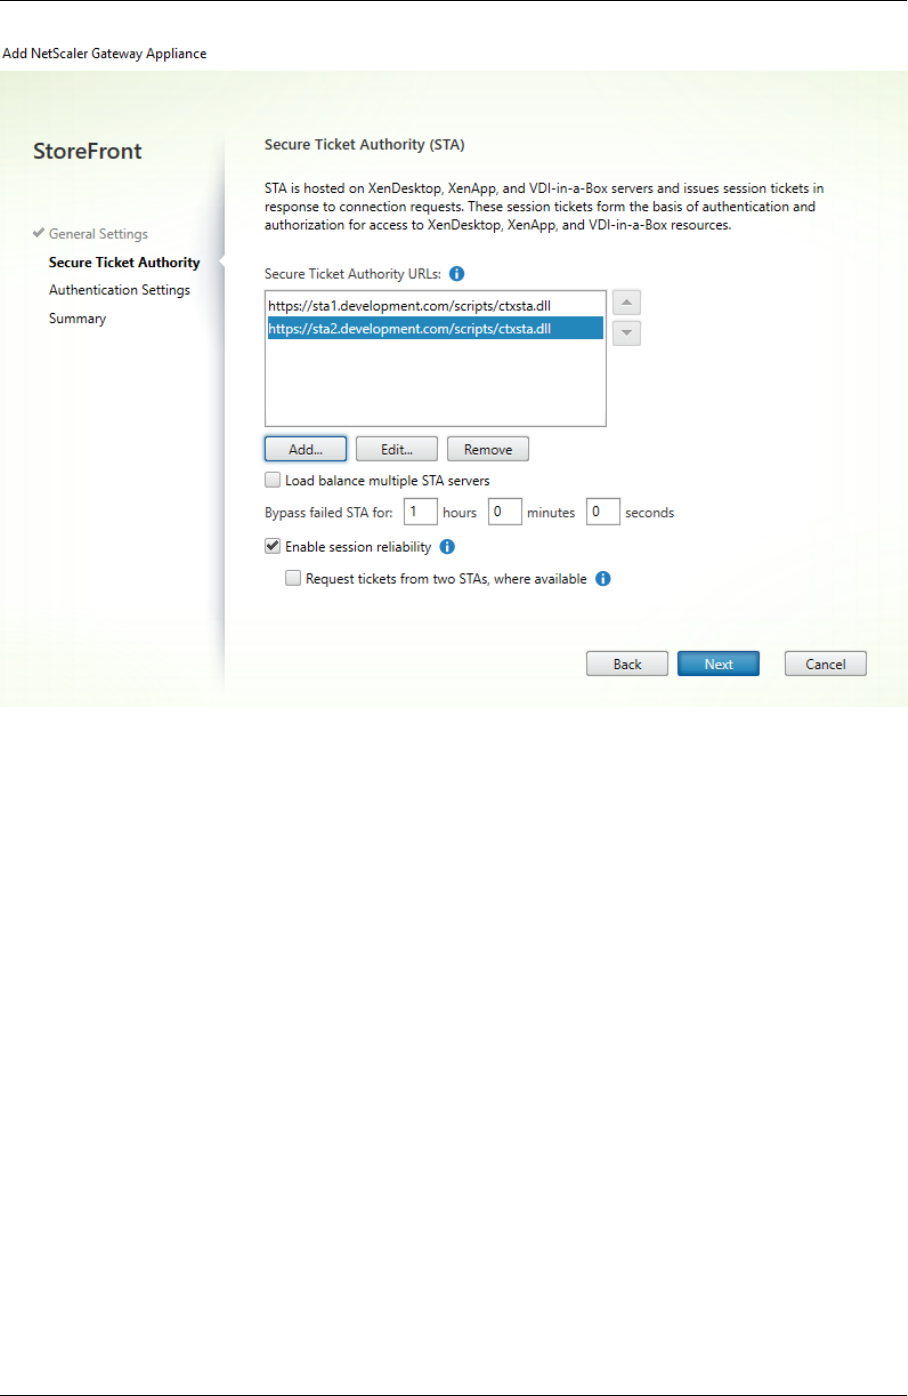
StoreFront 3.12
© 1999–2021 Citrix Systems, Inc. All rights reserved. 228

StoreFront 3.12
Note
DNS conditional forwarders may need to be added so that the DNS servers in use on both do‑
mains can resolve FQDNs on the other domain. The NetScaler must be able to resolve the STA
server FQDNs on the development.com domain using its production.com DNS server. Store‑
Front should also be able to resolve the callback URL on the production.com domain using its
development.com DNS server. Alternatively, a development.com FQDN can be used which
resolves to the NetScaler Gateway vServer virtual IP (VIP).
Enable pass‑through from NetScaler Gateway
1. Select Stores in the le pane of the Citrix StoreFront management console, and in the Actions
pane, click Manage Authentication Methods.
2. On the Manage Authentication Methods screen, select Pass‑through from NetScaler Gateway.
3. Click OK.
© 1999–2021 Citrix Systems, Inc. All rights reserved. 229

StoreFront 3.12
Configure the store for remote access using the Gateway
1. Select the Stores node in the le pane of the Citrix StoreFront management console and, in the
results pane, select a store. In the Actions pane, click Configure Remote Access Settings.
2. Select Enable Remote Access.
3. Ensure that you have registered the NetScaler Gateway with your store. If you do not register
the NetScaler Gateway, the STA ticketing will not work.
© 1999–2021 Citrix Systems, Inc. All rights reserved. 230

StoreFront 3.12
Disable token consistency
1. Select the Stores node in the le pane of the Citrix StoreFront management console and, in the
results pane, select a store. In the Actions pane, click Configure Store Settings.
2. On the Configure Store Settings page, select Advanced Settings.
3. Clear the Require token consistency check box. For more information, see Advanced store
settings.
4. Click OK.
© 1999–2021 Citrix Systems, Inc. All rights reserved. 231

StoreFront 3.12
Note
The Requiretoken consistency settingis selected (on) by default. If you disable this setting, Smar‑
tAccess features used for NetScaler End Point Analysis (EPA) stop working. For more information
on SmartAccess, see CTX138110.
Disable pass‑through from NetScaler Gateway for the Receiver for Web site
Important
Disabling pass‑through from NetScaler Gateway prevents Receiver for Web from trying to use the
incorrect credentials from the production.com domain passed from NetScaler. Disabling pass‑
throughfromNetScalerGateway causes Receiver for Web toprompt the user to enter credentials.
These credentials are dierent from the credentials used to log on through the Netscaler Gate‑
way.
1. Select the Stores node in the le pane of the Citrix StoreFront management console.
2. Select the store that you want to modify.
3. In the Actions pane, click Manage Receiver for Web Sites.
4. In Authentication Methods, clear the Pass‑through from NetScaler Gateway check box.
5. Click OK.
© 1999–2021 Citrix Systems, Inc. All rights reserved. 232

StoreFront 3.12
Log on to Gateway using a production.com user and credentials
To test, log on to Gateway using a production.com user and credentials.
Aer logon, the user is prompted to enter development.com credentials.
© 1999–2021 Citrix Systems, Inc. All rights reserved. 233

StoreFront 3.12
Add a trusted domain drop‑down list in StoreFront (optional)
This setting is optional, but it may help prevent the user from accidentally entering the wrong domain
to authenticate through the NetScaler Gateway.
If the user name is the same for both domains, entering the wrong domain is more likely. New users
may also be used to leaving out the domain when they log on through the NetScaler Gateway. Users
may then forget to enter domain\username for the second domain when they are prompted to log on
to the Receiver for Web site.
1. Select Stores in the le pane of the Citrix StoreFront management console, and in the Actions
pane, click Manage Authentication Methods.
2. Select the drop‑down arrow next to User name and password.
3. Click Add to add development.com as a trusted domain, and select the Show domains list in
logon page check box.
4. Click OK.
© 1999–2021 Citrix Systems, Inc. All rights reserved. 234

StoreFront 3.12
Note
Browser password caching is not recommended in this authentication scenario. If users have
dierent passwords for the two dierent domain accounts, password caching can lead to a poor
experience.
NetScaler clientless VPN (CVPN) session action policy
• If Single Sign‑on to web applications is enabled within your NetScaler session policy, incorrect
credentials sent by NetScaler to Receiver for Web are ignored because you disabled the Pass‑
through from NetScaler Gateway authentication method on the Receiver for Web site. Re‑
ceiver for Web prompts for credentials regardless of what this option is set to.
• Populating the Single Sign‑on entries in the Client Experience and Published App tabs in
NetScaler does not change the behavior described in this article.
© 1999–2021 Citrix Systems, Inc. All rights reserved. 235

StoreFront 3.12
© 1999–2021 Citrix Systems, Inc. All rights reserved. 236

StoreFront 3.12
Configure beacon points
October 25, 2018
Use the Manage Beacons task to specify URLs inside and outside your internal network to be used
as beacon points. Citrix Receiver attempts to contact beacon points and uses the responses to deter‑
mine whether users are connected to local or public networks. When a user accesses a desktop or
application, the location information is passed to the server providing the resource so that appropri‑
ate connection details can be returned to Citrix Receiver. This ensures that users are not prompted to
log on again when they access a desktop or application.
© 1999–2021 Citrix Systems, Inc. All rights reserved. 237

StoreFront 3.12
For example, if the internal beacon point is accessible, this indicates that the user is connected to the
local network. However, if Citrix Receiver cannot contact the internal beacon point and receives re‑
sponses from both the external beacon points, this means that the user has an Internet connection
but is outside the corporate network. Therefore, the user must connect to desktops and applications
though NetScaler Gateway. When the user accesses a desktop or application, the server providing
the resource is notified to provide details of the NetScaler Gateway appliance through which the con‑
nection must be routed. This means that the user does not need to log on to the appliance when
accessing the desktop or application.
By default, StoreFront uses the server URL or load‑balanced URL of your deployment as the internal
beacon point. The Citrix website and the virtual server or user logon point (for Access Gateway 5.0)
URL of the first NetScaler Gateway deployment you add are used as external beacon points by default.
If you change any beacon points, ensure that users update Citrix Receiver with the modified beacon
information. Where a Receiver for Web site is configured for a store, users can obtain an updated Citrix
Receiver provisioning file from the site. Otherwise, you can export a provisioning file for the store and
make this file available to your users.
Important: In multiple server deployments, use only one server at a time to make changes to the con‑
figuration of the server group. Ensure that the Citrix StoreFront management console is not running
on any of the other servers in the deployment. Once complete,
propagate your configuration changes to the server group so that the other servers in the deployment
are updated.
1. On the Windows Start screen or Apps screen, locate and click the Citrix StoreFront tile.
2. Select the Stores node in the le pane of the Citrix StoreFront management console and, in the
Actions pane, click Manage Beacons.
3. Specify the URL to use as the internal beacon point.
• To use the server URL or load‑balanced URL of your StoreFront deployment, select Use the
service URL.
• To use an alternative URL, select Specify beacon address and enter a highly available URL
within your internal network.
4. Click Add to enter the URL of an external beacon point. To modify a beacon point, select the
URL in the External beacons list and click Edit. Select a URL in the list and click Remove to stop
using that address as a beacon point.
You must specify at least two highly available external beacon points that can be resolved from
public networks. The beacon URLs should be fully qualified domain names (http://example
.com) and not the abbreviated NetBIOS name (http://example). This enables Citrix Receiver
to determinewhether users are locatedbehind an Internet paywall, such as in a hotel or Internet
café. In such cases, all the external beacon points connect to the same proxy.
© 1999–2021 Citrix Systems, Inc. All rights reserved. 238

StoreFront 3.12
Advanced configurations
October 15, 2018
StoreFront allows advanced options that you can configure using the StoreFront console, PowerShell,
certificate properties, or configuration files.
Configure Desktop Appliance sites Create, remove, and modify Desktop Appliance
sites.
Create a single Fully Qualified Domain Name
(FQDN) to access a store internally and
externally
Provide access to resources from within your
corporate network and from the Internet
through a NetScaler Gateway and simplify the
user experience by creating a single FQDN for
both internal and roaming external clients.
Configure Resource Filtering Filter enumeration resources based on
resource type and keywords.
Configure Desktop Appliance sites
February 25, 2021
The tasks below describe how to create, remove, and modify Desktop Appliance sites. To create or re‑
move sites, you execute Windows PowerShell commands. Changes to Desktop Appliance site settings
are made by editing the site configuration files.
Important: In multiple server deployments, use only one server at a time to make changes to the con‑
figuration of the server group. Ensure that the Citrix StoreFront management console is not running
on any of the other servers in the deployment. Once complete,
propagate your configuration changes to the server group so that the other servers in the deployment
are updated.
Note: The StoreFront and PowerShell consoles cannot be open at the same time. Always close the
StoreFront admin console before using the PowerShell console to administer your StoreFront config‑
uration. Likewise, close all instances of PowerShell before opening the StoreFront console.
© 1999–2021 Citrix Systems, Inc. All rights reserved. 239

StoreFront 3.12
To create or remove Desktop Appliance sites
Only a single store can be accessed through each Desktop Appliance site. You can create a store con‑
taining all the resources you want to make available to users with non‑domain‑joined desktop appli‑
ances. Alternatively, create separate stores, each with a Desktop Appliance site, and configure your
users’ desktop appliances to connect to the appropriate site.
1. Use an account with local administrator permissions to start Windows PowerShell and, at a com‑
mand prompt, type the following command to import the StoreFront modules.
1 & "installationlocation\Scripts\ImportModules.ps1"
2 <!--NeedCopy-->
Where installationlocation is the directory in which StoreFront is installed, typically C:\Program
Files\Citrix\Receiver StoreFront\.
2. To create a new Desktop Appliance site, type the following command.
1 Install-DSDesktopAppliance -FriendlyName sitename -SiteId iisid
2 -VirtualPath sitepath -UseHttps {
3 $False | $True }
4
5 -StoreUrl storeaddress [-EnableMultiDesktop {
6 $False | $True }
7 ]
8 [-EnableExplicit {
9 $True | $False }
10 ] [-EnableSmartCard {
11 $False | $True }
12 ]
13 [-EnableEmbeddedSmartCardSSO {
14 $False | $True }
15 ]
16 <!--NeedCopy-->
Where sitename is a name that helps you to identify your Desktop Appliance site. For iisid,
specify the numerical ID of the Microso Internet Information Services (IIS) site hosting Store‑
Front, which can be obtained from the Internet Information Services (IIS) Manager console. Re‑
place sitepath with the relative path at which the site should be created in IIS, for example,
/Citrix/DesktopAppliance. Note that Desktop Appliance site URLs are case sensitive.
Indicate whether StoreFront is configured for HTTPS by setting ‑UseHttps to the appropriate
value.
To specify the absolute URL of the store service used by the Desktop Appliance Connector site,
use StoreUrl storeaddress. This value is displayed for the Store summary in the administration
© 1999–2021 Citrix Systems, Inc. All rights reserved. 240

StoreFront 3.12
console.
Bydefault, when a user logs on to a Desktop Appliance site, the firstdesktop available to the user
starts automatically. To configure your new Desktop Appliance site to enable users to choose
between multiple desktops, if available, set ‑EnableMultiDesktop to $True.
Explicit authentication is enabled by default for new sites. You can disable explicit authenti‑
cation by setting the ‑EnableExplicit argument to $False. Enable smart card authentication by
setting ‑EnableSmartCard to $True. To enable pass‑through with smart card authentication,
you must set both ‑EnableSmartCard and ‑EnableEmbeddedSmartCardSSO to $True. If you en‑
able explicit and either smart card or pass‑through with smart card authentication, users are
initially prompted to log on with a smart card, but can fall back to explicit authentication if they
experience any issues with their smart cards.
The optional arguments configure settings that can also be modified aer the Desktop Appli‑
ance site has been created by editing the site configuration file.
Example:
Create a Desktop Appliance Connector site at virtual path /Citrix/DesktopAppliance1 in the de‑
fault IIS web site.
1 Install-DSDesktopAppliance \`
2
3 \-FriendlyName DesktopAppliance1 \`
4
5 \-SiteId 1 \`
6
7 \-VirtualPath /Citrix/DesktopAppliance1 \`
8
9 \-UseHttps $false \`
10
11 \-StoreUrl https://serverName/Citrix/Store \`
12
13 \-EnableMultiDesktop $true \`
14
15 \-EnableExplicit $true \`
16
17 \-EnableSmartCard $true \`
18
19 \-EnableEmbeddedSmartCardSSO $false
3. To remove an existing Desktop Appliance site, type the following command.
1 Remove-DSDesktopAppliance -SiteId iisid -VirtualPath sitepath
2 <!--NeedCopy-->
© 1999–2021 Citrix Systems, Inc. All rights reserved. 241

StoreFront 3.12
Where iisid is the numerical ID of the IIS site hosting StoreFront and sitepath is the relative path
of the Desktop Appliance site in IIS, for example, /Citrix/DesktopAppliance.
4. To list the Desktop Appliance sites currently available from your StoreFront deployment, type
the following command.
1 Get-DSDesktopAppliancesSummary
2 <!--NeedCopy-->
To configure user authentication
Desktop Appliance sites support explicit, smart card, and pass‑through with smart card authentica‑
tion. Explicit authentication is enabled by default. If you enable explicit and either smart card or
pass‑through with smart card authentication, the default behavior initially prompts users to log on
with a smart card. Users who experience issues with their smart cards are given the option of enter‑
ing explicit credentials. If you configure IIS to require client certificates for HTTPS connections to all
StoreFront URLs, users cannot fall back to explicit authentication if they cannot use their smart cards.
To configure the authentication methods for a Desktop Appliance site, you edit the site configuration
file.
1. Use a text editor to open the web.config file for the Desktop Appliance site, which is typically
located in the C:\inetpub\wwwroot\Citrix\storenameDesktopAppliance directory, where store‑
name is the name specified for the store when it was created.
2. Locate the following element in the file.
1 <explicitForms enabled="true" />
2 <!--NeedCopy-->
3. Change the value of the enabled attribute to false to disable explicit authentication for the site.
4. Locate the following element in the file.
1 <certificate enabled="false" useEmbeddedSmartcardSso="false"
2 embeddedSmartcardSsoPinTimeout="00:00:20" />
3 <!--NeedCopy-->
5. Set the value of the enabled attribute to true to enable smart card authentication. To enable
pass‑through with smart card authentication, you must also set the value of the useEmbed‑
dedSmartcardSso attribute to true. Use the embeddedSmartcardSsoPinTimeout attribute to
set the time in hours, minutes, and seconds for which the PIN entry screen is displayed before
it times out. When the PIN entry screen times out, users are returned to the logon screen and
must remove and reinsert their smart cards to access the PIN entry screen again. The time‑out
period is set to 20 seconds by default.
© 1999–2021 Citrix Systems, Inc. All rights reserved. 242

StoreFront 3.12
To enable users to choose between multiple desktops
By default, when a user logs on to a Desktop Appliance site, the first desktop (in alphabetical order)
available to the user in the store for which the site is configured starts automatically. If you provide
users with access to multiple desktops in a store, you can configure the Desktop Appliance site to
display the available desktops so users can choose which one to access. To change these settings,
you edit the site configuration file.
1. Use a text editor to open the web.config file for the Desktop Appliance site, which is typically
located in the C:\inetpub\wwwroot\Citrix\storenameDesktopAppliance directory, where store‑
name is the name specified for the store when it was created.
2. Locate the following element in the file.
1 <resources showMultiDesktop="false" />
2 <!--NeedCopy-->
3. Change the value of the showMultiDesktop attribute to true to enable users to see and select
from all the desktops available to them in the store when they log on to the Desktop Appliance
site.
Create a single Fully Qualified Domain Name (FQDN) to access a store
internally and externally
October 25, 2018
Note: To use this feature with native desktop receivers, the following versions are required.
• Windows Receiver 4.2
• MAC Receiver 11.9
You canprovideaccess toresources from within your corporatenetworkandfromthe Internetthrough
a NetScaler Gateway and simplify the user experience by creating a single FQDN for both internal and
roaming external clients.
Creating a single FQDN is helpful to users who configure any of the native Receivers. They need re‑
member only a single URL whether they are currently connected to an internal or public network.
StoreFront beacons for native Receivers
Citrix Receiver attempts to contact beacon points and uses the responses to determine whether users
are connected to local or public networks. When a user accesses a desktop or application, the loca‑
tion information is passed to the server providing the resource so that appropriate connection details
© 1999–2021 Citrix Systems, Inc. All rights reserved. 243

StoreFront 3.12
can be returned to Citrix Receiver. This ensures that users are not prompted to log on again when they
access a desktop or application. For information about configuring beacon points, see Configure bea‑
con points.
Configure the NetScaler Gateway vServer and SSL Certificate
The shared FQDN resolves either to an external firewall router interface IP or NetScaler Gateway
vServer IP in the DMZ when external clients try to access resources from outside of the corporate
network. Ensure the Common Name and Subject Alternative Name fields of the SSL certificate
contain the shared FQDN to be used to access the store externally. By using a third party root CA such
as Verisign instead of an enterprise Certification Authority (CA) to sign the gateway certificate, any
external client automatically trusts the certificate bound to the gateway vServer. If you use a third
party root CA such as Verisign, no additional root CA certificates need to be imported on to external
clients.
To deploy a single certificate with the Common Name of the shared FQDN to both the NetScaler Gate‑
way and the StoreFront server, consider whether you want to support remote discovery. If so, make
sure the certificate follows the specification for the Subject Alternative Names.
© 1999–2021 Citrix Systems, Inc. All rights reserved. 244

StoreFront 3.12
NetScaler Gateway vServer example certificate: storefront.example.com
1. Ensure that the shared FQDN, the callback URL, and the accounts alias URL are included in the
DNS field as Subject Alternative Name (SANs).
2. Ensure that the private key is exportable so the certificate and key can be imported into the
NetScaler Gateway.
3. Ensure that Default Authorization is set to Allow.
4. Sign the certificate using a third party CA such as Verisign or an enterprise root CA for your orga‑
nization.
Two‑node server group example SANs:
storefront.example.com (mandatory)
storefrontcb.example.com (mandatory)
accounts.example.com (mandatory)
© 1999–2021 Citrix Systems, Inc. All rights reserved. 245

StoreFront 3.12
storefrontserver1.example.com (optional)
storefrontserver2.example.com (optional)
Sign the Netscaler Gateway vServer SSL certificate using a Certification Authority (CA)
Based on your requirements, you have two options for choosing the type of CA signed certificate.
• Option 1 ‑ Third Party CA signed certificate: If the certificate bound to the Netscaler Gateway
vServer is signed by a trusted third party, external clients will likely NOT need any root CA cer‑
tificates copied to the their trusted root CA certificate stores. Windows clients ship with the
root CA certificates of the most common signing agencies. Examples of commercial third party
CAs that could be used include DigiCert, Thawte, and Verisign. Note that mobile devices such
as iPads, iPhones, and Android tablets and phones might still require the root CA to be copied
onto the device to trust the NetScaler Gateway vServer.
• Option 2 ‑ Enterprise Root CA signed certificate: If you choose this option, every external client
requiresthe enterprise root CA certificate copied to their trustedroot CA stores. If using portable
devices with native Receiver installed, such as iPhones and iPads, create a security profile on
these devices.
Import the root certificate into portable devices
• iOS devices can import .CER x.509 certificate files using email attachments, because accessing
the local storage of iOS devices is usually not possible.
• Android devices require the same .CER x.509 format. The certificate can be imported from the
device local storage or email attachments.
External DNS: storefront.example.com
Ensure that the DNS resolution provided by your organization’s Internet service provider resolves to
the externally facing IP of the firewall router on the outside edge of DMZ or to the NetScaler Gateway
vServer VIP.
Split view DNS
• When split‑view DNS is correctly configured, the source address of the DNS request should send
the client to the correct DNS A record.
• When clients roam between public and corporate networks, their IP should change. Depending
on the network to which they are currently connected, they should receive the correct A record
when they query storefront.example.com.
Import certificates issued from a Windows CA to NetScaler Gateway
WinSCP is a useful and free third party tool to move files from a Windows machine to a NetScaler Gate‑
way file system. Copy certificates for import to the /nsconfig/ssl/ folder within the NetScaler Gateway
file system. You can use the OpenSSL tools on the NetScaler Gateway to extract the certificate and
© 1999–2021 Citrix Systems, Inc. All rights reserved. 246

StoreFront 3.12
key from a PKCS12/PFX file to create two separate .CER and .KEY X.509 files in PEM format that can be
used by the NetScaler Gateway
1. Copy the PFX file into /nsconfig/ssl on the NetScaler Gateway appliance or VPX.
2. Open the NetScaler Gateway command line interface.
3. To switch to the FreeBSD shell, type Shell to exit the NetScaler Gateway command line interface.
4. To change directory, use cd /nsconfig/ssl.
5. Run openssl pkcs12 ‑in <imported cert file>.pfx ‑nokeys ‑out <certfilename>.cer and enter the
PFX password when prompted.
6. Run openssl pkcs12 ‑in <imported cert file>.pfx ‑nocerts ‑out <keyfilename>.key
7. Enter the PFX password when prompted and then set a private key PEM passphrase to protect
the .KEY file.
8. To ensure that the .CER and .KEY files were successfully created inside /nsconfig/ssl/, run ls –al.
9. To return to the NetScaler Gateway command line interface, type Exit.
Native Windows/Mac Receiver Gateway session policy
REQ.HTTP.HEADER User‑Agent CONTAINS CitrixReceiver && REQ.HTTP.HEADER X‑Citrix‑Gateway EX‑
ISTS
Receiver for Web Gateway session policy
REQ.HTTP.HEADER User‑Agent NOTCONTAINS CitrixReceiver && REQ.HTTP.HEADER Referer EXISTS
cVPN and Smart Access Settings
If you use SmartAccess, enable smart access mode on the NetScaler Gateway vServer properties page.
Universal Licenses are required for every concurrent user who accesses remote resources.
Receiver profile
© 1999–2021 Citrix Systems, Inc. All rights reserved. 247

StoreFront 3.12
Configure the session profile accounts service URL to be https://accounts.example.com/
Citrix/Roaming/Accounts NOT https://storefront.example.com/Citrix/Roaming/
Accounts.
© 1999–2021 Citrix Systems, Inc. All rights reserved. 248

StoreFront 3.12
Also add this URL as an additional <allowedAudiences> in the authentication and roaming web.config
files on the StoreFront server. For more information, see the “Configure the StoreFront server host
base URL, gateway, and SSL certificate” section below.
Receiver for Web profile
© 1999–2021 Citrix Systems, Inc. All rights reserved. 249

StoreFront 3.12
© 1999–2021 Citrix Systems, Inc. All rights reserved. 250

StoreFront 3.12
ICA Proxy & Basic Mode settings
If you use ICA proxy, enable basic mode on the NetScaler Gateway vServer properties page. Only a
Netscaler platform license is required.
Receiver profile
© 1999–2021 Citrix Systems, Inc. All rights reserved. 251

StoreFront 3.12
Receiver for Web profile
© 1999–2021 Citrix Systems, Inc. All rights reserved. 252

StoreFront 3.12
Configure the StoreFront server host base URL, gateway, and SSL certificate
The same shared FQDN that resolves to the NetScaler Gateway vServer should also resolve directly to
the StoreFront load balancer, if a StoreFront cluster was created or a single StoreFront IP that hosts
the store.
Internal DNS: Create three DNS A records.
• storefront.example.com should resolve to the storefront load balancer or single StoreFront
server IP.
• storefrontcb.example.com should resolve to the gateway vServer VIP so if a firewall exists
between the DMZ and the enterprise local network, allow for this.
• accounts.example.com — create as a DNS alias for storefront.example.com. It also re‑
solves to the load balancer IP for the StoreFront cluster or a single StoreFront server IP.
StoreFront server example certificate: storefront.example.com
1. Create a suitable certificate for the StoreFront server or server group before installing Store‑
Front.
2. Add the shared FQDN to the Common name and DNS fields. Ensure this matches the FQDN used
in the SSL certificate bound to the NetScaler Gateway vServer that you created earlier or use the
same certificate bound to the NetScaler Gateway vServer.
3. Add the accounts alias (accounts.example.com) as another SAN to the certificate. Note that
the accounts alias used in the SAN is the one used in the Netscaler Gateway Session Profile in
the earlier procedure ‑ Native Receiver Gateway session policy and profile.
© 1999–2021 Citrix Systems, Inc. All rights reserved. 253

StoreFront 3.12
4. Ensure that the private key is exportable so the certificate can be transferred to another server
or to multiple StoreFront server group nodes.
© 1999–2021 Citrix Systems, Inc. All rights reserved. 254

StoreFront 3.12
5. Sign the certificate using a third party CA such as VeriSign, your enterprise root CA, or interme‑
diate CA.
6. Export the certificate in PFX format including the private key.
7. Import the certificate and private key into the StoreFront server. If deploying a Windows NLB
StoreFront cluster, import the certificate into every node. If using an alternative load balancer
such as a Netscaler LB vServer, import the certificate there instead.
8. Create an HTTPS binding in IIS on the StoreFront server and bind the imported SSL certificate
to it.
© 1999–2021 Citrix Systems, Inc. All rights reserved. 255

StoreFront 3.12
9. Configure the hostbaseURL on the StoreFront server to match the already chosen shared FQDN.
Note: StoreFront always auto selects the last Subject Alternative Name in the list of SANs within
the certificate. This is merely a suggested host base URL to assist StoreFront administrators and
is usually correct. You can manually set it to any valid HTTPS://<FQDN> provided it exists within
the certificate as a SAN. Example: https://storefront.example.com
Configure the Gateway on the StoreFront server: storefront.example.com
1. From the Stores node, click on Manage NetScaler Gateways in the Actions pane.
2. Select the Gateway from the list and click Edit.
© 1999–2021 Citrix Systems, Inc. All rights reserved. 256

StoreFront 3.12
3. On the General Settings page, type the shared FQDN in the NetScaler Gateway URL field.
4. Select the Authentication Settings tab and type the callback FQDN into the Callback URL field.
5. Select the Secure Ticket Authority tab and ensure that the Secure Ticket Authority (STA) servers
match the list of delivery controllers already configured within the Store node.
6. Enable remote access for the store.
7. Manually set the internal beacon to the accounts alias (accounts.example.com) and it must not
be resolvable from outside the gateway. This FQDN must be distinct from the external beacon that
is shared by the StoreFront hostbase URL and NetScaler Gateway vServer (storefront.example.
com). DO NOT use the shared FQDN, as this creates a situation where both the internal and external
© 1999–2021 Citrix Systems, Inc. All rights reserved. 257
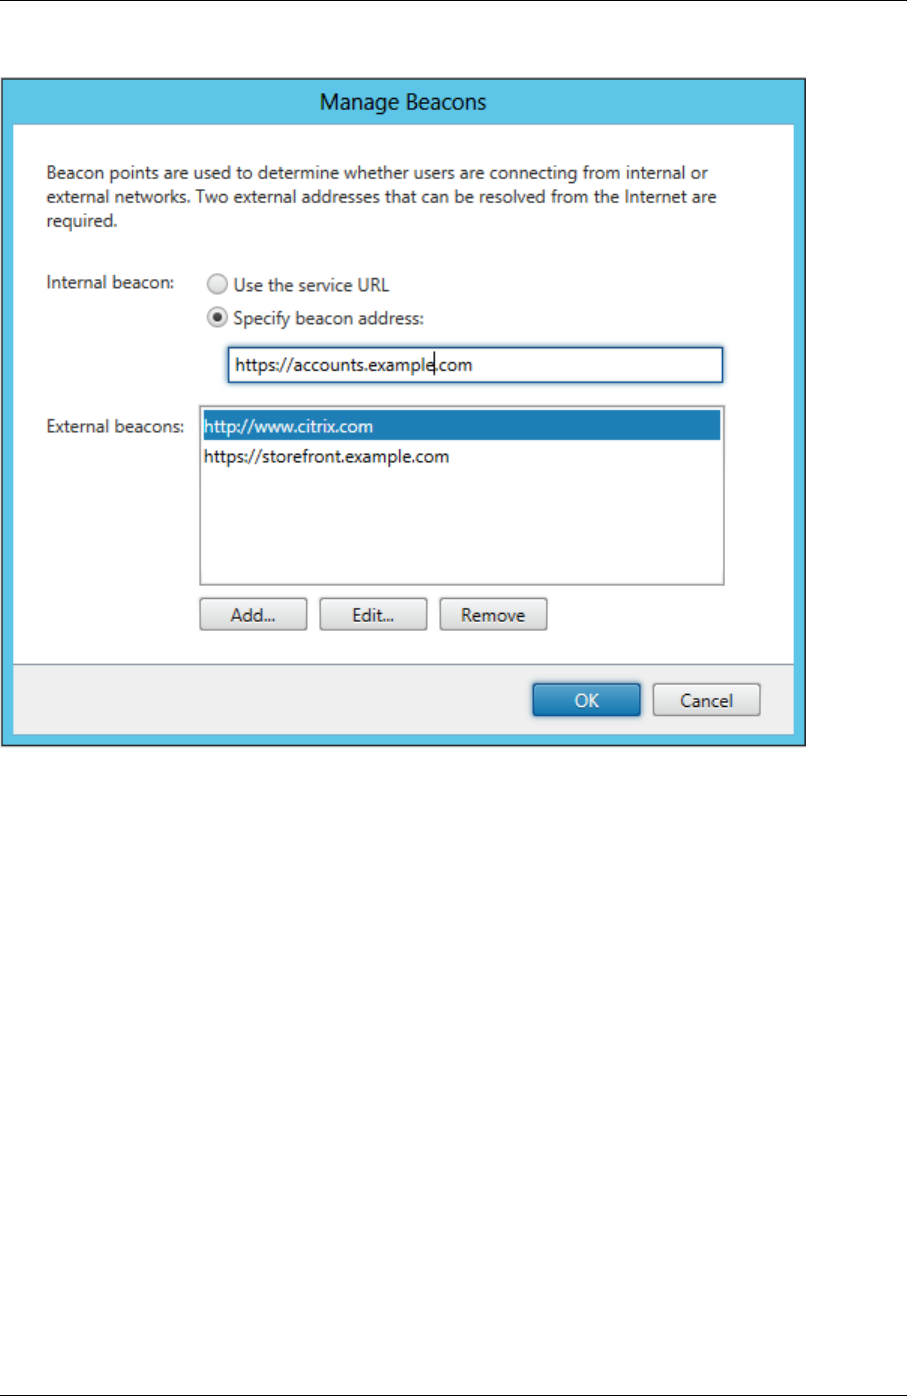
StoreFront 3.12
beacons are identical.
8. Note that if you want to support discovery using FQDNs, follow these steps. If the provisioning file
configuration is enough or if you are using only Receiver for Web, you can skip the following steps.
Add an additional <allowedAudiences> entryin C:\inetpub\wwwroot\Citrix\Authentication\web.config.
There are two <allowedAudiences> entries in the authentication web.config file. Only the first entry in
the file for the Authentication Token Producer requires you to add an additional <allowedAudience>.
9. Perform a search for the <allowedAudiences> string. Locate the following entry below and add the
line shown in bold, save, and close the web.config file.
<service id=”abd6f54b‑7d1c‑4a1b‑a8d7‑14804e6c8c64” displayName=”Authentication Token Pro‑
ducer”>
……….
……….
<allowedAudiences>
<add name=”https‑storefront.example.com” audience=”https://storefront.example.com/” />
** <add name=”https‑accounts.example.com” audience=”https://accounts.example.com/” />**
</allowedAudiences>
© 1999–2021 Citrix Systems, Inc. All rights reserved. 258

StoreFront 3.12
9. In C:\inetpub\wwwroot\Citrix\Roaming\web.config. Locate the following entry below and add
the line shown in bold, save, and close the web.config file.
<tokenManager>
<services>
<clear />
……….
……….
1 \</trustedIssuers\>
2 \<allowedAudiences\>
3 \<add name="https-storefront.example.com" audience="
https://storefront.example.com/" /\>
4 **\<add name="https-accounts.example.com"
audience="https://accounts.example.com/"
/\>**
5 \</allowedAudiences\>
6 \</service\>
7 \</services\>
8 \</tokenManager\>
Alternatively, it is possible to export the native receiver .CR provisioning file for the store. This elimi‑
nates the need for First Time Use configuration of native Receivers. Distribute this file to all Windows
and MAC Receiver clients.
© 1999–2021 Citrix Systems, Inc. All rights reserved. 259

StoreFront 3.12
If a Receiver is installed on the client, the .CR file type is recognized and double clicking on the provi‑
sioning file triggers it to be automatically imported.
Configure Resource Filtering
January 4, 2019
This topic explains how to filter enumeration resources based on resource type and keywords. You can
use this type of filtering with the more advanced customization oered by the Store Customization
SDK. Using this SDK, you can control which apps and desktops are displayed to users, modify access
conditions, and adjust launch parameters. For more information, see the Store Customization SDK.
Note: The StoreFront and PowerShell consoles cannot be open at the same time. Always close the
StoreFront admin console before using the PowerShell console to administer your StoreFront config‑
uration. Likewise, close all instances of PowerShell before opening the StoreFront console.
Configure filtering
Configure the filter using PowerShell cmdlets defined within the StoresModule. Use the following
PowerShell snippet to load the required modules:
© 1999–2021 Citrix Systems, Inc. All rights reserved. 260

StoreFront 3.12
1 $dsInstallProp = Get-ItemProperty `
2 -Path HKLM:\SOFTWARE\Citrix\DeliveryServicesManagement -Name InstallDir
3 $dsInstallDir = $dsInstallProp.InstallDir
4 & $dsInstallDir\..\Scripts\ImportModules.ps1
Filter by type
Use this to filter the resource enumeration by resource type. This is an inclusive filter, meaning it
removes any resources that are not of the specified types from the resource enumeration result. Use
the following cmdlets:
Set‑DSResourceFilterType: Sets up enumeration filtering based on resource types.
Get‑DSResourceFilterType: Gets the list of resource types that Storefront is allowed to return in enu‑
meration.
Note: Resource types are applied before keywords.
Filter by keywords
Use this to filter resources based on keywords, such as resources derived from XenDesktop or XenApp.
Keywords are generated from mark‑up in the description field of the corresponding resource.
The filter can operate either in inclusive or exclusive mode, but not both. The inclusive filter allows
enumeration of resources matching the configured keywords and removes non matching resources
fromthe enumeration. Theexclusive filter removes resources matchingthe configuredkeywords from
the enumeration. Use the following cmdlets:
Set‑DSResourceFilterKeyword: Sets up enumeration filtering based on resource keywords.
Get‑DSResourceFilterKeyword: Gets the list of filter keywords.
The following keywords are reserved and must not be used for filtering:
• Auto
• Mandatory
For more information on keywords, see Optimize the user experience and Application delivery.
Examples
This command will set filtering to exclude workflow resources from enumeration:
1 Set-DSResourceFilterKeyword -SiteId 1 -VirtualPath "/Citrix/Store" -
ExcludeKeywords @("WFS")
© 1999–2021 Citrix Systems, Inc. All rights reserved. 261

StoreFront 3.12
This example will set allowed resource types to applications only:
1 Set-DSResourceFilterType -SiteId 1 -VirtualPath "/Citrix/Store" -
IncludeTypes @("Applications")
Configure using configuration files
October 15, 2018
You can use configuration files to configure additional settings for Citrix StoreFront and Citrix Receiver
for Web that cannot be set with the Citrix StoreFront management console.
The Citrix StoreFront settings you can configure include:
• Enable ICA file signing
• Disable file type association
• Customize the Citrix Receiver logon dialog box
• Prevent Receiver for Windows from caching passwords and usernames
The Citrix Receiver for Web settings you can configure include:
• How resources are displayed for users
• Disable the My Apps Folder View
Configure StoreFront using the configuration files
February 22, 2019
This article describes additional configuration tasks that cannot be carried out using the Citrix Store‑
Front management console.
Enable ICA file signing
StoreFront provides the option to digitally sign ICA files so that versions of Citrix Receiver that sup‑
port this feature can verify that the file originates from a trusted source. When file signing is enabled
in StoreFront, the ICA file generated when a user starts an application is signed using a certificate
from the personal certificate store of the StoreFront server. ICA files can be signed using any hash
algorithm supported by the operating system running on the StoreFront server. The digital signature
is ignored by clients that do not support the feature or are not configured for ICA file signing. If the
signing process fails, the ICA file is generated without a digital signature and sent to Citrix Receiver,
the configuration of which determines whether the unsigned file is accepted.
© 1999–2021 Citrix Systems, Inc. All rights reserved. 262

StoreFront 3.12
To be used for ICA file signing with StoreFront, certificates must include the private key and be within
the allowed validity period. If the certificate contains a key usage extension, this must allow the key
to be used for digital signatures. Where an extended key usage extension is included, it must be set to
code signing or server authentication.
For ICA file signing, Citrix recommends using a code signing or SSL signing certificate obtained from
a public certification authority or from your organization’s private certification authority. If you are
unable to obtain a suitable certificate from a certification authority, you can either use an existing
SSL certificate, such as a server certificate, or create a new root certification authority certificate and
distribute it to users’ devices.
ICA file signing is disabled by default in stores. To enable ICA file signing, you edit the store configura‑
tion file and execute Windows PowerShell commands. For more information about enabling ICA file
signing in Citrix Receiver, see ICA File Signing to protect against application or desktop launches from
untrusted servers.
Note: The StoreFront and PowerShell consoles cannot be open at the same time. Always close the
StoreFront admin console before using the PowerShell console to administer your StoreFront config‑
uration. Likewise, close all instances of PowerShell before opening the StoreFront console.
Important: In multiple server deployments, use only one server at a time to make changes to the con‑
figuration of the server group. Ensure that the Citrix StoreFront management console is not running
on any of the other servers in the deployment. Once complete,
propagate your configuration changes to the server group so that the other servers in the deployment
are updated.
1. Ensure that the certificate you want to use to sign ICA files is available in the Citrix Delivery
Services certificate store on the StoreFront server and not the current user’s certificate store.
2. Use a text editor to open the web.config file for the store, which is typically located in the
C:\inetpub\wwwroot\Citrix\storename\ directory, where storename is the name specified for
the store when it was created.
3. Locate the following section in the file.
1 <certificateManager>
2 <certificates>
3 <clear />
4 <add ... />
5 ...
6 </certificates>
7 </certificateManager>
8 <!--NeedCopy-->
4. Include details of the certificate to be used for signing as shown below.
© 1999–2021 Citrix Systems, Inc. All rights reserved. 263

StoreFront 3.12
1 <certificateManager>
2 <certificates>
3 <clear />
4 <add id="certificateid" thumb="certificatethumbprint" />
5 <add ... />
6 ...
7 </certificates>
8 </certificateManager>
9 <!--NeedCopy-->
Where certificateid is a value that helps you to identify the certificate in the store configuration
file and certificatethumbprint is the digest (or thumbprint) of the certificate data produced by
the hash algorithm.
5. Locate the following element in the file.
1 <icaFileSigning enabled="False" certificateId="" hashAlgorithm="
sha1" />
2 <!--NeedCopy-->
6. Change the value of the enabled attribute to True to enable ICA file signing for the store. Set
the value of the certificateId attribute to the ID you used to identify the certificate, that is, cer‑
tificateid in Step 4.
7. If you wanttouse a hash algorithmotherthan SHA‑1, set the value of the hashAgorithm attribute
to sha256, sha384, or sha512, as required.
8. Using an account with local administrator permissions, start Windows PowerShell and, at a com‑
mand prompt, type the following commands to enable the store to access the private key.
1 Add-PSSnapin Citrix.DeliveryServices.Framework.Commands
2 $certificate = Get-DSCertificate "certificatethumbprint"
3
4 Add-DSCertificateKeyReadAccess -certificate $certificates[0] -
accountName “ IIS APPPOOL\Citrix Delivery Services Resources ”
5 <!--NeedCopy-->
Where certificatethumbprint is the digestof the certificatedata produced by the hash algorithm.
Disable file type association
By default, file type association is enabled in stores so that content is seamlessly redirected to users’
subscribed applications when they open local files of the appropriate types. To disable file type asso‑
ciation, you edit the store configuration file.
© 1999–2021 Citrix Systems, Inc. All rights reserved. 264
StoreFront 3.12
Important: In multiple server deployments, use only one server at a time to make changes to the con‑
figuration of the server group. Ensure that the Citrix StoreFront management console is not running
on any of the other servers in the deployment. Once complete,
propagate your configuration changes to the server group so that the other servers in the deployment
are updated.
1. Use a text editor to open the web.config file for the store, which is typically located in the
C:\inetpub\wwwroot\Citrix\storename\ directory, where storename is the name specified for
the store when it was created.
2. Locate the following element in the file.
1 <farmset ... enableFileTypeAssociation="on" ... >
2 <!--NeedCopy-->
3. Change the value of the enableFileTypeAssociation attribute to o to disable file type associa‑
tion for the store.
Customize the Citrix Receiver logon dialog box
When Citrix Receiver users log on to a store, no title text is displayed on the logon dialog box, by de‑
fault. You can display the default text “Please log on” or compose your own custom message. To
display and customize the title text on the Citrix Receiver logon dialog box, you edit the files for the
authentication service.
Important: In multiple server deployments, use only one server at a time to make changes to the con‑
figuration of the server group. Ensure that the Citrix StoreFront management console is not running
on any of the other servers in the deployment. Once complete,
propagate your configuration changes to the server group so that the other servers in the deployment
are updated.
1. Use a text editor to open the UsernamePassword.tfrm file for the authentication service, which
is typically located in the C:\inetpub\wwwroot\Citrix\Authentication\App_Data\Templates\ di‑
rectory.
2. Locate the following lines in the file.
1 @* @Heading("ExplicitAuth:AuthenticateHeadingText") *@
2 <!--NeedCopy-->
3. Uncomment the statement by removing the leading and trailing leading @* and trailing *@, as
shown below.
1 @Heading("ExplicitAuth:AuthenticateHeadingText")
2 <!--NeedCopy-->
© 1999–2021 Citrix Systems, Inc. All rights reserved. 265

StoreFront 3.12
Citrix Receiver users see the default title text “Pleaselog on”, or the appropriatelocalizedversion
of this text, when they log on to stores that use this authentication service.
4. To modify the title text, use a text editor to open the ExplicitAuth.resx file for the authentication
service, which is typically located in the C:\inetpub\wwwroot\Citrix\Authentication\App_Data\resources\
directory.
5. Locate the following elements in the file. Edit the text enclosed within the <value> element to
modify the title text that users see on the Citrix Receiver logon dialog box when they access
stores that use this authentication service.
1 <data name="AuthenticateHeadingText" xml:space="preserve">
2 <value>My Company Name</value>
3 </data>
4 <!--NeedCopy-->
To modify the Citrix Receiver logon dialog box title text for users in other locales, edit the local‑
ized files ExplicitAuth.languagecode.resx, where languagecode is the locale identifier.
Prevent Citrix Receiver for Windows from caching passwords and usernames
By default, Citrix Receiver for Windows stores users’ passwords when they log on to StoreFront stores.
To prevent Citrix Receiver for Windows, but not Citrix Receiver for Windows Enterprise, from caching
users’ passwords, you edit the files for the authentication service.
Important: In multiple server deployments, use only one server at a time to make changes to the con‑
figuration of the server group. Ensure that the Citrix StoreFront management console is not running
on any of the other servers in the deployment. Once complete,
propagate your configuration changes to the server group so that the other servers in the deployment
are updated.
1. Use a text editor to open the inetpub\wwwroot\Citrix\Authentication\App_Data\Templates\UsernamePassword.tfrm
file.
2. Locate the following line in the file.
1 @SaveCredential(id: @GetTextValue("saveCredentialsId"), labelKey:
"ExplicitFormsCommon:SaveCredentialsLabel", initiallyChecked:
ControlValue("SaveCredentials"))
2 <!--NeedCopy-->
3. Comment the statement as shown below.
1 <!-- @SaveCredential(id: @GetTextValue("saveCredentialsId"),
labelKey: "ExplicitFormsCommon:SaveCredentialsLabel",
initiallyChecked: ControlValue("SaveCredentials")) -->
© 1999–2021 Citrix Systems, Inc. All rights reserved. 266

StoreFront 3.12
2 <!--NeedCopy-->
Citrix Receiver for Windows users must enter their passwords every time they log on to stores
that use this authentication service. This setting does not apply to Citrix Receiver for Windows
Enterprise.
Warning
Using Registry Editor incorrectly can cause serious problems that can require you to reinstall the
operating system. Citrix cannot guarantee that problems resulting from incorrect use of Registry
Editor can be solved. Use Registry Editor at your own risk. Make sure you back up the registry
before you edit it.
By default, Citrix Receiver for Windows automatically populated the last username entered. To su‑
press population of the username field, edit the registry on the user device:
1. Create a REG_SZ value HKLM\SOFTWARE\Citrix\AuthManager\RememberUsername.
2. Set its value “false”.
Configure Citrix Receiver for Web sites using the configuration files
February 25, 2021
This article describes additional configuration tasks for Citrix Receiver for Web sites that cannot be
carried out using the Citrix StoreFront management console.
Configure how resources are displayed for users
When both desktops and applications are available from a Citrix Receiver for Web site, separate desk‑
top and application views are displayed by default. Users see the desktop view first when they log
on to the site. If only a single desktop is available for a user, regardless of whether applications are
also available from a site, that desktop starts automatically when the user logs on. To change these
settings, you edit the site configuration file.
Important: In multiple server deployments, use only one server at a time to make changes to the con‑
figuration of the server group. Ensure that the Citrix StoreFront management console is not running
on any of the other servers in the deployment. Once complete,
propagate your configuration changes to the server group so that the other servers in the deployment
are updated.
1. Use a text editor to open the web.config file for the Citrix Receiver for Web site, which is typi‑
cally located in the C:\inetpub\wwwroot\Citrix\storenameWeb\ directory, where storename is
the name specified for the store when it was created.
© 1999–2021 Citrix Systems, Inc. All rights reserved. 267

StoreFront 3.12
2. Locate the following element in the file.
1 <uiViews showDesktopsView="true" showAppsView="true" defaultView="
desktops" />
2 <!--NeedCopy-->
3. Change the value of the showDesktopsView and showAppsView attributes to false to prevent
desktops and applications, respectively, being displayed to users, even if they are available
from the site. When both the desktop and application views are enabled, set the value of the
defaultView attribute to apps to display the application view first when users log on to the site.
4. Locate the following element in the file.
1 <userInterface ... autoLaunchDesktop="true">
2 <!--NeedCopy-->
5. Change the value of the autoLaunchDesktop attribute to false to prevent Citrix Receiver for Web
sites from automatically starting a desktop when a user logs on to the site and only a single
desktop is available for that user.
When the autoLaunchDesktop attribute is set to true and a user for whom only one desktop
is available logs on, that user’s applications are not reconnected, regardless of the workspace
control configuration.
Note: To enable Citrix Receiver for Web sites to start their desktops automatically, users accessing the
site through Internet Explorer must add the site to the Local intranet or Trusted sites zones.
Disable the My Apps Folder View
By default, Citrix Receiver for Web displays the My Apps Folder View for unauthenticated (access for
unauthenticated users) and mandatory (all published applications are available in the Home screen
without users subscribing to them) stores. This view displays applications in a folder hierarchy and
includes a breadcrumb path.
Important: In multiple server deployments, use only one server at a time to make changes to the con‑
figuration of the server group. Ensure that the Citrix StoreFront management console is not running
on any of the other servers in the deployment. Once complete,
propagate your configuration changes to the server group so that the other servers in the deployment
are updated.
1. Use a text editor to open the web.config file for the Citrix Receiver for Web site, which is typi‑
cally located in the C:\inetpub\wwwroot\Citrix\storenameWeb\ directory, where storename is
the name specified for the store when it was created.
2. Locate the following element in the file.
© 1999–2021 Citrix Systems, Inc. All rights reserved. 268

StoreFront 3.12
1 <userInterface enableAppsFolderView="true">
2 <!--NeedCopy-->
3. Change the value of the enableAppsFolderView attribute to false to disable Citrix Receiver for
Web My Apps Folder View.
Secure your StoreFront deployment
November 9, 2021
This article highlights areas that may have an impact on system security when deploying and config‑
uring StoreFront.
Configure Microso Internet Information Services (IIS)
You can configure StoreFront with a restricted IIS configuration. Note that this is not the default IIS
configuration.
Filename extensions
You can disallow unlisted file name extensions.
StoreFront requires these file name extensions in Request Filtering:
• . (blank extension)
• .appcache
• .aspx
• .cr
• .css
• .dtd
• .png
• .htm
• .html
• .ica
• .ico
• .jpg
• .js
• .png
• .svg
• .txt
• .xml
© 1999–2021 Citrix Systems, Inc. All rights reserved. 269

StoreFront 3.12
If download or upgrade of Citrix Receiver is enabled for Citrix Receiver for Web, StoreFront also
requires these file name extensions:
• .dmg
• .exe
If Citrix Receiver for HTML5 is enabled, StoreFront also requires these file name extensions:
• .eot
• .ttf
• .wo
MIME Types
You can remove MIME Types corresponding to the following file types:
• .exe
• .dll
• .com
• .bat
• .csh
Request Filtering
StoreFront requires the following HTTP verbs in Request Filtering. You can disallow unlisted verbs.
• GET
• POST
• HEAD
Other Microso IIS settings
StoreFront does not require:
• CGI programs
• FastCGI programs
Important
• Do not configure IIS Authorization Rules. StoreFront supports authentication directly, and
does not use or support IIS authentication.
• Do not select Client certificates: Require, in the SSL Settings for the StoreFront site. Store‑
Front installation configures the appropriate pages of the StoreFront site with this setting.
• StoreFront requires cookies. The Use Cookies setting must be selected. Do not select the
cookieless/Use URI setting.
• StoreFront requires Full Trust. Do not set the global .NET trust level to High or lower.
• StoreFront does not support a separate application pool for each site. Do not modify these
site settings.
© 1999–2021 Citrix Systems, Inc. All rights reserved. 270

StoreFront 3.12
Configure user rights
When you install StoreFront, its application pools are granted the logon right Log on as a service
and the privileges Adjust memory quotas for a process, Generate security audits, and Replace a
process level token. This is normal installation behavior when application pools are created.
You do not need to change these user rights. These privileges are not used by StoreFront and are
automatically disabled.
StoreFront installation creates the following Windows services:
• Citrix Configuration Replication (NT SERVICE\CitrixConfigurationReplication)
• Citrix Cluster Join (NT SERVICE\CitrixClusterService)
• Citrix Peer Resolution (NT SERVICE\Citrix Peer Resolution Service)
• Citrix Credential Wallet (NT SERVICE\CitrixCredentialWallet)
• Citrix Subscriptions Store (NT SERVICE\CitrixSubscriptionsStore)
• Citrix Default Domain Services (NT SERVICE\CitrixDefaultDomainService)
If you configure StoreFront Kerberos constrained delegation for XenApp 6.5, this creates the Citrix
StoreFront Protocol Transition service (NT SERVICE\SYSTEM). This service requires a privilege not nor‑
mally granted to Windows services.
Configure service settings
The StoreFront Windows services listed above in the “Configure user rights” section are configured to
log on as the NETWORK SERVICE identity. The Citrix StoreFront Protocol Transition service logs on as
SYSTEM. Do not change this configuration.
Configure group memberships
StoreFront installation adds the following services to the Administrators security group:
• Citrix Configuration Replication (NT SERVICE\CitrixConfigurationReplication)
• Citrix Cluster Join (NT SERVICE\CitrixClusterService)
These group memberships are required for StoreFront to operate correctly, to:
• Create, export, import and delete certificates, and set access permissions on them
• Read and write the Windows registry
• Add and remove Microso .NET Framework assemblies in the Global Assembly Cache (GAC)
• Access the folder Program Files\Citrix\<StoreFrontLocation>
• Add, modify, and remove IIS app pool identities and IIS web applications
• Add, modify, and remove local security groups and firewall rules
• Add and remove Windows services and PowerShell snap‑ins
• Register Microso Windows Communication Framework (WCF) endpoints
© 1999–2021 Citrix Systems, Inc. All rights reserved. 271

StoreFront 3.12
In updates to StoreFront, this list of operations might change without notice.
StoreFront installation also creates the following local security groups:
• CitrixClusterMembers
• CitrixCWServiceReadUsers
• CitrixCWServiceWriteUsers
• CitrixDelegatedAuthenticatorUsers
• CitrixDelegatedDirectoryClaimFactoryUsers
• CitrixPNRSUsers
• CitrixStoreFrontPTServiceUsers
• CitrixSubscriptionServerUsers
• CitrixSubscriptionsStoreServiceUsers
• CitrixSubscriptionsSyncUsers
• CitrixStoreFrontAdministrators (from StoreFront 3.12.6000 onwards)
StoreFront maintains the membership of these security groups. They are used for access control
within StoreFront, and are not applied to Windows resources such as files and folders. Do not modify
these group memberships.
Certificates in StoreFront
Server certificates
Server certificates are used for machine identification and Transport Layer Security (TLS) transport
security in StoreFront. If you decide to enable ICA file signing, StoreFront can also use certificates to
digitally sign ICA files.
To enable email‑based account discovery for users installing Citrix Receiver on a device for the first
time, you must install a valid server certificate on the StoreFront server. The full chain to the root cer‑
tificate must also be valid. For the best user experience, install a certificate with a Subject or Subject
Alternative Name entry of discoverReceiver.domain, where domain is the Microso Active Directory
domain containing your users’ email accounts. Although you can use a wildcard certificate for the
domain containing your users’ email accounts, you must first ensure that the deployment of such cer‑
tificates is permitted by your corporate security policy. Other certificates for the domain containing
your users’ email accounts can also be used, but users will see a certificate warning dialog box when
Citrix Receiver first connects to the StoreFront server. Email‑based account discovery cannot be used
with any other certificate identities. For more information, see Configure email‑based account discov‑
ery.
If your users configure their accounts by entering store URLs directly into Citrix Receiver and do not
use email‑based account discovery, the certificate on the StoreFront server need only be valid for that
server and have a valid chain to the root certificate.
© 1999–2021 Citrix Systems, Inc. All rights reserved. 272

StoreFront 3.12
Token management certificates
Authentication services and stores each require certificates for token management. StoreFront gener‑
ates a self‑signed certificatewhen an authenticationservice or store is created. Self‑signed certificates
generated by StoreFront should not be used for any other purpose.
Citrix Delivery Services certificates
StoreFront holds a number of certificates in a custom Windows certificate store (Citrix Delivery Ser‑
vices). The Citrix Configuration Replication service, Citrix Credential Wallet service, and Citrix Sub‑
scriptions Store service use these certificates. Each StoreFront server in a cluster has a copy of these
certificates. These services do not rely on TLS for secure communications, and these certificates are
not used as TLS server certificates. These certificates are created when a StoreFront store is created
or StoreFront is installed. Do not modify the contents of this Windows certificate store.
Code signing certificates
StoreFrontinstalls variousPowerShell scripts(.ps1) in the folder in <InstallDirectory>\Scripts.
The default StoreFront installationdoes not use these scripts, but you can use them to simplify specific
and infrequent configuration tasks. These scripts are signed, allowing StoreFront to support Power‑
Shell execution policy. We recommend the AllSigned policy. (The Restricted policy is not supported,
as it prevents PowerShell scripts from running.) StoreFront does not alter the PowerShell execution
policy.
Add a code signing certificate to the Trusted Publishers store, because StoreFront does not add it au‑
tomatically. Without a certificate added the StoreFront management console Snap‑in does not load
when you enable the Turn on Script Execution policy setting and set Allow only signed script.
If you run the scripts in a PowerShell session, Windows automatically adds the code signing certifi‑
cate in the Trusted Publishers store when the PowerShell script is run with the Always run option in
the AllSigned execution policy. (If you select the Never run option, the certificate is added to the
Untrusted Certificates store, and StoreFront PowerShell scripts do not run.)
Once the code signing certificate is added to the Trusted Publishers store, its expiration is no longer
checked by Windows. You can remove this certificate from the Trusted Publishers store aer the Store‑
Front tasks have been completed.
StoreFront communications
In a production environment, Citrix recommends using the Internet Protocol security (IPsec) or HTTPS
protocols to secure data passing between StoreFront and your servers. IPsec is a set of standard ex‑
tensions to the Internet Protocol that provides authenticated and encrypted communications with
data integrity and replay protection. Because IPsec is a network‑layer protocol set, higher level proto‑
cols can use it without modification. HTTPS uses the Secure Sockets Layer (SSL) and Transport Layer
Security (TLS) protocols to provide strong data encryption.
© 1999–2021 Citrix Systems, Inc. All rights reserved. 273

StoreFront 3.12
The SSL Relay can be used to secure data traic between StoreFront and XenApp servers. The SSL
Relay is a default component of XenApp that performs host authentication and data encryption.
Citrix recommends securing communications between StoreFront and users’ devices using NetScaler
Gateway and HTTPS. To use HTTPS, StoreFront requires that the Microso Internet Information Ser‑
vices (IIS) instance hosting the authentication service and associated stores is configured for HTTPS.
In the absence of the appropriate IIS configuration, StoreFront uses HTTP for communications. Citrix
strongly recommends that you do not enable unsecured user connections to StoreFront in a produc‑
tion environment.
StoreFront security separation
If you deploy any web applications in the same web domain (domain name and port) as StoreFront,
then any security risks in those web applications could potentially reduce the security of your Store‑
Front deployment. Where a greater degree of security separation is required, Citrix recommends that
you deploy StoreFront in a separate web domain.
ICA file signing
StoreFront provides the option to digitally sign ICA files using a specified certificate on the server so
thatversions of Citrix Receiverthat support this feature can verify that the file originates from a trusted
source. ICA files can be signed using any hash algorithm supported by the operating system running
on the StoreFront server, including SHA‑1 and SHA‑256. For more information, see Enable ICA file
signing.
User change password
You can enable Receiver for Web site users logging on with Active Directory domain credentials to
change their passwords, either at any time or only when they have expired. However, this exposes
sensitive security functions to anyone who can access any of the stores that use the authentication
service. If your organization has a security policy that reserves user password change functions for
internal use only, ensure that none of the stores are accessible from outside your corporate network.
When you create the authentication service, the default configuration prevents Receiver for Web site
users from changing their passwords, even if they have expired. For more information, see Optimize
the user experience.
Customizations
To strengthen security, do not write customizationsthat load contentor scripts from servers not under
your control. Copy the content or script into the Citrix Receiver for Web site custom folder where you
© 1999–2021 Citrix Systems, Inc. All rights reserved. 274

StoreFront 3.12
are making the customizations. If StoreFront is configured for HTTPS connections, ensure that any
links to custom content or scripts also use HTTPS.
Additional security information
Note:
This information may change at any time, without notice.
Your organization may want to perform security scans of StoreFront for regulatory reasons. The pre‑
ceding configuration options can help to eliminate some findings in security scan reports.
If there is a gateway between the security scanner and StoreFront, particular findings may relate to the
gateway rather than to StoreFront itself. Security scan reports usually do not distinguish these find‑
ings (for example, TLS configuration). Because of this, technical descriptions in security scan reports
can be misleading.
When interpreting security scan reports, note the following:
• HTML pages in StoreFront may not include clickjacking protection(by Content Security Policy or
X‑Frame‑Options response headers). However, these HTML pages consist only of static content,
and therefore clickjacking attacks are not relevant.
• The version of Microso IIS and the use of ASP.NET are visible in HTTP headers. However, this
information is already apparent from the presence of StoreFront itself, because it relies on these
technologies.
• When launching applications and desktops, StoreFront uses a token to protect against cross‑
site request forgery (CSRF). This token is sent as a cookie in a response without being marked
as Secure or HttpOnly. When later sent in a request, the token is included in the query string of
a URL. However, StoreFront does not rely on this mechanism to authenticate HTTP requests.
• StoreFront uses the open source component jQuery. According to the jQuery open source
project, a change was made in jQuery 1.12.0 to mitigate potential vulnerabilities in a specific
form of cross‑domain request. This change was not a mitigation to a vulnerability in jQuery it‑
self; it was a mitigation to potential misuse by application logic. The relevant Citrix application
logic, in the Receiver for Web feature shared by NetScaler and StoreFront, does not use this
specific form of cross‑domain request, is not aected by this vulnerability, and did not benefit
from this mitigation.
This mitigation was later removed in jQuery 1.12.3 for compatibility reasons. Since the Citrix
application logic did not benefit from this mitigation, this removal has no material impact in
the versions of NetScaler and StoreFront using jQuery 1.12.4.
© 1999–2021 Citrix Systems, Inc. All rights reserved. 275

StoreFront 3.12
Export and import the StoreFront configuration
November 12, 2019
Note:
You can only import StoreFront configurations which are the same StoreFront version as the tar‑
get StoreFront installation.
You can export the entire configuration of a StoreFront deployment. This includes both single server
deployments and server group configurations. If an existing deployment is already present on the
importing server, the current configuration is erasedandthen replacedbythe configurationcontained
within the backup archive. If the target server is a clean factory default installation, a new deployment
is created using the imported configuration stored within the backup. The exported configuration
backup is in the form of a single .zip archive if unencrypted, or a .ctxzip if you choose to encrypt the
backup file when it is created.
Scenarios where configuration export and import can be used
• Only backup StoreFront deployments in a working and trusted state. Any changes to the config‑
uration requires a new backup to be taken to replace the old one. You cannot modify existing
backups as a file hash of the backup.zip file prevents modification.
• Backup BEFORE upgrading StoreFront for disaster recovery.
• Cloning existing testing StoreFront deployments to put into production
• Creating user acceptance environments by cloning production deployments into a test environ‑
ment.
• Moving StoreFront during OS migrations such as upgrading the hosting OS from 2008R2 to 2019.
• Building extra server groups in multigeo deployments such as in large enterprises with multiple
datacenters.
Things to consider when exporting and importing a StoreFront configuration
• Do you currently use any Citrix published authentication SDK examples, such as Magic Word
authentication or third party authentication customizations? If so, you must install these pack‑
ages on ALL importing servers BEFORE importing a configuration containing extra authentica‑
tion methods. The configuration import fails if required authentication SDK packages are not
installed on any of the importing servers. If importing a configuration into a server group, install
the authentication packages on all members of the group.
• You can encrypt or decrypt your configuration backups. The exporting and importing Power‑
Shell cmdlets support both use cases.
© 1999–2021 Citrix Systems, Inc. All rights reserved. 276

StoreFront 3.12
• You can decrypt encrypted backups (.ctxzip) later, but StoreFront cannot re‑encrypt unen‑
crypted backup files (.zip). If an encrypted backup is required, perform the export again using
a PowerShell credential object containing a password of your choice.
• The SiteID of the website in IIS where StoreFront is currently installed (exporting server) must
match the SiteID of the target website in IIS (importing server) where you want to restore the
backed up StoreFront configuration.
PowerShell cmdlets
Export‑STFConfiguration
Parameter Description
‑TargetFolder (String) The export path to the backup archive.
Example: “$env:userprofile\desktop\”
‑Credential (PSCredential Object) Specify a credential object to create an
encrypted .ctxzip backup archive during
export. The PowerShell credential object
should contain the password to use for
encryption and decryption. Do not use
‑Credential at the same time as the
‑NoEncryption parameter. Example:
$CredObject
‑NoEncryption (Switch) Specify that the backup archive should be an
unencrypted .zip. Do not use ‑NoEncryption
at the same time as the ‑Credential parameter.
‑ZipFileName (String) The name for the StoreFront configuration
backup archive. Do not add a file extension,
such as .zip or .ctxzip. The file extension is
added automatically depending on whether
the ‑Credential or ‑NoEncryption parameter
is specified during export. Example: “backup”
‑Force (Boolean) This parameter automatically overwrites
backup archives with the same file name as
existing backup files already present in the
specified export location.
© 1999–2021 Citrix Systems, Inc. All rights reserved. 277
StoreFront 3.12
Important:
The SiteID parameter found in StoreFront 3.5 was deprecated in version 3.6. It is no longer neces‑
sary to specify the SiteID when performing an import, as the SiteID contained within the backup
archive is always be used. Ensure the SiteID matches the existing StoreFront website already
configured within IIS on the importing server. SiteID 1 to SiteID 2 configuration imports are
NOT supported.
Import‑STFConfiguration
Parameter Description
‑ConfigurationZip (String) The full path to the backup archive you want to
import. This should also include the file
extension. Use .zip for unencrypted and .ctxzip
for encrypted backup archives. Example: $env
:userprofile\desktop\backup.ctxzip
‑Credential (PSCredential Object) Specify a credential object to decrypt an
encrypted backup during import. Example:
$CredObject
‑HostBaseURL (String) If this parameter is included, the Host base URL
you specify is used instead of the Host base
URL from the exporting server. Example:
https://<importingserver>.example.
com
Unprotect‑STFConfigurationBackup
Parameter Description
‑TargetFolder (String) The export path to the backup archive.
Example: $env:userprofile\desktop\
‑Credential (PSCredential Object) Use this parameter to create an unencrypted
copy of the encrypted backup archive. Specify
the PowerShell credential object containing
the password to use for decryption. Example:
$CredObject
© 1999–2021 Citrix Systems, Inc. All rights reserved. 278

StoreFront 3.12
Parameter Description
‑EncryptedConfigurationZip (String) The full path of the encrypted backup archive
you want to decrypt. You must specify the file
extension .ctxzip. Example: $env:
userprofile\\desktop\\backup.ctxzip
‑OutputFolder (String) The path to create an unencrypted copy (.zip)
of the encrypted (.ctxzip) backup archive. The
original encrypted copy of the backup is
retained so it can be reused. Do not specify a
file name and file extension for the
unencrypted copy. Example:
$env:userprofile\desktop\
‑Force (Boolean) This parameter automatically overwrites
backup archives with the same file name as
existing backup files already present in the
specified export location.
Configuration export and import examples
Import the StoreFront cmdlets into the current PowerShell session
Open the PowerShell Integrated Scripting Environment (ISE) on the StoreFront server and run:
1 $env:PSModulePath = [Environment]::GetEnvironmentVariable('PSModulePath
','Machine')
2 $SDKModules = 'C:\Program Files\Citrix\Receiver StoreFront\
PowerShellSDK\Modules\Citrix.StoreFront'
3 Import-Module "$SDKModules\Citrix.StoreFront.psd1" -verbose
4 Import-Module "$SDKModules.Authentication\Citrix.StoreFront.
Authentication.psd1" -verbose
5 Import-Module "$SDKModules.Roaming\Citrix.StoreFront.Roaming.psd1" -
verbose
6 Import-Module "$SDKModules.Stores\Citrix.StoreFront.Stores.psd1" -
verbose
7 Import-Module "$SDKModules.WebReceiver\Citrix.StoreFront.WebReceiver.
psd1" -verbose
© 1999–2021 Citrix Systems, Inc. All rights reserved. 279
StoreFront 3.12
Single server scenarios
Create an unencrypted backup of an existing configuration on Server A and restore it onto the
same deployment
Export the configuration of the server you wish to back up.
1 Export-STFConfiguration -targetFolder "$env:userprofile\desktop\" -
zipFileName "backup" -NoEncryption
Copy the backup.zip file to a safe location. You can use this backup for disaster recovery to restore the
server to its previous state.
1 Import-STFConfiguration -configurationZip "$env:userprofile\desktop\
backup.zip" -HostBaseURL "https://storefront.example.com"
Back up an existing configuration on Server A and restore it onto Server B to create a clone of
an existing server
Export the configuration of the server you wish to back up.
1 Export-STFConfiguration -targetFolder "$env:userprofile\desktop\" -
zipFileName "backup" -NoEncryption
Copy the backup.zip file to the desktop of server B.
1 Import-STFConfiguration -configurationZip "$env:userprofile\desktop\
backup.zip" -HostBaseURL "https://serverB.example.com"
StoreFront is already deployed onto a custom website in IIS. Restore the configuration onto an‑
other custom website deployment
Server A has StoreFront deployed on a custom website location rather than the usual default website
within IIS. The IIS SiteID for the second website created in IIS is 2. The StoreFront website’s physical
path can be on another nonsystem drive such as d:\ or on the default c:\ system drive but should use
an IIS SiteID greater than 1.
A new website called StoreFront has been configured within IIS, which uses SiteID = 2. StoreFront is
already deployed on the custom website in IIS with its physical path on drive d:\inetpub\wwwrooot
.
1. Export a copy of the Server A configuration.
2. On Server B, configure IIS with a new website called StoreFront, which also uses SiteID 2.
© 1999–2021 Citrix Systems, Inc. All rights reserved. 280

StoreFront 3.12
3. Import the Server A configuration onto Server B. The site ID contained in the backup is used and
must match the target website where you want to import the StoreFront configuration.
Import-STFConfiguration -configurationZip "$env:userprofile\desktop\
backup.ctxzip"-HostBaseURL "https://serverB.example.com"
Server group scenarios
Scenario 1: Backup an existing server group configuration and restore it later onto the same
server group deployment
A previous configuration backup was taken while only two StoreFront servers, 2012R2‑A and 2012R2‑
B, were members of the server group. Within the backup archive is a record of the CitrixCluster‑
Membership at the time the backup was taken containing only the two original servers 2012R2‑A and
2012R2‑B. The StoreFront server group deployment has subsequently increased in size since the orig‑
inal backup was taken due to business demand, so an additional node 2012R2‑C has been added to
the server group. The underlying StoreFront configuration of the server group held in the backup has
not changed. The current CitrixClusterMembership of three servers must be maintained even if an old
backup containing only the two original server group nodes is imported. During import the current
cluster membership is preserved and then written back once the configuration has been successfully
imported onto the primary server. The import also preserves the current CitrixClusterMembership if
server group nodes were removed from the server group since the original backup was taken.
1. Export the Server Group 1 configuration from 2012R2‑A, which is the primary server used to
manage the entire server group.
1. Later you add an additional server, 2012R2‑C to the existing server group.
1. The configuration of the server group must be restored to a known previously working state.
StoreFront backs up the current CitrixClusterMembership of three servers during the import
process, and then restores it aer the import has succeeded.
2. Import the Server Group 1 configuration back onto node 2012R2‑A.
Import-STFConfiguration -configurationZip "$env:userprofile\desktop\
backup.ctxzip"-HostBaseURL "https://servergroup1.example.com"
3. Propagate the newly imported configuration to the entire server group, so all servers have a
consistent configuration aer import.
Scenario 2: Backup an existing configuration from Server Group 1 and use it to create a new
Server Group on a dierent factory default installation. You can then add other new server
group members to the new primary server
© 1999–2021 Citrix Systems, Inc. All rights reserved. 281

StoreFront 3.12
Server Group 2 is created containing two new servers, 2012R2‑C and 2012R2‑D. The Server Group 2
configuration will be based on the configuration of an existing deployment, Server Group 1, which
also contains two servers 2012R2‑A and 2012R2‑B. The CitrixClusterMembership contained within the
backup archive is not used when creating a new server group. The current CitrixClusterMembership
is always backed up and then restored aer the import is successful. When creating a new deploy‑
ment using an imported configuration, the CitrixClusterMembership security group contains only the
importing server until additional servers are joined to the new group. Server Group 2 is a new deploy‑
ment and intended to coexist alongside Server Group 1. Specify the ‑HostBaseURL parameter. Server
Group 2 will be created using a new factory default StoreFront installation.
1. Export the Server Group 1 configuration from 2012R2‑A, which is the primary server used to
manage the entire server group.
2. Import the Server Group 1 configuration onto node 2012R2‑C, which will be the primary server
used to manage the newly created Server Group 2.
Import-STFConfiguration -configurationZip "$env:userprofile\desktop\
backup.ctxzip"-HostBaseURL "https://servergroup2.example.com"
3. Join any additional serversthatwill be partof the new ServerGroup 2 deployment. Propagation
of the newly imported configuration from Server Group 1 to all new members of Server Group
2 is automatic, as this forms part of the normal join process when a new server is added.
Scenario 3: Backup an existing configuration from Server Group A and use it to overwrite the
existing Server Group B configuration
Server Group 1 and Server Group 2 already exist in two separate data centers. Many StoreFront con‑
figuration changes are made on Server Group 1, which you should apply to Server Group 2 in the
other data center. You can port the changes from Server Group 1 to Server Group 2. Do not use the
CitrixClusterMembership within the backup archive on Server Group 2. Specify the ‑HostBaseURL
parameter during import, as the Server Group 2 host base URL should not be changed to the same
FQDN that is currently in use by Server Group 1. Server Group 2 is an existing deployment.
1. Export the Server Group 1 configuration from 2012R2‑A, which is the primary server used to
manage the entire server group.
2. Import the Server Group 1 configuration onto the factory default installation on node 2012R2‑C,
which will be the primary server of the new Server Group 2.
Import-STFConfiguration -configurationZip "$env:userprofile\desktop\
backup.ctxzip"-NoEncryption -HostBaseURL "https://servergroup2.example.
com"
© 1999–2021 Citrix Systems, Inc. All rights reserved. 282

StoreFront 3.12
Create an encrypted backup of your server configuration
A PowerShell credential object comprises both a Windows account username and a password. Pow‑
erShell credential objects ensure that your password stays protected in memory.
Note:
To encrypt a configuration backup archive, you need only the password to perform encryption
and decryption. The username stored within the credential object is not used. You must create
a credential object containing the same password within the PowerShell session that is used on
both the exporting and importing servers. Within the credential object you can specify any user.
PowerShell requires that you specify a user when creating a new credential object. This example code
obtains the currently logged on Windows user for convenience.
Create a PowerShell Credential Object within your Powershell session on the exporting server.
1 $User = [System.Security.Principal.WindowsIdentity]::GetCurrent().Name
2 $Password = "Pa55w0rd"
3 $Password = $Password | ConvertTo-SecureString -asPlainText -Force
4 $CredObject = New-Object System.Management.Automation.PSCredential(
$User,$Password)
Export the configuration to backup.ctxzip which is an encrypted zip file.
1 Export-STFConfiguration -targetFolder "$env:userprofile\desktop\" -
zipFileName "backup" -Credential $CredObject
Create an identical PowerShell Credential Object within your Powershell session on the importing
server.
1 Import-STFConfiguration -configurationZip "$env:userprofile\desktop\
backup.ctxzip" -Credential $CredObject -HostBaseURL "https://
storefront.example.com"
Unprotect an existing encrypted backup archive
1 $User = [System.Security.Principal.WindowsIdentity]::GetCurrent().Name
2 $Password = "Pa55w0rd"
3 $Password = $Password | ConvertTo-SecureString -asPlainText -Force
4 $CredObject = New-Object System.Management.Automation.PSCredential(
$User,$Password)
5
6 Unprotect-STFConfigurationExport -encryptedConfigurationZip "$env:
userprofile\desktop\backup.ctxzip" -credential $CredObject -
outputFolder "c:\StoreFrontBackups" -Force
© 1999–2021 Citrix Systems, Inc. All rights reserved. 283

StoreFront 3.12
StoreFront SDK
February 25, 2021
Citrix StoreFront provides an SDK based on a number of Microso Windows PowerShell version 3.0
modules. With the SDK, you can perform the same tasks as you would with the StoreFront MMC con‑
sole, together with tasks you cannot do with the console alone.
For the SDK Reference, see StoreFront SDK.
Key dierences between the StoreFront 3.0 and current StoreFront SDK
• High‑level SDK Examples ‑ This version provides high‑level SDK scripts that enable you to
script and automate StoreFront deployments quickly and easily. You can tailor the high‑level
examples to your particular requirements enabling you to create a new deployment simply by
running one script.
• **New low‑level SDK **‑ Citrix provides a documented low‑level StoreFront SDK enabling the
configuration of deployments including stores, authentication methods, Citrix Receiver for Web
and Unified Citrix Receiver sites, as well as remote access with NetScaler Gateway.
• Backwards Compatibility ‑ StoreFront 3.6 still contains the StoreFront 3.0 and earlier APIs so
existing scripts can be gradually transitioned to the new SDK.
Important
Backwards compatibility with StoreFront 3.0 has been maintained where possible and practica‑
ble. However, Citrix recommends when writing new scripts, use the new Citrix.StoreFront.*
modules, as the StoreFront 3.0 SDK is deprecated and will eventually be removed.
Use the SDK
The SDK comprises of a number of PowerShell snap‑ins installed automatically by the installation
wizard when you install and configure various StoreFront components.
To access and run the cmdlets:
1. Start a shell in PowerShell 3.0.
You must run the shell or script using a member of the local administrators group on the Store‑
Front server.
2. To use SDK cmdlets within scripts, set the execution policy in PowerShell.
For more information about PowerShell execution policy, see your Microso documentation.
3. Add the modules you require into the PowerShell environment using the Add ‑Module com‑
mand in the Windows PowerShell console. For example, type:
© 1999–2021 Citrix Systems, Inc. All rights reserved. 284

StoreFront 3.12
1 Import-Module Citrix.StoreFront
2 <!--NeedCopy-->
To import all the cmdlets, type:
1 Get-Module -ListAvailable | Where-Object {
2 $_.Name.StartsWith("Citrix.StoreFront") }
3 | Import-Module
4
5 <!--NeedCopy-->
Aer importing, you have access to the cmdlets and their associated help.
Get started with the SDK
To create a script, perform the following steps:
1. Take one of the provided SDK examples installed by StoreFront into the %Program‑
Files%\Citrix\Receiver StoreFront\PowerShellSDK\Examples folder.
2. To help you customize your own script. review the example script to understand what each part
is doing. For more information, see the example use case, which explains in detail the script’s
actions.
3. Convert and adapt the example scripts to turn them into a script that is more consumable. To
do this:
• Use the PowerShell ISE or a similar tool to edit the script.
• Use variables to assign values that are to be reused or modified.
• Remove any commands that are not required.
• Note that StoreFront cmdlets can be identified by the prefix STF.
• Use the Get‑Help cmdlet supplying the cmdlet name and ‑Full parameter for more infor‑
mation on a specific command.
Examples
Note: When creating a script, to ensure you always get the latest enhancements and fixes, Citrix rec‑
ommends you follow the procedure described above rather than copying and pasting the example
scripts.
Examples Description
<Example: Create a Simple Deployment> Script: creates a simple deployment with a
StoreFront controller configured with a single
XenDesktop server.
© 1999–2021 Citrix Systems, Inc. All rights reserved. 285
StoreFront 3.12
<Example: Create a Remote Access
Deployment>
Script: builds on the previous script to add
remote access to the deployment.
<Example: Create a Remote Access
Deployment with Optimal Launch Gateway>
Script: builds on the previous script to add
preferred optimal launch gateways for a better
user experience.
<Example: Create a Deployment with a
Desktop Appliance Site>
Script: creates a simple deployment
configured with a Desktop Appliance site.
Example: Create a simple deployment
The following example shows how to create a simple deployment configured with one XenDesktop
controller.
Before you begin, make sure you follow the steps detailed in Get Started with the SDK. This exam‑
ple can be customized using the methods described to produce a script for automating StoreFront
deployment.
Note: To ensure you always get the latest enhancements and fixes, Citrix recommends you follow the
procedure described in this document, rather than copying and pasting the example script.
Understand the script
This section explains what each part of the script produced by StoreFront is doing. This will help you
with the customization of your own script.
• Sets the error handling requirements and imports the required StoreFront modules. Imports
are not required in newer versions of PowerShell.
Param(
1 \[Parameter(Mandatory=$true)\]
2
3 \[Uri\]$HostbaseUrl,
4
5 \[long\]$SiteId = 1,
6
7 \[ValidateSet("XenDesktop","XenApp","AppController","VDIinaBox")\]
8
9 \[string\]$Farmtype = "XenDesktop",
10
11 \[Parameter(Mandatory=$true)\]
12
© 1999–2021 Citrix Systems, Inc. All rights reserved. 286

StoreFront 3.12
13 \[string\[\]\]$FarmServers,
14
15 \[string\]$StoreVirtualPath = "/Citrix/Store",
16
17 \[bool\]$LoadbalanceServers = $false,
18
19 \[int\]$Port = 80,
20
21 \[int\]$SSLRelayPort = 443,
22
23 \[ValidateSet("HTTP","HTTPS","SSL")\]
24
25 \[string\]$TransportType = "HTTP"
)
# Import StoreFront modules. Required for versions of PowerShell earlier than 3.0 that do not support
autoloading
Import‑Module Citrix.StoreFront
Import‑Module Citrix.StoreFront.Stores
Import‑Module Citrix.StoreFront.Authentication
Import‑Module Citrix.StoreFront.WebReceiver
• Automates the virtual path of the authentication and Citrix Receiver for Web services based on
the $StoreVirtualPath supplied.
# Determine the Authentication and Receiver virtual path to use based of the Store
$authenticationVirtualPath = “$($StoreIISPath.TrimEnd(‘/’))Auth”
$receiverVirtualPath = “$($StoreVirtualPath.TrimEnd(‘/’))Web”
• Creates a new deployment if one is not already present iin preparation for adding the required
StoreFront services. ‑Confirm:$false supresses the requirement to confirm the deployment
can procede.
# Determine if the deployment already exists
$existingDeployment = Get‑STFDeployment
if(‑not $existingDeployment)
{
1 \# Install the required StoreFront components
2
© 1999–2021 Citrix Systems, Inc. All rights reserved. 287

StoreFront 3.12
3 Add-STFDeployment -HostBaseUrl $HostbaseUrl -SiteId $SiteId -Confirm:
$false
}
elseif($existingDeployment.HostbaseUrl ‑eq $HostbaseUrl)
{
1 \# The deployment exists but it is configured to the desired hostbase
url
2
3 Write-Output "A deployment has already been created with the specified
hostbase url on this server and will be used."
}
else
{
1 Write-Error "A deployment has already been created on this server with
a different host base url."
}
• Creates a new authentication service if one does not exist at the specified virtual path. The
default authentication method of username and password is enabled.
# Determine if the authentication service at the specified virtual path exists
$authentication = Get‑STFAuthenticationService ‑VirtualPath $authenticationVirtualPath
if(‑not $authentication)
{
1 \# Add an Authentication service using the IIS path of the Store
appended with Auth
2
3 $authentication = Add-STFAuthenticationService
$authenticationVirtualPath
}
else
{
© 1999–2021 Citrix Systems, Inc. All rights reserved. 288

StoreFront 3.12
1 Write-Output "An Authentication service already exists at the specified
virtual path and will be used."
}
• Creates a new authentication service if one does not exist at the specified virtual path. The
default authentication method of username and password is enabled.
# Determine if the authentication service at the specified virtual path exists
$authentication = Get‑STFAuthenticationService ‑VirtualPath $authenticationVirtualPath
if(‑not $authentication)
{
1 \# Add an Authentication service using the IIS path of the Store
appended with Auth
2
3 $authentication = Add-STFAuthenticationService
$authenticationVirtualPath
}
else
{
1 Write-Output "An Authentication service already exists at the specified
virtual path and will be used."
}
• Creates the new store service configured with one XenDesktop controller with the servers de‑
fined in the array $XenDesktopServers at the specified virtual path if one does not already
exist.
# Determine if the store service at the specified virtual path exists
$store = Get‑STFStoreService ‑VirtualPath $StoreVirtualPath
if(‑not $store)
{
# Add a Store that uses the new Authentication service configured to publish resources from the sup‑
plied servers
$store = Add‑STFStoreService ‑VirtualPath $StoreVirtualPath ‑AuthenticationService $authentication
‑FarmName $Farmtype ‑FarmType $Farmtype ‑Servers $FarmServers ‑LoadBalance $Loadbalance‑
Servers ‘
© 1999–2021 Citrix Systems, Inc. All rights reserved. 289

StoreFront 3.12
1 -Port $Port -SSLRelayPort $SSLRelayPort -TransportType
$TransportType
}
else
{
1 Write-Output "A Store service already exists at the specified virtual
path and will be used. Farm and servers will be appended to this
store."
2
3 \# Get the number of farms configured in the store
4
5 $farmCount = (Get-STFStoreFarmConfiguration $store).Farms.Count
6
7 \# Append the farm to the store with a unique name
8
9 Add-STFStoreFarm -StoreService $store -FarmName "Controller$($farmCount
+ 1)" -FarmType $Farmtype -Servers $FarmServers -LoadBalance
$LoadbalanceServers -Port $Port \`
10
11 -SSLRelayPort $SSLRelayPort -TransportType $TransportType
}
• Adds a Citrix Receiver for Web service at the specified IIS virtual path to access applications
published in the store created above.
# Determine if the receiver service at the specified virtual path exists
$receiver = Get‑STFWebReceiverService ‑VirtualPath $receiverVirtualPath
if(‑not $receiver)
{
1 \# Add a Receiver for Web site so users can access the applications and
desktops in the published in the Store
2
3 $receiver = Add-STFWebReceiverService -VirtualPath $receiverVirtualPath
-StoreService $store
}
else
{
© 1999–2021 Citrix Systems, Inc. All rights reserved. 290

StoreFront 3.12
1 Write-Output "A Web Receiver service already exists at the specified
virtual path and will be used."
}
• Enables XenApp services for the store so older Citrix Receiver clients can connect to published
applications.
# Determine if PNA is configured for the Store service
$storePnaSettings = Get‑STFStorePna ‑StoreService $store
if(‑not $storePnaSettings.PnaEnabled)
{
# Enable XenApp services on the store and make it the default for this server
Enable‑STFStorePna ‑StoreService $store ‑AllowUserPasswordChange ‑DefaultPnaService
}
Example: Create a remote access deployment
The following example builds on the previous script to add a deployment with remote access.
Before you begin, make sure you follow the steps detailed in Get Started with the SDK. This exam‑
ple can be customized using the methods described to produce a script for automating StoreFront
deployment.
Note: To ensure you always get the latest enhancements and fixes, Citrix recommends you follow the
procedure described in this document, rather than copying and pasting the example script.
Understand the script
This section explains what each part of the script produced by StoreFront is doing. This will help you
with the customization of your own script.
• Sets the error handling requirements and import the required StoreFront modules. Imports are
not required in newer versions of PowerShell.
Param(
1 \[Parameter(Mandatory=$true)\]
2
3 \[Uri\]$HostbaseUrl,
4
5 \[Parameter(Mandatory=$true)\]
6
© 1999–2021 Citrix Systems, Inc. All rights reserved. 291

StoreFront 3.12
7 \[long\]$SiteId = 1,
8
9 \[string\]$Farmtype = "XenDesktop",
10
11 \[Parameter(Mandatory=$true)\]
12
13 \[string\[\]\]$FarmServers,
14
15 \[string\]$StoreVirtualPath = "/Citrix/Store",
16
17 \[bool\]$LoadbalanceServers = $false,
18
19 \[int\]$Port = 80,
20
21 \[int\]$SSLRelayPort = 443,
22
23 \[ValidateSet("HTTP","HTTPS","SSL")\]
24
25 \[string\]$TransportType = "HTTP",
26
27 \[Parameter(Mandatory=$true)\]
28
29 \[Uri\]$GatewayUrl,
30
31 \[Parameter(Mandatory=$true)\]
32
33 \[Uri\]$GatewayCallbackUrl,
34
35 \[Parameter(Mandatory=$true)\]
36
37 \[string\[\]\]$GatewaySTAUrls,
38
39 \[string\]$GatewaySubnetIP,
40
41 \[Parameter(Mandatory=$true)\]
42
43 \[string\]$GatewayName
)
Set‑StrictMode ‑Version 2.0
# Any failure is a terminating failure.
$ErrorActionPreference = ‘Stop’
$ReportErrorShowStackTrace = $true
© 1999–2021 Citrix Systems, Inc. All rights reserved. 292

StoreFront 3.12
$ReportErrorShowInnerException = $true
# Import StoreFront modules. Required for versions of PowerShell earlier than 3.0 that do not support
autoloading
Import‑Module Citrix.StoreFront
Import‑Module Citrix.StoreFront.Stores
Import‑Module Citrix.StoreFront.Roaming
• Create an internal access StoreFront deployment by calling the previous examples script. The
base deployment will be extended to support remote access.
# Create a simple deployment by invoking the SimpleDeployment example
$scriptDirectory = Split‑Path ‑Path $MyInvocation.MyCommand.Definition ‑Parent
$scriptPath = Join‑Path $scriptDirectory “SimpleDeployment.ps1”
& $scriptPath‑HostbaseUrl $HostbaseUrl‑SiteId$SiteId‑FarmServers $FarmServers‑StoreVirtualPath
$StoreVirtualPath ‑Farmtype $Farmtype ‘
1 -LoadbalanceServers $LoadbalanceServers -Port $Port -SSLRelayPort
$SSLRelayPort -TransportType $TransportType
• Gets services created in the simple deployment as they need to be updated to support the re‑
mote access scenario.
# Determine the Authentication and Receiver sites based on the Store
$store = Get‑STFStoreService ‑VirtualPath $StoreVirtualPath
$authentication = Get‑STFAuthenticationService ‑StoreService $store
$receiverForWeb = Get‑STFWebReceiverService ‑StoreService $store
• Enables CitrixAGBasic on the Citrix Receiver for Web service required for remote access using
NetScaler Gateway. Get the Citrix Receiver for Web CitrixAGBasic and ExplicitForms authentica‑
tion method from the supported protocols.
# Get the Citrix Receiver for Web CitrixAGBasic and ExplicitForms authentication method from the
supported protocols
# Included for demonstration purposes as the protocol name can be used directly if known
$receiverMethods = Get‑
STFWebReceiverAuthenticationMethodsAvailable
Where‑Object { $_ ‑match “Explicit” ‑or $_
‑match “CitrixAG” }
# Enable CitrixAGBasic in Receiver for Web (required for remote access)
© 1999–2021 Citrix Systems, Inc. All rights reserved. 293

StoreFront 3.12
Set‑STFWebReceiverService $receiverForWeb ‑AuthenticationMethods $receiverMethods
• Enables CitrixAGBasic on the authentication service. This is required for remote access.
# Get the CitrixAGBasic authentication method from the protocols installed.
# Included for demonstration purposes as the protocol name can be used directly if known
$citrixAGBasic =
Get‑STFAuthenticationProtocolsAvailable
Where‑Object { $_ ‑match “CitrixAGBasic” }
# Enable CitrixAGBasic in the Authentication service (required for remote access)
Enable‑STFAuthenticationServiceProtocol ‑AuthenticationService $authentication ‑Name $citrixAG‑
Basic
• Adds a new remote access Gateway, adding the optional subnet ipaddress is supplied and reg‑
isters it with the store to be accessed remotely.
# Add a new Gateway used to access the new store remotely
Add‑STFRoamingGateway ‑Name “NetScaler10x” ‑LogonType Domain ‑Version Version10_0_69_4
‑GatewayUrl $GatewayUrl ‘
‑CallbackUrl $GatewayCallbackUrl ‑SecureTicketAuthorityUrls $GatewaySTAUrls
# Get the new Gateway from the configuration (Add‑STFRoamingGateway will return the new Gateway
if ‑PassThru is supplied as a parameter)
$gateway = Get‑STFRoamingGateway ‑Name $GatewayName
# If the gateway subnet was provided then set it on the gateway object
if($GatewaySubnetIP)
{
1 Set-STFRoamingGateway -Gateway $gateway -SubnetIPAddress
$GatewaySubnetIP
}
# Register the Gateway with the new Store
Register‑STFStoreGateway ‑Gateway $gateway ‑StoreService $store ‑DefaultGateway
Example: Create a remote access deployment with optimal launch Gateway
The following example builds on the previous script to add a deployment with optimal launch Gate‑
way remote access.
© 1999–2021 Citrix Systems, Inc. All rights reserved. 294

StoreFront 3.12
Before you begin, make sure you follow the steps detailed in Get Started with the SDK. This exam‑
ple can be customized using the methods described to produce a script for automating StoreFront
deployment.
Note: To ensure you always get the latest enhancements and fixes, Citrix recommends you follow the
procedure described in this document, rather than copying and pasting the example script.
Understand the script
This section explains what each part of the script produced by StoreFront is doing. This will help you
with the customization of your own script.
• Sets the error handling requirements and imports the required StoreFront modules. Imports
are not required in newer versions of PowerShell.
Param(
1 \[Parameter(Mandatory=$true)\]
2
3 \[Uri\]$HostbaseUrl,
4
5 \[long\]$SiteId = 1,
6
7 \[string\]$Farmtype = "XenDesktop",
8
9 \[Parameter(Mandatory=$true)\]
10
11 \[string\[\]\]$FarmServers,
12
13 \[string\]$StoreVirtualPath = "/Citrix/Store",
14
15 \[bool\]$LoadbalanceServers = $false,
16
17 \[int\]$Port = 80,
18
19 \[int\]$SSLRelayPort = 443,
20
21 \[ValidateSet("HTTP","HTTPS","SSL")\]
22
23 \[string\]$TransportType = "HTTP",
24
25 \[Parameter(Mandatory=$true)\]
26
27 \[Uri\]$GatewayUrl,
28
29 \[Parameter(Mandatory=$true)\]
30
© 1999–2021 Citrix Systems, Inc. All rights reserved. 295

StoreFront 3.12
31 \[Uri\]$GatewayCallbackUrl,
32
33 \[Parameter(Mandatory=$true)\]
34
35 \[string\[\]\]$GatewaySTAUrls,
36
37 \[string\]$GatewaySubnetIP,
38
39 \[Parameter(Mandatory=$true)\]
40
41 \[string\]$GatewayName,
42
43 \[Parameter(Mandatory=$true)\]
44
45 \[Uri\]$OptimalGatewayUrl,
46
47 \[Parameter(Mandatory=$true)\]
48
49 \[string\[\]\]$OptimalGatewaySTAUrls,
50
51 \[Parameter(Mandatory=$true)\]
52
53 \[string\]$OptimalGatewayName
)
Set‑StrictMode ‑Version 2.0
# Any failure is a terminating failure.
$ErrorActionPreference = ‘Stop’
$ReportErrorShowStackTrace = $true
$ReportErrorShowInnerException = $true
# Import StoreFront modules. Required for versions of PowerShell earlier than 3.0 that do not support
autoloading
Import‑Module Citrix.StoreFront
Import‑Module Citrix.StoreFront.Stores
Import‑Module Citrix.StoreFront.Roaming
• Calls into the remote access deployment script to configure the basic deployment and add re‑
mote access.
# Create a remote access deployment
© 1999–2021 Citrix Systems, Inc. All rights reserved. 296

StoreFront 3.12
$scriptDirectory = Split‑Path ‑Path $MyInvocation.MyCommand.Definition ‑Parent
$scriptPath = Join‑Path $scriptDirectory “RemoteAccessDeployment.ps1”
& $scriptPath‑HostbaseUrl $HostbaseUrl‑SiteId$SiteId‑FarmServers $FarmServers‑StoreVirtualPath
$StoreVirtualPath ‑Farmtype $Farmtype ‘
1 -LoadbalanceServers $LoadbalanceServers -Port $Port -SSLRelayPort
$SSLRelayPort -TransportType $TransportType \`
2
3 -GatewayUrl $GatewayUrl -GatewayCallbackUrl $GatewayCallbackUrl -
GatewaySTAUrls $GatewaySTAUrls -GatewayName $GatewayName
• Adds the preferred optimal launch gateway and get it from the list of configured gateways.
# Add a new Gateway used for remote HDX access to desktops and apps
$gateway = Add‑STFRoamingGateway ‑Name $OptimalGatewayName ‑LogonType UsedForHDXOnly
‑GatewayUrl $OptimalGatewayUrl ‑SecureTicketAuthorityUrls $OptimalGatewaySTAUrls ‑PassThru
• Gets the store service to use the optimal gateway, register it assigning it to launches from the
farm named.
# Get the Store configured by SimpleDeployment.ps1
$store = Get‑STFStoreService ‑VirtualPath $StoreVirtualPath
# Register the Gateway with the new Store for launch against all of the farms (currently just one)
$farmNames =
@($store.FarmsConfiguration.Farms
foreach { $_.FarmName })
Register‑STFStoreOptimalLaunchGateway ‑Gateway $gateway ‑StoreService $store ‑FarmName
$farmNames
Example: Create a deployment with a Desktop Appliance site
TThe following example builds on the simple deployment example to add a deployment with Desktop
Appliance site.
Before you begin, make sure you follow the steps detailed in Get Started with the SDK. This exam‑
ple can be customized using the methods described to produce a script for automating StoreFront
deployment.
Note: To ensure you always get the latest enhancements and fixes, Citrix recommends you follow the
procedure described in this document, rather than copying and pasting the example script.
© 1999–2021 Citrix Systems, Inc. All rights reserved. 297

StoreFront 3.12
Understand the script
This section explains what each part of the script produced by StoreFront is doing. This will help you
with the customization of your own script.
• Sets the error handling requirements and import the required StoreFront modules. Imports are
not required in newer versions of PowerShell.
Param(
1 \[Parameter(Mandatory=$true)\]
2
3 \[Uri\]$HostbaseUrl,
4
5 \[long\]$SiteId = 1,
6
7 \[string\]$Farmtype = "XenDesktop",
8
9 \[Parameter(Mandatory=$true)\]
10
11 \[string\[\]\]$FarmServers,
12
13 \[string\]$StoreVirtualPath = "/Citrix/Store",
14
15 \[bool\]$LoadbalanceServers = $false,
16
17 \[int\]$Port = 80,
18
19 \[int\]$SSLRelayPort = 443,
20
21 \[ValidateSet("HTTP","HTTPS","SSL")\]
22
23 \[string\]$TransportType = "HTTP",
24
25 \[Parameter(Mandatory=$true)\]
26
27 \[Uri\]$GatewayUrl,
28
29 \[Parameter(Mandatory=$true)\]
30
31 \[Uri\]$GatewayCallbackUrl,
32
33 \[Parameter(Mandatory=$true)\]
34
35 \[string\[\]\]$GatewaySTAUrls,
36
© 1999–2021 Citrix Systems, Inc. All rights reserved. 298

StoreFront 3.12
37 \[string\]$GatewaySubnetIP,
38
39 \[Parameter(Mandatory=$true)\]
40
41 \[string\]$GatewayName,
42
43 \[Parameter(Mandatory=$true)\]
44
45 \[Uri\]$OptimalGatewayUrl,
46
47 \[Parameter(Mandatory=$true)\]
48
49 \[string\[\]\]$OptimalGatewaySTAUrls,
50
51 \[Parameter(Mandatory=$true)\]
52
53 \[string\]$OptimalGatewayName
)
Set‑StrictMode ‑Version 2.0
# Any failure is a terminating failure.
$ErrorActionPreference = ‘Stop’
$ReportErrorShowStackTrace = $true
$ReportErrorShowInnerException = $true
# Import StoreFront modules. Required for versions of PowerShell earlier than 3.0 that do not support
autoloading
Import‑Module Citrix.StoreFront
Import‑Module Citrix.StoreFront.Stores
Import‑Module Citrix.StoreFront.Roaming
• Automate a desktop appliance path based on that of the $StoreVirtualPath.
$desktopApplianceVirtualPath = “$($StoreIISPath.TrimEnd(‘/’))Appliance”
• Calls into the simple deployment script to configure a default deployment with the required
services.
# Create a remote access deployment
$scriptDirectory = Split‑Path ‑Path $MyInvocation.MyCommand.Definition ‑Parent
$scriptPath = Join‑Path $scriptDirectory “RemoteAccessDeployment.ps1”
© 1999–2021 Citrix Systems, Inc. All rights reserved. 299

StoreFront 3.12
& $scriptPath‑HostbaseUrl $HostbaseUrl‑SiteId$SiteId‑FarmServers $FarmServers‑StoreVirtualPath
$StoreVirtualPath ‑Farmtype $Farmtype ‘
1 -LoadbalanceServers $LoadbalanceServers -Port $Port -SSLRelayPort
$SSLRelayPort -TransportType $TransportType \`
2
3 -GatewayUrl $GatewayUrl -GatewayCallbackUrl $GatewayCallbackUrl -
GatewaySTAUrls $GatewaySTAUrls -GatewayName $GatewayName
• Getsthestoreservice touse for the DesktopAppliance site. Use the Add‑STFDesktopApplianceService
cmdlet to add the new site with MultiDesktop and Explicit username and password authentica‑
tion.
$store = Get‑STFStoreService ‑VirtualPath $StoreVirtualPath
# Create a new Desktop Appliance site using the desktops published by the Store Service
Add‑STFDesktopApplianceService ‑VirtualPath $desktopApplianceVirtualPath ‑StoreService $store ‑
EnableExplicit
Example: Exchange metadata between the Identity Provider and the Service Provider
(StoreFront) for SAML authentication
SAML authentication can be configured in the StoreFront management console (see Configure the au‑
thentication service)orusing the following PowerShellcmdlets: Export‑STFSamlEncryptionCertificate,
Export‑STFSamlSigningCertificate, Import‑STFSamlEncryptionCertificate, Import‑STFSamlSigningCertificate,
New‑STFSamlEncryptionCertificate, New‑STFSamlIdPCertificate, New‑STFSamlSigningCertificate.
You can use the cmdlet, Update‑STFSamlIdPFromMetadata, to exchange metadata (identifiers, cer‑
tificates, endpoints and other configuration) between the Identity Provider and the Service Provider,
which is StoreFront in this case.
For a StoreFront Store, named “Store”, with its dedicated authentication service, the metadata end‑
point will be:
https://<storefront host>/Citrix/StoreAuth/SamlForms/ServiceProvider/Metadata
If your Identity Provider supports metadata import, then you can point it at the above URL. Note: This
must be done over HTTPS.
For StoreFront to consume the metadata from an Identity Provider, the following PowerShell can be
used:
1 Get-Module "Citrix.StoreFront*" -ListAvailable | Import-Module
2
3 # Remember to change this with the virtual path of your Store.
4 $StoreVirtualPath = "/Citrix/Store"
© 1999–2021 Citrix Systems, Inc. All rights reserved. 300

StoreFront 3.12
5
6 $store = Get-STFStoreService -VirtualPath $StoreVirtualPath
7 $auth = Get-STFAuthenticationService -StoreService $store
8
9 # To read the metadata directly from the Identity Provider, use the
following:
10 # Note again this is only allowed for https endpoints
11 Update-STFSamlIdPFromMetadata -AuthenticationService $auth -Url https:
//example.com/FederationMetadata/2007-06/FederationMetadata.xml
12
13 # If the metadata has already been download, use the following:
14 # Note: Ensure that the file is encoded as UTF-8
15 Update-STFSamlIdPFromMetadata -AuthenticationService $auth -FilePath "C
:\Users\exampleusername\Downloads\FederationMetadata.xml"
Example: List the metadata and ACS endpoints for a specified store for SAML
authentication
You can use the following script to list out the metadata and ACS (Assertion Consumer Service) end‑
points for a specified store.
1 # Change this value for your Store
2 $storeVirtualPath = "/Citrix/Store"
3
4 $auth = Get-STFAuthenticationService -Store (Get-STFStoreService -
VirtualPath $storeVirtualPath)
5 $spId = $auth.AuthenticationSettings["samlForms"].SamlSettings.
ServiceProvider.Uri.AbsoluteUri
6 $acs = New-Object System.Uri $auth.Routing.HostbaseUrl, ($auth.
VirtualPath + "/SamlForms/AssertionConsumerService")
7 $md = New-Object System.Uri $auth.Routing.HostbaseUrl, ($auth.
VirtualPath + "/SamlForms/ServiceProvider/Metadata")
8 $samlTest = New-Object System.Uri $auth.Routing.HostbaseUrl, ($auth.
VirtualPath + "/SamlTest")
9 Write-Host "SAML Service Provider information:
10 Service Provider ID: $spId
11 Assertion Consumer Service: $acs
12 Metadata: $md
13 Test Page: $samlTest"
Example of the output
1 SAML Service Provider information:
2 Service Provider ID: https://storefront.example.com/Citrix/StoreAuth
© 1999–2021 Citrix Systems, Inc. All rights reserved. 301

StoreFront 3.12
3 Assertion Consumer Service: https://storefront.example.com/Citrix/
StoreAuth/SamlForms/AssertionConsumerService
4 Metadata: https://storefront.example.com/Citrix/StoreAuth/SamlForms/
ServiceProvider/Metadata
5 Test Page: https://storefront.example.com/Citrix/StoreAuth/SamlTest
Troubleshoot StoreFront
January 7, 2020
When StoreFront is installed or uninstalled, the following log files are created by the StoreFront in‑
staller in the C:\Windows\Temp\StoreFront directory. The file names reflect the components that cre‑
ated them and include time stamps.
• Citrix‑DeliveryServicesRoleManager‑*.log—Created when StoreFront is installed interactively.
• Citrix‑DeliveryServicesSetupConsole‑*.log—Created when StoreFront is installed silently and
when StoreFront is uninstalled, either interactively or silently.
• CitrixMsi‑CitrixStoreFront‑x64‑*.log—Created when StoreFront is installed and uninstalled, ei‑
ther interactively or silently.
StoreFront supports Windows event logging for the authentication service, stores, and Receiver for
Web sites. Any events that are generated are written to the StoreFront application log, which can be
viewed using Event Viewer under either Application and Services Logs > Citrix Delivery Services or
Windows Logs > Application. You can control the number of duplicate log entries for a single event by
editing the configuration files for the authentication service, stores, and Receiver for Web sites.
The Citrix StoreFront management console automatically records tracing information. By default,
tracing for other operations is disabled and must be enabled manually. Logs created by Windows
PowerShell commands are stored in the \Admin\logs\ directory of the StoreFront installation, typi‑
cally located at C:\Program Files\Citrix\Receiver StoreFront\. The log file names contain command
actions and subjects, along with time stamps that can be used to dierentiate command sequences.
Important: In multiple server deployments, use only one server at a time to make changes to the con‑
figuration of the server group. Ensure that the Citrix StoreFront management console is not running
on any of the other servers in the deployment. Once complete,
propagate your configuration changes to the server group so that the other servers in the deployment
are updated.
To configure log throttling
1. Use a text editor to open the web.config file for the authentication service, store, or Receiver
for Web site, which are typically located in the C:\inetpub\wwwroot\Citrix\Authentication\,
© 1999–2021 Citrix Systems, Inc. All rights reserved. 302

StoreFront 3.12
C:\inetpub\wwwroot\Citrix\storename\, and C:\inetpub\wwwroot\Citrix\storenameWeb\
directories, respectively, where storename is the name specified for the store when it was
created.
2. Locate the following element in the file.
1 <logger duplicateInterval="00:01:00" duplicateLimit="10">
2 <!--NeedCopy-->
Bydefault, StoreFront is configuredtolimit the number of duplicatelog entries to 10 per minute.
3. Change the value of the duplicateInterval attribute to the set the time period in hours, minutes,
and seconds over which duplicate log entries are monitored. Use the duplicateLimit attribute
to set the number of duplicate entries that must be logged within the specified time interval to
trigger log throttling.
When log throttling is triggered, a warning message is logged to indicate that further identical log
entries will be suppressed. Once the time limit elapses, normal logging resumes and an informational
message is logged indicating that duplicate log entries are no longer being suppressed.
To enable tracing
Caution: The StoreFront and PowerShell consoles cannot be open at the same time. Always close the
StoreFront admin console before using the PowerShell console to administer your StoreFront config‑
uration. Likewise, close all instances of the PowerShell before opening the StoreFront console.
1. Use an account with local administrator permissions to start Windows PowerShell and, at a com‑
mand prompt, type the following commands and restart the server to enable tracing.
1 Add-PSSnapin Citrix.DeliveryServices.Framework.Commands
2 Set-DSTraceLevel -All -TraceLevel Verbose
3 <!--NeedCopy-->
Allowed values for ‑TraceLevel are, in increasing levels of tracing detail: O, Error, Warning, Info,
Verbose.
StoreFront automatically captures Error trace messages. Due to the large amount of data that
can potentially be generated, tracing may significantly impact the performance of StoreFront,
so it is recommended that the Info or Verbose levels are not used unless specifically required
for troubleshooting.
Optional arguments for the Set‑DSTraceLevel cmdlet are:
‑FileCount: Specifies the number of trace files (default = 3)
‑FileSizeKb: Specifies the maximum size of each trace file (default = 1000)
© 1999–2021 Citrix Systems, Inc. All rights reserved. 303

StoreFront 3.12
‑ConfigFile <FileName>: An alternative to ‑All that allows a specific configuration file to be up‑
dated rather than all. Forexample,a ‑ConfigFile valueofc:\inetpub\wwwroot\Citrix\<StoreName>\web.config
would set tracing for the Store with the name <StoreName>.
2. To disable tracing, type the following commands and restart the server.
1 Add-PSSnapin Citrix.DeliveryServices.Framework.Commands
2 Set-DSTraceLevel -All -TraceLevel Off
3 <!--NeedCopy-->
When tracing is enabled, tracing information is written in the \Admin\Trace\ directory of the Store‑
Front installation located at C:\Program Files\Citrix\Receiver StoreFront\.
© 1999–2021 Citrix Systems, Inc. All rights reserved. 304

StoreFront 3.12
© 1999–2021 Citrix Systems, Inc. All rights reserved. 305

Locations
Corporate Headquarters | 851 Cypress Creek Road Fort Lauderdale, FL 33309, United States
Silicon Valley | 4988 Great America Parkway Santa Clara, CA 95054, United States
© 2021 Citrix Systems, Inc. All rights reserved. Citrix, the Citrix logo, and other marks appearing herein are property of
Citrix Systems, Inc. and/or one or more of its subsidiaries, and may be registered with the U.S. Patent and Trademark
Oice and in other countries. All other marks are the property of their respective owner(s).
Citrix Product Documentation | docs.citrix.com November 11, 2021
