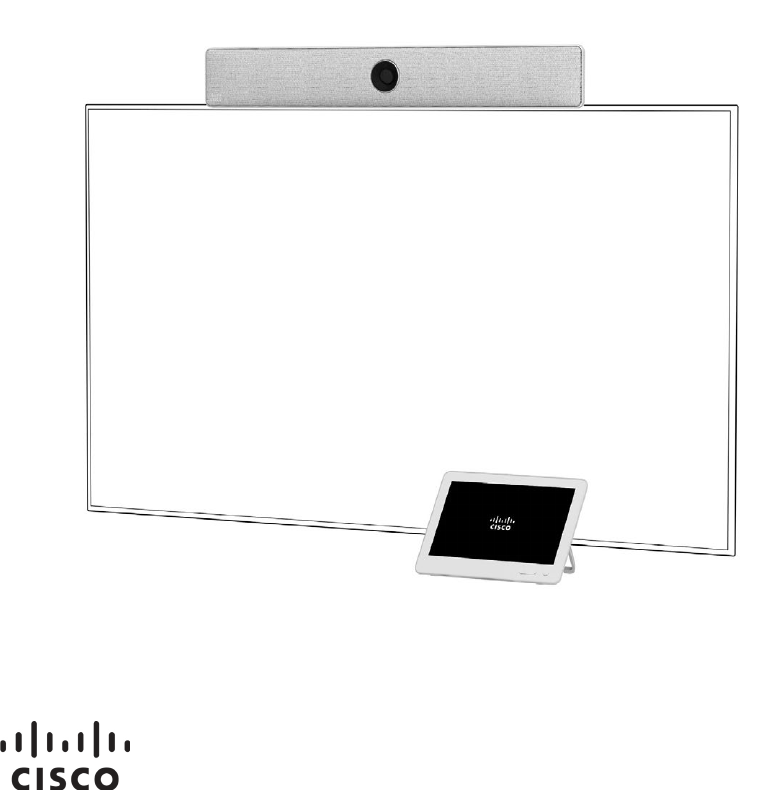
Cisco Spark Room Kit
Installation Guide
2 3
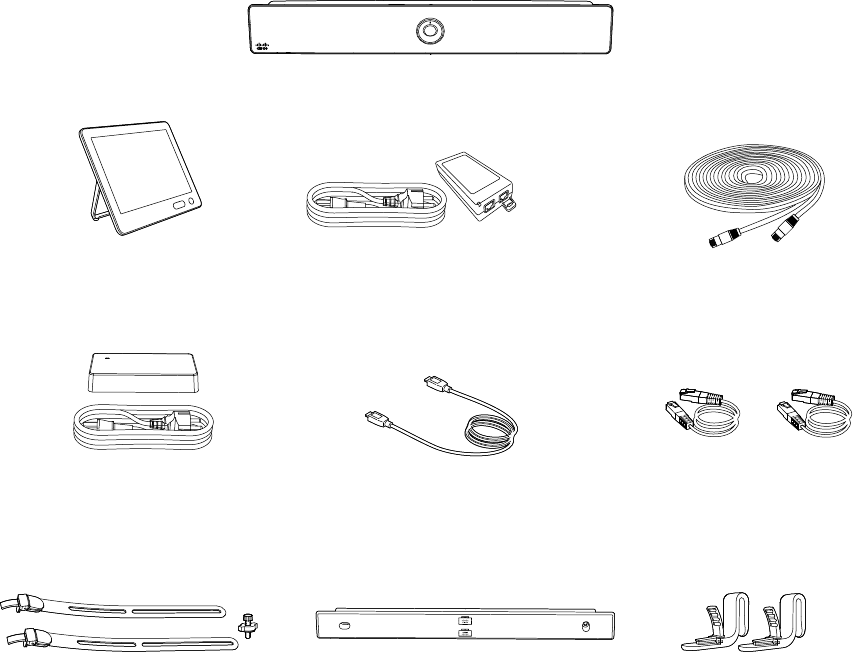
What’s in the box
Accessories (ordered separately)
• 2 × Cisco TelePresence Table Mic 20
• 2 × Microphone extension cable
• HDMI second monitor cable 1.5 m / 4.9 ft
• HDMI presentation cable 8 m / 26.2 ft
×4
Mediabar
Touch controller
2× wall bracketScreen mount
Power adapter for mediabar
Network cable, at,
for Touch controller
8 m / 26.2 ft
HDMI cable 1.5 m / 4.9 ft
Power adapter for Touch controller
Wall mount bar
2 × Network cables, round
5 m / 16.4 ft
4 5
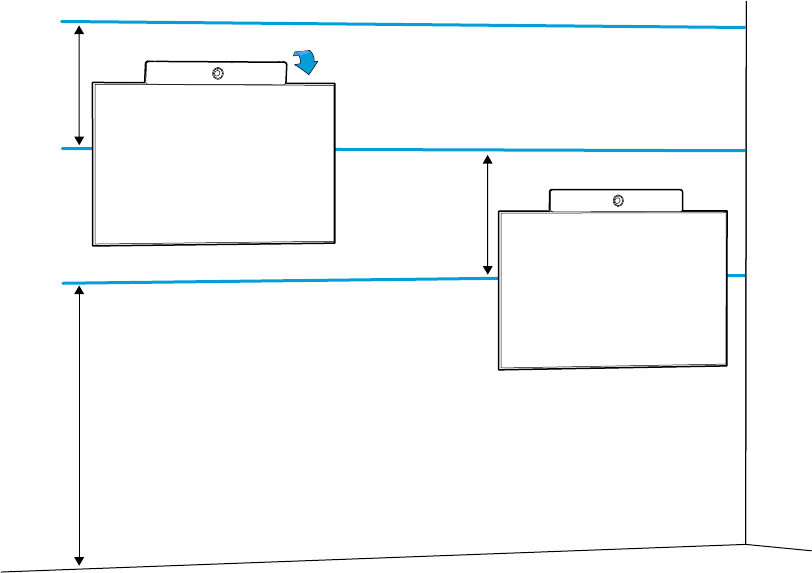
1. Mounting height
Recommended mounting height:
• Center of lens should be at 150 - 180 cm
/ 59 - 70 inch above floor level
We recommend using a 50 - 60 inch screen,
but screens up to 70 inch work well.
The mounting height affects your camera
view. If your screen is mounted higher, you
can tilt the mediabar to achieve an optimal
camera view. See step 5.
If you have a pre-installed screen which is
installed higher than the recommended
height, wall mounting the mediabar under the
screen may work better.
For our recommendations for positioning
the screen, tables, and more, visit Project
Workplace at projectplace.cisco.com
5°tilt
180 - 210 cm
70 - 82 inch
0°tilt
151 - 179 cm
59 - 70 inch
Minimum
lens height
150 cm / 59 inch
Steps overview
1. Determine mounting height for the mediabar and screen 5
2. Mount the mediabar with either the screen mount
or the wall mount
6-8
3. Connect the cables, and follow the on-screen instructions
to setup your device
10-13
4. Adjust the camera angle 14
6 7
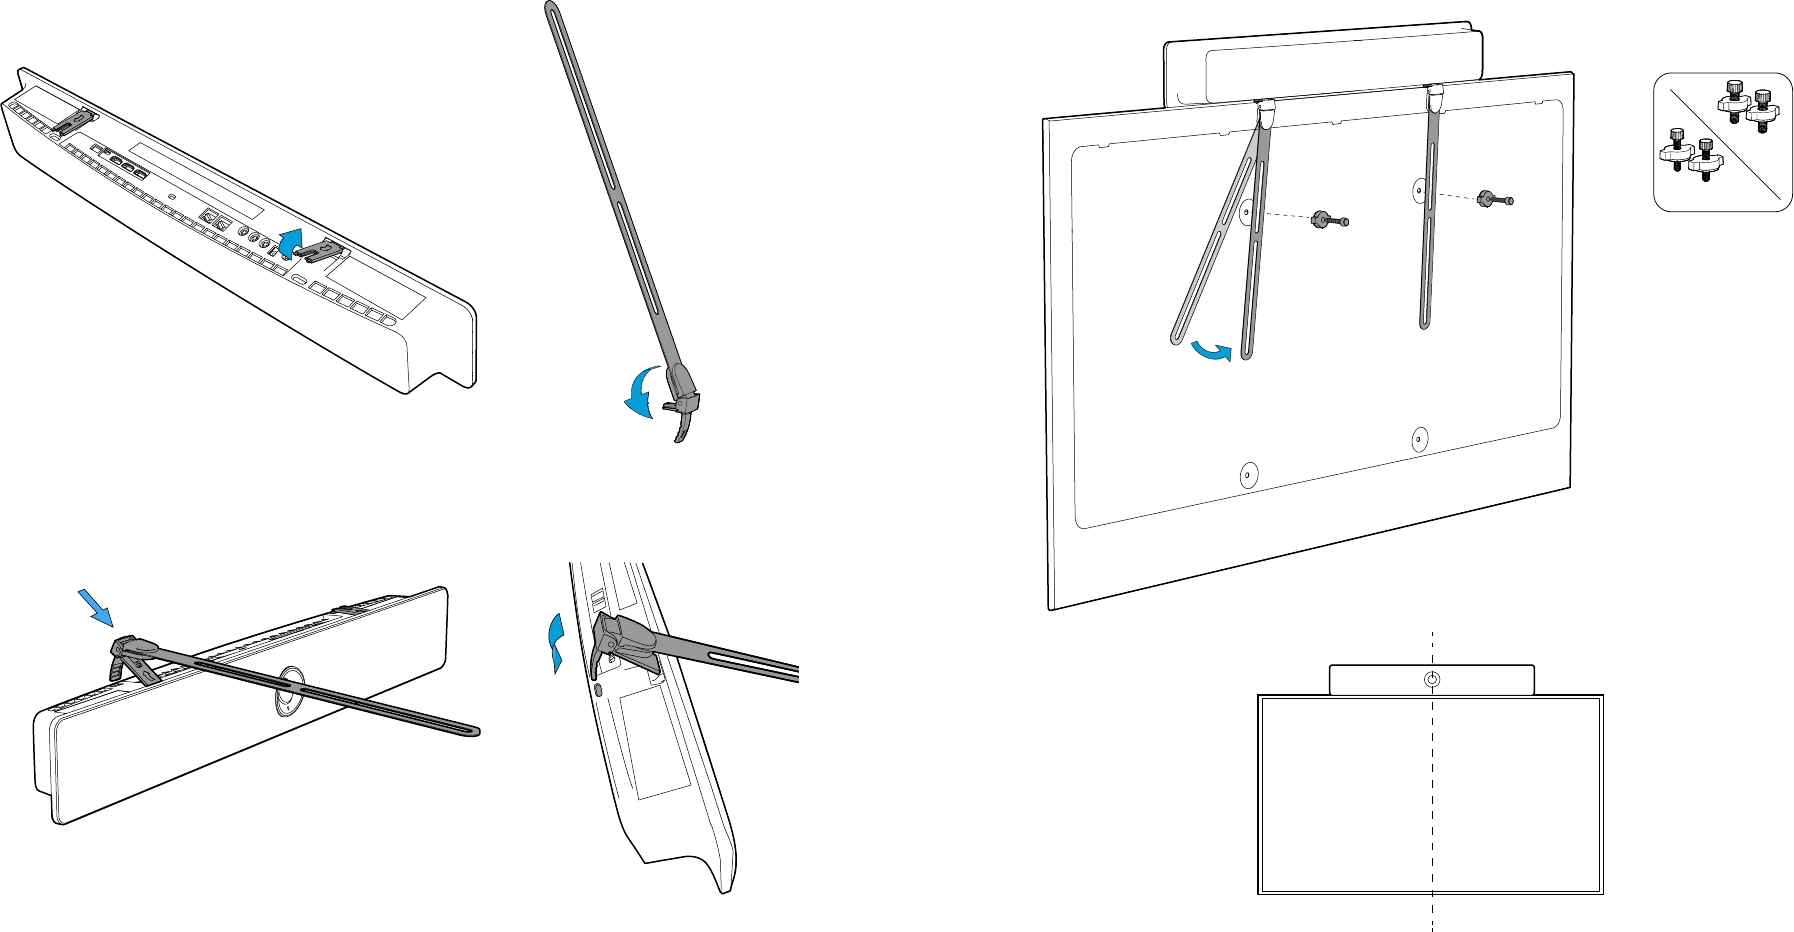
2 a. Set up with screen mount
If you prefer to use the wall mount, go to step 2 b.
Attach the screen mounts to the mediabar Mount the mediabar on the top of the screen
M8
M6

8 9
2 b. Wall mounting
Mount the wall mount bar Attach the wall mount brackets
30 mm / 1.2 inch
Due to the size and mass of this product, it is
important that the wall-mounted system is safely
installed according to these installation instructions.
The wall and mounting hardware must be able to
safely support the product.
The wall-mounted system must be installed by
qualified personnel, in accordance with state and
local building regulations.
Place the mediabar on the wall mount

10 11
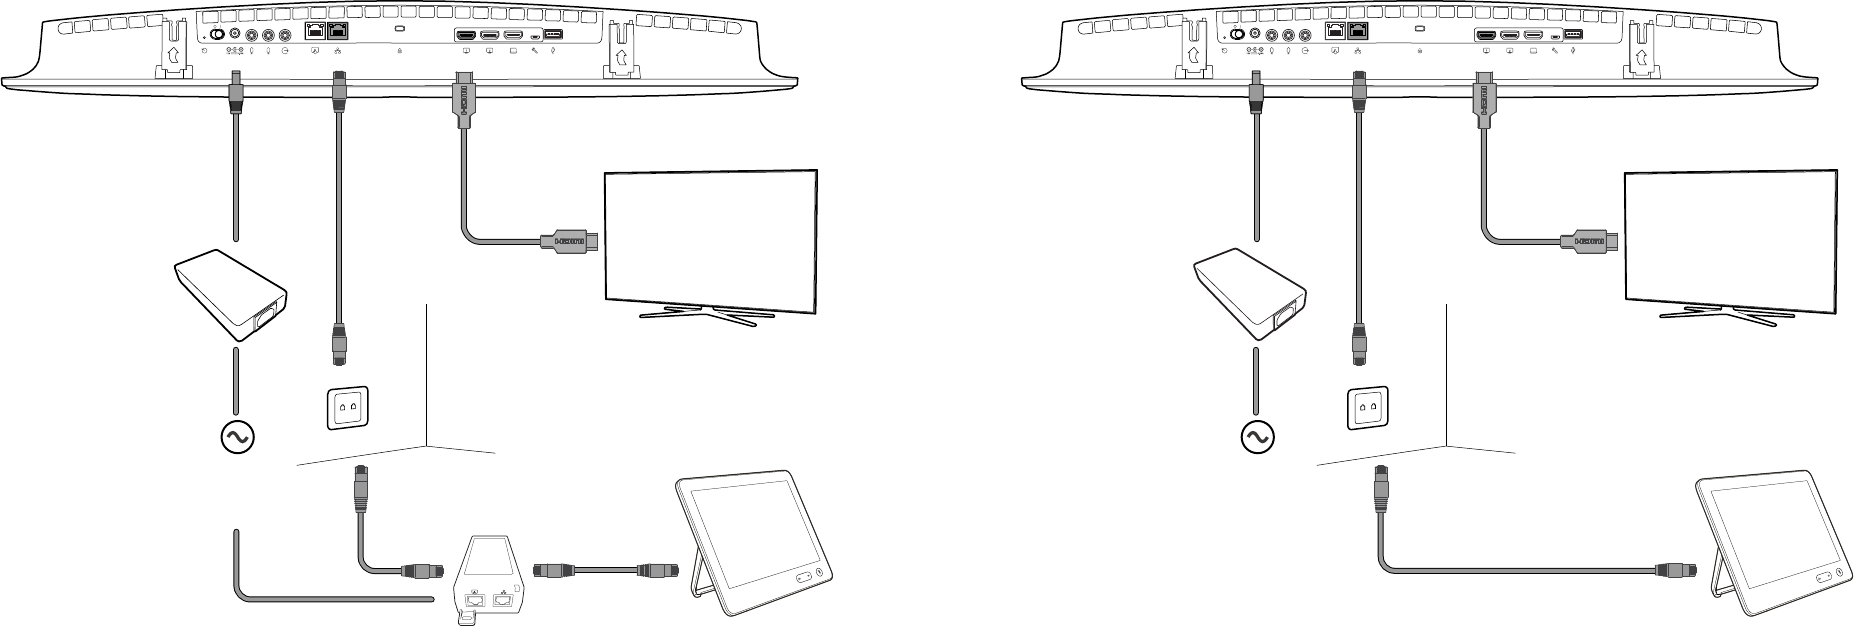
3. Connect the mediabar to the screen,
Touch controller, network, and power
Connect the cables according to the illustration.
Make sure to connect the network cables to
the correct ports, and use the flat network
cable for the Touch controller.
If you wish to connect the Touch controller over
the network, instead of connecting it directly to
the mediabar, see pages 12-13 for instructions.
After you have connected the necessary
cables, follow the on-screen instructions to
setup your device.
If you don’t see the on-screen display, check
that you have selected the HDMI input you
have connect the mediabar to as the input on
your screen.
The system powers up automatically. If the
system doesn’t power up, check the power
switch.
Power
(100-240 VAC, 50/60 Hz)
adapter
HDMI out:
Second
screen
HDMI in:
Content
sharing
Micro-
USB
USB
Kensington
lock
Power
switch
Factory
reset
pinhole
Microphones
3.5 mm
mini-jack
Audio
line out
12 13
Power
(100-240 VAC,
50/60 Hz)
Power
(100-240 VAC,
50/60 Hz)
Alternative:
Connect Touch controller over network
When you connect a Touch controller to the
mediabar over a network, both devices must
be on the same sub network.
If your network provides PoE (Power over
Ethernet), you can connect the Touch 10
directly to a network port.
Alternative:
Connect Touch controller over network with PoE
14 15
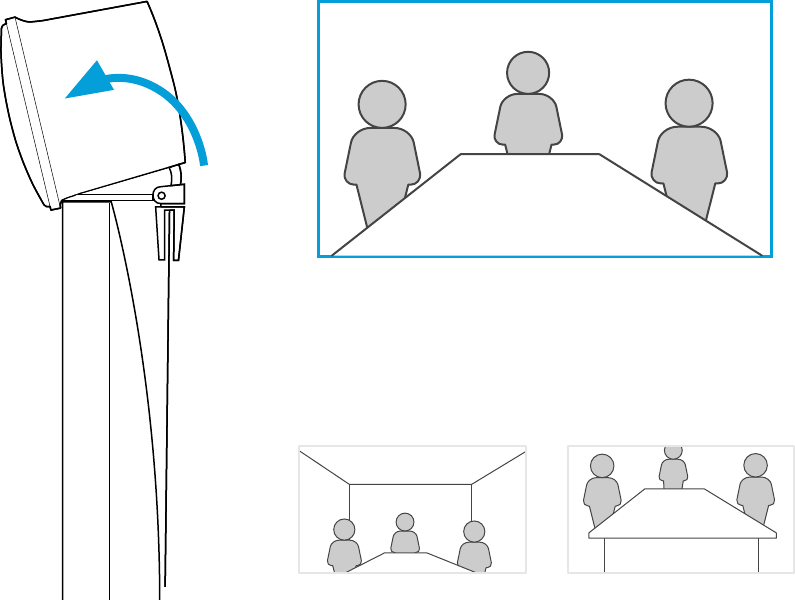
4. Adjust the camera tilt
9
Too high
Correct angle
Adjust the camera tilt angle to optimize the view.
Too low
Support and documentation
Cisco Spark
To find more information about Cisco Spark
registered devices, visit:
help.ciscospark.com
Other services
For user guides and other documentation
when your device is registered to on-premises
services, visit:
www.cisco.com/go/roomkit-docs
Safety information
To find compliance and safety information for
this product, visit:
www.cisco.com/go/roomkit-docs
78-101104-01 A0
MARCH 2017
Cisco Systems Inc.
Corporate Headquarters
170 West Tasman Dr.
San Jose, CA 95134
USA
Cisco has more than 200 offices worldwide. Find an overview of the offices
on the Cisco web site.
http://www.cisco.com/go/offices
Cisco and the Cisco logo are trademarks or registered trademarks of Cisco and/or its affiliates in the U.S. and
other countries. To view a list of Cisco trademarks, go to this URL: www.cisco.com/go/trademarks. Third-
party trademarks mentioned are the property of their respective owners. The use of the word partner does
not imply a partnership relationship between Cisco and any other company. (1110R)
© 2017 Cisco Systems, Inc.
All rights reserved.
78-101104-01A0
Printed in China PRC
