

WELCOME TO MINI.
OWNER'S MANUAL.
Thank you for choosing a MINI.
The more familiar you are with your vehicle, the better control you will have
on the road. We therefore strongly suggest:
Read this Owner's Manual before starting off in your new MINI. Also use the
Integrated Owner's Manual in your vehicle. It contains important notes on
vehicle operation that will help you make full use of the technical features
available in your MINI. The manual also contains information designed to
enhance operating reliability and traffic safety, and to contribute to
maintaining the value of your MINI.
Any updates made after the editorial deadline can be found in the appendix of
the printed Owner's Manual for the vehicle.
Get started now. We wish you driving fun and inspiration with your MINI.
3
Online Edition for Part no. 01405A54505 - II/22

TABLE OF CONTENTS
Navigation, Entertainment and Communication can be called up via the
Integrated Owner's Manual in the vehicle.
NAVIGATION
Overview...................................................................................................................................6
Destination input................................................................................................................... 7
Trip...........................................................................................................................................12
Map...........................................................................................................................................14
Settings................................................................................................................................... 22
Split screen............................................................................................................................ 25
Traffic bulletins....................................................................................................................27
Navigation data.................................................................................................................... 31
Frequently Asked Questions............................................................................................32
ENTERTAINMENT
General information............................................................................................................34
Sound.......................................................................................................................................36
Radio........................................................................................................................................38
Audio....................................................................................................................................... 46
COMMUNICATION
Telephone...............................................................................................................................52
MINI Connected...................................................................................................................63
REFERENCE
Everything from A to Z...................................................................................................... 70
4
Online Edition for Part no. 01405A54505 - II/22

© 2022 Bayerische Motoren Werke
Aktiengesellschaft
Munich, Germany
Reprinting, including excerpts, only with the written consent of BMW AG, Munich.
US English II/22, -
Printed on environmentally friendly paper, bleached without chlorine, suitable for recycling.
5
Online Edition for Part no. 01405A54505 - II/22

Overview
Vehicle features and options
This chapter describes all standard, country-
specific and optional features offered with
the series. It also describes features and
functions that are not necessarily available
in your vehicle, e.g., due to the selected op-
tions or country versions. This also applies
to safety-related functions and systems.
When using these functions and systems,
the applicable laws and regulations must be
observed.
General information
The navigation system can determine the
precise position of the vehicle with the aid
of satellites, and can reliably guide you to
every entered destination.
Navigation data is stored in the vehicle and
can be updated from a USB device.
Safety information
Warning
Operating the integrated information sys-
tems and communication devices while
driving can distract from surrounding traf-
fic. It is possible to lose control of the ve-
hicle. There is a risk of accident. Only use
the systems or devices when the traffic
situation allows. As warranted, stop and
use the systems and devices while the ve-
hicle is stationary.
Warning
There can be deviations between the cur-
rent traffic situation and details of the
navigation instructions, for instance
changed road layout or road construction.
There is a risk of accident. The respec-
tively valid traffic rules take precedence.
Call up the navigation system
1. Depending on the equipment, press the
button on the Controller:
–
–
2. "Navigation"
Seite 6
NAVIGATION Overview
6
Online Edition for Part no. 01405A54505 - II/22

Destination input
Vehicle features and options
This chapter describes all standard, country-
specific and optional features offered with
the series. It also describes features and
functions that are not necessarily available
in your vehicle, e.g., due to the selected op-
tions or country versions. This also applies
to safety-related functions and systems.
When using these functions and systems,
the applicable laws and regulations must be
observed.
Entering a destination via ad-
dress
General information
Destination guidance is started to the town/
city center if no street is entered.
Selecting the state/province
1. "Navigation"
2. "Enter address"
3. "State/Province?"
4. Select the country from the list.
Entering the address
Principle
The address can be entered in any order.
Example: entering the address via the
town/city
1. "City/Postal code?"
2. Enter the town/city.
The list is narrowed down further with
each entry.
3. Select the icon.
4. Tilt the Controller to the right to select
the town/city from the list.
5. If necessary, enter the street.
6. Select the street as you would the town/
city.
7. If necessary, enter a house number.
8. Select the icon.
9. Select a house number or range of house
numbers from the list.
Starting destination guidance
"Start guidance" or Add intermediate desti-
nations, refer to page 12.
Recent destinations
General information
The previous destinations driven to are
stored automatically.
Call up destination from recent
destinations
1. "Navigation"
2. "Recent destinations"
3. Select the destination.
Deleting the recent destinations
1. "Navigation"
2. "Recent destinations"
3. Highlight the destination.
Seite 7
Destination input NAVIGATION
7
Online Edition for Part no. 01405A54505 - II/22

4. Press the button.
5. "Delete destination" or "Delete all recent
destinations"
MINI Cooper SE: last charging
stations
General information
The addresses of the 30 last used charging
stations, for instance at home are automati-
cally stored.
The charging stations can be called up and
used as a destination for destination guid-
ance.
Call up the last charging stations
1. "Navigation"
2. "Enter new destination"
3. "Recent charging stations"
4. Select charging station.
Deleting the last charging stations
1. "Navigation"
2. "Enter new destination"
3. "Recent charging stations"
4. Highlight charging station.
5. Press the button.
6. "Delete charging station" or "Delete all
charging stations"
Quick search
Principle
Depending on the equipment, points of in-
terest and addresses can be searched for by
entering a sequence of letters or by search-
ing in the navigation data stored in the ve-
hicle.
All entries are displayed that include this
text string.
General information
It is possible to search simultaneously by
town/city and street. To do this, enter a text
string for the town/city, then a blank space
and a text string for the street name.
Call up quick search
1. "Navigation"
2. "Enter new destination"
3. "Quick search"
4. Enter at least three letters or characters.
5. Select the icon, if needed.
Results are displayed in a list.
For vehicles with charging socket:
charging station display, refer to
page 11.
6. Tilt the Controller to the right.
7. Select desired destination.
Destination input by voice
General information
– Instructions for the voice activation sys-
tem, see vehicle Owner's Manual.
– When making a destination input by
voice, you can change between voice
control and operation via Central Infor-
mation Display (CID).
– To have the available voice commands
read out loud: ›Voice
commands‹ or ›Help‹.
Seite 8
NAVIGATION Destination input
8
Online Edition for Part no. 01405A54505 - II/22

Saying the entries
– Complete addresses can be spoken as a
single command, or countries, towns/
cities, streets and intersections can be
spoken as whole words. The language of
the system must be set to the language
of the destination country.
– Addresses can be spelled, even when the
configured language of the system is dif-
ferent.
Say the letters smoothly, and avoid ex-
aggerating the pronunciation and insert-
ing lengthy pauses between the letters.
– You can search for points of interest for
the navigation online in natural lan-
guage, such as with a question for spe-
cific restaurants nearby.
– The options available for entering data
depend on the navigation data and the
country and language settings.
Entering an address in a command
1. Press the button on the steer-
ing wheel.
2. ›Enter destination‹
3. Wait for a request from the voice activa-
tion system.
4. Say the address in the suggested order.
5. Continue making the entry as prompted
by the voice activation system.
If necessary, individually name the separate
parts of the address, for instance the town/
city.
Home address
General information
The home address must be stored.
Accept home address as
destination
1. "Navigation"
2. "Enter new destination"
3. "Home address"
Defining the home address
1. "Navigation"
2. "Enter new destination"
3. "Set home address"
4. Enter the address and possibly a name
and further details.
Changing the home address
The home address is stored in the contacts
and can be changed there. Edit contacts, re-
fer to page 55.
Charging stations and points
of interest
General information
Points of interest are destinations that can
be helpful while driving. Points of interest
such as restaurants, hotels, filling stations,
or charging stations, can be added as desti-
nations. Even with the most current naviga-
tion data, information regarding particular
points of interest may have changed. For in-
stance, certain filling stations may not be
operating.
Find points of interest
Call up points of interest
1. "Navigation"
2. "Enter new destination"
3. "Points of Interest"
4. Select the desired setting:
Seite 9
Destination input NAVIGATION
9
Online Edition for Part no. 01405A54505 - II/22

– "Keyword search" or "Category
search": search for points of interest
in the navigation data stored in the
vehicle.
– Search via preferred points of inter-
est categories.
Keyword search
1. "Keyword search"
2. Enter a search term.
3. Select the icon.
Points of interest at the current location
are searched for.
A list of the points of interest is dis-
played.
The points of interest are sorted by dis-
tance.
For vehicles with charging socket:
charging station display, refer to
page 11.
4. "Change location and sorting": the
search can be adjusted, if needed.
– "Location": change search area.
– "Sort by": change sorting.
5. Select a point of interest.
Details are displayed.
6. Select the address.
7. If necessary, "Start guidance"
Category search
1. "Category search"
2. "All categories" or select the desired
points of interest category.
Points of interest at the current location
are searched for.
3. A list of the points of interest is dis-
played.
The points of interest are sorted by dis-
tance.
For vehicles with charging socket:
charging station display, refer to
page 11.
4. "Change location and filter criteria": ad-
just the search criteria if needed:
– "Location": change search area.
– "Sort by": change sorting.
– If necessary, select category details.
– "Keyword": narrow down the list via
a keyword search.
5. "Show results"
6. Select a point of interest.
Details are displayed.
7. Select the address.
8. If necessary, "Start guidance"
Preferred points of interest categories
The points of interest categories that have
been search for the most are displayed.
Select a preferred points of interest cate-
gory to search for points of interest in the
desired category at your current location.
Displaying points of interest on the
map
Principle
The points of interest categories can be dis-
played on the map as icons.
Selecting categories
1. "Navigation"
2. "Settings"
3. "Map elements"
4. "Points of Interest"
5. Select the desired setting.
The display in the toolbar of the map view,
refer to page 20, can be switched on and
off.
Seite 10
NAVIGATION Destination input
10
Online Edition for Part no. 01405A54505 - II/22

For vehicles with charging socket:
charging station display
General information
Depending on the equipment, different
icons indicate charging stations in the map
view:
– AC charging stations.
– DC charging stations, where AC
charging may also be possible.
– Public MINI Charging stations, use
with valid contract with the MINI
Charging Card or MINI Charging app.
Selecting a destination from
the contacts
1. "Navigation"
2. "Enter new destination"
3. "Contacts"
Contacts with addresses are displayed if
these have been checked as destinations
from among the Contacts. Check the ad-
dress as a destination, refer to
page 55.
4. Select a contact.
5. Select the address.
6. "Start guidance"
Destination input using Global
Positioning System coordi-
nates
Principle
Destinations can be entered directly using
Global Positioning System coordinates.
General information
Enter the coordinates in degrees, minutes
and seconds or as decimal values.
Call up
1. "Navigation"
2. "Enter new destination"
3. "GPS coordinates"
4. "Format"
– "Degrees Minutes Seconds"
– "Decimal"
5. "Longitude" or "Latitude"
6. Turn the Controller until the desired de-
gree indication and point of the compass
are displayed.
7. Press the Controller.
8. Enter the values for minutes and sec-
onds and direction, if needed.
9. "Accept destination"
Destination input via Con-
cierge service
General information
Depending on the equipment, the service
provides information about hotels and res-
taurants, for instance. Addresses can be
transmitted directly to the navigation sys-
tem.
Call Concierge Service
1. "Navigation"
2. "Enter new destination"
3. "Concierge"
A voice connection to the Concierge
service is established.
Seite 11
Destination input NAVIGATION
11
Online Edition for Part no. 01405A54505 - II/22

Trip
Vehicle features and options
This chapter describes all standard, country-
specific and optional features offered with
the series. It also describes features and
functions that are not necessarily available
in your vehicle, e.g., due to the selected op-
tions or country versions. This also applies
to safety-related functions and systems.
When using these functions and systems,
the applicable laws and regulations must be
observed.
General information
When planning a trip, several intermediate
destinations can be entered.
New trip
1. "Navigation"
2. "Map"
3. Tilt the Controller to the left, if needed.
4. "Guidance"
5. "Enter new destination"
6. Select the type of destination input.
7. Select a single destination.
8. Enter an intermediate destination.
9. "Start guidance"
Intermediate destinations
General information
Before entering an intermediate destina-
tion, an individual destination must be set.
A maximum of 30 intermediate destina-
tions can be entered for one trip.
Entering an intermediate
destination
1. "Navigation"
2. "Add intermediate destination"
3. Select the type of destination input.
4. Enter an intermediate destination.
Alternatively, the intermediate destination
can also be entered using the map:
1. "Navigation"
2. "Map"
3. Tilt the Controller to the left.
4. "Guidance"
5. "Add intermediate destination"
6. Select the type of destination input.
7. Enter an intermediate destination.
The intermediate destination is entered in
the destination list and is highlighted.
Adjusting the intermediate
destinations
1. "Navigation"
2. "Map"
3. Tilt the Controller to the left.
4. "Guidance"
5. Select the intermediate destination.
6. Select the desired setting:
Seite 12
NAVIGATION Trip
12
Online Edition for Part no. 01405A54505 - II/22

– "Skip destination": skip the current
intermediate destination.
– "Start guidance": start destination
guidance to the intermediate desti-
nation.
– "Change order": shift the intermedi-
ate destination within the list.
– "Delete destination": delete the inter-
mediate destination.
Seite 13
Trip NAVIGATION
13
Online Edition for Part no. 01405A54505 - II/22

Map
Vehicle features and options
This chapter describes all standard, country-
specific and optional features offered with
the series. It also describes features and
functions that are not necessarily available
in your vehicle, e.g., due to the selected op-
tions or country versions. This also applies
to safety-related functions and systems.
When using these functions and systems,
the applicable laws and regulations must be
observed.
Call up the map
1. "Navigation"
2. "Map"
The map can also be accessed directly
with the button on the Controller.
Overview
General information
The map can be used via the Central Infor-
mation Display (CID).
Basic entry explanation, refer to the Own-
er's Manual for the vehicle.
Map view
1 Toolbar
2 Route section with traffic obstruction
3 Traffic sign for traffic obstruction
4 Planned route
5 Current location
6 Status field
7 If equipped with touchscreen: display
current location
Toolbar
Icon Function
Start/end destination guid-
ance.
MINI Cooper SE: when the
icon is yellow or red, the
range is hardly sufficient or
insufficient. Range assis-
tant, refer to page 15.
Change current route.
Turn voice guidance on and
off.
Traffic bulletins.
Status of the traffic bulle-
tins.
Seite 14
NAVIGATION Map
14
Online Edition for Part no. 01405A54505 - II/22

Icon Function
Detour available.
Display additional informa-
tion on map.
Select the map view.
Interactive map.
To change to the toolbar, tilt the Controller
to the left.
Status field
The following information is displayed:
– Icon for active destination guidance.
– Arrival time and distance to destination.
– If necessary, time delay due to traffic
obstructions.
Lines in the map
Streets and routes are displayed in different
colors and line styles depending on their
classification.
– Dashed lines: railways and ferry connec-
tions
– Thin lines: country borders.
Traffic obstructions
If traffic bulletins of a radio station or a
traffic information service are received,
traffic obstructions can be displayed on the
map.
Destination guidance
Starting
1. "Navigation"
2. Enter the destination, refer to page 7.
3. "Start guidance"
After the route has been started, a message
is displayed with the most important set
route preference.
End
1. "Navigation"
2. "Map"
3. Tilt the Controller to the left.
4. Select the icon.
5. "Stop guidance"
MINI Cooper SE: Range Assistant
Principle
A check is made of whether an entered des-
tination can be reached with the current
state of charge of the vehicle.
General information
The range to a charging station that has al-
ready been used, such as home, can be
monitored, refer to page 23.
Range recommendations
General information
If the electrical range is not sufficient, vari-
ous recommendations to help increase the
range are displayed automatically.
– "Mode and route: GREEN": accept effi-
cient route.
– "Mode: GREEN +": switch to GREEN +.
– "Charging station search": search for
charging stations along the route or in
the vicinity, if applicable.
GREEN Route
An efficient variant of the route can be cal-
culated and applied in the destination guid-
ance. The new route is displayed in the map
view and continued in the destination guid-
Seite 15
Map NAVIGATION
15
Online Edition for Part no. 01405A54505 - II/22

ance. Arrival time and consumption are
based on driving in GREEN.
1. "Mode and route: GREEN"
GREEN +
The range can be increased by changing to
GREEN +.
1. "Mode: GREEN +"
2. Activate GREEN + with MINI Driving
Modes switch.
Search charging stations
Charging stations along the route are
searched and can be applied as destinations
in the destination guidance or as intermedi-
ate destinations.
1. "Charging station search"
2. Select desired charging station.
Manually displaying range
recommendations
When the icon in the map toolbar is yel-
low or red, the recommendations for in-
creasing the range can be displayed man-
ually.
1. "Navigation"
2. "Map"
3. Tilt the Controller to the left, if needed.
4. "Guidance"
5. "Range insufficient."
Storing the current destination as
contact
Principle
After a destination input, it can be stored in
the contacts.
Storing
1. "Navigation"
2. "Map"
3. Tilt the Controller to the left.
4. "Guidance"
5. Select the destination.
6. Press the button.
7. "Save as new contact" or "Add to
contact"
8. Select an existing contact, if available.
9. Enter name and, if necessary, additional
details.
10. "Save contact in the vehicle"
Changing the route details
Route preference
General information
The route calculated can be influenced by
selecting certain criteria. The recommended
route may differ from the route you would
take based on personal experience.
Standard settings for route preference
The route preference can be individually ad-
justed. The settings are stored as standard
and automatically applied to new destina-
tion guidances.
Default settings for route, refer to
page 22.
With destination guidance active:
changing route preference in the map
view
1. "Navigation"
2. "Map"
3. Tilt the Controller to the left.
Seite 16
NAVIGATION Map
16
Online Edition for Part no. 01405A54505 - II/22
4. "Route"
5. Select the desired setting.
6. If necessary, select general routine pref-
erence: "General route settings"
Alternative routes
Principle
If possible, alternative routes are suggested
during active destination guidance.
Displaying alternative routes
1. "Navigation"
2. "Map"
3. Tilt the Controller to the left.
4. "Route"
An overview showing the current route
and the suggested alternative routes is
displayed. In addition, details such as
travel time and route length, and infor-
mation about consumption for the alter-
native routes compared to the current
route may be displayed, if required.
The routes are shown in color on the
split screen.
5. Select an alternative route in order to
accept it in the destination guidance.
Route details
Principle
During destination guidance, more detailed
information about the current route can be
displayed and the route details can be ad-
justed.
General information
Depending on the equipment, different
views are available to display the route de-
tails during destination guidance:
– List of route sections.
– Map view, refer to page 14.
– Route guidance information on the map,
refer to page 20.
– Arrow view in the split screen, refer to
page 25.
– Arrow view in the instrument cluster.
List of route sections
Principle
When destination guidance is activated, a
list of route sections can be displayed.
General information
The distance to be driven per route section
is displayed. If needed, gas station or charg-
ing recommendations are displayed as well.
Displays
1. "Navigation"
2. "Map"
3. Tilt the Controller to the left.
4. "Route"
5. "Route details"
6. Highlight route section.
The route section is displayed on the
split screen.
Bypassing a section of the route
Principle
A new route can be calculated for a route
section.
Adjusting a detour
1. "Navigation"
2. "Map"
3. Tilt the Controller to the left.
4. "Route"
Seite 17
Map NAVIGATION
17
Online Edition for Part no. 01405A54505 - II/22

5. "Change route"
6. "Detour:"
7. Turn Controller until the desired dis-
tance before returning to the original
route is displayed.
8. Press the Controller.
Cancel detour
1. "Navigation"
2. "Map"
3. Tilt the Controller to the left.
4. "Route"
5. "Change route"
6. "Delete detour"
Vehicles with combustion engine: gas
station recommendation
Principle
The remaining range is calculated, and if
needed, filling stations along the route are
displayed.
General information
Even with the most current navigation data,
information regarding individual filling sta-
tions may have changed. For instance, cer-
tain filling stations may not be operating.
Gas station recommendations are displayed
in the list of route sections.
Call up
1. "Navigation"
2. "Map"
3. Tilt the Controller to the left.
4. "Route"
5. "Route details"
6. "Refuel"
A list of filling stations is displayed.
7. Highlight a filling station.
The position of the filling station is dis-
played on the split screen.
8. Select the filling station.
9. Select the icon.
10. "Start guidance"
MINI Cooper SE: charging
recommendation
Principle
When destination guidance is active, the re-
maining range is calculated and, if needed,
charging stations along the route are dis-
played.
General information
Even with the most current navigation data,
information regarding individual charging
stations may have changed. For instance,
certain charging stations may not be operat-
ing.
Charging recommendations are displayed in
the list of route sections.
Call up
1. "Navigation"
2. "Map"
3. Tilt the Controller to the left.
4.
5. "Route details"
6. "Charging"
A list of the charging stations is dis-
played.
7. Highlight charging station.
The position of the charging station is
displayed on the split screen.
8. Select charging station.
9. Select the icon.
10. "Start guidance"
Seite 18
NAVIGATION Map
18
Online Edition for Part no. 01405A54505 - II/22

Changing the route details
Principle
With active destination guidance, the route
displayed on the map can be adjusted man-
ually. To do this, use a marking point on the
route, the 'route magnet,' to drag the route
in the desired direction.
Setting a route magnet
1. "Navigation"
2. "Map"
3. Tilt the Controller to the left.
4. "Route"
5. "Change route"
6. "Add route magnet"
7. As with the interactive map, drag route
magnet to the desired location using the
Controller:
– To change the scale: turn the Con-
troller.
– To shift the map: tilt the Controller
in the required direction.
– To shift the map diagonally: tilt the
Controller in the required direction
and turn it.
8. Press the Controller.
9. "Accept magnet"
Editing a route magnet
1. "Navigation"
2. "Map"
3. Tilt the Controller to the left.
4. "Route"
5. "Change route"
6. Select the desired setting:
– "Modify route magnet": modify
changed route once more.
– "Remove route magnet": the original
route is restored.
Voice guidance
Turning on/off
The setting is stored for the driver profile
currently used.
1. "Navigation"
2. "Map"
3. Tilt the Controller to the left.
4. "Voice instructions"
Repeat
1. "Navigation"
2. "Map"
3. Press the Controller.
4. "Repeat voice instruction"
Using the button:
Press the button twice.
Volume
Turn the volume button during the voice
guidance until the desired volume is set.
Storing on the programmable
memory buttons
The function for turning the voice guidance
on/off can be stored on a programmable
memory button for fast access.
Seite 19
Map NAVIGATION
19
Online Edition for Part no. 01405A54505 - II/22

Displaying additional infor-
mation on the map
1. "Navigation"
2. "Map"
3. Tilt the Controller to the left.
4. "Map content"
5. Select the desired setting:
– "Points of Interest": icons for
points of interest are displayed.
– "Traffic flow": lines for traffic
flow are displayed.
Information about traffic flow in the
map view, refer to page 29.
– "Traffic icons": icons for traffic
bulletins are displayed.
– "Weather": display weather
symbols on the map.
– MINI Cooper SE:
"Electric range (2D)": the ranges
with the current and most economi-
cal program of the MINI Driving
Modes switch based on the GREEN
Route are displayed as colored lines
on the map. If a preferred charging
station has been specified, it is also
displayed on the map. Specifying a
preferred charging station, refer to
page 23.
Map view
Principle
The map view can be displayed in different
perspectives, such as facing north or facing
the direction of travel.
General information
The scale of the map can be enlarged or re-
duced.
Further settings for map, refer to page 23.
Selecting a map view
1. "Navigation"
2. "Map"
3. Tilt the Controller to the left.
4. "Map views"
5. Select the desired setting:
– "Facing north"
– "Direction of travel"
– "Perspective"
– "Auto zoom": with active destina-
tion guidance, the map is enlarged
automatically when approaching a
maneuver.
– "Auto zoom with info": with ac-
tive destination guidance, the map is
enlarged automatically when ap-
proaching a maneuver. In addition,
route guidance information is dis-
played on the map.
– "Manual zoom": enlarge or re-
duce map scale manually.
– "Route overview": display the
distance between current location
and the destination.
Destination guidance hints
Principle
If route guidance is active, route guidance
information can be displayed in the map
view for the respective maneuvering points
of the current route.
Seite 20
NAVIGATION Map
20
Online Edition for Part no. 01405A54505 - II/22

General information
In the case of multi-lane roads, lane infor-
mation may indicate the recommended
lanes.
Route guidance information can also be dis-
played as arrow view in the split screen, re-
fer to page 25.
Display
Functions in the map view
General information
Different information can be called up for
any point on the map and settings can be
adjusted.
Here, the map can be used via the Central
Information Display (CID).
Operating via the Controller
1. "Navigation"
2. "Map"
3. Tilt the Controller to the left.
4. "Interactive map"
5. Select the destination with cross-hairs.
– To change the scale: turn the Con-
troller.
– To shift the map: tilt the Controller
in the required direction.
– To shift the map diagonally: tilt the
Controller in the required direction
and turn it.
6. Press the Controller.
7. Select the desired setting.
Functions
Different functions are available depending
on the point selected on the map:
– "Repeat voice instruction"
With destination guidance active.
– "Start guidance": start destination
guidance.
– "Add as intermediate dest.": add des-
tination.
– "Show details": details about the des-
tination can be displayed as necessary.
– "Show details": if the cross-hairs are
positioned over a place with multiple
points of interest, these destinations
will be displayed in a list.
– "Leave interactive map": with opera-
tion via Controller: end interactive map.
– If equipped with touchscreen:
"Back to current location": change to
normal map view.
– "Show destination": map section
around the destination is displayed.
– "Save position": store current posi-
tion as contact.
– "Change map view":
change the map view.
Seite 21
Map NAVIGATION
21
Online Edition for Part no. 01405A54505 - II/22

Settings
Vehicle features and options
This chapter describes all standard, country-
specific and optional features offered with
the series. It also describes features and
functions that are not necessarily available
in your vehicle, e.g., due to the selected op-
tions or country versions. This also applies
to safety-related functions and systems.
When using these functions and systems,
the applicable laws and regulations must be
observed.
General information
Navigation settings can be individually con-
figured. Settings are stored for the driver
profile currently used.
Route
Principle
The route preference can be individually ad-
justed. The settings are stored as standard
and automatically applied to new destina-
tion guidances.
Default preference
1. "Navigation"
2. "Settings"
3. "Route settings"
4. "Default preference"
5. Select the desired setting:
– "Fast": time-optimized route, being a
combination of the shortest possible
distance and the fastest distances.
– "Short": distance-optimized route, be-
ing a combination of the shortest
possible distance and the fastest dis-
tances.
– "GREEN" or "Efficient": efficient
route, being a combination of the
route requiring low consumption
and fast distances.
Arrival time and consumption are
based on driving in GREEN Mode.
Further criteria
1. "Navigation"
2. "Settings"
3. "Route settings"
4. Select the desired setting:
– Settings for dynamic destination
guidance:
– "Automatic": traffic bulletins are
considered in destination guid-
ance. The current route is auto-
matically changed as needed.
– "With confirmation": when suita-
ble detours are available, a mes-
sage is displayed first.
– "Toll roads"
– "Avoid"
– "Use cash"
– "Toll tag"
– "Avoid highways": highways are
avoided wherever possible.
Seite 22
NAVIGATION Settings
22
Online Edition for Part no. 01405A54505 - II/22

– "Avoid ferries": ferries are avoided
where possible.
– "Avoid carpool roads": carpool lanes
are avoided where possible.
Map
Principle
The map view can be individually adjusted,
for instance the map color and mode can be
set. It can also be defined, which points of
interest are shown on the map.
Adjusting the map
1. "Navigation"
2. "Settings"
3. Select the desired setting.
Home address
Principle
The home address can be specified or
changed.
Adjusting the home address
1. "Navigation"
2. "Settings"
3. "Set home address" or "Change home
address"
MINI Cooper SE: monitoring
charging stations
Principle
The range to a charging station that has al-
ready been used, such as home, can be
monitored. For this purpose, the respective
charging station must be set as a preferred
charging station.
General information
When destination guidance is activated, the
range to the destination and to the specified
charging station is monitored. First, the
range to the destination is monitored and
recommendations for increasing the range
are displayed if applicable. The range to the
specified charging station is then checked.
Specifying a preferred charging
station
1. "Navigation"
2. "Settings"
3. "Range monitoring"
4. "Set preferred charging station"
5. Select desired charging station.
Display
The preferred charging station is displayed
together with the range on the range map,
refer to page 20.
Color Meaning
Green Charging station within
range.
Yellow Charging station just within
range.
Red Charging station not within
range.
White Route not yet calculated.
Seite 23
Settings NAVIGATION
23
Online Edition for Part no. 01405A54505 - II/22

Activate/deactivate charging
station monitoring
Range monitoring can only be activated or
deactivated when a preferred charging sta-
tion has been set.
1. "Navigation"
2. "Settings"
3. "Range monitoring"
4. "Monitoring"
Deleting a preferred charging
station
1. "Navigation"
2. "Settings"
3. "Range monitoring"
4. "Remove preferred charging station"
Navigation data
Principle
Information regarding position determina-
tion and navigation data version can be
called up.
Adjusting
1. "Navigation"
2. "Settings"
3. "Position and software version"
4. Select the desired setting:
– "Enter position": the vehicle position
can be manually set on the map in
situations without GPS reception or,
for instance immediately after trans-
port on a ferry.
– "Software version": information
about the current map version.
Resetting the settings
1. "Navigation"
2. "Settings"
3. Press the button.
4. "Reset all settings"
Seite 24
NAVIGATION Settings
24
Online Edition for Part no. 01405A54505 - II/22

Split screen
Vehicle features and options
This chapter describes all standard, country-
specific and optional features offered with
the series. It also describes features and
functions that are not necessarily available
in your vehicle, e.g., due to the selected op-
tions or country versions. This also applies
to safety-related functions and systems.
When using these functions and systems,
the applicable laws and regulations must be
observed.
Principle
When equipped accordingly, additional in-
formation can be displayed in several me-
nus on the right side of the screen display,
referred to as the split screen. Different
views can be set for the split screen sepa-
rately from the main screen.
Adjusting
1. Tilt the Controller to the right until the
split screen is selected.
2. Press the Controller.
3. Select the desired setting:
– "Map": adjust the map view.
– "Arrow display": with destination
guidance active, the arrow view is
displayed. A compass is displayed
when the destination guidance is in-
active.
– "Position": display current position.
– "Exit ramp view": selected route sec-
tions, for instance major road inter-
sections, are shown in perspective
view.
Arrow view
Principle
If route guidance is active, the route guid-
ance information can be displayed as list in
the split screen.
General information
It is possible to set which additional infor-
mation should be displayed in the arrow
view.
In the case of multi-lane roads, lane infor-
mation may indicate the recommended
lanes.
Adjusting
1. Tilt the Controller to the right until the
split screen is selected.
2. Press the Controller.
3. "Arrow display"
4. Select the desired setting:
– "Traffic Info": display traffic flow and
traffic events.
– "Additional information": display ad-
ditional information such as tunnels.
Display
The following information is displayed dur-
ing destination guidance:
Seite 25
Split screen NAVIGATION
25
Online Edition for Part no. 01405A54505 - II/22

1 Turn information
2 Traffic flow and traffic events
3 Upcoming street
4 Distance to maneuver
5 Lane information
6 Current street
Depending on the country-specific version,
the display may deviate from what is de-
picted.
Seite 26
NAVIGATION Split screen
26
Online Edition for Part no. 01405A54505 - II/22

Traffic bulletins
Vehicle features and options
This chapter describes all standard, country-
specific and optional features offered with
the series. It also describes features and
functions that are not necessarily available
in your vehicle, e.g., due to the selected op-
tions or country versions. This also applies
to safety-related functions and systems.
When using these functions and systems,
the applicable laws and regulations must be
observed.
General information
Traffic bulletins from traffic warning serv-
ices or radio stations that broadcast Traffic
Information can be displayed in the map
view and taken into account when calculat-
ing routes. Information on traffic obstruc-
tions and dangers is updated continuously
in this system.
The traffic bulletins are indicated on the
map by icons.
In the event of special dangers, for instance
objects on the road, a message is displayed.
Several hazard messages are also displayed
in the instrument cluster as a Check Control
message.
Certain MINI models equipped with naviga-
tion have the capability to display traffic in-
formation. If your system has this capabil-
ity, the following additional terms and
conditions apply:
An End-User shall no longer have the right
to use the traffic information in the event
that the End-User is in material breach of
the terms and conditions contained herein.
MINI or its third party providers hold the
rights to the traffic data. You may not mod-
ify, copy, scan or use any other method to
reproduce, duplicate, republish, transmit or
distribute in any way any portion of traffic
data.
The traffic data is for informational purpose
only. Users assume all risk of use. MINI NA
and its service providers make no represen-
tations about content, traffic and road con-
ditions, route usability, or speed.
THE TRAFFIC DATA IS PROVIDED TO
YOU "AS IS," AND "WHERE IS". MINI NA
AND ALL THIRD PARTY PROVIDERS OF
ANY OF THE TRAFFIC DATA, EXPRESSLY
DISCLAIMS, TO THE FULLEST EXTENT
PERMITTED BY LAW, ALL EXPRESS, IM-
PLIED OR STATUTORY WARRANTIES OR
REPRESENTATIONS WITH RESPECT TO
THE TRAFFIC DATA (INCLUDING, WITH-
OUT LIMITATION, THAT THE TRAFFIC
DATA WILL BE ERROR-FREE, WILL OP-
ERATE WITHOUT INTERRUPTION OR
THAT THE TRAFFIC DATA WILL BE AC-
CURATE), INCLUDING, WITHOUT LIMITA-
TION, THE IMPLIED WARRANTIES OF
MERCHANTABILITY, NON-INFRINGE-
MENT FITNESS FOR A PARTICULAR PUR-
POSE, OR THOSE ARISING FROM A
COURSE OF DEALING OR USAGE OF
TRADE
NEITHER MINI NA NOR ITS THIRD PARTY
PROVIDERS WILL BE LIABLE TO YOU
FOR ANY INDIRECT, SPECIAL, CONSE-
QUENTIAL, EXEMPLARY, OR INCIDENTAL
DAMAGES (INCLUDING, WITHOUT LIMI-
TATION, LOST REVENUES, ANTICIPATED
REVENUES, OR PROFITS RELATING TO
THE SAME) ARISING FROM ANY CLAIM
RELATING DIRECTLY OR INDIRECTLY TO
USE OF THE TRAFFIC DATA, AND EVEN
IF MINI NA OR ITS THIRD PARTY PRO-
Seite 27
Traffic bulletins NAVIGATION
27
Online Edition for Part no. 01405A54505 - II/22

VIDERS ARE AWARE OF THE POSSIBIL-
ITY OF SUCH DAMAGES. THESE LIMITA-
TIONS APPLY TO ALL CLAIMS,
INCLUDING, WITHOUT LIMITATION,
CLAIMS IN CONTRACT AND TORT (SUCH
AS NEGLIGENCE, PRODUCT LIABILITY
AND STRICT LIABILITY). SOME STATES
DO NOT ALLOW THE EXCLUSION OR LIM-
ITATION OF INCIDENTAL OR CONSE-
QUENTIAL DAMAGES, SO THOSE PARTIC-
ULAR LIMITATIONS MAY NOT APPLY TO
YOU.
Display in the toolbar of the
map view
Icon Function
Yellow icon:
The traffic bulletins relate to the
calculated route and the antici-
pated delay is less than 20 mi-
nutes.
Red icon:
The anticipated delay is more
than 20 minutes, or there is a
road block or hazard warning for
the route.
Gray icon:
No traffic bulletins are available
or the anticipated delay is less
than 5 minutes.
A suitable detour is available for
the traffic bulletins.
The Advanced Real-time traf-
fic information
In some countries, Advanced Real Time
Traffic Information is transmitted.
Advanced Real Time Traffic Information is
then used and displayed instead of the traf-
fic bulletins from the radio stations.
Advanced Real Time Traffic Information is
used to locate traffic obstructions more
comprehensively and precisely. Traffic con-
ditions on roads other than the highways,
for instance secondary roads and urban
streets are also recorded and displayed for a
wide area. Recommended detours can be
calculated more accurately on the basis of
this information. The risk of becoming
caught in a further traffic obstruction on
detour routes is reduced. If applicable, sev-
eral detour recommendations or additional
information may be offered.
When traveling in countries where Ad-
vanced Real Time Traffic Information is not
available, the traffic bulletins from the radio
stations are still used, if possible.
The toolbar in the map view, refer to
page 14, shows whether Traffic Informa-
tion or Advanced Real Time Traffic Informa-
tion is being used.
Turning on/off
1. "Navigation"
2. "Settings"
3. "Receive Traffic Info"
Displaying list of traffic bulle-
tins
1. "Navigation"
2. "Map"
3. Tilt the Controller to the left.
4. "Traffic Info"
Seite 28
NAVIGATION Traffic bulletins
28
Online Edition for Part no. 01405A54505 - II/22

With active destination guidance, first
the traffic bulletins for the calculated
route are displayed with red symbols.
Then, the traffic bulletins that do not af-
fect the route are shown with gray sym-
bols. The traffic bulletins are sorted by
their distance from the current position
of the vehicle.
5. Select a traffic bulletin.
– "Previous message": browse to the
previous traffic bulletin.
– "Next message": browse to the next
traffic bulletin.
Displaying detour recommen-
dation
1. "Navigation"
2. "Map"
3. Tilt the Controller to the left.
4. "Traffic Info"
5. "Detour": a detour recommendation is
displayed.
The following functions are available:
– "Current route": stay on current
route.
– "New route in": accept detour.
Traffic bulletins on the map
Adjusting map view
1. "Navigation"
2. "Map"
3. Tilt the Controller to the left.
4. "Map content"
– "Traffic icons": symbols for traf-
fic events are displayed.
– "Traffic flow": lines for traffic
flow are displayed.
Icons in the map view
Depending on the scale of the map and the
location of the traffic obstruction, the icons
for traffic events are displayed.
Information about traffic flow in
the map view
Depending on the scale of the map, length
and impact of a traffic obstruction are dis-
played on the map using colored lines.
– Black: road blocked.
– Red: traffic jam.
– Orange: stop-and-go traffic.
– Yellow: heavy traffic.
– Green: clear roads.
– Gray: general traffic bulletins, for in-
stance construction site.
The displayed information depends on the
particular traffic information service.
Dynamic destination guidance
Principle
With dynamic destination guidance, traffic
bulletins are considered when calculating
routes.
Adjusting
1. "Navigation"
2. "Settings"
3. "Route settings"
4. "Dynamic guidance"
5. Select the desired setting:
Seite 29
Traffic bulletins NAVIGATION
29
Online Edition for Part no. 01405A54505 - II/22

– "With confirmation": a message is
displayed, whether the route should
be guided around a traffic obstruc-
tion.
– "Automatic": the route is automati-
cally changed in the event of traffic
obstructions.
Seite 30
NAVIGATION Traffic bulletins
30
Online Edition for Part no. 01405A54505 - II/22

Navigation data
Vehicle features and options
This chapter describes all standard, country-
specific and optional features offered with
the series. It also describes features and
functions that are not necessarily available
in your vehicle, e.g., due to the selected op-
tions or country versions. This also applies
to safety-related functions and systems.
When using these functions and systems,
the applicable laws and regulations must be
observed.
Principle
Information regarding position determina-
tion and navigation data version can be
called up.
Adjusting
1. "Navigation"
2. "Settings"
3. "Position and software version"
4. Select the desired setting:
– "Enter position": the vehicle position
can be manually set on the map in
situations without GPS reception or,
for instance immediately after trans-
port on a ferry.
– "Software version": information
about the current map version.
Map update
General information
Navigation data is stored in the vehicle and
can be updated from a USB device.
Up-to-date navigation data is available from
a dealer's service center or another qualified
service center or repair shop.
Depending on the data volume, the naviga-
tion data update may take several hours.
The status of the update can be queried.
The navigation data is updated during the
trip to preserve the vehicle battery.
Update
1. Connect the USB device with the new
navigation data at a USB port in the
front.
2. Follow the instructions on the Control
Display.
3. Remove the USB device after the up-
date.
Viewing the status
1. Press the button.
2. "Saving navigation data in the vehicle…
(USB )"
Automatic map update
Depending on the vehicle equipment and
country version, the navigation data for the
home region is transmitted online to the ve-
hicle several times a year and automatically
installed and updated.
Seite 31
Navigation data NAVIGATION
31
Online Edition for Part no. 01405A54505 - II/22

Frequently Asked Questions
Vehicle features and options
This chapter describes all standard, country-
specific and optional features offered with
the series. It also describes features and
functions that are not necessarily available
in your vehicle, e.g., due to the selected op-
tions or country versions. This also applies
to safety-related functions and systems.
When using these functions and systems,
the applicable laws and regulations must be
observed.
Frequently Asked Questions
Why can the current position not be dis-
played?
– The position is located in an unrecog-
nized region, is in a poor reception area,
or the system is currently determining
the position.
Reception is usually best when you have
an unobstructed view of the sky.
Why does destination guidance not accept a
destination without the street?
– No downtown can be determined for the
entered town/city.
Enter any street in the selected town/
city and start destination guidance.
Why does destination guidance not accept a
destination?
– The destination data is not contained in
the navigation data. Select a destination
that is as close as possible to the origi-
nal.
Why can letters not be selected for destina-
tion input?
– The destination data is not contained in
the navigation data. Select a destination
that is as close as possible to the origi-
nal.
Why are spoken destination guidance in-
structions not provided at intersections?
– You have left the recommended route
and the system requires a few seconds
to calculate a new route suggestion.
Seite 32
NAVIGATION Frequently Asked Questions
32
Online Edition for Part no. 01405A54505 - II/22

Seite 33
Frequently Asked Questions NAVIGATION
33
Online Edition for Part no. 01405A54505 - II/22

General information
Vehicle features and options
This chapter describes all standard, country-
specific and optional features offered with
the series. It also describes features and
functions that are not necessarily available
in your vehicle, e.g., due to the selected op-
tions or country versions. This also applies
to safety-related functions and systems.
When using these functions and systems,
the applicable laws and regulations must be
observed.
Control elements
Depending on the country and equipment
version, the radio has the following buttons.
Button Function
Press: turns sound output on/off.
Turn: adjusts the volume.
Change the entertainment
source.
Press once: changes the station/
track.
Press and hold: fast forward/
rewind the track.
Programmable memory buttons.
Changeover of wave range/satel-
lite radio.
Sound output
Safety information
Warning
A high sound output volume can damage
your hearing. There is a risk of injury. Do
not adjust the volume too high.
Volume and sound output
– Turn the button to adjust the vol-
ume.
– Press the button to switch off the
sound output. Pressing the but-
ton again restores the previous
volume setting.
Audio recording playback is stopped during
muting.
Entertainment sources
General information
Possible entertainment sources:
– Radio, refer to page 38.
– USB audio, refer to page 46.
– Bluetooth® audio, refer to page 47.
– Apple CarPlay, refer to page 67.
Changing the entertainment source
On the radio:
1. Press the button.
Seite 34
ENTERTAINMENT General information
34
Online Edition for Part no. 01405A54505 - II/22

A list of all currently available entertain-
ment sources is displayed.
2. Press the button again to select
an entertainment source.
Via the Central Information Display (CID):
1. "Media/Radio"
A list of all possible entertainment sour-
ces is displayed.
2. Select the desired entertainment source.
Via the button on the Controller:
1. Press the button.
The most recently selected entertain-
ment source is played.
2. Press the button again.
A list of all currently available entertain-
ment sources is displayed.
3. Select the desired entertainment source.
Seite 35
General information ENTERTAINMENT
35
Online Edition for Part no. 01405A54505 - II/22

Sound
Vehicle features and options
This chapter describes all standard, country-
specific and optional features offered with
the series. It also describes features and
functions that are not necessarily available
in your vehicle, e.g., due to the selected op-
tions or country versions. This also applies
to safety-related functions and systems.
When using these functions and systems,
the applicable laws and regulations must be
observed.
General information
Settings are stored for the driver profile
currently used.
Treble, bass, balance, and
fader
1. "Media/Radio"
2. "Tone"
3. Select the desired setting:
– "Treble": treble adjustment.
– "Bass": depth adjustment.
– "Balance": left/right volume distribu-
tion.
– "Fader": front/rear volume distribu-
tion.
4. To adjust: turn the Controller.
5. To store: press the Controller.
Volume settings
Principle
An automatic increase of the volume can be
set to compensate for the increasing driving
noises at higher speeds.
Adjust automatic volume increase
1. "Media/Radio"
2. "Tone"
3. "Volume settings"
4. Select the desired setting:
– "Navigation": ratio of voice guidance
volume to entertainment volume.
– "Speed volume": ratio of entertain-
ment volume to speed.
– "PDC": ratio of the volume of the sig-
nal tone of Park Distance Control to
the entertainment volume.
The base setting ensures that the
signal tone is audible at any volume.
– "Gong": ratio of the volume of the
signal tone, for instance for seat belt
reminder, to the entertainment vol-
ume.
The base setting ensures that the
signal tone is audible at any volume.
– "Microphone": sensitivity of the mi-
crophone during a phone call.
The setting is adjusted while calling
and is stored for the mobile phone
used.
– "Speakers": volume of the loudspeak-
ers during a phone call.
Audio recording playback is stopped
during muting.
Seite 36
ENTERTAINMENT Sound
36
Online Edition for Part no. 01405A54505 - II/22

The setting is adjusted while calling
and is stored for the mobile phone
used.
5. To adjust: turn the Controller.
6. To store: press the Controller.
Reset the sound settings
The sound settings are reset to the factory
settings.
1. "Media/Radio"
2. "Tone"
3. "Reset"
Seite 37
Sound ENTERTAINMENT
37
Online Edition for Part no. 01405A54505 - II/22

Radio
Vehicle features and options
This chapter describes all standard, country-
specific and optional features offered with
the series. It also describes features and
functions that are not necessarily available
in your vehicle, e.g., due to the selected op-
tions or country versions. This also applies
to safety-related functions and systems.
When using these functions and systems,
the applicable laws and regulations must be
observed.
General information
Settings are stored for the driver profile
currently used.
AM/FM station
General information
Depending on the vehicle equipment and
country version, it may not be possible to
receive AM stations.
Radio Data System RDS
Principle
RDS broadcasts additional information,
such as the station name, in the FM wave
range.
It is recommended to turn on RDS.
Turning RDS on/off
1. "Media/Radio"
2. "FM"
3. Press the button.
4. "RDS"
Selecting a station
1. "Media/Radio"
2. "FM" or "AM"
The last station listened to will be
played and the station list displayed.
3. Select the desired station.
Changing the station
On the radio:
Press the left or right button.
The previous or next station from the list of
stations is played.
Storing a station
General information
An icon on the highlighted channel indi-
cates whether the channel has already been
stored.
Icon Meaning
Station is not stored.
Station is already stored.
Storing the station being played
1. "Media/Radio"
2. "FM" or "AM"
3. Tilt the Controller to the left.
4. "Save station"
The storage list is displayed.
5. Select the desired memory location.
Seite 38
ENTERTAINMENT Radio
38
Online Edition for Part no. 01405A54505 - II/22
Storing a station that is not being
played
1. "Media/Radio"
2. "FM" or "AM"
3. Highlight the desired station.
4. Press the Controller and hold until the
storage list is displayed.
5. Select the desired memory location.
The stations can also be stored on the pro-
grammable memory buttons, see the Own-
er's Manual for the vehicle.
Selecting a station manually
Station selection via the frequency.
1. "Media/Radio"
2. "FM" or "AM"
3. Tilt the Controller to the left.
4. "Manual search"
5. To select the frequency: turn the Con-
troller.
6. To store the frequency: press the Con-
troller.
Renaming a station
When storing a station with RDS signal, the
RDS information transferred during storing
is accepted as the station name. The station
name can be changed.
1. "Media/Radio"
2. "FM"
3. Select the desired station.
4. Press the button.
5. "Rename to:"
If necessary, wait until the name of the
desired station appears.
6. Press the Controller to store this name.
Additional station info(rmation)
Principle
If a radio station broadcasts radio text or
radio text plus, this information can be dis-
played, for instance the track or artist of the
music. Availability, content and sequence
are set by the radio station.
Displaying additional station
information
1. "Media/Radio"
2. "FM"
3. Select the desired station.
4. Press the button.
5. "Station info"
HD Radio™ reception
Principle
Many radio stations broadcast both analog
and digital signals.
General information
When setting a station with a digital signal,
it may take a few seconds before the station
plays in digital quality.
Note about HD Radio stations whose station
name ends with ...HD or with ...HD1:
In areas in which the station is not continu-
ously received in digital mode, the playback
switches between analog and digital recep-
tion. In this case, turn off digital radio re-
ception.
Note about HD Radio multicast stations
whose station name ends
with ...HD2, ...HD3, ...:
In areas in which the station is not continu-
ously received in digital mode, there may be
interruptions of the audible signal lasting
Seite 39
Radio ENTERTAINMENT
39
Online Edition for Part no. 01405A54505 - II/22

several seconds. The duration of the inter-
ruption depends on the reception.
Turning digital radio reception on/off
1. "Media/Radio"
2. "FM" or "AM"
Depending on the vehicle equipment
and country version, it may not be possi-
ble to receive AM stations.
3. Press the button.
4. "HD Radio reception"
This icon is displayed in the status field
when the sound signal is digital.
Displaying additional information
Some stations broadcast additional informa-
tion on the current track, such as the name
of the artist.
1. "Media/Radio"
2. "FM" or "AM"
Depending on the vehicle equipment
and country version, it may not be possi-
ble to receive AM stations.
3. Select a station.
4. Press the button.
5. "Station info"
License conditions
HD Radio Technology manu-
factured under license from
iBiquity Digital Corporation. U. S. and For-
eign Patents. HD Radio™ and the HD, HD
Radio, and “Arc” logos are proprietary
trademarks of iBiquity Digital Corp.
Satellite radio
General information
Before a channel can be played, you must
subscribe to it via telephone. Several chan-
nels can be combined into specified pack-
ages.
Managing a subscription
General information
In order to enable or unsubscribe from
channels, you must have reception. It is
usually at its best when you have an unob-
structed view of the sky. The channel name
is displayed in the status line.
Enabling channels
1. "Media/Radio"
2. "Satellite radio"
3. Press the button.
4. "Show subscription info"
The phone number and identification
number of the radio are displayed.
5. Call the phone number to have the chan-
nel enabled.
You can unsubscribe from the channels
again via this phone number.
Unsubscribing from channels
1. "Media/Radio"
2. "Satellite radio"
3. Press the button.
4. "Show subscription info"
The phone number and identification
number of the radio are displayed.
5. Call the phone number to cancel your
subscription to the channel.
Seite 40
ENTERTAINMENT Radio
40
Online Edition for Part no. 01405A54505 - II/22

Selecting channels
You can only listen to enabled channels.
1. "Media/Radio"
2. "Satellite radio"
The last channel played will be played
back and the channel list displayed.
3. Select the desired channel from the
channel list.
To display information about the selected
channel:
1. Highlight a channel.
2. Press the button.
3. "Channel information"
Adjusting display of the channel
list
The display of the playlist can be adjusted.
1. "Media/Radio"
2. "Satellite radio"
3. Tilt the Controller to the left.
4. "Change view"
5. Select the desired display:
– "Channel"
The name of the channel will be dis-
played.
– "Artist"
The name of the artist playing will
be displayed.
– "Titles"
The name of the track playing will be
displayed.
Changing the channel
Press the button on the radio.
The next and/or previous channel from the
channel list is played.
Storing a channel
1. "Media/Radio"
2. "Satellite radio"
An icon on the highlighted channel indi-
cates whether the channel has already been
stored.
Icon Meaning
Channel is not stored.
Channel is already stored.
To store the channel played:
1. Tilt the Controller to the left.
2. "Save station"
The storage list is displayed.
3. Select the desired memory location.
Or:
1. Highlight the played channel.
2. Press the Controller.
The storage list is displayed.
3. Select the desired memory location.
To store a channel other than the one
played:
1. Highlight the desired channel.
2. Press the Controller and hold until the
storage list is displayed.
3. Select the desired memory location.
Or:
1. Highlight the desired channel.
2. Press the button.
3. "Save in presets"
The storage list is displayed.
4. Select the desired memory location.
The stations can also be stored on the pro-
grammable memory buttons.
Seite 41
Radio ENTERTAINMENT
41
Online Edition for Part no. 01405A54505 - II/22

Selecting a category
1. "Media/Radio"
2. "Satellite radio"
3. Tilt the Controller to the left.
4. "Category"
5. Select the desired category.
The subscribed channels from this cate-
gory are displayed.
6. Select the desired channel.
Time shift
General information
The channel you are currently listening to is
stored in a buffer for up to an hour.
Prerequisite: the signal must be available.
The stored audio track can be played with a
delay following the live transmission. When
the memory is full, the older titles are over-
written. The memory is cleared when a new
channel is selected or when the vehicle is
switched off.
Call up the time shift function
1. "Media/Radio"
2. "Satellite radio"
3. Tilt the Controller to the left.
4. "Time shift"
Time shift forward/fast rewind
Within the stored recording, it is possible
to jump to any point in time.
Press the button on the radio or
turn the Controller.
You can jump to the next or the previous
track.
Press and hold the button on the
radio.
The recording is spooled forward or back.
Time shift menu
Icon Function
Go to the live transmission.
Automatic time shift deacti-
vated/activated.
/ Playback/pause.
Automatic time shift
With automatic time shift, audio playback is
paused for the following events.
– Incoming and outgoing telephone calls.
– Activation of the voice activation sys-
tem.
– Muting.
After that, audio playback is continued from
the time of the interruption.
1. Tilt the Controller to the left.
2. To activate:
"Automatic time shift"
Deactivate:
"Automatic time shift".
Smart Favorites
General information
A maximum of six channels can be stored as
Smart Favorites.
If a stored channel is selected, the current
title will be played from the beginning.
Adding the current channel to Smart
Favorites
1. Press the button.
2. "Add to Smart Favorites"
Seite 42
ENTERTAINMENT Radio
42
Online Edition for Part no. 01405A54505 - II/22

Removing the current channel from
Smart Favorites
1. Press the button.
2. "Remove from Smart Favorites"
Selecting Smart Favorite
1. "Media/Radio"
2. "Satellite radio"
3. Tilt the Controller to the left.
4. "Category"
5. Select a Smart Favorite.
The subscribed channels from this cate-
gory are displayed.
6. Select the desired channel.
Favorites
General information
An artist, a title, a league or a team can be
stored as a favorite. If the stored favorite is
played on a channel, a message appears on
the Control Display. Up to 30 Favorites can
be stored.
Storing the artist or track
It is only possible to store Favorites that are
currently being broadcast. The channel in-
formation must be available.
1. "Media/Radio"
2. "Satellite radio"
3. Tilt the Controller to the left.
4. "Add to favorites"
5. Highlight the artist or track, and press
the Controller.
An icon indicates whether the artist and
track were already stored.
Icon Meaning
Artist/track is not stored.
Artist/track was already stored.
Storing the league or team
1. "Media/Radio"
2. "Satellite radio"
3. Tilt the Controller to the left.
4. "Add to favorites"
5. "Add sports information"
6. Select the type of sport desired.
7. Select the desired team.
Activate/deactivate a notification
A notification can be displayed when a se-
lected favorite is being played.
1. "Media/Radio"
2. "Satellite radio"
3. Press the button.
4. "Manage favorites"
The stored Favorites are displayed.
5. "Activate alert"
Set a check mark to activate notification
for the selected Favorites.
Remove the check mark to deactivate
notification for the selected Favorites.
6. Select the desired Favorites.
Call up the Favorites
If an activated favorite is played back, the
following message is displayed for approx.
20 seconds: "Favorite on air!".
To change to the played Favorites:
Tap on the message on the Control Display.
Seite 43
Radio ENTERTAINMENT
43
Online Edition for Part no. 01405A54505 - II/22

Or:
1. Tilt the Controller to the left.
2. "Favorite alert"
Select the icon while the message is
shown.
The displayed favorite is played.
When the message disappears, the list of
channels that is currently playing one of the
stored Favorites can be displayed.
1. Tilt the Controller to the left.
2. "Category"
3. Select the Favorites list.
The channels that are currently playing
a favorite are displayed.
4. Select the channel that you would like to
change to.
Deleting Favorites
1. "Media/Radio"
2. "Satellite radio"
3. Press the button.
4. "Manage favorites"
The stored Favorites are displayed.
5. Highlight the desired favorites.
6. Press the button.
7. "Delete entry"
Traffic Jump
General information
Traffic and weather information for a se-
lected region is broadcast every few mi-
nutes.
Selecting a region
1. "Media/Radio"
2. "Satellite radio"
3. Press the button.
4. "Configure jump"
5. Select the desired region.
Activate/deactivate Traffic Jump
You must have reception in order to acti-
vate or deactivate.
1. "Media/Radio"
2. "Satellite radio"
3. Press the button.
4. "Configure jump"
5. "Jump to:"
Place a check mark to activate Traffic
Jump.
Information for the selected region is
broadcast as soon as it is available.
Remove the check mark to deactivate
Traffic Jump.
Channel magazine
In the channel magazine, the current and
subsequent program for each channel
booked is displayed.
1. "Media/Radio"
2. "Satellite radio"
3. Tilt the Controller to the left.
4. "SiriusXM program guide"
Automatic update
About twice a year, Sirius performs an up-
date of the channel names and positions.
The update takes place automatically and
may take several minutes.
System limits
– Reception may not be available in some
situations, such as under certain envi-
ronmental or topographical conditions.
Seite 44
ENTERTAINMENT Radio
44
Online Edition for Part no. 01405A54505 - II/22

The satellite radio has no influence on
this.
– Graphical contents can be received un-
der certain circumstances.
– The signal may not be available in tun-
nels or underground garages next to tall
buildings or near trees, mountains or
other powerful sources of radio interfer-
ence.
Stored stations
General information
Up to 40 stations can be stored.
Selecting a station
1. "Media/Radio"
2. "Presets"
3. Select the desired station.
Deleting a station
1. "Media/Radio"
2. "Presets"
3. Highlight the station you want to delete.
4. Press the button.
5. "Delete entry"
Seite 45
Radio ENTERTAINMENT
45
Online Edition for Part no. 01405A54505 - II/22
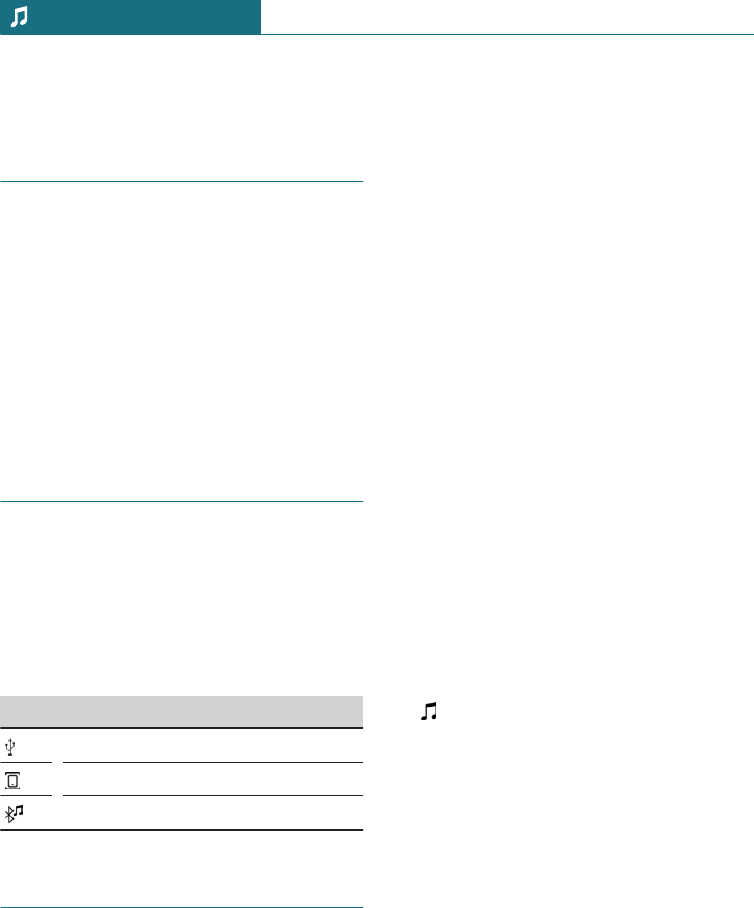
Audio
Vehicle features and options
This chapter describes all standard, country-
specific and optional features offered with
the series. It also describes features and
functions that are not necessarily available
in your vehicle, e.g., due to the selected op-
tions or country versions. This also applies
to safety-related functions and systems.
When using these functions and systems,
the applicable laws and regulations must be
observed.
General information
Titles, audio books, and podcasts can be
played back. Sound is output through the
vehicle loudspeakers.
Settings are stored for the driver profile
currently used.
Depending on the vehicle equipment, the
following audio sources can be used:
Icon Meaning
USB device.
Music interface for smartphones.
Bluetooth audio.
USB device
Playable formats
MP3, MP4, M4A, M4B, AAC, WMA.
Apple iPod/iPhone
The music search and playback of Apple
iPod/iPhone are supported.
Audio player and storage media
with USB port
Information on all titles, for instance artist,
genre or title, as well as playback lists, are
transmitted into the vehicle. This may take
some time, depending on the USB device,
file size, and number of titles.
During the transmission, the titles can be
called up via the file folder.
The information for approx. 40,000 tracks
can be stored in the vehicle. However, a
maximum of 16,000 tracks can be stored
per USB device.
Titles with integrated Digital Rights Man-
agement DRM cannot be played.
Selecting the USB device
For information about the USB port, see
Owner's Manual for the vehicle.
1. Connecting USB device to the USB port.
The adapter cable supplied with the USB
device would be ideal.
2. "Media/Radio"
3. "USB"
Or:
Select the name of the USB device.
Further playback descriptions, refer to
page 47.
Seite 46
ENTERTAINMENT Audio
46
Online Edition for Part no. 01405A54505 - II/22

Bluetooth® audio
General information
– Playback of music files on external devi-
ces such as audio devices or mobile
phones via Bluetooth®.
– The volume of the sound output depends
on the device. If necessary, adjust the
volume setting on the device.
– Up to four external devices can be con-
nected to the vehicle.
Functional requirements
– Bluetooth® device is connected to the
vehicle. Bluetooth® connections, see
Owner's Manual for the vehicle.
– Bluetooth® audio playback was acti-
vated.
Selecting the Bluetooth device
1. "Media/Radio"
2. Select the desired Bluetooth device from
the list.
Further playback descriptions, refer to
page 47.
If the Bluetooth device is not listed in the
device list, Bluetooth audio playback may
have not been activated. To activate Blue-
tooth audio playback, proceed as follows:
1. "Media/Radio"
2. "Manage mobile devices"
3. Select the desired Bluetooth device.
4. "Bluetooth® audio"
Playback
General information
Once an audio source has been selected, in-
formation on playback appears on the Con-
trol Display.
Information available for the current title
followed by the playlist is shown on the
Control Display. Content and scope of the
playlist depend on the type of the selected
audio source and the search criteria applied.
For USB and Bluetooth® devices, the se-
lected playlist is displayed. This can be the
result of a search or of a previously stored
playlist.
Further functions are displayed by tilting
the Controller to the left. The scope of these
functions depends on the selected audio
source.
Depending on the supported Bluetooth® ver-
sion, some Bluetooth® device functions may
be limited when using the Central Informa-
tion Display (CID). If necessary, the missing
functions can be accessed directly on the
device itself.
Selecting a title
Select the desired title from the playlist.
Starting with the selected title, all titles of
the playlist are played.
Changing the title
On the radio:
Press the left or right button.
The previous or next title from the playlist
is played.
Fast forward/fast rewind
On the radio:
Seite 47
Audio ENTERTAINMENT
47
Online Edition for Part no. 01405A54505 - II/22

Press and hold the left or right but-
ton.
Search criteria
General information
The possible search criteria depend on the
selected audio source.
Sear for title information
The following search criteria refer to the
data stored in the title information.
1. Tilt the Controller to the left.
2. "Media search"
3. Select the desired setting:
– "Search"
All the titles containing the search
string are displayed. Entering more
characters will continue to limit the
search results.
Tilt the Controller to the right to dis-
play the list of results.
– "Genres"
A list of all available genres is dis-
played.
Select a genre to display all respec-
tive artists.
– "Artists"
A list of all available artists is dis-
played.
Select an artist to display all respec-
tive albums and titles.
– "Albums"
A list of all available albums is dis-
played.
Select an album to display all respec-
tive titles.
– "Titles"
A list of all available titles is dis-
played.
4. Select album, if needed.
5. Select the title at which the playback is
going to begin.
The search for artists and titles can also be
selected directly.
1. Tilt the Controller to the left.
2. "Artists" or "Titles"
Titles where the selected search criterion is
not stored are summarized under "un-
known". Titles without title information can
only be found via the folder structure.
Search playlists
1. Tilt the Controller to the left.
2. "Media search"
3. "Playlists"
A list of all available playback lists is
displayed.
4. Select the playlist.
5. Select the title at which the playback is
going to begin.
Information on playback appears on the
Control Display. A playlist is created
from the title list resulting from the
search.
Search audio books and podcasts
Depending on the USB device and equip-
ment, separate audio book and podcast
searches are possible.
1. Tilt the Controller to the left.
2. "Media search"
3. Select the desired setting:
– "Podcasts"
A list of all available podcasts is dis-
played.
– "Audio books"
Seite 48
ENTERTAINMENT Audio
48
Online Edition for Part no. 01405A54505 - II/22

A list of all available audio books is
displayed.
4. Select the title at which the playback is
going to begin.
Information on playback appears on the
Control Display. A playlist is created
from the title list resulting from the
search.
Browse directory structure
It is possible to search the USB devices via
the directory structure.
The names of folders and titles correspond
to folder and file names. The folder and file
names can deviate from the names in the ti-
tle information.
1. Tilt the Controller to the left.
2. "Media search"
3. "Browse folder"
4. Change into a sub folder, if needed.
Select the title at which the playback is
going to begin.
Information on playback appears on the
Control Display. A playlist is created
from the title list resulting from the
search.
Browse through albums
1. Tilt the Controller to the left.
2. "Browse albums"
Available albums are graphically pre-
sented.
3. Turn the Controller to browse through
the albums.
4. Select the desired album.
All titles of the selected album are dis-
played.
5. Select the title at which the playback is
going to begin.
6. Tilt the Controller to the left. The Con-
trol Display shows information on play-
back. The playlist corresponds to the ti-
tle list of the album.
Searching for similar titles
1. Tilt the Controller to the left.
2. "Similar titles (local)"
A list with similar titles is displayed.
3. Select the title at which the playback is
going to begin.
Information on playback appears on the
Control Display. A playlist is created
from the title list resulting from the
search.
Random playback
Principle
The current playlist or all titles of the se-
lected audio source are played back in ran-
dom order.
Select random
1. Tilt the Controller to the left.
2. "Shuffle"
Favorites list
Principle
The current title can be assigned to a spe-
cial playlist, the Favorites list. If the current
title already belongs to the Favorites list, it
can be deleted from this list. The Favorites
list is displayed first with Search for play-
back lists, refer to page 48.
Seite 49
Audio ENTERTAINMENT
49
Online Edition for Part no. 01405A54505 - II/22

Creating the Favorites list
1. Tilt the Controller to the left.
2. "Add to favorites" or "Delete
from favorites"
Seite 50
ENTERTAINMENT Audio
50
Online Edition for Part no. 01405A54505 - II/22

Seite 51
Audio ENTERTAINMENT
51
Online Edition for Part no. 01405A54505 - II/22

Telephone
Vehicle features and options
This chapter describes all standard, country-
specific and optional features offered with
the series. It also describes features and
functions that are not necessarily available
in your vehicle, e.g., due to the selected op-
tions or country versions. This also applies
to safety-related functions and systems.
When using these functions and systems,
the applicable laws and regulations must be
observed.
Telephone functions
General information
Mobile phones can be connected to the ve-
hicle via Bluetooth®, see Owner's Manual
for the vehicle.
At high temperatures, the charge function
of the mobile phone can be limited where
appropriate and functions are no longer exe-
cuted.
Do not operate a mobile phone that is con-
nected to the vehicle on the mobile phone
keyboard, as this may lead to a malfunction.
When the mobile phone is used via the ve-
hicle, refer to the operating instructions of
the mobile phone.
Safety information
Warning
Operating the integrated information sys-
tems and communication devices while
driving can distract from surrounding traf-
fic. It is possible to lose control of the ve-
hicle. There is a risk of accident. Only use
the systems or devices when the traffic
situation allows. As warranted, stop and
use the systems and devices while the ve-
hicle is stationary.
Incoming call
If the number of the caller is stored in the
phone book and is transmitted by the net-
work, the name of the contact is displayed.
Otherwise, only the phone number is dis-
played.
Accepting a call
Incoming calls can be answered in several
ways.
– Via Central Information Display (CID):
"Accept"
– Press the button on the steering
wheel.
Rejecting a call
"Reject"
Ending a call
– Via Central Information Display (CID):
"End call"
– Press the button on the steering
wheel.
Last calls
The last outgoing, missed, and incoming
calls are transferred to the vehicle. Depend-
ing on the equipment, the calls are transmit-
ted from the main phone and additional tele-
phones.
Seite 52
COMMUNICATION Telephone
52
Online Edition for Part no. 01405A54505 - II/22
Displays
1. "Communication"
2. "Recent calls"
The 20 last calls are displayed.
Filtering call list
1. "Calls:"
2. Select the desired setting.
Selecting number from list
Select from list. Call is established via the
mobile phone, from where the entry origi-
nates.
Via options: start call via the second mobile
phone.
To cancel: "End call"
Storing as contact or adding to contact
1. Highlight the phone number.
2. Press the button.
3. "Save as new contact" or "Add to
contact"
Active calls
Adjusting the volume
Turn the volume button on the radio during
the call, until the desired volume is reached.
The setting is stored for the driver profile
currently used.
Automatic volume settings
1. "My MINI"
2. "System settings"
3. "Tone"
4. "Volume settings"
5. "Microphone" or "Speakers"
6. To adjust: turn the Controller.
7. To store: press the Controller.
Dialing a number
1. "Communication"
2. "Dial number"
3. Enter the numbers.
4. Select the icon.
The connection is established via the
mobile phone to which this function has
been assigned.
Establish the connection via the additional
telephone:
1. Press the button.
2. "Call via"
Holding, resuming
An active call can be put on hold and re-
sumed later on.
– "Hold/Resume"
Call is put on hold.
– "Hold/Resume"
Call is resumed.
Muting the microphone
When a call is active, the microphone can
be muted.
"Microphone"
The muted microphone is automatically ac-
tivated:
– When a new connection is established.
– When switching between call parties
with toggle.
Calls with multiple parties
General information
You can change between calls or connect
two calls to a single conference call. These
Seite 53
Telephone COMMUNICATION
53
Online Edition for Part no. 01405A54505 - II/22

functions must be supported by the mobile
phone and service provider.
Accepting a call while speaking to
another party
If a second call comes in during an ongoing
call, a call waiting signal sounds where ap-
propriate.
"Accept"
The call is accepted and the existing call is
put on hold.
Establishing a second call
An additional call can be established while a
call is active.
1. "Contacts"
2. Select new number.
The call is started and the first call is put
on hold.
Switching between two calls, toggle
You can switch between two calls.
1. Establish two calls.
2. "Resume"
The call on hold is resumed.
Establishing a conference call
Two calls can be connected to a single tele-
phone conference call. The calls must be
made from the same mobile phone.
1. Establish two calls.
2. "Conference call"
Hands-free system
General information
Calls that are being made on the hands-free
system can be continued on the mobile
phone and vice versa.
From the mobile phone to the hands-
free system
Calls that were begun outside of the Blue-
tooth range of the vehicle can be continued
on the hands-free system with standby state
or the ignition switched on. The vehicle key
must be located in the vehicle for this to
work.
Depending on the mobile phone, the system
automatically switches to hands-free mode.
If the system does not switch over automat-
ically, follow the instructions on the display
of the mobile phone. Refer also to the oper-
ating instructions of the mobile phone.
From the hands-free system to the
mobile phone
Calls that are made on the hands-free sys-
tem can in some cases be continued on the
mobile phone; this depends on the mobile
phone.
Follow the instructions on the display of the
mobile phone. Refer also to the operating
instructions of the mobile phone.
Contacts
General information
Contacts can be created and edited. The
contacts from the mobile phone are addi-
tionally transferred and displayed. Contact
pictures can be displayed, if the mobile
phone supports this function.
Displaying all contacts
1. "Communication"
2. "Contacts"
The contacts are listed in alphabetical
order. Depending on the number of con-
tacts, contact search and quick search
are offered.
Seite 54
COMMUNICATION Telephone
54
Online Edition for Part no. 01405A54505 - II/22

Contact search
Contact search is available with more than
30 contacts.
1. "Search"
2. Enter the letters.
The hits are displayed on the right side.
3. Tilt the Controller to the right.
4. Select the contact to display it.
Quick search in lists
Quick search is available starting from
30 contacts. All letters, for which there are
entries, are displayed in alphabetical order
on the left of the Control Display.
1. Turn the Controller to the left or right
quickly.
All letters, for which contacts are stored,
are displayed on the left.
2. Select the first letter of the desired con-
tact.
The first entry of the selected letter is
displayed.
Sorting contacts
Contact names can be displayed in a differ-
ent order. Depending on how the contacts
were stored on the mobile phone, the sort-
ing order of the contacts may differ from
the selected sorting order.
1. Press the button.
2. "Sort contacts"
3. "Last name" or "First name"
Checking the address as a destination
If the vehicle is equipped with a navigation
system, a contact can be adopted as a desti-
nation.
1. Select the desired contact.
2. Select the address.
3. "Check address" or "Search for address
online"
4. Correct entries, if necessary.
5. "Start guidance"
The address can be used for the destination
guidance.
Editing a contact
If a contact is changed, which has been
transferred from the mobile phone, a copy
of the entry is created in the vehicle during
storing.
Contact entries having identical names are
combined into one contact.
1. Select the desired contact.
2. "Edit contact"
3. Change the desired entry or add entries.
4. "Save contact in the vehicle"
Displaying contact pictures
Images stored with the contacts are stored
in the vehicle when the mobile phone is
connected to the vehicle.
1. "My MINI"
2. "System settings"
3. "Mobile devices"
4. "Settings"
5. "Contact images"
6. Press the Controller.
Seite 55
Telephone COMMUNICATION
55
Online Edition for Part no. 01405A54505 - II/22

Voice command response
A smartphone connected to the vehicle can
be used via voice.
Activate voice command response on the
smartphone for this purpose.
Button on
the steering
wheel
Function
Press the button for at
least 3 seconds. Voice
command response is acti-
vated on the smartphone.
If activation is successful, a confirmation
appears on the Control Display.
If it was not possible to activate voice com-
mand response, the list of Bluetooth devices
appears on the Control Display.
Additional functions
General information
Depending on the mobile phone, the follow-
ing contents of the mobile phone are trans-
ferred to the vehicle:
– Contacts, refer to page 54.
– Short messages, refer to page 56.
– E-mails, refer to page 57.
– Calendar entries, appointments, refer to
page 58.
– Tasks, refer to page 59.
– Memos, refer to page 60.
Data transmission can take several minutes.
Certain functions may need to be enabled
by the mobile phone provider or service
provider.
Detailed information about which mobile
phones are supported is available at
www.miniusa.com/bluetooth.
Short messages
Displaying all short messages
1. "Communication"
2. "Messaging"
Status
An icon identifies the short message status.
Icon Meaning
Read short message.
Unread short message.
Filtering the message list
1. Press the button.
2. "Filter messages"
3. Select the desired setting.
Selecting sources
You can choose, whether and from which
mobile phone the short messages should be
transferred.
1. Press the button.
2. "Select sources for messages"
3. Select the desired mobile phone.
Deleting a conversation
Completely delete a conversation with a
contact.
1. Highlight the desired short message.
2. Press the button.
3. "Delete text message thread"
4. "Yes"
Seite 56
COMMUNICATION Telephone
56
Online Edition for Part no. 01405A54505 - II/22

Displaying a short message
Select the desired short message or conver-
sation. The conversation with this contact is
displayed.
Answering or forwarding a short
message
1. Select the desired short message.
2.
– "Reply"
The recipient of the short message is
automatically entered.
– "Forward"
"To:"
Enter phone number or contact. Tilt
the Controller to the right as needed
to select the contact from the list of
results.
3. "From:"
Select mobile phone as needed, from
which the short message should be sent.
4. "Send"
New short message
1. "Communication"
2. "Messaging"
3. "Compose text message"
4. "To:"
Enter phone number or contact. Tilt the
Controller to the right as needed to se-
lect the contact from the list of results.
5. "From:"
Select mobile phone as needed, from
which the short message should be sent.
6. "Send"
To cancel: "Delete all content"
Further functions
The following functions are available when
a short message or conversation is selected.
– "Call sender"
– "Add to contacts" or "Show sender"
– "Forward", refer to page 57.
– "Reply", refer to page 57.
– "Delete"
– Read contents, refer to page 61.
– "Use contact data", refer to page 61.
E-mail
Displaying all e-mails
1. "Communication"
2. "Email"
Selecting account
You can choose, whether and from which
mobile phone and possibly from which user
account the e-mails will be transferred.
1. Press the button.
2. "Select account"
3. Select the desired account.
Status
An icon identifies the e-mail status.
Icon Meaning
Read e-mail.
Unread e-mail.
Filtering e-mails
1. Press the button.
2. "Filter emails"
3. Select the desired setting.
Seite 57
Telephone COMMUNICATION
57
Online Edition for Part no. 01405A54505 - II/22

Deleting e-mail
1. Highlight the desired e-mail.
2. Press the button.
3. "Delete email"
4. "OK"
Displaying all recipients
If an e-mail has several recipients, they can
be displayed and their data used for further
functions.
1. Select the desired e-mail.
2. Press the button.
3. "Show all recipients"
New e-mail
1. "Communication"
2. "Email"
3. "Compose email"
4. "To:"
Enter e-mail address or contact. Tilt the
Controller to the right as needed to se-
lect the contact from the list of contacts.
5. "From:"
Select account as needed, from which
the e-mail should be sent.
6. "Send"
To cancel: "Delete all content"
Answering and forwarding e-mails
1. Select the desired e-mail.
2. "Reply"
– "Reply"
The e-mail recipient is automatically
entered.
– "Reply to all"
All e-mail recipients are automati-
cally entered.
– "Forward"
Enter e-mail address or contact. Tilt
the Controller to the right as needed
to select the contact from the list of
contacts.
3. "To:"
Enter e-mail address or contact. Tilt the
Controller to the right as needed to se-
lect the contact from the list of results.
4. "From:"
Select mobile phone and user account as
needed, from which the e-mail should be
sent.
5. "Send"
Further functions
The following functions are available for a
selected e-mail.
– "Text-to-speech", refer to page 61.
– "Reply", refer to page 58.
– "Add to contacts" or "Show sender"
– "Mark as unread"
– "Delete email"
Calendar
Displaying the calendar
1. "Communication"
2. "Calendar"
The appointments of the current week
are displayed.
To display different days in the calendar:
– "Show previous week"
– "Show next week"
Displaying the calendar month
Select the calendar day.
Seite 58
COMMUNICATION Telephone
58
Online Edition for Part no. 01405A54505 - II/22

The monthly overview is displayed. Calen-
dar days with appointments are marked.
Switching to today
1. Press the button.
2. "Change to today"
Selecting sources
You can choose, whether and from which
mobile phone the appointments should be
transferred.
1. Press the button.
2. "Select source"
3. Select the desired mobile phone.
Activate reminders
1. Press the button.
2. "Activate reminders"
Reminders are displayed in the Notifica-
tions and in the Status field, see Owner's
Manual for the vehicle.
Deactivating reminders
1. Select the desired calendar entry.
2. "Deactivate reminders"
Updating the calendar
Update data, refer to page 61.
Further functions
Depending on the vehicle equipment, the
following functions are available in a se-
lected appointment:
– Read contents, refer to page 61.
– Start destination guidance.
– "Use details", refer to page 61.
Tasks
Display tasks
1. "Communication"
2. "Tasks"
All tasks are displayed.
Sorting tasks
1. "Sorted by"
2. Select the desired setting.
Activate reminders
1. Press the button.
2. "Activate reminders"
Reminders are displayed in the Notifica-
tions and in the Status field, see Owner's
Manual for the vehicle.
Updating tasks
Update data, refer to page 61.
Selecting sources
You can choose, whether and from which
mobile phone the tasks should be transfer-
red.
1. Press the button.
2. "Select source"
3. Select the desired mobile phone.
Further functions
The following functions are available in a
selected task.
– Read contents, refer to page 61.
– "Use contact data", refer to page 61.
Seite 59
Telephone COMMUNICATION
59
Online Edition for Part no. 01405A54505 - II/22

Notes
Displaying all memos
1. "Communication"
2. "Memos"
All voice memos and text notes are dis-
played.
Exporting all voice memos
In order to export voice memos via the USB
port, a compatible device must be con-
nected to the USB port.
Voice memos already existing on the USB
device are overwritten during exporting.
– Compatible devices: USB mass storage
devices, such as USB flash drives or
MP3 players with a USB port.
– Non-compatible devices: USB hard
drives, USB hubs, USB memory card
readers with multiple slots, Apple iPod/
iPhone.
– File systems: popular file systems for
USB devices are supported. The FAT32
format is recommended.
1. Press the button.
2. "Export all memos (USB)"
Deleting all voice memos
1. Press the button.
2. "Delete all voice memos"
3. "OK"
New voice memo
1. "New voice memo"
2. "Start recording"/"Resume
recording"
3. "Pause recording"
4. "Save"
The voice memo is displayed in the list
of voice notes.
To cancel: "Cancel"
Displaying a memo
Select the desired memo.
Further functions
The following functions are available when
a voice memo is selected.
– "Email with voice memo", refer to
page 58.
– "Export (USB)", refer to page 60.
– "Delete"
– "Play", refer to page 61.
Updating memos
Update data, refer to page 61.
Optical character recognition/
dictation function
General information
The offering depends on the vehicle equip-
ment and the country-specific variant.
Principle
Spoken words are detected by speech recog-
nition and converted into text. The text can
be corrected and supplemented as required.
The text can be used as subject or content
of e-mails or short messages. To use the
functions, data is transmitted to a service
provider via an encrypted connection and
stored locally there.
Functional requirement
The mobile phone must support the func-
tion.
The following function is activated: "Server
speech recognition"
Seite 60
COMMUNICATION Telephone
60
Online Edition for Part no. 01405A54505 - II/22

Recording texts
1. Select the desired language.
2. Select the icon to start the record-
ing.
3. Select the icon to end the recording.
4. "Confirm text"
5.
– "Delete last dictation"
– "Delete all"
– "Read out full text"
– "Read out last dictation"
Improving speech recognition for
contact names
Principle
The contact names of the connected mobile
phones are transmitted to speech recogni-
tion. This improves the recognition of con-
tact names during text conversion. To use
the functions, data is transmitted to a serv-
ice provider via an encrypted connection
and stored locally there.
Activate/deactivate the function
The function can be activated or deacti-
vated for the respective mobile phone.
1. "My MINI"
2. "System settings"
3. "Mobile devices"
4. Select the desired device.
5. "Contact upload for messaging"
Reading out loud
SMS, e-mail, tasks, text notes, and calendar
entries can be read out loud.
– "Play"
– "Pause"
– "Next section"/"Next element"
– "Previous section"/"Previous
element"
– Tilt the Controller to the left to end.
Playback
Voice notes can be played.
– "Play"
– "Pause"
– "Fast forward"
– "Fast rewind"
Updating data
Notes, tasks, and appointments of the calen-
dar can be updated.
1. "Communication"
2. Select the desired setting:
– "Calendar"
– "Tasks"
– "Memos"
3. Press the button.
4. "Update data"
Using data
Phone numbers, mail addresses in the calen-
dar, short messages, etc., can be used in
other functions.
While driving:
1. Select the desired element, for instance
a short message.
2. "Use contact data"
3. All usable data is displayed.
4. Highlight the desired element, for in-
stance a phone number.
5. Tilt the Controller to the right.
All available options are displayed.
– "Compose email"
– "Compose text message"
Seite 61
Telephone COMMUNICATION
61
Online Edition for Part no. 01405A54505 - II/22

– "Add to contact"
– "Save as contact"
– "Call number in message"
6. Select the desired setting.
The elements can be individually selected
when the vehicle is stationary. The availa-
ble options are displayed.
Adjusting the menu
The menu can be adapted, for instance to
remove entries from the menu for functions
not being used.
1. "Communication"
2. "Personalize menu"
3. Select the desired setting.
Seite 62
COMMUNICATION Telephone
62
Online Edition for Part no. 01405A54505 - II/22

MINI Connected
Vehicle features and options
This chapter describes all standard, country-
specific and optional features offered with
the series. It also describes features and
functions that are not necessarily available
in your vehicle, e.g., due to the selected op-
tions or country versions. This also applies
to safety-related functions and systems.
When using these functions and systems,
the applicable laws and regulations must be
observed.
General information
The Teleservices features, intelligent emer-
gency call or an active MINI Connected con-
tract are required to use the services and
applications described here.
The content and scope of the services that
are available may vary by country. There-
fore, it is possible that some of the services
and applications described in the Owner's
Manual may not be offered, or not yet be of-
fered, in the vehicle's country of registra-
tion.
Details on the content and scope of MINI
Connected can be obtained from www.mini-
usa.com/connectivity or your service cen-
ter.
Safety information
Warning
Operating the integrated information sys-
tems and communication devices while
driving can distract from surrounding traf-
fic. It is possible to lose control of the ve-
hicle. There is a risk of accident. Only use
the systems or devices when the traffic
situation allows. As warranted, stop and
use the systems and devices while the ve-
hicle is stationary.
MINI Teleservices
Principle
Teleservices are services that help to main-
tain vehicle mobility.
General information
The offering depends on the vehicle equip-
ment and the country-specific variant.
For further information on the available
services, the vehicle manufacturer recom-
mends contacting a service center or cus-
tomer support.
Teleservices can comprise the following
services:
– Teleservice Call, refer to page 64.
– Your dealer’s service center, refer to
page 64.
– Roadside Assistance, see Owner's
Manual for the vehicle.
Seite 63
MINI Connected COMMUNICATION
63
Online Edition for Part no. 01405A54505 - II/22

Prerequisites
– Active MINI Connected contract or
equipment version with intelligent
emergency call.
– Cellular network reception.
– Ignition or standby state is switched on.
Teleservice Call
Automatic Teleservice Call
The Teleservice data on the vehicle's serv-
ice notifications is sent automatically to the
service center by MINI prior to the service
due date. If feasible, the service center will
contact the customer about arranging a
service appointment.
This way, the dealer’s service center can
plan the necessary work in advance. This
shortens the workshop visit.
Last Teleservice Call
Principle
The last Teleservice Call, for instance the
last report to the dealer’s service center, can
be displayed on the Control Display.
Displaying the last Teleservice Call
Check to see when the last Teleservice Call
was transmitted.
1. "My MINI"
2. "Vehicle status"
3. Tilt the Controller to the left.
4. "Teleservice Call"
Your dealer’s service center
Principle
The preset service center is displayed. It is
possible to contact the service center.
General information
To use Service Partner management in the
vehicle, log in with the MINI Connected ac-
cess data in the MINI Connected customer
portal. In addition, your vehicle must be as-
signed to your account in the MINI Con-
nected customer portal.
Displaying service centers
The service center that is currently as-
signed to the vehicle is displayed as a con-
tact in the vehicle.
1. "MINI Connected" or
"Communication"
2. "MINI Assist"
3. "Your service center" or select service
partner management if necessary.
The assigned service center is displayed
along with all its contact information.
Depending on the vehicle equipment, the
following functions are available in a con-
tact:
– "Start guidance"
– Call contact.
– "Compose email"
Updating MINI Assist
Principle
Starts the manual update of all services
available in the vehicle.
Updating services
1. "MINI Connected"
2. Press the button.
3. "Update MINI Services"
Seite 64
COMMUNICATION MINI Connected
64
Online Edition for Part no. 01405A54505 - II/22

Customer support
Principle
Contact customer support for information
on all aspects of your vehicle.
Calling customer support
1. "MINI Connected"
2. "MINI Assist"
3. "Customer support"
The number for customer support is dis-
played and a voice connection is estab-
lished. If a voice connection is not es-
tablished, dial the number manually.
MINI Connected Services
Functional requirements
– MINI Connected Services has been acti-
vated.
– Cellular network reception.
– For certain services, the vehicle must be
able to determine its current position,
for instance in order to receive informa-
tion about the current location.
MINI Connected Store
Principle
In vehicles with specific technical prerequi-
sites, various services can be booked later.
General information
The range of services offered depends on
the country.
Ordering services
1. Call up the MINI Connected Store via
the MINI homepage.
2. Select the desired service.
The service you purchased will be trans-
ferred to the vehicle automatically.
Messages
General information
Messages from the Concierge Service or As-
sistance are displayed.
Information about the short messages from
the mobile phone, refer to page 56.
Displaying messages
1. "MINI Connected" or
"Communication"
2. "MINI messages"
Current messages are displayed.
Status
An icon identifies the message status.
Icon Meaning
Read message.
Unread message.
Filtering message list by status
1. Press the button.
2. "Filter MINI messages"
3. Select the desired setting.
Filtering message list by message type
1. "Filter"
2. Select the desired setting.
Delete a message
1. Press the button.
2. Delete highlighted message: "Delete
message"
Delete all messages: "Delete all
messages"
Seite 65
MINI Connected COMMUNICATION
65
Online Edition for Part no. 01405A54505 - II/22

Further functions
Depending on the equipment, the following
functions are available in a selected mes-
sage.
– Select the location to start destina-
tion guidance.
– Select phone number to make a call.
Vehicle apps
Principle
MINI Connected Services offer the option
to display information, for instance regard-
ing the weather or news, on the Control Dis-
play using apps and other functions.
Displaying MINI Connected Services
apps
1. "MINI Connected"
2. Select desired app.
Pairing
To display personal data such as e-mails, it
is necessary to log on.
This function is country-specific.
1. "MINI Connected"
2. Press the button.
3. "Login"
4. "User:"
Enter the user name.
5. "Password:"
Enter the password.
6. "OK"
Automatic pairing
Registration is performed automatically
when the vehicle apps are called up.
"Auto-login"
The "Auto-login" function can be deacti-
vated in the MINI Connected portal on the
Internet. A change may be required in the
customer portal under Password protection
in the vehicle in the Control menu item.
Logging off
1. "MINI Connected"
2. "Vehicle apps"
3. Press the button.
4. "Logout"
Adjusting the menu
The menu can be adapted, for instance to
remove entries from the menu for functions
not being used.
1. "MINI Connected"
2. "Personalize menu"
3. Select the desired setting.
4. Tilt the Controller to the left.
Remote Services
Principle
Remote Services enable some vehicle func-
tions to be controlled remotely via the MINI
app. The app can be used to lock and unlock
the vehicle, for instance.
Other functions may be available, depend-
ing on the vehicle.
General information
The use of the Remote Services requires an
active MINI Connected contract.
The vehicle is controlled via the MINI app.
The MINI app is available for iOS from the
Apple App Store and for Android from the
Google Play Store.
Seite 66
COMMUNICATION MINI Connected
66
Online Edition for Part no. 01405A54505 - II/22

Alternatively, remote control of certain
functions can also be requested via the
MINI Connected Call Center.
Concierge Service
Principle
The Concierge service offers information on
events, filling stations or hotels, and pro-
vides phone numbers and addresses. A
voice connection to the Concierge service is
established for this purpose. Many hotels
can be booked directly by the Concierge
service. The Concierge service is part of the
optional Response Center Plan.
Starting Concierge Service
1. "MINI Connected"
2. "Concierge"
A voice connection to the selected service
is established.
Apple CarPlay preparation
Principle
CarPlay allows select functions of a compat-
ible Apple iPhone to be used via Siri voice
control and the on-board monitor.
General information
Depending on the country-specific version,
CarPlay may not be available. Contact a
dealer's service center or another qualified
service center or repair shop for more de-
tailed information.
The iPhone provides CarPlay and any asso-
ciated apps. The scope and content depend
on the equipment manufacturer and can
vary depending on the country-specific ver-
sion.
The following restrictions apply to an
iPhone connected via CarPlay:
– Not every app installed on the iPhone
can be used via CarPlay.
– Calling is only possible via CarPlay.
– The iPhone cannot be paired as addi-
tional telephone.
– The phone book entries are not transfer-
red into the vehicle.
– Only one additional telephone can be
connected with the vehicle.
– Using CarPlay can incur mobile radio
costs. These costs are not a part of the
optional vehicle feature.
Functional requirements
The iPhone is connected to the vehicle, see
Owner's Manual for the vehicle.
Selecting CarPlay
CarPlay can be selected via the following
menus:
– In the main menu of the vehicle.
"Apple CarPlay"
The CarPlay menu is displayed.
– Depending on the equipment:
press the button on the Control-
ler. The CarPlay menu is dis-
played.
– "Media/Radio"
"Apple CarPlay"
The iPhone music app opens.
– "Navigation"
"Maps in Apple CarPlay"
The iPhone navigation app opens.
– "Communication"
"Phone in Apple CarPlay"
The iPhone telephone app opens.
Seite 67
MINI Connected COMMUNICATION
67
Online Edition for Part no. 01405A54505 - II/22

Using CarPlay
CarPlay can be used via the Central Infor-
mation Display (CID) and voice operation.
Via voice operation:
1. Press and hold the button on
the steering wheel, until the Siri Voice
command response is activated on the
iPhone.
2. Say the same commands as if using the
iPhone directly.
Switch between CarPlay and the
on-board monitor
To operate other functions via the on-board
monitor, CarPlay must be exited. CarPlay re-
mains active in the background and can be
selected again at any time.
1. "My MINI"
2. "System settings"
3. "Mobile devices"
4. Select the iPhone with CarPlay function.
5.
– "MINI on-board monitor"
Select the entry to switch CarPlay
off. The iPhone remains connected
as a smartphone.
– "Apple CarPlay"
Select the entry to switch CarPlay
on.
Exit CarPlay
The following options are available to exit
CarPlay without switching CarPlay off:
– Press the button on the Controller.
– Select the MINI icon in the CarPlay
main menu.
– Press the button on the Controller
when the CarPlay main menu is
displayed.
MINI App
Principle
The MINI app provides mobility-based serv-
ices and applications.
General information
The MINI app is available for iOS from the
Apple App Store and for Android from the
Google Play Store. The app must be down-
loaded and installed on the smartphone. The
installation process depends on the smart-
phone that is used and the installed soft-
ware.
When starting the app, a one-time registra-
tion is required provided you have not yet
created an account with a MINI ID.
The vehicle must be linked to the MINI ID
in order to use the functions. You only need
to do this once. The link is established with
the app. Confirmation in the vehicle via the
on-board monitor is also required.
Some functions such as Remote Services
enable communication with the vehicle
without the need for you to be inside or at
the vehicle.
You can find more information on installa-
tion and on app content in the correspond-
ing app store or at www.miniusa.com/
connected.
MINI Connected Apps
Principle
Certain apps of a compatible smartphone
can be integrated in the vehicle. These apps
are shown on the Control Display.
General information
For reasons of safety, some apps are usable
only while the vehicle is stationary.
Seite 68
COMMUNICATION MINI Connected
68
Online Edition for Part no. 01405A54505 - II/22

The manufacturer of your vehicle recom-
mends the use of apps that MINI has deter-
mined to be compatible with your vehicle;
otherwise, there may be malfunctions in
system operations.
Information on using apps:
– The range of functions shown on the
Control Display depends on the scope of
the app installed on the smartphone.
– The data transfer of the apps from the
smartphone to the vehicle can take some
time. Some apps depend on the speed of
the available Internet connection of the
smartphone.
– Some smartphones cannot simultane-
ously use apps and the Bluetooth hands-
free system. If necessary, restart the app
on the smartphone after a phone conver-
sation.
– Using apps on a smartphone can incur
costs. These costs are not a part of the
optional vehicle feature.
Information on compatibility:
– Compatible smartphones: from a dealer's
service center or another qualified serv-
ice center or repair shop.
– For more information about MINI Con-
nected: www.mini.com/connected.
– From a dealer's service center or an-
other qualified service center or repair
shop.
Prerequisites
– Corresponding mobile contract.
– Compatible smartphone.
– Apps are installed on the smartphone
and ready for operation.
– The smartphone is connected to the ve-
hicle via USB port or Bluetooth, refer to
Owner's Manual for the vehicle.
– The selection depends on the support of
third-party providers.
Use Apps
1. "MINI Connected"
2. Select desired app on the smartphone.
Displaying the status
1. "MINI Connected"
2. "Mobile devices"
Frequently Asked Questions
Why are the apps installed on my smart-
phone not displayed on the Control Display,
although the smartphone is connected to
the vehicle?
– The smartphone is not selected anymore
for using apps.
A different smartphone connected to the
vehicle was selected for using apps.
– The smartphone is not selected anymore
for using Bluetooth audio.
The smartphone is connected to the ve-
hicle via Bluetooth. A different smart-
phone connected to the vehicle was se-
lected for using Bluetooth audio.
Without Bluetooth audio, apps cannot
be used via a Bluetooth connection.
Two different smartphones are used for
audio playback and for using apps. In
this case, one of the smartphones has to
be connected to the vehicle via the USB
port.
– The smartphone is connected to the ve-
hicle via Bluetooth and USB port at the
same time.
If the connection is established via the
USB port and Bluetooth at the same
time, the Bluetooth connection is priori-
tized.
Seite 69
MINI Connected COMMUNICATION
69
Online Edition for Part no. 01405A54505 - II/22

Everything from A to Z
Index
A
Advanced Real Time Traffic Informa-
tion 28
Alternative routes 17
AM/FM station 38
Announcement, navigation, see Voice guid-
ance 19
Apple CarPlay preparation, operation 67
Applications, see MINI Apps 68
Appointments, see Calendar 58
App, Remote Services 66
Apps 68
Arrow view, split screen 25
Audio 46
Audio playback, pausing 34
Audio playback, see Audio 46
Automatic Teleservice Call 64
B
Balance, setting, see Sound settings 36
Bass, setting, see Sound settings 36
Bluetooth audio 47
C
Calendar 58
Call up the map, navigation 14
CarPlay, operation 67
Charging assistant, see Points of inter-
est 9
Charging recommendation 18
Charging station search 9
Charging stations monitoring 23
Communication 52
Concierge service 67
Concierge service messages, see Mes-
sages 65
Conference, see Calls with multiple par-
ties 53
ConnectedDrive Store, see MINI Connected
Store 65
Connected Services 65
Contacts 54
Customer relations 65
Customer support 65
D
Default settings, navigation 22
Destination entry by voice 8
Destination entry, Global Positioning Sys-
tem coordinates 11
Destination entry, GPS coordinates 11
Destination guidance 15
Destination guidance hints, route 20
Destination guidance with intermediate
destinations, see Trip 12
Destination input 7, 11
Destination input by voice 8
Destination, storing as contact 16
Dictation function 60
Digital radio, see HD Radio reception 39
Dynamic destination guidance 29
E
E-mail 57
Enter address, navigation 7
Entertainment, control elements 34
Entertainment source, changing 34
F
Fader, setting, see Sound settings 36
FM/AM station 38
Seite 70
REFERENCE Everything from A to Z
70
Online Edition for Part no. 01405A54505 - II/22

G
Gas station recommendation, naviga-
tion 18
GPS coordinates, destination entry 11
GPS navigation, see Navigation system 6
H
Hands-free system 54
HD Radio 39
Help regarding navigation, see Frequently
Asked Questions 32
Home address, navigation 9
Hotline, see Customer support 65
I
Information on the navigation data 24, 31
Interactive map 21
Intermediate destination, navigation 12
iPod/iPhone 46
L
Last charging stations 8
List of route guidance information, split
screen 25
M
Maneuvering hints, see Route guidance in-
formation 20
Map update 31
Microphone, muting 53
MINI App 68
MINI Connected App, see MINI App 68
MINI Connected Services 65
MINI Connected Store 65
MINI Smartphone App, see MINI App 68
MINI Teleservices 63
Mobile phone 52
Mobile phone, operation 52
Monitoring the charging stations 23
MP3 player, see Audio 46
My MINI App, see MINI App 68
N
Navigation data 24, 31
Navigation, split screen 25
Navigation system 6
Notes 60
O
Optical character recognition 60
P
Phone conference, see Calls with multiple
parties 53
Play music from USB devices 46
Play music via Bluetooth 47
Points of interest, navigation 9
Q
Quick search, navigation 8
R
Radio 38
Radio, control elements 34
Radio Data System RDS 38
Radio, muting 34
Radio, sound settings 36
Radio, volume, adjusting 34
Range assistant 15
Range map 20
RDS Radio Data System 38
Reading out loud 61
Real time traffic bulletins 28
Recent destinations 7
Remote Services, app 66
Route, changing 16
Route details, see Navigation 17
Route guidance information 20
Seite 71
Everything from A to Z REFERENCE
71
Online Edition for Part no. 01405A54505 - II/22

Route magnet, see Changing the route de-
tails 19
Route preference, route 16
Route section, bypassing 17
RTTI, see Advanced Real Time Traffic Infor-
mation 28
S
Satellite tuner 40
SDARS, see Satellite tuner 40
Search, navigation 8
Select a destination from contacts, naviga-
tion 11
Service messages, see Messages 65
Services, Remote 66
Settings, navigation 22
Short messages 56
SiriusXM 40
Smartphone, operation 52
Software applications, CarPlay 67
Software applications, see MINI Apps 68
Sound settings 36
Speech recognition, see Optical character
recognition/dictation function 60
Speed-dependent volume settings 36
Split screen, navigation 25
State/province, selecting for navigation 7
Station, AM/FM 38
Station, renaming 39
Stations, stored 45
Store, see MINI Connected Store 65
Switching calls, see Calls with multiple par-
ties 53
T
Tasks 59
Telephone 52
Telephone conference, see Calls with multi-
ple parties 53
Telephone, operation 52
Teleservice Call 64
Teleservices 63
Text messages, see Short messages 56
Toggle, see Calls with multiple parties 53
Traffic bulletins, navigation 27
Traffic bulletins, see Advanced Real Time
Traffic Information 28
Treble, setting, see Sound settings 36
Trip, destination guidance with intermedi-
ate destinations 12
U
Update, navigation map 31
USB audio 46
V
Vehicle apps 66
Version of the navigation data 24, 31
Voice command response, smartphone 56
Voice guidance, navigation 19
Voice notes 60
Volume, adjusting 34
Volume settings 36
Y
Your dealer's service center 64
Seite 72
REFERENCE Everything from A to Z
72
Online Edition for Part no. 01405A54505 - II/22

01405A54505 ue
*BL5A5450500K*
Online Edition for Part no. 01405A54505 - II/22

California Proposition 65
Warning
For vehicles sold in California:
Online Edition for Part no. 01405A54505 - II/22
*BL5A5450500K*
01405A54505 ue
Online Edition for Part no. 01405A54505 - II/22
