STA21 WAWF Invoice Input 3-9
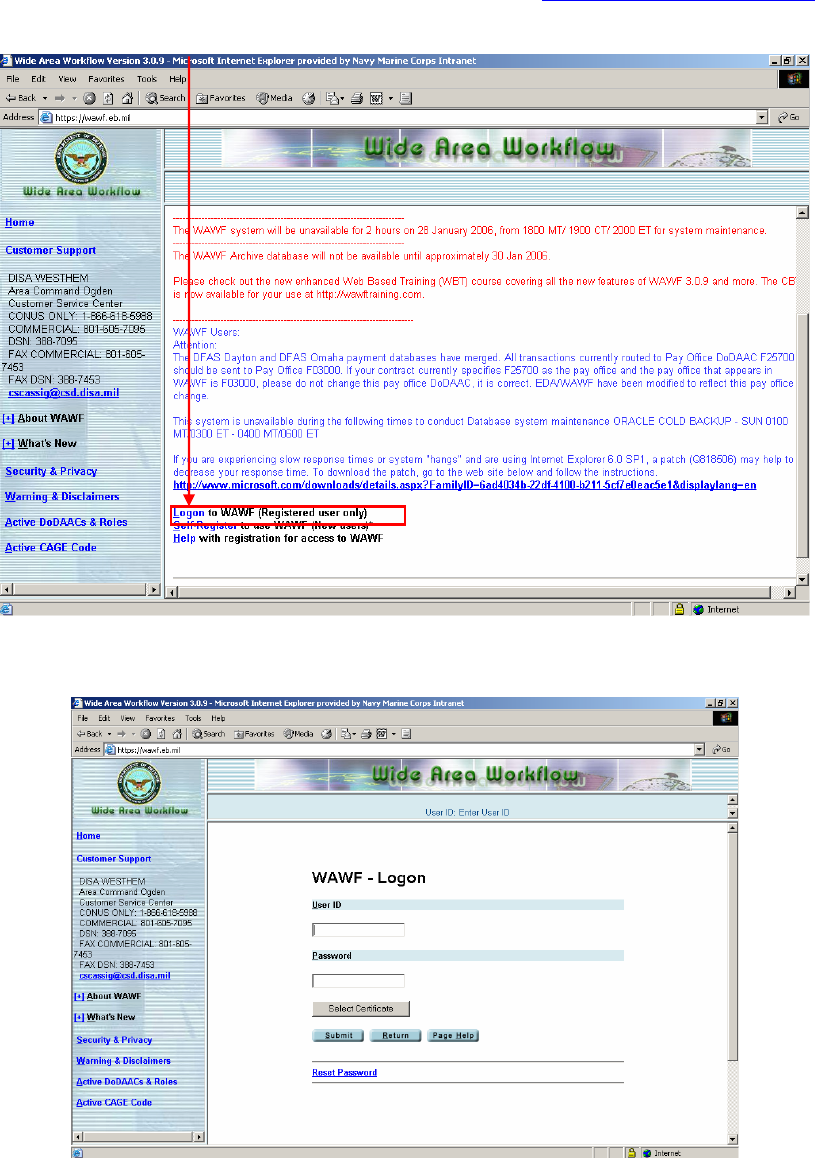
Access the Wide Area Work Flow website at https://wawf.eb.mil.
Scroll down and click the Logon link.
Enter your username and password and click Submit.
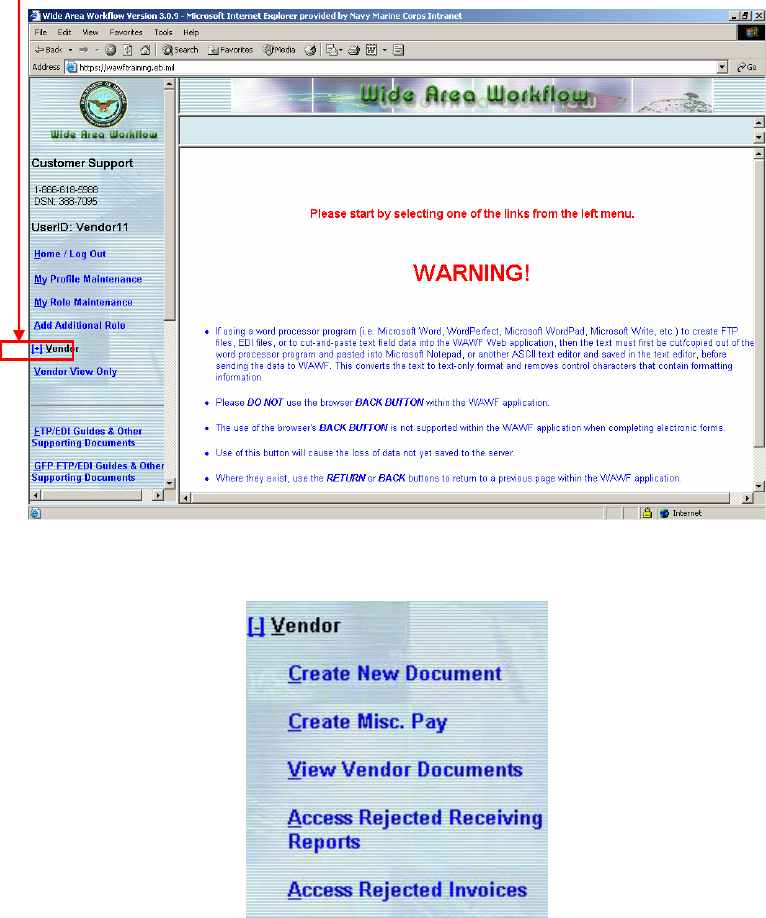
Click the + icon next to Vendor to expand the menu.
Click on Create New Document under the expanded Vendor menu.
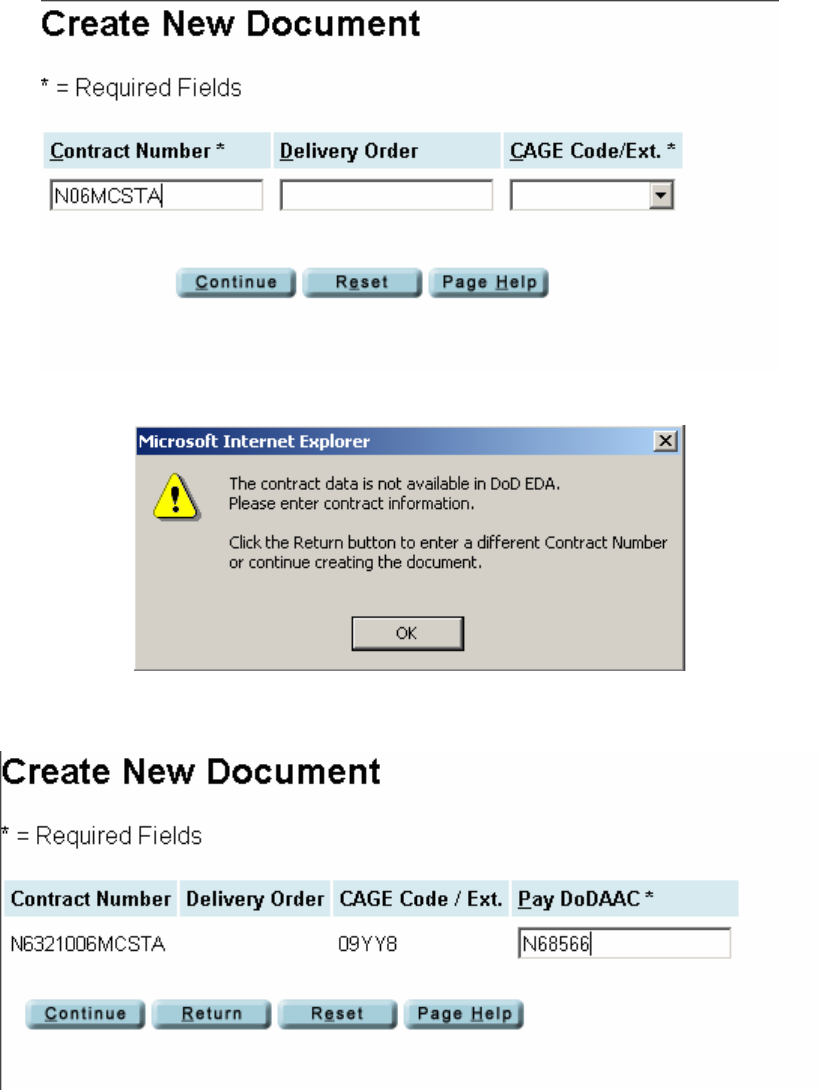
Input your contract number, leave the delivery order blank, and
choose your CAGE code from the drop down menu and click
Continue.
Click OK to the message that appears.
Enter the Pay DoDAAC N68566 and click Continue.
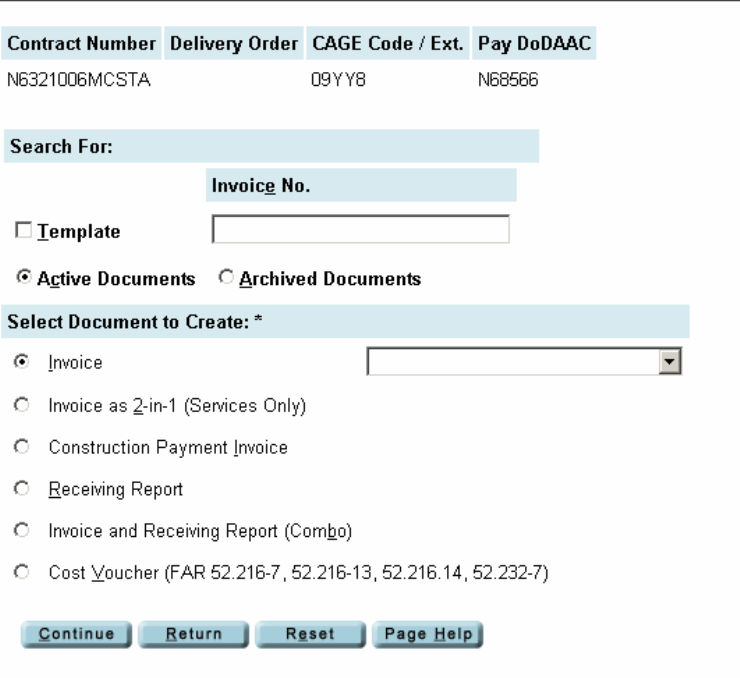
Click the button next to Invoice. The screen will refresh as
below. Click Continue.
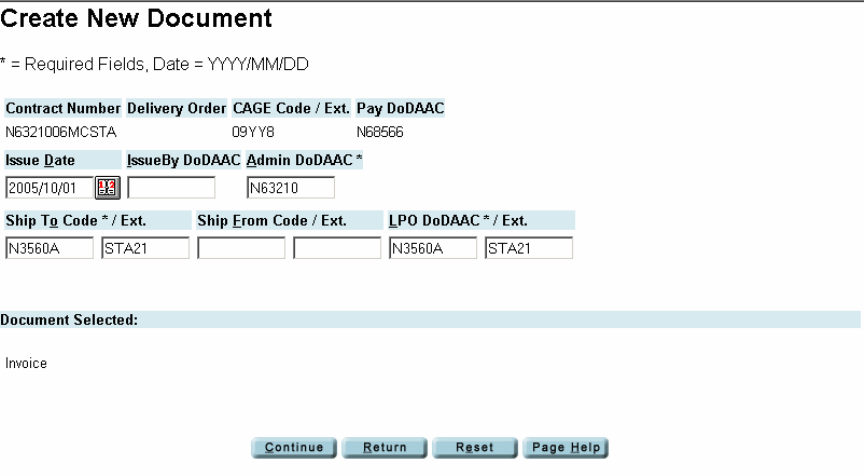
At the next screen, input the following information:
-Issue Date: beginning of the fiscal year. For all FY06
invoices, it will be 10/01/2005
-Admin DoDAAC: This will be your school UIC. Information
will be provided by Brenda Cox.
-Ship to Code: This will always be N3560A ext. STA21. It is
very important to put the STA21 extension in so that your
invoice is directed to the correct inbox for certification.
-LPO DoDAAC: This will always be N3560A ext. STA21. It is
very important to put the STA21 extension in so that your
invoice is directed to the correct inbox for certification.
When all fields are complete, click the Continue button.
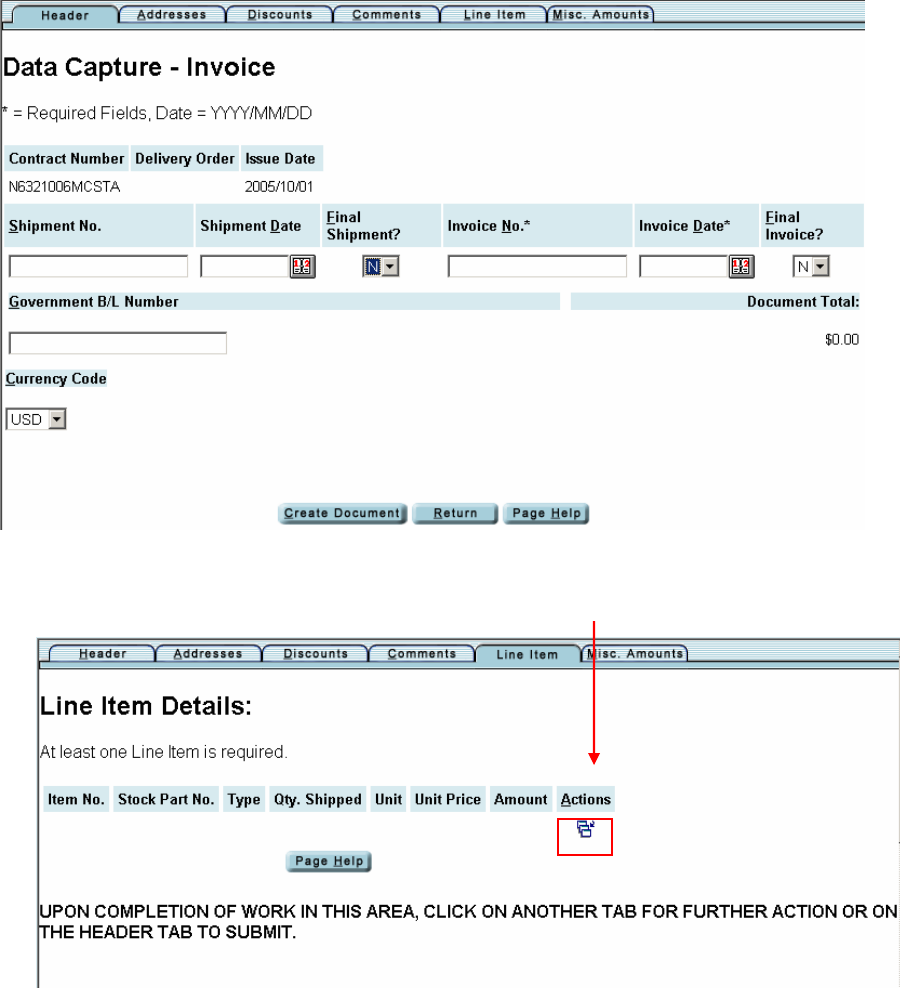
Input the invoice number and invoice date. Be sure not to input
an invoice date that is later than the current date, or the
invoice will be rejected by the certifier. Leave the Final
Invoice box on N.
Once all invoice data is input, click on the Line Item tab.
Click on the three boxes icon under Actions.

Input the line item information:
Item No. can be 0001.
Stock Part No. can be NONE
Type will be SV-services
QTY shipped will be 1 (for lump sum line item)
Unit will be EA for each.
Unit Price – enter the full amount of the invoice.
Description field needs some comment entered, but there are
no specific requirements. You will want to ensure that the
certifier knows what the bill is for.
Once all line item information is entered, scroll down and click
on the Save CLIN/SLIN button.
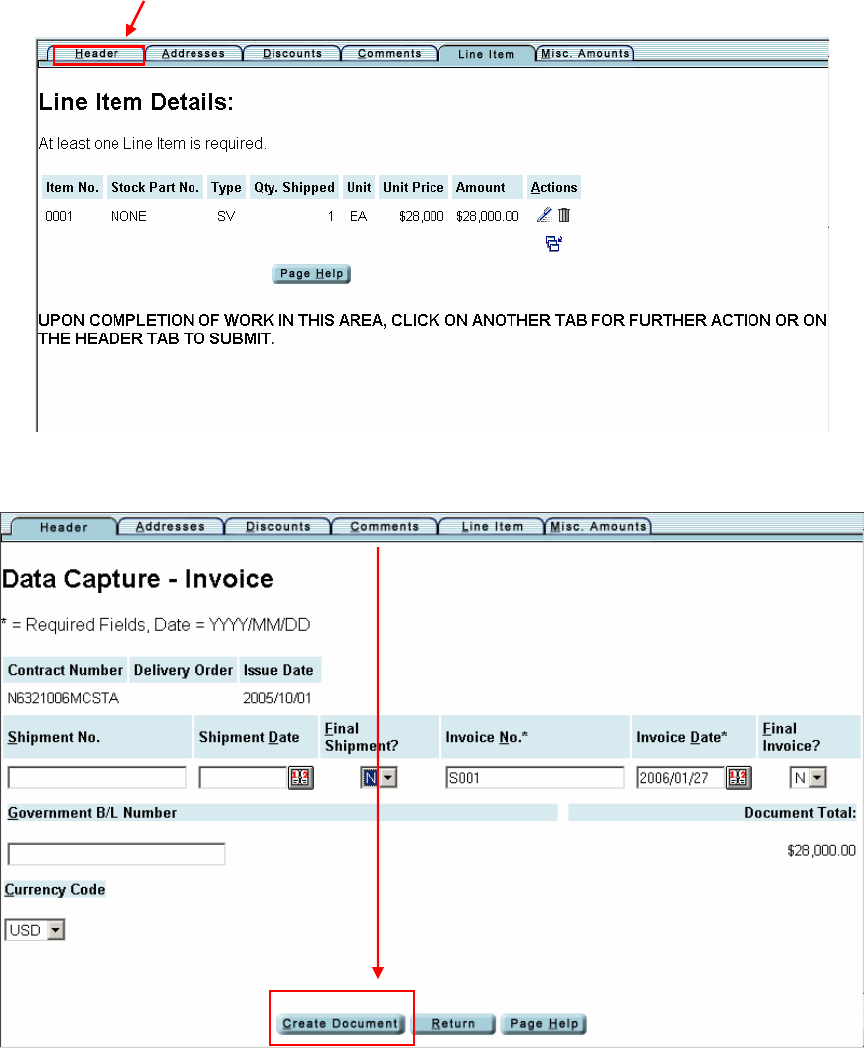
You will see a summary of the line item information you just
input. Click on the Header tab.
Click on the Create Document button.
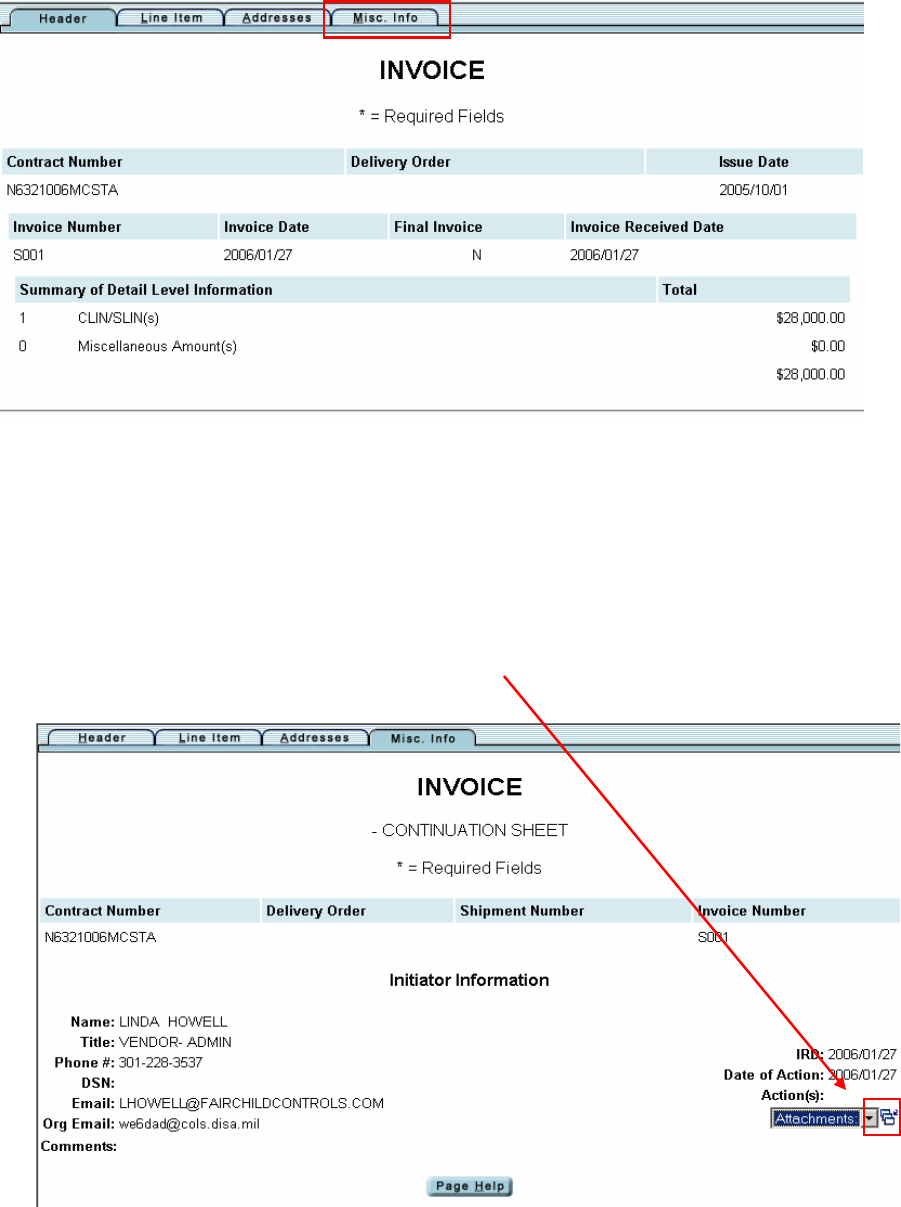
You will now see the summary data of your invoice. Click on the
Misc. Info tab to add an attachment.
You will need to add an attachment to the invoice to transmit
the student and course information to the certifier. This
attachment can be a scanned pdf document or any Microsoft Office
product (Word, Excel). Be sure to list the student name, social
(last 4 if necessary), course number, and amount being paid. If
you are unable to list the full social, please include the
associated document number for NCMIS input.
Click on the three boxes icon next to attachments.
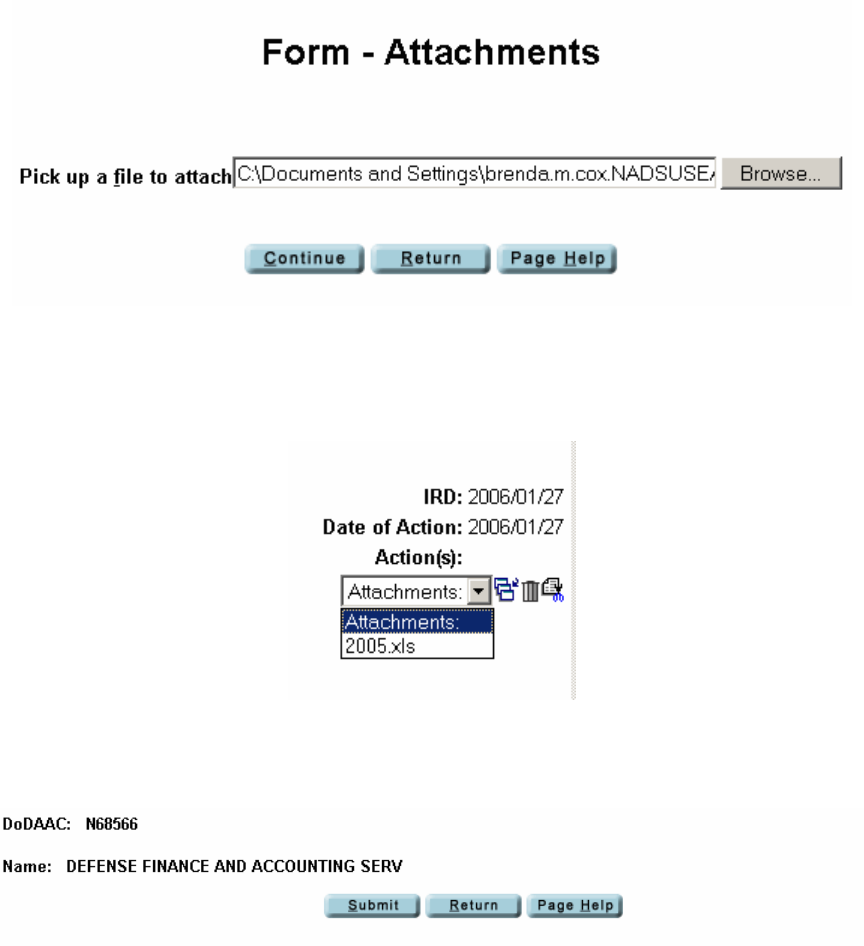
Click the Browse button to find the document on your computer.
Once you find the document, click Open. You will be returned to
the screen below and will see the document path listed in the
box. Click Continue.
The attachment will be listed in the drop down box. You can
click the trash can icon to remove the attachment, or click the
three boxes to add another attachment.
Once all attachments are made, click on the Header tab. Scroll
to the bottom of the screen and click the Submit button.
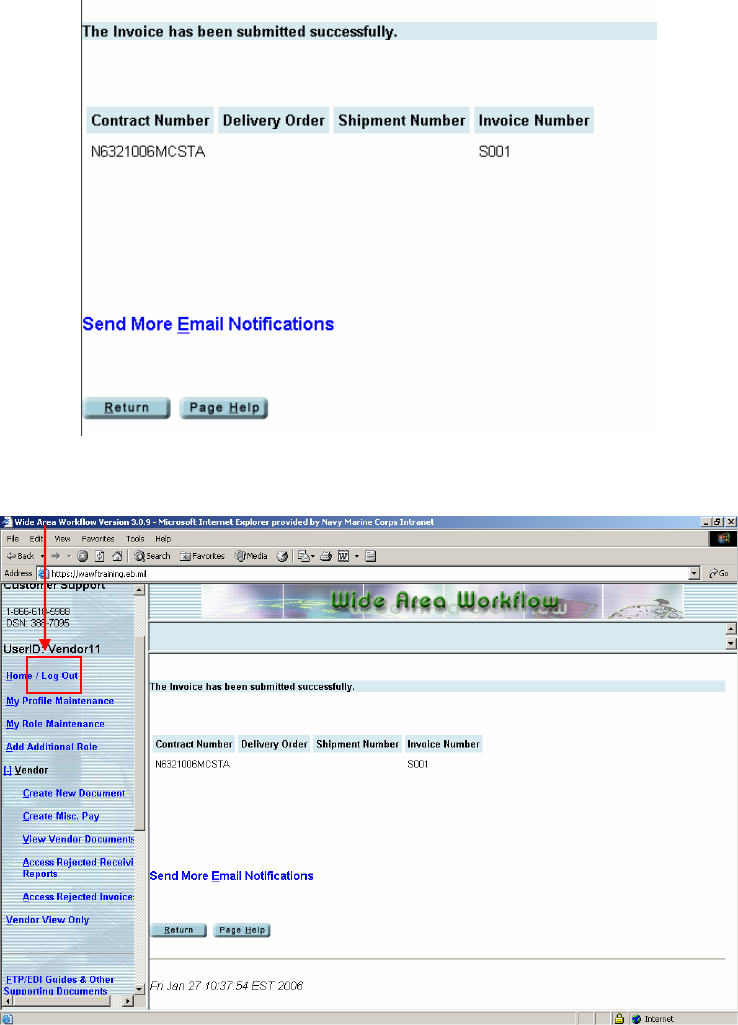
You will receive a message that the invoice has been submitted
successfully. Click Return to go back to the document creation
screen.
Click Log Out to exit WAWF.
