Table Of Contents
• Basics
• Calibration
• Function Buttons
• Mouse Operations
• Whiteboard
• Pen Variations
• Normal Pen
• Intelli-Pen
• Text Recognition
• Search text in Google
• Search text in Wikipedia
• Pointer Pen
• Clipart, Templates, Object Management
• Flash Learning Objects
• Create Own Templates
• Import Background from Applications
• Text Input
• Copy/Paste split text
• Import Background from Applications
• Hyperlink, File Attachment
• Webcam Input
• TWAIN Input
• Hitachi Projector Control
• Customize Toolbar
• User Profile
• Math Tools
• Screen Capture Tool
• File Export (Save as…)
• Further Information
Table Of Contents
StarBoard Software Training
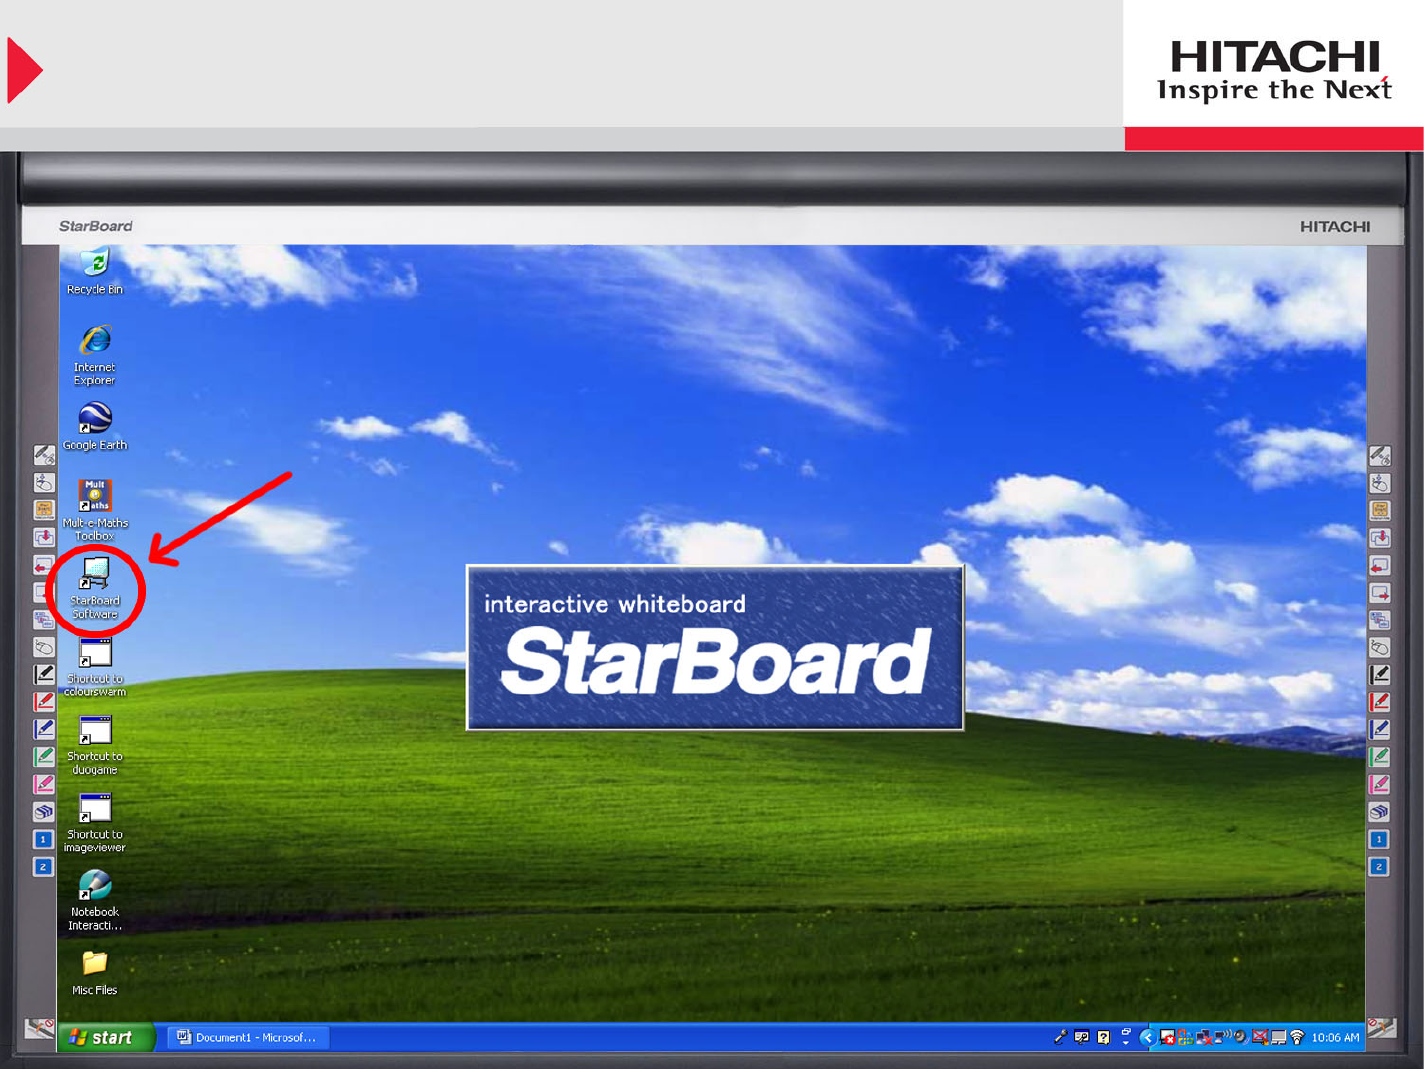
Open StarBoard Software
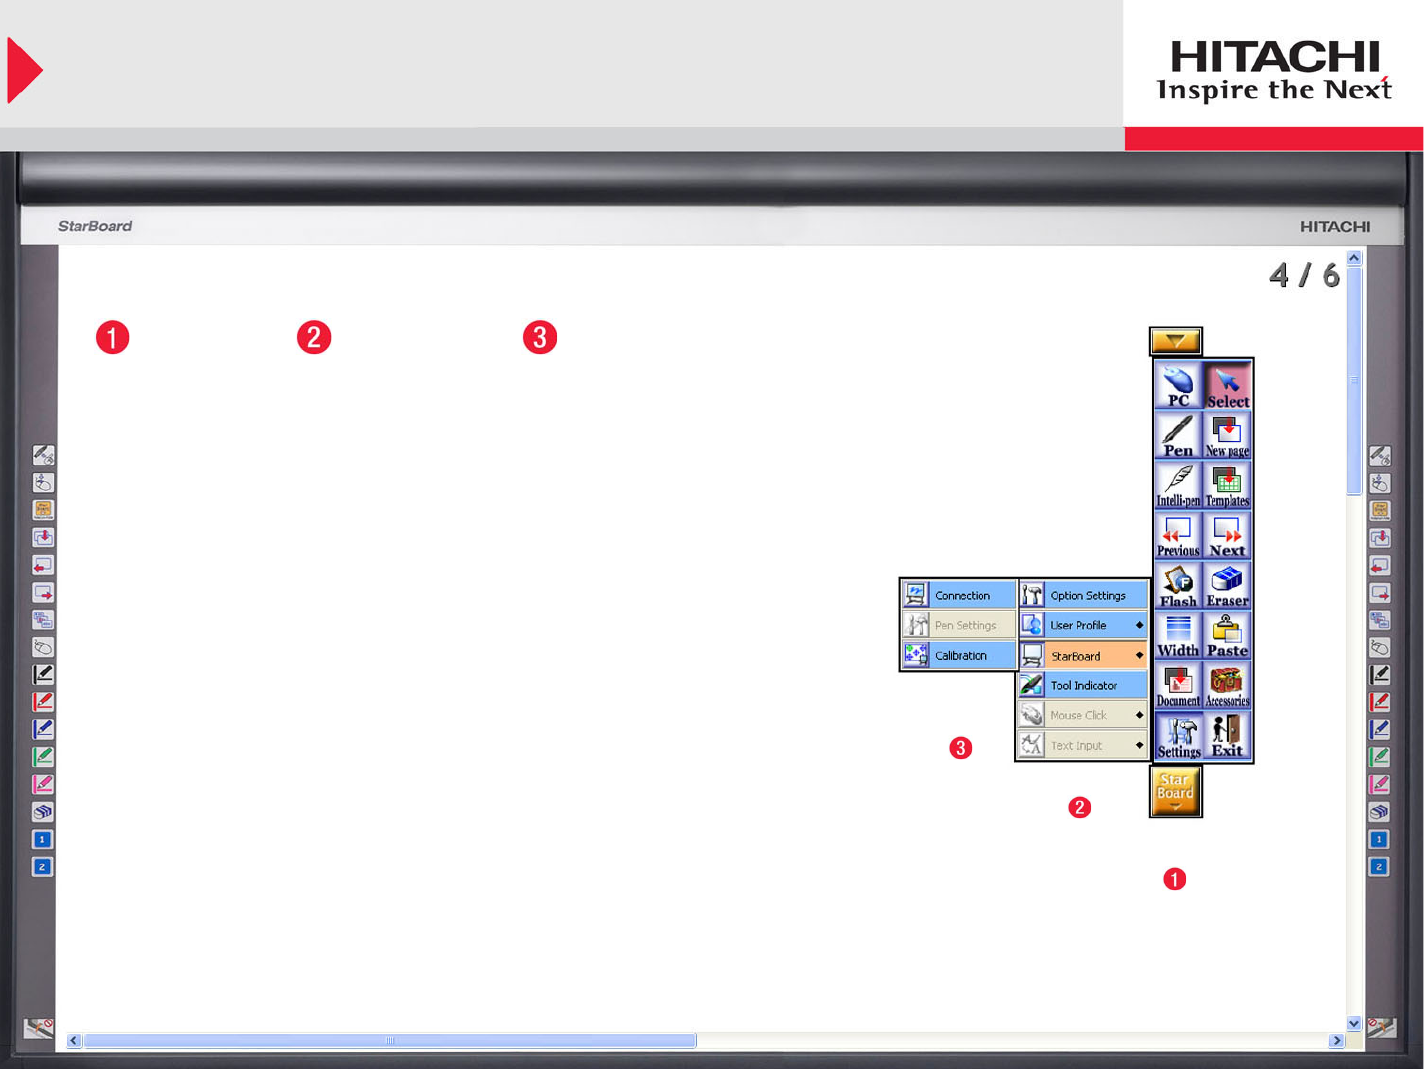
Basics: Calibration
If Calibration Icon is not in toolbar, locate it at:
Settings StarBoard Calibration
NOTE:
A Calibration Shortcut is often set
up for the Blue “1” Function Button,
if not you can customize it later
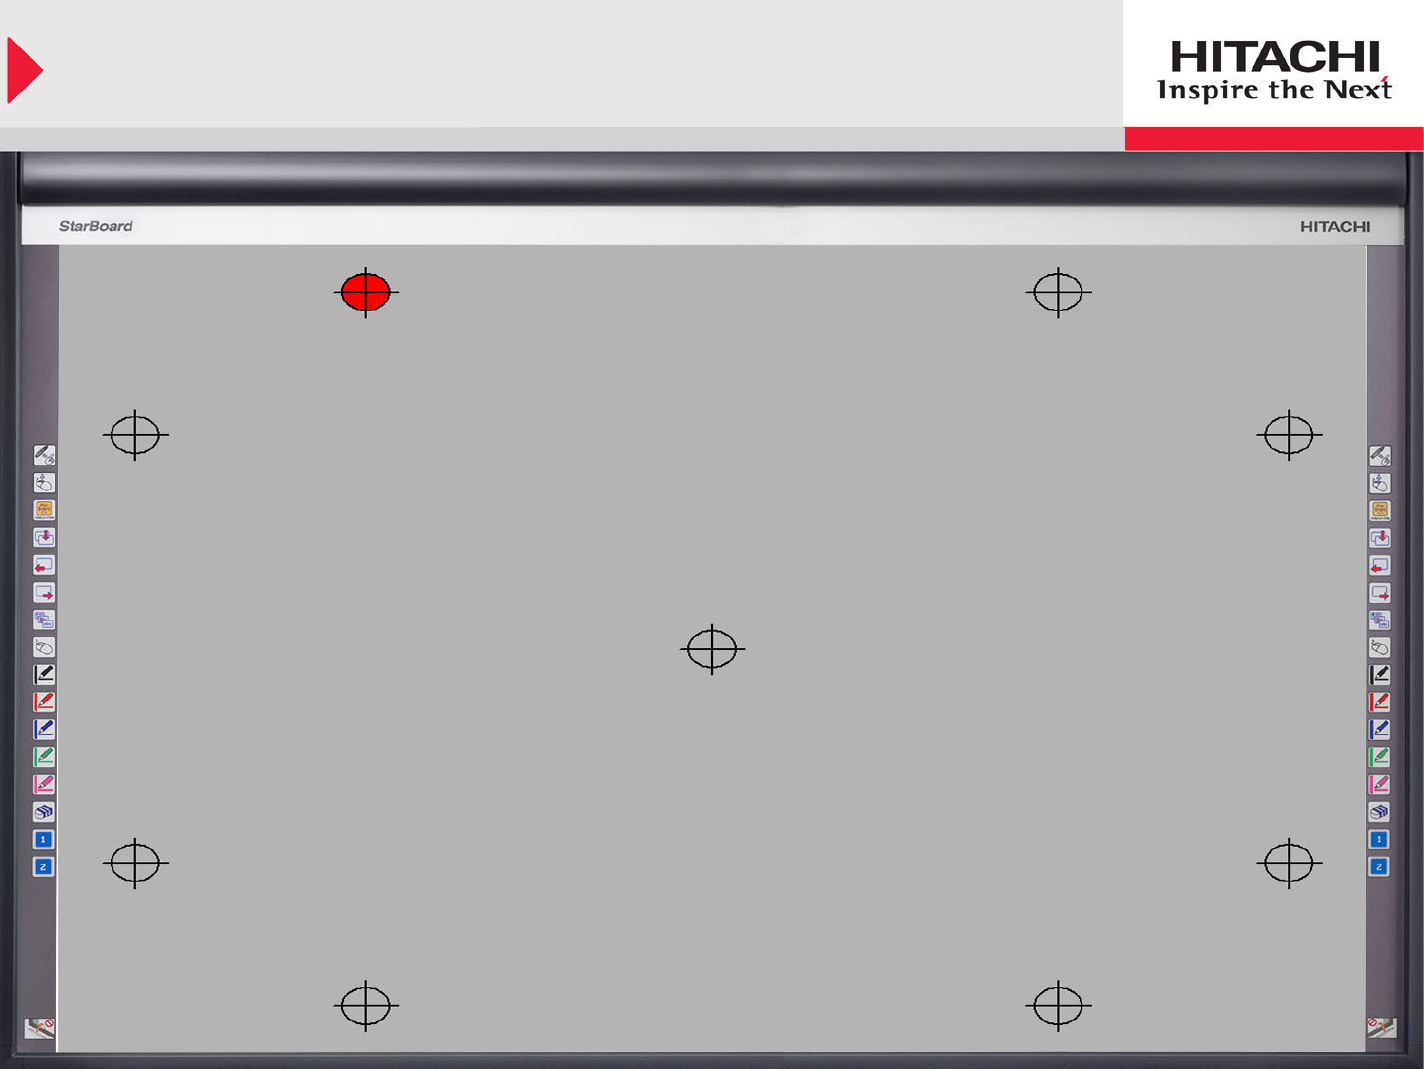
Calibration (continued)
1. Hold tip of pen or finger
on center of blinking red circles
until that circle turns green
3. Continue Counter Clockwise,
ending with the center circle
PURPOSE OF CALIBRATING:
• To match cursor location to point of contact with StarBoard
WHEN TO CALIBRATE:
• Cursor location is different from point of contact
• Projector/StarBoard is not fixed (e.g. not ceiling/wall mounted)
• Multiple laptops connected to StarBoard
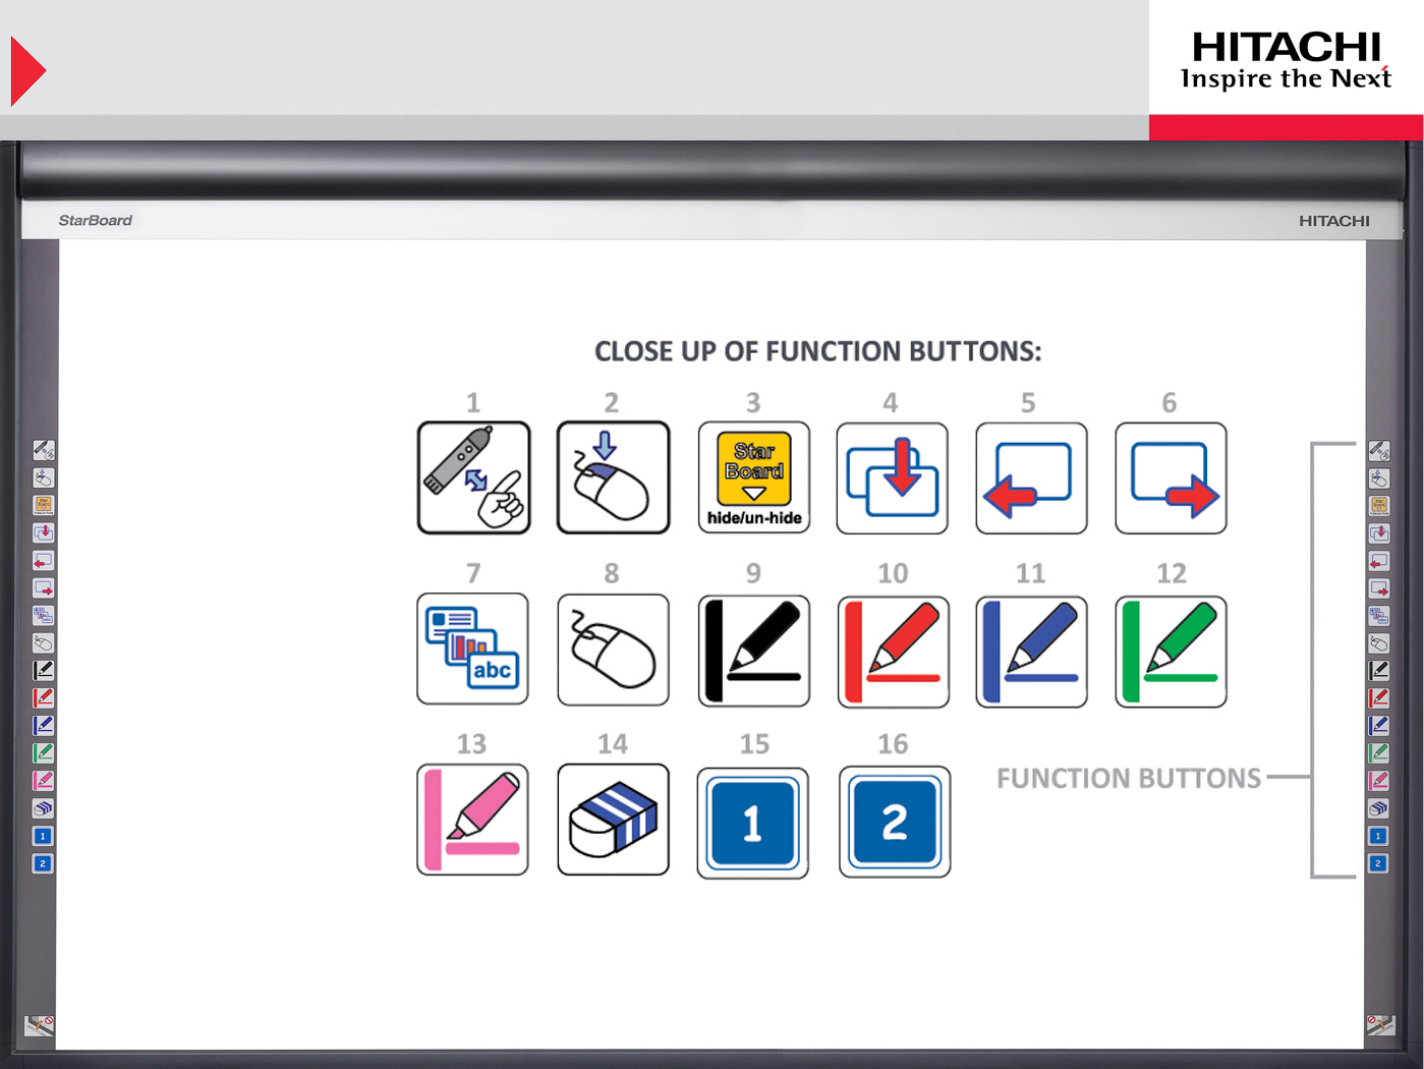
Basics: Function Buttons
FUNCTION(BUTTONS:(
1)(!"#$%&#'"()*+,")
2)(-&'./)01&23)
3)(4&,"$-"5"61)7++186()
4)(9":)!6'")
5)(!("5&+;<)!6'")
6)(9"=/)!6'")
7)(7+>&2)?&</)
8)(!0)*+,")
9)(@1623)!"#)
10)(-",)!"#)
11)(@1;")!"#)
12)(A(""#)!"#)
13)(!)4&'.1&'./"()
14)(B(6<"()
15)(061&8(6C+#)
16)(9+/)>(+'(6DD",))
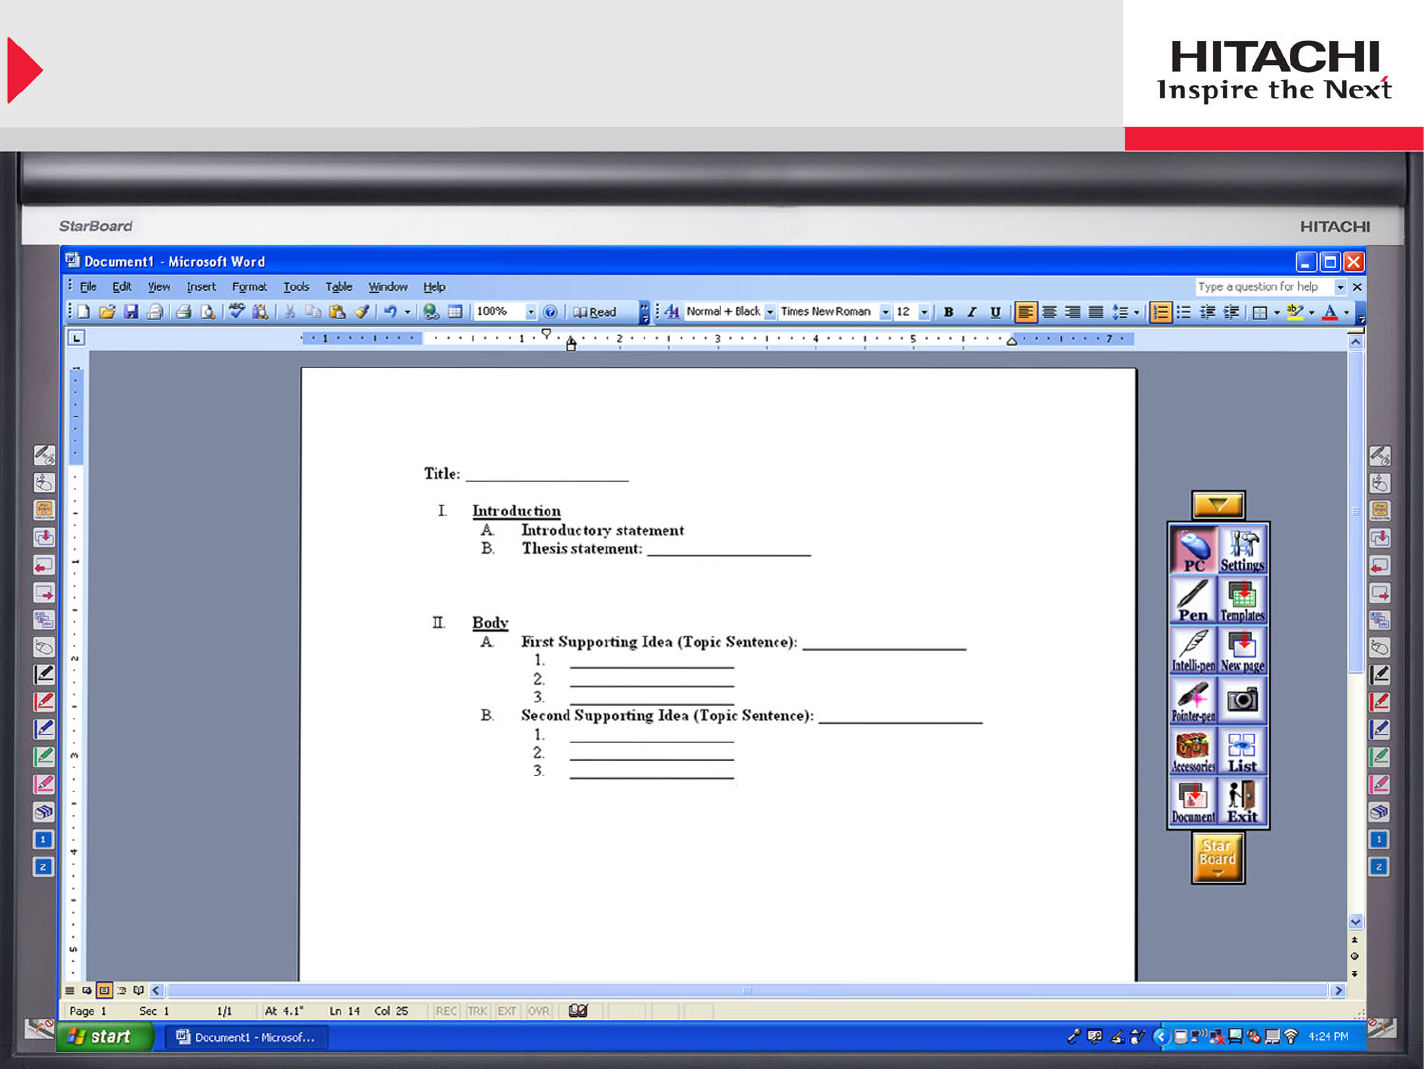
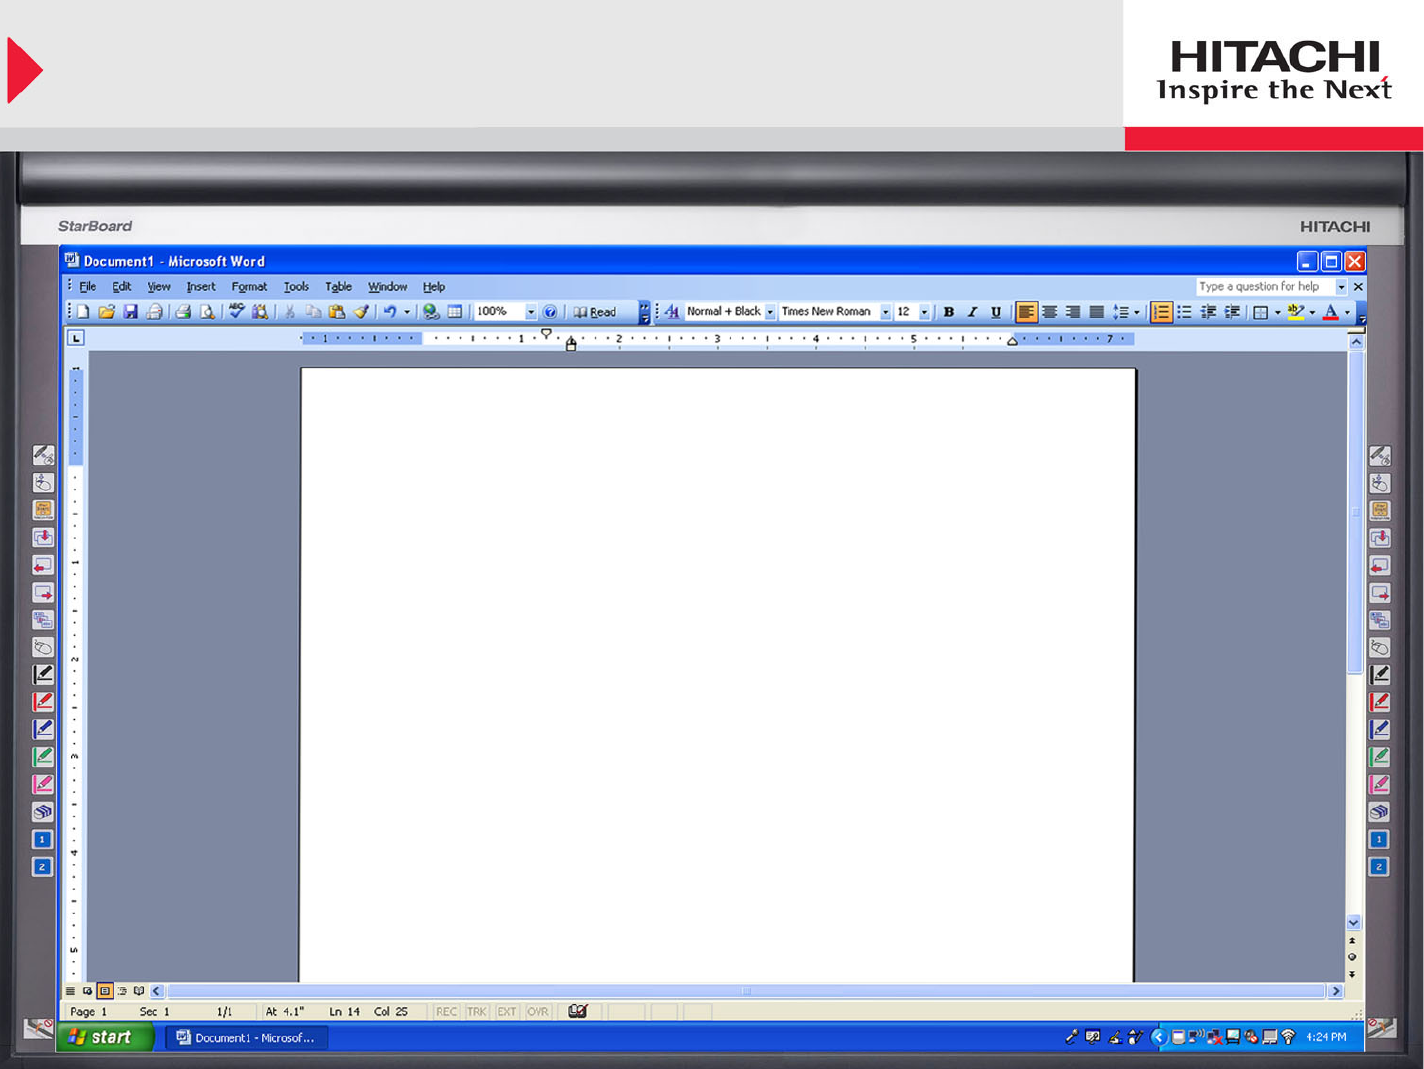
Basics: Mouse Operations
The Mouse Icon must be
selected for PC operations
(e.g. Microsoft Word)
While in PC Mode, select
Pen Icon to take a screen
capture of current screen
!
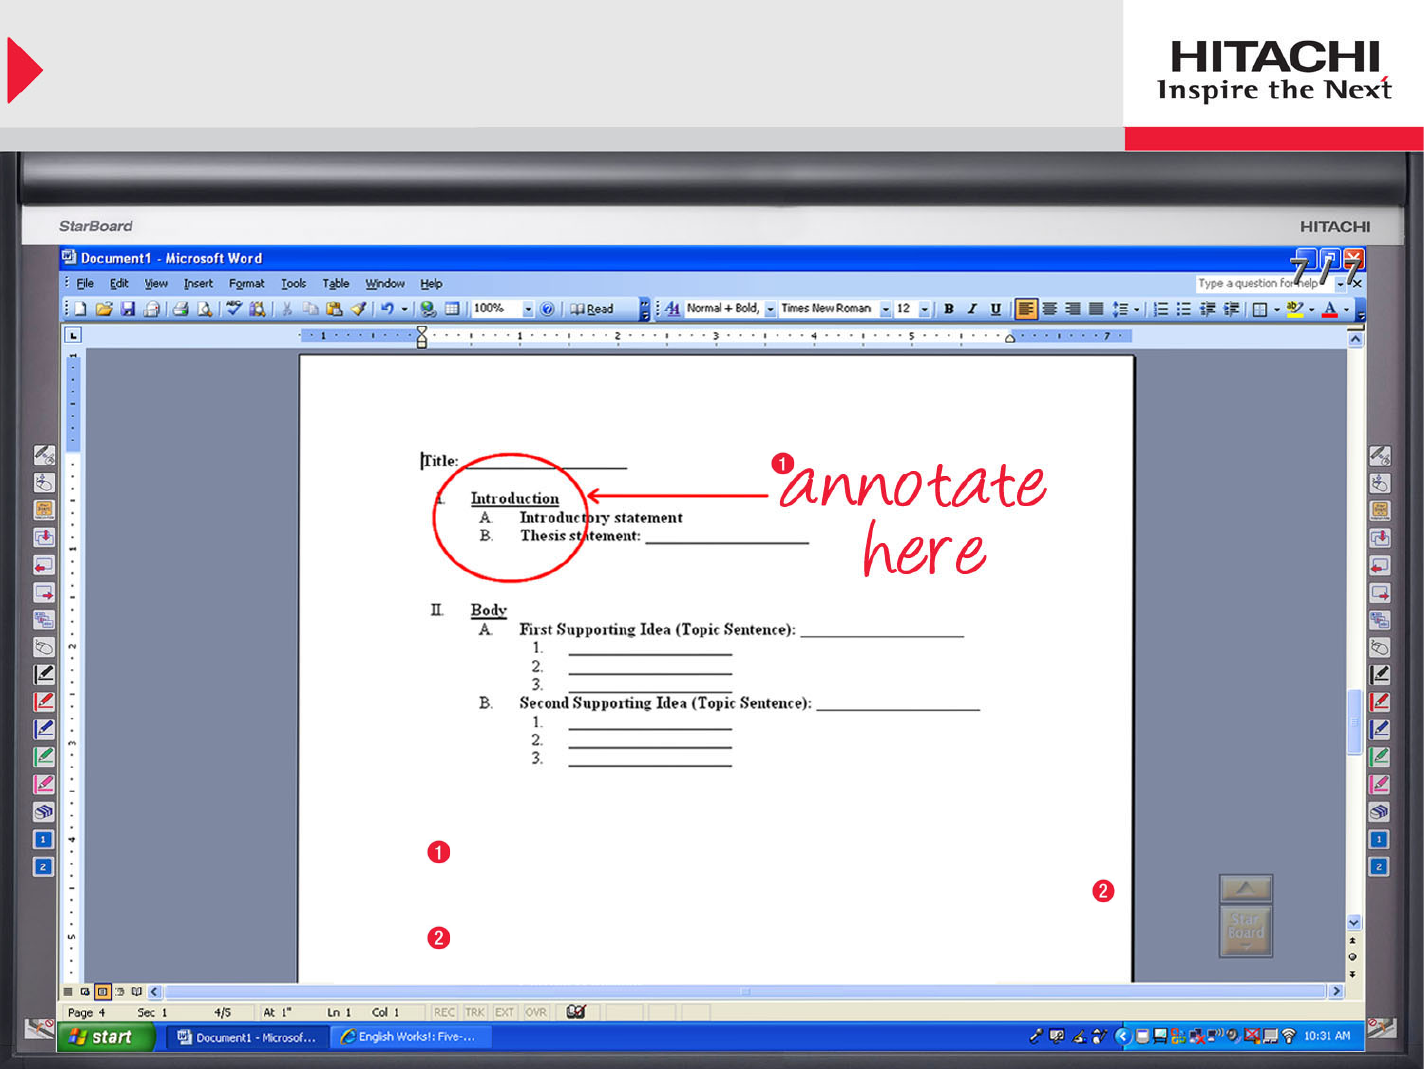
Basics: Mouse Operations (continued)
The Screen Capture is automatically imported
into the StarBoard Pages, ready for annotation
Hide toolbar by selecting yellow arrow at the top
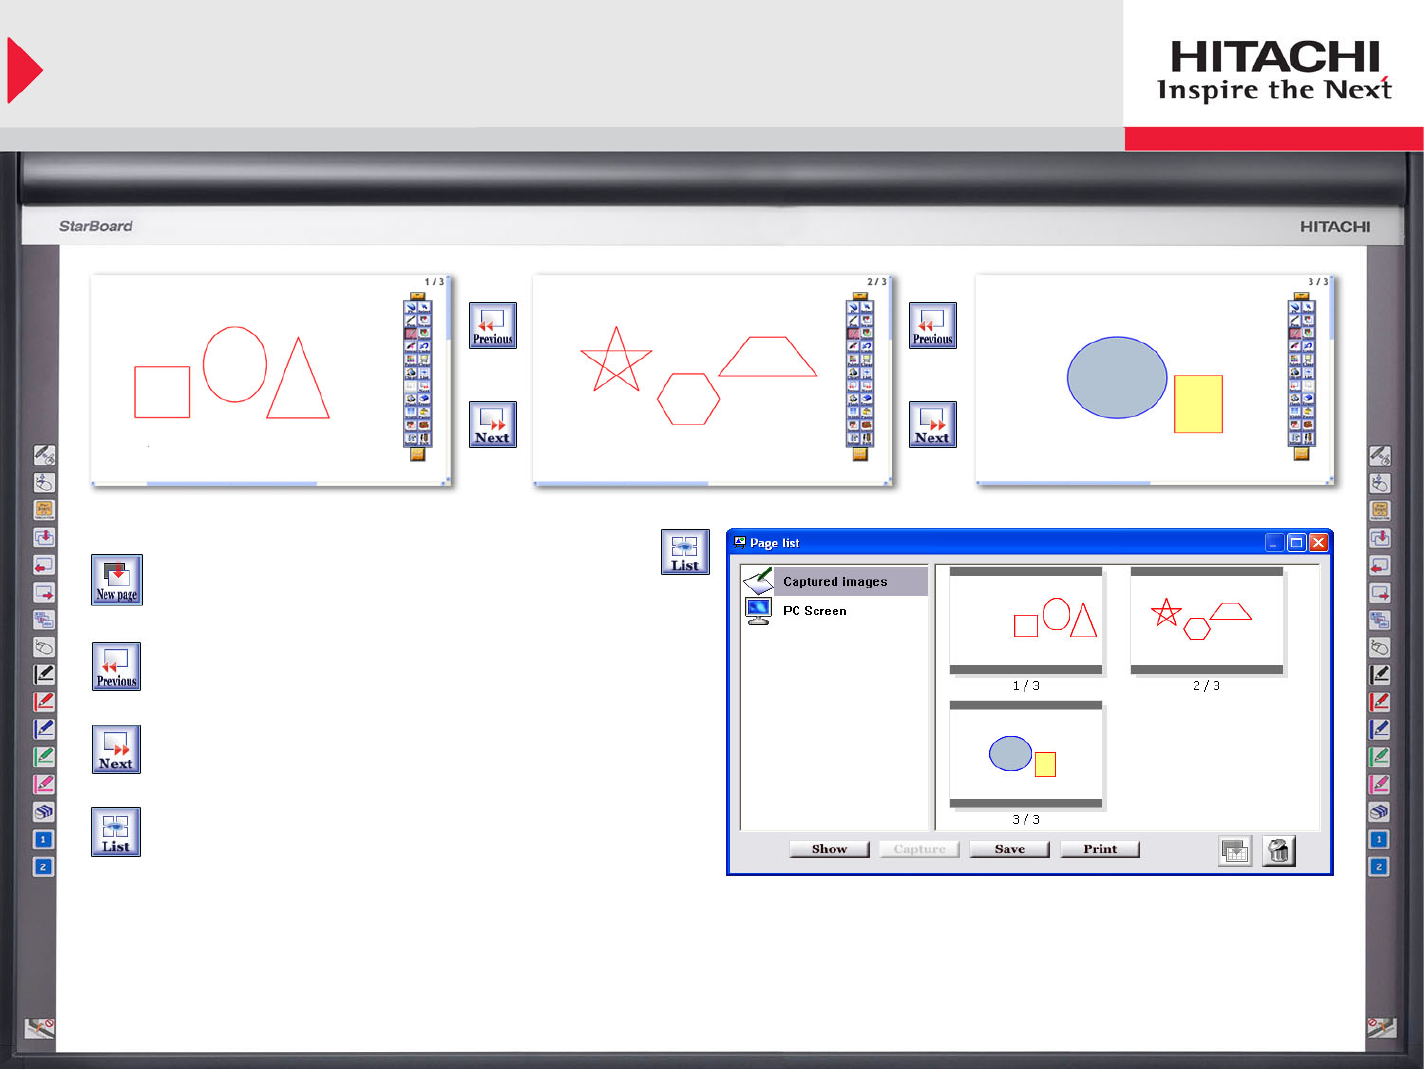
Basics: Whiteboard
Add New Blank Page
Move to Previous Page
Move to Next Page
View all pages at once, change order of pages,
or delete pages
NOTE:
Page Icons should be located in toolbar, if not
they can be added (see “Customize Toolbar”)
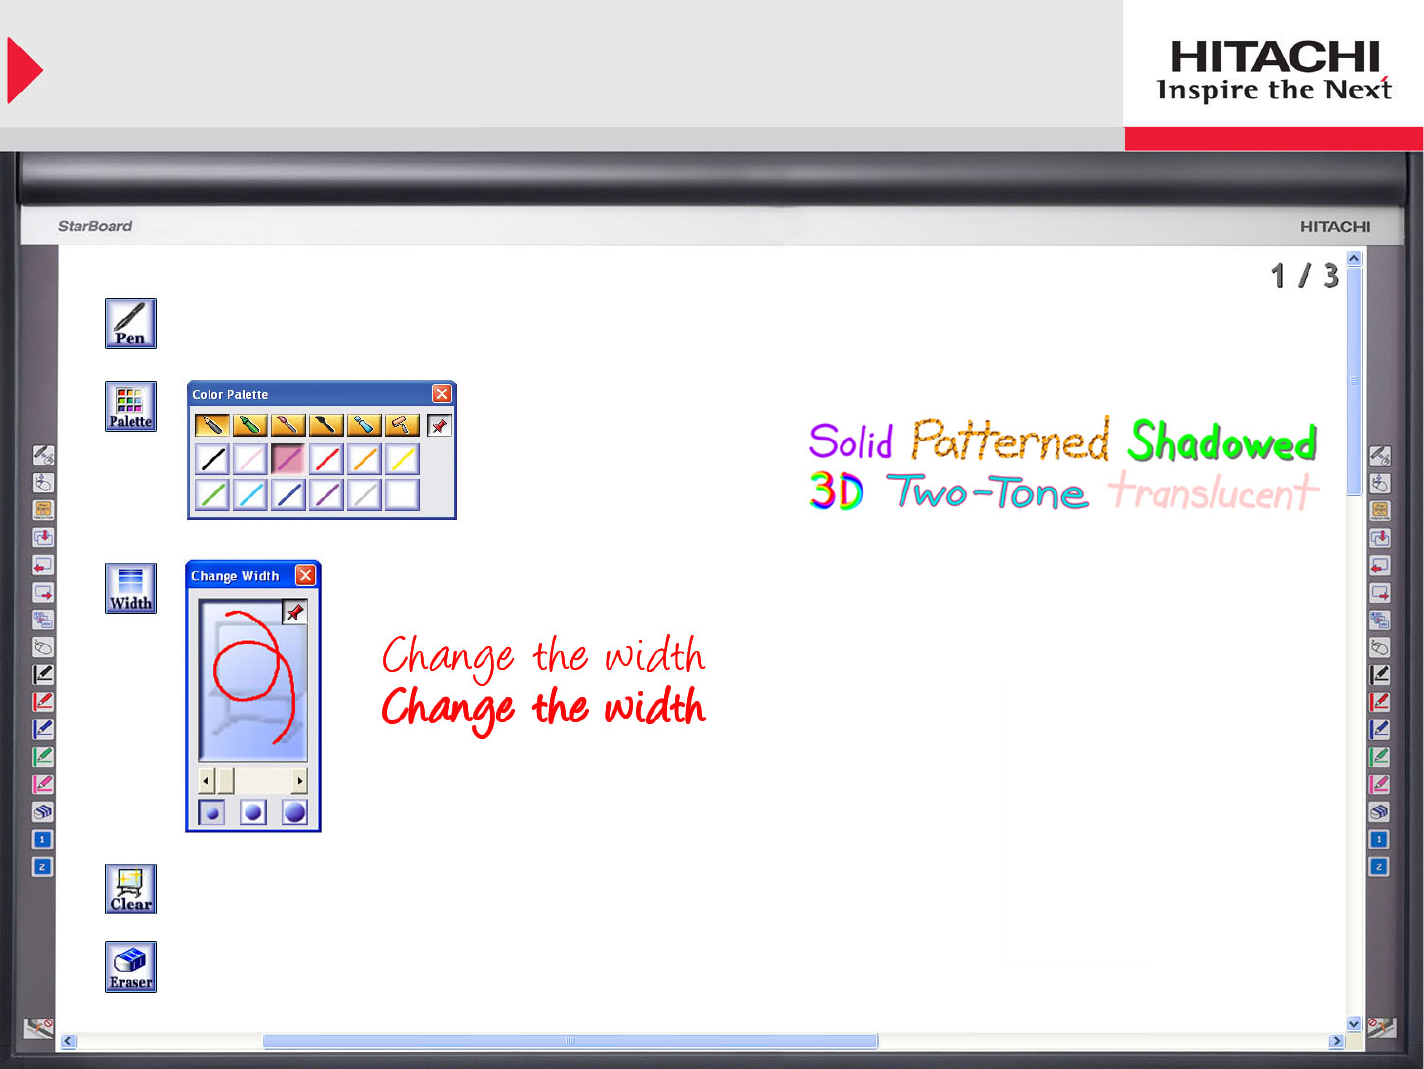
Pen Variations: Normal Pen
Six Digital Inks to choose from
12 colors for each digital ink
{!
{!
Customize width with Slider
Small, Medium, or Large
Standard Drawing Pen:
Best for Annotations and free hand
Clear:
Erase Entire Page (only current page)
Eraser:
Erase lines made with Pen (Standard Pen only)
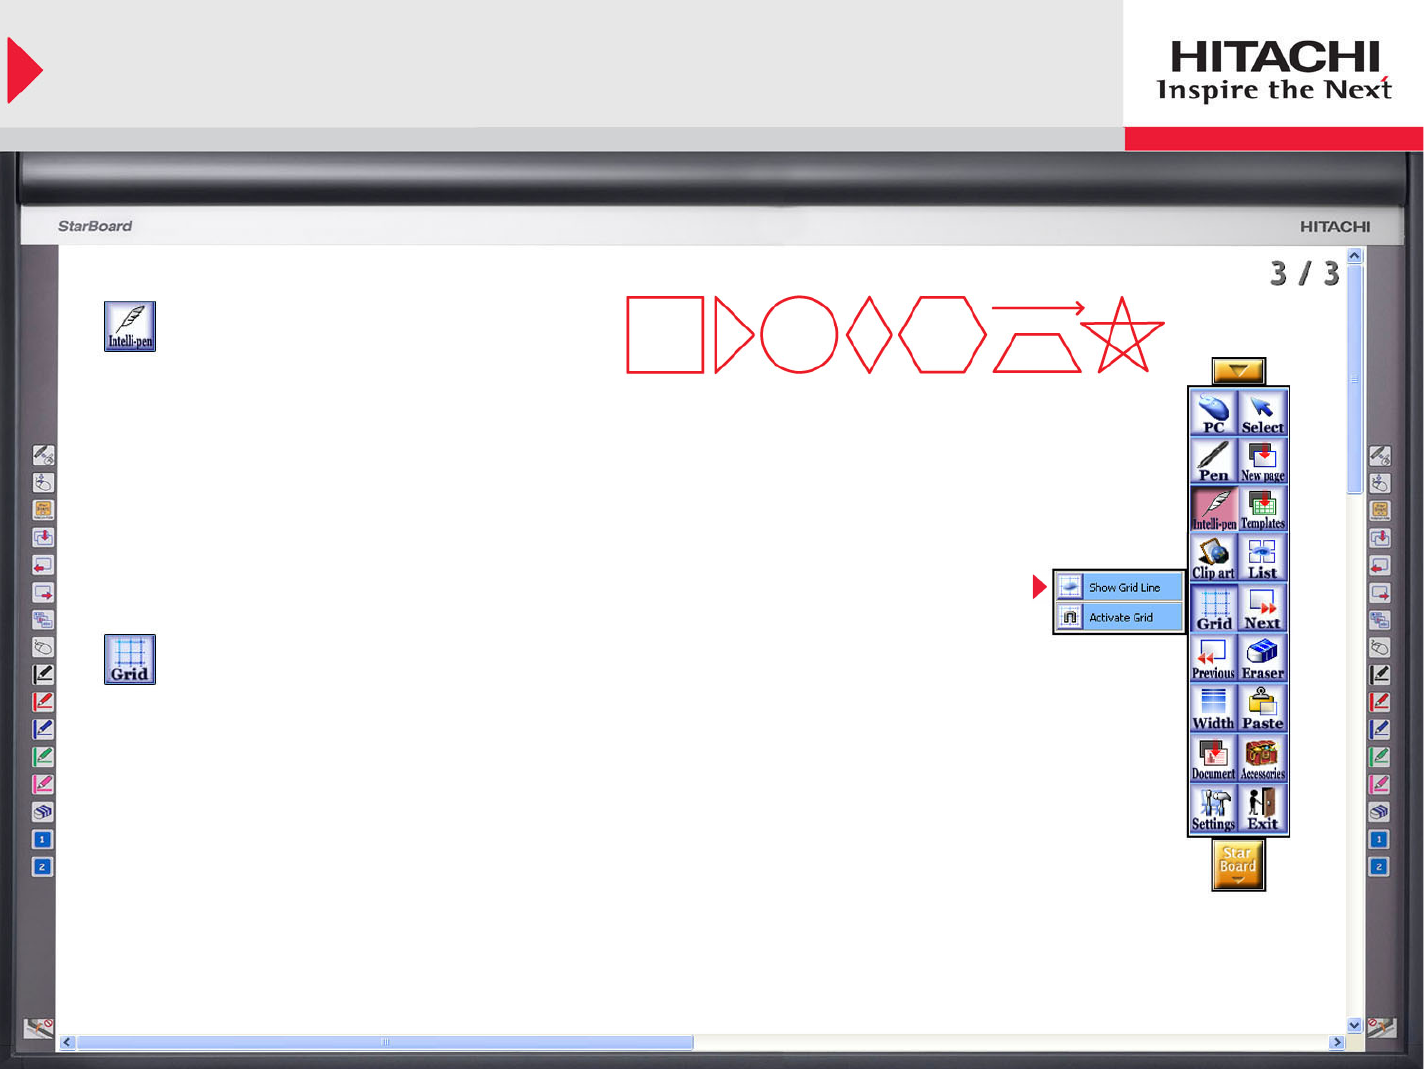
Pen Variations: Intelli-Pen
{
Intelli-Pen:
• Automatically converts free-hand shapes
into geometric objects
(Supported Shapes: Rectangle, Circle, Arrow,
Star, Triangle, Polygons, Diamond, dotted and
dashed lines)
• Can convert handwriting into text
• Search converted text in Wikipedia or Google
• Great for Math Lessons when used with
the Grid Options
Grid:
Show Grid Line
(see next slide if Grid Icon is not in the toolbar)
NOTE:
If Grid or Intelli-Pen Icons are not located in toolbar,
they can be added (see “Customize Toolbar”)
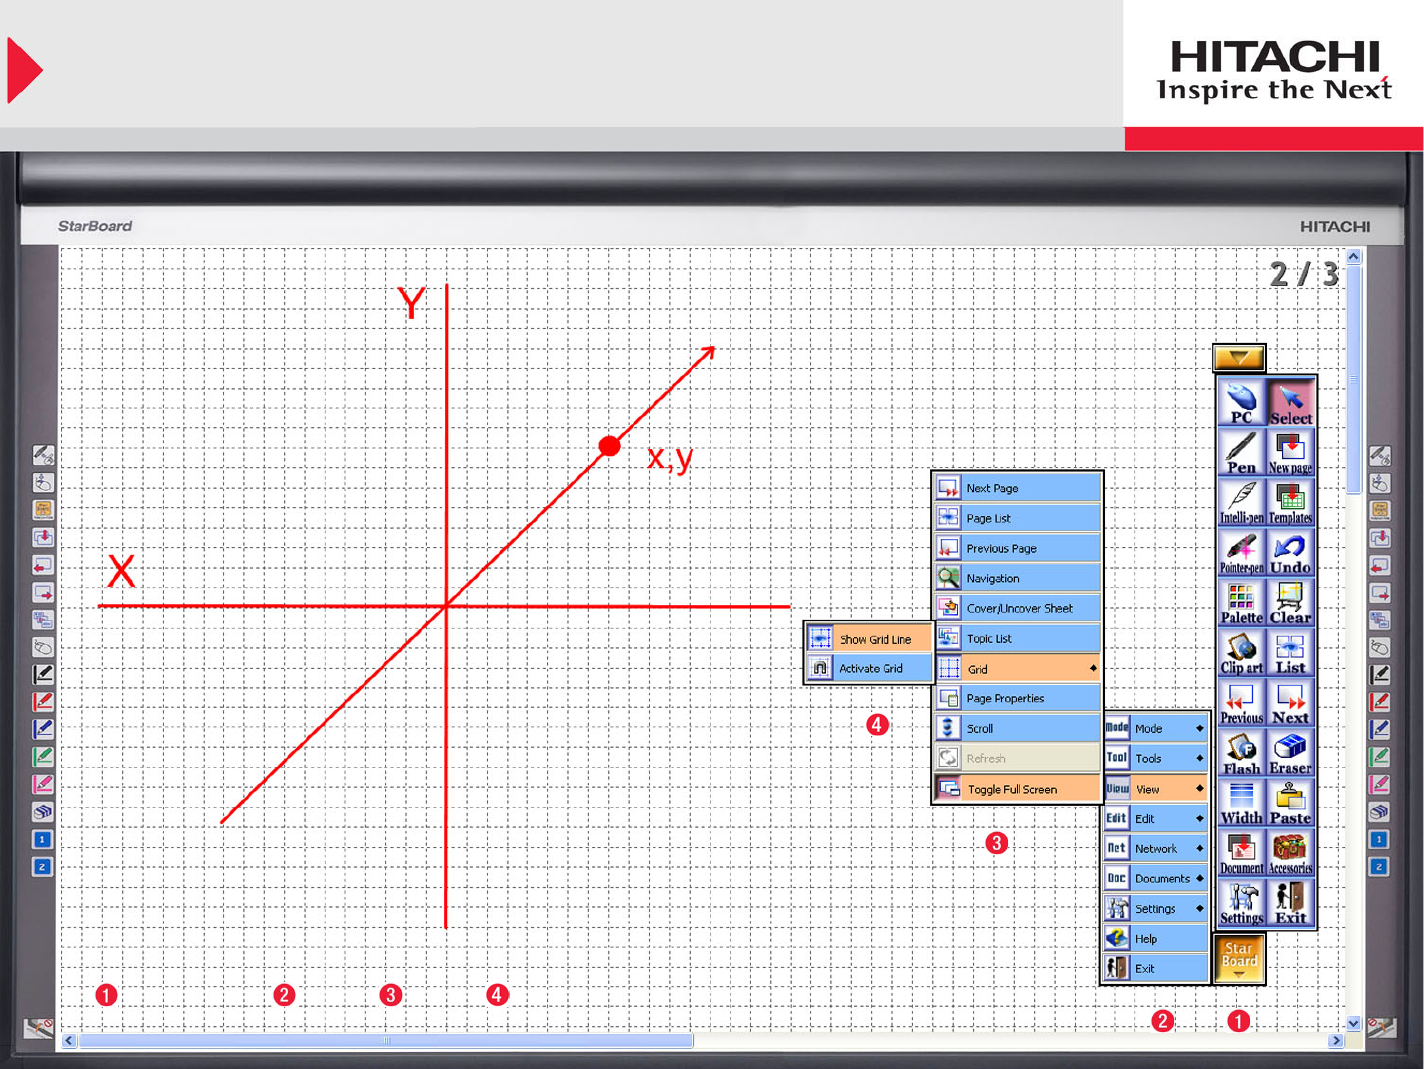
Pen Variations: Intelli-Pen (using grid)
If Grid Icon is not in Toolbar, locate it at:
StarBoard View Grid Show Grid Line
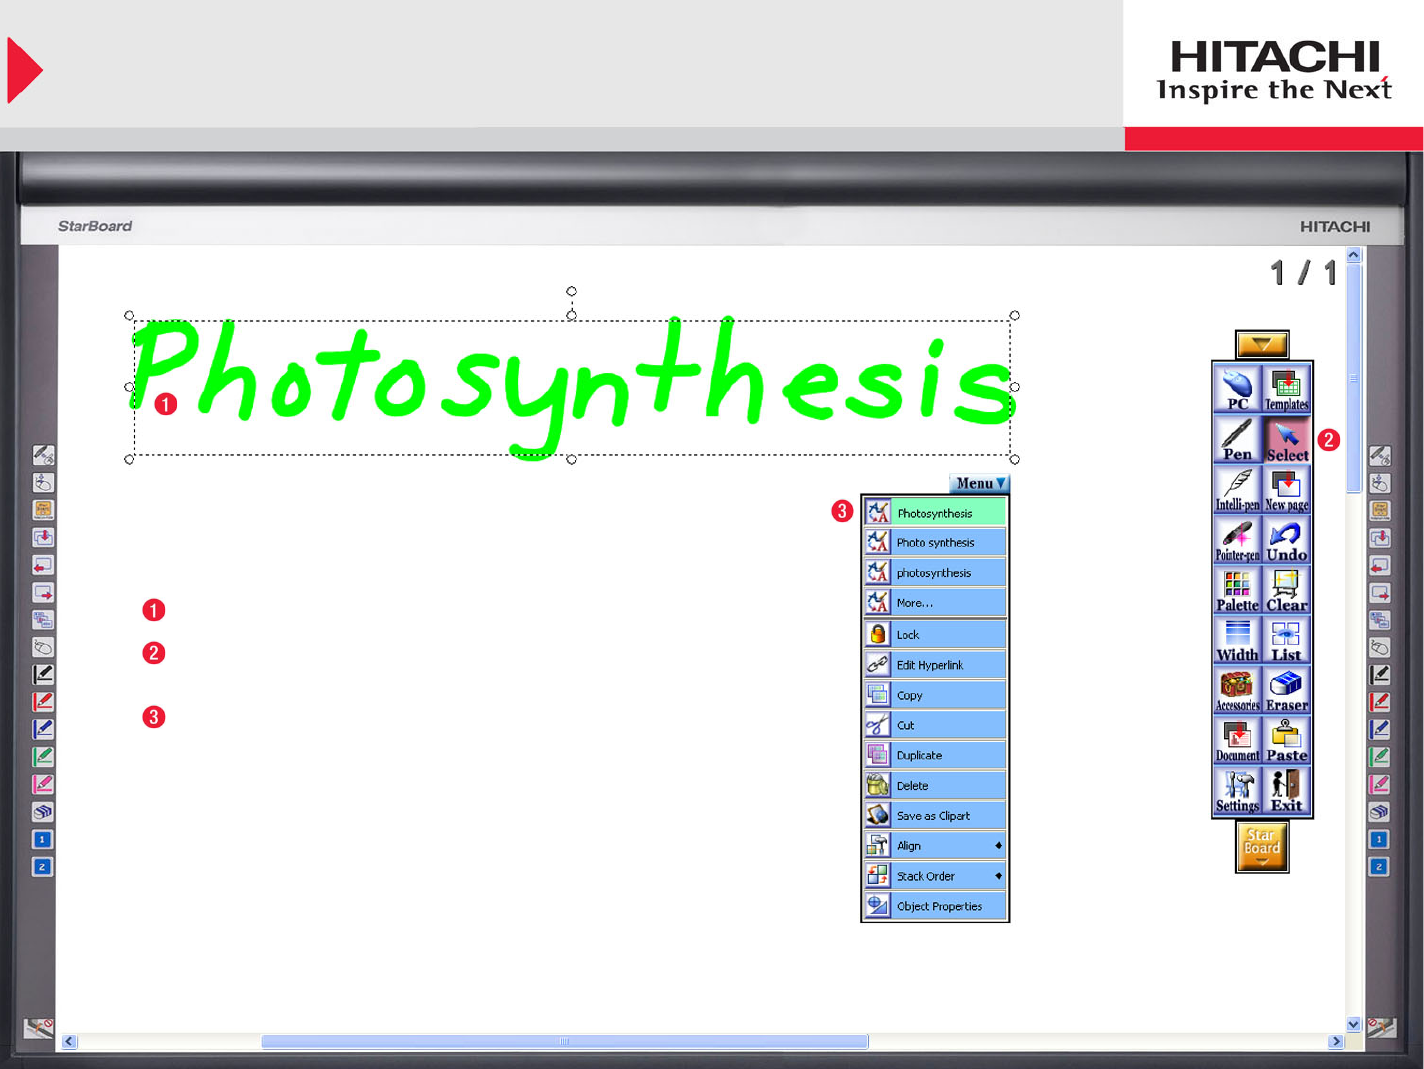
Text Recognition
Free-hand word or phrase using Standard Pen
Select word or phrase using the Select tool
(Menu Bar will automatically appear once selected)
Choose the correct text from the menu bar
(text will then replace handwriting)
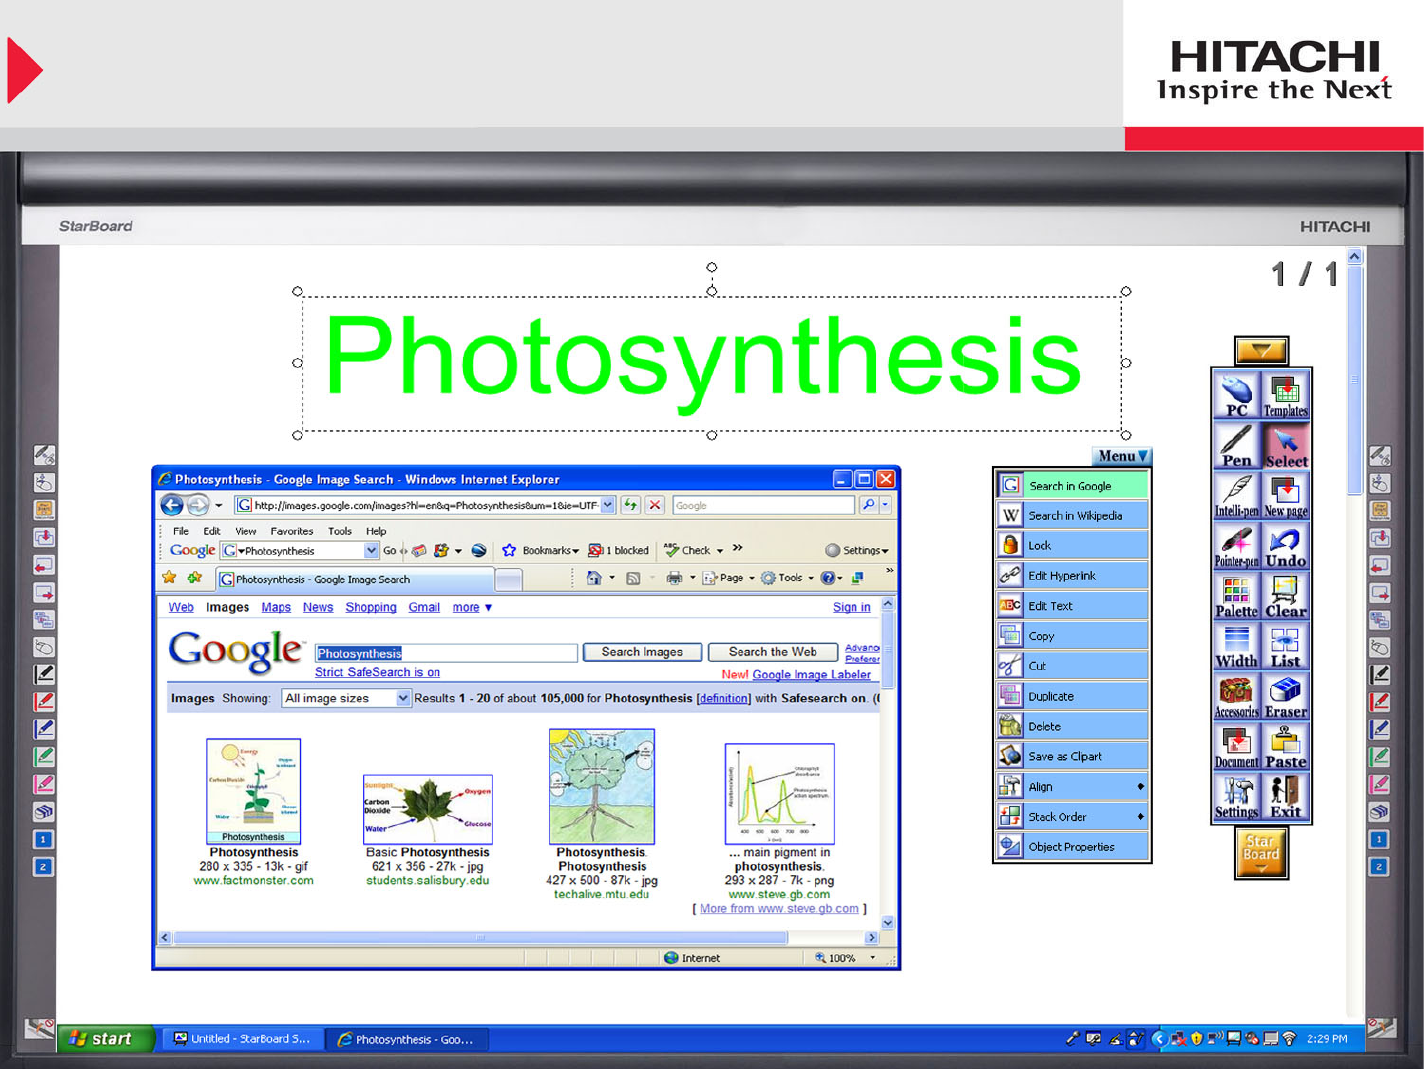
Search in Google
Google Search:
Reselect text to bring up
Menu bar, then select
“Search in Google”
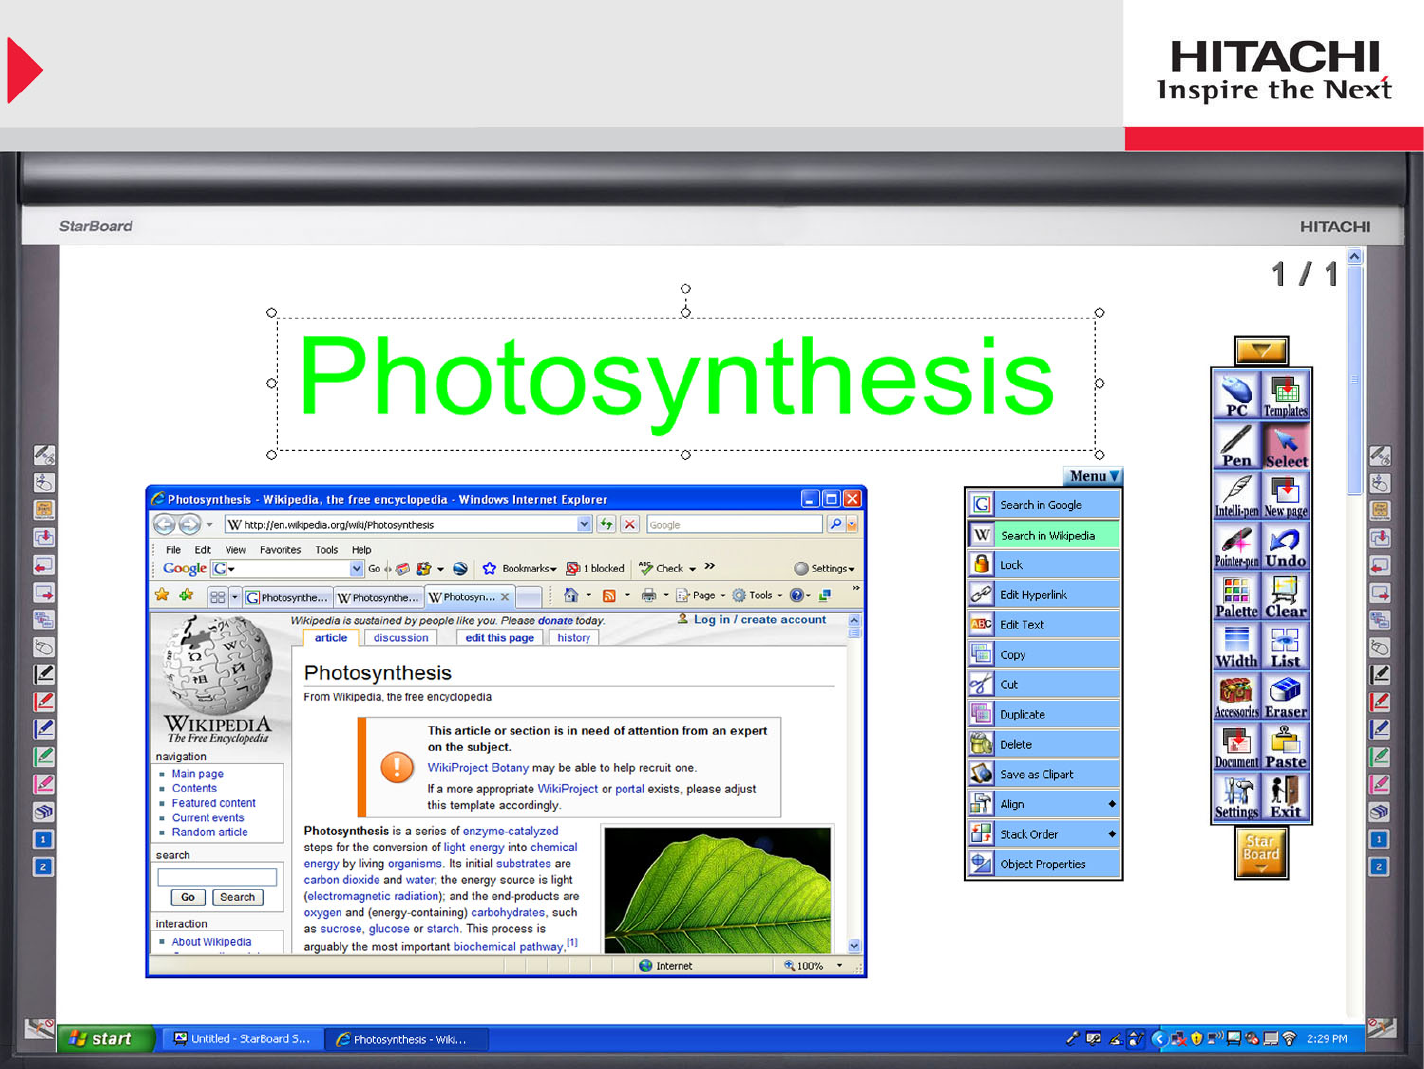
Search in Wikipedia
Wikipedia Search:
Reselect text to bring up
Menu bar, then select
“Search in Wikipedia”
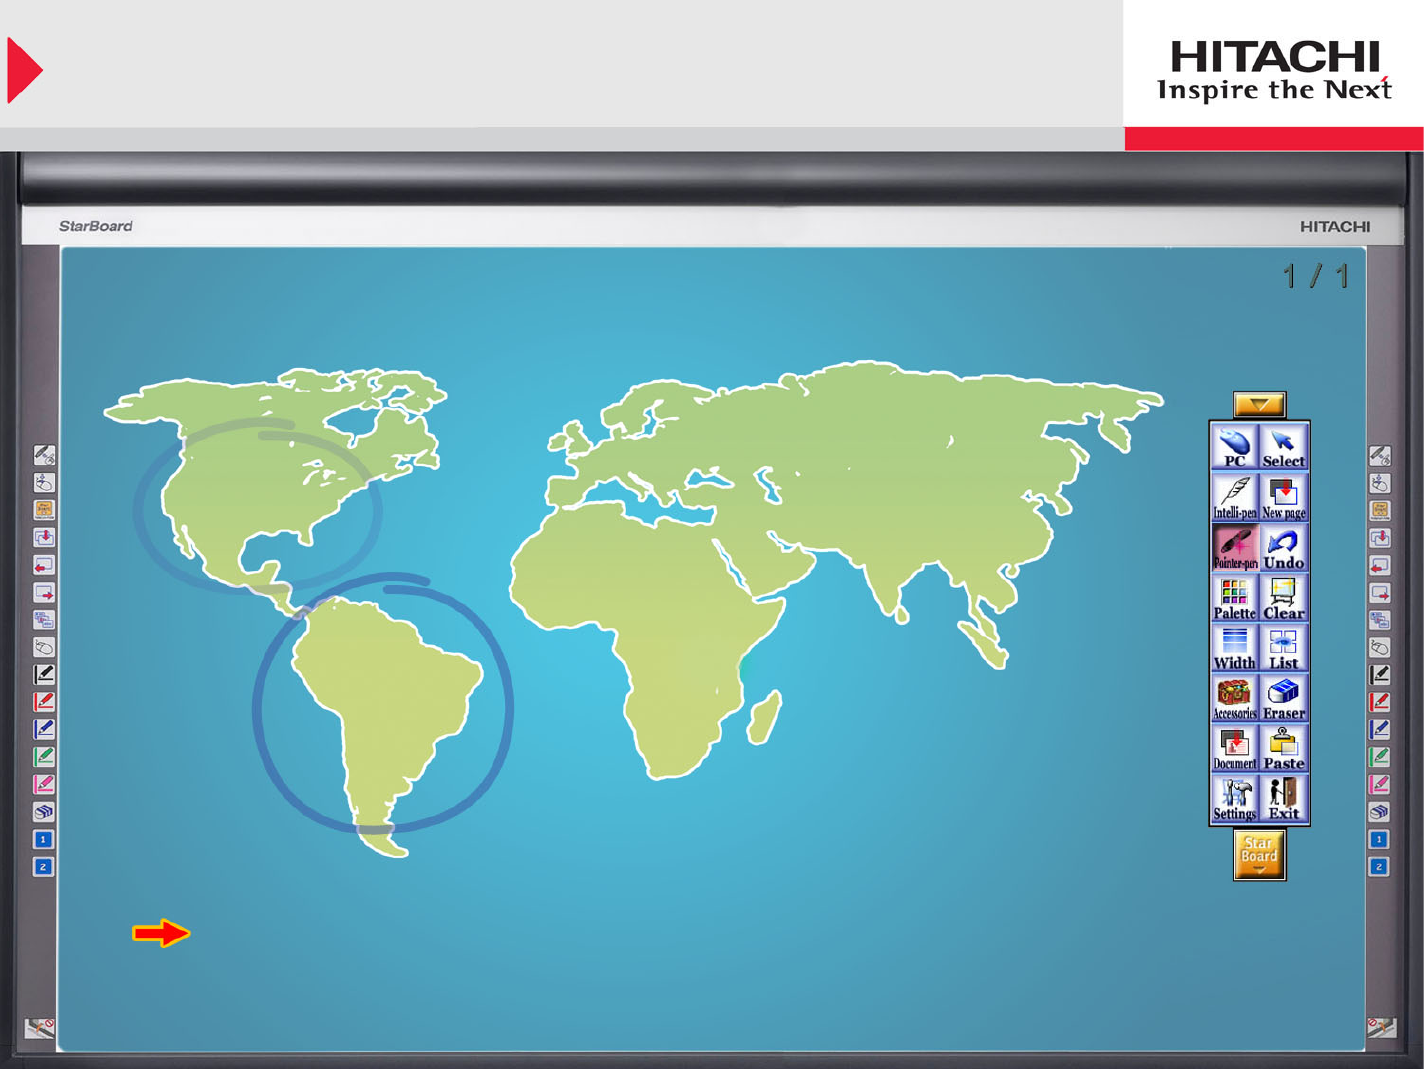
Pen Variations: Pointer Pen
Pointer Pen Functions:
• Works the same as a laser pointer
• Highlight an area as desired, when next area is highlighted, the previous highlighting will disappear
• Works well with Presentations (e.g. Microsoft PowerPoint)
Select Pointer Pen
from Toolbar
Click once with Pointer Pen and an
arrow will appear where Pen was released
< Previous Highlighted Area will disappear
< New Highlighted Area
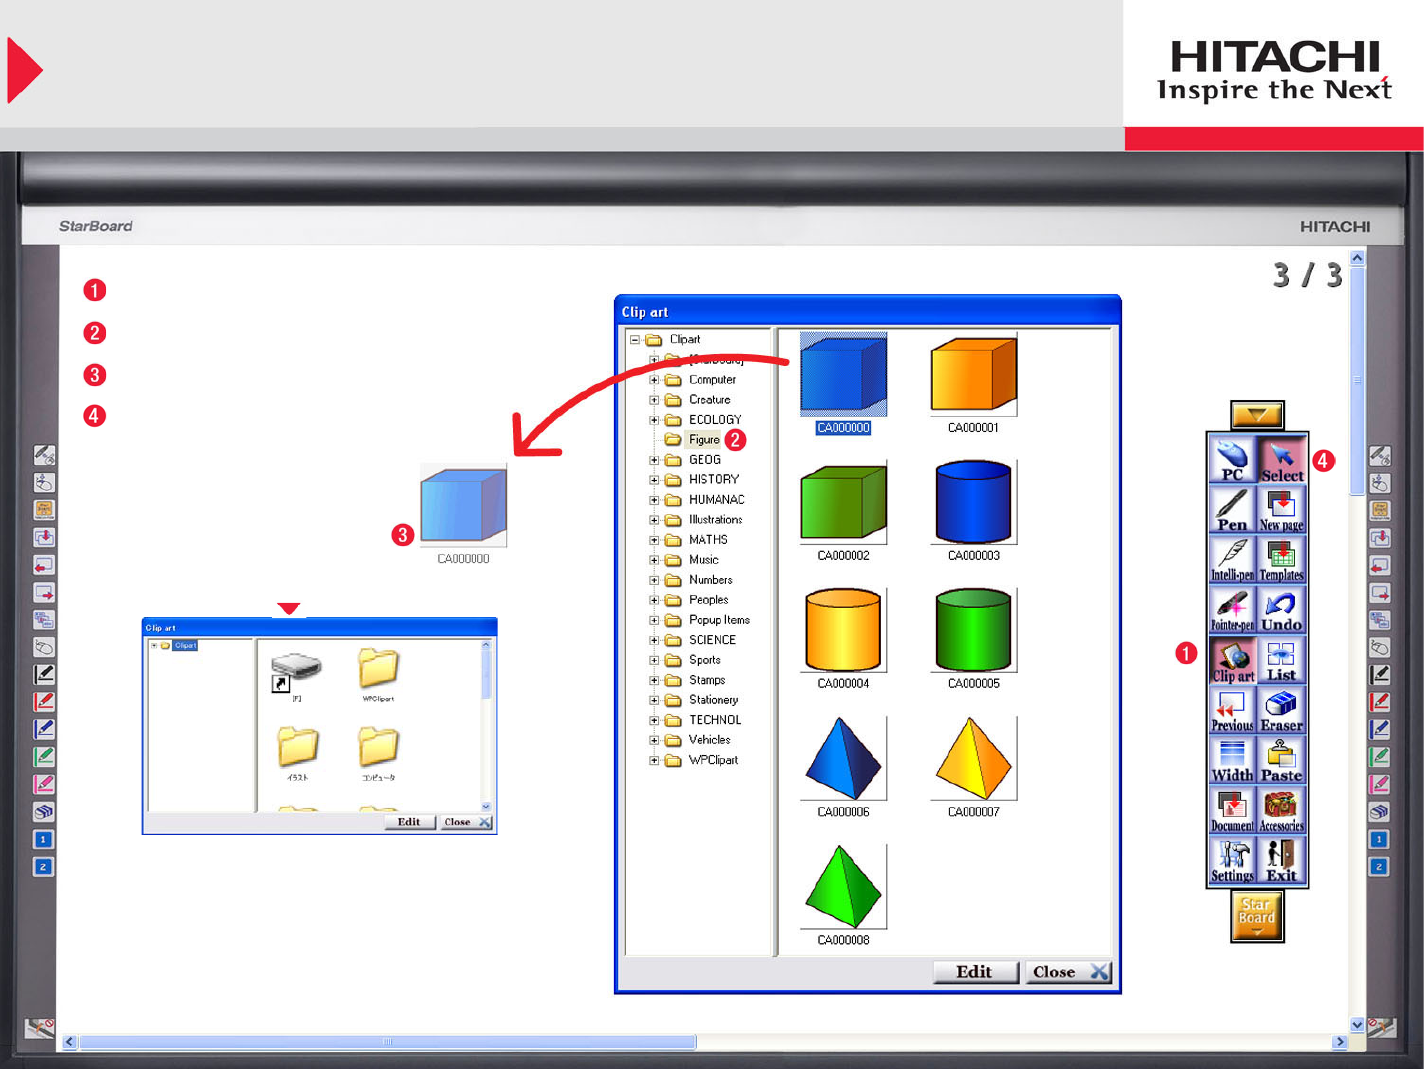
Clip Art
Select Clip Art from Toolbar
Choose Subject Folder of Clip Art
Drag and Drop image into StarBoard Pages
Move, resize, rotate object with Select Tool
NOTE:
There are 3,500 Clip Art Images to choose from,
or import your own from USB Flash Memory.
If Clip Art Icon is not in Toolbar, locate it at:
StarBoard > Tools > Clip Art
USB Flash Memory
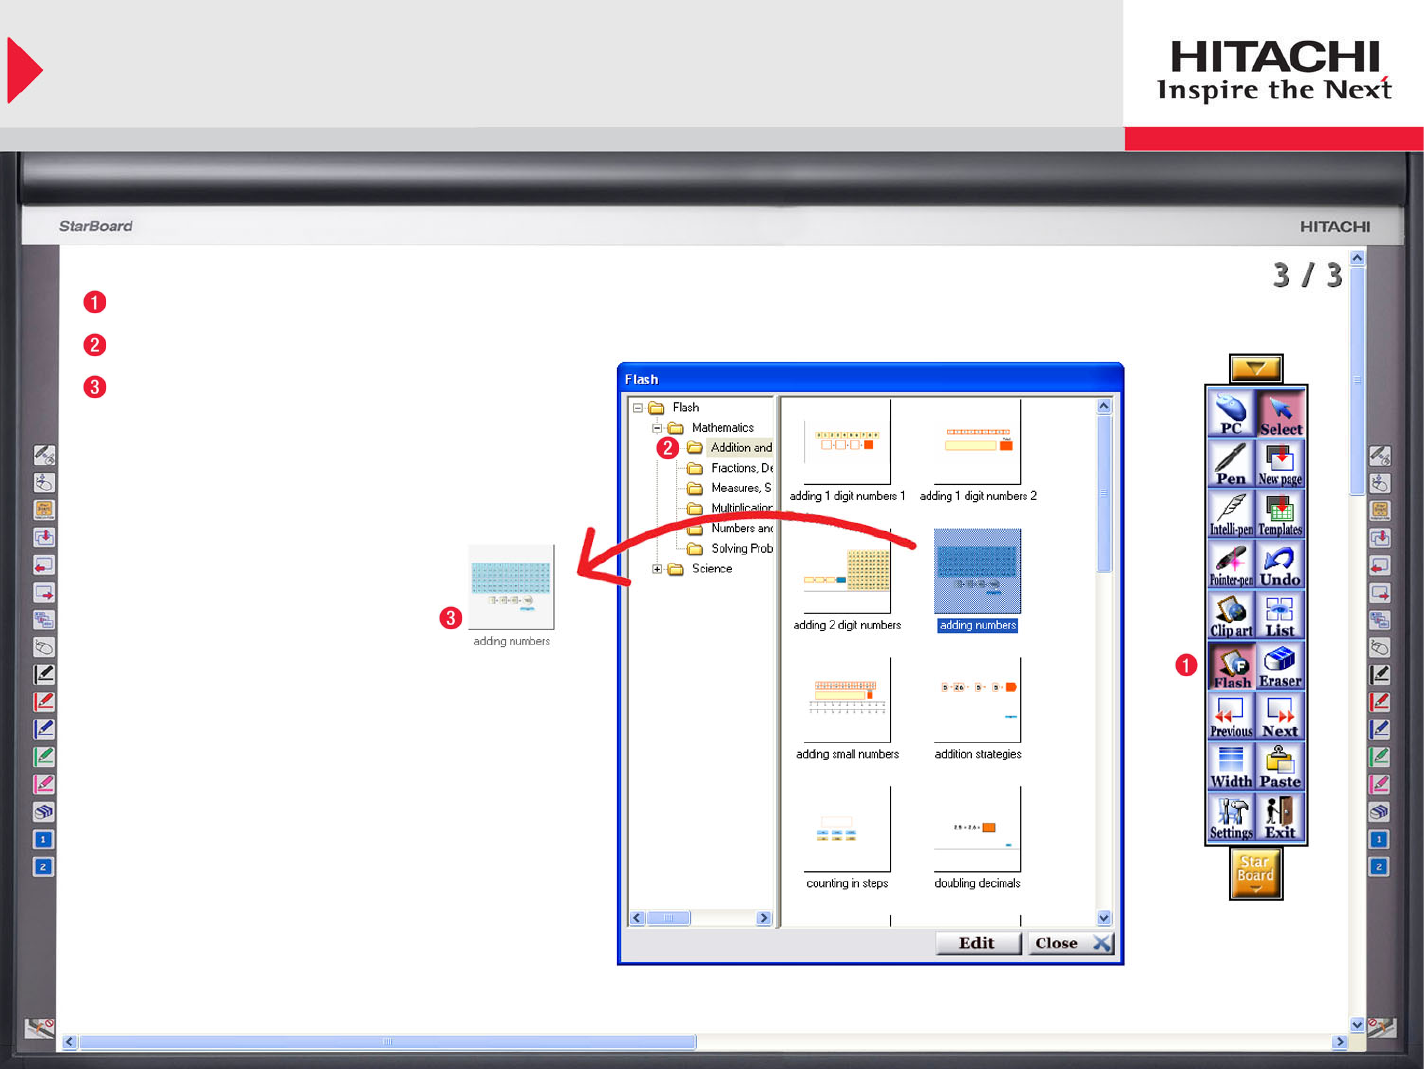
Flash Learning Objects
Select the Flash Icon from Toolbar
Choose Subject Folder of Flash
Drag and Drop Flash Learning Object
into StarBoard Pages
NOTE:
Math and Science Flash Learning Objects
are available.
If Flash Icon is not in Toolbar, locate it at:
StarBoard > Tools > Flash
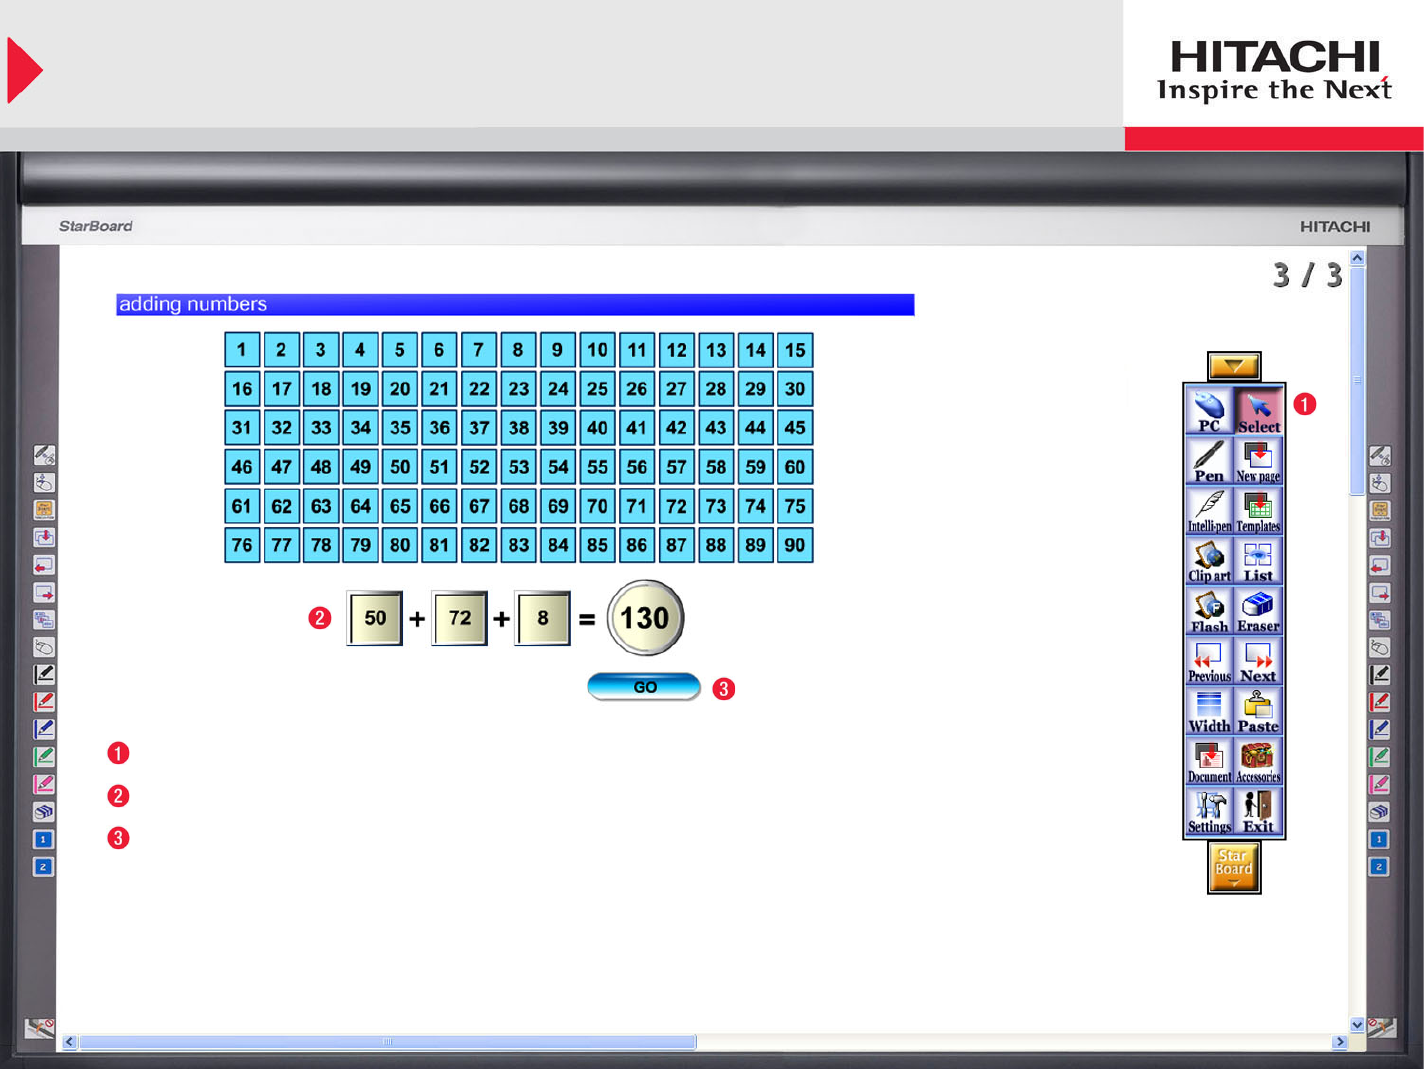
Flash Learning Objects (continued)
Make sure the Select Tool is selected from toolbar
Drag and Drop numbers into the empty boxes
Click “GO” and the answer will appear
NOTE:
Other Flash Learning Objects function similarly
to the “Adding Numbers” Flash Object above.

Create Your Own Template
Create Template image on New StarBoard Page
Select the “List” Icon from the toolbar
Select the page you wish to add as a template
Click Template Button in the “Page List” Window
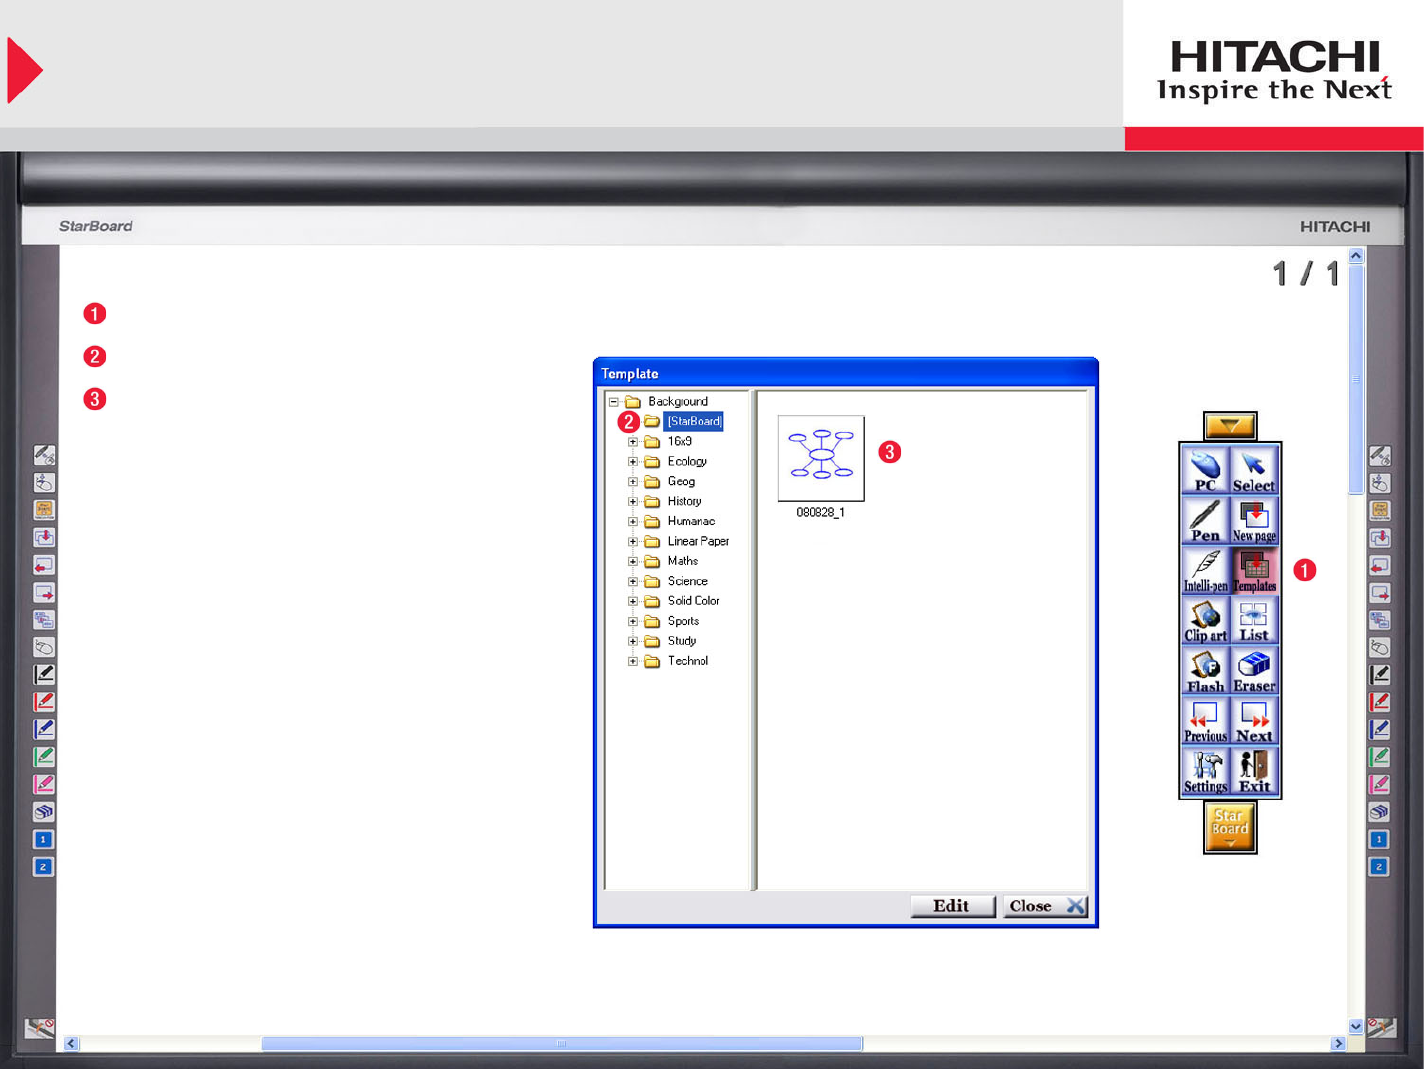
Create Your Own Template (continued)
To retrieve template, select “Templates” Icon from toolbar
Templates are saved into the “StarBoard” Folder
Double click on desired template to open it
NOTE:
If Templates Icon is not in Toolbar, locate it at:
StarBoard > Documents > Templates
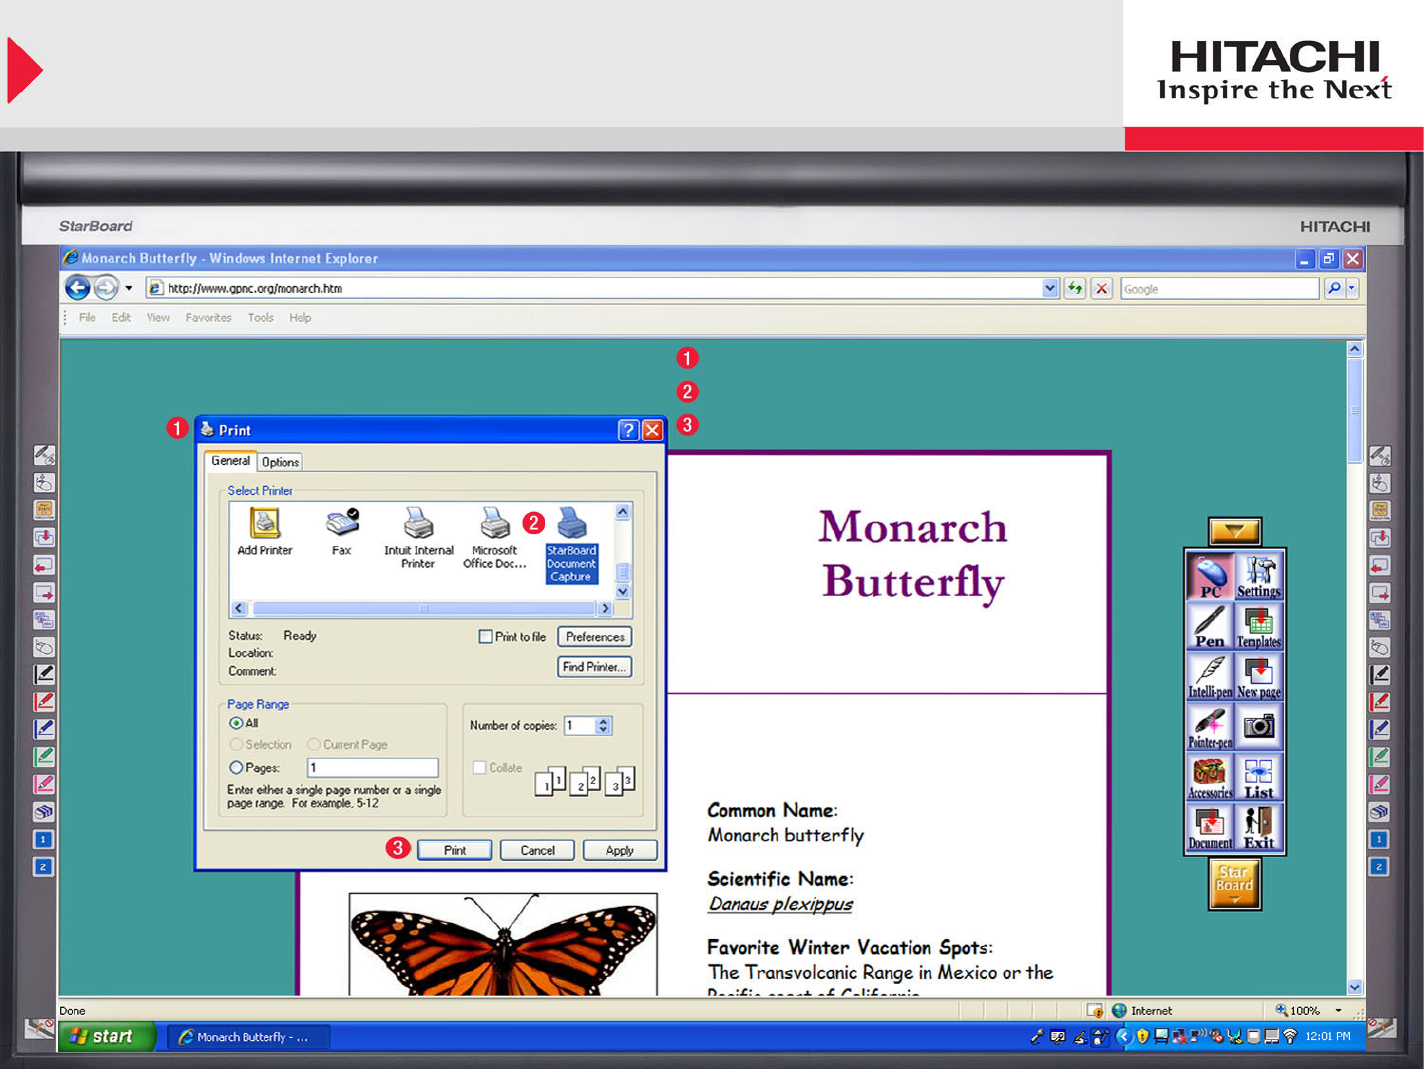
Select File>Print as you normally do to print
Select Starboard Document Capture from Printers
Then click PRINT
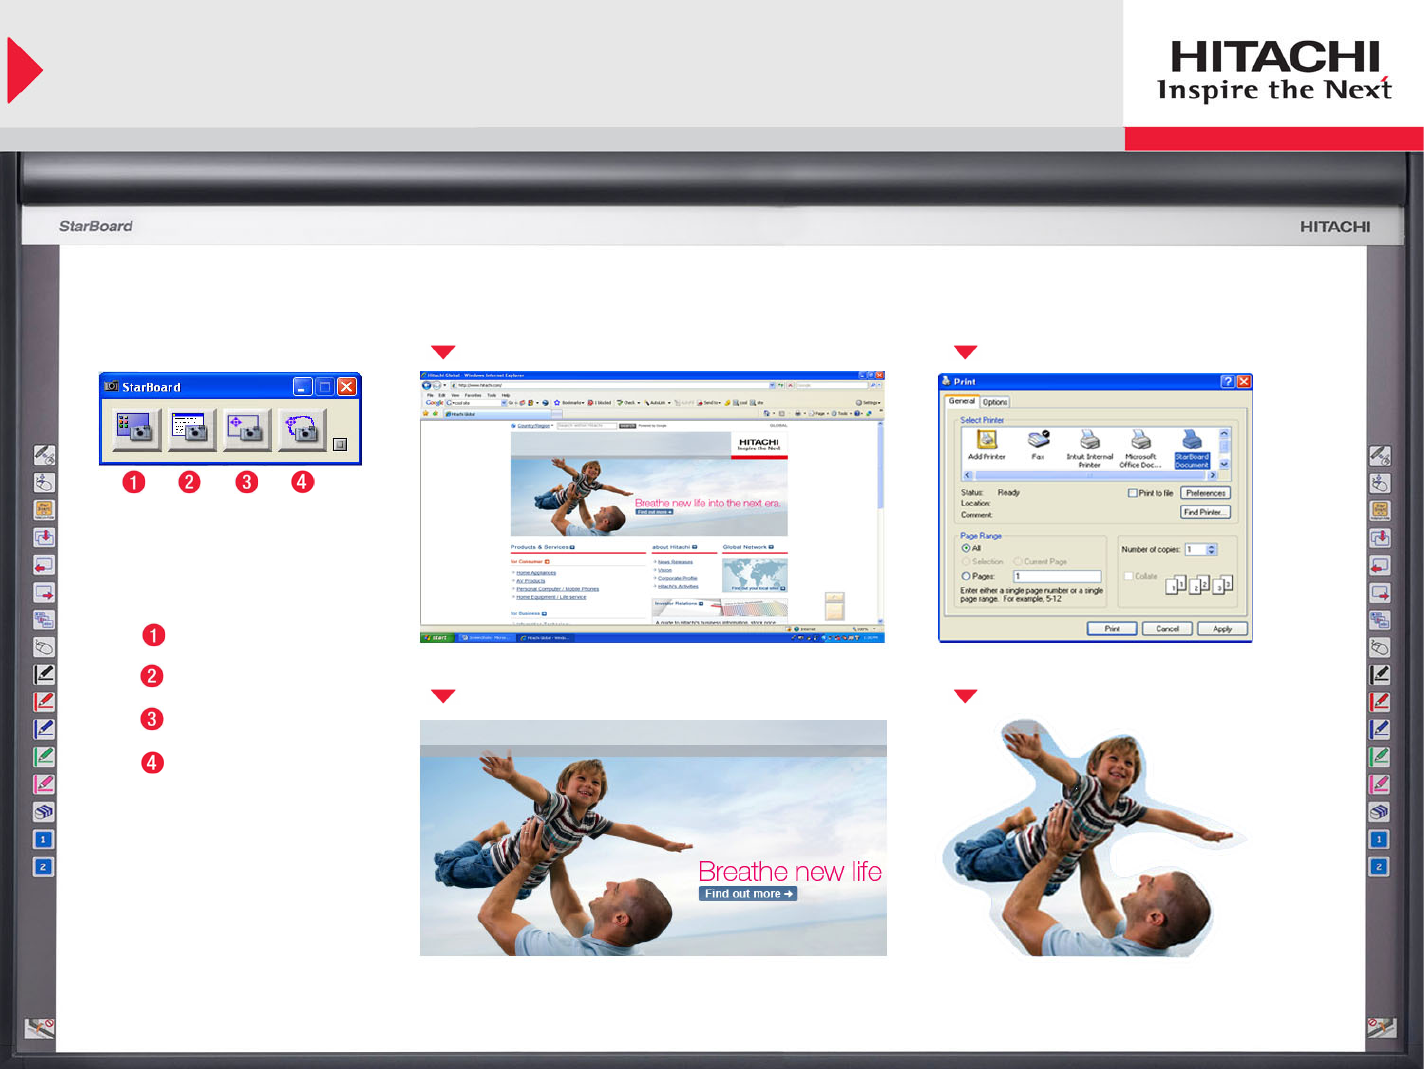
Import Background from Applications
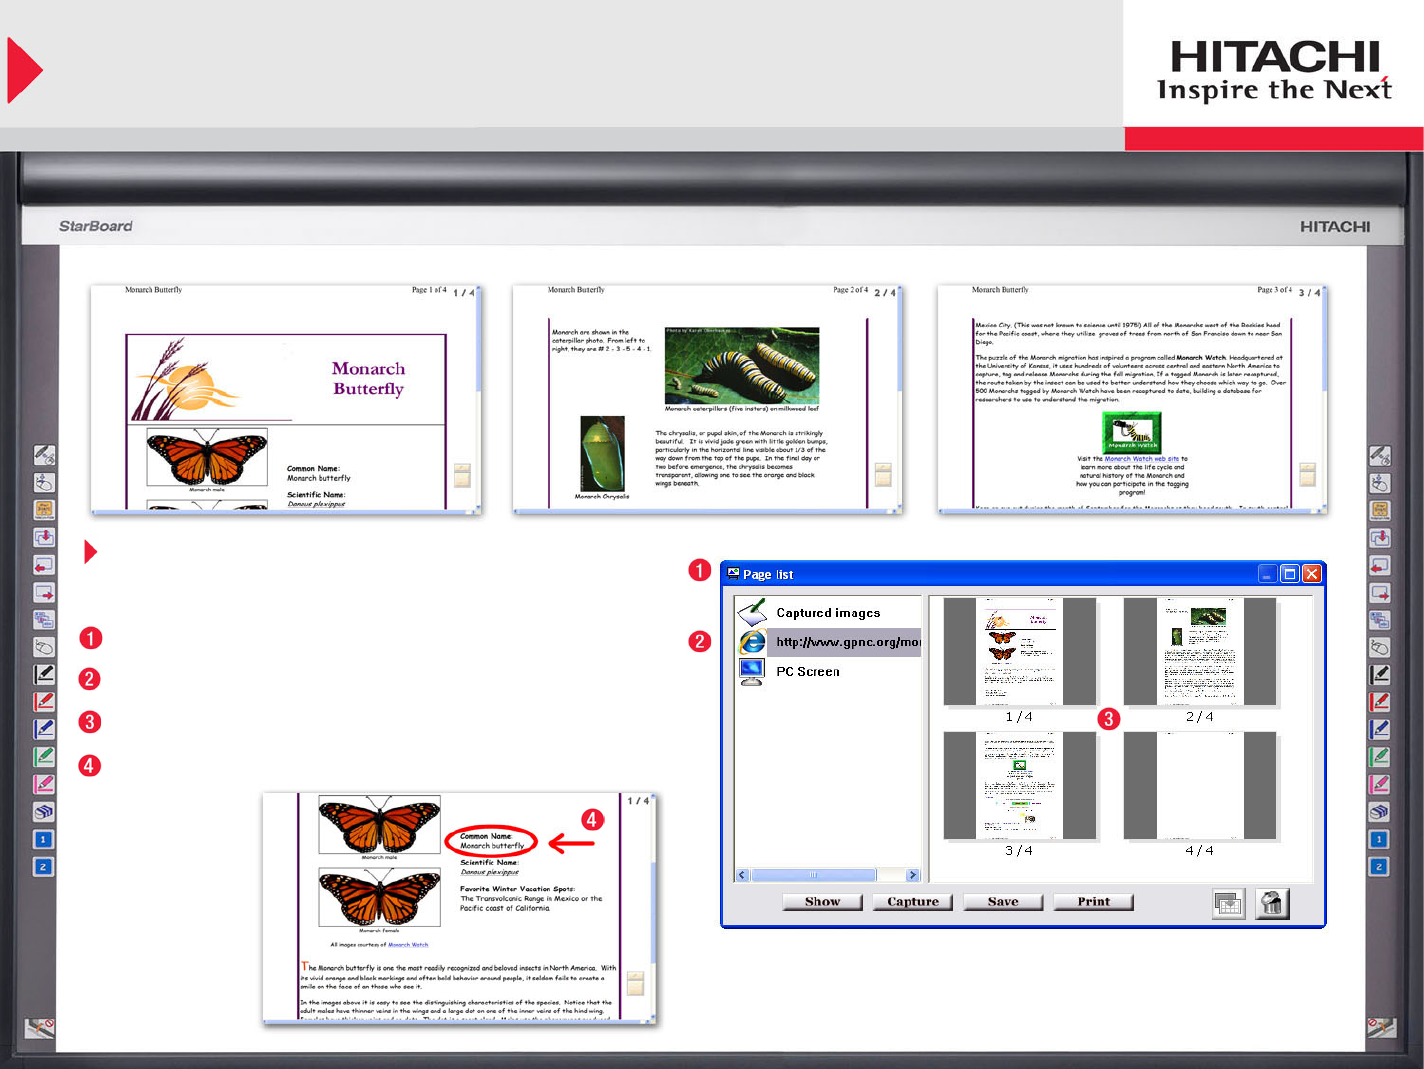
Import Background from Applications
All Pages of Application (in this case, a web site) are automatically
imported into Starboard Pages, which can then be annotated on and
saved for future reference.
Select “List” Icon from Toolbar
Select Application from which pages were captured (e.g. Internet Explorer)
Select which page you would like to view, annotate on
Now you are free to annotate anywhere on captured page!

Input text
Select “PC” Icon from Toolbar
If Web Browser already open, highlight desired text
Right Click and select “Copy” from drop down menu
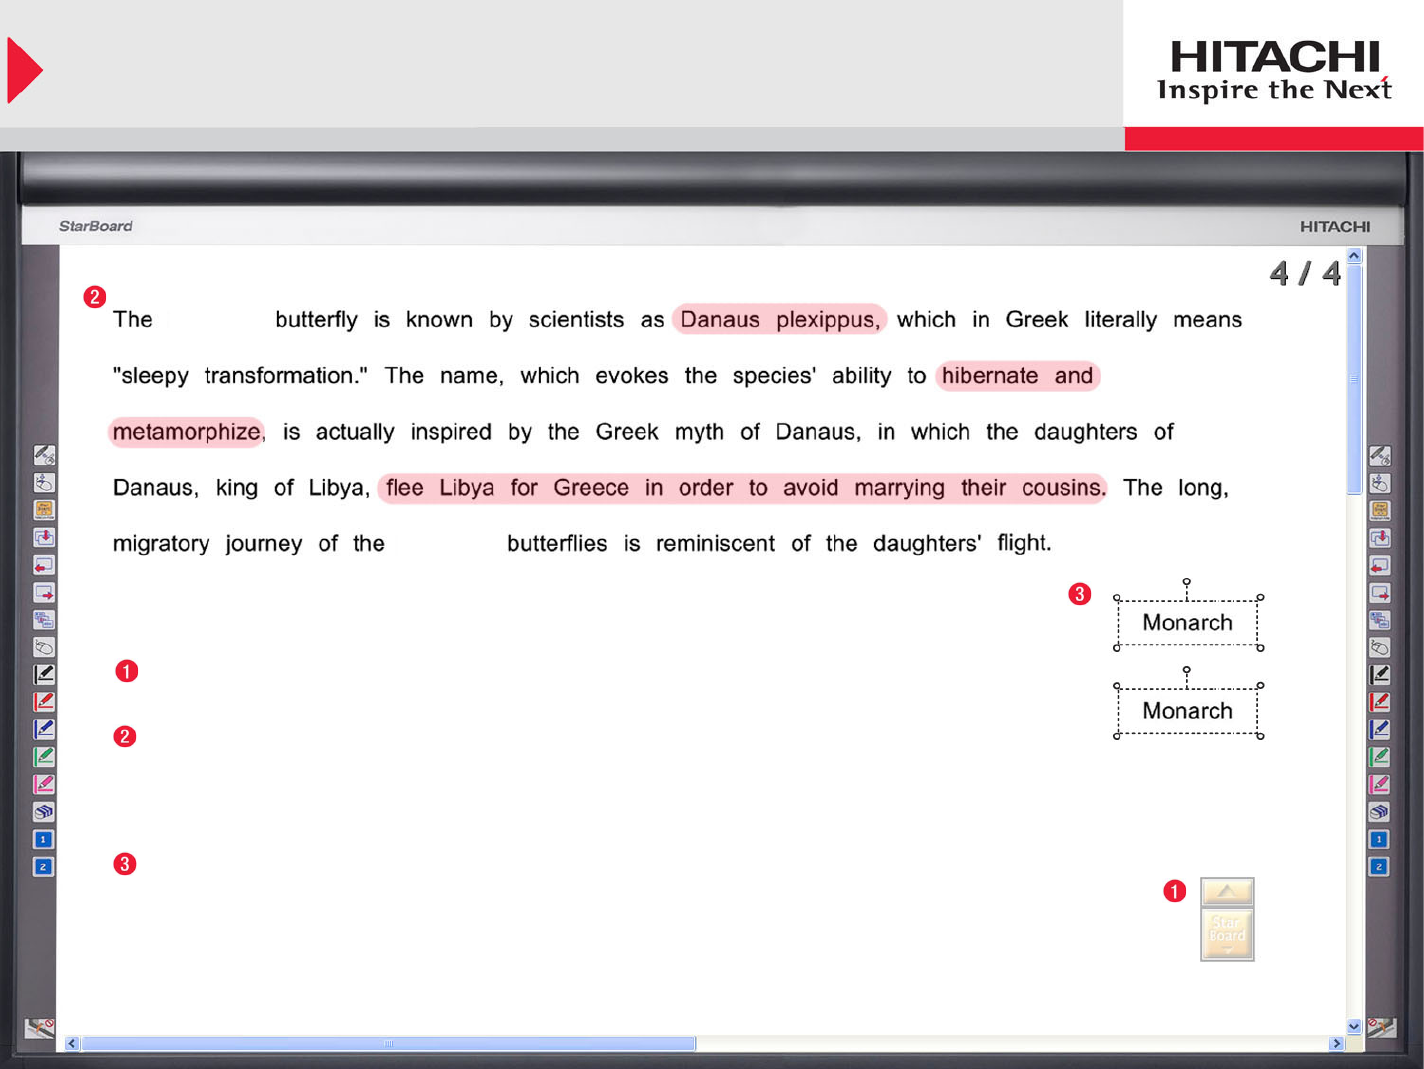
Input text (continued)
Select “Paste” Icon from toolbar, or locate it at:
StarBoard > Edit > Paste
It will prompt you with 3 options:
1) Single text object
2) Text objects split by word
3) Text objects split by line
(After you select an option, text will then appear in StarBoard Pages)
You can highlight on top of text, resize text, drag some words to the side and
hide them for lessons and quizzes, and many more interactive options.
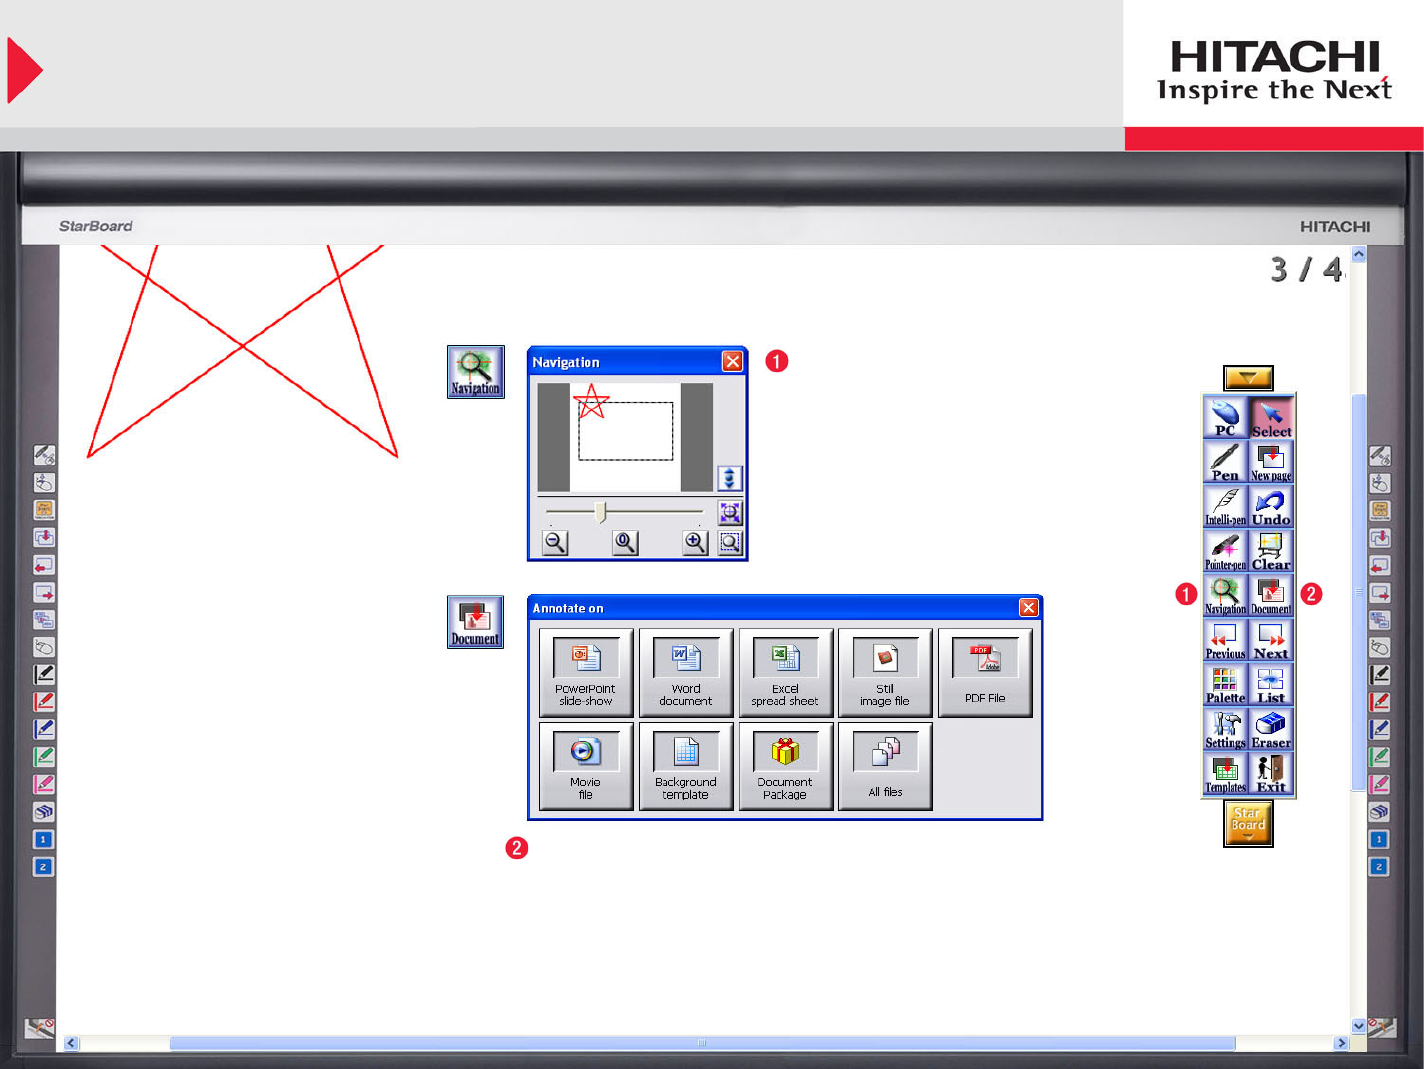
Input text (continued)
To Navigate Page:
Select “Navigation” Icon from
toolbar, or locate it at:
StarBoard > View > Navigation
Use slider Bar and other option
buttons to zoom in and out and
move around current page.
To Annotate on a Document:
Select “Document” Icon from toolbar, or locate it at:
StarBoard > Documents > Document
You can import Word, Excel, PDF files into StarBoard
Software as printed images to annotate on.
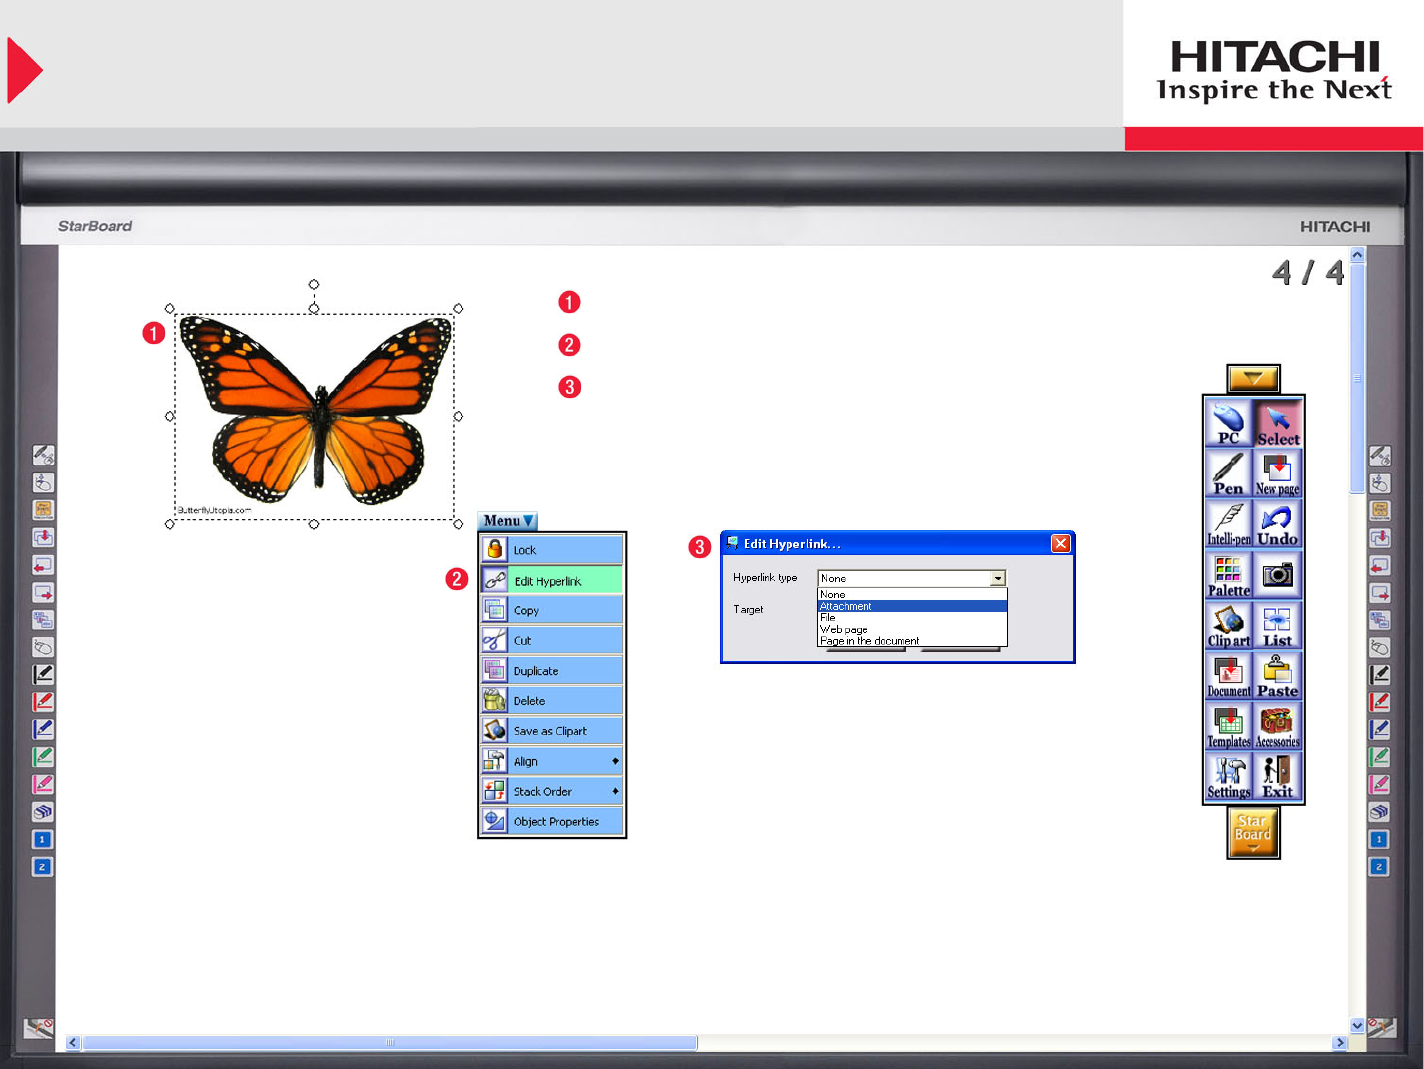
Hyperlink/File Attachment
Select Object with “Select” Tool, drop down menu will appear
Choose “Edit Hyperlink” from drop down menu
Choose Hyperlink Type:
Attachment – embedded “yar” file in StarBoard Software
File – external file on PC
Web page – web pages
Page in the Doc – links to another StarBoard Page
NOTE:
You can open the hyperlink by double-clicking the object.
If you select Attachment, the yar contents work on any PC.
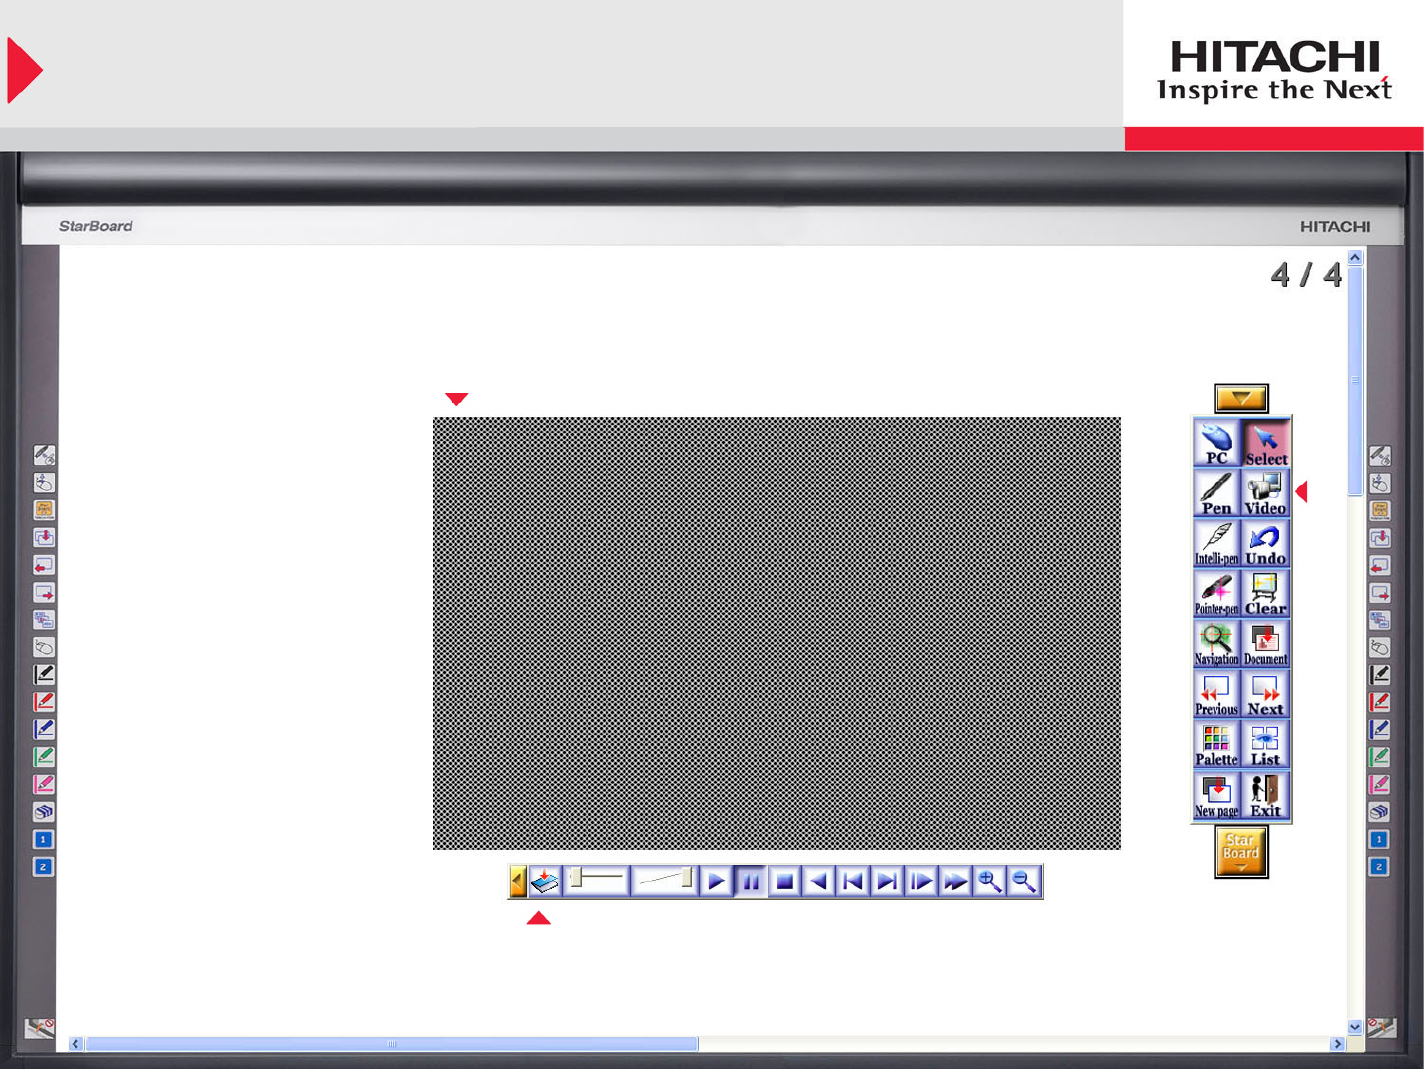
Video Input
NOTE:
If “Video” Icon is not in toolbar, locate it at:
StarBoard > Mode > Video Input
Video Displayed Here
Video and Image Input:
• Import webcam images into StarBoard
• Digital Video Devices with USB/IEEE are also supported
• Works well for experiments, etc.
• Use same interface for movie files
Movie Control Toolbar

TWAIN Input
TWAIN:
• TWAIN devices allow users to input still images to PC
• Devices include: Scanner, Digital Camera, Document Camera
• Input scanned paper documents into StarBoard Software as
background images (e.g. Above image of Scantron®)
TWAIN Supported Devices
Scanner Digital Camera Doc Camera
Image imported into StarBoard Software as a background
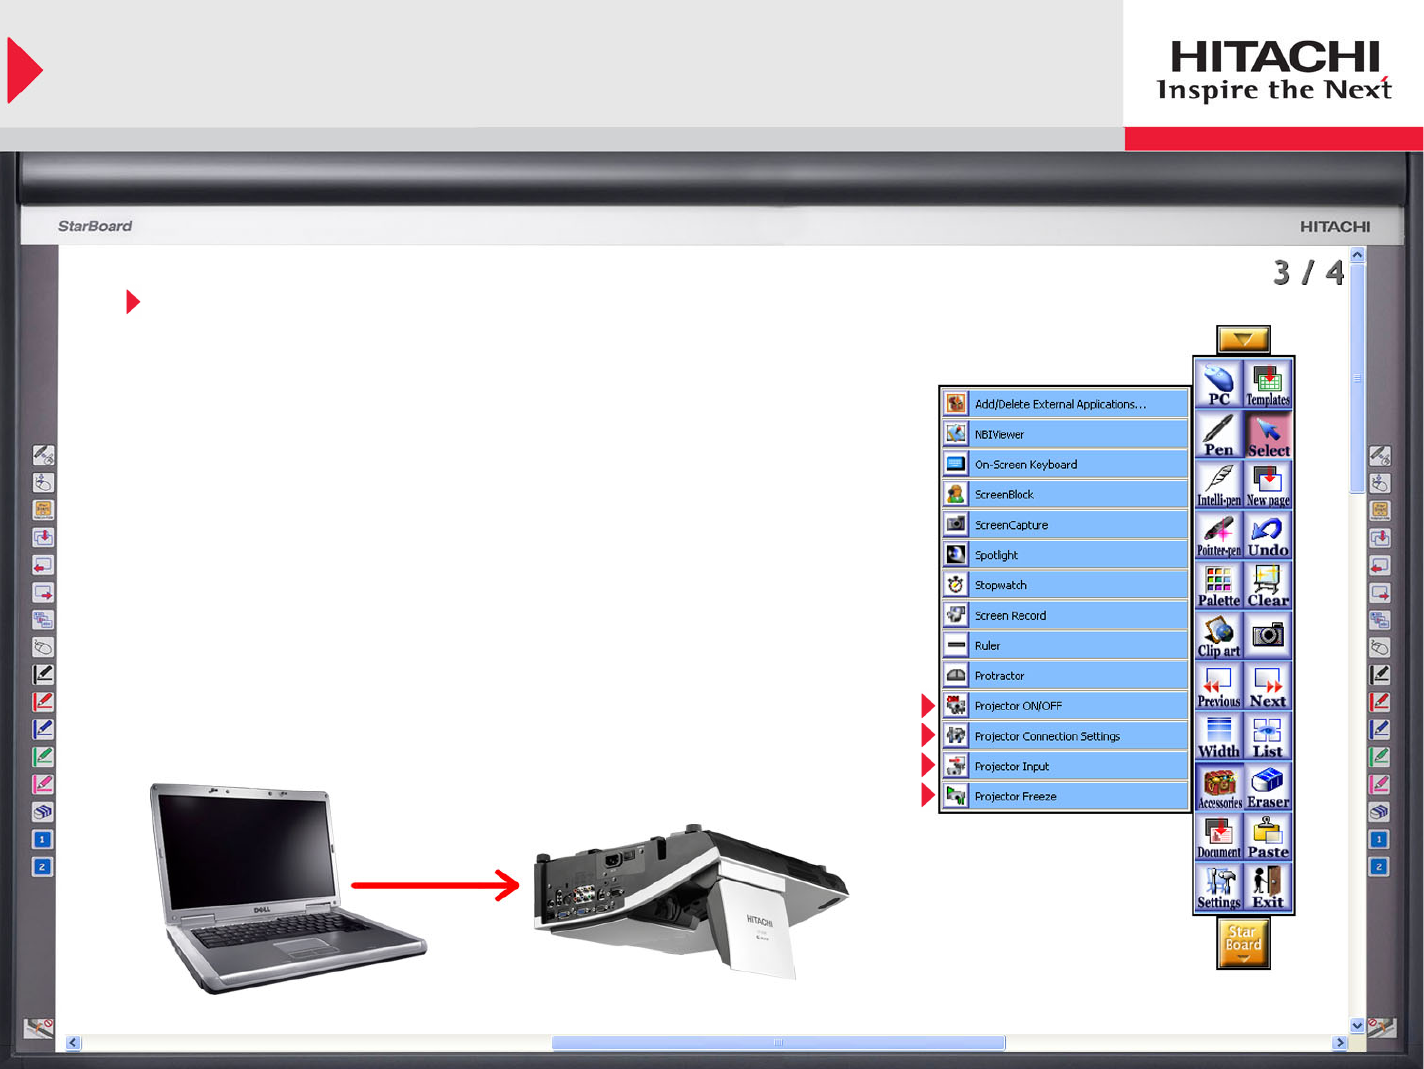
Hitachi Projector Control
Projector Controls – Supported Functions:
Projector ON/OFF: turn projector on/off
Projector Connection Settings: Connection Settings (network or
serial connection settings)
Projector Input: Select input source (RGB Composite Input)
Projector Freeze: Freeze or Unfreeze image
NOTE:
It is possible to control Hitachi Projectors (which support remote
management) using StarBoard via network (TCP/IP) or Serial Cable.
If Projector Controls are not in toolbar, locate them at:
Accessories > Projector… (if Accessories in Toolbar)
Or
StarBoard > Mode > Accessories > Projector…
Network or Serial Cable

Customize Toolbar
Customize Toolbar:
To Add: Drag and Drop any icons onto the toolbar
To Remove: Drag and Drop Icons off toolbar
(hold down click for 1 second before dragging it off)
To Save Toolbar: Save User Profile is located at:
Settings > User Profile > Save (if Settings in Toolbar)
Or
StarBoard > Settings > User Profile > Save
To Load Toolbar: Same location as Save User Profile:
Settings > User Profile > Load (if Settings in Toolbar)
Or
StarBoard > Settings > User Profile > Load
NOTE:
There are predefined
Profiles for specific purposes:
• Novice User
• Whiteboard
• Presentation
• Pupils, etc.
Save Profile on USB Flash
Memory to use with other PCs.
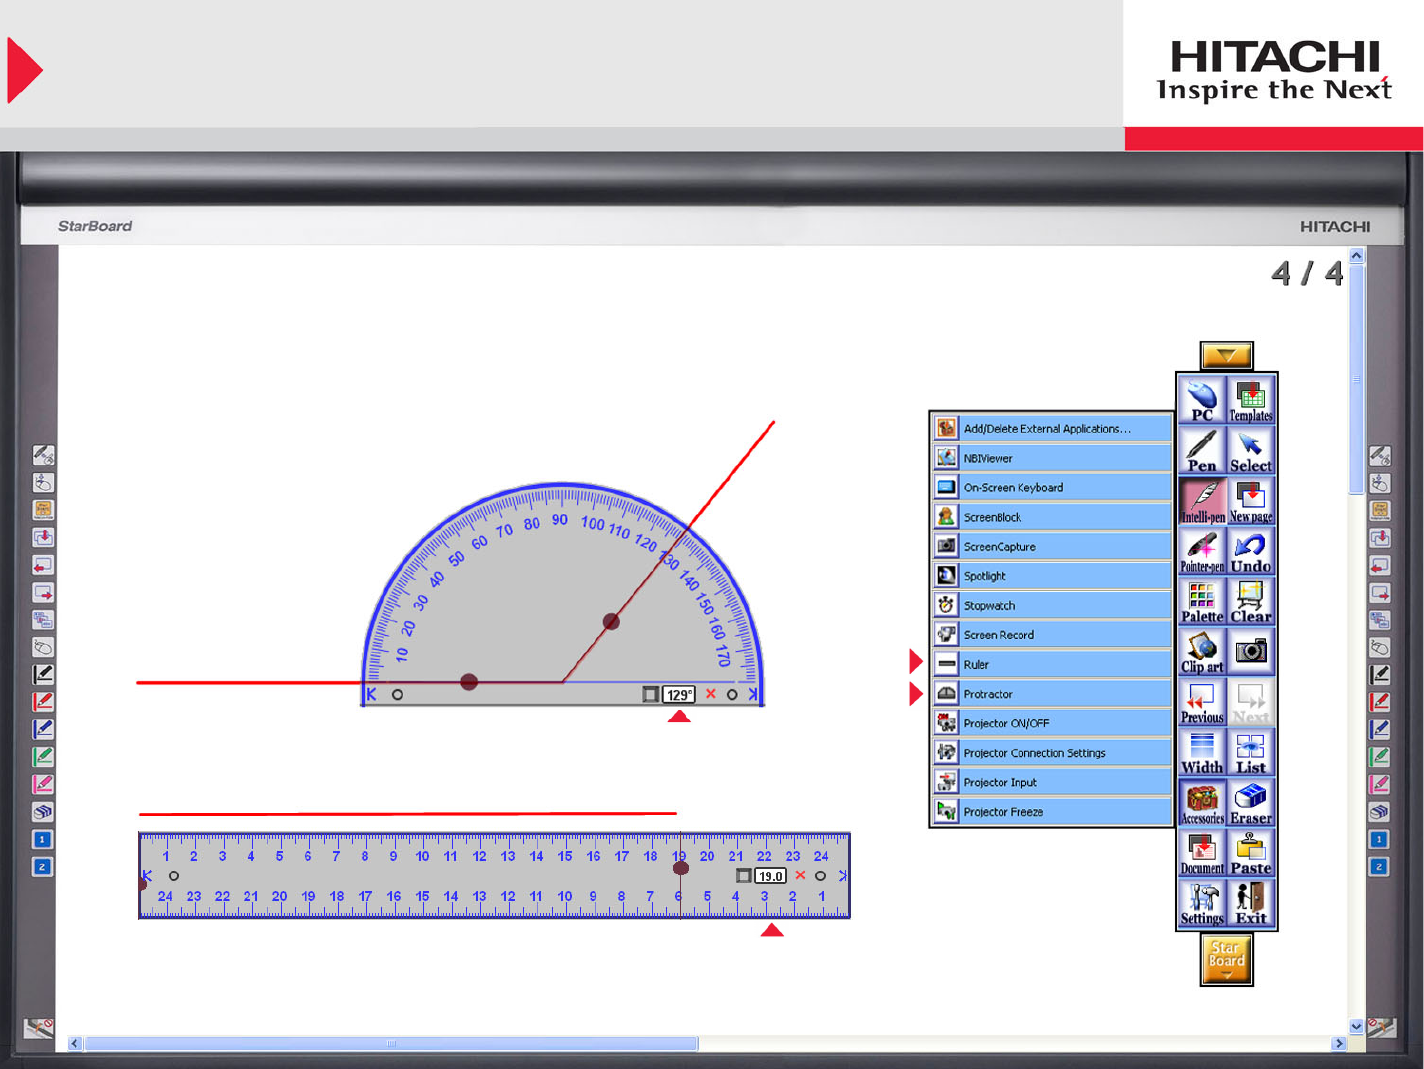
Math Tools
Value Displayed Here
Value Displayed Here
Protractor and Ruler:
• If Protractor or Ruler are not in toolbar, locate them at:
Accessories > Ruler/Protractor (if Accessories in Toolbar)
Or
StarBoard > Mode > Accessories > Ruler/Protractor
• Resize, move and rotate Protractor and Ruler as desired.
• Show Values (angle for protractor, length for ruler).
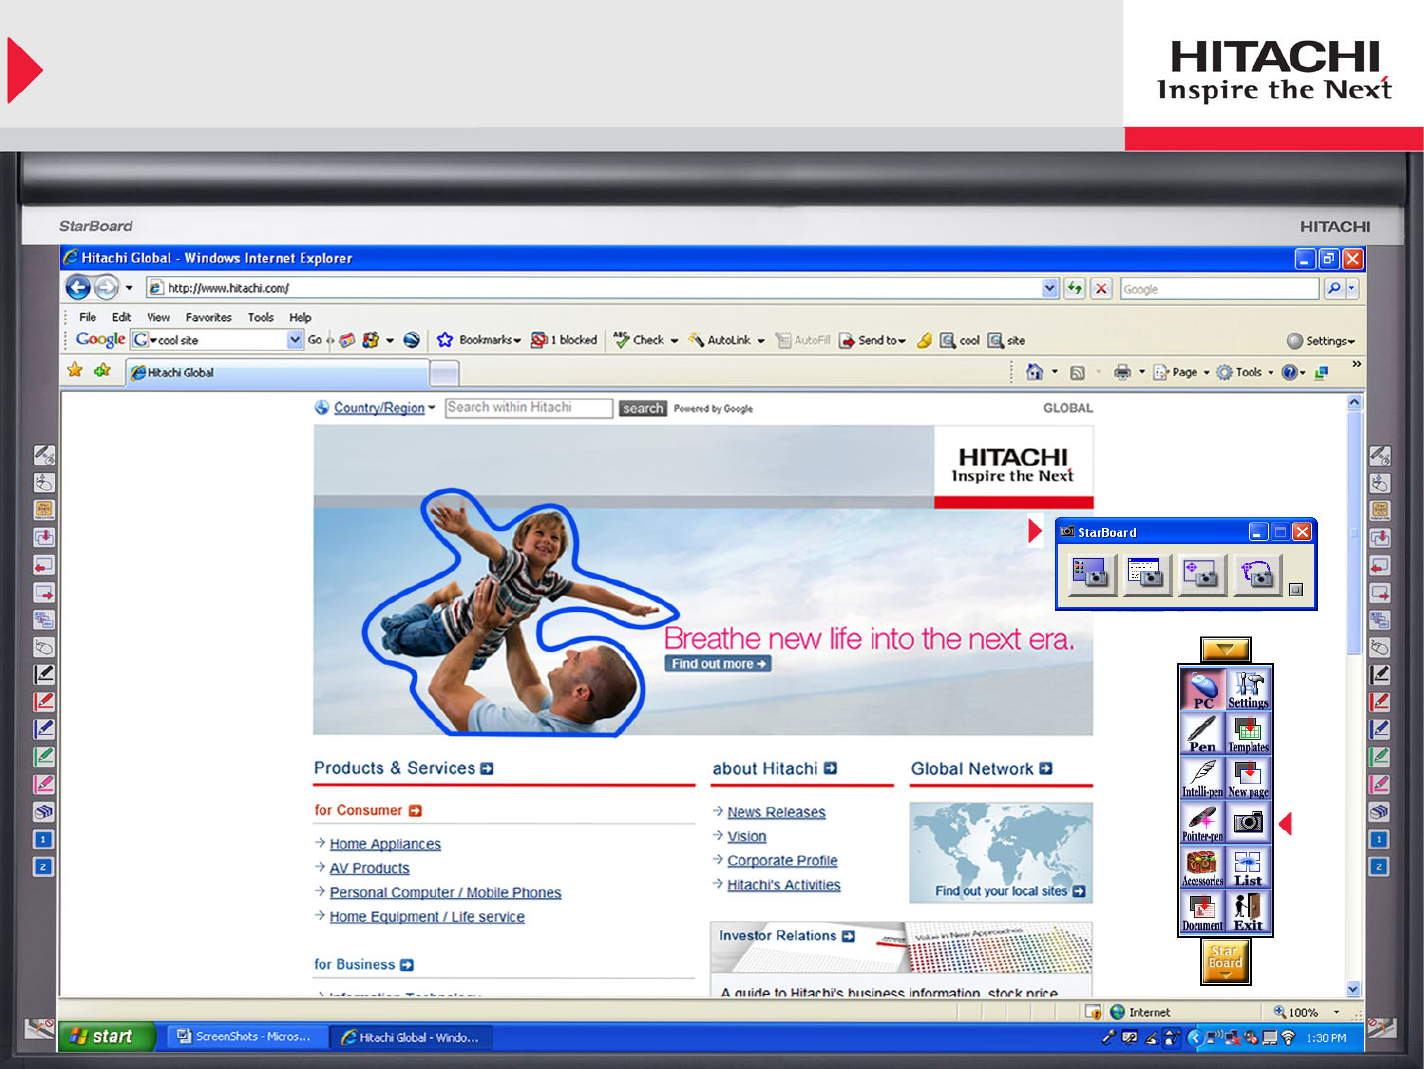
Screen Capture Options
Screen Capture Options:
• Full Screen
• Window
• Partial Selection
• Freehand Selection
Screen Capture Options Window
NOTE:
This example displays
freehand Selection mode.
Screen Capture Options (continued)
Full Screen Window
Partial Selection Freehand Selection
Screen Capture Options:
(From left to Right)
Full Screen
Window
Partial Selection
Freehand Selection
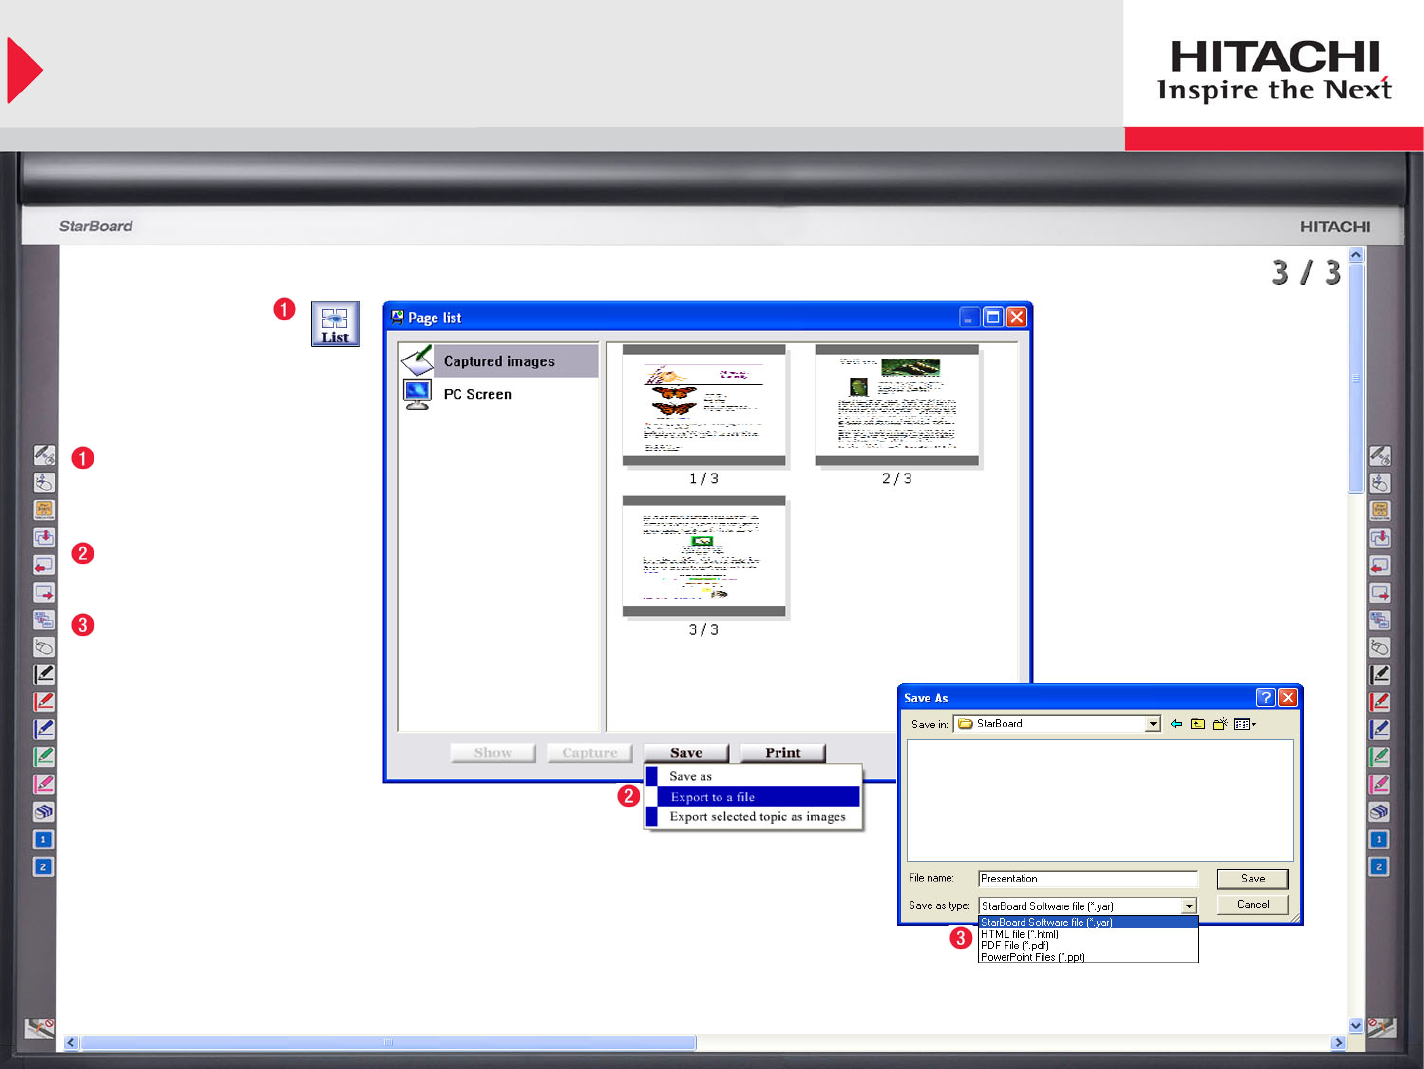
Export File (Save as)
Select “List” Icon from Toolbar,
or locate it at:
StarBoard > View > Page List
Select “Save” from Page List
Window, then “Export to a file”
Choose file location, name the
file, and choose file type from
drop down menu
Supported Formats:
• yar – StarBoard specific file format
• html – HTML contains page images
• PDF – Portable Document Format (works with Acrobat Reader)
• PPT – PowerPoint Format (new with Version 8 Software)

Further Information
Details on StarBoard capabilities are located at:
StarBoard > Help
Customizable function buttons are available for the following models:
StarBoard FXDUO-Series
Cambridge Board Series
StarBoard FX-Series
StarBoard T-17SXL
StarBoard BT-2Gm
Resource Center – Prepared lessons available
United States (curriculum correlated)
http://starboard.hitachi-software.co.uk/ResourceCenter/en-us
United Kingdom
http://starboard.hitachi-software.co.uk/RescourceCentre/en
Further Information
